When you click on links to various merchants on this site and make a purchase, this can result in this site earning a commission. Affiliate programs and affiliations include, but are not limited to, the eBay Partner Network.
I ended up installing the Hella Xenon Blue light bulbs. They are DOT legal and supposedly a 4000k light temperature. If im honest, I'm a bit disappointed in the color of these bulbs. They are a bit more white and less yellow then OEM bulbs but not by much. They are not white enough to resemble HID's in my opinion. I think in order to make a real difference you need a 6000k bulb which wouldn't be road legal. That being said the Hella bulbs do seem brighter despite the fact they are the same wattage as the OEM's. Will try to post a pic soon.
Philips Diamondvision have a nice white color - they say 5000k - all I know is that they are whiter than OEM and no purple tinge.
Does the bar that holds the light in need to be in a particular position when the headlight is reinserted?
The little hump needs to be layed down so the light assembly slides over it, then with the tool, you turn it to lock it into position. You'll feel and hear when it engages
The little hump needs to be layed down so the light assembly slides over it, then with the tool, you turn it to lock it into position. You'll feel and hear when it engages
Thanks. The first light came out on the first try, the second one was a bear, but finally got it out. But in the process of studying the mechanism on the first light I fiddled with the bar and then only afterwards realized that I should have paid attention to its position.
My next problem is the removal of the fog light...I don't have the 'release card' that is mentioned in the owners manual...will need to do a search on that one. What I am trying to do is remove the front bumper to clean out the radiators...
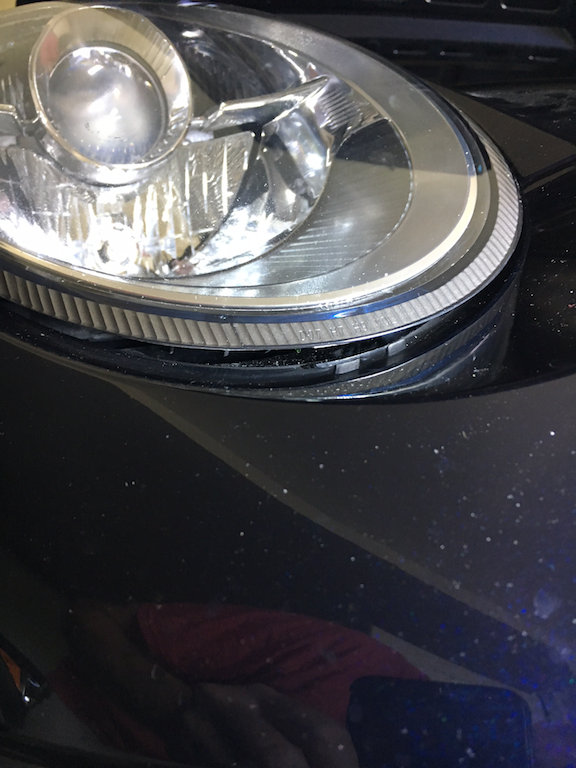
Putting bumper back on today and when reinserted headlight everything seemed fine; slid in, used the tool to make sure that it "popped" and is in tight and tested to make sure that the lights worked. But there seems to be a big gap at the bottom of the light. Just doesn't seem right. Hard to see in this picture but does this seem normal? This is the passenger side light
It certainly isn't right. While the latch, which is more to the rear successfully engaged, the assembly as a whole didn't sit down and engage in the track properly so the front is propped up on top of the track "rails". You need to pop it out again. Look at the tracks on the car and the bottom of the light. You'll need to make sure those engage when you slide it back in.
Thanks JH and Storm...I will try to reseat them. After I posted the image I took the passenger side one out and redid it...it is much better but still not completely correct I don't think so will try again. Unfortunately, the driver side one is not coming out...it had given me trouble when I was first removing, I am thinking that the hex screw that the special tool seats onto is stripped. I will continue to fiddle with it but I may need to take to a professional...
It's easy to miss getting the tool all of the way on the "bolt" that allows you to turn it. There is quite a bit of springy resistance when you have it right (if it is completely rigid you are turning the wrong way). If it is spinning too freely you haven't gotten the tool all of the way on yet. Try repositioning and inserting the tool more deeply (maybe you are off to the side). BTW, there will be quite a pop when it releases... a bit scary the first time.
@StormRune I�ve spent a reasonable time trying to get the tool to fit correctly. I�ve tried both sides but in both cases it feels like either the tool or the socket are not the right size. The tool almost catches and then slips and I never get the �pop� sound and the headlight doesn�t move.
Could the tool or socket be stripped? Or am I just being that incompetent?

 10-01-2014, 06:30 PM