When you click on links to various merchants on this site and make a purchase, this can result in this site earning a commission. Affiliate programs and affiliations include, but are not limited to, the eBay Partner Network.
Engine Mounts (Wevo) for 997.1S - Install for dummies and driving impressions
mikymu has an excellent DIY for Wevo engine mounts here, and I used that to install my mounts. However, his write up is for a GT3 and I wanted to put something up more specific to the 997.1 Carrera. I imagine the base, S, 2 and 4 would be similar.
Tools I used:
- Floor Jack
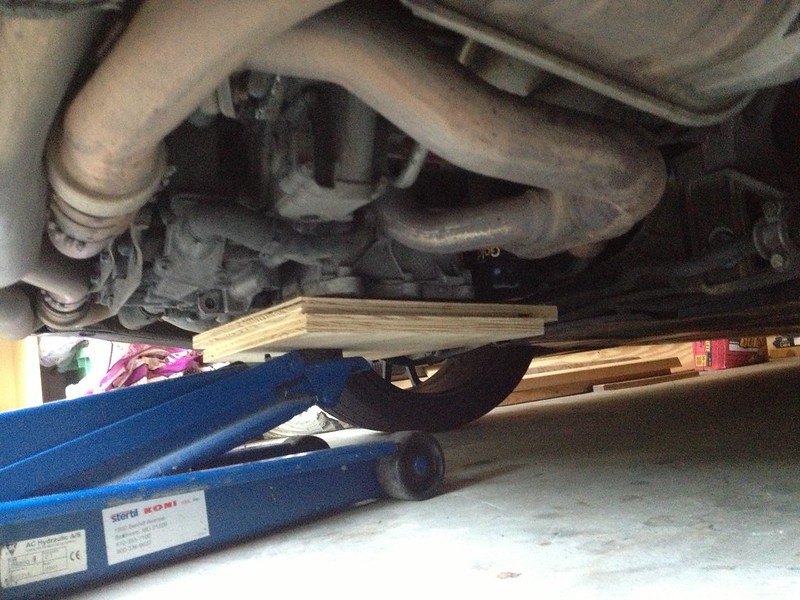
- wood to distribute the pressure from the jack
- 3/8" ratchet and torque wrench
- 13mm, 13mm deep, 18mm deep sockets
- 3/8" universal joint socket, two extensions, maybe 3" and 6"
- flat screwdriver or 1/4" ratchet, small extension, and 7mm socket for clamp to throttle body
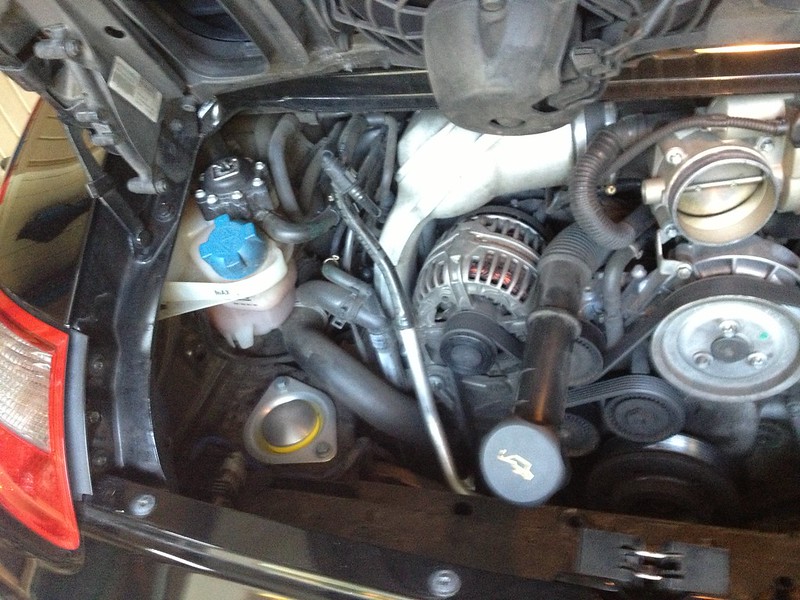
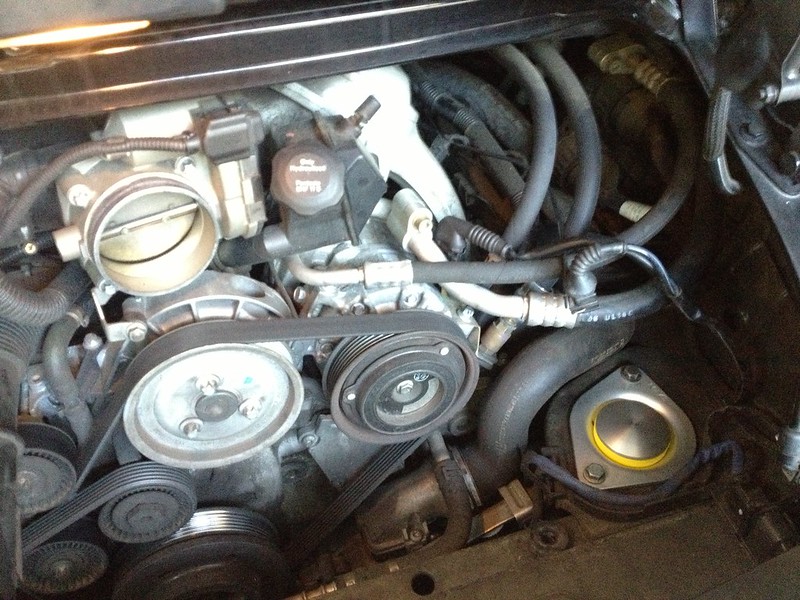
For the 997.1S (and probably similar models), you'll need to remove the airbox to get to the passenger side engine mount. Plan ahead and consider changing out your air filter while you're doing engine mounts. You can get an air filter for ~$20, so it might be worth it, even if it's not quite the right time.
First, you'll need to jack up the engine. miky recommends 3-4". Since we have the M97 and he has the Metzger, we're off on a different (but similar) track already. I used some wood to distribute the pressure on my oil pan and I first measured the floor to the top of the rear fender well. I went up 3" and I think that's plenty, considering that I measured from a spot forward of the jack and engine.
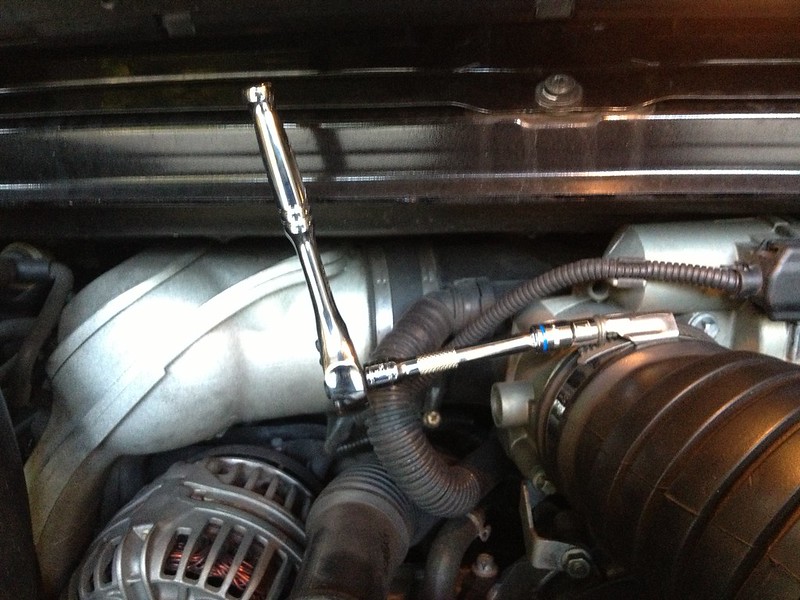
First, remove the airbox, following one of the DIYs available. I used one from 2FST4U on 6. I think I had one of two clips on the driver's side that weren't referenced in that document, so look out for that. I like using a ratchet vs a screwdriver for the clamp:
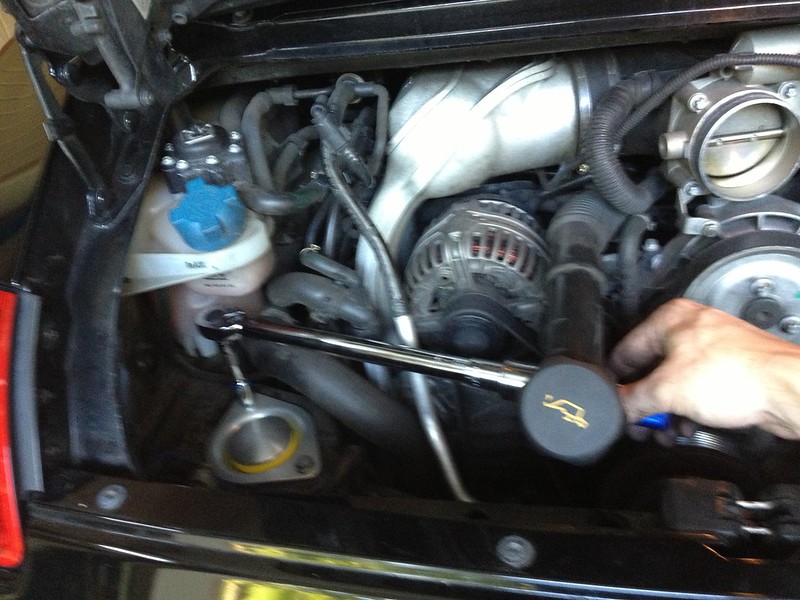
I followed miky's advice and changed one mount at a time. Use the 13mm socket for the two bolts on top. I loosened them quite a bit and then went under the car for the 18mm nut. Note that as you loosen the top bolts - at first or when you get back to it - that the engine mount starts to separate from the steel body. Back to this later.
So crawl under the car, and look up in between your exhaust pipes for the 18mm bolt. You should have a fairly good idea where it is based on the location of the engine mount. I used the 18mm deep socket and both of my extensions, and the torque wrench, set toward the max to break the bolt and get it moving. Then i switched to my regular socket wrench as it's easier to work quickly.
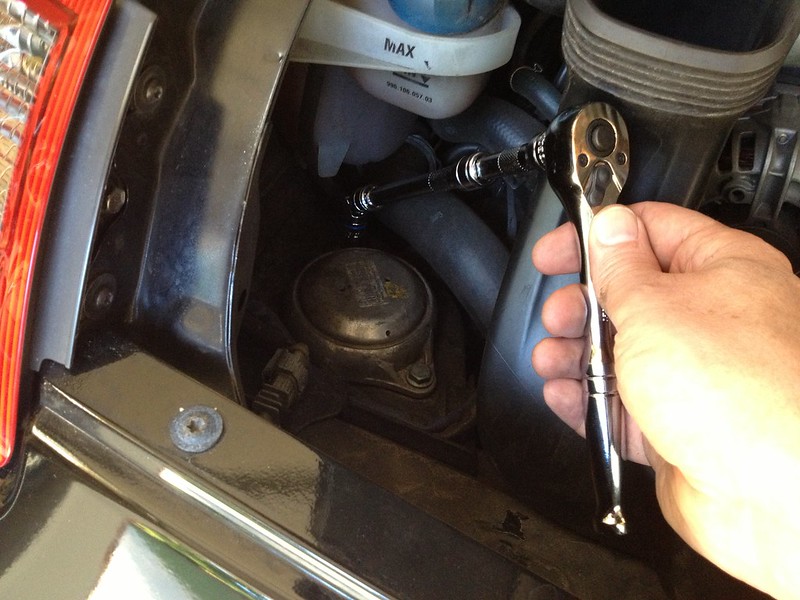
Back on top and off go the two 13mm bolts. I used the universal joint to get to the far bolt (toward the front of the car). [This was necessary at first, bc I didn't remove the airbox at first. You'll have more room to work if you take it out right away]
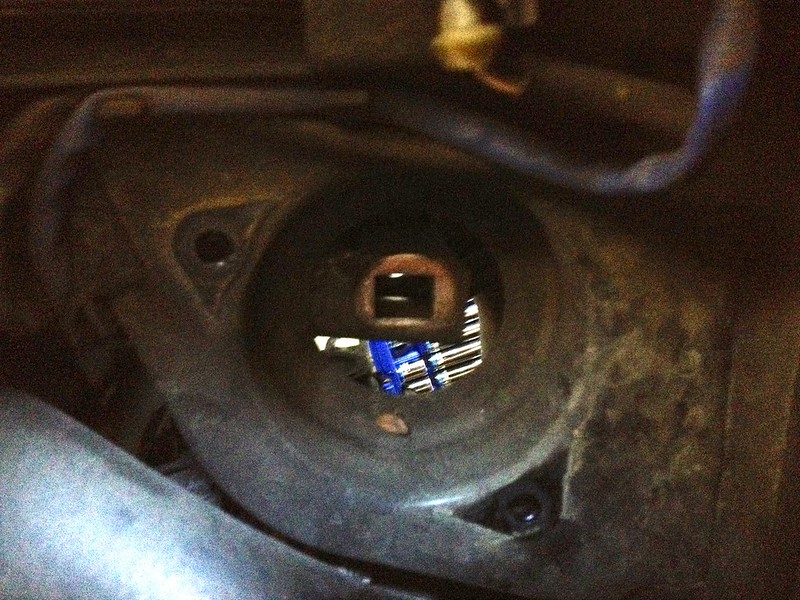
Out comes the old engine mount - again note that it is no longer flush to the body. When you put the Wevo mount in, you'll see that it also doesn't sit flush. This concerned me at first as I didn't notice that the OEM mount separated as I'd loosened the bolts. Do however ensure that the new mount seats in properly, regarding the square bolt on the underside of the mount.
In the very center of the pic below, you'll see the square hole where the mount seats in:
Miky seemed to have to twist his a bit to get it oriented properly, but mine seated right in. I started with the top bolts, tightening them about 1/2-way. I then went below and tightened the 18mm nut to 60 ft/lbs per Miky's recommendation.
He says to tighten the top bolts to 20ft/lbs but I was unable to do that with my torque wrench. First, it starts at 20, so I'm not sure how accurate that would be. More importantly, though, there wasn't enough room in the engine compartment for me to be able to get more than one click of the ratchet on that far bolt.
After a while, I realized that I was probably over-torqueing it so I loosened it up and switched to the regular ratchet. I checked the passenger side original bolts for they're tightness, and just tried to simulate that as I installed the new mounts. For the top bolts, I used a few combinations on the ratchet to deal with the lack of space. For the passenger far bolt, I used the ratchet and the 13mm deep socket to get the right height. The small extension paired with the regular socket was too high.
I think I used the small extension and regular socket for the front bolts, and like I said earlier, the universal joint for the far bolt on the driver side. As with most jobs, having the right tools makes the job much easier.
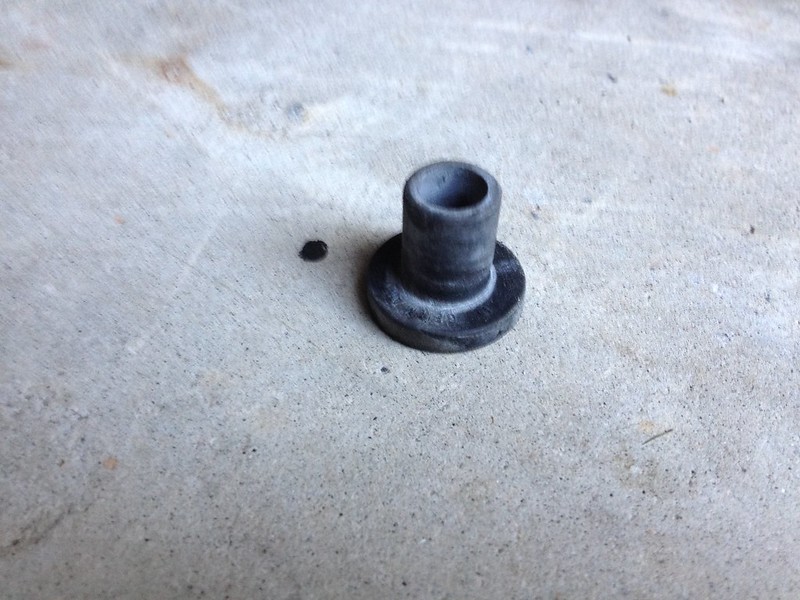
One final note about the install - I had removed my airbox last weekend to replace my air filter. Like I said earlier, it would be better to do these two jobs together. It was my first time removing the airbox and I really didn't know what I was doing. After that job, I found this part on the floor the next day:
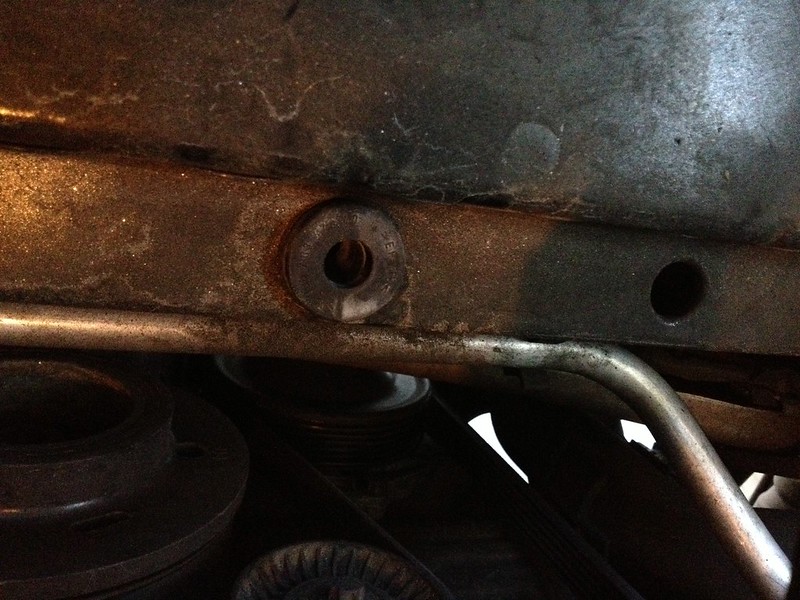
I was a bit worried about it, so I set it to the side. While doing the engine mount job, I saw where that thing goes:
I have two of them along the body under the airbox. I was able to put it back in prior to putting the box in this time. Keep an eye out for them while you're doing this job.
Overall, it's a pretty simple install, particularly if you're familiar with the R/R for the airbox.
Driving impressions: I was prepared for 'increased vibrations', a tighter feel, stiffer over bumps, etc. What I wasn't prepared for was a change in the 'exhaust note'. I suppose that sound is vibration after all, so maybe it's not that strange, but I don't recall anyone else mentioning that. I have a basically stock exhaust with the Gundo hack (D Fister), and it sounds pretty good. Tame at idle and a bit of a growl as RPMs increase. The engine mounts result in a tiny bit more growl at idle, and I think that extra noise is maintained (addictively to your existing sound) throughout the rev range.
Yes, it is stiffer, but not enough to bother me and it is a bit louder.
I just put them on last night and only took a short drive on the twisty road near my home. I'd expect them to perform very well on the track and since I do plan to start heading to the track more (1-3x/yr), I'm glad that I made the change. You'll see very positive impressions of this mod in mikymu's thread that I referenced at the top of this page, but I'd pay particular attention to Andy's post #70 where he points out that it really is a big difference and stock mounts are "soo much more civil and pleasant on the street". I would bear that in mind and I'd probably agree (too soon for me and he swapped them back/forth) that it doesn't make sense to install these in a car that's not going to see some track time.
Jack, nice write-up and thanks for sharing with us... a mod I've been considering myself.
BTW, the flickr videos are show as not available thru IE, firefox, and chrome browsers.
Everything is on Flickr and its the first time I'm using it. They are all photos so some are working and some are not. I'll look into it when I get home.
One of my motor mounts went bad and resulted in a premature failure of my clutch. This is my theory anyway. My slave cylinder was deformed on the end and my pressure plate had uneven wear. After the new mounts were installed it was much easier and smoother to shift. Not trying to hijack your thread but just adding to it the importance of good motor mounts. Thanks.
Last edited by user 72902; 06-15-2013 at 09:59 PM.
Great write up! I'll be replacing the engine mount this week. Before using the floor jack to support the engine, did you jack up the car and put it on the jack stand first?
Great write up! I'll be replacing the engine mount this week. Before using the floor jack to support the engine, did you jack up the car and put it on the jack stand first?
I did raise my car just a bit so I could access the bottom of the mounts but I have a lift. I did not check to see if there was enough clearance to access the bottom of the mounts with all four wheels on the ground but that should be easy to see before you get started.
Was the car lifted from the wheels (car's weight is supported by the wheels) or from the 4 x jack points of the cars (car's weight is supported by the jack points)?
I'm trying to figure out if it would make it difficult / impossible to install if the car's weight is on the wheels, because once the mount is off, the weight of the engine is on the supporting jack, so the body of the car be bounced up and creating a gap between engine carrier and the mounting point?
Lvt - actually my engine mount (and transmission mount) had been replaced by my Indy during the last service a few months ago because the vibration at idle was more than normal. Ironically, I'm now replacing it again with a solid engine mount which will probably create even more vibration
Originally Posted by jkw911
I did raise my car just a bit so I could access the bottom of the mounts but I have a lift. I did not check to see if there was enough clearance to access the bottom of the mounts with all four wheels on the ground but that should be easy to see before you get started.
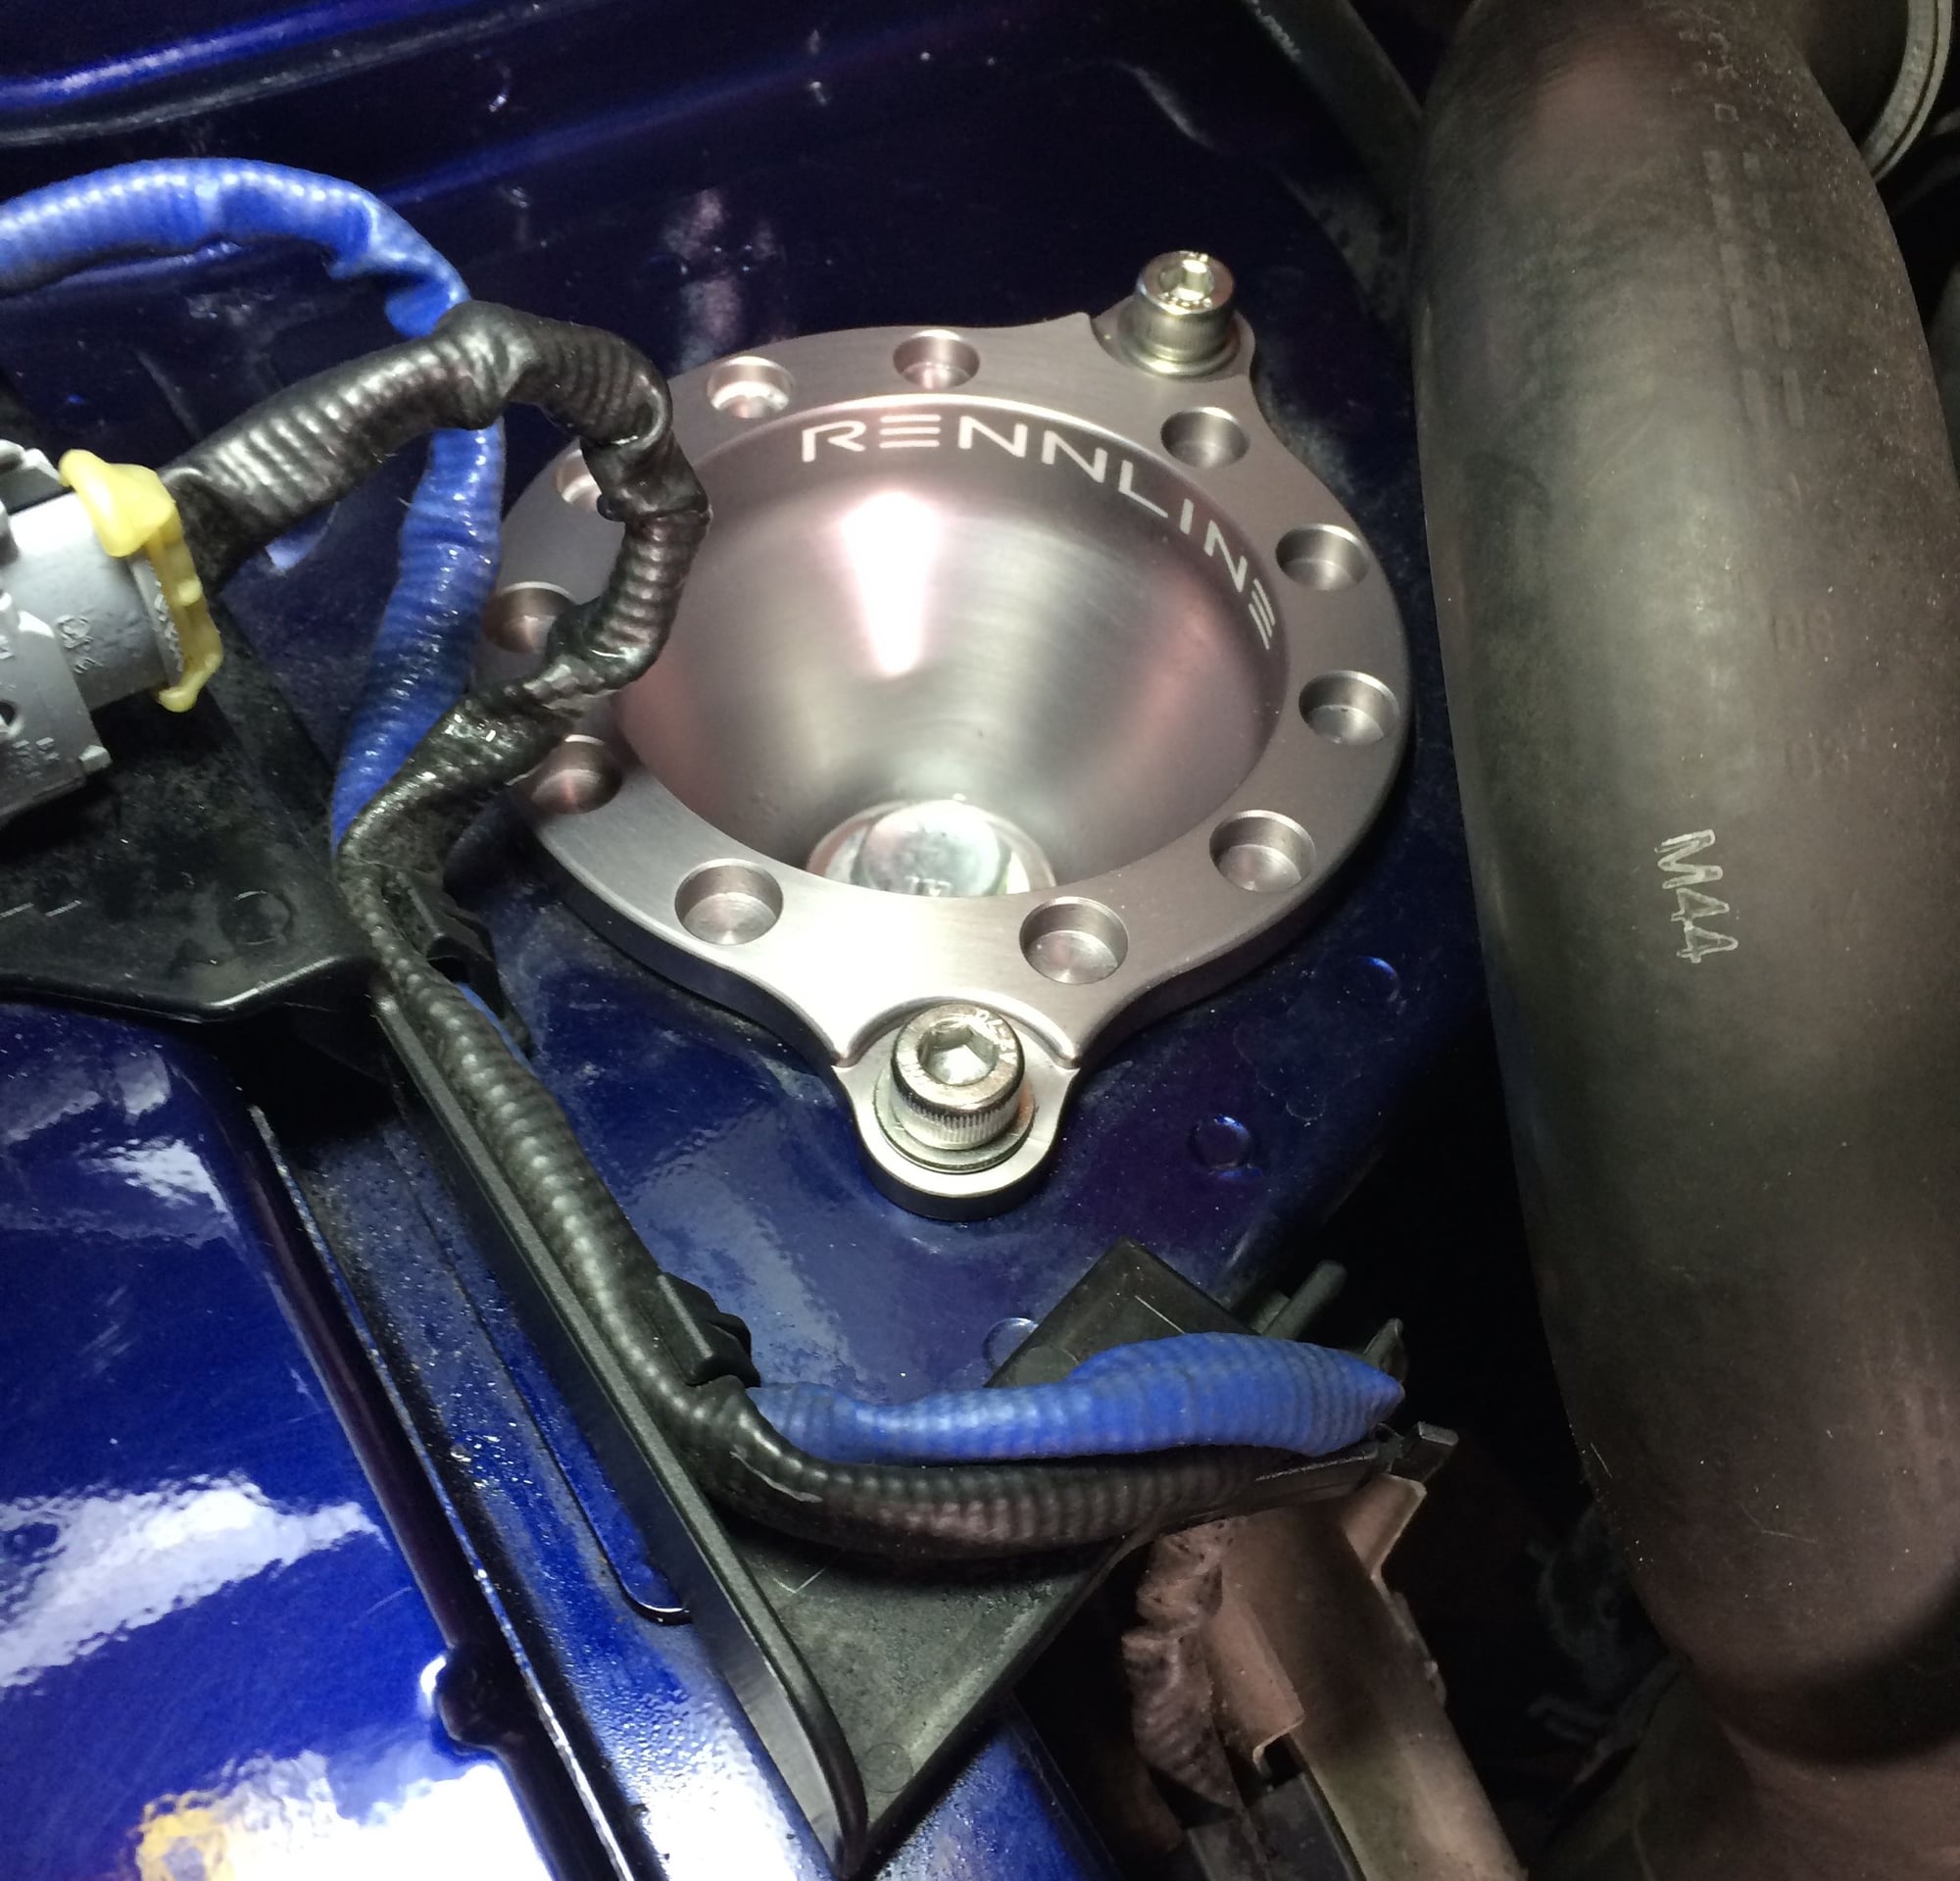
I did the Rennline solid engine mounts. Had the car on four jack stands because I was swapping rotors as well. Very simple DIY. The jack on the engine requires very little pressure, but I don't recommend putting it on the oil pan like I've seen others do...there is a nice solid casting behind the oil pan to use.
I would say dollar to environmental change ratio is pretty significant for this mod. Big change in the cabin wrt sound and vibration and I will say it either does a much better job putting the power down or traction at the rear is compromised some how because I have had the rear end break loose much easier than before...kinda fun
Hey Don, yep, saw your post and made me decided to order a set So trying to figure out before they arrive if there's possible to install without putting the car on the jack stand.
Originally Posted by M3 Defector
I did the Rennline solid engine mounts. Had the car on four jack stands because I was swapping rotors as well. Very simple DIY. The jack on the engine requires very little pressure, but I don't recommend putting it on the oil pan like I've seen others do...there is a nice solid casting behind the oil pan to use.
I would say dollar to environmental change ratio is pretty significant for this mod. Big change in the cabin wrt sound and vibration and I will say it either does a much better job putting the power down or traction at the rear is compromised some how because I have had the rear end break loose much easier than before...kinda fun
What are the top 3 things that improved after this upgrade for you guys? Seems like a simple & relatively cost-effective upgrade, why don't more people do this?
Sagging exhaust tips were my first indication of a problem, along with a vibrating passenger's front seat at idle (with no passenger in the seat). If the gap between your exhaust tip and the bumper cover seems a little bit too big, then your mounts may be sagging.
The improvements were:
1. The car handles better. You don't get as much weight transfer when the engine moves around on the old mounts when cornering.
2. Shifting action improves with a manual transmission when the new mounts are installed. It feels much more solid.
3. Cabin NVH (noise, vibration, harshness) is reduced compared to the bad mounts. This was even true going to a semi solid mount.

 06-15-2013, 10:11 AM


 So trying to figure out before they arrive if there's possible to install without putting the car on the jack stand.