When you click on links to various merchants on this site and make a purchase, this can result in this site earning a commission. Affiliate programs and affiliations include, but are not limited to, the eBay Partner Network.
I have a black car so tried to paint them myself. Was able to remove the washers using the instructions above. Unfortunately the bases slipped through the clamps and dropped back into place inside the bumper. I'm hoping that when I'm finished I can just push the nozzles back down onto the bases until they click into position. With care I was able to remove the chrome painted tips from the nozzles by levering them off using tiny flat screwdrivers between the tip and the base not through the little square holes.
I bought some black duplicolor paint like the previous poster as it is claimed to be a perfect match. the paint didn't say anything about needing a primer so I roughened them up using 600 grit paper.
I set them up on pencils with a dob of blutak on the end to fit into the base of the tips ready for painting.
I used 4 coats of black and 3 coats of clear coat. Left it dry for a day then used find cutting paste to polish the clearcoat.
They looked great except that some of the paint pealed off from the lip of the outlet for the nozzle. Damn. I'll have to sand them back again and this time make sure I sand the edge of the outlet and use a primer.
Dan,
I noticed your fog/turn signal is different..it is a LED?
Which one is it? And how is the install?
RotTec is the manufacturer of these LED fronts (and rears). They are a nice form, fit, function replacement. Take a quick search on 997 for the story of these.
Resurrecting an old thread. I have a problem with the alignment of my driver side headlight spray nozzle. Instead of pointing at the middle of the headlight, it is clocked about 30 degrees CCW (as viewed from above) toward the passenger side.
I was able to remove the spray nozzle per the instructions in this thread, thinking that I could just rotate the cylindrical part that stays on the car to achieve the desired result. This tube has a keying feature with the nozzle that establishes the alignment.
My problem is that with the spray nozzle removed, the base of the sprayer resists CW rotation, and I was afraid to force it.
I did this mod this weekend and elected to paint the cap myself and have it clearcoated and polished by a body shop for a few bucks to make it a pro job.
The chrome bits can be removed from the washer assembly easily. There are two tabs on either side of the chrome cap. Depress the tab and pull up to free one side. Do the same on the other side being careful not to accidentally reengage the first tab. I accidentally reengaged the tab the first time and simply slipped a credit card between the bottom of the nozzle and the assembly to keep it from reengaging again. All-in this extra step took 5 maybe 6 minutes.
I then sanded, prepped and painted the caps before a body shop clearcoated, baked and polished them.
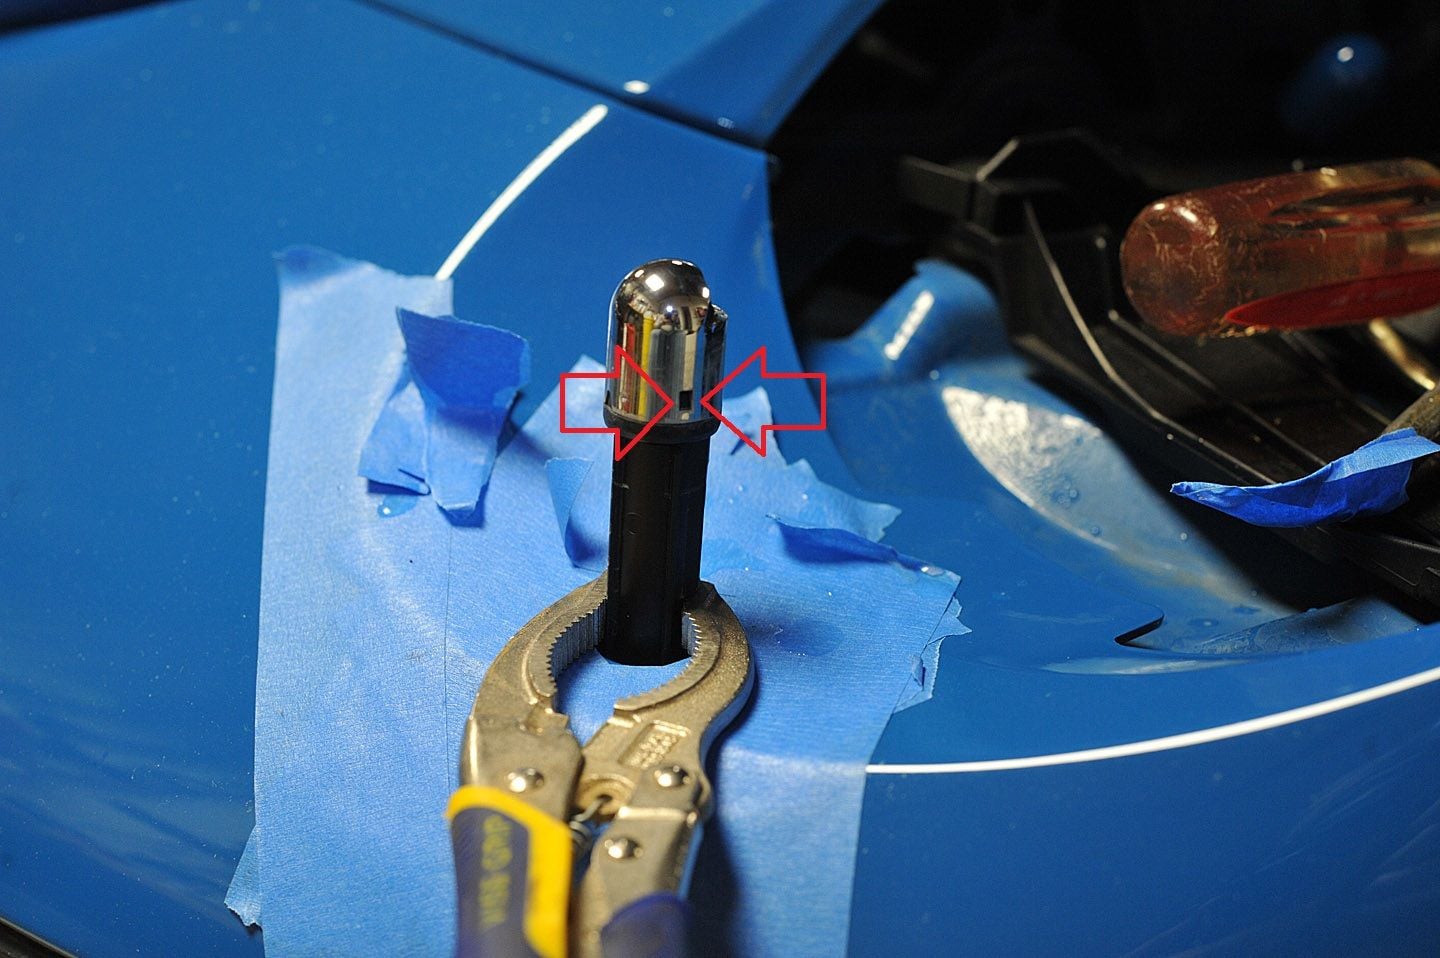
Here is the location of one tab on the nozzle in the OPs pic. The other tab is on the exact opposite side from the one pictured.
Thread revival for anyone else searching in the future.. I found the easiest way for me, instead of messing with screw drivers and trying not to damage the plastic, I grabbed the chrome cap by hand and squeezed on the opposite sides of the tabs so that the plastic would flex into an oval shape ever so slightly, allowing me to pull it over the tab on one side and then over the other side. Came right off.
Browsing this topic made me confident enough to give it a try as I really disliked those chrome caps on my all black 997. I did it a bit different, not removing head or foglight, not tape etc. I used a small Allen key to lift the entire housing from the bumper (see first picture below). Then I used a small clamp to prevent it from sliding back in and put a cloth underneath to prevent scratching the paint. Caps came right off when squeezing the cap at opposite ends of where the tab holes are. Sanded caps (600 grit wet) and painted them (no primer, first several thin layers of black and then two layers of clear coat). Snapped them back on after a good day of drying and released entire assembly back in the bumper.
Easy job and very satisfying result
Last edited by Beezztie; 06-25-2018 at 09:51 AM.
Reason: typo
Thanks Edgy! Now the OCD in me is going to color match my chrome domes to Carrara White. lol
Originally Posted by Beezztie
Browsing this topic made me confident enough to give it a try as I really disliked those chrome caps on my all black 997. I did it a bit different, not removing head or foglight, not tape etc. I used a small Allen key to lift the entire housing from the bumper (see first picture below). Then I used a small clamp to prevent it from sliding back in and put a cloth underneath to prevent scratching the paint. Caps came right off when squeezing the cap at opposite ends of where the tab holes are. Sanded caps (600 grit wet) and painted them (no primer, first several thin layers of black and then two layers of clear coat). Snapped them back on after a good day of drying and released entire assembly back in the bumper.
Easy job and very satisfying result
Very awesome and I was just going to ask Edgy how he exactly lifted the nozzle out with a cotter pin removal tool. This explains it more and basically any 90 degree tool can be used to hook the dome and lift it up.
Even removing them by squeezing at the opposite sides of the tabs to release it is more easier.
EDIT: 7.20.18
The paint chipped away from road debris enough that I needed to fix these. Porsche sells them in black with the cap and stem for around $25 each at the time of this post. pinching on the opposite ends of the tabs is definitely the way to go. super easy. Just pull them up with a hook tool, grab the base with your hand to keep it from sliding back down, pinch and remove the old cap, snap on the new cap. Both sides done in 30 seconds. Dont mess with the clamping. Even if it drops back down after the cap is removed you can pull i back up since the nozzle is still attached. And it's unecessary to pull it up to snap on the new cap. 2/10 difficulty.
Here is the part number for the GLOSS BLACK cap and stem. 97062825100 (Sonnen has them for $18.50)
EDIT: 7.20.18
Here is the part number for the GLOSS BLACK cap and stem. 97062825100 (Sonnen has them for $18.50)
Thanks for this info! I�ve been plotting for the last year I�ve owned the car how I was going to get rid of those hideous chrome pimples. My procrastination over painting them myself paid off as this is obviously the easiest solution. Just ordered from Sonnen, and they are still 18.50 each.
ordered the matte black caps from suncoast, swapping out took 60 seconds, just pulled off old ones and lined up and pressed these ones on. On a related note if any one has a chrome coloured 911 I can hook you up with some free matching nozzle caps!


 03-08-2012, 11:51 AM