When you click on links to various merchants on this site and make a purchase, this can result in this site earning a commission. Affiliate programs and affiliations include, but are not limited to, the eBay Partner Network.
I have been having the dreaded check engine light come on for these trouble codes so I started researching and figuring out how to get it resolved. I found a few very helpful threads on the issue, especially this one: CEL for P0491 and P0492
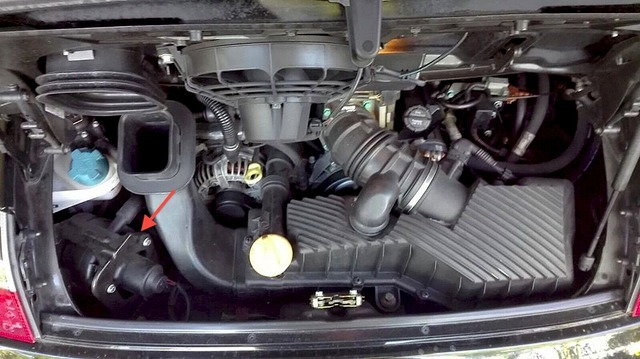
I used my Durametric to test the pump and it wouldn't come on so I figured it was toast. Having read that the pump could not be accessed without dropping the motor I figured that I would have to either live with the light, or find another way.
I had seen threads on changing the 996 SAI pump and thought that they had it right when the pump was easily accessible so my aim was to fit a pump into that same location on the 997 and route a hose to the combi valve, assuming that the valve wasn't clogged or at least could be changed without dropping the engine.
(I know, I know, but it's an experiment people) to see what I could pull off.
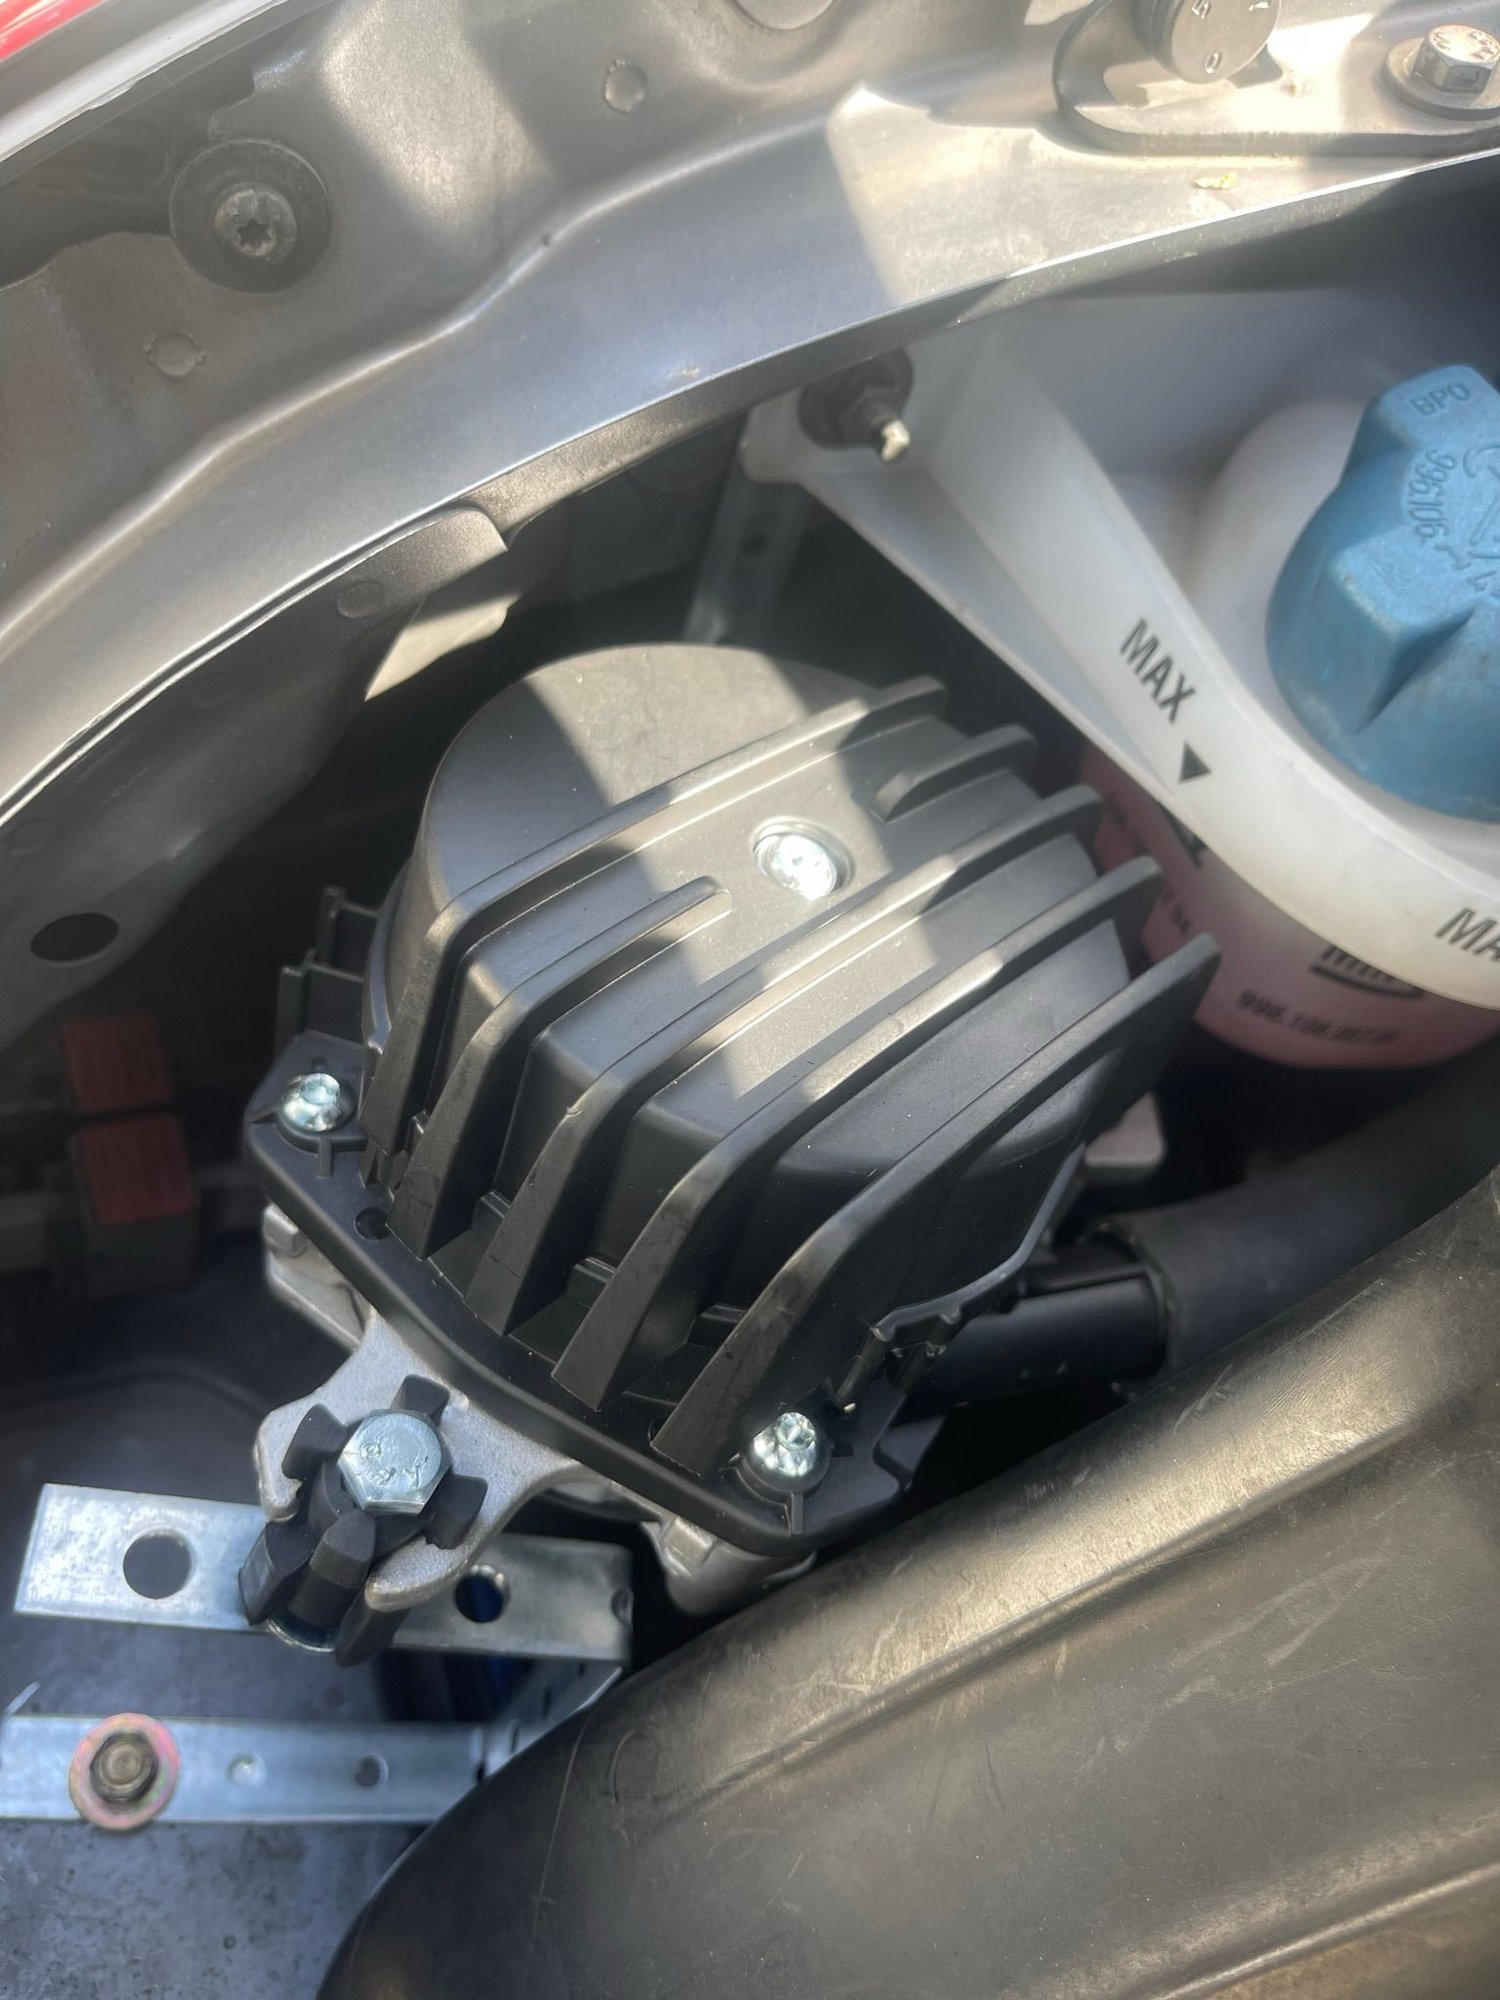
When the pump came in I kind of threw it into that empty corner on the left side of my airbox and it seemed to fit ok so my idea was possible.
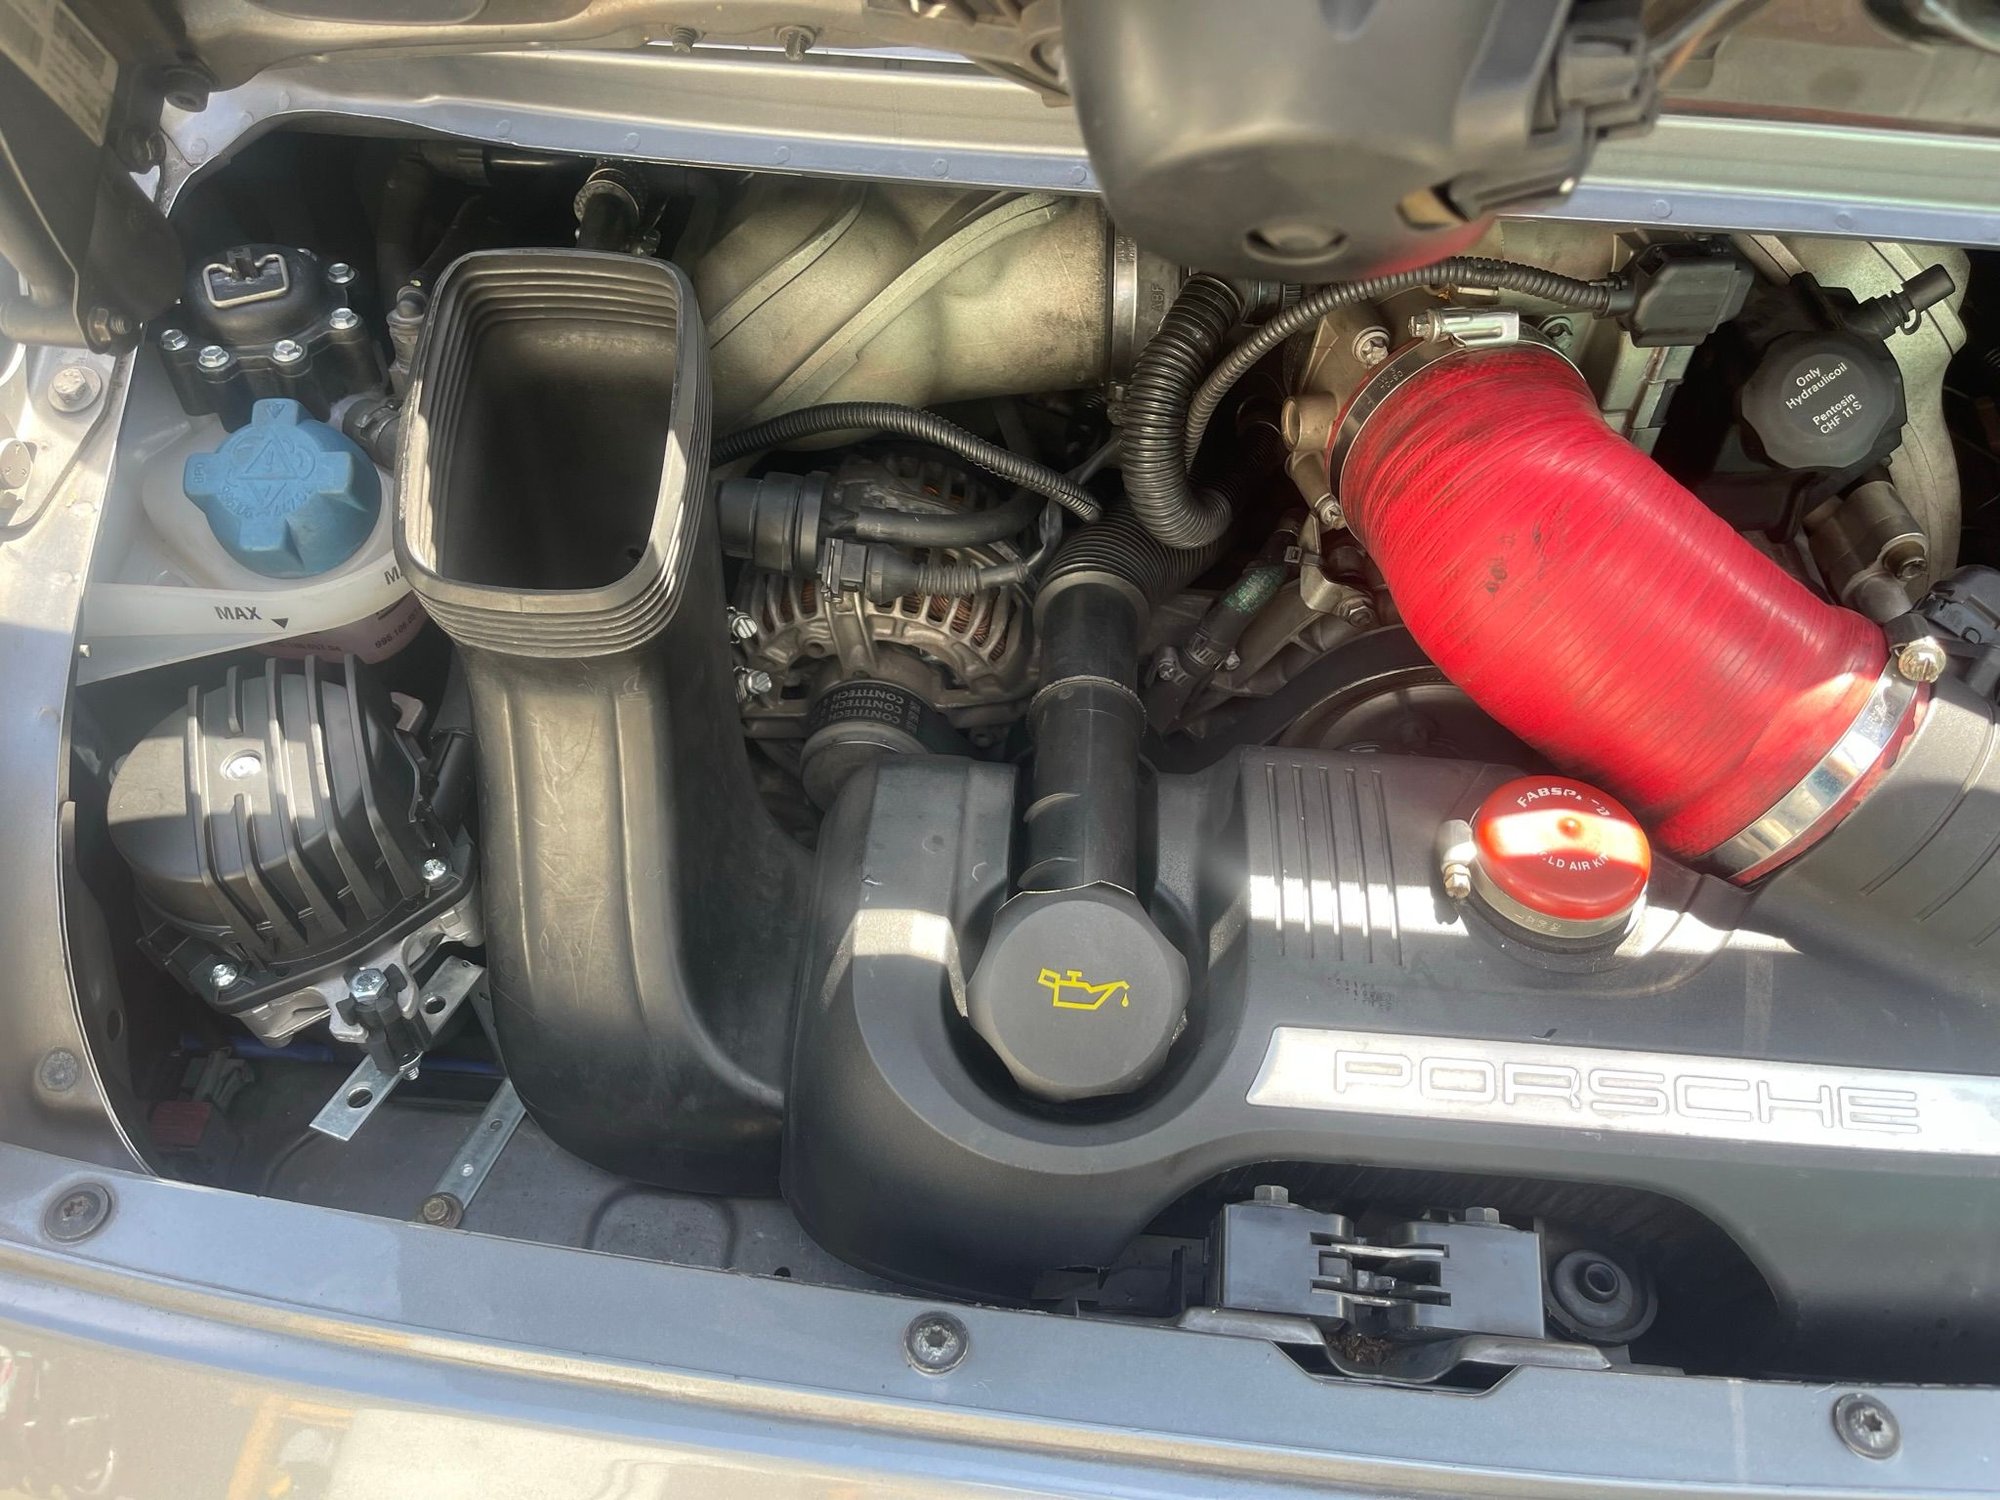
The next move was to take everything apart... I was going in to replace my started and AOS and had been living with manually turning off the light for a while so I had to give this a shot.
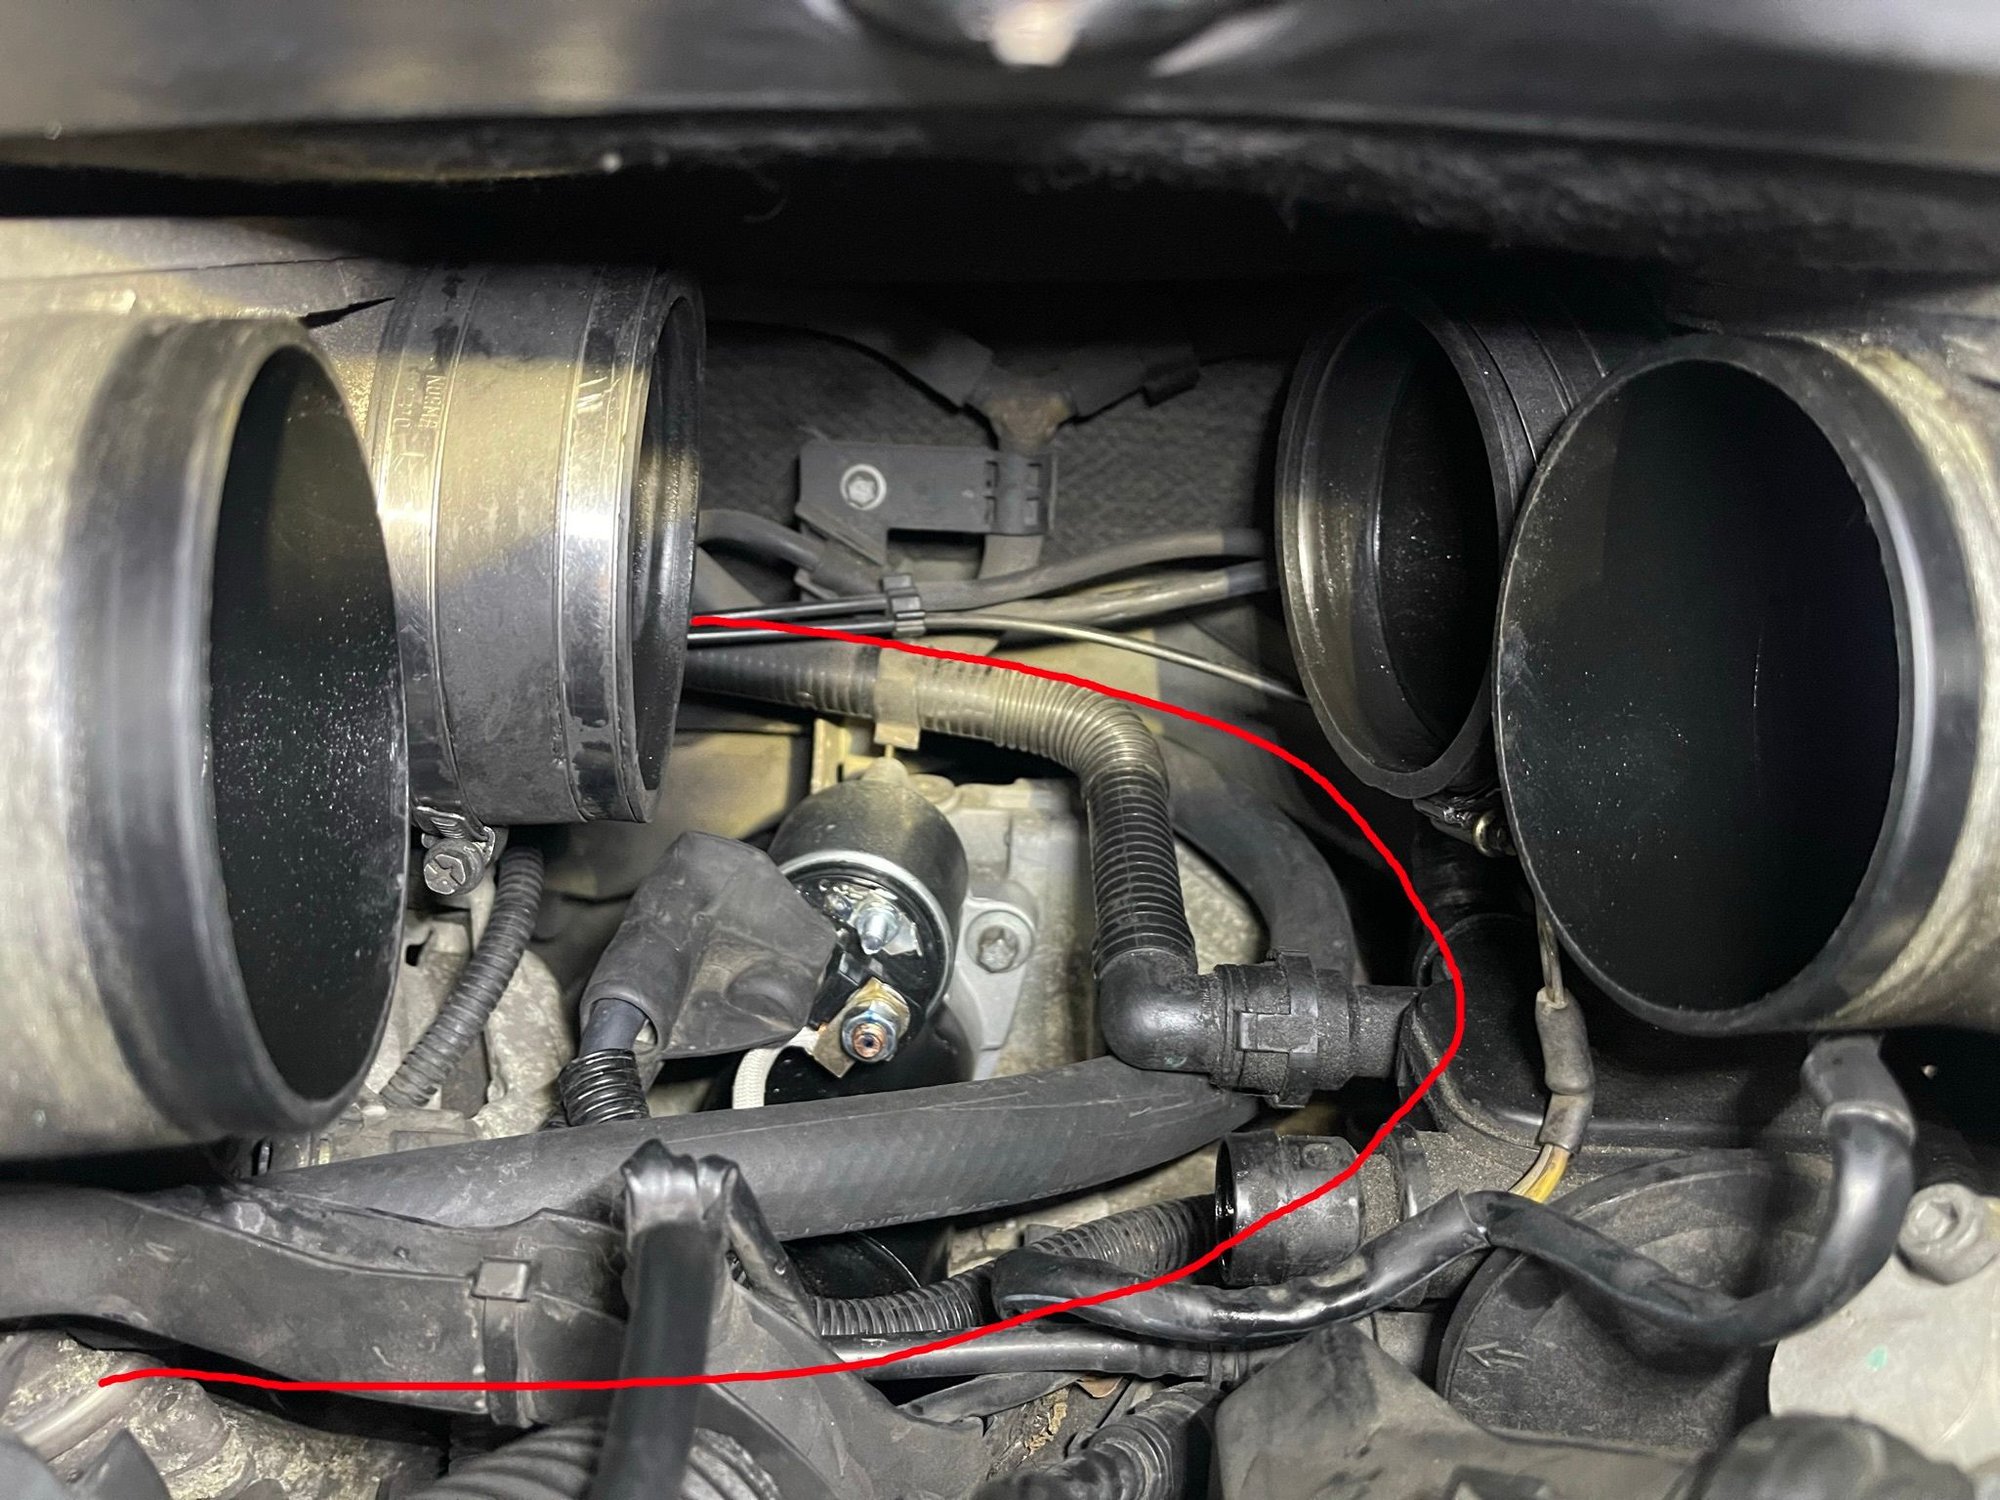
To connect the remote pump I found a long section on hose ( I think it was 3/4") and pulled the small hose that goes from the existing pump to the combi valve.
Before figuring out how to route the new hose to the remote pump I connected it to the valve through the center of the engine and took a deep breath and blew through the hose and was pleasantly surprised that the valve wasn't stuck closed and that I could blow through it with some reasonable amount of restriction.
Operation bypass was a go at this point!
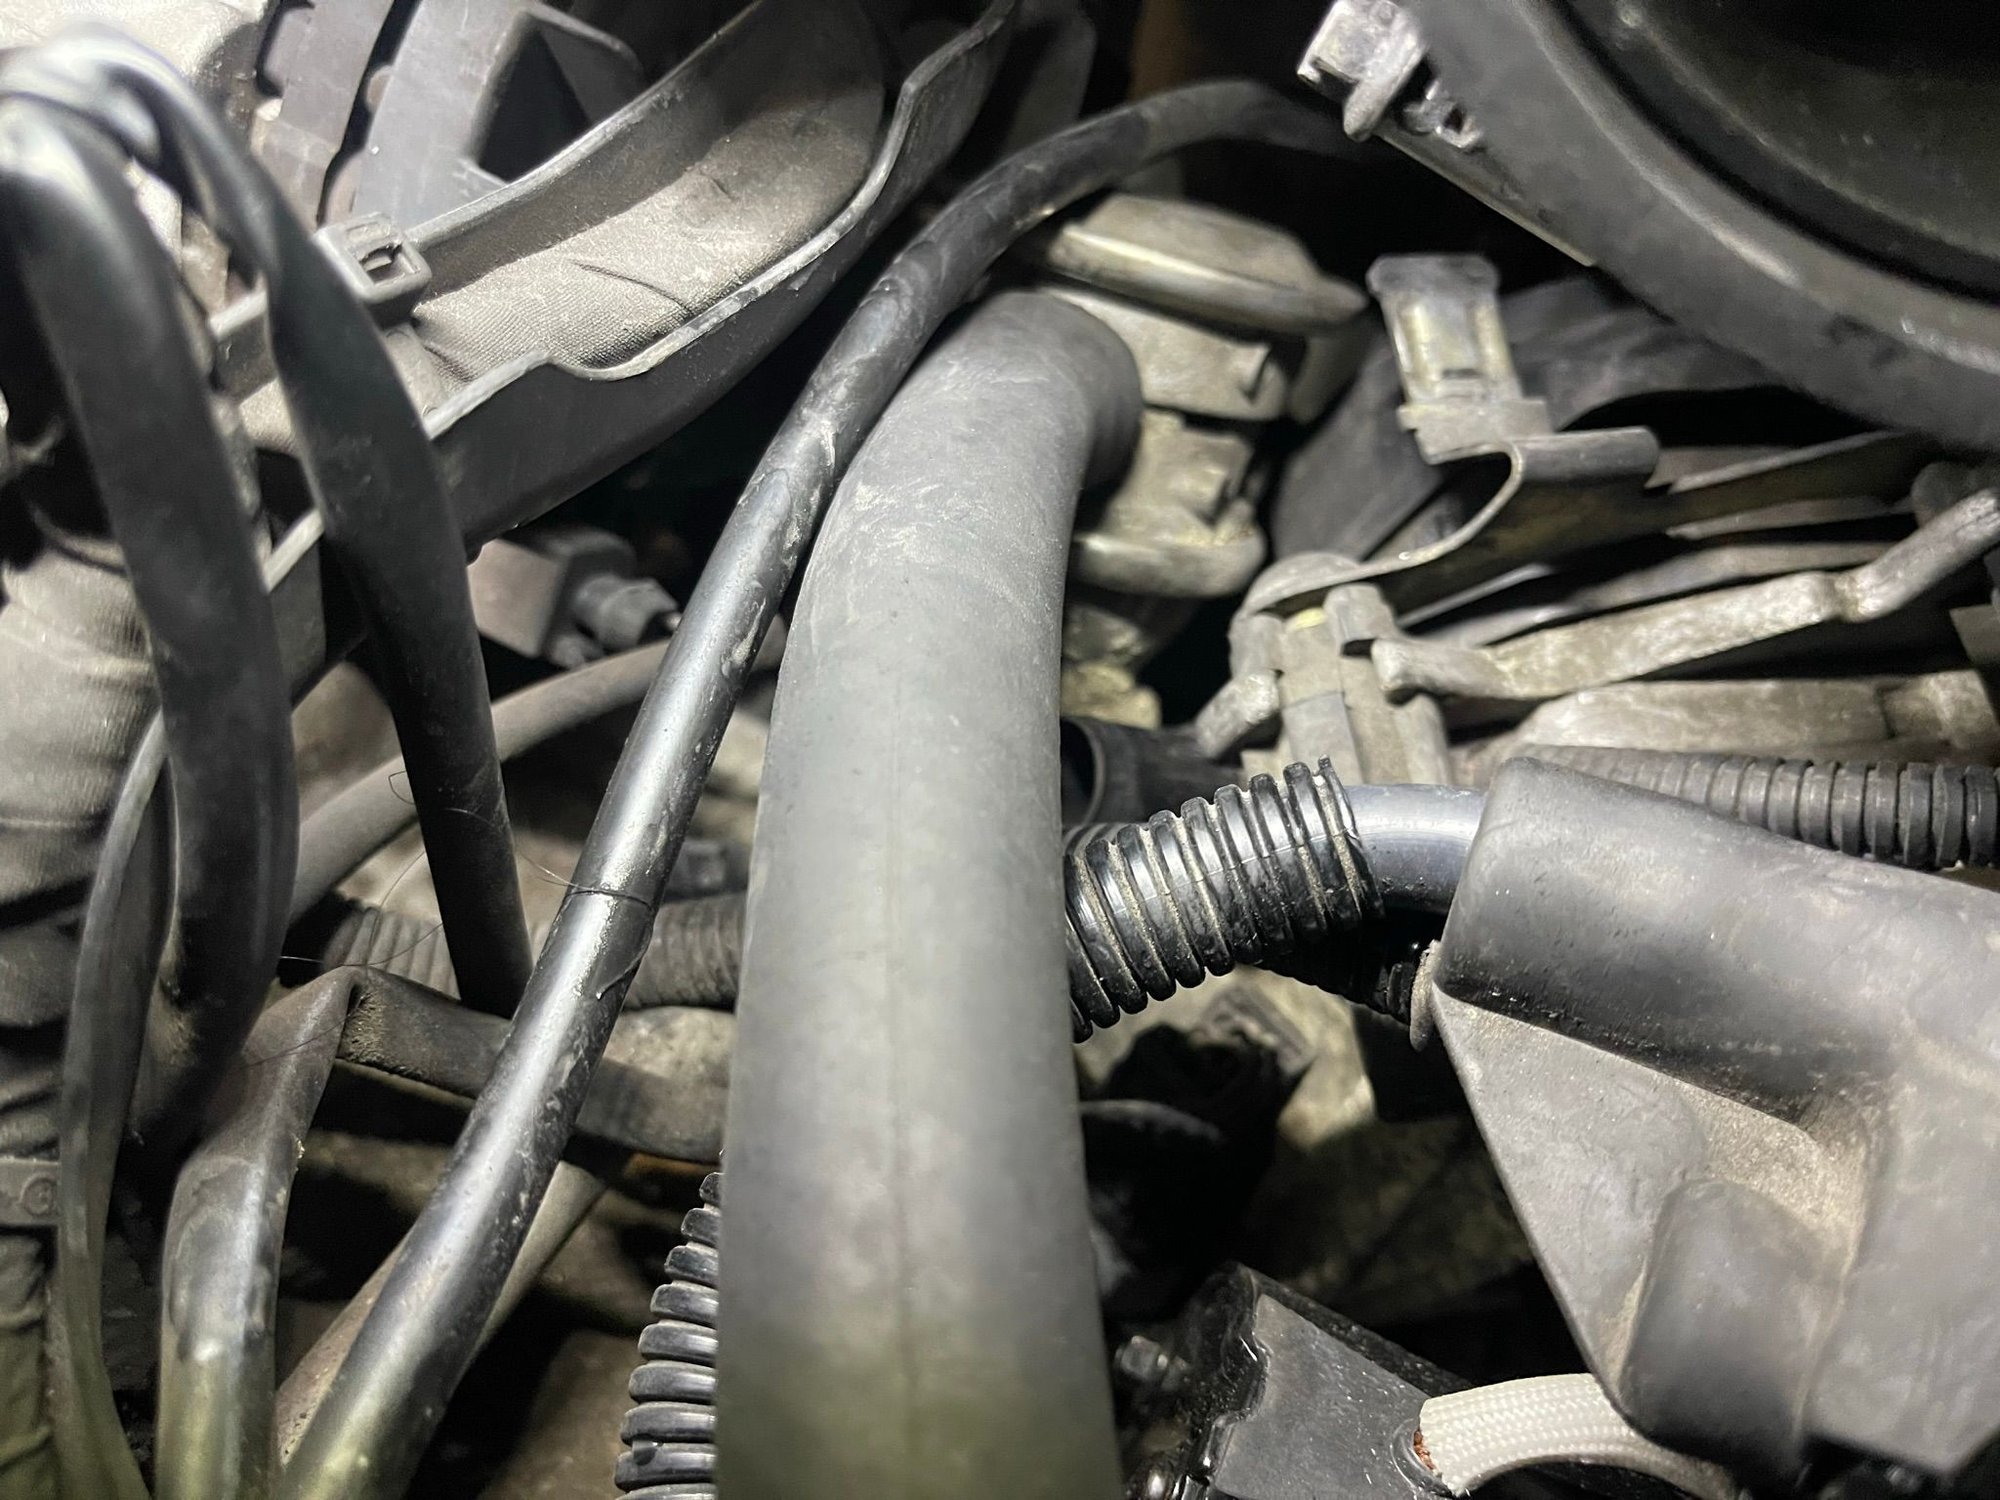
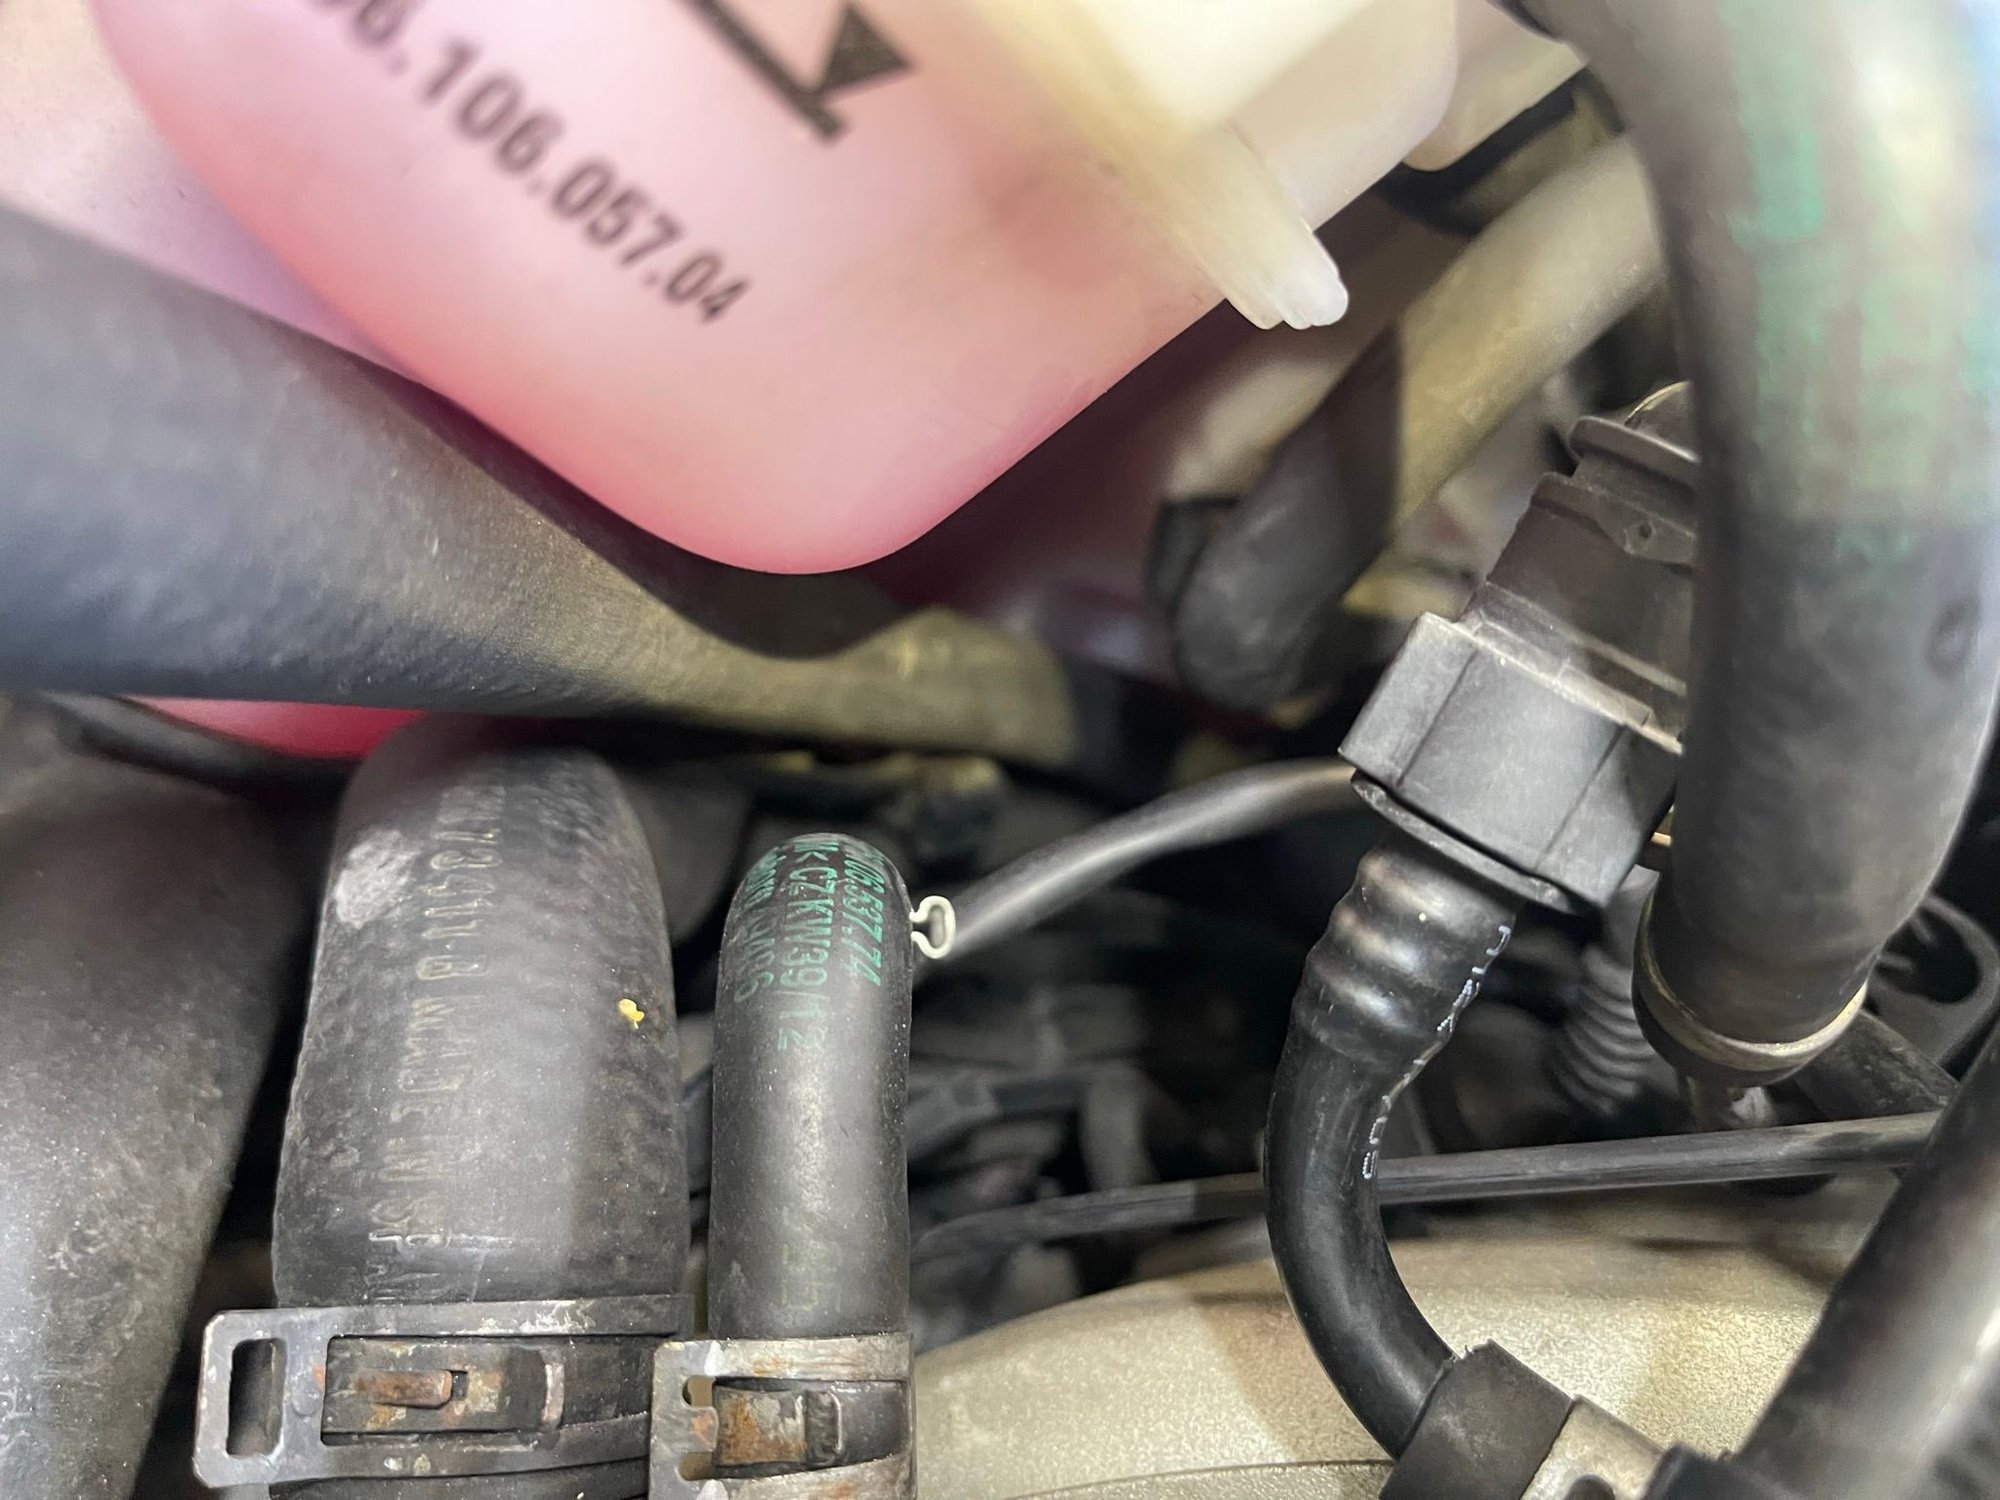
The hose that I had came off of a roll so it had a natural arc to it and I was able to snake it through under the expansion tank, around the rear of the manifold, and into the combi valve without much fuss.
I then cut the electrical connector off of the new pump and extended it by about 2 ft so that it could make it back to the harness in the original location. I soldered the wires but looking back at it I should have added a connector near the pump so that I could remove the pump without having to get all the way back into the deep parts of the engine. Worst case I'll just cut the wires
I have now and do the connector at that time.
Once the wiring and hose was all hooked up I tested it with the Durametric and it turned right on!
I used some zip ties to fasten the new wiring and the hose. There were a lot of placed to secure it. In one of the pictures above it looks like the hose is up against the AOS but it ended up being close but not in contact with it.
Now I had to figure out how to mount this thing. I had some metal straps laying around so I used that to mock up a bracket. There are threaded holes on the frame that I could use and there is a stud holding the expansion tank close by. I didn't want to drill into anything and make this completely reversable since I do plan on dropping the engine at some point for a major rebuild. I'll be replacing the SAI pump along with a whole lot more at that time!
This is what it looked like at the end - new starter, new AOS and remote SAI done!
I'm probably going to make a better mount for it at some point, but for now this is working great. The pump comes on and off as it's supposed to and the CEL is off which is what I was most concerned with. I got tired of having to pull out my phone and turn off the light all the time.
I wanted to share with everyone here in case another brave soul wants to try an alternative solution to a bad SAI. The additional labor was minimal considering I was going all the way in anyway.
Make sure when the pump is on that it doesn't contact the expansion tank as the vibration will wear a hole in the tank. The mounting brackets look like exposed steel and will likely rust. When redoing the mounting, might I suggest using some rubber fuel pump mounts to absorb the vibration when the pump is running so it doesn't shake the car and make noise.
I thought about the 996 bracket but didn�t want to buy too much stuff in case it didn�t work out. I have a 996 bracket on order and will update the thread on how it works out.


 04-27-2023 | 10:37 PM