When you click on links to various merchants on this site and make a purchase, this can result in this site earning a commission. Affiliate programs and affiliations include, but are not limited to, the eBay Partner Network.
Motor Mounts Replacement Issue-I'm in Trouble-HELP
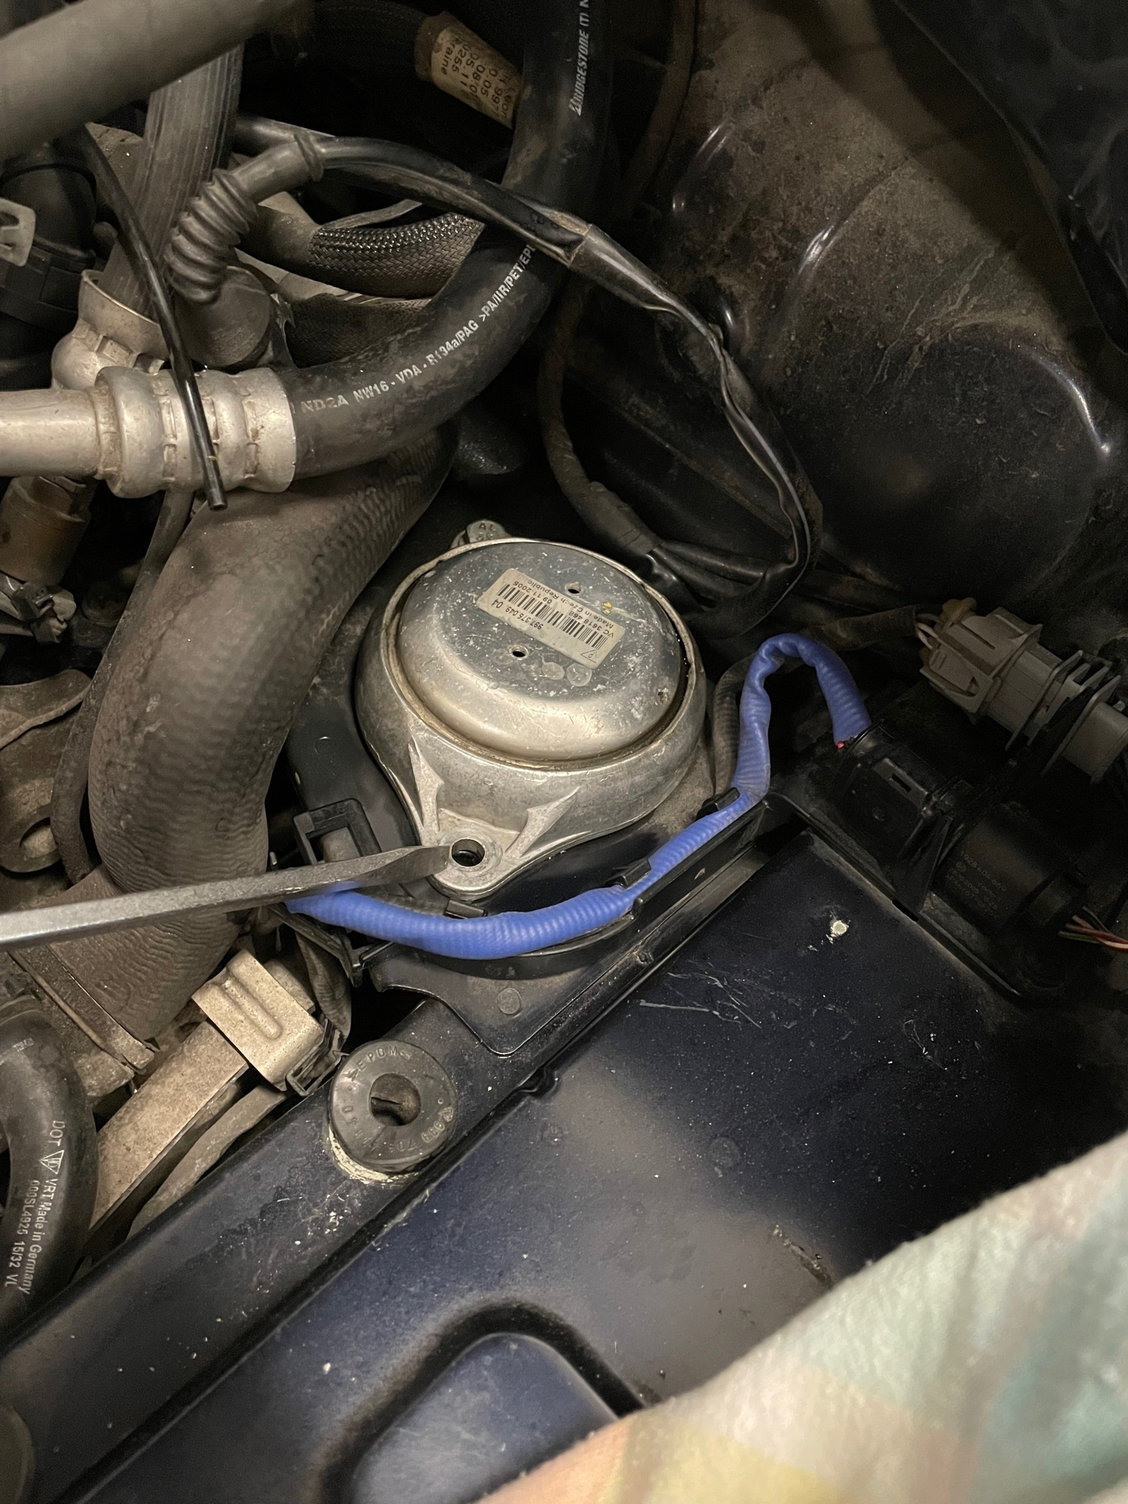
I have an '06 997S and I'm in the process of replacing the (rear) motor mounts. Unfortunately, despite liberal use of penetrant, I broke the 40mm M8 bolt that holds down the motor mount in place on the passenger side inboard location. see pic-screw driver points to my main issue.
The bolt broke at approximately 25mm which means that I have 15mm left in the threaded insert on the body motor mount "shelf". I drilled and attempted extraction with bolt extractor but, you guessed it, the extractor broke inside.
I cannot find the actual piece that the screw goes into on the P.E.T. I do note, however, that there is some sort of hex fitting on the underside of the shelf that I think the broken bolt goes into. Can anybody confirm this and is it replaceable?
Any suggestions, pics of the underside of the shelf (without the obstruction of the exhaust plumbing) would be welcome.
Thanks in advance.
I don't have the exact answer, however help will be on the way. We have all been there as to broken bolts and studs. Usually it happens where you can't see or get to. Yours will be easy. I have never had a "easy-out "work. They always break and leave a hardened steel problem in the way. The final method will be to Dremel it out with a diamond burr. Someone will have pics of what is underneath. Stay calm.
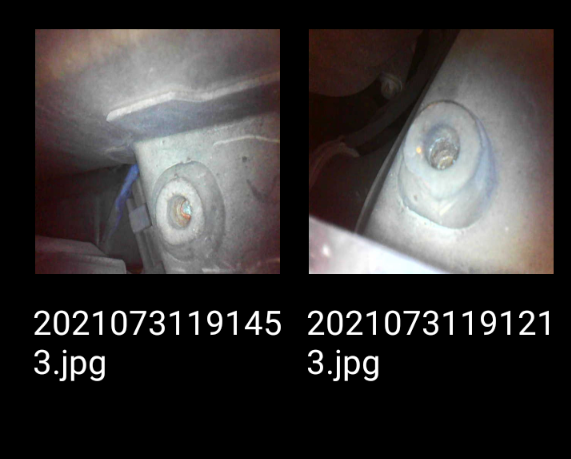
Hey Johann, I have a 2005 C2S and a DEPSTECH borescope. I took a couple of pics but can't seem to get the full size photos to my phone but I did get a screenshot of them. I'll keep trying to download them but here's the screenshot, for now.
[Sorry to say it looks welded. But if you clear the hole you could probably use a nut and bolt.]
Shoot, that's an awkward mishap. I've changed those mounts on several cars and the original bolts have always come out easily. I don't have a clue how to get it out, but you're probably going to want better access to the bottom of that stuck bolt, so now may be as good a time as any to remove the center muffler just to get it out of the way while you're waiting for someone smarter than me to show up with an actual suggestions. Good luck!.
Floyd- had forgotten about the diamond burr and Dremel. Thank you for reminding me of that method.
jchapura- you have confirmed my nightmare, the fitting is welded in. Many thanks for taking the time with the borescope photos. A long bolt and nut is probably what I’ll end up doing.
John- you are probably right that the centre muffler should to come out (more broken bolts, I’m sure) but I’ll try with the diamond bit Dremel first to get the broken extraction bit out. If I’m successful, then I’ll drill right through from the top. I can get my fingers in easily underneath right in the engine compartment to hold the nut in place.
Thanks again all of you. I now have a plan A and plan B. Keep you posted.
Cheers,…..
If you have access from the bottom, drill up through broken bolt until you contact the end of the easyout.
Use a nice sharp cobalt drill, medium speed, lubricant and plenty of constant push force to ensure the drill cuts, and doesn't just rub causing work hardening of the bolt.
Punch out remains of broken easyout. Use something other than hardened steel to do this.
Get fresh cobalt bit, continue drilling. The drill will eventually "catch" and wind your broke bolt out the top of the hole.
Be patient with this and don't get anxious, even though these things are so aggravating. What starts out as an enjoyable 1 hour "project" turns into a weekend nightmare. We have all been down this road many times. The Dremel and the little burrs always work and you can reuse the weld nut by chasing the thread when you get the debris out of the hole. Does this method take time? Yes, it takes a lot of time but you have a an accessible place to do the surgery.
For the next time, you can start out the drilling with regular bits but as you near the final size, use a left handed bit. Most of the time all the work will "loosen" the screw and the LH rotation will back it out. Of course, use penetrating oil too.
You did support the engine before starting, right? Pour more penetrating oil in the hole and, with a hammer and punch, tap on the broken bolt for a while to let oil work it's way down, and hopefully break it loose. Soak and tap on the others too. The Dremel idea sounds interesting. You'll get it. Take your time. All of us have been there.
If you have access from the bottom, drill up through broken bolt until you contact the end of the easyout.
Use a nice sharp cobalt drill, medium speed, lubricant and plenty of constant push force to ensure the drill cuts, and doesn't just rub causing work hardening of the bolt.
Punch out remains of broken easyout. Use something other than hardened steel to do this.
Get fresh cobalt bit, continue drilling. The drill will eventually "catch" and wind your broke bolt out the top of the hole.
This. And then you can heli-coil it, if necessary.
I just had to drill out some exhaust studs on my Cayenne. The cobalt drill bits do the trick. Just be patient and use good pressure at low speed.
This. And then you can heli-coil it, if necessary.
I just had to drill out some exhaust studs on my Cayenne. The cobalt drill bits do the trick. Just be patient and use good pressure at low speed.
I think I need a lesson on cobalt drills. A little bit of research tells me that M35 grade is no good for hardened steel. M42 appears to be the best alternative. Are there other alternatives. Sure would love to hear from someone who knows this stuff.
At this point, I�m inclined to attempt a time-sert.
And, yes, the motor is supported�.
I went to Home Depot and got the Milwaukee set of colbalt drill bits. Was about 30 bucks I think. Used wd40 as lube and put the drill in the slower high torque mode. And the spun it around 300rpm. Started with a very small bit to get things going and then got it done in two additional stages.
My Ford engineer friend noted a trick he learned when he was a tech at a Jaguar dealership working his way through college... Coka-Cola overnight. The acid will work it loose. I never tried this but he said he used this trick often.
Glad you got this resolved. I'm surprised the bolts were on so tight. The torque spec for the top bolts is only 18 lb-ft or something like that (23 lb-ft for M10). Basically hand tight. I just did my engine mounts:
Loosen the top bolts first and then loosely thread them back in by a couple threads.
Then jack the car up to get to the torx nuts underneath.
Support the engine. I placed a support on the rearward edge of the oil pan.
Do one mount at a time. Torque the lower nuts to 63 lb-ft and then tighten the top bolts to spec.
You can easily get this done in less than 30 min (assuming no bolts break!). Good luck!
We used to use Caterpillar cobalt drill sets to drill out broken off exhaust studs in heavy earth moving equipment.
They are a 135 degree split point sharpening, the point design makes the bit easy to push into hardened alloy steel that's been work hardened by thousands of hours of machinery use.
Cat part number 1U-5399 for the set. Don't expect them to be cheap.
If you come across a broken easyout or even a tap in the hole and there is no other alternative than to continue to try and drill through the broken easy out, its time to breakout the Sandvik Diagrit Hardcut bits. Solid carbide, Extremely tricky to use and suffer no clumsy hand, pro user recommended.
But my original suggestion of drilling from the bottom still rings true, drill enough just to be able to punch the broken easyout from the bottom, up and out, before continuing drilling out the stud.

 07-31-2021, 03:36 PM