When you click on links to various merchants on this site and make a purchase, this can result in this site earning a commission. Affiliate programs and affiliations include, but are not limited to, the eBay Partner Network.
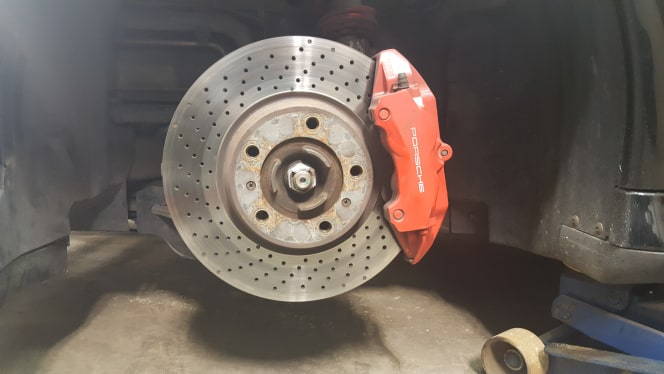
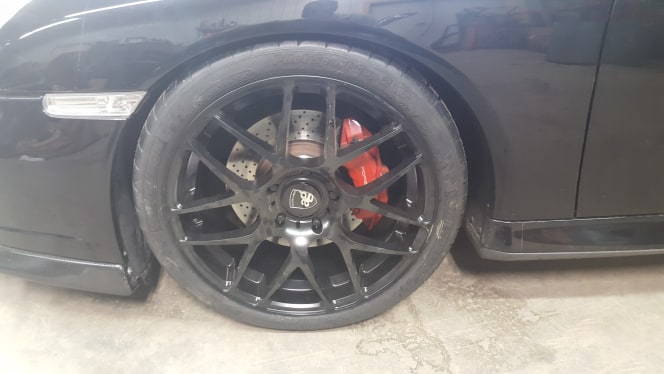
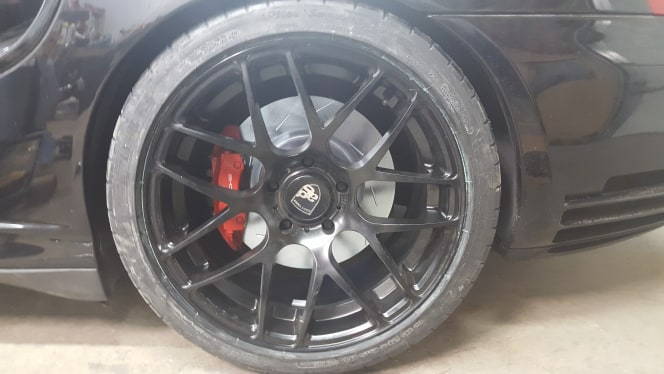
The 330mm to 350mm stock caliper big brake kits are becoming more and more popular. This is a basic walk through on the process of removing your old stock 330mm rotors and upgrading and installing your new 350mm rotors along with bolt and spacer kit. These kits are available from a few suppliers and is an upgrade i highly recommend to anyone with a 996 turbo, 996 c4s, 997 c2s, or 997 c4s.
Tools:
Jack or lift
Sock to remove wheels (some guys have special lugs sockets)
10mm allen socks
10mm standard socket
torque wrench
flat screwdriver
phillips screwdriver
wire brush
added tools that help:
impact screw gun
screw gun or die grinder with wire brush
Step 1:
Jack up car and remove wheel
step 2 Front:
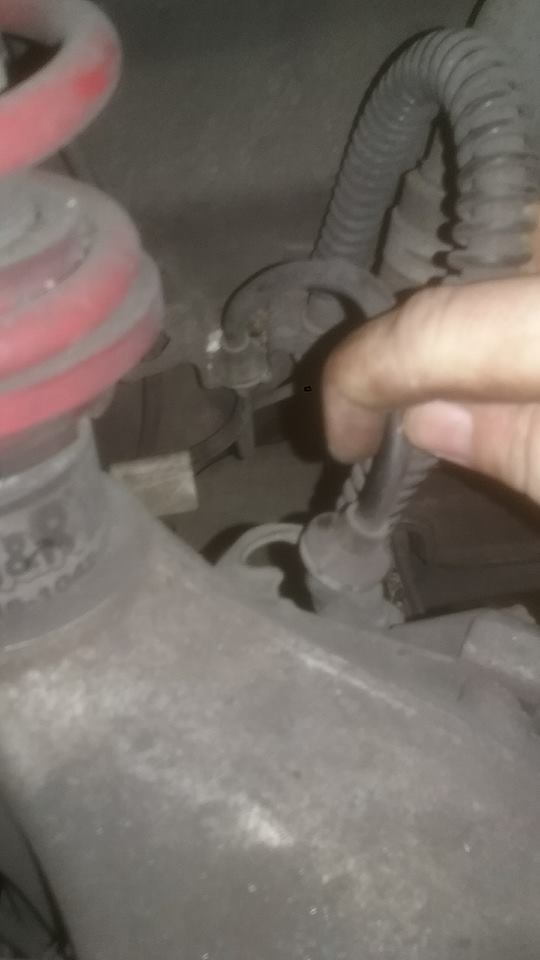
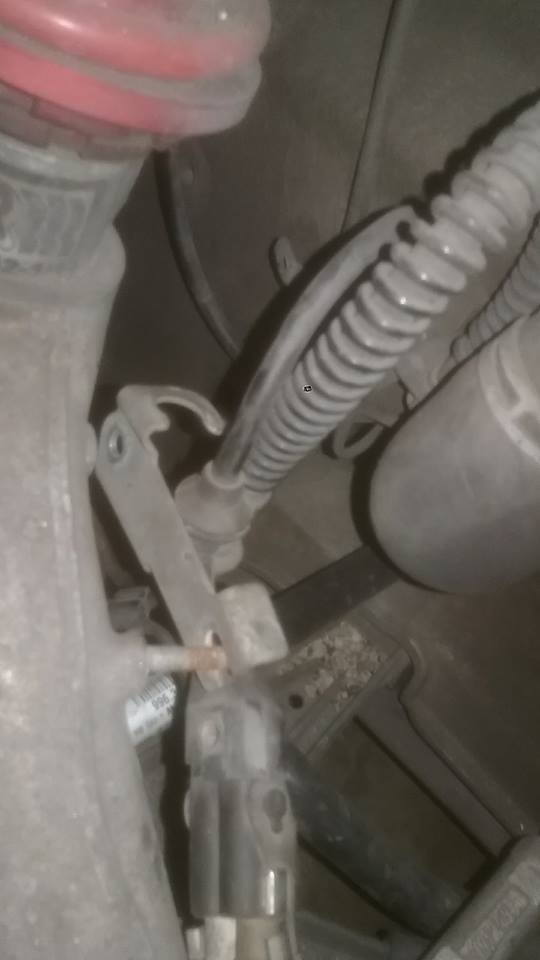
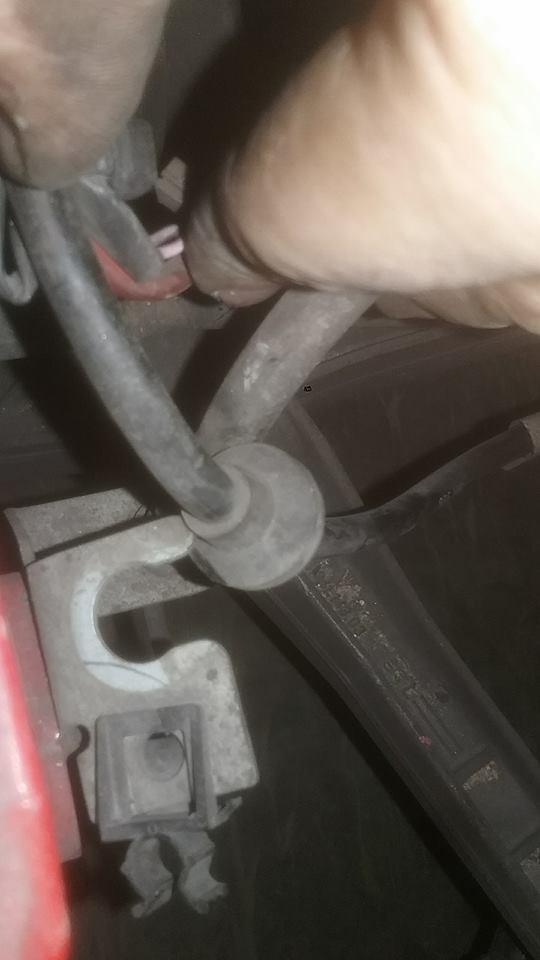
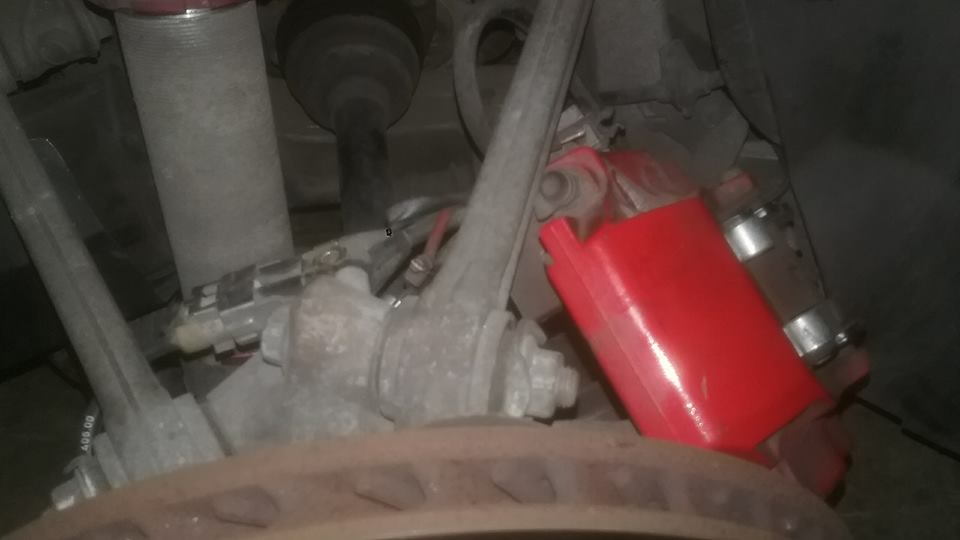
Use a flat head screwdriver to pry the ABS wire grommet out of bracket. Then remove the bolt and nut holding the ABS/pad sensor wires and brake line to the upright.
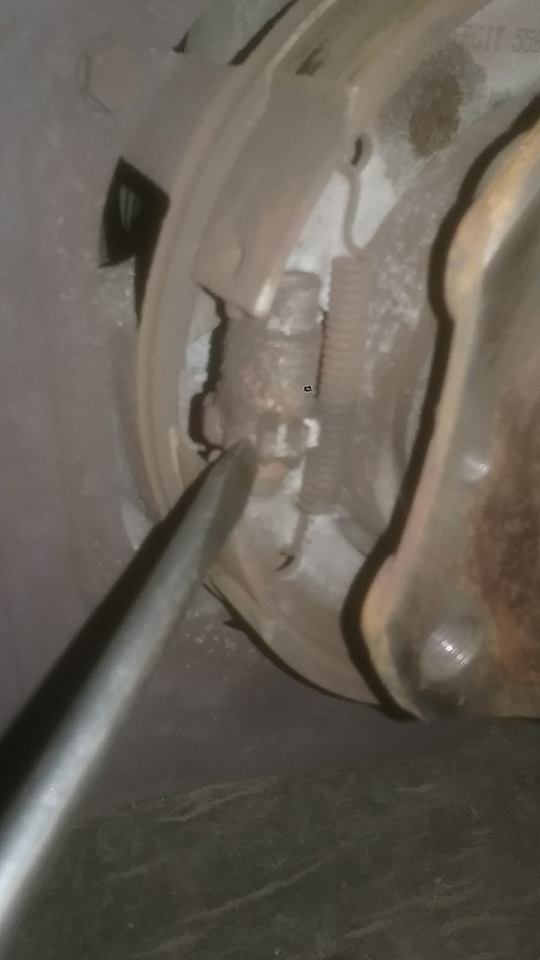
Step 2 Rear:
Use flat head screwdriver to remove ABS wire from bracket on the caliper
Step 3:
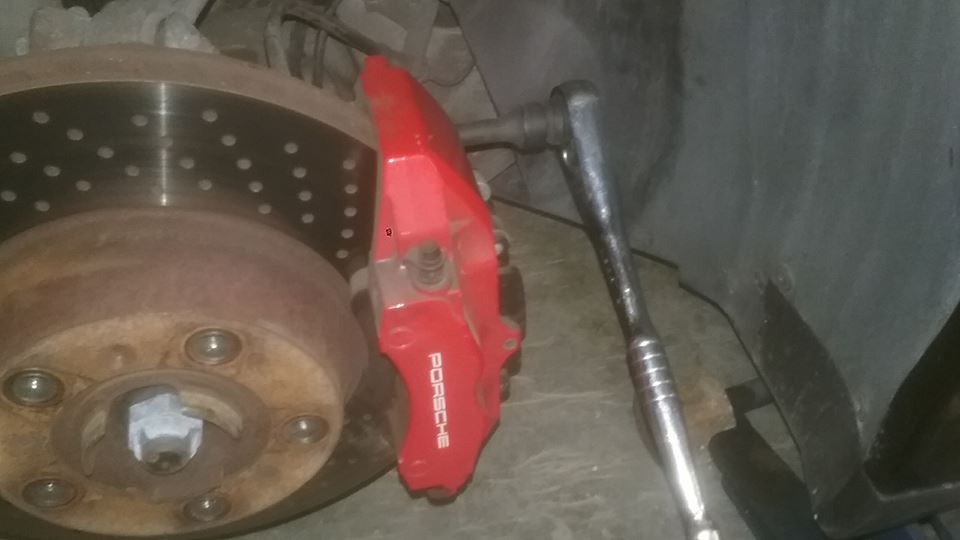
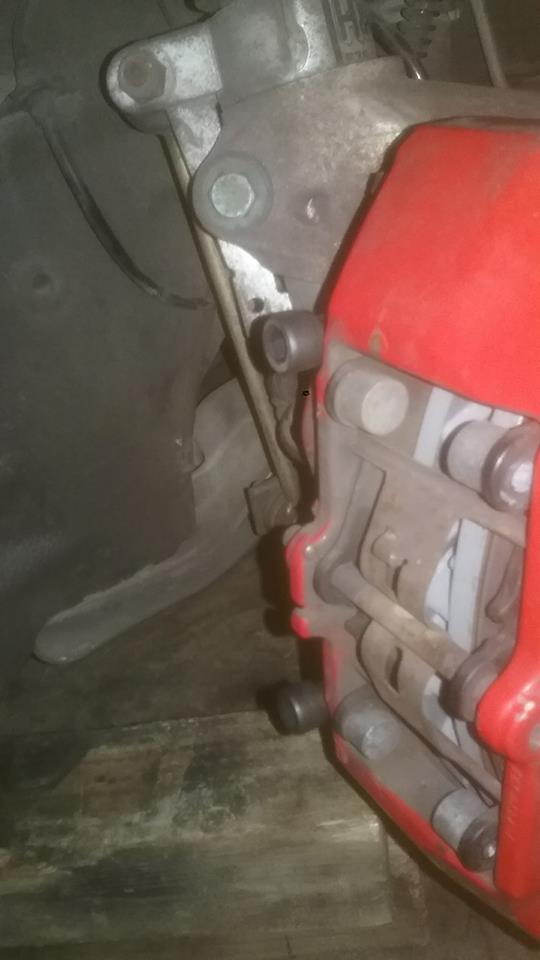
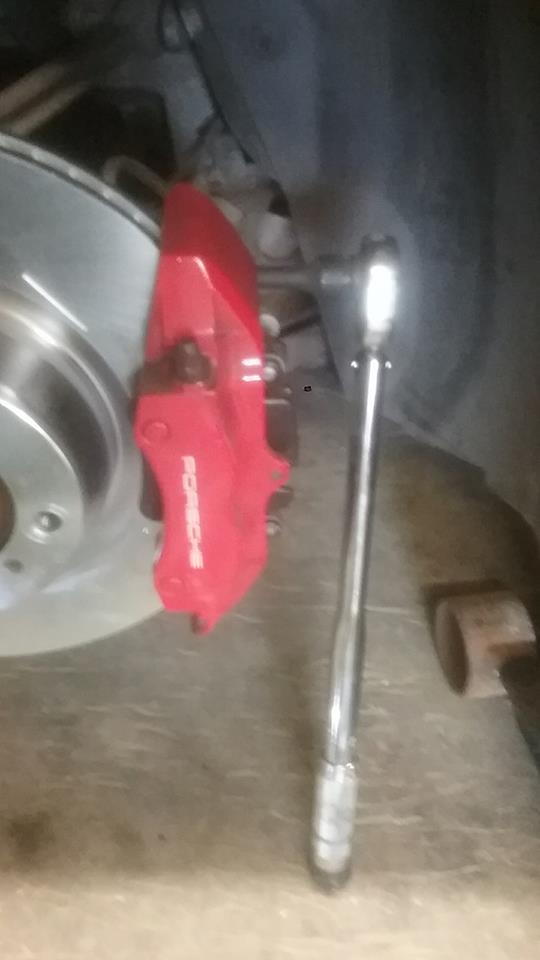
Use your 10mm allen socket and driver to remove the 2 bolts mounting the caliper to the upright. after removing boots, safely set the calipers behind the rotor in the suspension. Use a zip tie or wood blocks to support the caliper so the metal brake hard lines do not get bent or damaged.
Step 4:
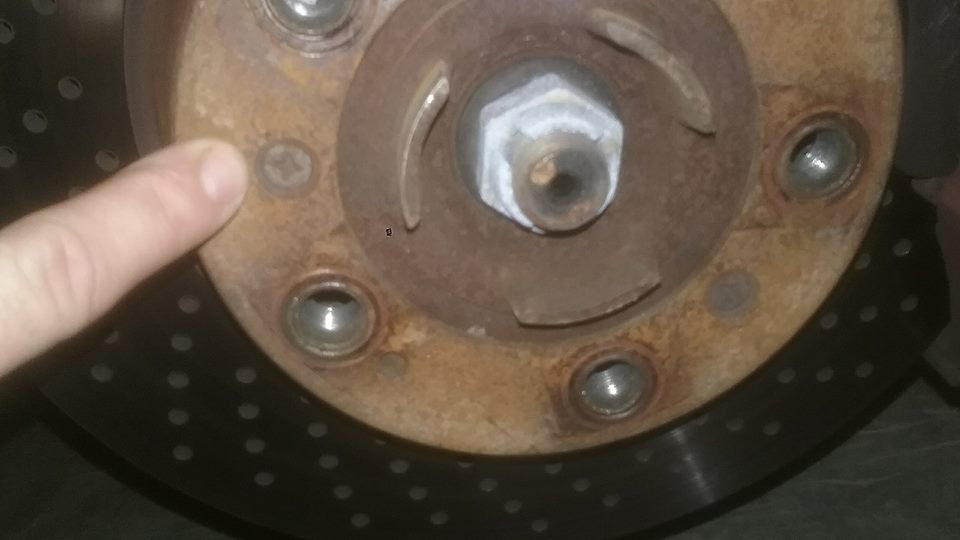
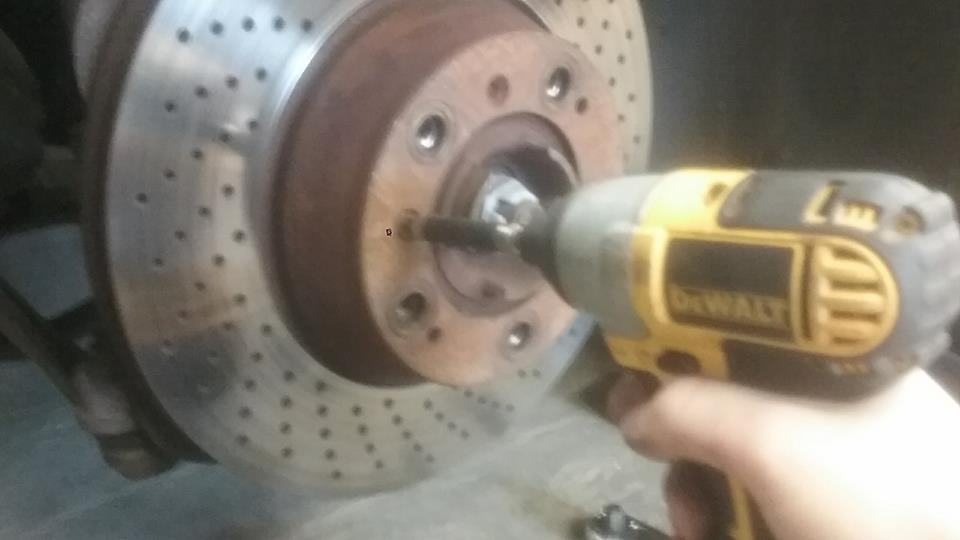
Using a phillips screwdriver (impact screw gun is very helpful to use if you have one) remove the 2 screws holding the rotor to the hub. after screws are removed, take rotor off and set aside.
Step 5:
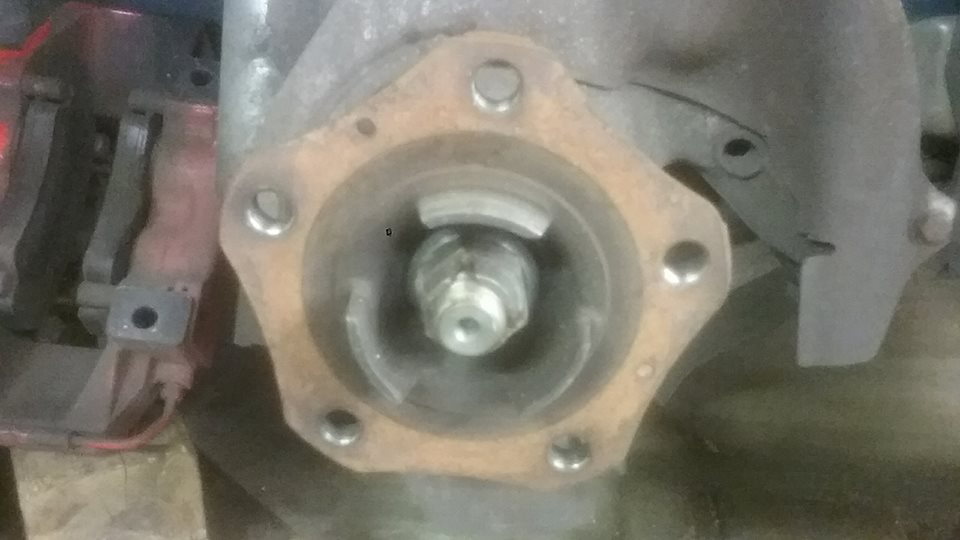
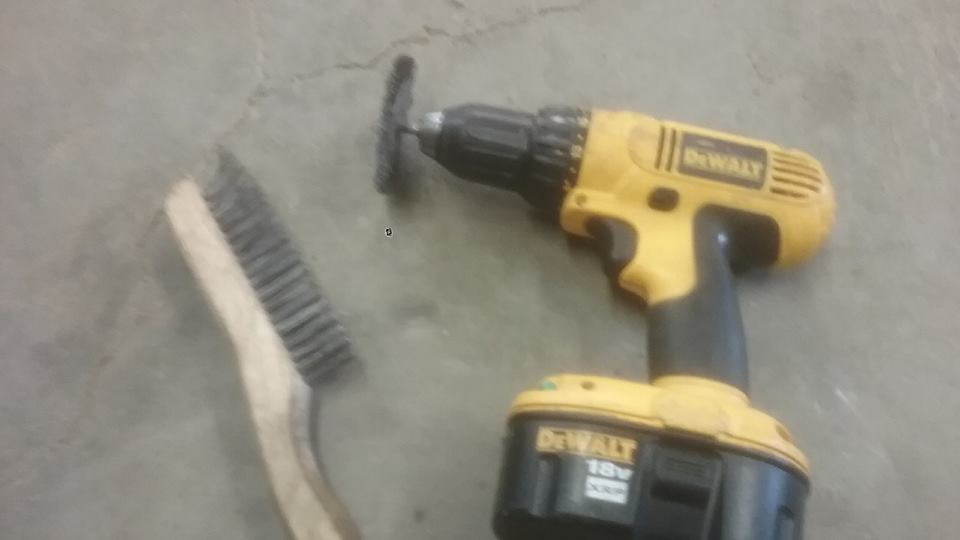
Now that you have removed the rotor, it is very important to clean any rust off the hub so the new rotor sits flat on the hub. Use a wire brush (or screw gun/ die grinder with wire brush) to clean the hub surface until all rust is removed.
Step 6:
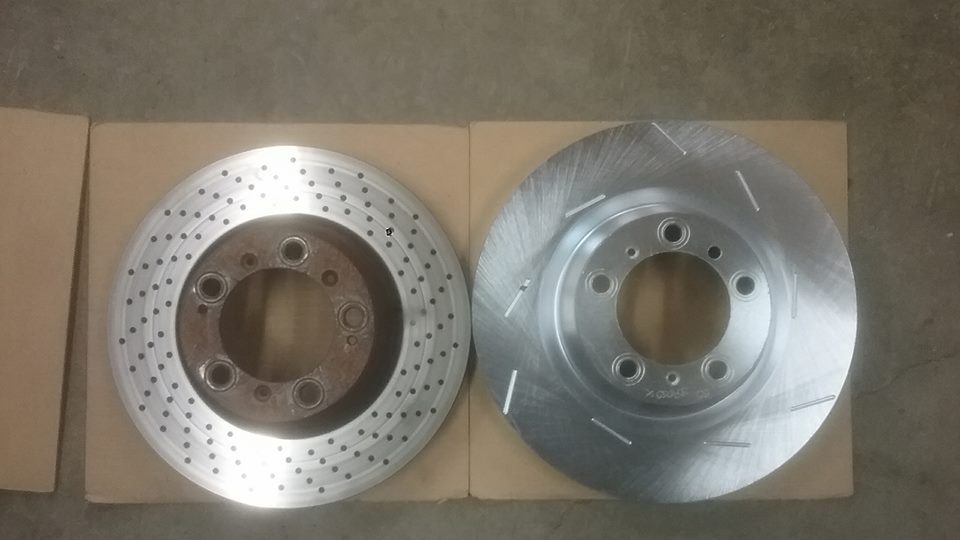
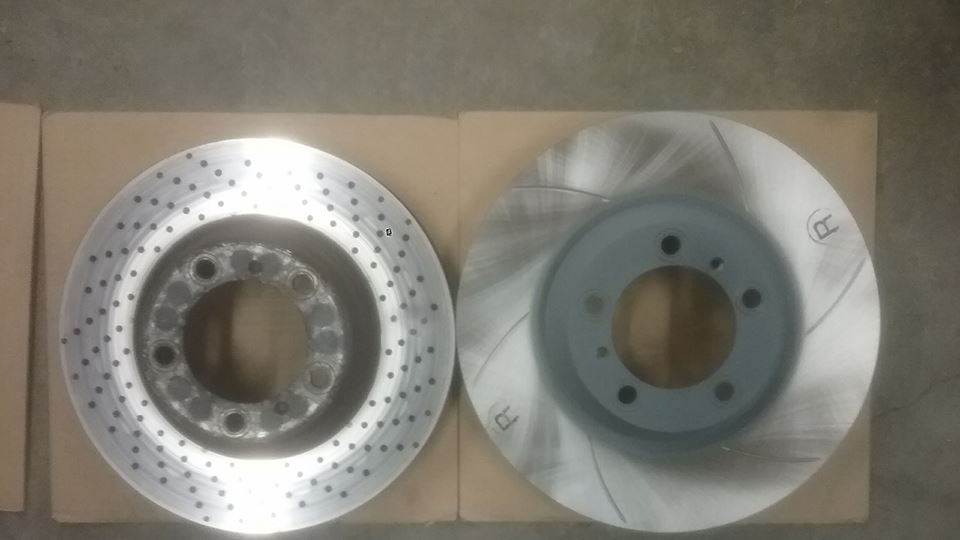
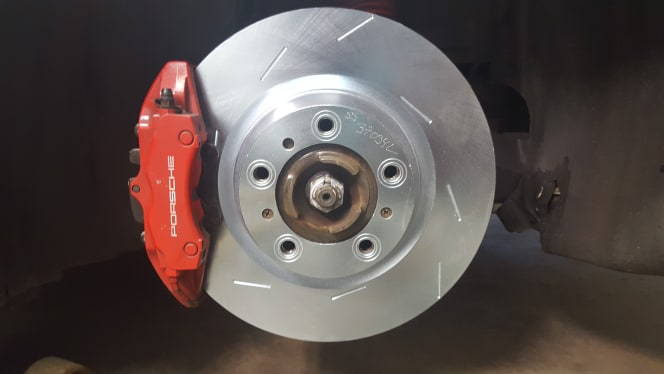
Unbox your new 350mm rotors. Clean them with brake cleaner and remove any oil or grease on them.
Step 7 (rear only):
Test fit rotor on hub. It may not fit due to the ebrake shoes contacting the rotor. If this is an issue, use a flat head screw driver to turn down the start screw on the brake shoe adjuster. Turn it a few turns at a time and test fit rotor until it slides over the ebrake shoes.
Step 8:
Install rotors. Use the 2 phillips head screw to mount rotor to hub. Very important to screw these in by hand and not use a screw gun do the heads do not become stripped out. Many people replace these screw when changing rotor and is recommended but not mandatory.
Step 9:
Install your calipers with new longer bolts and spacers. you may need to use a C clamp to push the pistons and pads back in all the way to spread wide enough to fit over the new rotor.
Whether you're using plate style or washer style spacers, install the top bolt first. Slide bolt through the caliper and slide spacer up and use bolt to hold in place. Then line up with mounting hole and finger start the bolt. Now install the bottom bolt into calipers. Slide spacer into place and start bolt with your fingers.
Now tighten the bolts as much as possible with your fingers. After they are finger tight, use your 10mm allen head socket and driver to tighten the bolts to a light snuggle. Its a good idea to do this buy tightening each bolt a little at a time.
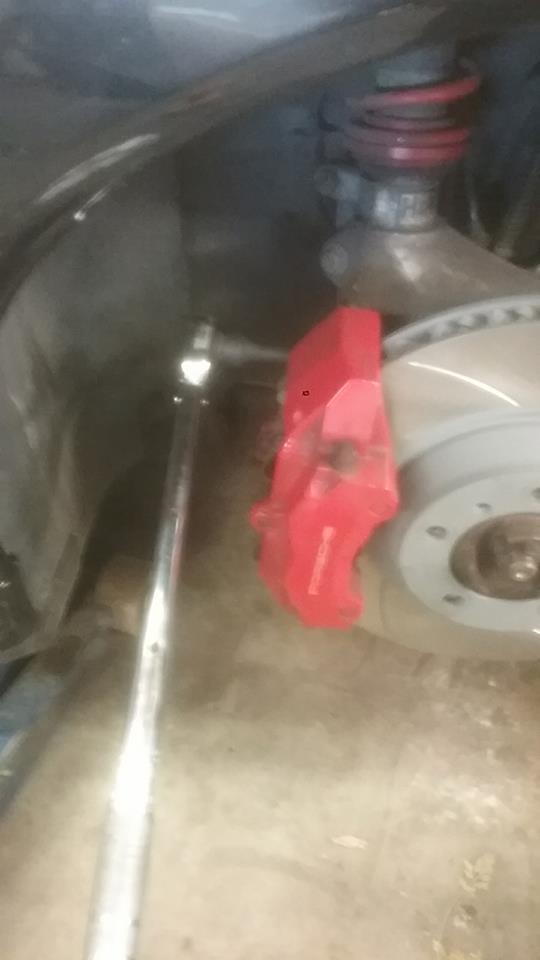
After bolts are snug, you need to mount your 10mm allen socket on to your torque wrench. OEM torque spec for the caliper bolts is 63ft/lb. personally i torque them to 70ft/lb but 63ft/lb is the proper OEM spec
Step 10 front:
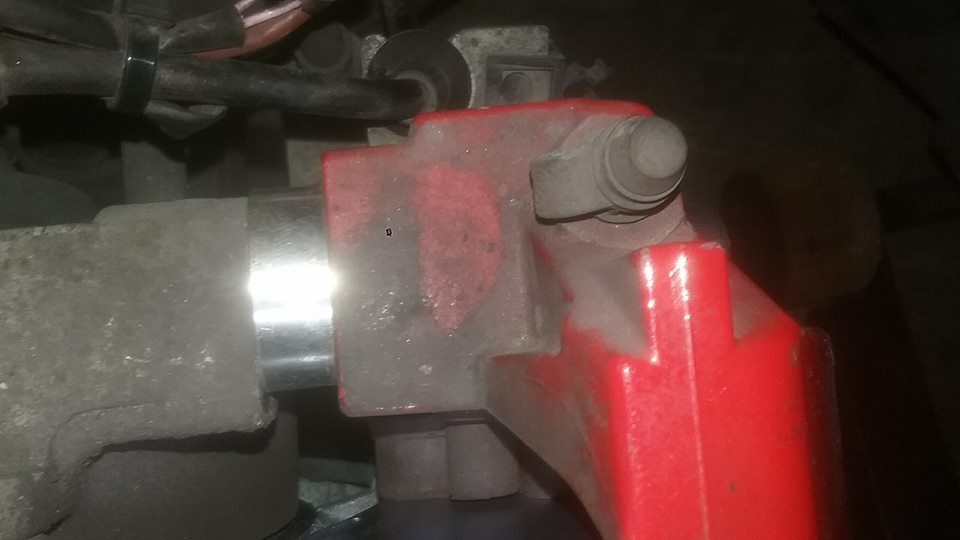
You will not want to reinstall the brake line/ABS wire bracket. Finger start the bolt to the upright. Now slide the sensor mount back over stud, finger start nut. With your 10mm socket and driver, tighten the bolt and nut back up. Then slide the abs wire grommet back into the bracket.
Step 10 rear:
Slide the ABS wire grommet back into bracket mount on caliper.
Step 11:
Reinstall wheel, lower jack and torque lug nuts to spec.
Step 12:
Repeat on other 3 corners
Step 13
Start car. Press the brake pedal a few time until you have good pedal pressure back. Now take the car for a drive and go through a brake pad bedding process. You need to bed the pads to the new rotors and remove and coating on the rotors left
Notes:
During this install, it is also a good time to change pads and fluid. You would do this the same you would any other time by removing old pads, installing new pads, and then bleeding brakes until you have new clean fluid with no air coming out of the calipers.
Edit:
Pictures wont upload through computer for some reason. Posting then add them with my phone.
In your final picture, is that a hole in the fender liner on the right? Looks like it was eaten through by tire rubbing.
Yes it is. All pictures are actually of a 996 turbo which is a friend of mines car. The 997 c2s and c4s have the same brakes though.
This car has a new wheel and tire setup not that no longer rubs.
Thanks for the great writeup. What are your impressions of the difference in braking, including any additional noise or other downsides?
increase in braking is very noticeable, especially at 70+mph. You also have a decrease in pedal travel to produce the same amount of braking as the stock 330mm rotors. This great improves pedal feel and overall braking confidence as well. The larger rotors also off more thermal mass for better cooling.
only down side is the increase in rotating mass and unsprung weight which the benefits far out way those IMO.
These look like Girodisc two-piece rotors which are lighter than stock 330s?
Very nice write-up, looks good. Now, in terms of your noticeable better breaking, I am a bit skeptical, could it be just that they're newer? Larger rotors without new calipers, would just have more mass to dissipate heat so will help on track but on the street I am at a loss to explain the difference.
Very nice write-up, looks good. Now, in terms of your noticeable better breaking, I am a bit skeptical, could it be just that they're newer? Larger rotors without new calipers, would just have more mass to dissipate heat so will help on track but on the street I am at a loss to explain the difference.
Good point ... what about that the rotor surface in contact with the pads at any given speed, while the same in area, is travelling faster given the larger diameter?
Very nice write-up, looks good. Now, in terms of your noticeable better breaking, I am a bit skeptical, could it be just that they're newer? Larger rotors without new calipers, would just have more mass to dissipate heat so will help on track but on the street I am at a loss to explain the difference.
Originally Posted by the_buch
Good point ... what about that the rotor surface in contact with the pads at any given speed, while the same in area, is travelling faster given the larger diameter?
ok guys I'm going to copy and past something I wrote earlier today to explain this. Overall though this has been done in the 996 turbo world for over 5 years and is a well tested and proven mod. Also has been done by many oem and aftermarket companies for a very long time. Use the same calipers but larger rotors to produce more braking and better cooling.
The increase in rotor size does a few thing. First it increases the leverage the caliper/pads have on the rotor which increases overall braking power. That increased can be maxed though by limits in the friction of the pads and grip of your tires.
Second, the larger rotor both increases thermal mass for heat absorption and dissipation. This greatly reduces brake fade on track because of the increase in cooling.
Third, because the increase in leverage, it greatly decreases pedal travel to produce the same amount the braking as the standard 330 rotor. This gives you better pedal feel as well as a huge increase in braking confidence.
IMO this is a good upgrade for everyone, especially if you need to change replace rotors anyway. This fits under the stock 18 inch wheels as well.
First it increases the leverage the caliper/pads have on the rotor which increases overall braking power. Third, because the increase in leverage, it greatly decreases pedal travel to produce the same amount the braking as the standard 330 rotor.
I'm not sure what you mean by 'leverage', but if I'm guessing correctly your statement is only true if the oem 330mm and the upgraded 350mm have the same moment of inertia. Your statement about cooling though is generally correct.
Originally Posted by alexb76
Very nice write-up, looks good. Now, in terms of your noticeable better breaking, I am a bit skeptical, could it be just that they're newer? Larger rotors without new calipers, would just have more mass to dissipate heat so will help on track but on the street I am at a loss to explain the difference.
Great write up but agree with this. more rotating mass and a higher moment of inertia with equal friction surface area says friction will be less at a given brake line PSI.. ergo braking would actually be worse on the street. given the same rotor surface conditions (i.e temp, pad/rotor composition, etc), you would only have better braking if the rotors had an equal or lesser moment of inertia which in rotors usually translates to less mass overall since they are fairly evenly spread from the axis of rotation in a cast iron rotor.
did you weigh your rotors?
i ask because the fact that these are single piece cast iron, are a larger diameter and are not cross-drilled leads me to believe that they weigh more than new 330mm OEM rotors which means, however slight, braking on the street will be 'worse'... again all things being equal.
just wanted to know since the rotors are bigger I’m guessing the brake pads won’t sweep the whole rotor surface ? Does that leave a rust ring on the unswept area after long term usage?
I'm not sure what you mean by 'leverage', but if I'm guessing correctly your statement is only true if the oem 330mm and the upgraded 350mm have the same moment of inertia. Your statement about cooling though is generally correct.
Great write up but agree with this. more rotating mass and a higher moment of inertia with equal friction surface area says friction will be less at a given brake line PSI.. ergo braking would actually be worse on the street. given the same rotor surface conditions (i.e temp, pad/rotor composition, etc), you would only have better braking if the rotors had an equal or lesser moment of inertia which in rotors usually translates to less mass overall since they are fairly evenly spread from the axis of rotation in a cast iron rotor.
did you weigh your rotors?
i ask because the fact that these are single piece cast iron, are a larger diameter and are not cross-drilled leads me to believe that they weigh more than new 330mm OEM rotors which means, however slight, braking on the street will be 'worse'... again all things being equal.
The increase in leverage is front the movement of the caliper and pads further way from hub center. Your statement in inertia is true but the increase in inertia with the large rotor in percentage to the inertia the wheel and tire are creating is tiny. The increase in leverage vastly overcomes this.
the rotor does weight slightly more. They very from brand to brand and design being slotted or drilled.
I can tell you though that braking is increases a good amount and is not decreased in any way. This is tried and true and has been used in this brake setup for almost 10 years. I'll be doing some back to bad data just to post it on the spring but we have snow here in Minnesota now.
Originally Posted by Presto
Very nice diy, thank you for the info.
just wanted to know since the rotors are bigger I�m guessing the brake pads won�t sweep the whole rotor surface ? Does that leave a rust ring on the unswept area after long term usage?
Pad height and sweep area is identical. No difference between this or having 997 turbo/gt3 calipers in sweep area.
Originally Posted by floatingkiwi
Also what discs are these? How thick is the spacer?
You use 997 turbo rotors to do this. Spacers are 11mm thick.

 12-20-2017, 09:24 AM