
CLEAN THOSE RADIATORS!
 04-02-2016, 10:48 PM
#1
Rennlist Member
Thread Starter
I just finished changing all three radiators(CSF ~$1,600 plus front hoses $318.)
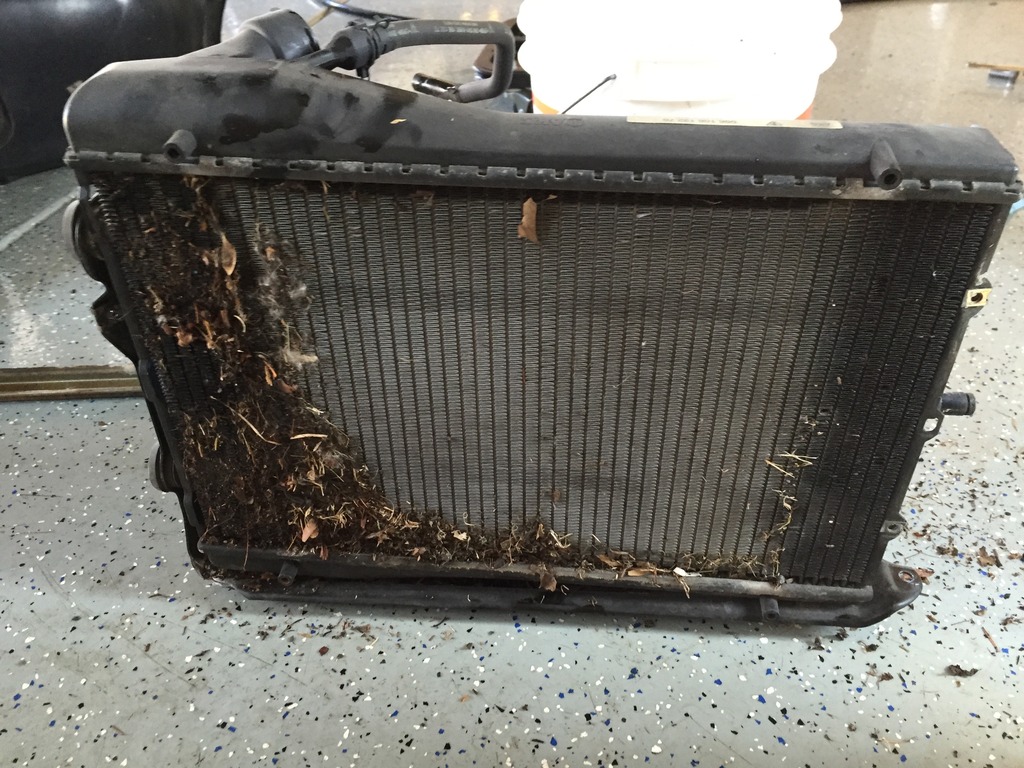
The attached pic is what my radiators looked like without being cleaned for 12 years & 18K miles.
About 1/4 of each side radiator was packed with what looked like rusty cement, with the added bonus of being full of pin holes.
The center one cleaned up pretty well but while you are in there...
The attached pic is what my radiators looked like without being cleaned for 12 years & 18K miles.
About 1/4 of each side radiator was packed with what looked like rusty cement, with the added bonus of being full of pin holes.
The center one cleaned up pretty well but while you are in there...
Last edited by fpb111; 04-03-2016 at 08:26 PM.

 04-05-2016, 03:21 PM
#4
Rennlist Member
Thread Starter
This one must have traveled a dirt/gravel road often. The "cement" looked like a mixture of gray stone dust and red clay. Probably with salt/calcium chloride mixed in for good measure.
04-05-2016, 04:15 PM
#6
Three Wheelin'
yep, I noticed temps going up higher than I wanted on my first track day..... One of the side radiators was almost completely clogged and the center and other side weren't exactly open, took them out and cleaned them well... Next track day, similar weather, temps stayed a bit lower. 
Trending Topics
 04-05-2016, 07:18 PM
#9
OP, you're doesn't look bad at all, lol
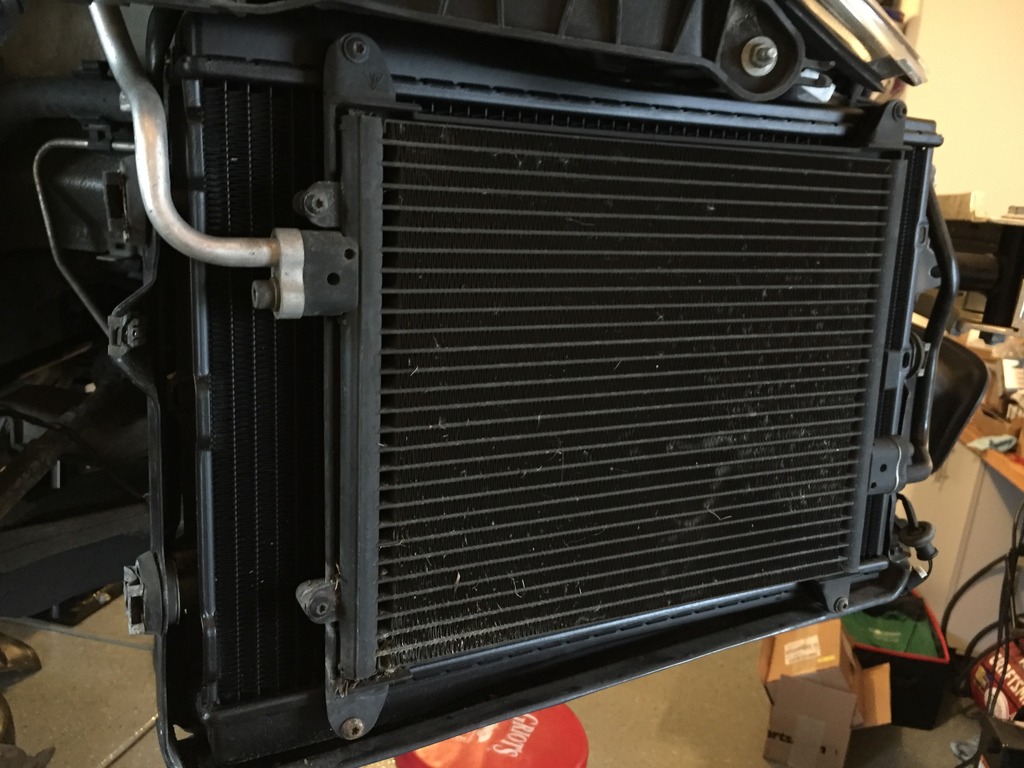
This was my factory original passenger side radiator after 70K miles...
Previous owner replaced other 2, but didn't think to remove debris from the third after the first two failed, lol
All fixed now!
This was my factory original passenger side radiator after 70K miles...

Previous owner replaced other 2, but didn't think to remove debris from the third after the first two failed, lol
All fixed now!
 04-05-2016, 10:14 PM
#10
Rennlist Member
Thread Starter
 I have some posters and such to hang when I get time.
  04-05-2016, 10:26 PM
#11
Rennlist Member
Thread Starter
That pic is after I cleaned the exterior crud off. I couldn't get the stuff out of the "honey comb" so that light/air could flow through. Plus there were many pin holes. I guess one point to take away is even with only ~18k miles a "little" crud can cause perforation failure over time, 12yrs.
04-05-2016, 10:45 PM
#12
That pic is after I cleaned the exterior crud off. I couldn't get the stuff out of the "honey comb" so that light/air could flow through. Plus there were many pin holes. I guess one point to take away is even with only ~18k miles a "little" crud can cause perforation failure over time, 12yrs.
 04-07-2016, 10:45 AM
#13
Rennlist Member
Thread Starter
I love mine too. I use at the 25" height mostly. That is the best height for my roll around seat when I'm working on tires, brakes radiators etc. it also works for the creeper.
So far I have used it on: Mercedes ML 350, Subaru Outback, 2002Boxster, Scion XB, 2003 C2 Cab, 2004 Turbo Cab, Harley Road King.
So far I have used it on: Mercedes ML 350, Subaru Outback, 2002Boxster, Scion XB, 2003 C2 Cab, 2004 Turbo Cab, Harley Road King.