DIY: Installing 997.2 GT2RS Intercoolers
#1
Rennlist Member
Thread Starter
Ok, let's install some intercoolers! This, while not a difficult project, is a time consuming one. I probably had something around 8-10 hours into this. This isn't a complete DIY, I'm assuming you know how to take off your rear bumper. If you don't, look it up. If that looks like something you don't want to do, installing these intercoolers is something you definitely don't want to do.
Many thanks to John and Paul for their help with this!!!
Tools needed:
3/8" drive rachet, with extensions
T25 socket or driver
10mm and 13mm sockets
Screwdriver, phillips and flat head
Dremel with cut off wheel and sanding attachments
Rivet gun and rivets
Weather stripping
Patience, lots and lots of patience!
Ok, time to kick this off. Remove the rear bumper. That leaves you staring at the intercooler assembly. Porsche designed this to come off as one big piece.

There are various 13mm bolts/nuts holding this on. Two on the front, two on the back, two on the bottom attached to the heat shield and one vertically mounted one on the top front. Don't forget to pop the two retaining clips off the boost hoses and pull the boost hoses free. Now remove the entire thing and you have this sitting on the floor.

Car looks like this now

Now you have to separate the bracket from the shrouds/IC assembly. They're held in place with clips, 4 total, 2 on the top and bottom each. Once you've done that, pull the bracket free.

Pop the retaining clips off that hold the two halves of the shrouds together, after you've marked the orientation and sides of the shrouds so you know how to put them back together. These pop off easily with a flat head screwdriver. Mark the clips for inside/outside, as they do differ. Set them aside, we'll be using these later.
Now let's compare the stock IC to the GT2RS ones. You'll notice that the stock ones are longer, but the GT2RS IC's are thicker and have more rows to them. Research has shown these to cool 65-70F better than stock and recover quickly.

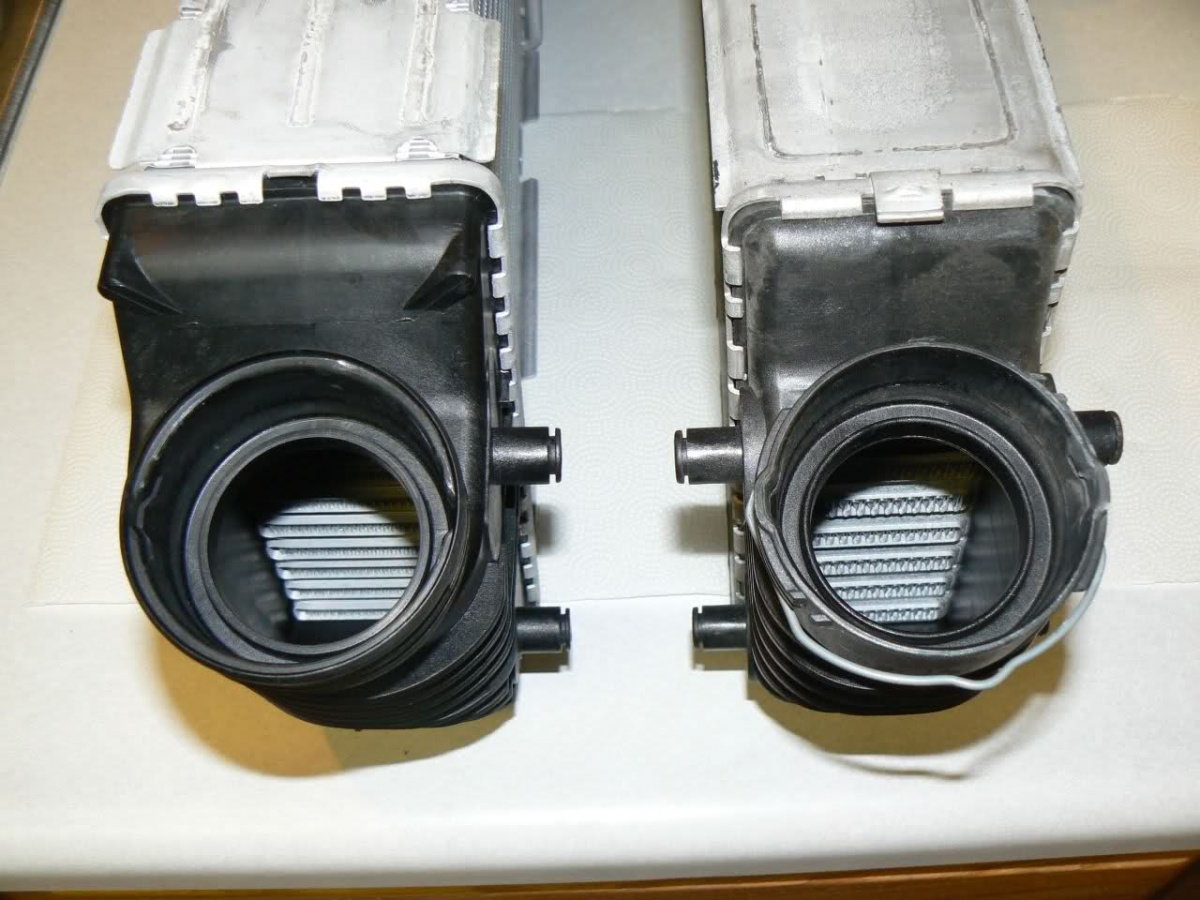
Width of GT2RS IC

Width of stock IC

Ok, time to start modifying the shrouds. You don't need to modify the GT2RS IC's themselves at all for a 996 Turbo install. Modifying the shrouds, frankly, was a huge PITA. Be really careful as the plastic is brittle and to replace them is costly. I got a lot of help here from a pwdrhnd, thanks a ton John! You saved me an immense amount of time. He let a friend and me borrow his already modified shrouds so we could measure them and copy his design.
There are several modifications you have to make, beginning with cutting off the inner lip from each shroud. Do this with a dremel/cut off wheel, then smooth it down with files, sandpaper wheels, etc. Now you get to start to cut notches in the shrouds. Here's where you do it, with measurements.


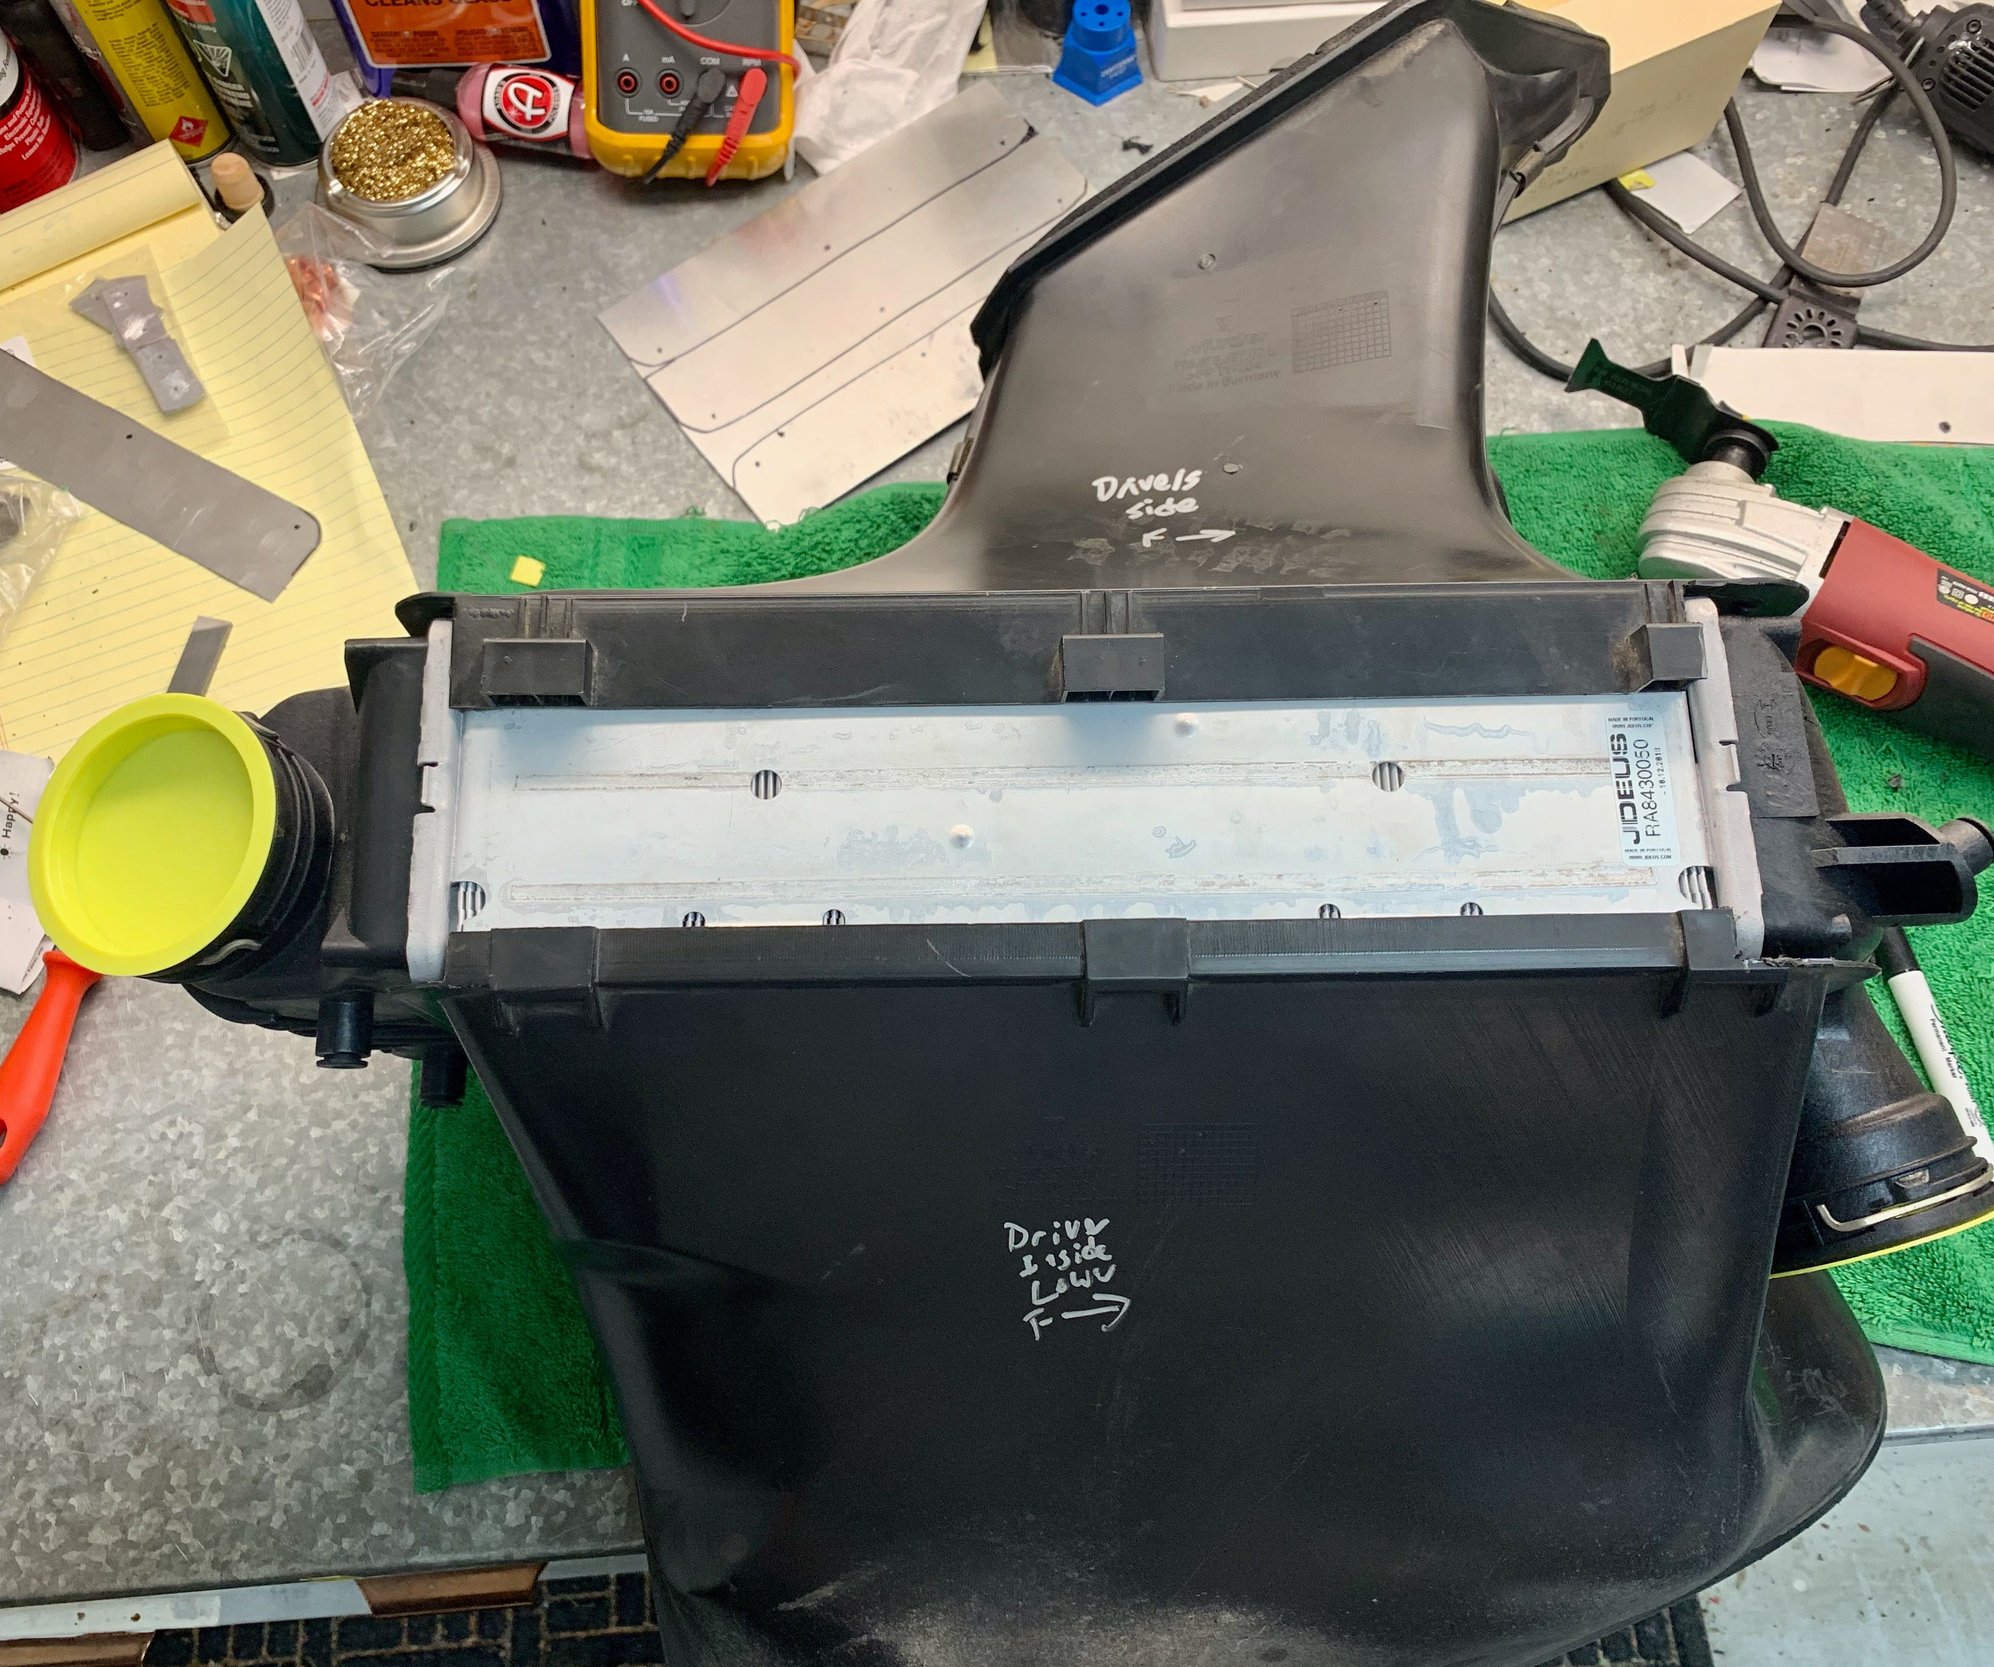
Here's the shrouds sitting on the IC's so you can orient the above pics to make sense


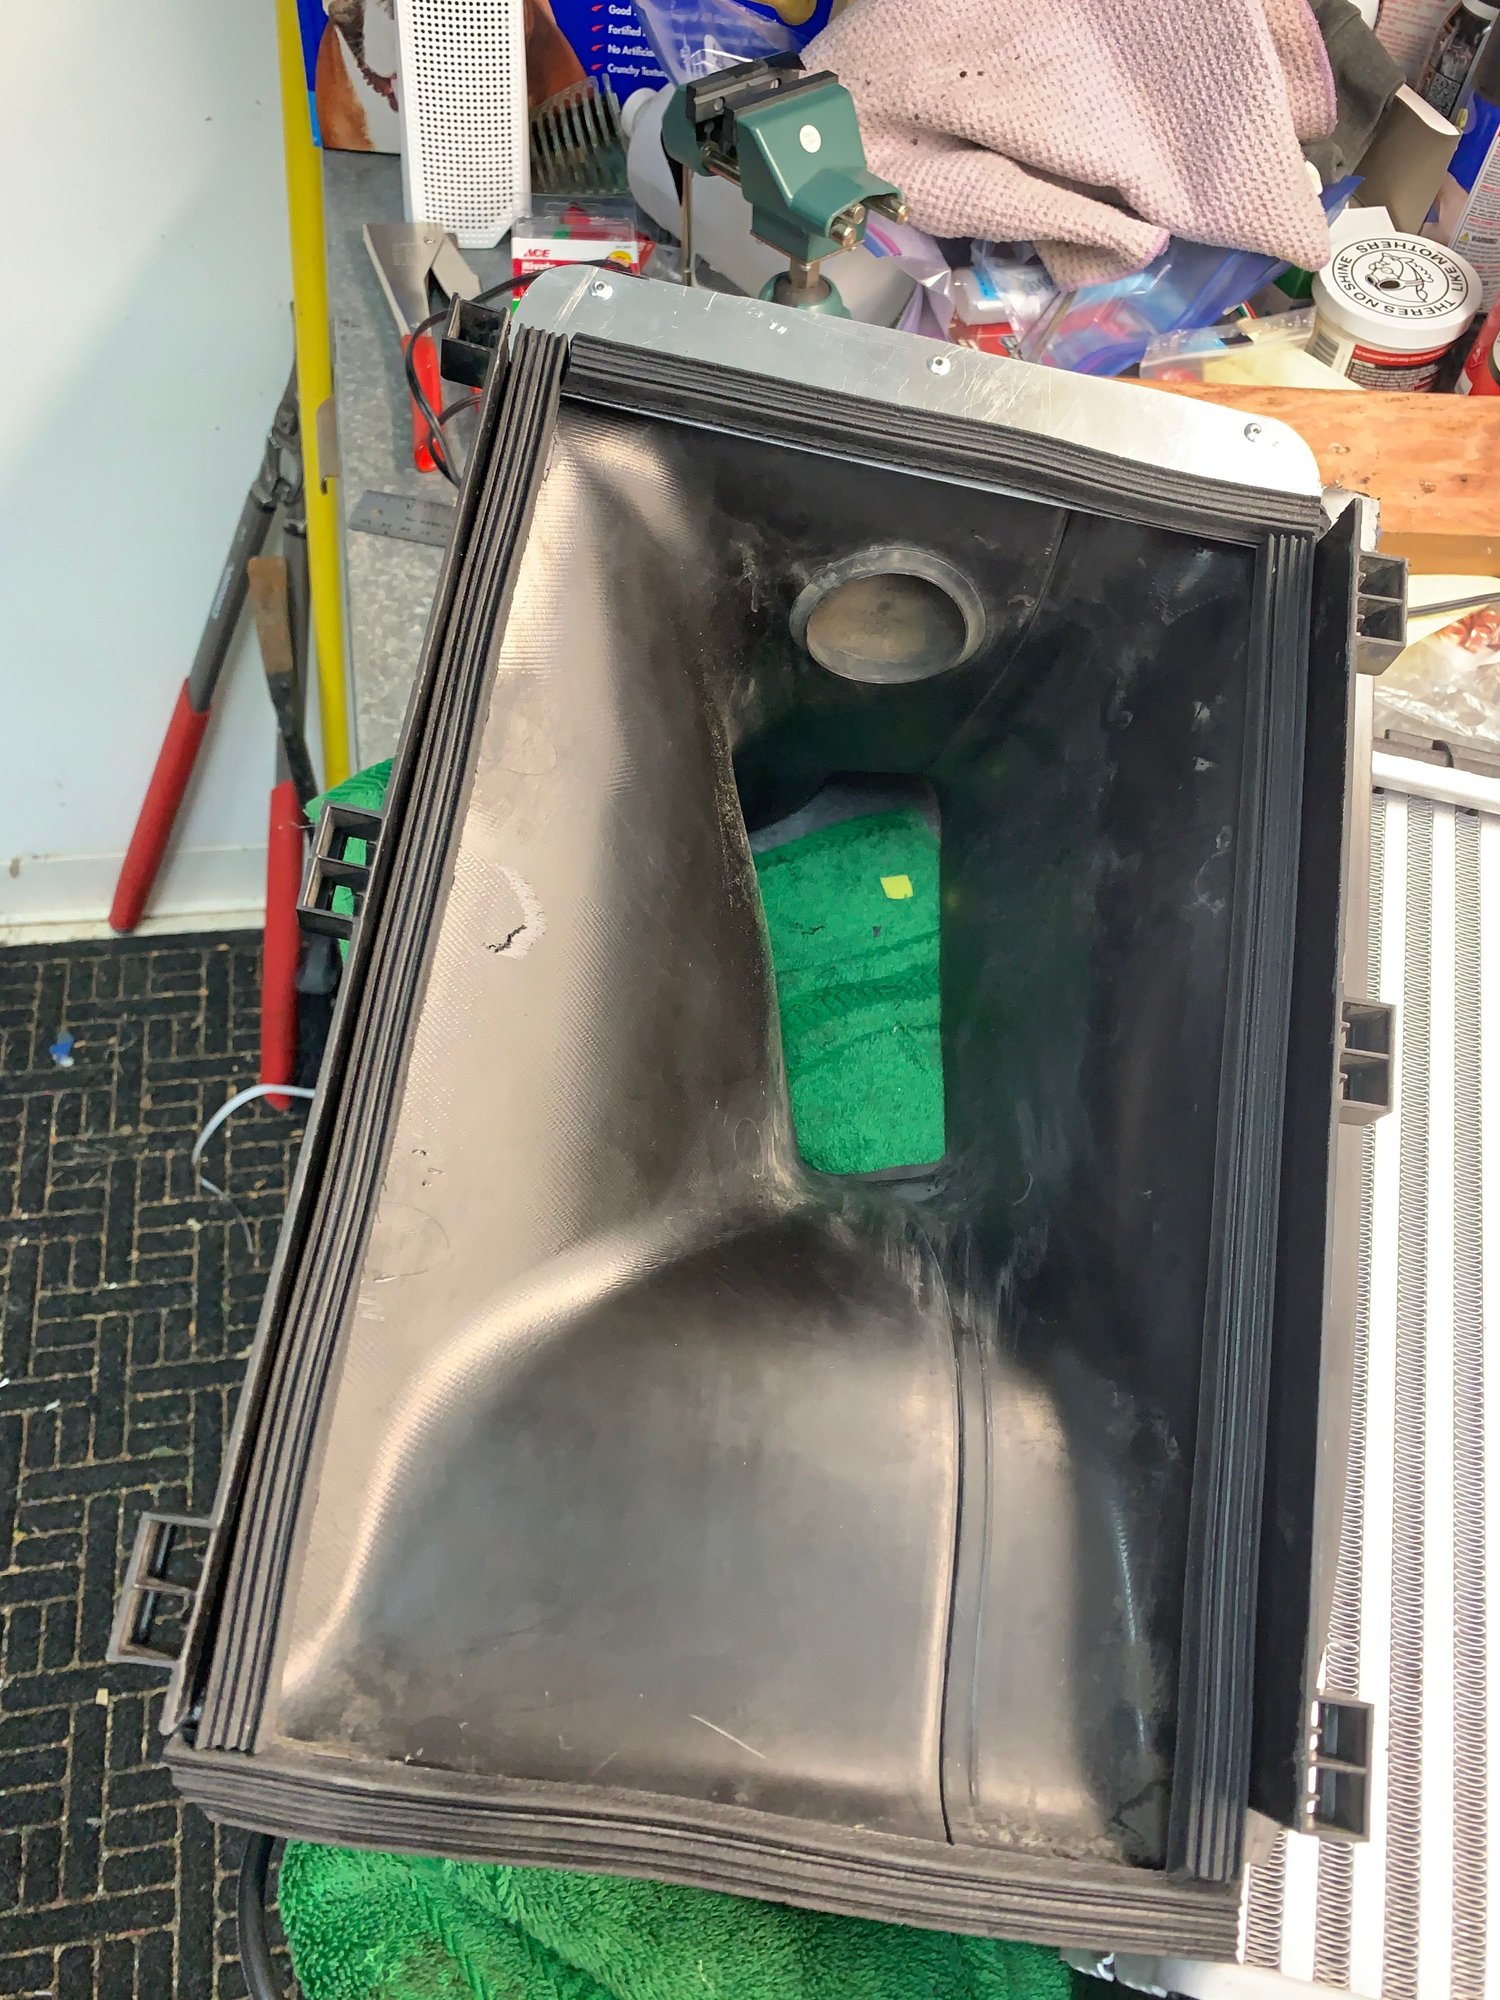
Now you have to add an extension plate to the shroud to make it fit the shorter GT2RS IC better. You only need to do this on the inlet side. Some thin aluminum sheeting works well here, then rivet it into place.

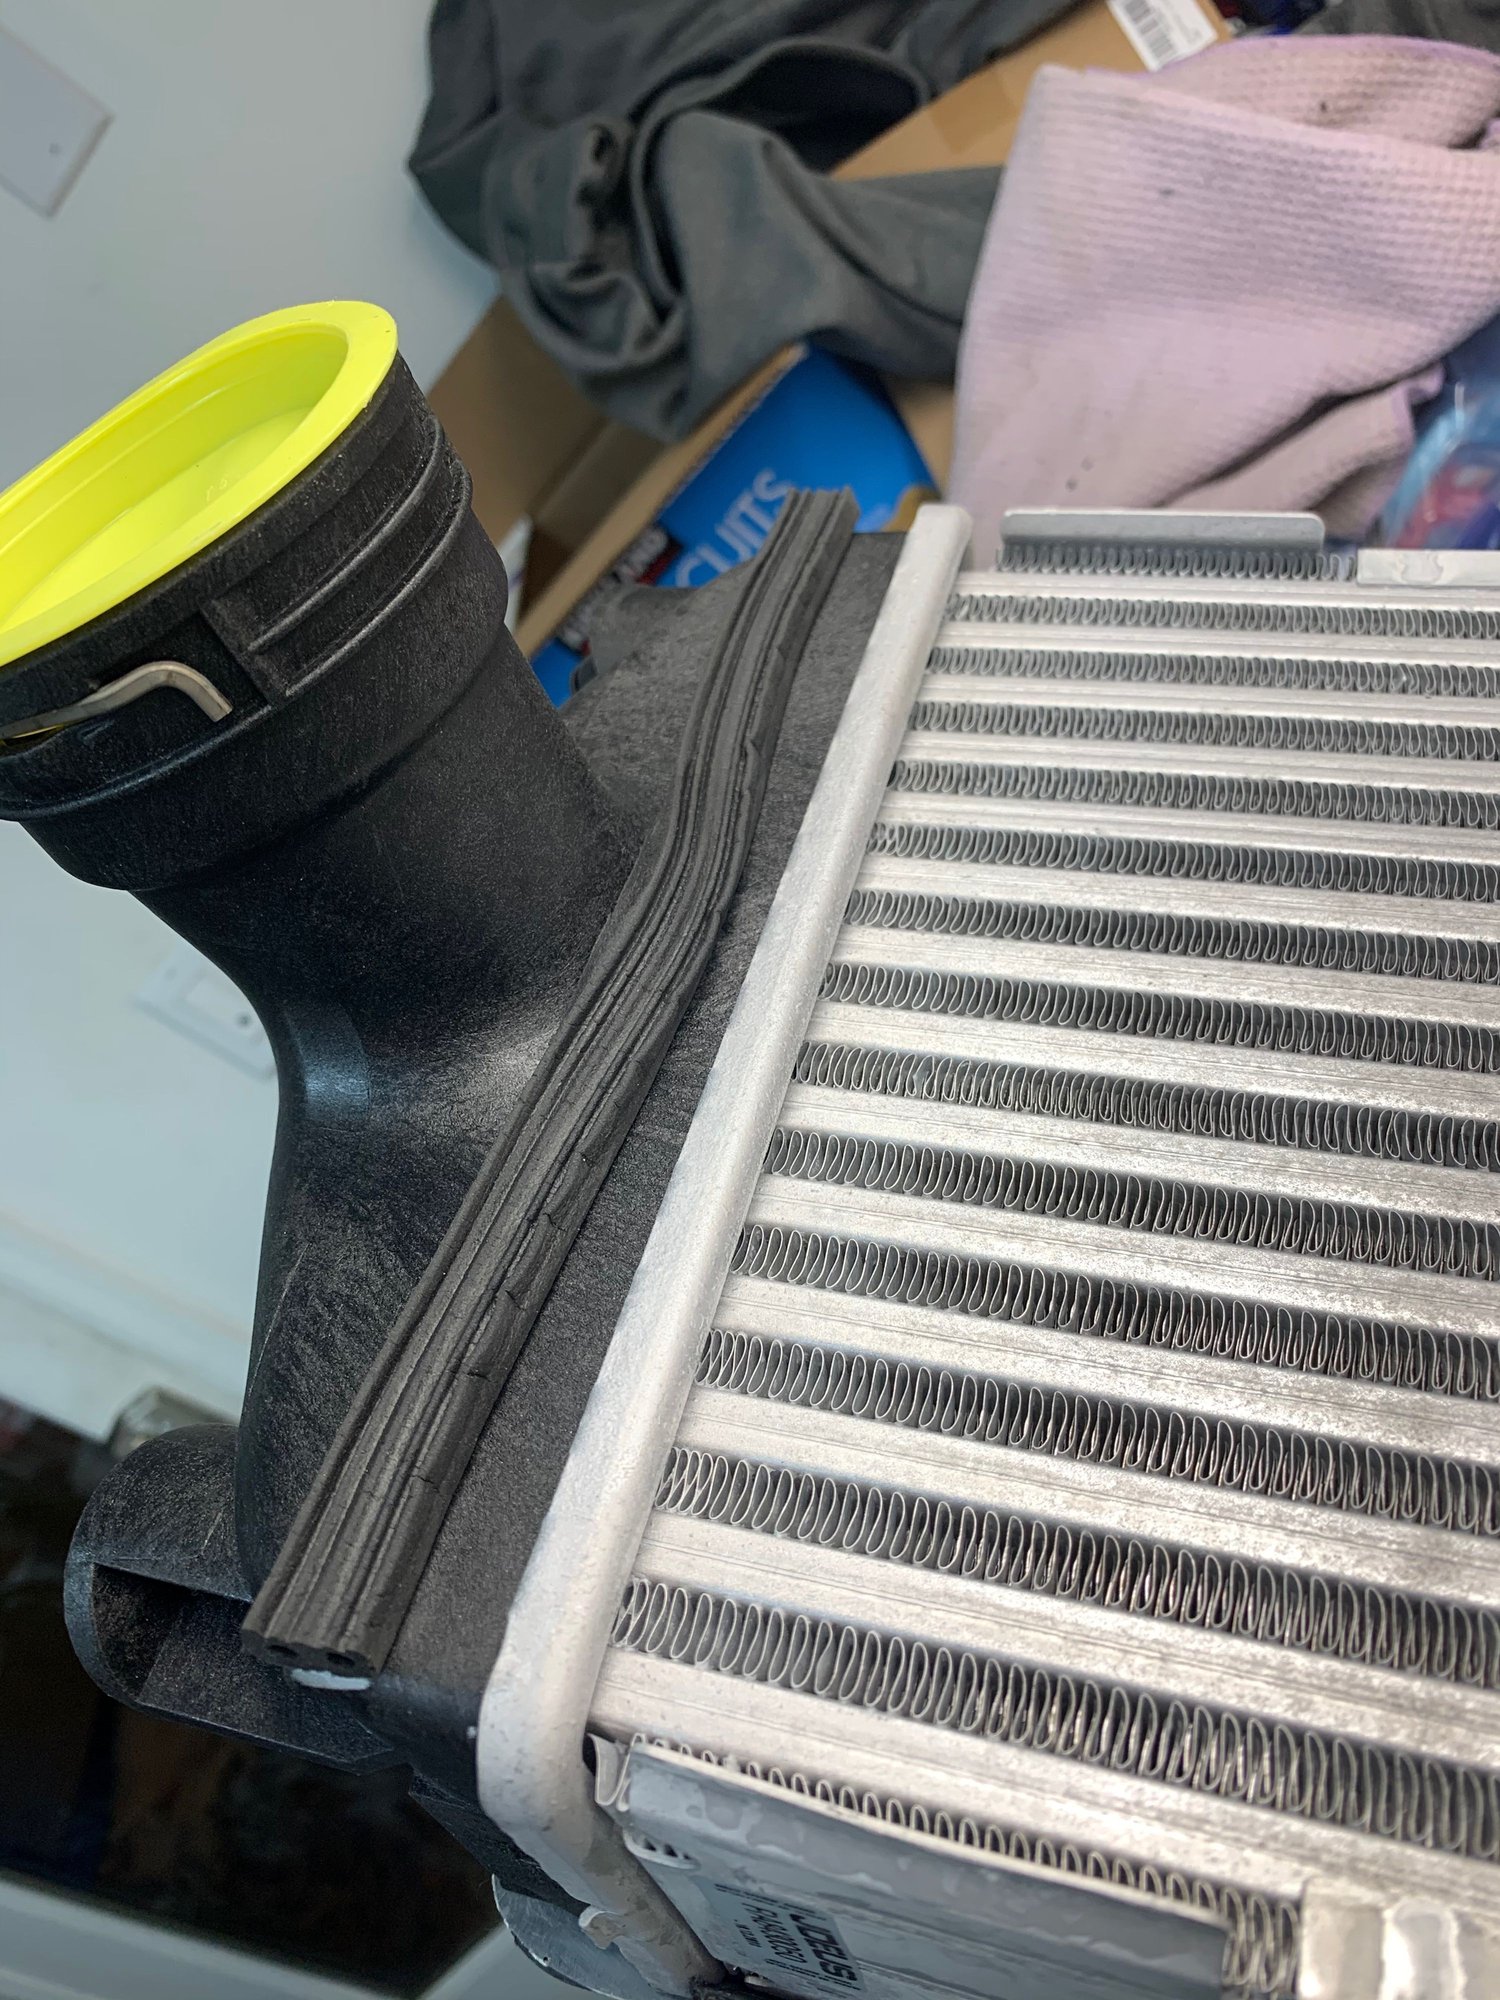
Put weatherstriping all around the perimeter of this shroud, as it's the inlet side. I used this stuff.

Ok, now you have a decision to make. How do you plan to hold the two halves of the shrouds together? The stock clips are too short to fit. You can either modify the clips or use heavy duty zip ties. Either will work, your choice. Zip ties are easier, clips are more secure long term. I decided to modify the clips.
You need to cut the clips in half, then use 4.5cm length pieces of aluminum to extend them. Drill holes in the clips/extension pieces and rivet them together using 1/8" rivets with a backing plate. These are the rivets I used

Your clips should now look like this

Ok, time to start putting all this stuff back together. Put the IC's into the shrouds, making sure you're orientating them correctly. Pop the clips on. This is how I felt at the time

Put the assembly back into the brackets. Note that only three of the bracket mounting points line up now. Getting those clips back in is a total PITA if you're solo. I recommend lubing the snot out of the bushings and using a wood workers racheting clamp to squeeze the assembly togther so you can drive the clip into place. Once that's done, install them into the car.

Hook everything up, put the rear bumper back on and you're done. You've more than earned your favorite frosty beverage!

Many thanks to John and Paul for their help with this!!!
Tools needed:
3/8" drive rachet, with extensions
T25 socket or driver
10mm and 13mm sockets
Screwdriver, phillips and flat head
Dremel with cut off wheel and sanding attachments
Rivet gun and rivets
Weather stripping
Patience, lots and lots of patience!
Ok, time to kick this off. Remove the rear bumper. That leaves you staring at the intercooler assembly. Porsche designed this to come off as one big piece.

There are various 13mm bolts/nuts holding this on. Two on the front, two on the back, two on the bottom attached to the heat shield and one vertically mounted one on the top front. Don't forget to pop the two retaining clips off the boost hoses and pull the boost hoses free. Now remove the entire thing and you have this sitting on the floor.

Car looks like this now

Now you have to separate the bracket from the shrouds/IC assembly. They're held in place with clips, 4 total, 2 on the top and bottom each. Once you've done that, pull the bracket free.

Pop the retaining clips off that hold the two halves of the shrouds together, after you've marked the orientation and sides of the shrouds so you know how to put them back together. These pop off easily with a flat head screwdriver. Mark the clips for inside/outside, as they do differ. Set them aside, we'll be using these later.
Now let's compare the stock IC to the GT2RS ones. You'll notice that the stock ones are longer, but the GT2RS IC's are thicker and have more rows to them. Research has shown these to cool 65-70F better than stock and recover quickly.

Width of GT2RS IC

Width of stock IC

Ok, time to start modifying the shrouds. You don't need to modify the GT2RS IC's themselves at all for a 996 Turbo install. Modifying the shrouds, frankly, was a huge PITA. Be really careful as the plastic is brittle and to replace them is costly. I got a lot of help here from a pwdrhnd, thanks a ton John! You saved me an immense amount of time. He let a friend and me borrow his already modified shrouds so we could measure them and copy his design.
There are several modifications you have to make, beginning with cutting off the inner lip from each shroud. Do this with a dremel/cut off wheel, then smooth it down with files, sandpaper wheels, etc. Now you get to start to cut notches in the shrouds. Here's where you do it, with measurements.


Here's the shrouds sitting on the IC's so you can orient the above pics to make sense


Now you have to add an extension plate to the shroud to make it fit the shorter GT2RS IC better. You only need to do this on the inlet side. Some thin aluminum sheeting works well here, then rivet it into place.

Put weatherstriping all around the perimeter of this shroud, as it's the inlet side. I used this stuff.

Ok, now you have a decision to make. How do you plan to hold the two halves of the shrouds together? The stock clips are too short to fit. You can either modify the clips or use heavy duty zip ties. Either will work, your choice. Zip ties are easier, clips are more secure long term. I decided to modify the clips.
You need to cut the clips in half, then use 4.5cm length pieces of aluminum to extend them. Drill holes in the clips/extension pieces and rivet them together using 1/8" rivets with a backing plate. These are the rivets I used

Your clips should now look like this

Ok, time to start putting all this stuff back together. Put the IC's into the shrouds, making sure you're orientating them correctly. Pop the clips on. This is how I felt at the time

Put the assembly back into the brackets. Note that only three of the bracket mounting points line up now. Getting those clips back in is a total PITA if you're solo. I recommend lubing the snot out of the bushings and using a wood workers racheting clamp to squeeze the assembly togther so you can drive the clip into place. Once that's done, install them into the car.

Hook everything up, put the rear bumper back on and you're done. You've more than earned your favorite frosty beverage!

The following 3 users liked this post by docwyte:
#2
Great job. I would hesitate to say that clips are more secure long term though, as this is just conjecture on your part, as once everything is bolted up the coolers are sandwiched together. Many are using zip ties on the cages.
Yours came out really nice. The bigger cores require you to actually section out the top of the shroud to get it back to an OE position.
Yours came out really nice. The bigger cores require you to actually section out the top of the shroud to get it back to an OE position.
#3
Rennlist Member
Nice writeup. My install was pretty similar but I ended up centering the upper duct on the intercooler and used thick weatherstripping to seal it off versus using the riveted aluminum panel but either will work.
also, I trimmed a little bit more along where the bumper gasket goes to get it to fit a bit better once I got the bumper back on.
also, I trimmed a little bit more along where the bumper gasket goes to get it to fit a bit better once I got the bumper back on.
#4
Rennlist Member
Thread Starter
Great job. I would hesitate to say that clips are more secure long term though, as this is just conjecture on your part, as once everything is bolted up the coolers are sandwiched together. Many are using zip ties on the cages.
Yours came out really nice. The bigger cores require you to actually section out the top of the shroud to get it back to an OE position.
Yours came out really nice. The bigger cores require you to actually section out the top of the shroud to get it back to an OE position.
#5
Rennlist Member
#6
Super helpful write up. Thanks!
Trending Topics
#8
Rennlist Member
Thread Starter
A few notes, my friend Paul, who helped a lot with this project has a 2001 996 Turbo. Even though the part number for the intercooler brackets are the same between his 2001 and my 2003, his brackets are different than mine. He had to do a little bit of fab work to get the 997 GT2RS intercoolers to fit into them. He has pics and hopefully he'll post them in this thread.
Also Friday it was really nice here and I decided to take the car for a drive for the first time since I installed the intercoolers. First time I got into boost I popped a boost hose off. Yesterday I looked at the car and it was the upper passenger inside connection on the intercooler. I took the bumper off and verified it. Had to pop out the airbox to get to the back side of the hose properly so I could re-seat it. I checked the drivers side too and while it hadn't popped out entirely it was on its way. Another quick test drive confirmed all is well now. Just in time as its snowing like an SOB right now.
So when you do this job I recommend removing the airbox so you can make sure you've gotten those boost hoses all the way into place.
#9
Rennlist Member
A few notes, my friend Paul, who helped a lot with this project has a 2001 996 Turbo. Even though the part number for the intercooler brackets are the same between his 2001 and my 2003, his brackets are different than mine. He had to do a little bit of fab work to get the 997 GT2RS intercoolers to fit into them. He has pics and hopefully he'll post them in this thread.
Also Friday it was really nice here and I decided to take the car for a drive for the first time since I installed the intercoolers. First time I got into boost I popped a boost hose off. Yesterday I looked at the car and it was the upper passenger inside connection on the intercooler. I took the bumper off and verified it. Had to pop out the airbox to get to the back side of the hose properly so I could re-seat it. I checked the drivers side too and while it hadn't popped out entirely it was on its way. Another quick test drive confirmed all is well now. Just in time as its snowing like an SOB right now.
So when you do this job I recommend removing the airbox so you can make sure you've gotten those boost hoses all the way into place.
Also Friday it was really nice here and I decided to take the car for a drive for the first time since I installed the intercoolers. First time I got into boost I popped a boost hose off. Yesterday I looked at the car and it was the upper passenger inside connection on the intercooler. I took the bumper off and verified it. Had to pop out the airbox to get to the back side of the hose properly so I could re-seat it. I checked the drivers side too and while it hadn't popped out entirely it was on its way. Another quick test drive confirmed all is well now. Just in time as its snowing like an SOB right now.
So when you do this job I recommend removing the airbox so you can make sure you've gotten those boost hoses all the way into place.
#10
Rennlist Member
anyone know the difference?
The issue is that the brackets and original intercoolers on my 2001 were slightly different. The mounting studs and bracket holes on the top of the intercooler are the same across all years 996 Turbo and 997 Turbo, but the bottom studs/bracket holes differ a bit. On the intercoolers themselves, there are sort of four locations for the lower studs, but only two of the locations will actually have studs.
On my stock brackets and intercoolers, the lower stud locations were top outside, top inside.
if O represents stud, and X represents cut off or no stud, then my 2001 brackets/intercoolers are:
O O
X X
Later 996 Turbos seem to have:
RIGHT
O X
X O
LEFT
X O
O X
The RS and 997 intercoolers use bottom only
X X
O O
This is why when installing the 997 intercoolers on most 996 turbos, you can only use one of the two lower mounting points. On my 2001 Turbo, i could use neither lower mounting point and had to make a small bracket extension.
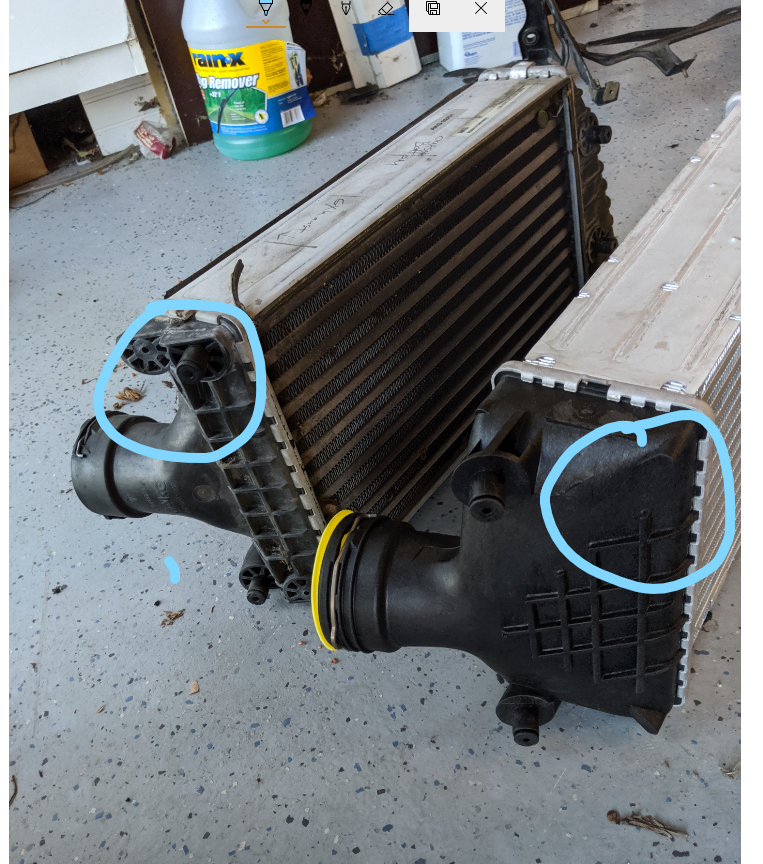
--referring to the picture below,
This is the LATER 996 intercooler, right side. It would be a
O X
X O
configuration.
If it had a stud where the red circle is and no stud where the green circle is, it would match my original 2001 intercooler with a
O O
X X
configuration
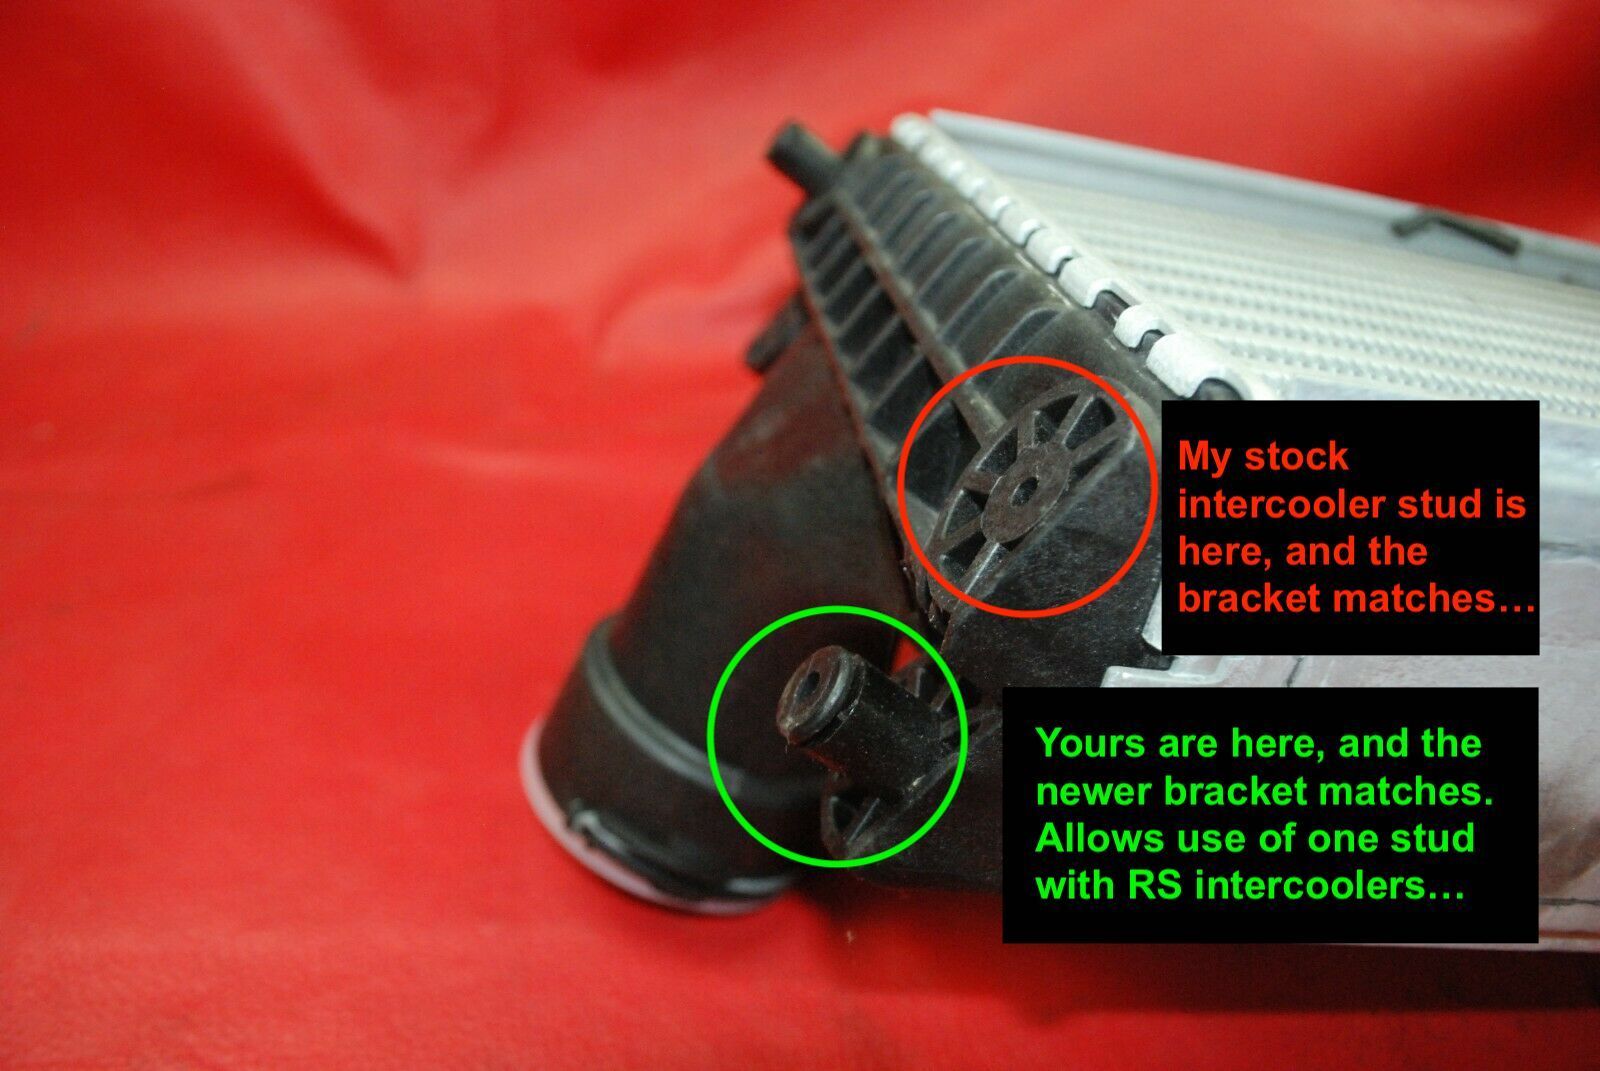
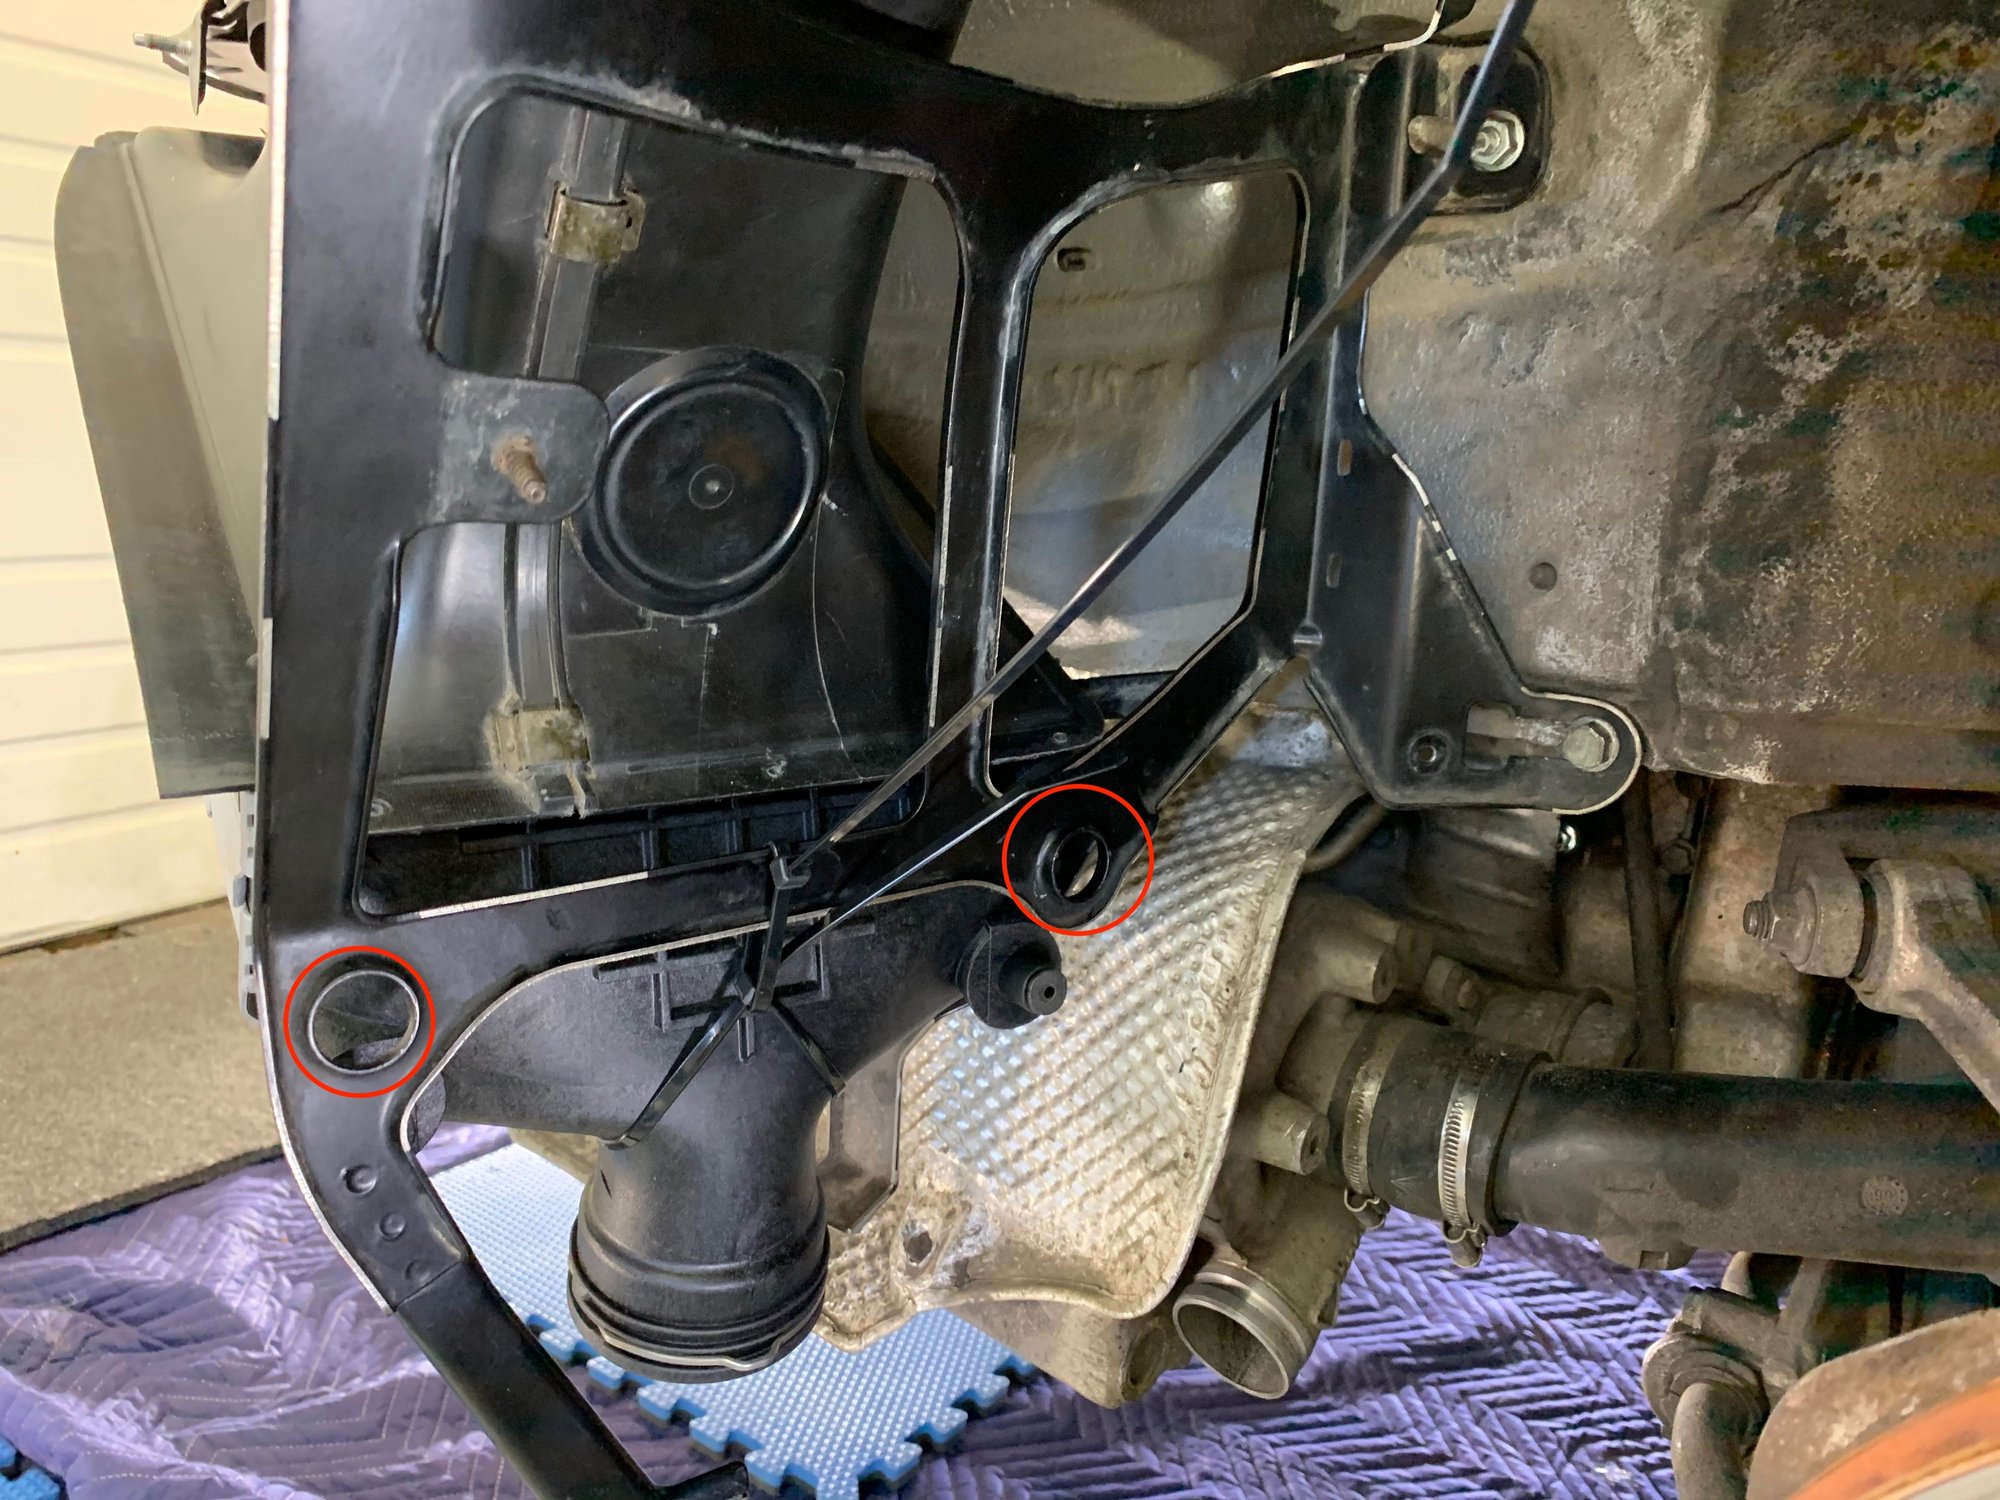
Here is my stock right side bracket, set up for an
O O
X X
configuration, with the RS intercooler behind it. You can clearly see the inside lower mounting hole does NOT line up.
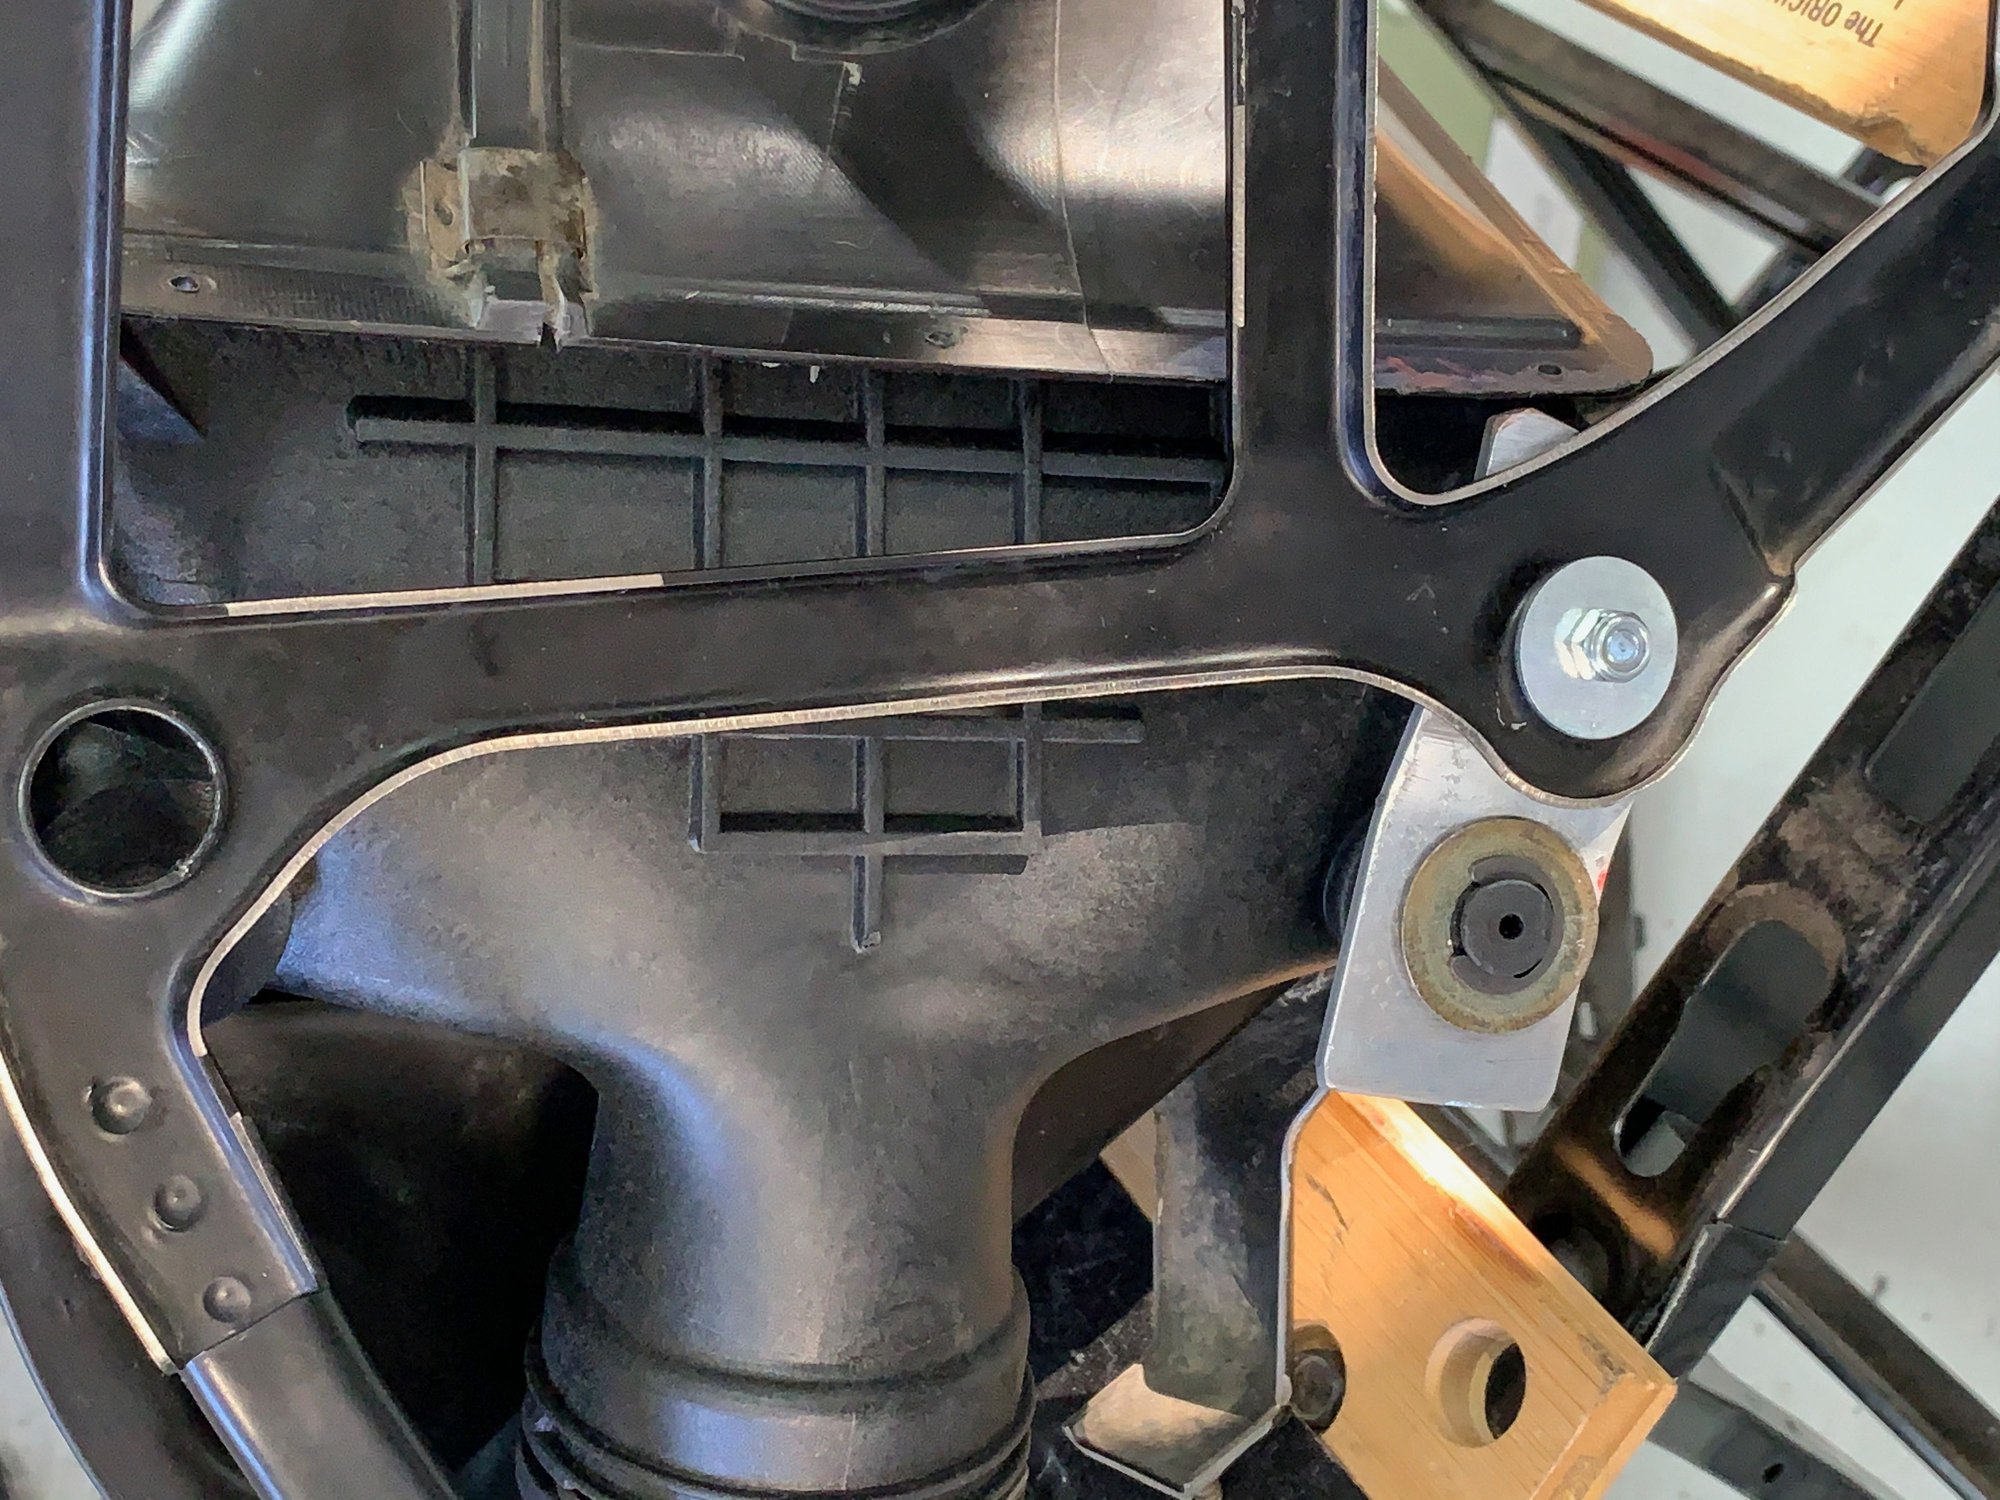
This was my solution... A small aluminum bracket that 'extends' the mounting hole... This isn't really all that different from how Porsche modified the intercooler racks on later cars...
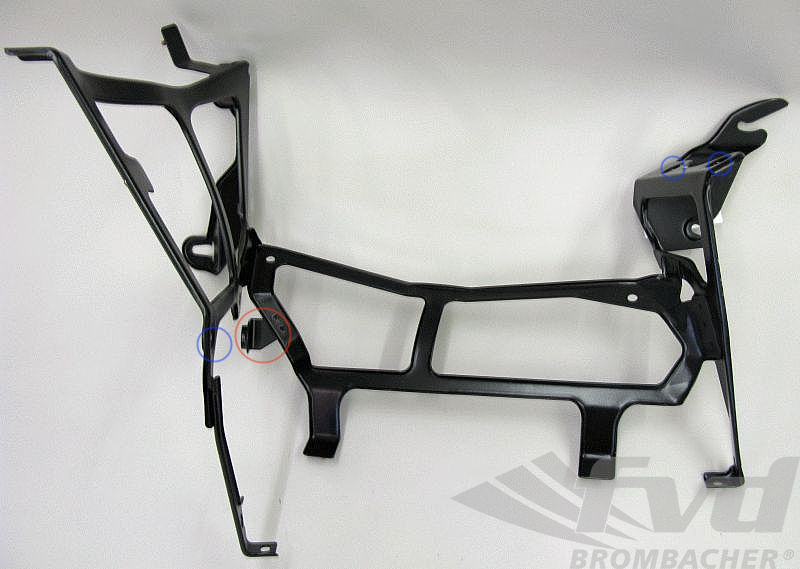
This is the intercooler rack from a later 996... if you have this style, no modification is needed. You see the part circled in red? This is how they relocated the mounting hole from:
O O
X X
to
O X
X O
they simply cut off the original tab and welded on an additional tab in the alternate location...
Clear as mud?
Another quick example...
This is not my car, but it shows a later 996 intercooler on left:
X O
O X
(if your original intercoolers look like this, you won't need my bracket extension)
and the new RS intercooler
O O
X X
Last edited by pfbz; 06-26-2020 at 05:40 PM.
The following 2 users liked this post by pfbz:
Carlo_Carrera (06-26-2020),
tekkie (06-26-2020)
#11
Rennlist Member
Whew... that was exhausting to just explain!
#12
RL Community Team
Rennlist Member
Rennlist Member
#13
Rennlist Member
Nicely done!
#15
Rennlist Member
Particularly as 3 other guys I know all did the same mod and told me "it fits, you just use one of the mount holes". Since I had made mods to the shrouds, taken everytthing aprt, etc, and didn't have any relevant pictures of the other installs, I kept trying to figure out how to "make it fit"! I finally noticed on a picture of another stock intercooler that the mounting studs were slightly different and the pieces fell into place... Once you see it, it's clear as day, but I kept wondering what I could have possibly done wrong to make it not fit!

