The Offical Debut of the New & Improved KPV 996TT
#1
The Official Debut of the new and improved KPV996TT:
Much time has been spent over the past 8 weeks painstakingly planning, purchasing and installing a host of various modifications to the car. Many of you have been very curious as to what I have been up to. Well, the time has come to disclose the various changes made to the car. Buckle up and enjoy the ride!!!
Aerodynamics:
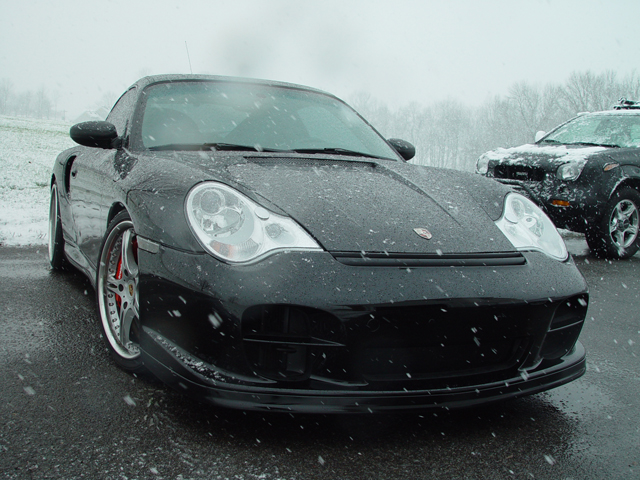
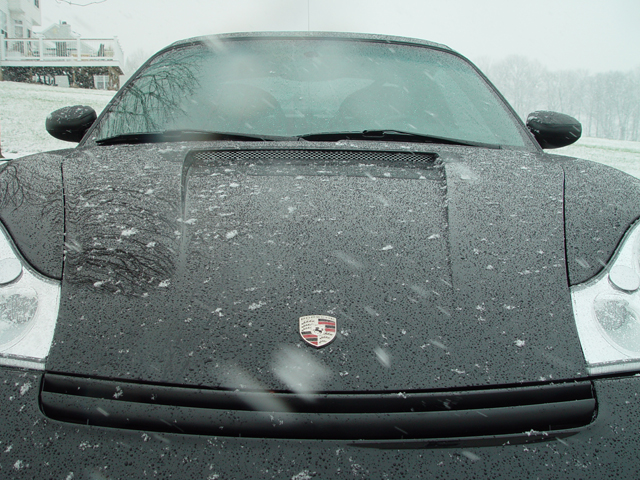
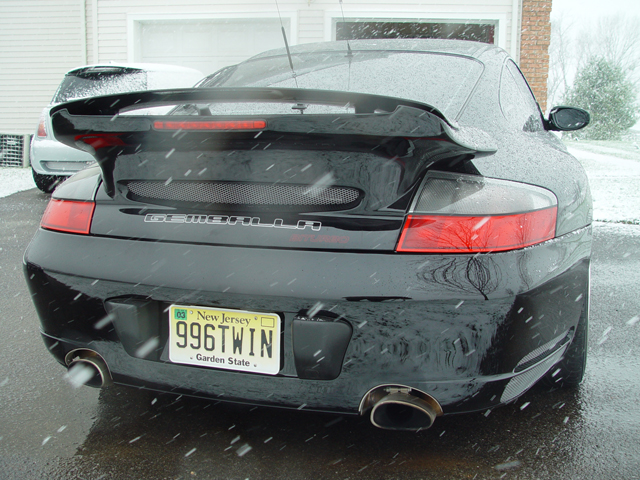
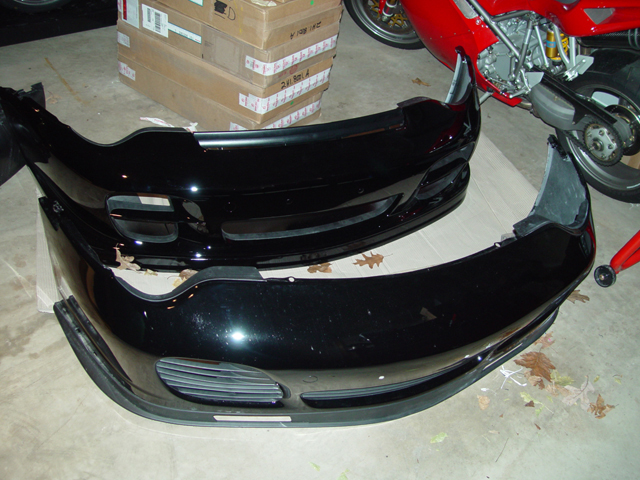
Many of you know I am a tried and true Gemballa fan. Love it or hate it, I can’t seem to be drawn away from his current crop of designs. I deliberated over what modifications to do and finally decided to go with a more direct and free flowing intercooler outlet modification, the replacement of the hood with Gemballa’s carbon fiber 993 style hood and the replacement of the front bumper with a factory original GT2 bumper cover. The front bumper cover replacement was the toughest decision. I went back and forth with the Gemballa EVO bumper and the factory GT2 and depending on the day, had a different opinion. Finally, I saw a picture of a black turbo with the GT2 front bumper and Gemballa hood and I finalized my decision. The other consideration was the material. The GT2 bumper is made of polypropylene which is pliable by its very nature. The Gemballa bumper is a fiberglass/Kevlar mix. The PP material will be a little less susceptible to stone chips since it has greater resiliency.
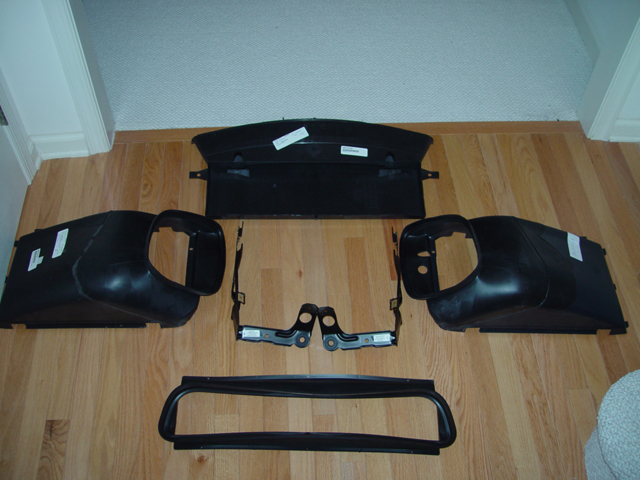
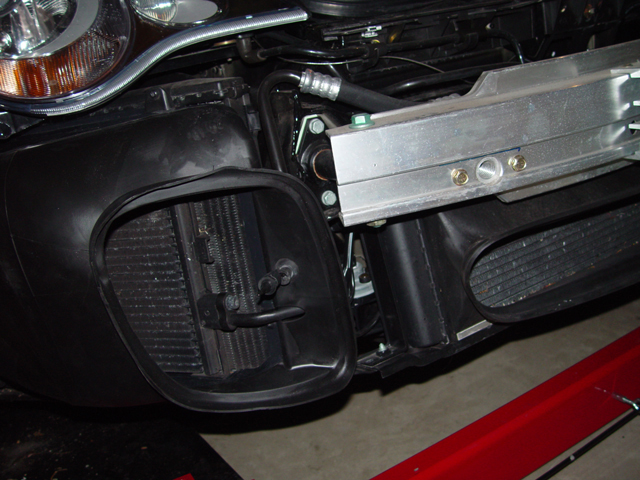
There are several ways to do this mod. The first is purely aesthetic wherein you simply replace the bumper cover and leave all else alone. The second way is to replace the radiator supports and ducting. As you may know, the TT’s center radiator is vertically oriented. Air flows through the coils and is deposited below the car. This has the tendency to increase the air pressure beneath the car and therefore increase the lift effect. The GT2, on the other hand, has its center radiator tilted forward. This allows the cooling airstream to flow through the radiator coils and exhaust up through the vents at the base of the hood. This has the tendency to increase the pressure above the car and therefore decrease lift.
In case you guys don’t know, I do all of my own work and this was a real pain in the ***. The conversion entails the purchase of the front and rear ducts for the center radiator, the front ducts for the two side radiators, left and right radiator supports for the center radiator to allow it to tilt, spacers and hoses. The fitment is not fun. It is similar to putting a puzzle together. In addition the coolant feed hoses to the center radiator have a really extreme angle to overcome so their length must be right on the money otherwise kinking can occur. All in all a tough job but I like the way it turned out.
The replacement hood is very light and fits very well right out of the box. I was skeptical to say the least. The hood comes with a gel coat on its top surface. Nonetheless, Grant (my body guy) treated the top surface with an additional special “gel-coat-like” thick primer material (Duratec) to insure the carbon weave in no way showed through. This material is used in the boating industry and is very thick. We opted to leave the carbon weave exposed on the inside for effect. The factory hood weighs 28 pounds. The Gemballa carbon fiber hood weighs 14 pounds. Insofar as the build quality is concerned, it is very good. Grant commented on the very good quality of the inserts. These include the hinge attachment receptacles and hood latch inserts. I knew to expect this quality after having dealt with previous Gemballa stuff. The grill at the back of the hood is epoxied in place.
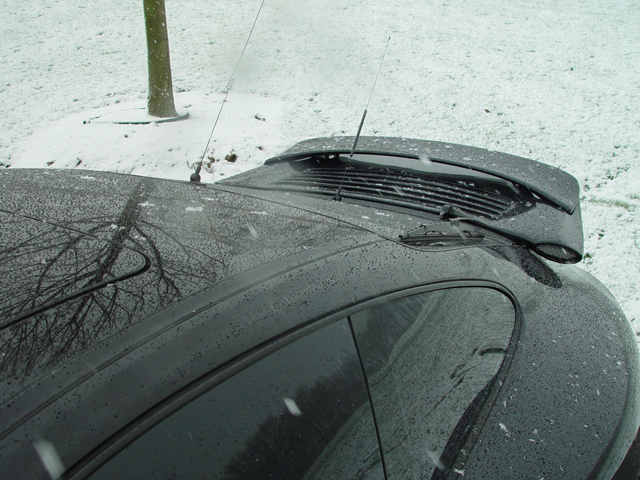
Here are a few pictures of the final product:


#3
Brakes:
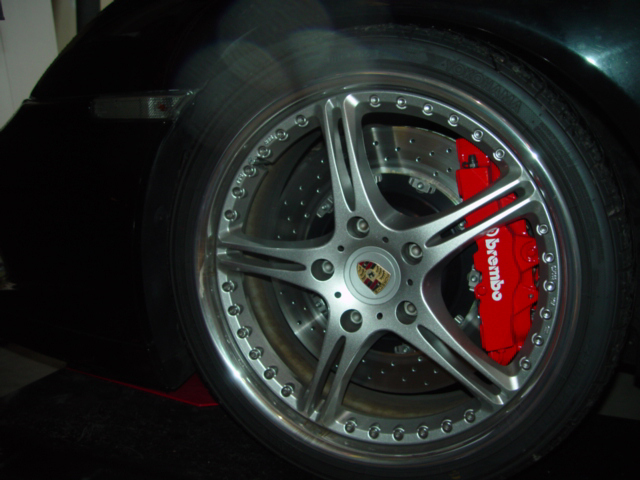
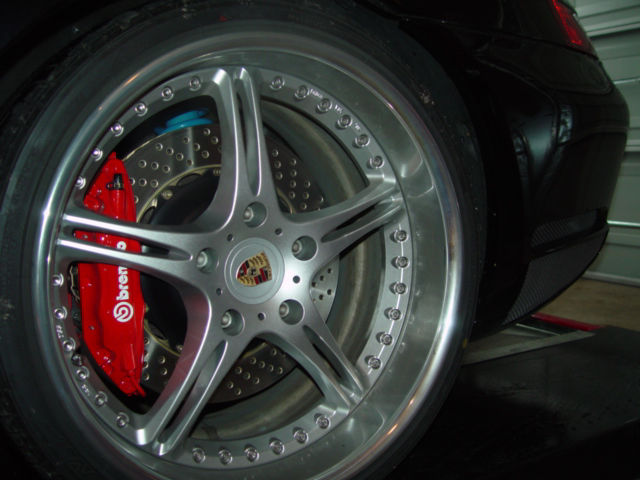
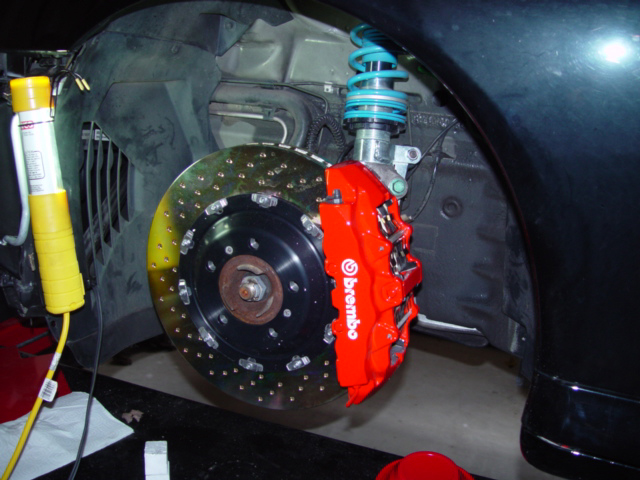
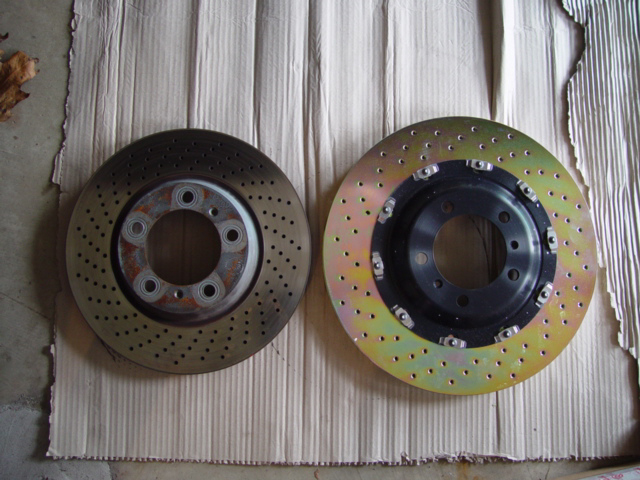
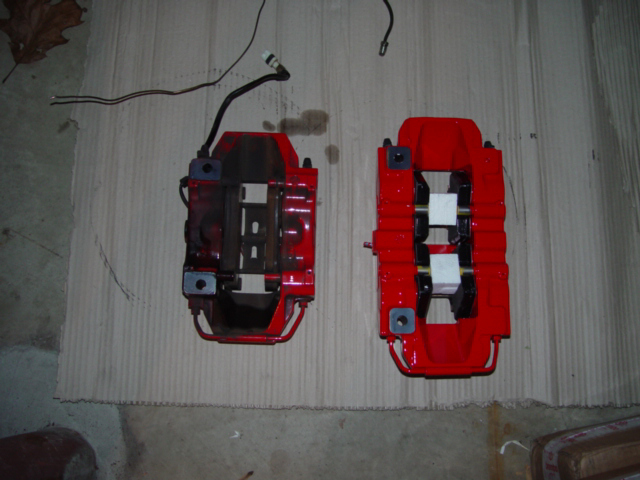
I deliberated here as well. I reviewed the factory 6 piston setup (piston bore diameters of 28mm, 32mm and 38mm), the Brembo 4 piston and the Brembo 8 piston (piston bore diameters of 32mm, 32mm, 38mm and 38mm) systems. In the end, I picked the 8 piston setup. If you thought the stock system was tremendous, wait until you get a foot-full of these!!!! The installation is straight forward. Basic plug and play. The only difficulty is the bleeding. It can be a drag. I bought a Motive Products Power Bleeder which made the bleeding a very simple matter. Incidentally, the weights of these brakes are listed below. All in all, not a huge penalty for the size difference.
Stock Setup:
Front Rotor = 23 pounds
Front Caliper & pads = 13 pounds
Rear Rotor = 19 pounds
Rear Caliper and pads = 9 pounds
Brembo Setup:
Front 15” rotor = 27 pounds
Front 8 piston caliper, pads and bracket = 13.5 pounds
Rear 14” rotor = 18 pounds
Rear 4 piston caliper, pads and bracket = 10 pounds
Here are a few pictures:
Seats:
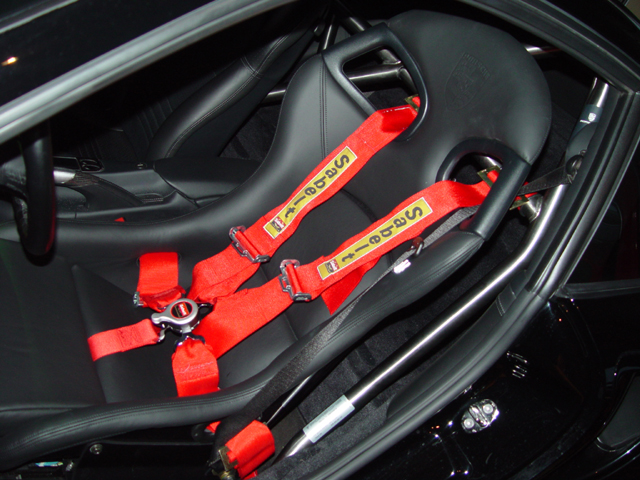
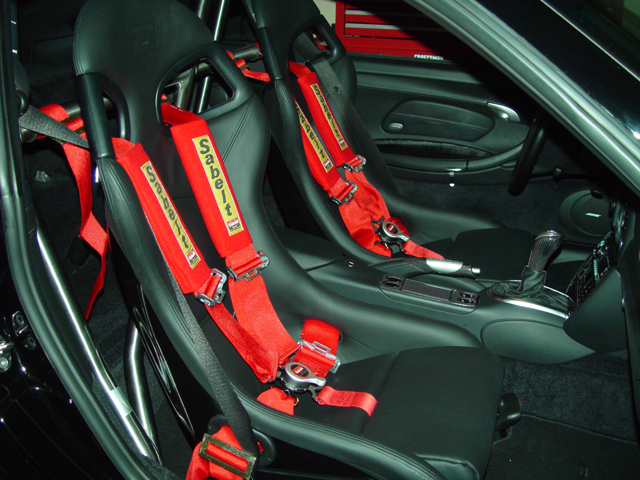
Again, deliberation is the operative word. I went back and forth with the GT3 seats and Recaro Pole Position seats for awhile. The GT3 seats were direct bolt-in replacements whereas the Pole Positions required separate brackets and sliders. Not a big deal, but a difference. The stock Sport Seats weigh 48 pounds each whereas the GT3 seats weigh 28 pounds each.
Here are some pictures:

Shifter:
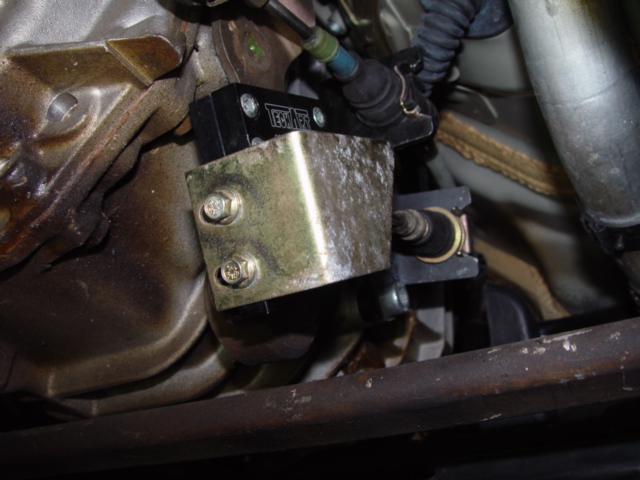
I was looking at all of the available options with these. At our last NJ/PA meet, HSCTTX50 (Harold) offered me his TechArt shifter for purchase. I accepted and only recently installed it. The installation occurs under the car at the transmission. The shifter in the car doesn’t get touched. I have it set at 30% reduction and it makes a marked improvement.
Here is a picture:
Electronics:
This represents a very large portion of the modifications. They are about 98% complete at this time. I will post a complete photo essay when I am done within the next week.
I deliberated here as well. I reviewed the factory 6 piston setup (piston bore diameters of 28mm, 32mm and 38mm), the Brembo 4 piston and the Brembo 8 piston (piston bore diameters of 32mm, 32mm, 38mm and 38mm) systems. In the end, I picked the 8 piston setup. If you thought the stock system was tremendous, wait until you get a foot-full of these!!!! The installation is straight forward. Basic plug and play. The only difficulty is the bleeding. It can be a drag. I bought a Motive Products Power Bleeder which made the bleeding a very simple matter. Incidentally, the weights of these brakes are listed below. All in all, not a huge penalty for the size difference.
Stock Setup:
Front Rotor = 23 pounds
Front Caliper & pads = 13 pounds
Rear Rotor = 19 pounds
Rear Caliper and pads = 9 pounds
Brembo Setup:
Front 15” rotor = 27 pounds
Front 8 piston caliper, pads and bracket = 13.5 pounds
Rear 14” rotor = 18 pounds
Rear 4 piston caliper, pads and bracket = 10 pounds
Here are a few pictures:


Seats:
Again, deliberation is the operative word. I went back and forth with the GT3 seats and Recaro Pole Position seats for awhile. The GT3 seats were direct bolt-in replacements whereas the Pole Positions required separate brackets and sliders. Not a big deal, but a difference. The stock Sport Seats weigh 48 pounds each whereas the GT3 seats weigh 28 pounds each.
Here are some pictures:


Shifter:
I was looking at all of the available options with these. At our last NJ/PA meet, HSCTTX50 (Harold) offered me his TechArt shifter for purchase. I accepted and only recently installed it. The installation occurs under the car at the transmission. The shifter in the car doesn’t get touched. I have it set at 30% reduction and it makes a marked improvement.
Here is a picture:

Electronics:
This represents a very large portion of the modifications. They are about 98% complete at this time. I will post a complete photo essay when I am done within the next week.


 it would of really been a nice TOD surprise
  I would recommend getting a techart rear roof spoiler