When you click on links to various merchants on this site and make a purchase, this can result in this site earning a commission. Affiliate programs and affiliations include, but are not limited to, the eBay Partner Network.
I've been traveling and was able to only get to physical work tonight. I did get a few organizational things done though in the interim:
1) Time the need to buy tools with your birthday. Instant birthday list for everyone to get you stuff (I can never figure out things for people to get me). Yoke, wrenches and a new torque wrench for more accurate low torques all en route.
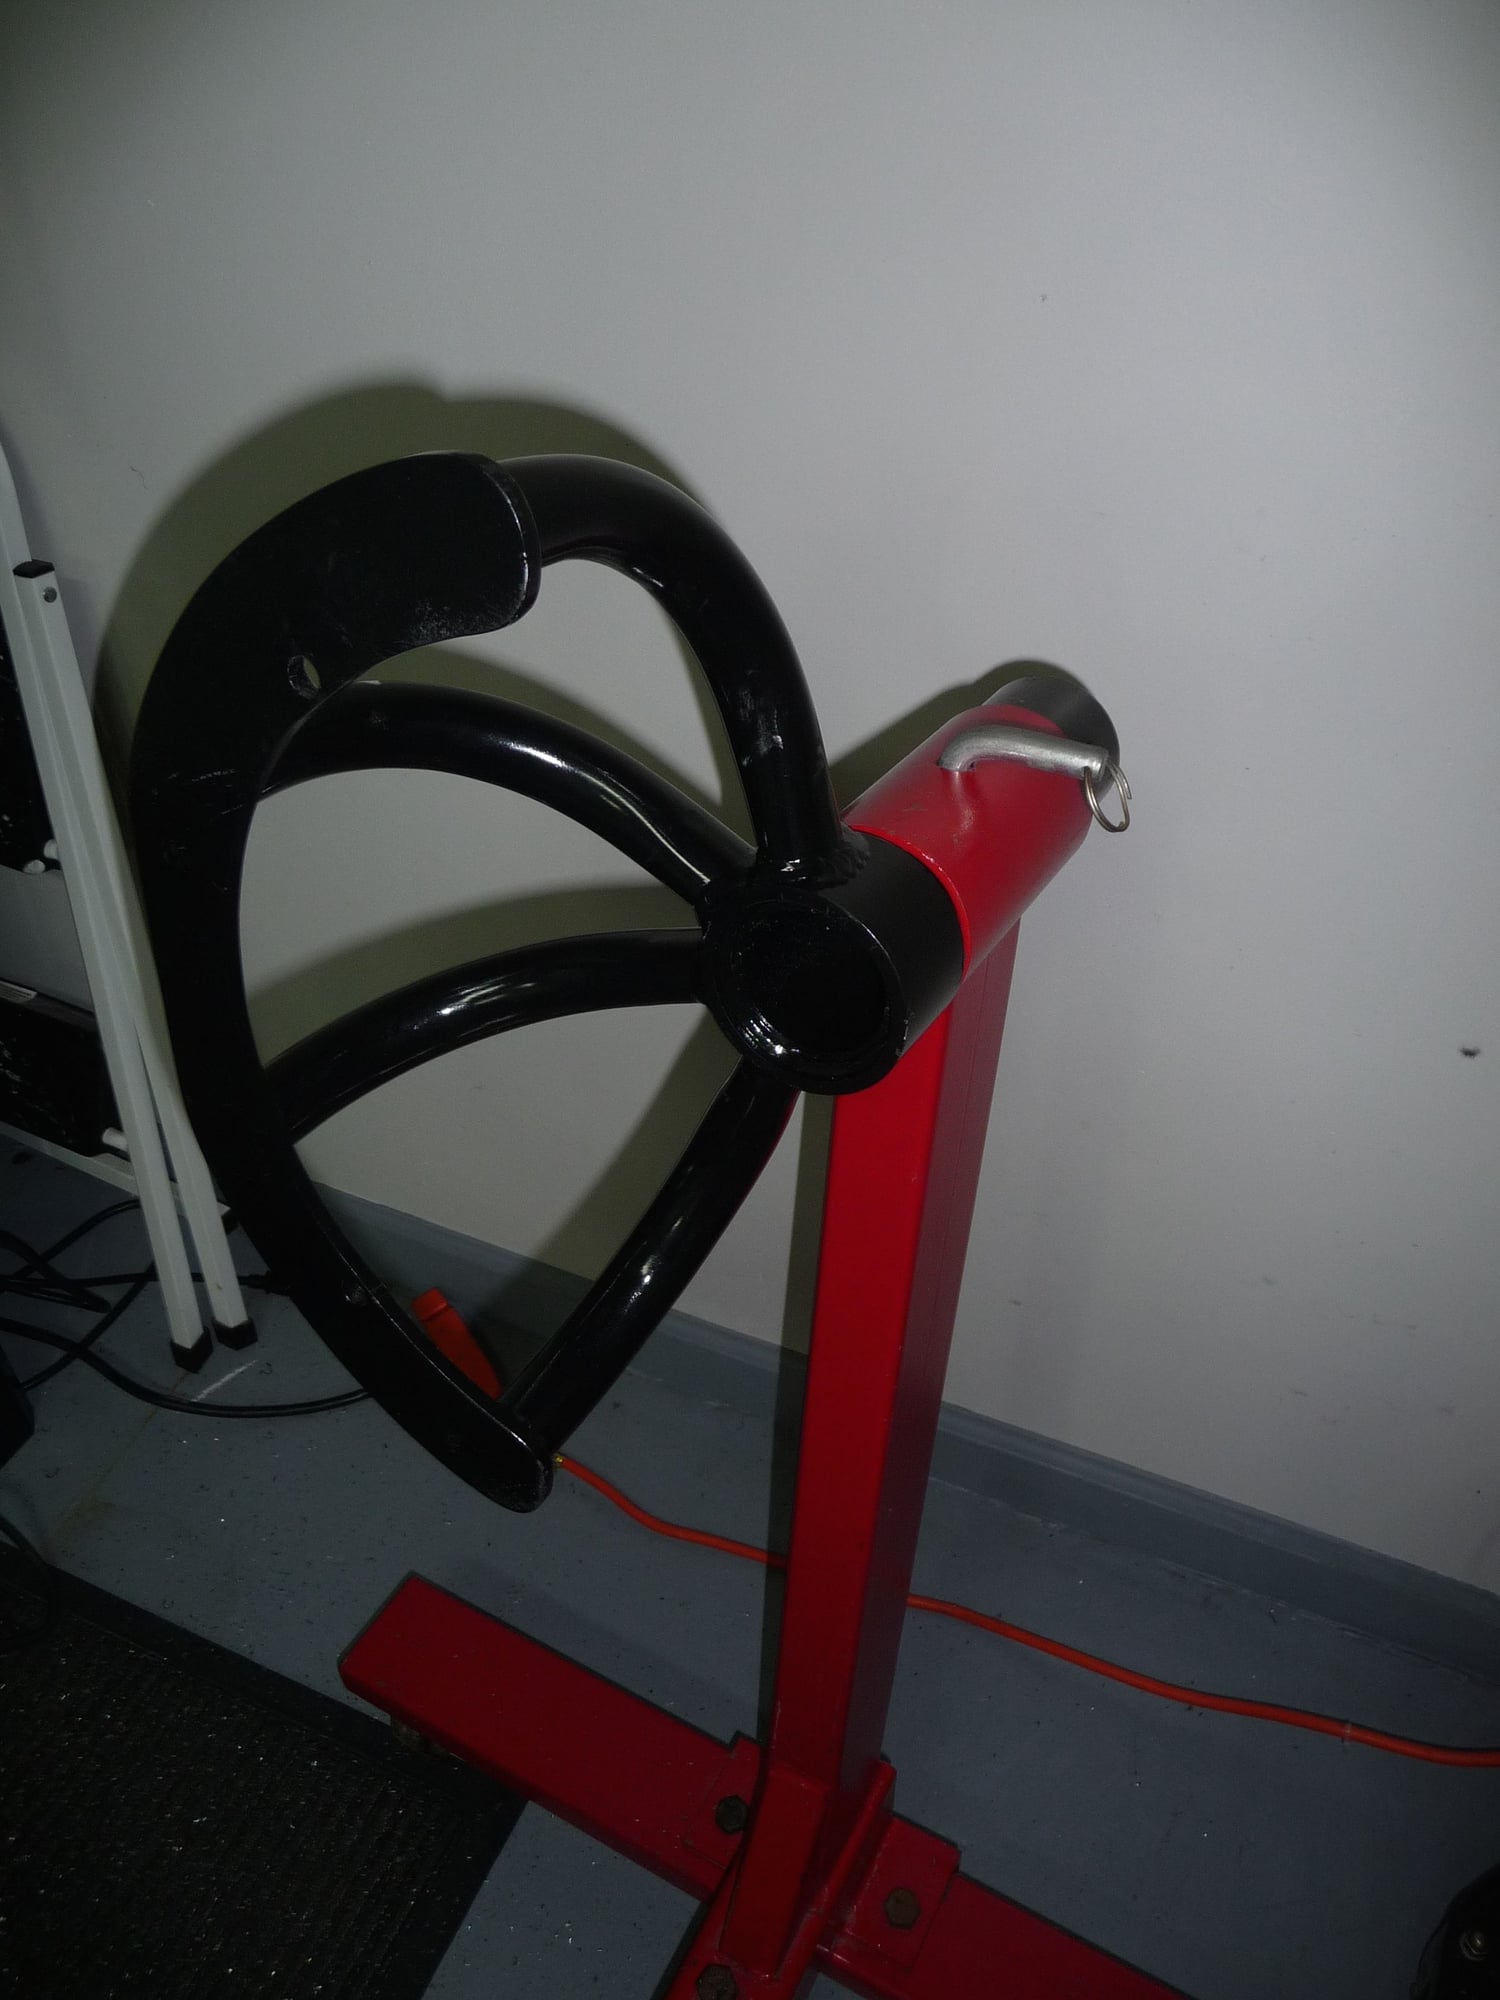
2) Regarding the yoke, I'm going to give the eBay one a shot. I may need to alter it slightly so it works better with my stand, but the pattern will work. I heard some concerns about the weight of a watercooled vs. non-watercooled engine on that, which I will double check.
3) I've been Facebook friends with a local Porsche dealer mechanic and he has agreed to inspect the engine once I've pulled it apart. This is huge. Super huge. I'll go from there on next steps based on his recommendations.
4) I have an engine stand now (craigslist unused Powerbuilt 1000 lbs for $45) and a friend of a friend 2 blocks away is happy to lend me a cherry picker when I need it.
I also calibrated my torque wrenches. I used the string with weight method to do it myself. It was pretty easy. You just have to be patient in turning the adjustment screw in reasonably small increments and slowly making your way to a calibrated state. The hardest part was to borrow 40 lbs of weights and carry the suitcase a block down the street from my neighbor.
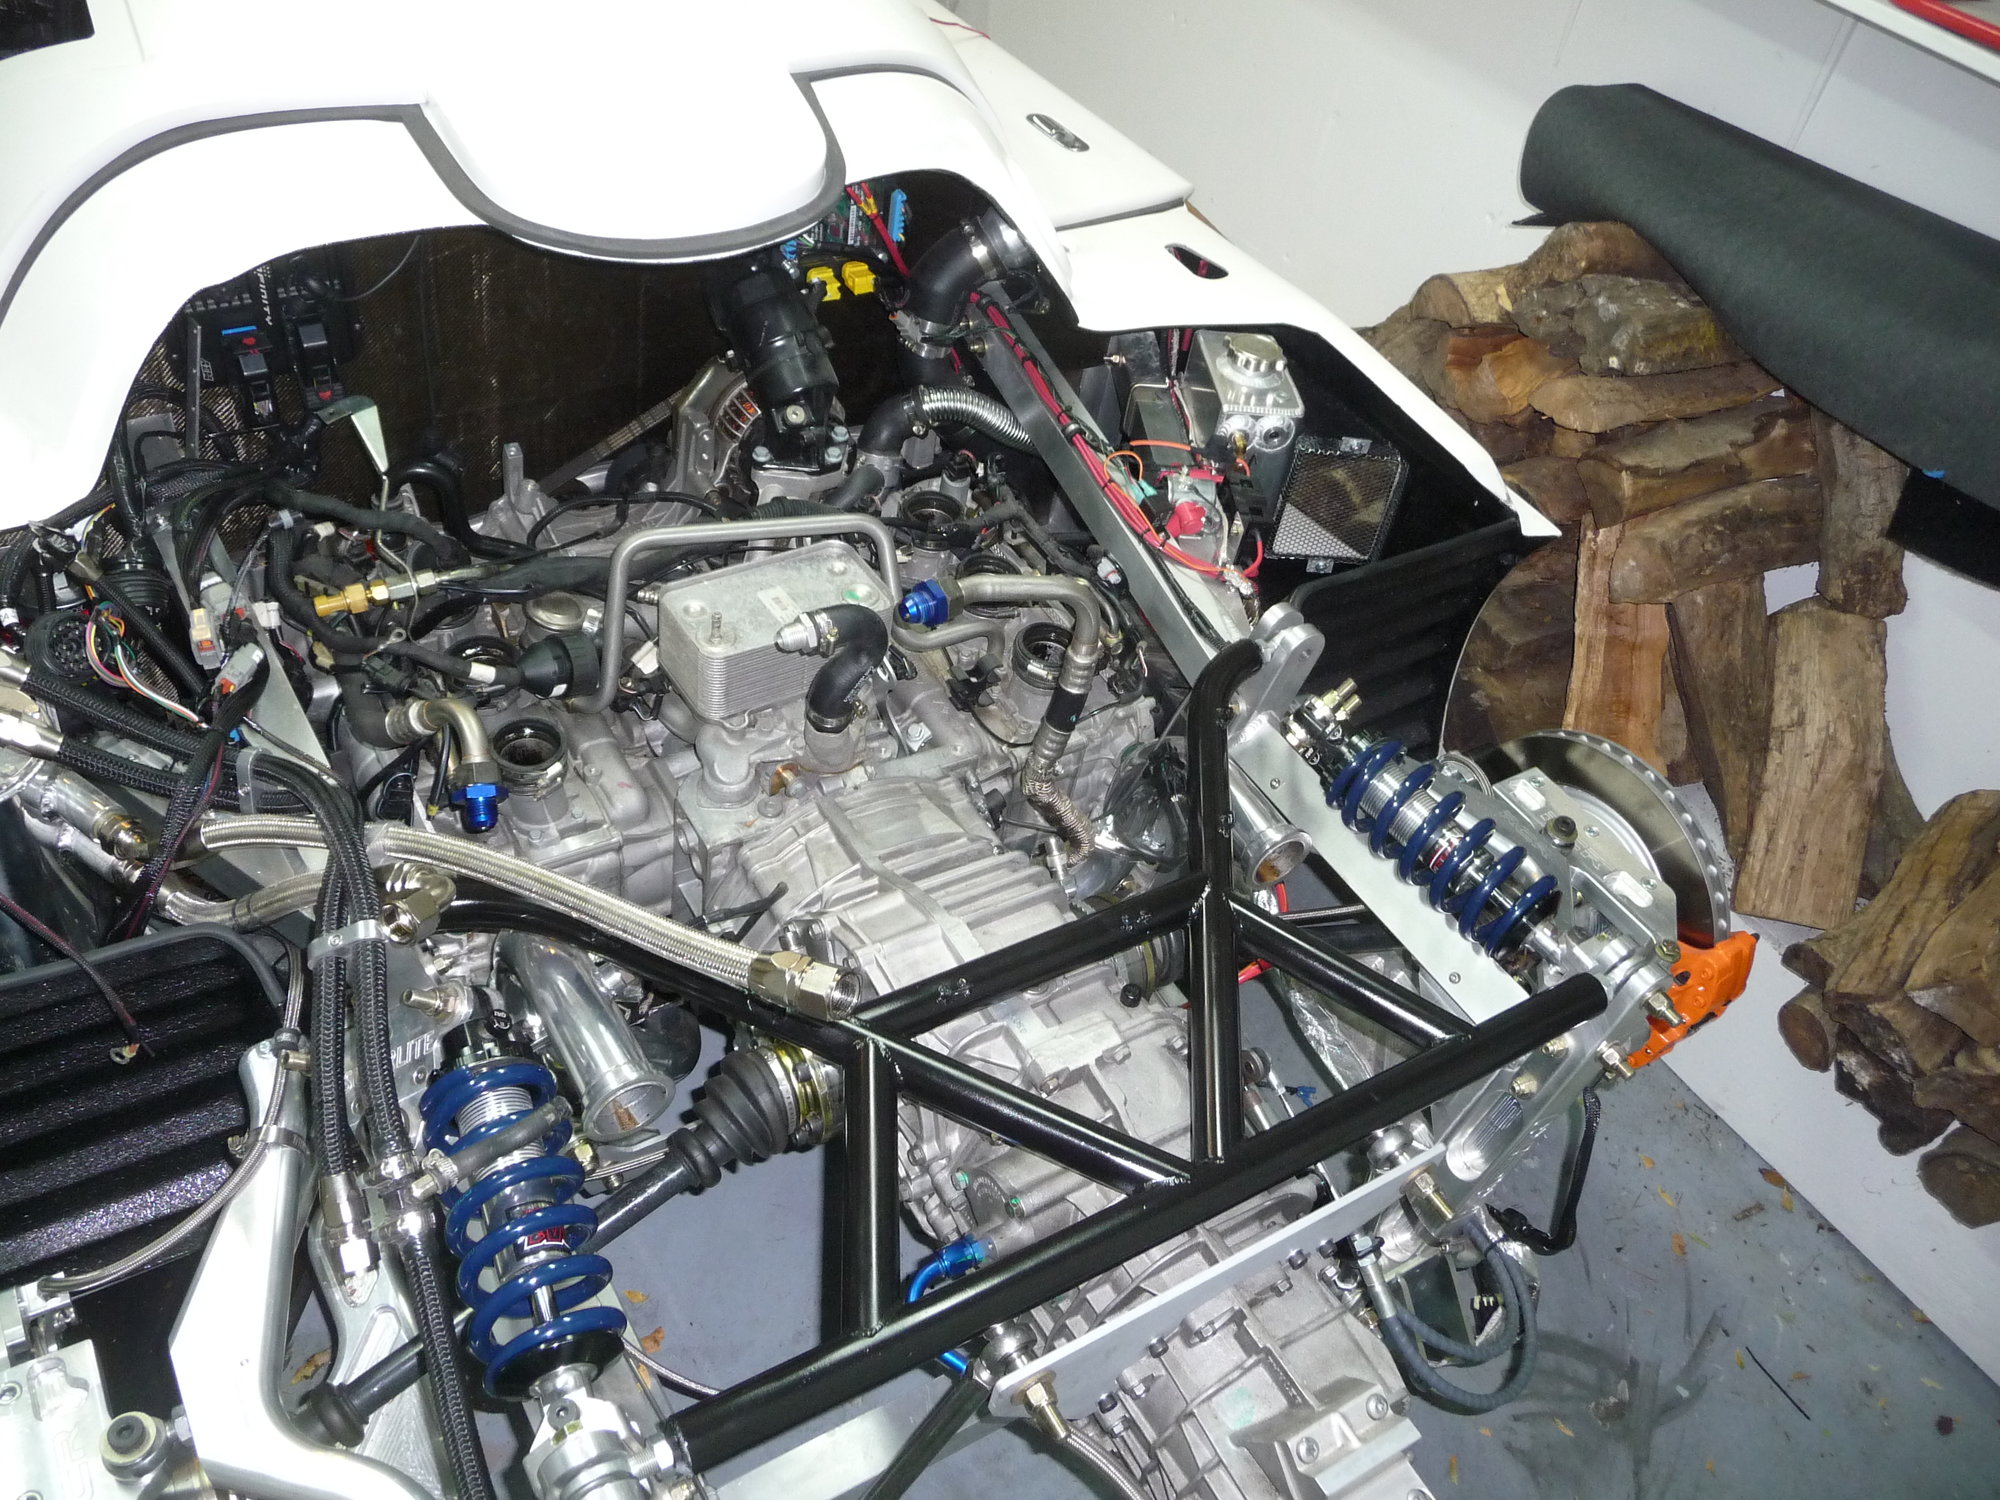
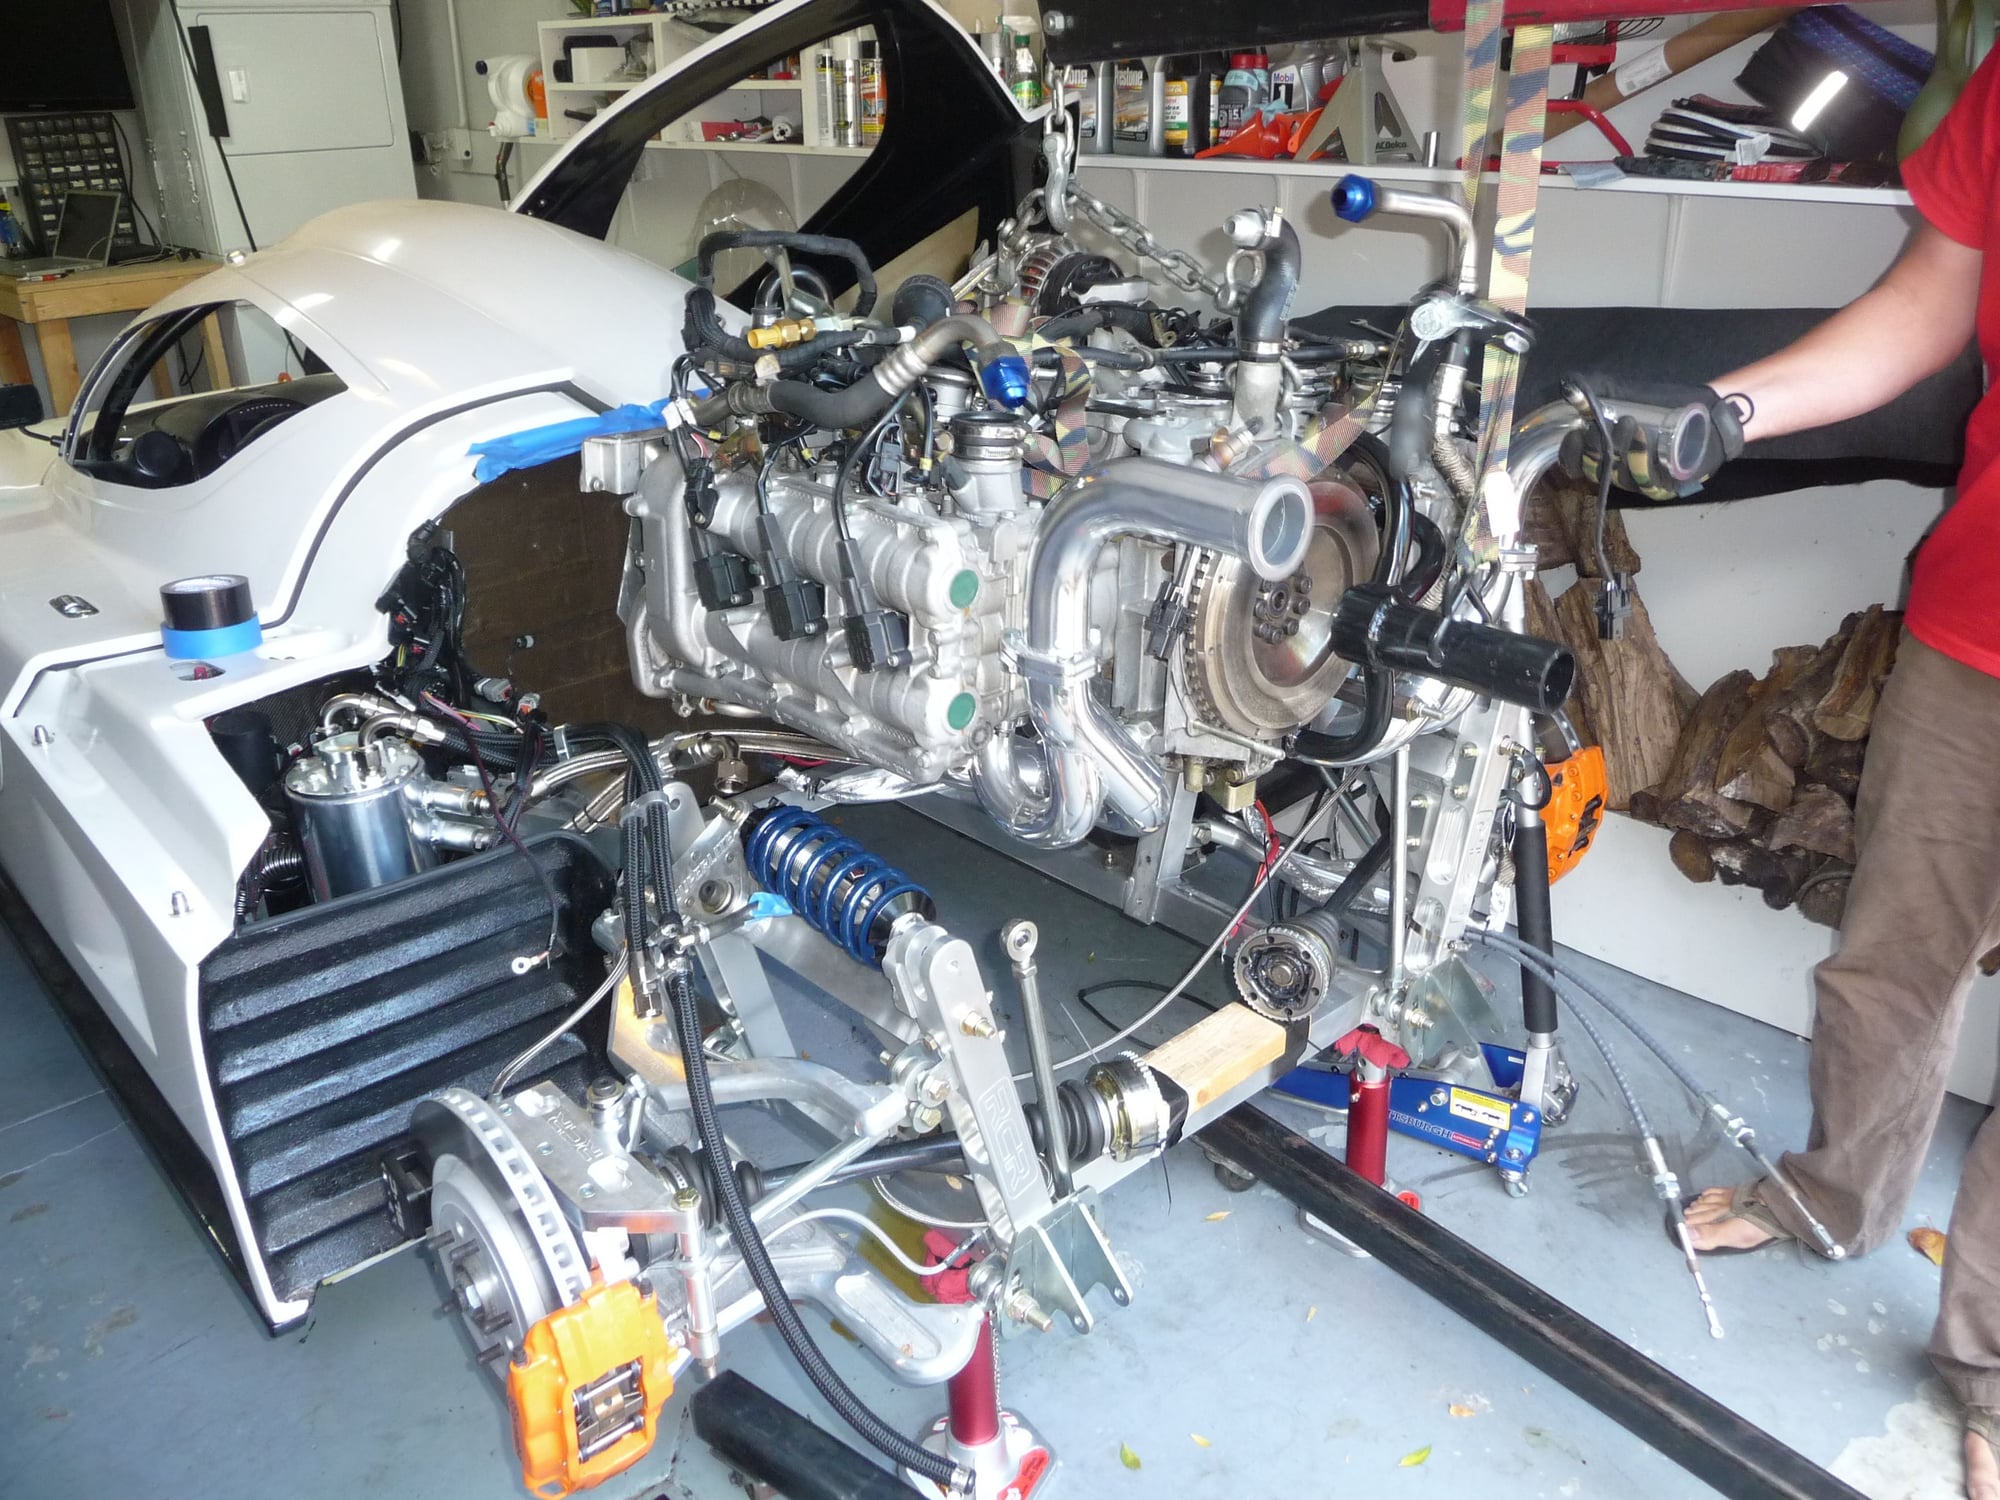
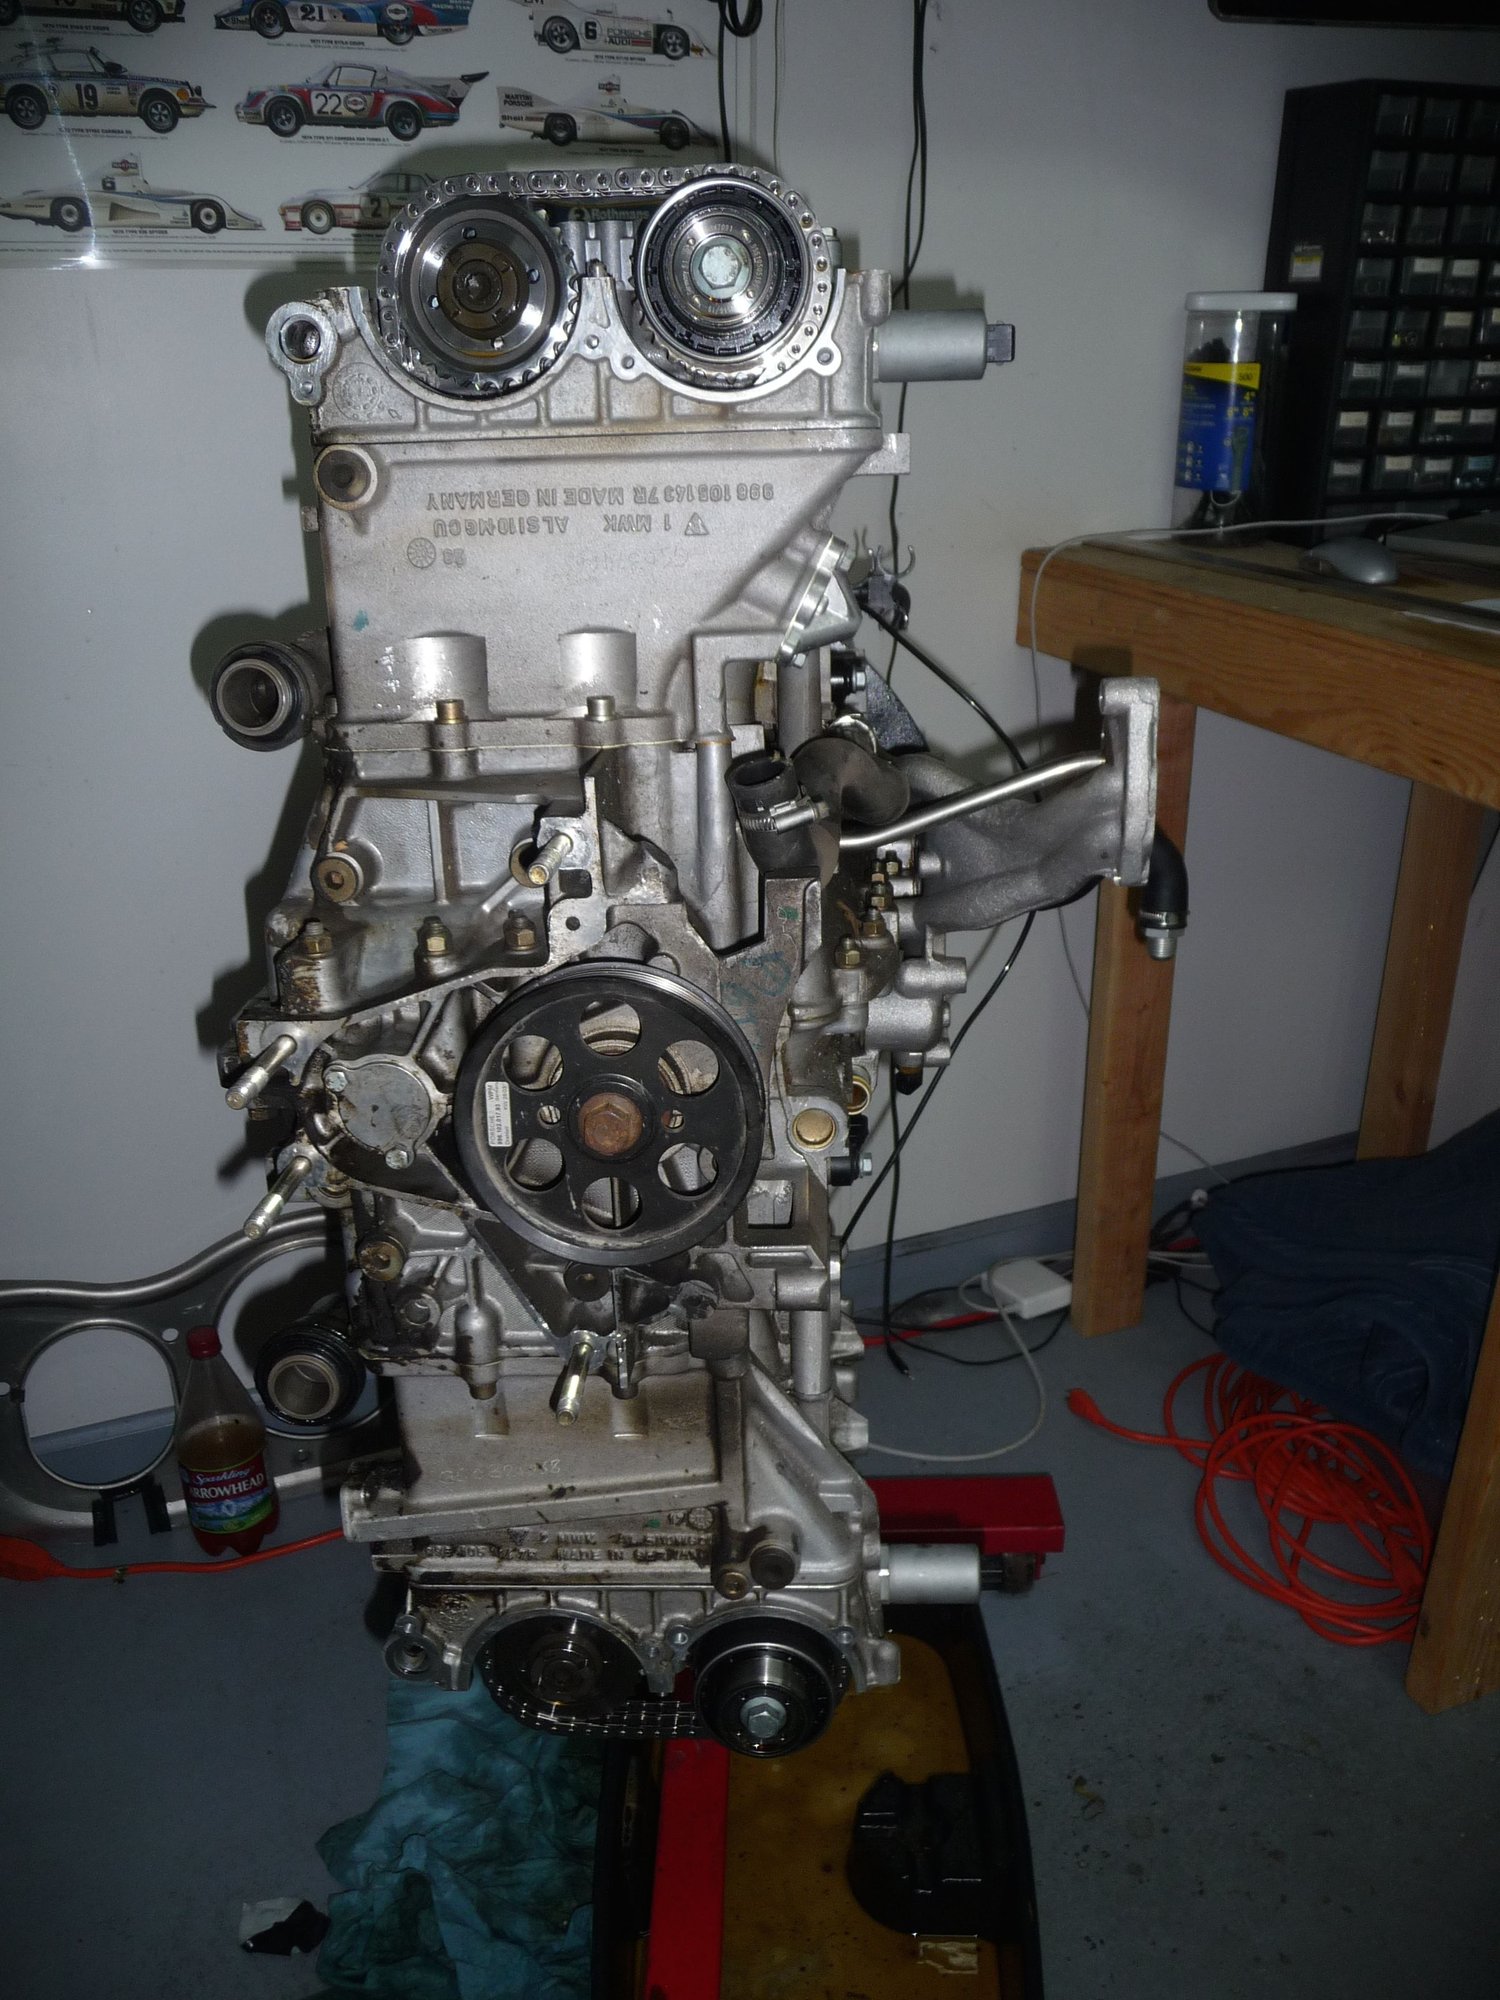
But enough of the boring logistics. Here's what the car looks like now:
The intake is off, all electrical disconnected, fuel lines disconnected, top side oil disconnected, coolant disconnected and rear exhaust removed. Still need to drain oil & coolant, remove oil feed and coolant to overflow tank connection. I also need to remove that big black cross-brace and the transmission obviously, but the engine is mostly disconnected and read to go.
Here's a shot of the intake. Looks a little different than in a stock GT3, huh?
And last but not least, pretty clear confirmation that there are some issues:
Lots of of updates. In short, engine is out, yoke works on generic stand, teardown has begun, waiting on a tool, have a question on a part number.
The $89 eBay VW/Porsche air cooled yoke arrived. It works. It does need some machining to fit the specific engine hoist, but that's only drilling holes so you can pin the engine place and a safety pin. Here's the yoke on the 1000 lbs stand I snagged on craigslist:
The one downside with the yoke is that you have to remove the pressure plate, but that's 9 bolts that are not on super tight and which you can reuse. The flywheel bolts would be more painful, since torque is high and the bolts should not be reused.
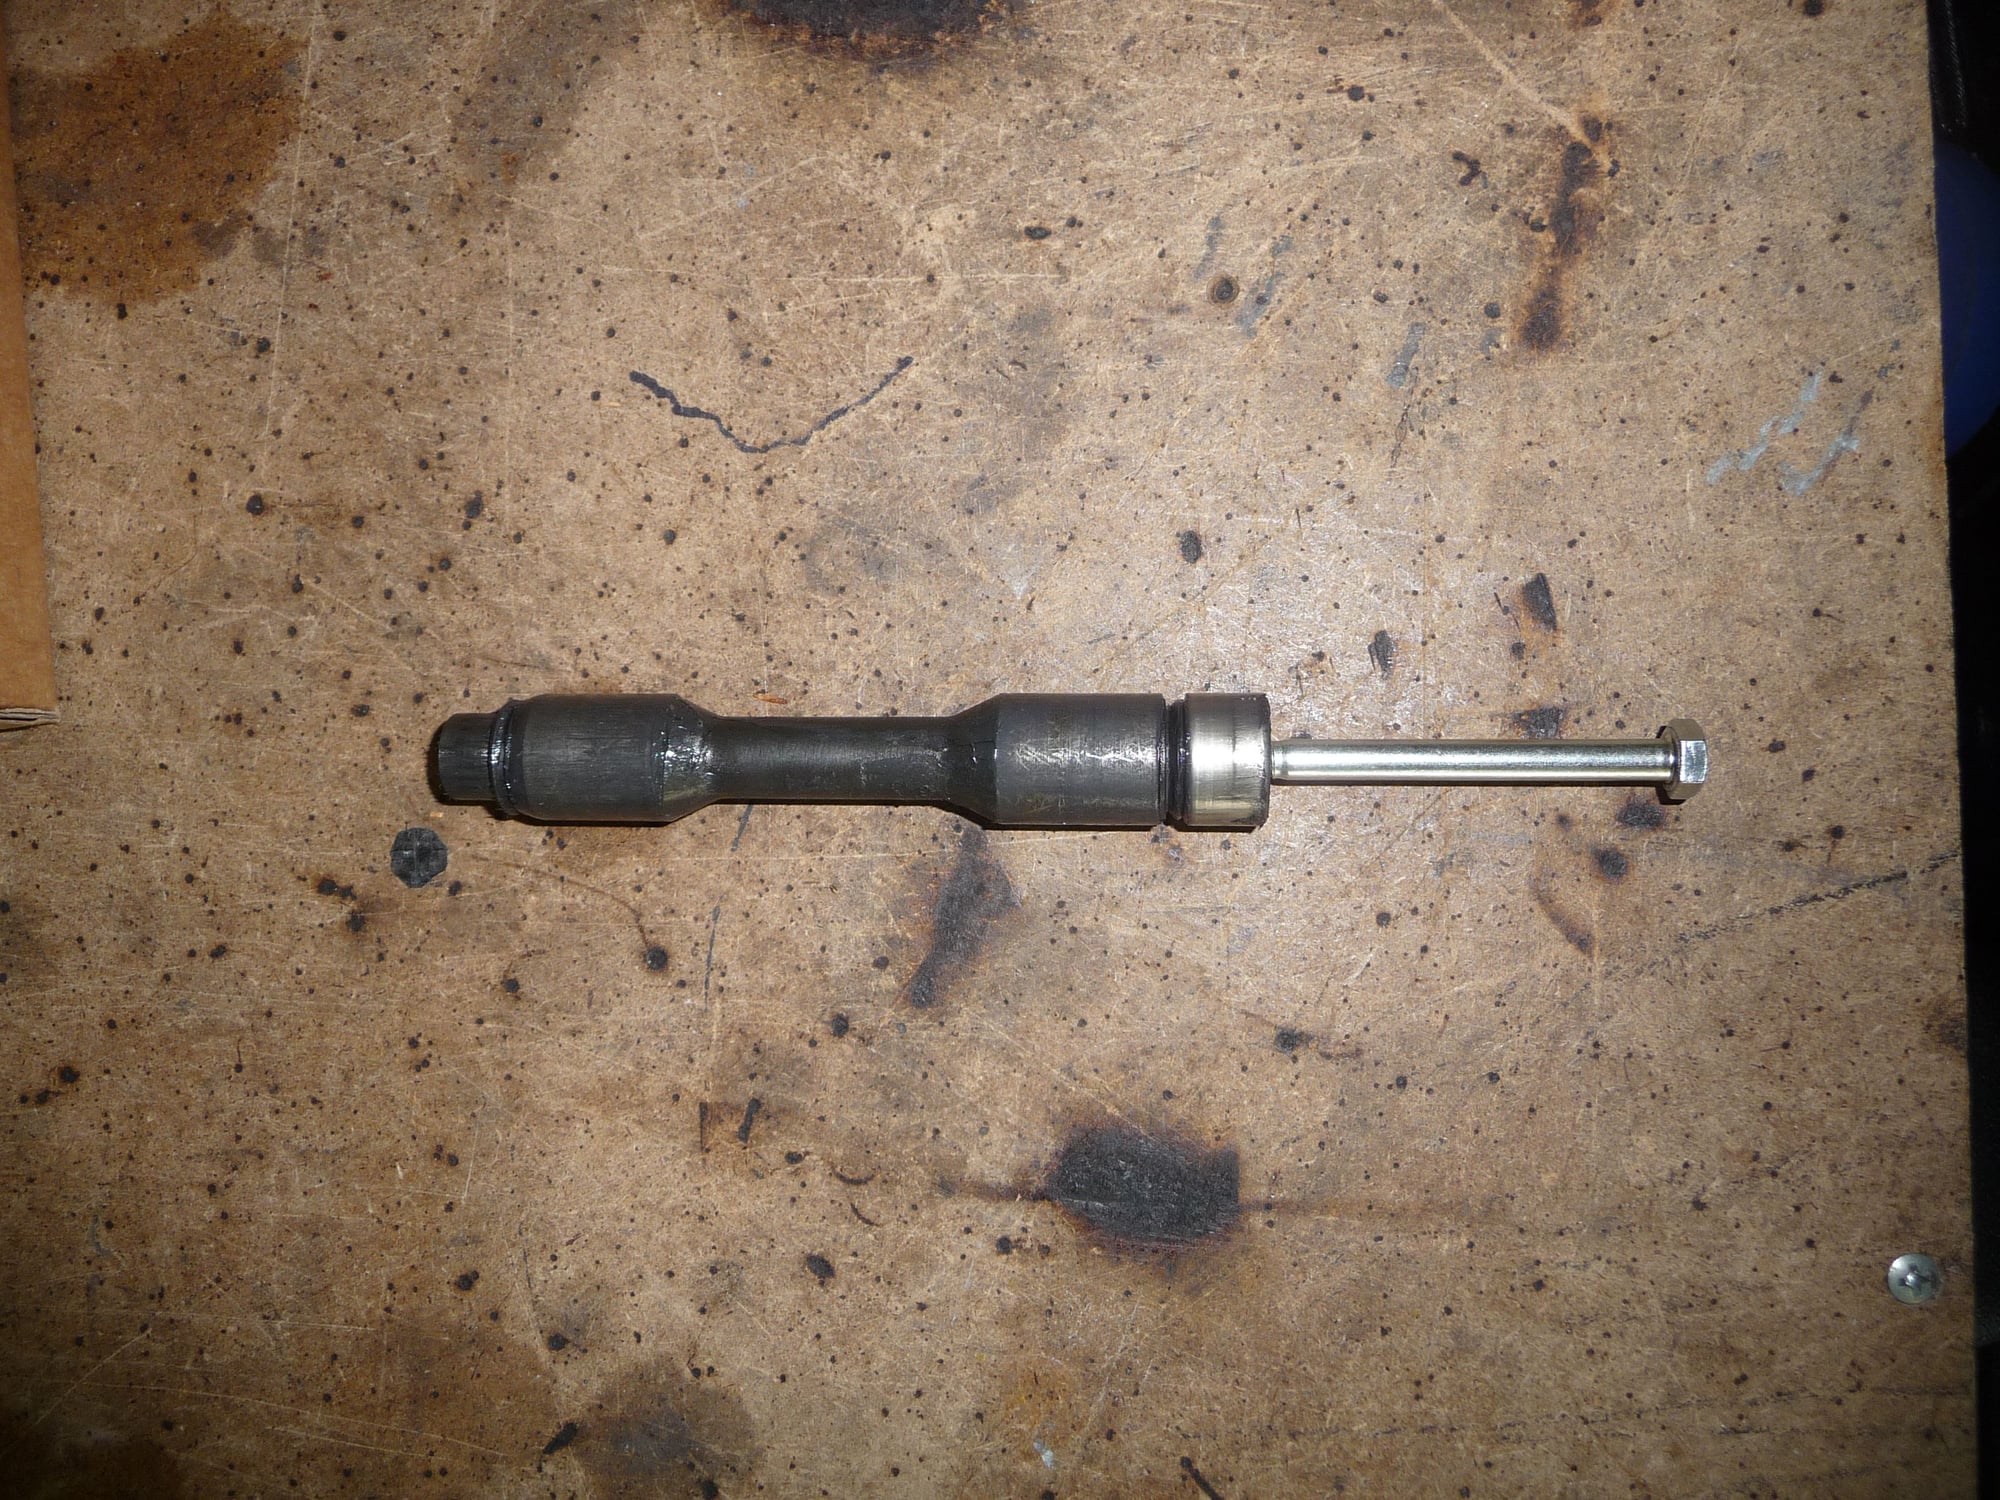
Next I got the transmission out. There are a few tricks, like using a long bolt to pull the clutch pin:
Clutch fork pin is behind the hard rubber bung
Clutch fork pin pulled with long screw. Note left roller bearing left behind in case and retrieved later.
Coming out. Note the safety first footwear of my helper.
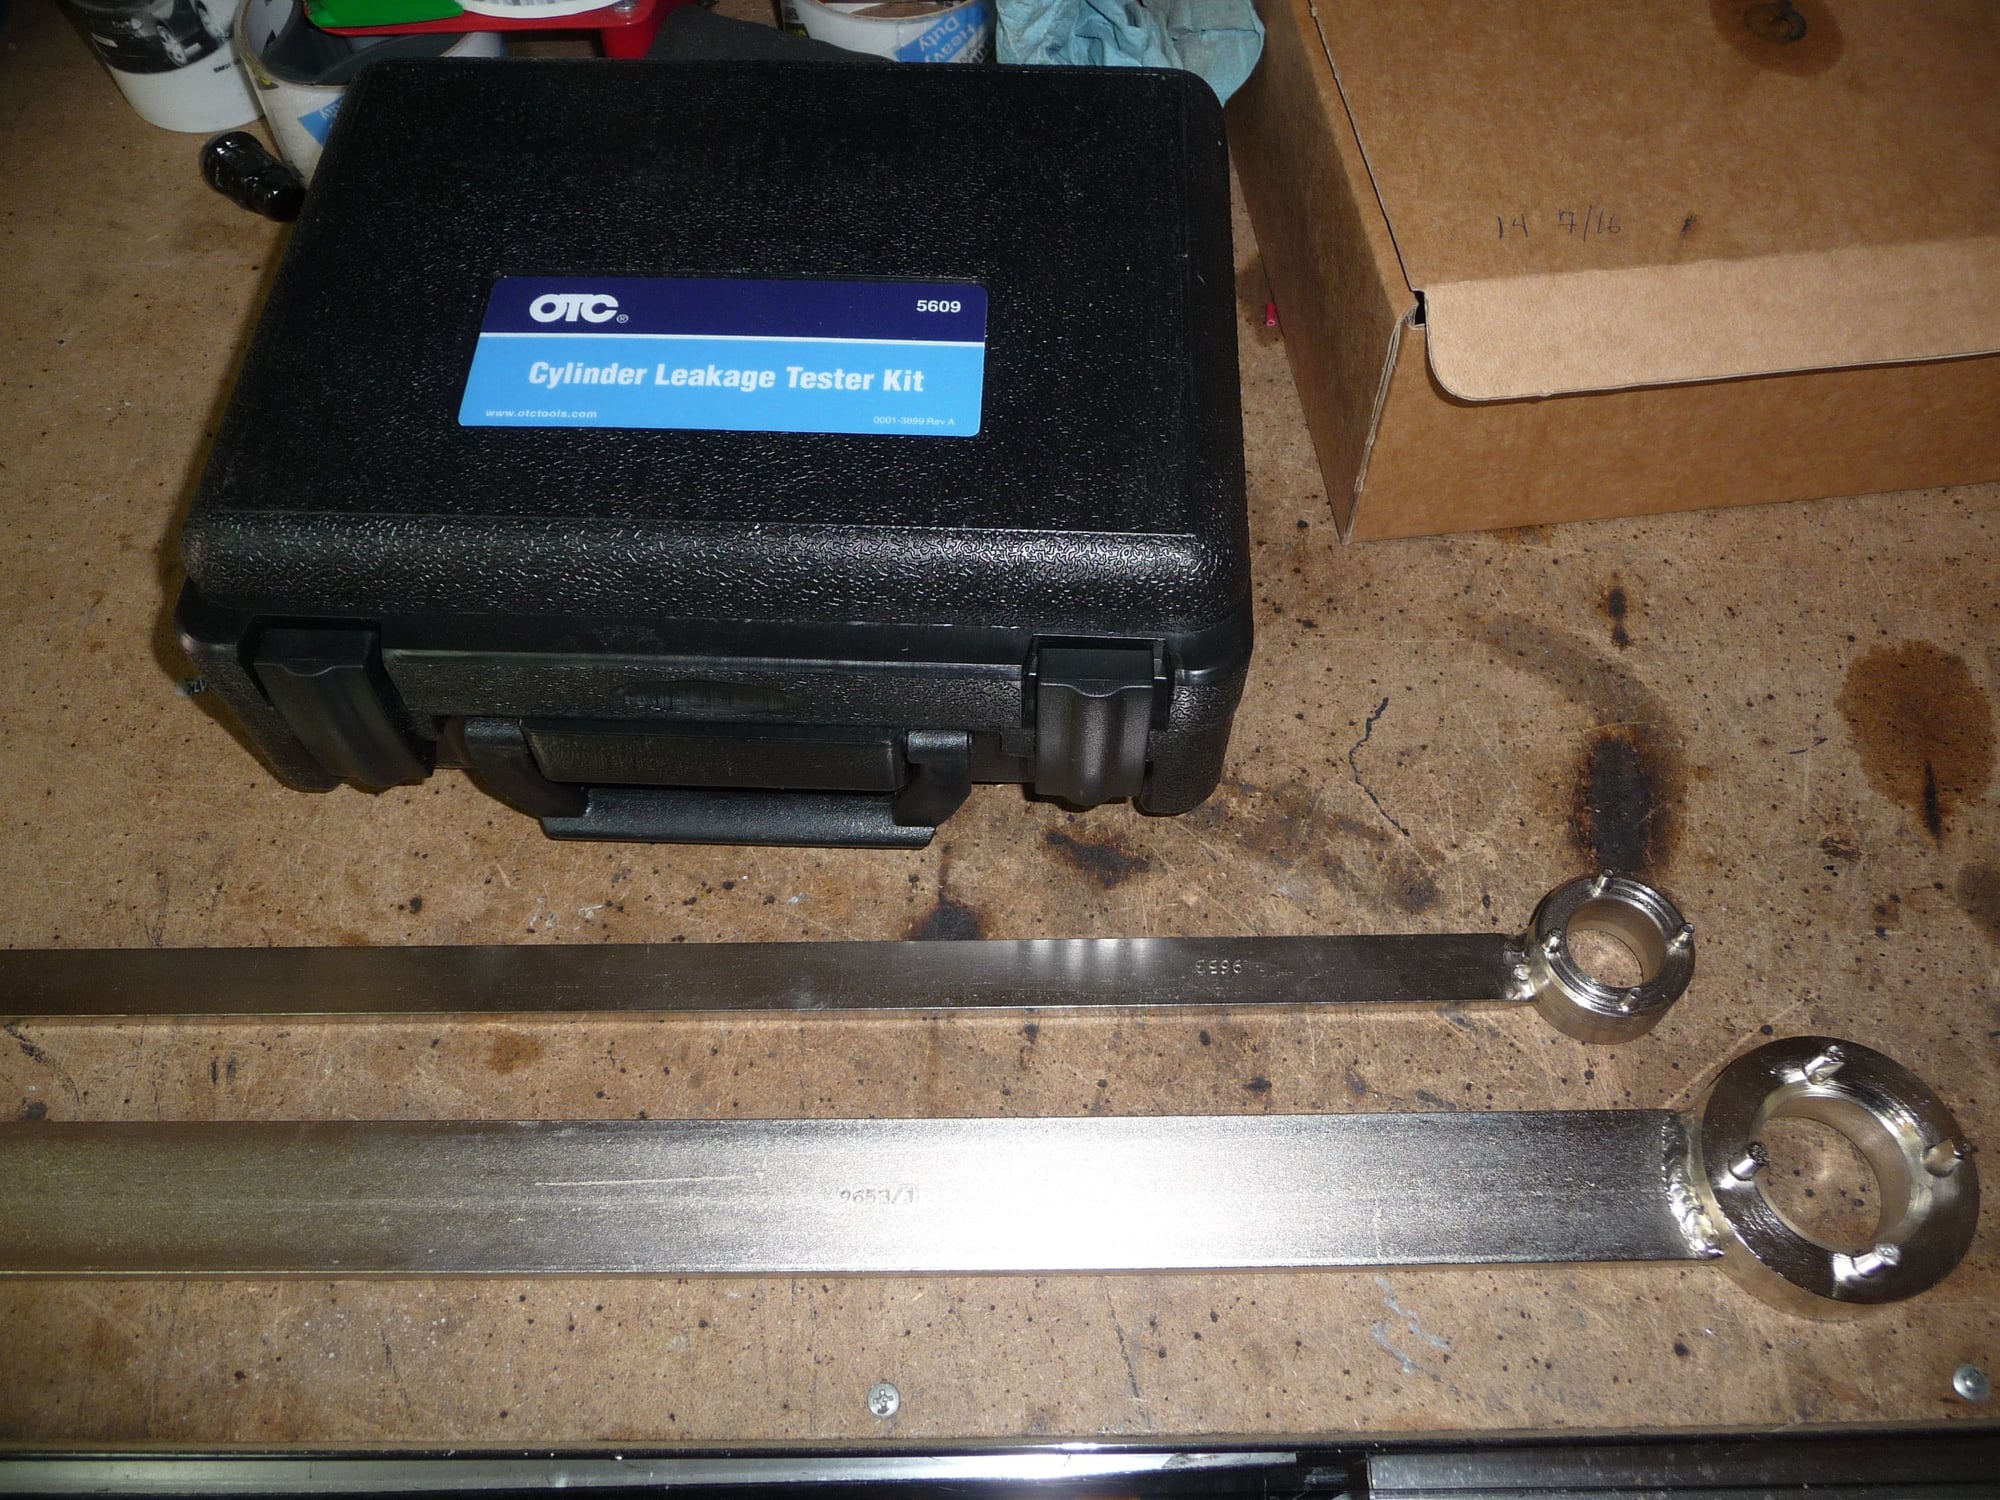
$360 of cam tools from Baum - a lot cheaper than Porsche direct
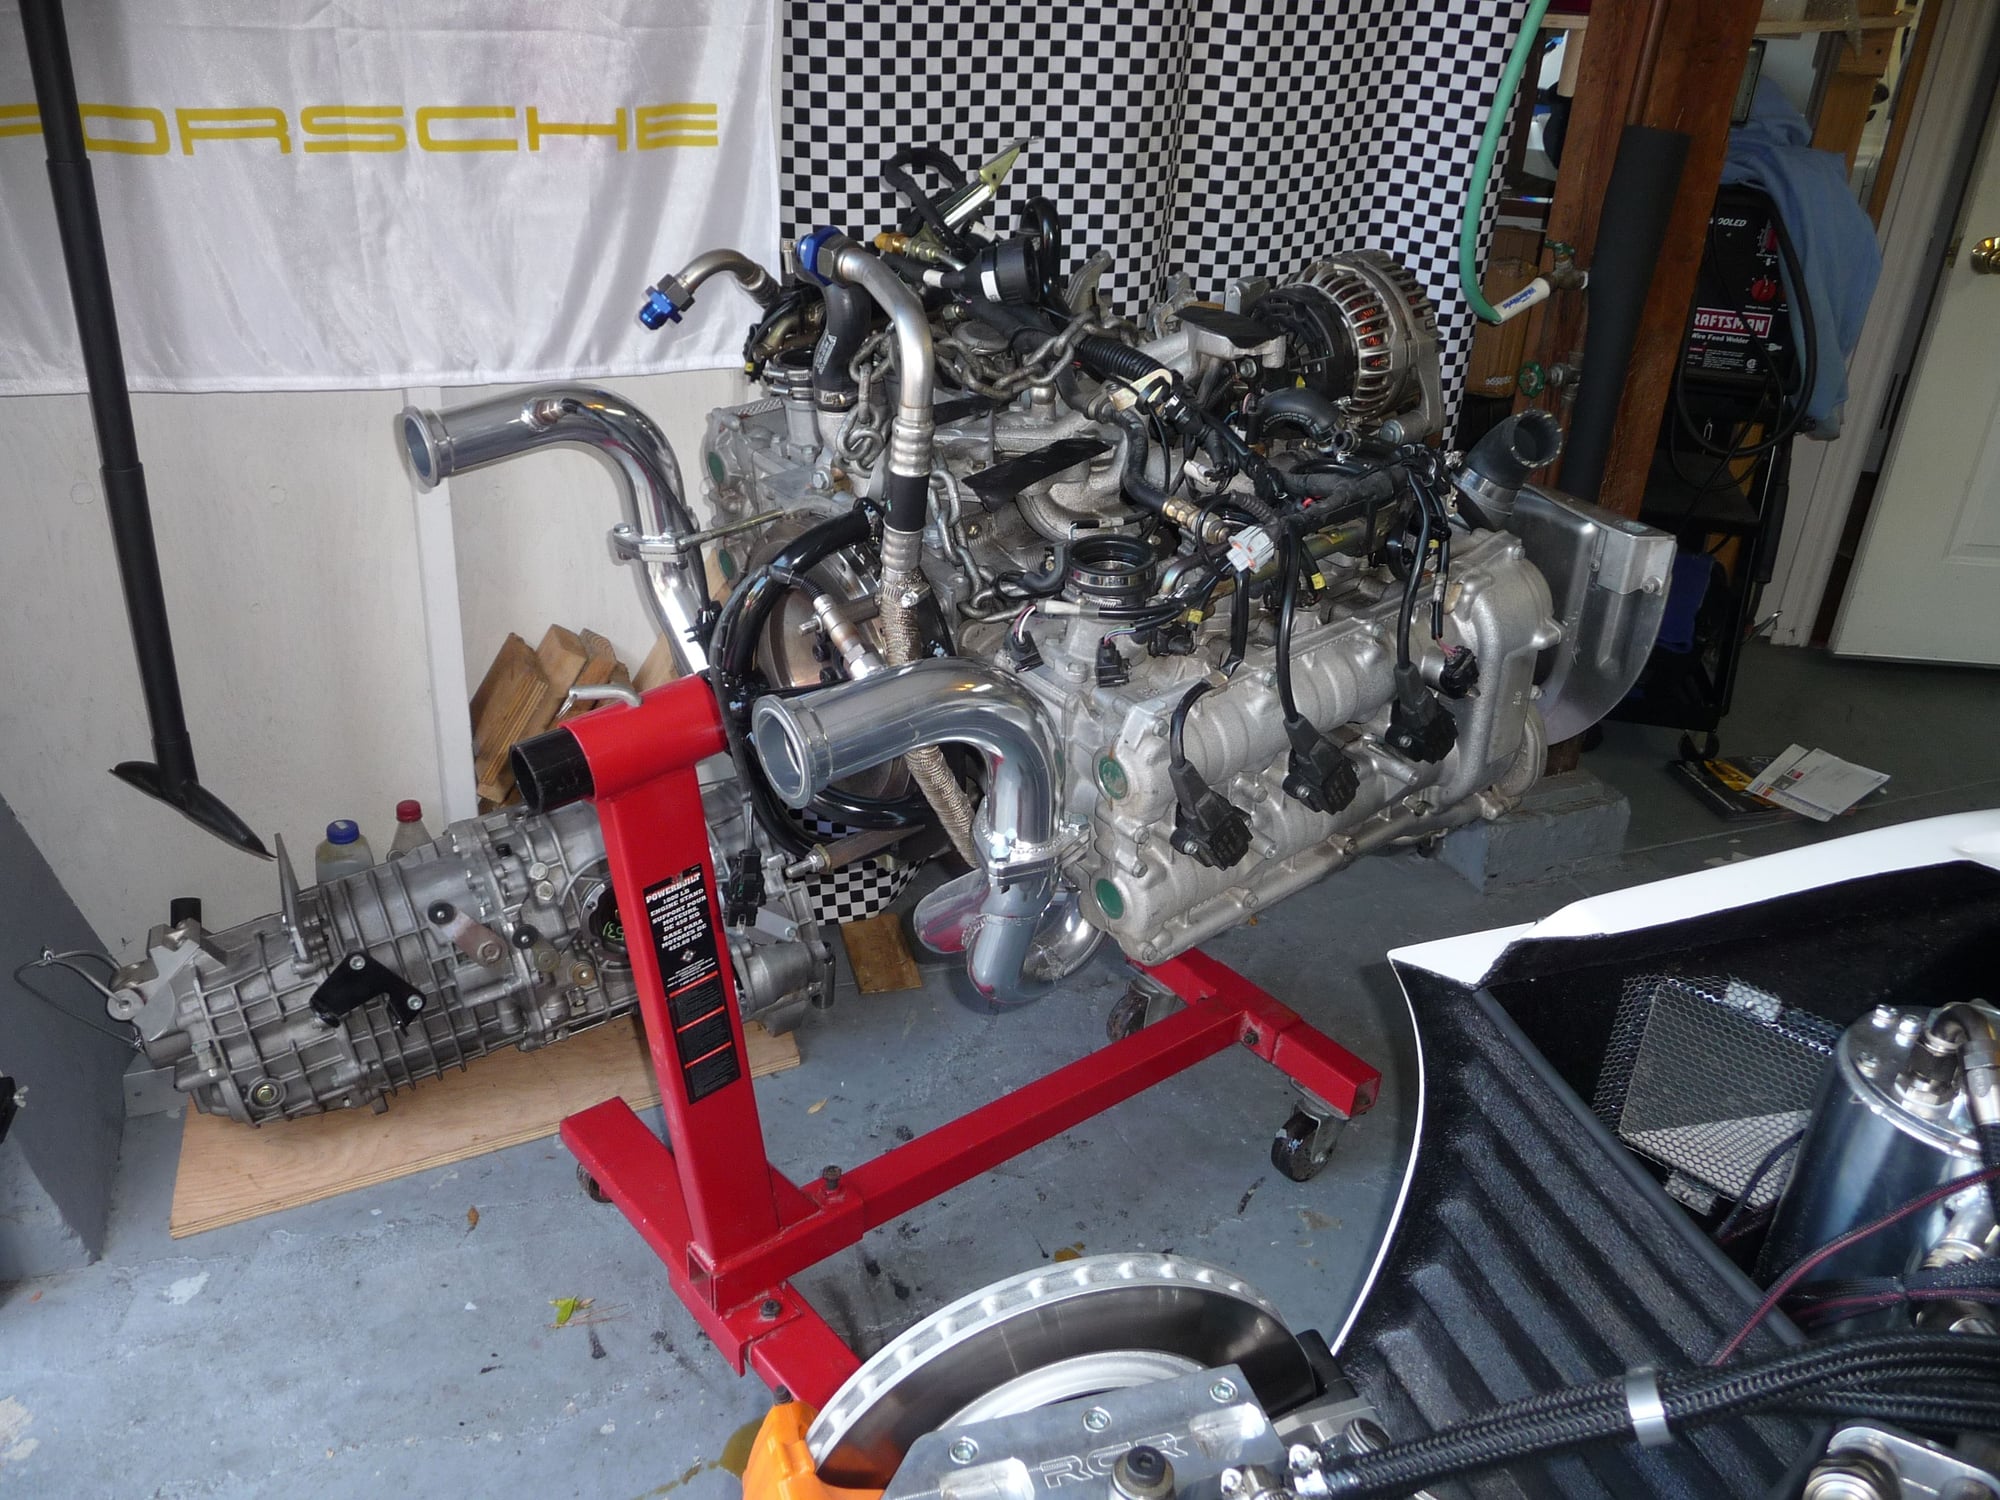
And it's out and on the stand.
Teardown starting. Custom headers I built btw. I MIG welded them and then had them professionally TIG welded, then ceramic coated. Lots of work, including lots of homework an planning, but a great learning experience.
Pretty much everything off that I can do for now, except oil cooler bracket & filter tower.
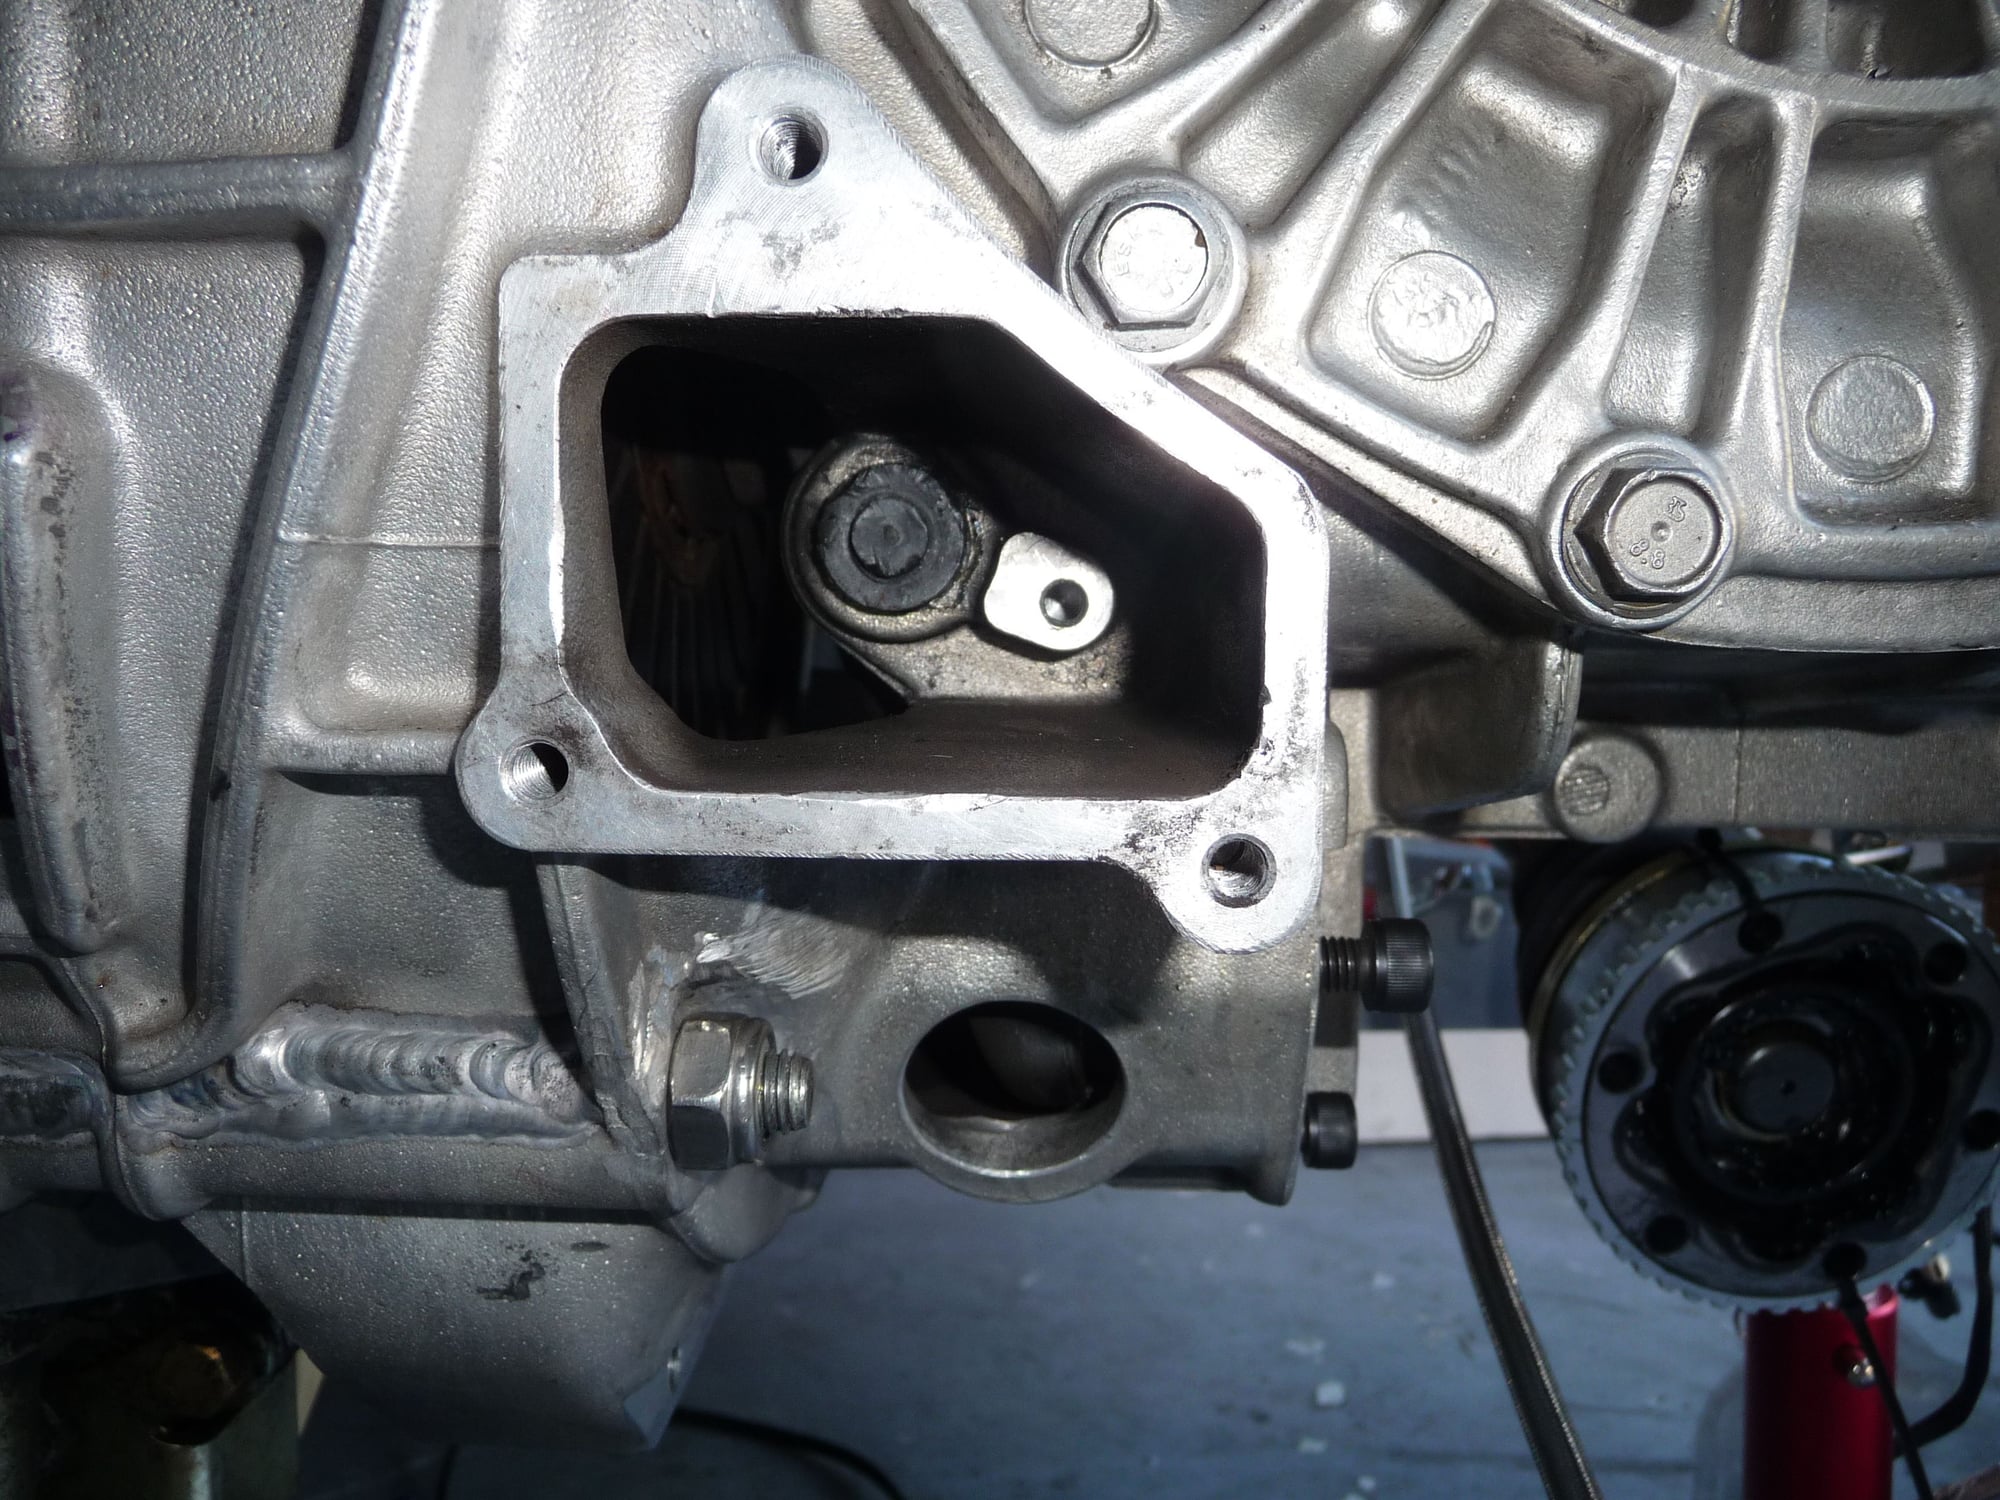
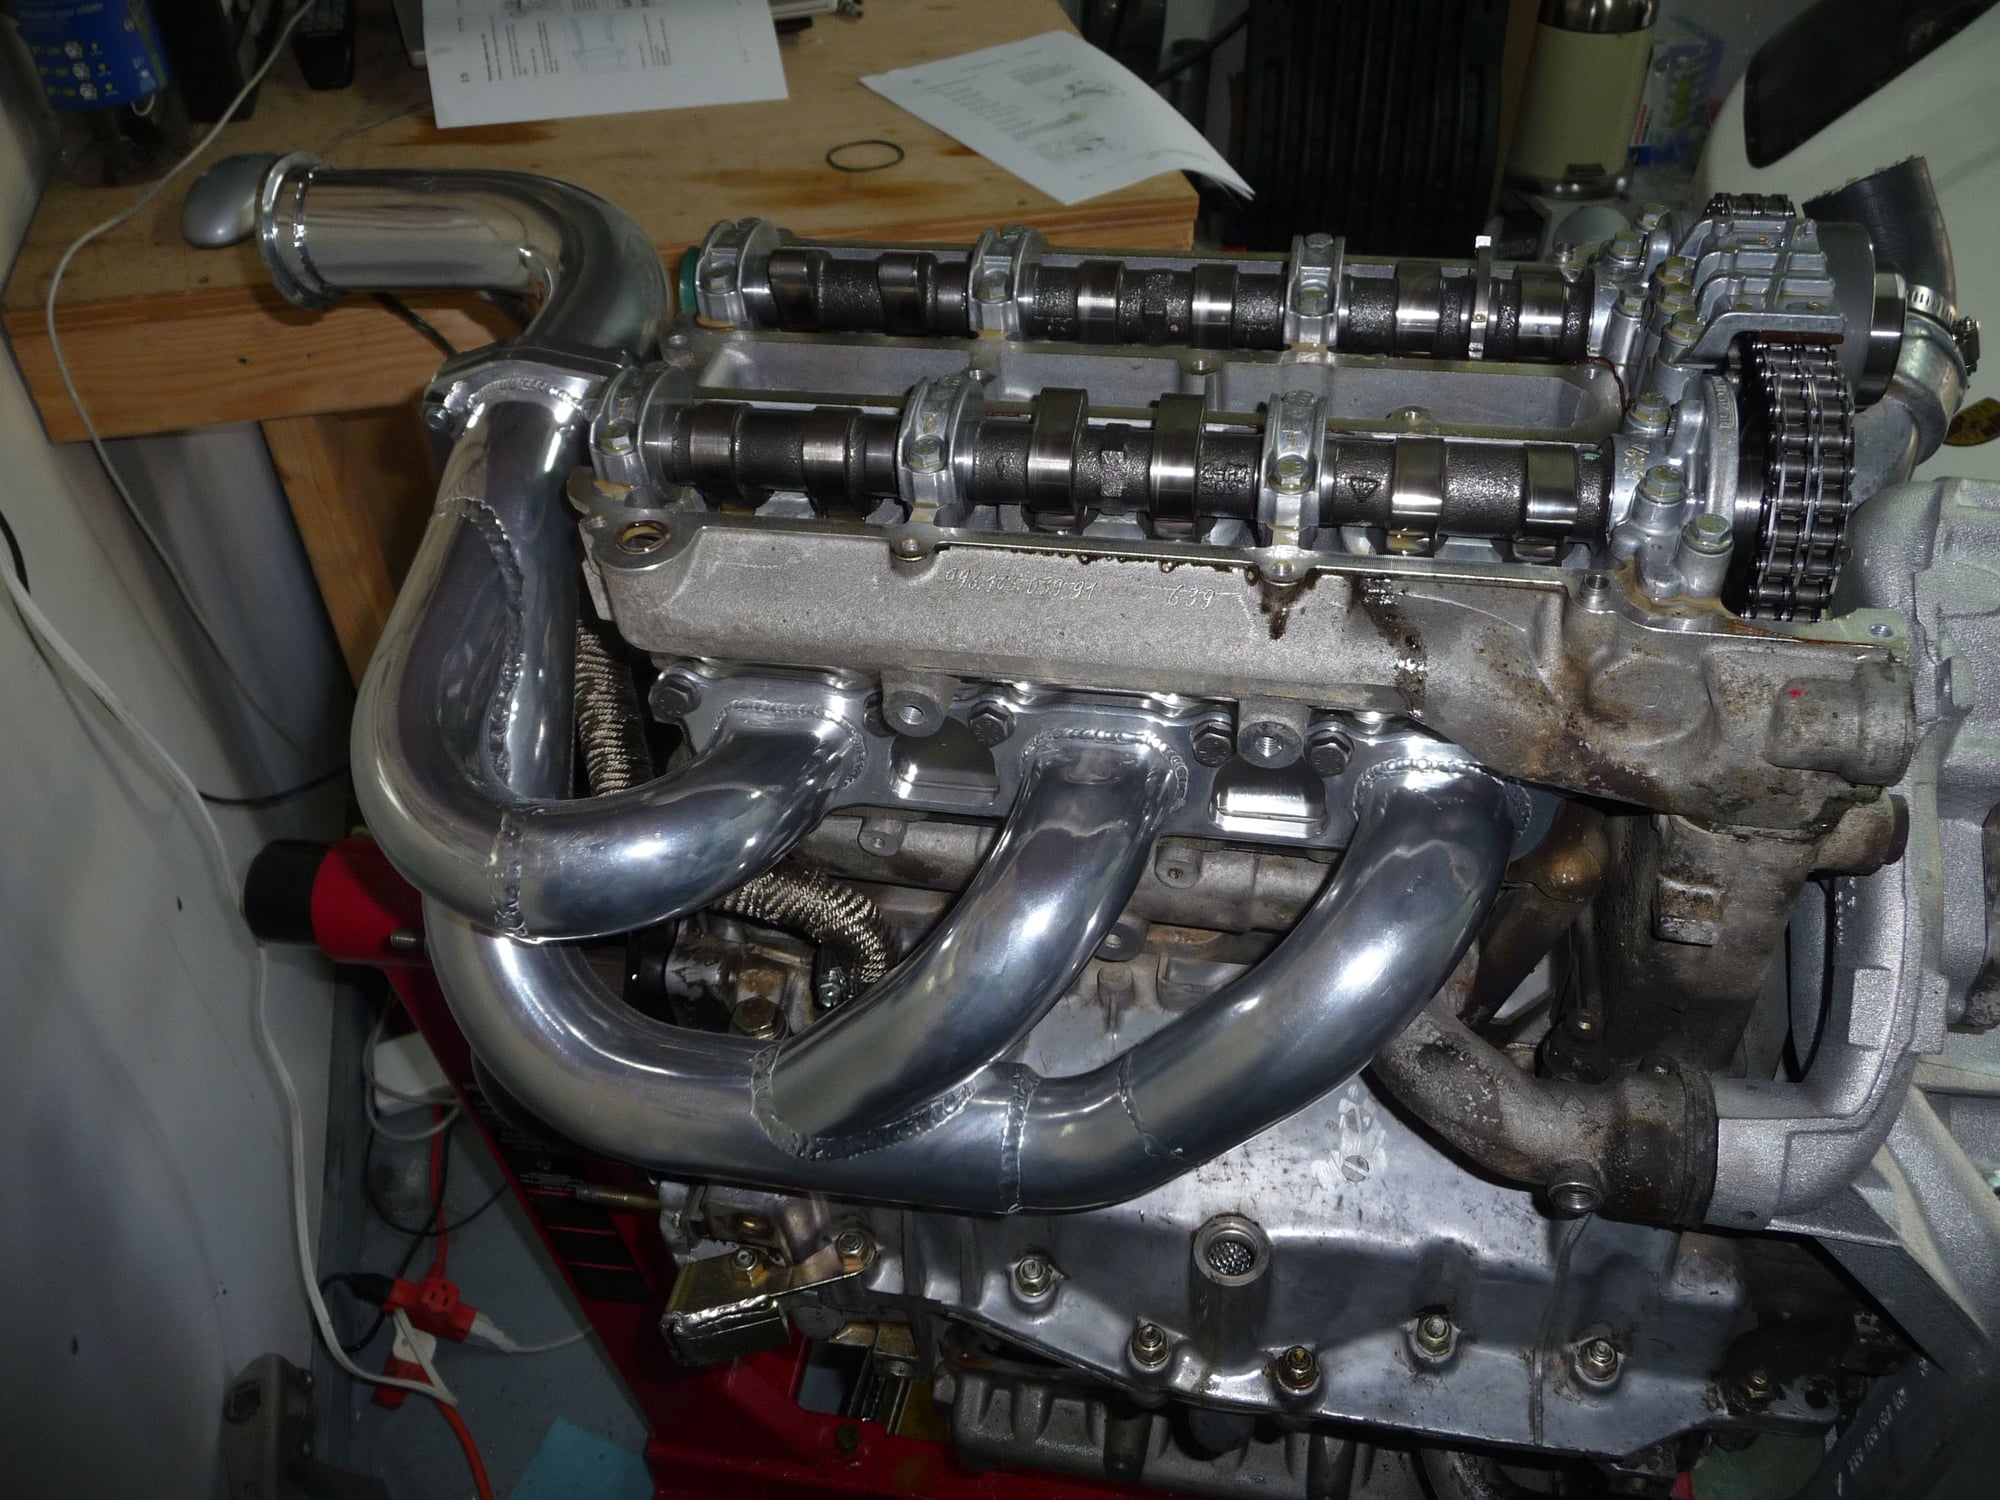
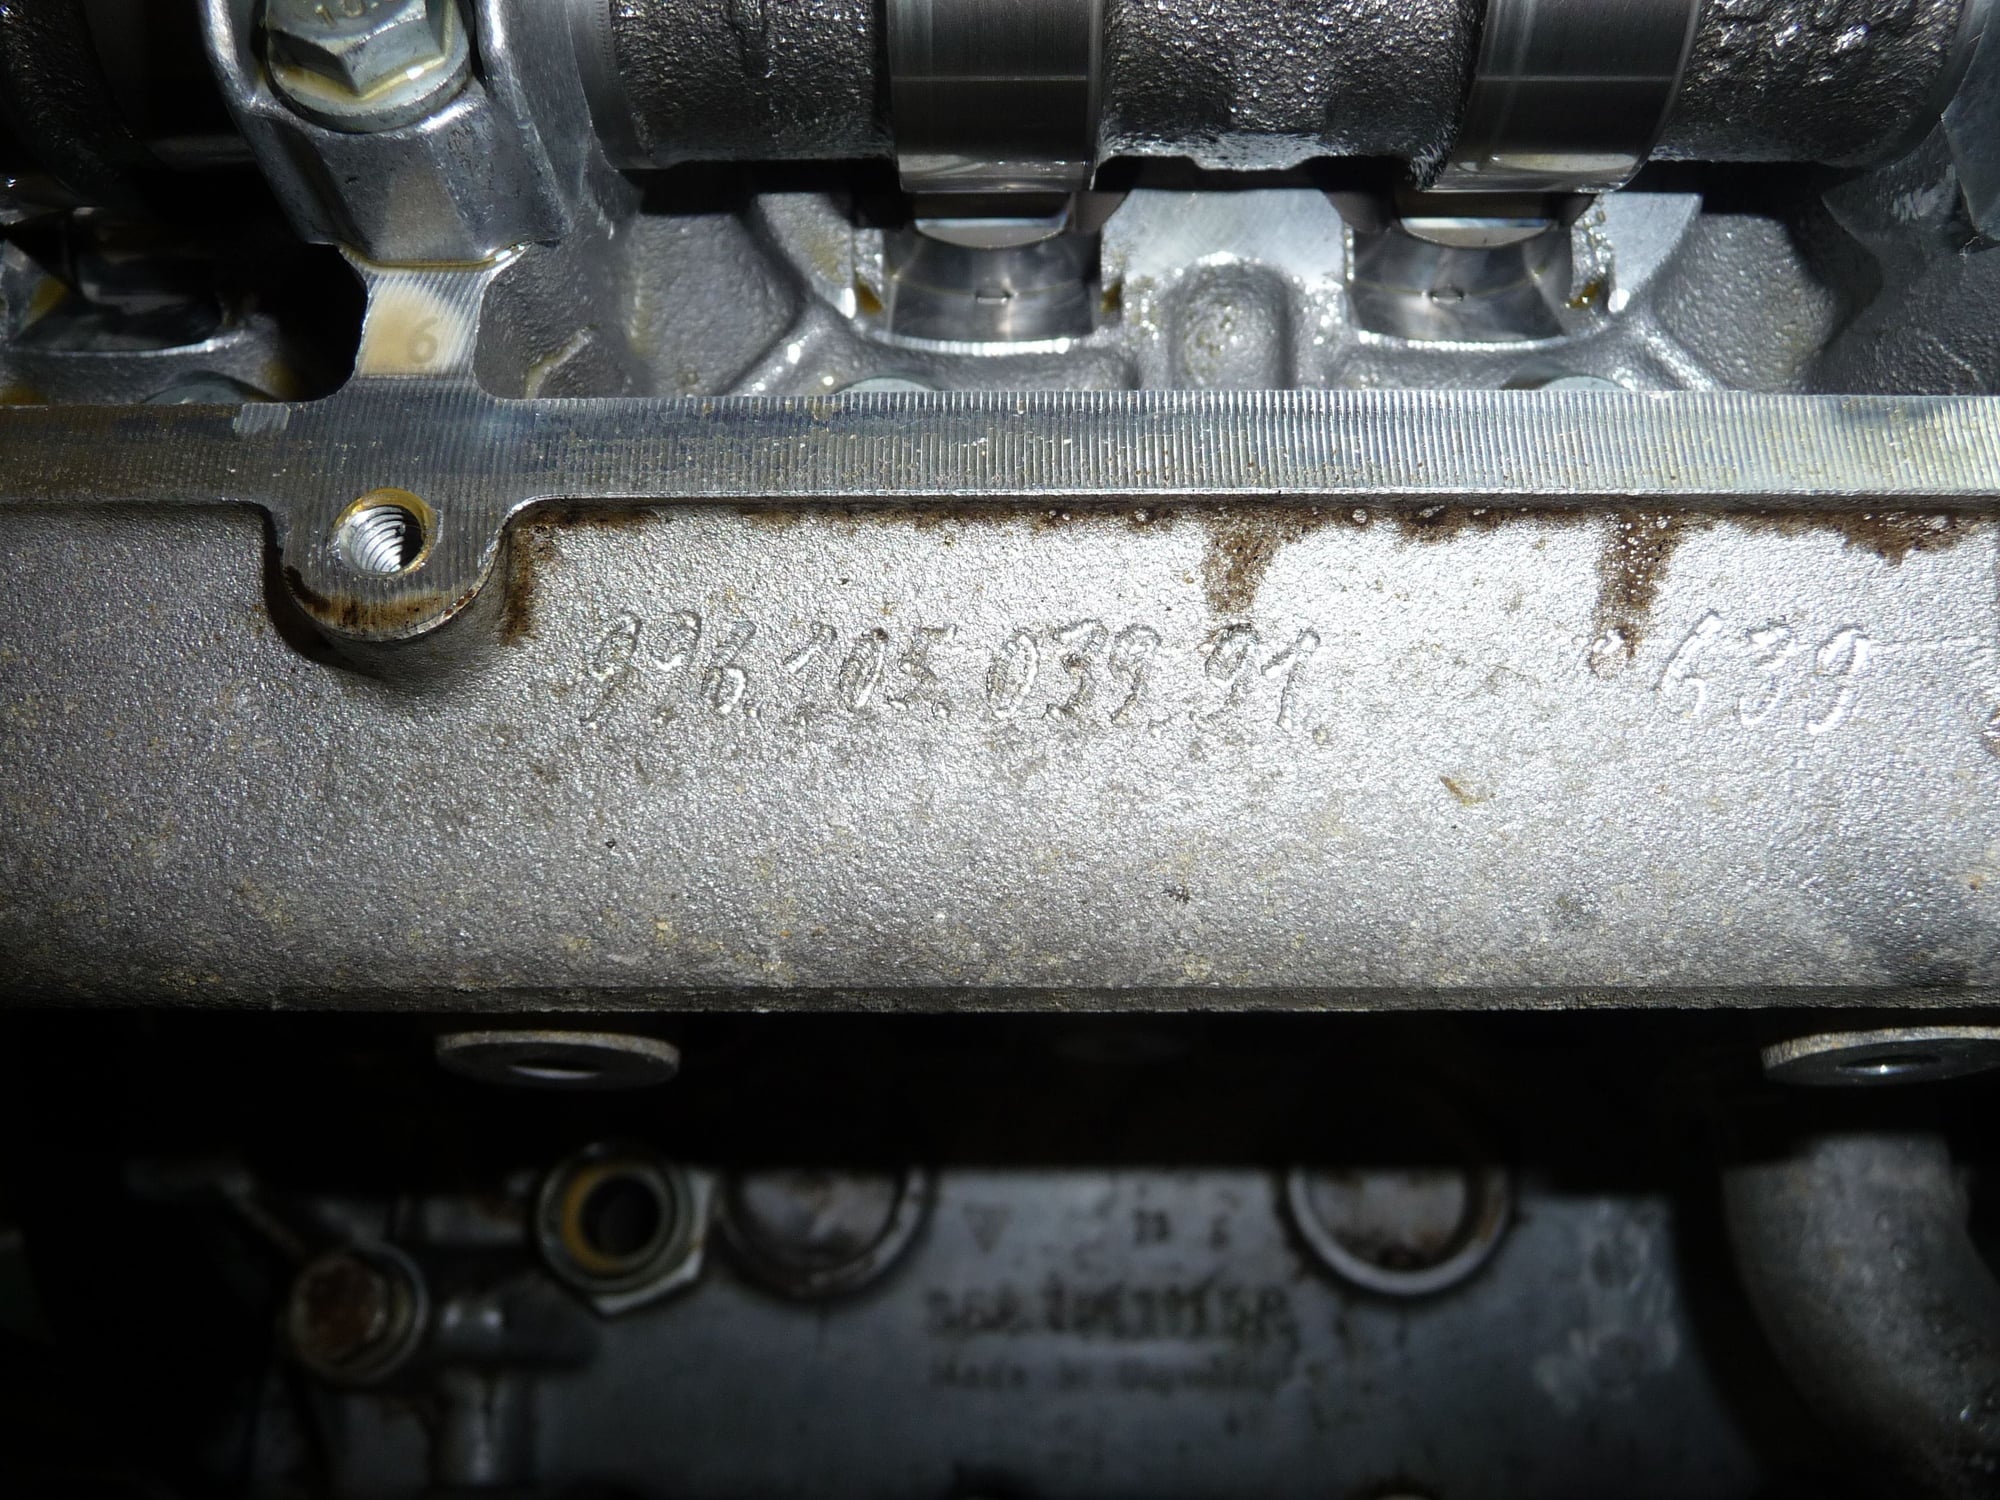
Hmm... what's that part number.
So regarding that last pic, I noticed this hand-etched part number on the camshaft housing. It reads 996.105.039.91 - that's a Cup part number to my surprise. The casting number is 996.105.539.9R, which I can't figure out what it is.
Unfortunately, I don't have PET running yet; I just have PDF docs for all the cars. Can anyone confirm what this cam housing really is? I read the numbers off the camshafts and they're the street versions (only intake cam is different to Cup anyway).
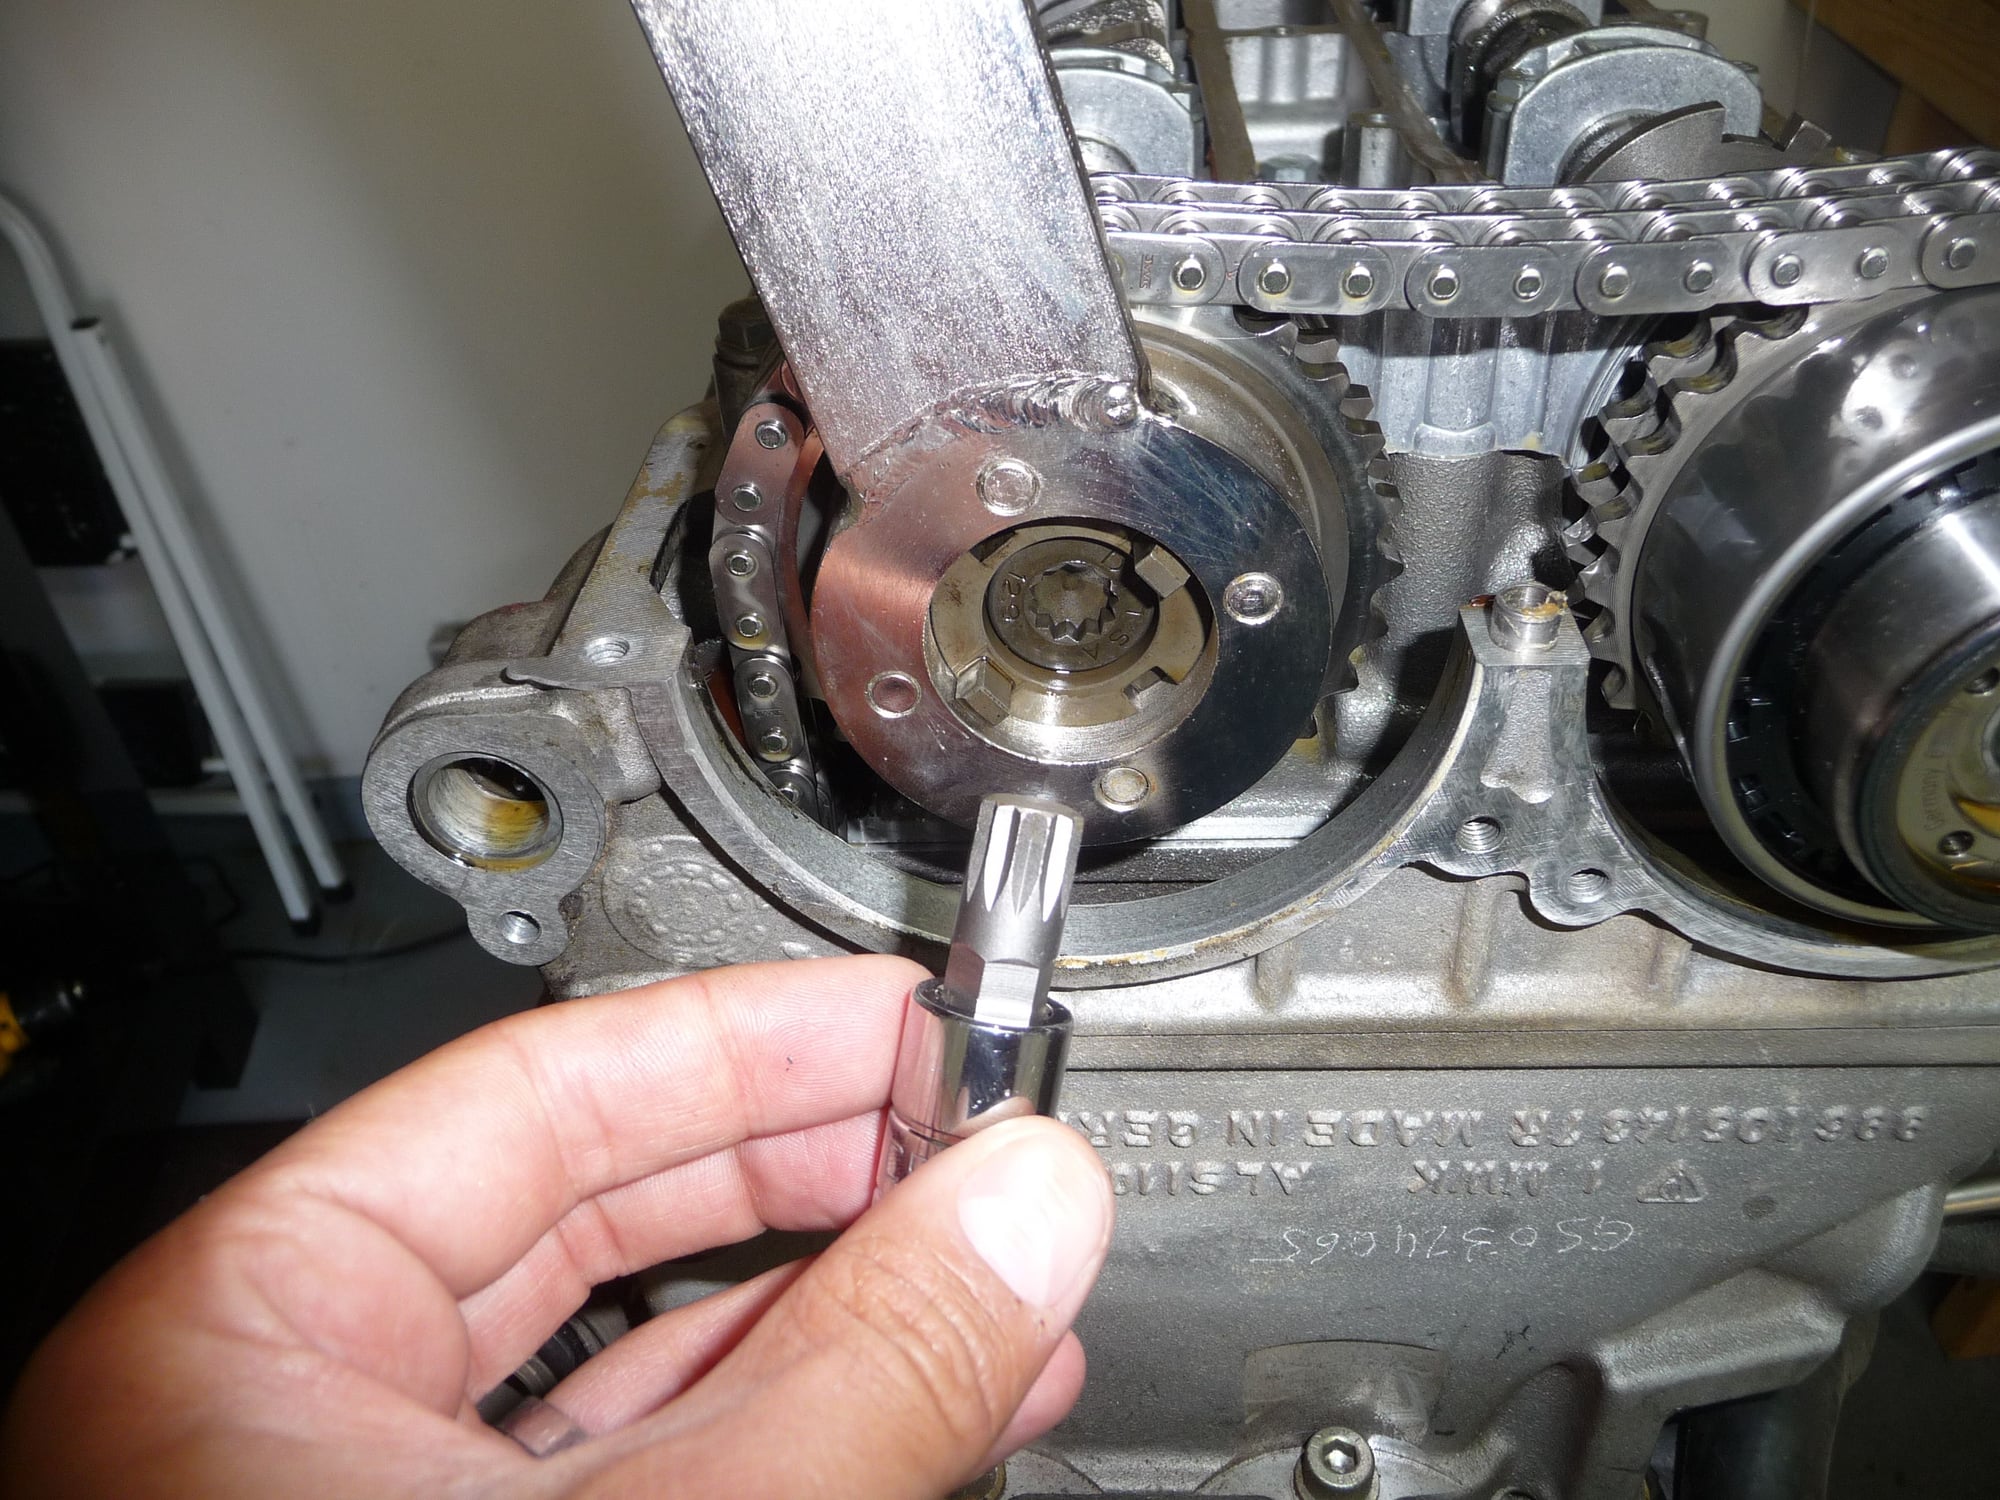
Also as an FYI, the Porsche docs say to use a Torx bit, albeit their special tools one, to remove the intake camshaft. It's actually a 12-pin Torx that's really called a "triple square spline". I figured it's best to use the real thing and ordered a set of them. $22.57 on Amazon Prime:
Also as an FYI, the Porsche docs say to use a Torx bit, albeit their special tools one, to remove the intake camshaft. It's actually a 12-pin Torx that's really called a "triple square spline". I figured it's best to use the real thing and ordered a set of them. $22.57 on Amazon Prime: http://www.amazon.com/gp/product/B007UQLR9U/. That's why I'm actually stuck since I didn't want to potentially screw up the spline on the camshafts with my 6-point Torx bits.
FWIW, I got my triple square bits from NAPA when I needed them to do the flywheel / pressure plate on my car. Prime isn't much slower though which is really nice.
great thread I plan on continuing to watch your progression.
Have you determined why you have coolant in one cylinder yet? And is it in just one cylinder? I see you have a leak down tester. Did you use it and if so, what did you learn?
No, don't know yet. The engine is salvage so chances are it's gaskets or O-rings that overheated. I'll only know as I tear it down further.
I got the leak down tester earlier this week, but have not used it yet. Never done it before, but looks easy enough. It was recommended to me to do this pre teardown and post reconstruction, but I also got a little excited just starting to tear the engine down. :-) I think I can do it in its current state still.
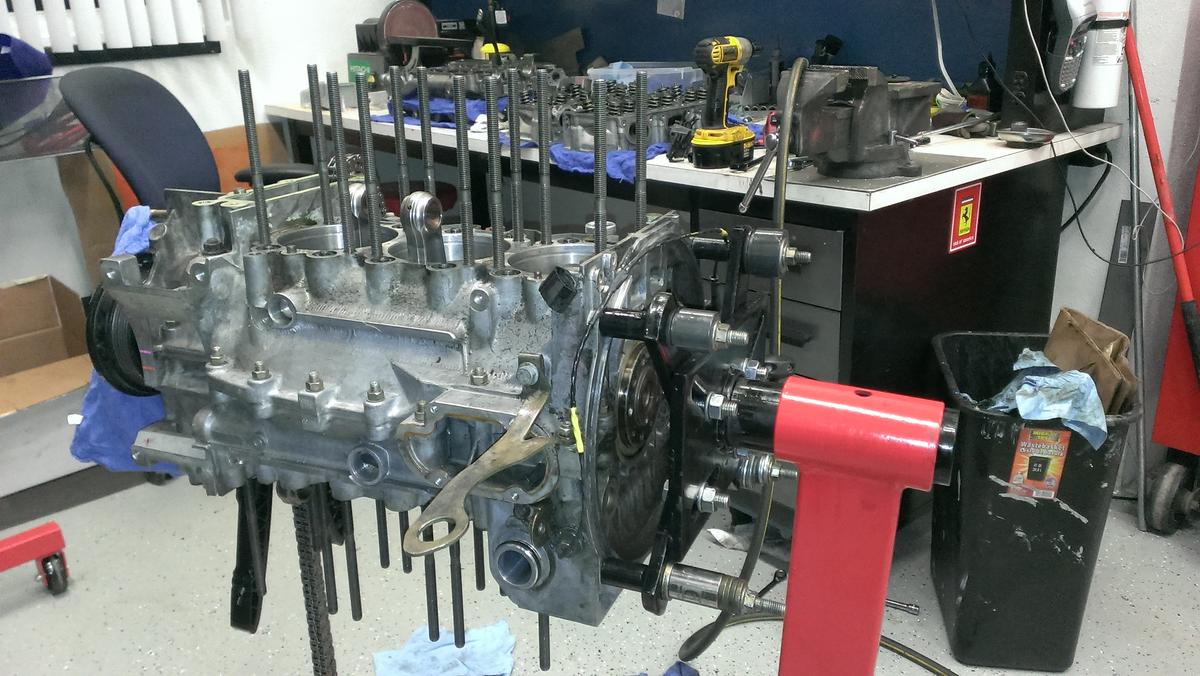
Alright, slow going in the last few weeks, but I've now got the heads off and took the cylinder sleeves on the more problematic side off as well.
Deep in, things look pretty clean to my untrained eye. The engine exterior is dirty in parts where I couldn't clean it while installed in the car, but the interior looks clean:
I did drain slightly contaminated oil out of the crankcase as well, but here the oil is not contaminated at all. The most contamination seems to have been in the external oil tank.
In order to get to this stage I followed the workshop manual instructions, which was pretty simple really. A few pics from that process below.
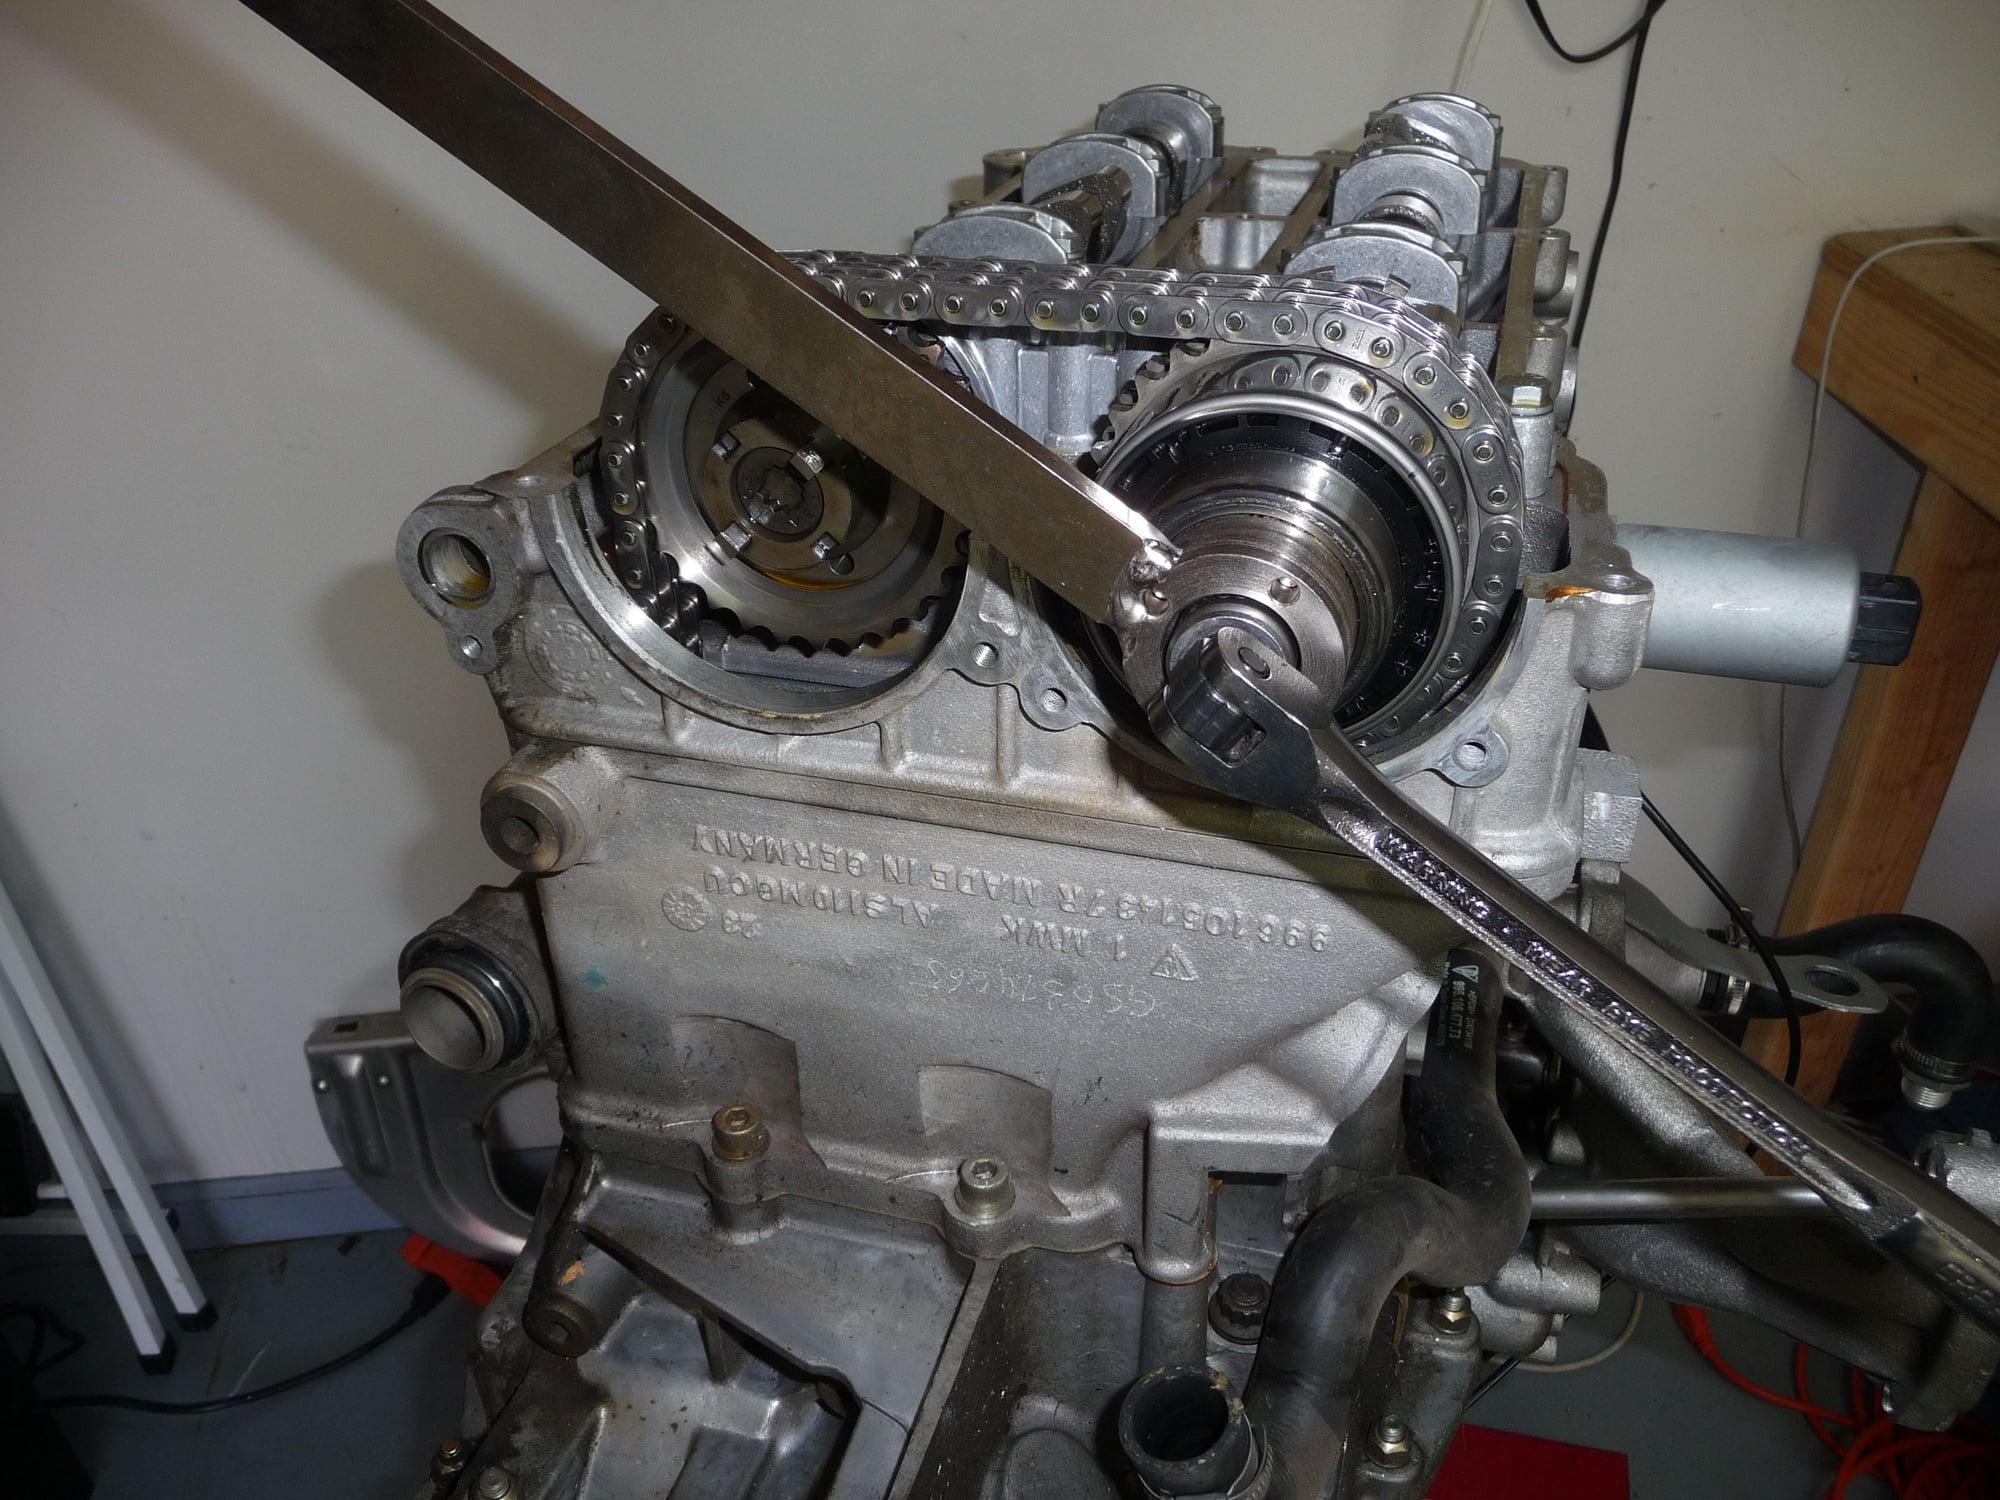
Loosen the intake camshaft bolt with the first special wrench:
The exhaust camshaft is loosened with the other special wrench and the triple-square bit:
You have to make sure to rotate the crank/cams to the right position in each bank so there's no pressure from the cam lobes on the valves while unscrewing the camshafts. This can cause damage to the cam bearings and other pieces if not done properly or worst case you get a dancing camshaft on the floor. Not good.
Next you release the thrust bearing cover, then the cam bearings. These must be kept in order. Mine all had numbers hand-etched into them and I took a bunch of pictures to put it back together the same way. Once you have the camshafts out, you remove the flat-based tappets, which you also have to keep sorted. My method was to box them up in the order I pulled them with intake in the top row:
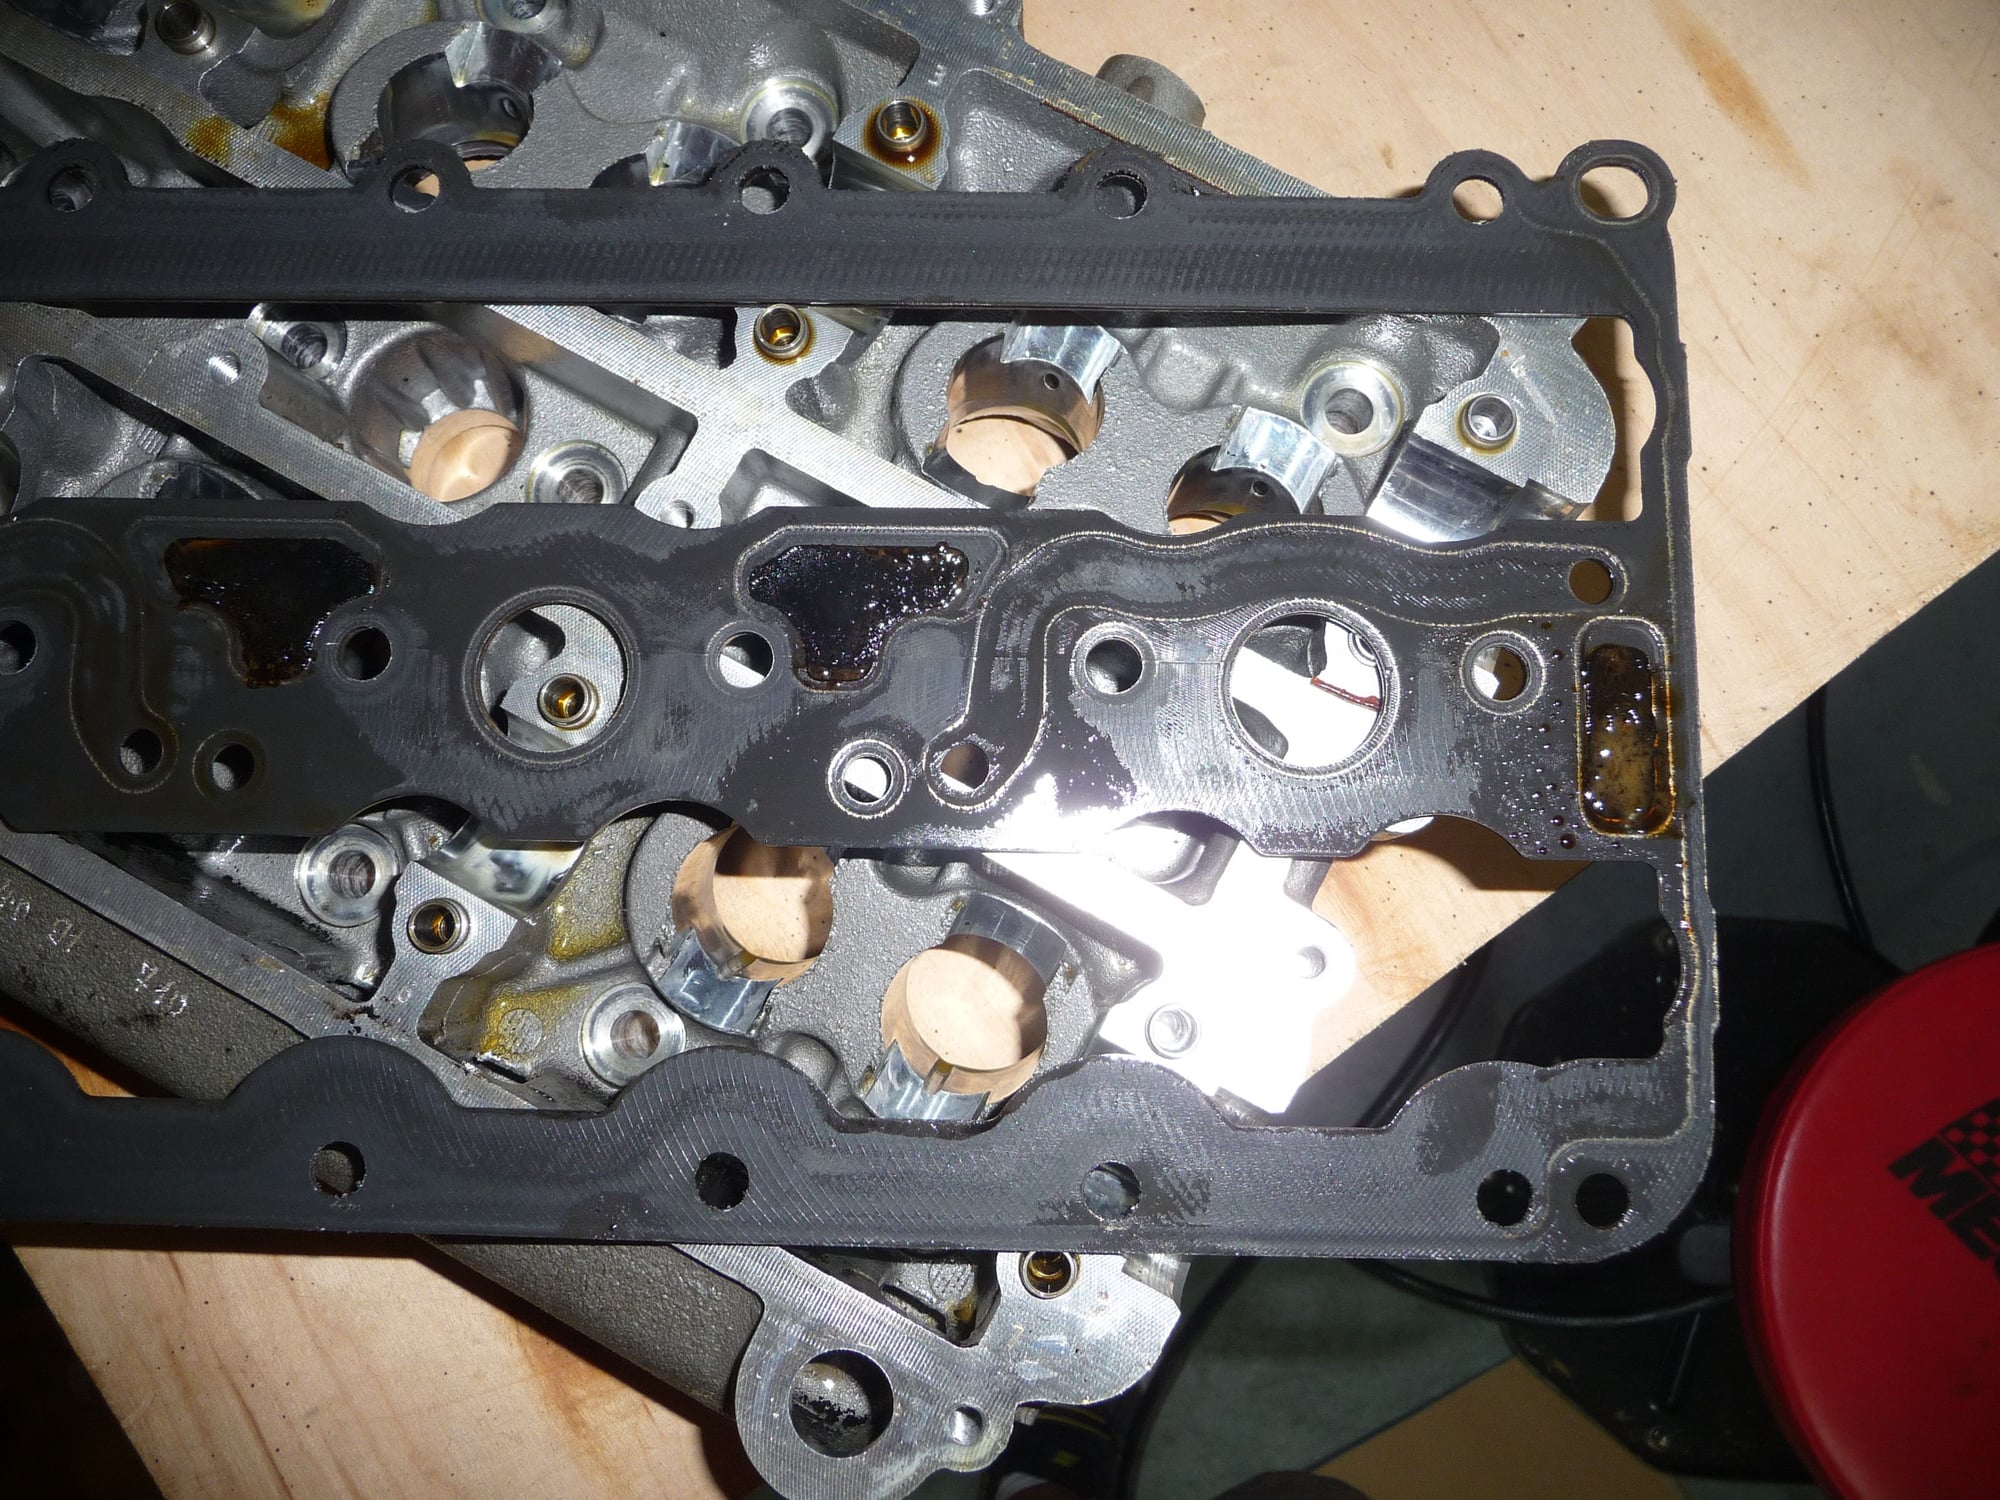
The camshaft housing comes off easily with 16 bolts, released a half turn at a time in a specific order. I even went a quarter turn to be safe. That then gets me to the gasket that may be the issue. I can't visually tell, but here's a picture of it:
Please let me know if you have any thoughts on this...
Moving on, you can now remove the heads, again with a very specific unbolting pattern, half turn at a time until everything is loose. The heads pull right off once the nuts are removed.
Lastly, removing the cylinder sleeves take a little work, though they're not bolted in. The pistons seals are the tricky part and will be super tricky to install again. I only pulled one side for now therefore.
I do think that I may end up just wanting to rebuild the entire engine for vanity and peace of mind reasons. The block's exterior is super dirty and I've come this far, so why not go all the way and have known wear-and-tear parts replaced to have a fresh engine, assuming I'm confident in my assembly skills. Pro/con votes on this? I highly doubt I would upgrade the engine, but I'm seriously thinking about just having a super clean engine top to bottom when I'm done.
Oh, I also did the leak down tests. None of the cylinders leaked more than 3%, really all in the 1-2% range. They were all right around 51 vs. 52 (i.e. 1-2%), which was all the pressure my compressor would muster.
Any chance that you can give me the measurements of the cam shaft holder tools - inside/outside diameters, pin diameter, and outside diameter (placement) of the pins?
Hello, I have just finished a recent 996 Cup engine build. It looks like you have the vario cam...make sure you mark the rear slots in the cams for your initial set-up. The generic Porsche cam alignment tools are not a 1-size fits all and having an accurate reference point helps. Also, I have a complete spreadsheet with ALL of the gaskets, bearings, etc with Porsche part numbers if you need assistance sourcing the parts. FYI, the Porsche PET is only about 50% accurace and the parts search can be daunting.
Quick update on what's going on since I haven't posted in a while. This is very much still an active project, but life just sometimes gets in the way! Sorry, not pics here, but learned some stuff and I'll follow up with some pics later.
The biggest take-away is that the engine itself wasn't actually damaged and thus causing the coolant in the cylinders. As much as I hate admitting it, it was actually my own stupidity. Or to be more concise, I misread a drawing. It said "vent line" out of the oil cooler which I assumed is vent to vacuum like every other vent seems to be. Alas, it's vent to coolant tank instead. When there's lower pressure in the intake, guess what starts to get sucked in now? Yea, very coolant indeed. Given that I haven't previously owned a GT3 and could not reference a real car, this is unfortunately what happened. It sucks, but there's a silver lining.
I ended up tearing the engine down to everything except splitting the case. After talking to many folks about what would be good things to take care of now that I have the engine in pieces, I decided to pull a rod to look at the rod bearings. With an assumed 30k miles on the engine, it turns out the rod bearings are actually slightly worn and should be replaced. I did a lot of research on Porsche original (made by Glyco) or aftermarket straight from Glyco. Depending on where you source them, the price difference can be 3:1. There's of course much discussion on which one to go with. Here's what I found out:
1) Glyco makes the Porsche part. You can see the G stamping on the original part (it looks like a circle, but it's a G)
2) Glyco overall has a solid reputation. There are supposedly some questions on the 2.7L rod bearings with potentially old tooling being a cause of quality issues, but there's zero way to verify this and I'm not in any way trying to perpetuate this rumor. Supposedly (again) GT3 bearings are fine to use straight from Glyco, but who knows. I'm not taking any sides at all on this. The internets have lots of opinions. Caveat emptor.
3) The Porsche part made by Glyco is supposed something that's gone through a quality control by Porsche. It then has a P logo stamped onto it along with the G logo and it costs you quite a bit more.
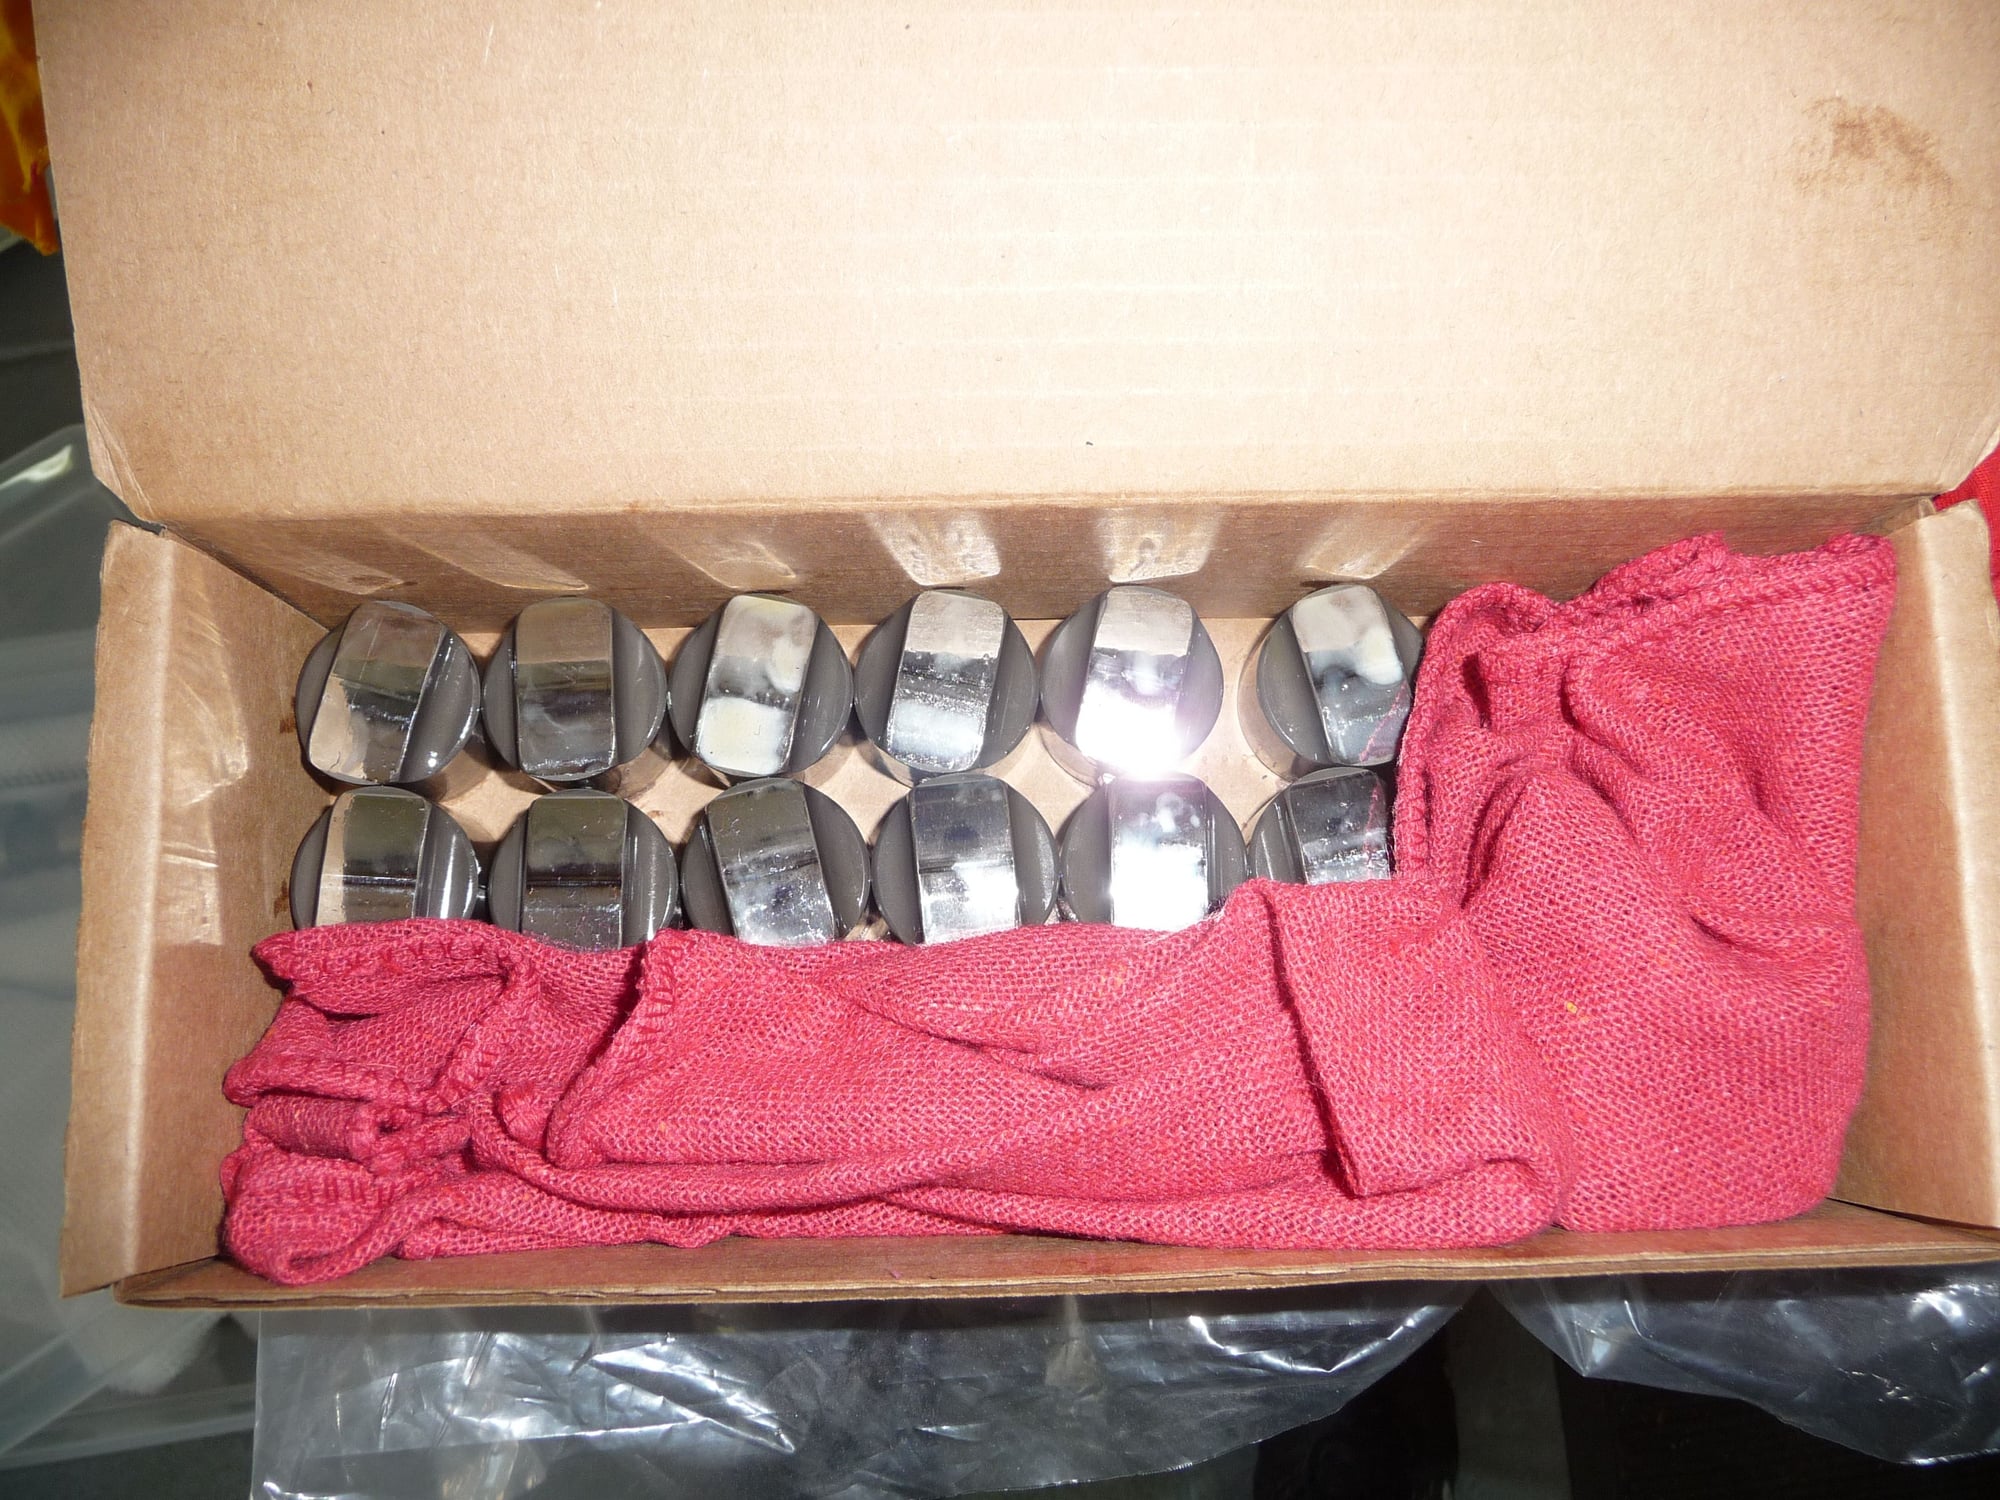
In essence you're therefore paying 2-3x the Glyco-direct cost for Porsche saying "this part is ok". I bought a Porsche set of 12 for $249.
So that's the rod bearings. From here on up, I'm more or less just replacing the gaskets and running any parts I can through a parts cleaner. I may do a partial rebuild of the heads pending feedback on the valve guide sleeves. I'd like to avoid $2800 to get the heads rebuilt, so we'll see what the experts say. I can post a video of how much play there is if anyone is interested.
The sliver lining in all of this is that I'll have a mostly refreshed engine (pending the heads decision) with a fixed LWFW pulley and some reconfig of parts I don't need for just under $1000. That includes the cam wrenches, though it does not include any timing tools. More importantly though, I've learned a phenomenal amount about this engine, which I've truly enjoyed. Yea, the car isn't on the road, but so what, this has honestly been quite fun.
I'll be back with some pics soon. Project continues. Thanks for reading.
Here's everyone's chance to armchair quarterback this rebuild.
As mentioned in my previous post, there's a question of whether the valve guides in the heads should be replaced. Here's a low-res and high-res video of when I removed one valve spring and wiggled the valve. What are your thoughts on how much this moves?
Does the maintenance manual give limits/max clearance? I wouldn't want to make a call on something like this without measuring and comparing to the acceptable tolerance.
 08-12-2014, 03:04 AM