When you click on links to various merchants on this site and make a purchase, this can result in this site earning a commission. Affiliate programs and affiliations include, but are not limited to, the eBay Partner Network.
I just typed an hour-long post only for the forum to force me to log in again when I hit submit and thus lose the post. This one will be a little shorter, sorry.
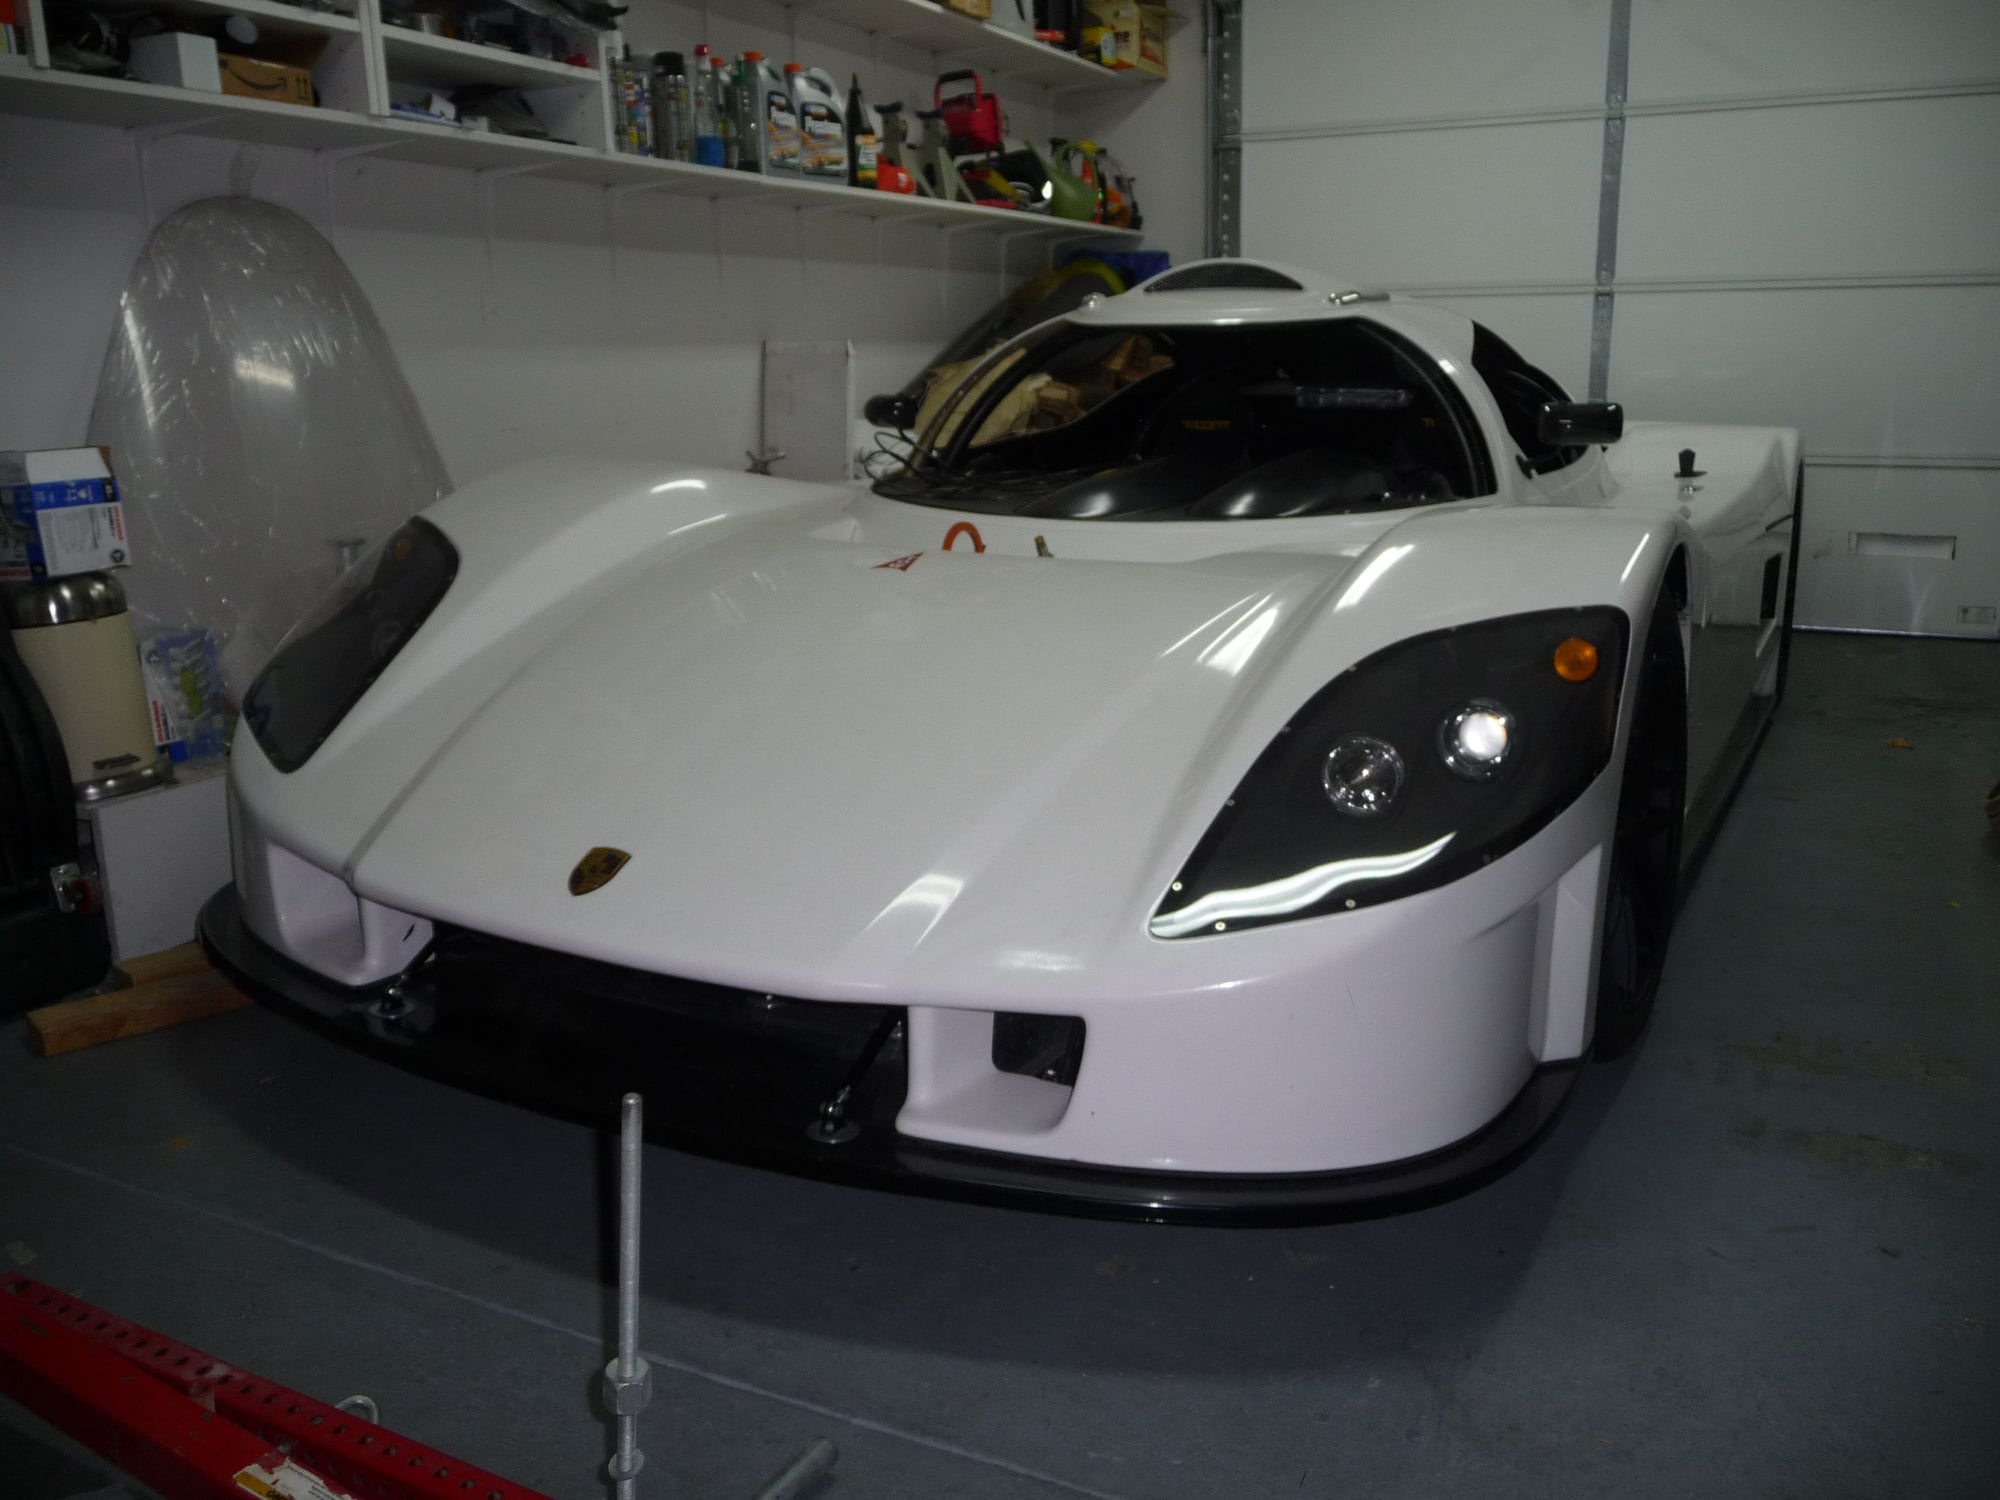
Long story short, I need to rebuild a 996 GT3 motor from the heads up. It's in a car called a SuperLite Coupe. It's a mid-engined car that I'm running these specs:
- GT3 motor: salvage, no power steering pump, no A/C compressor, no coolant plumbing to any transmission oil cooler
- GT3 transmission: rebuilt and inverted by Gbox
- AEM Infinity ECU: designed and built wiring harness myself, used stock engine harness, but replaced a number of sensors like oil pressure, intake pressure, intake temperature
- Motec D125 dash: connected via CAN to ECU
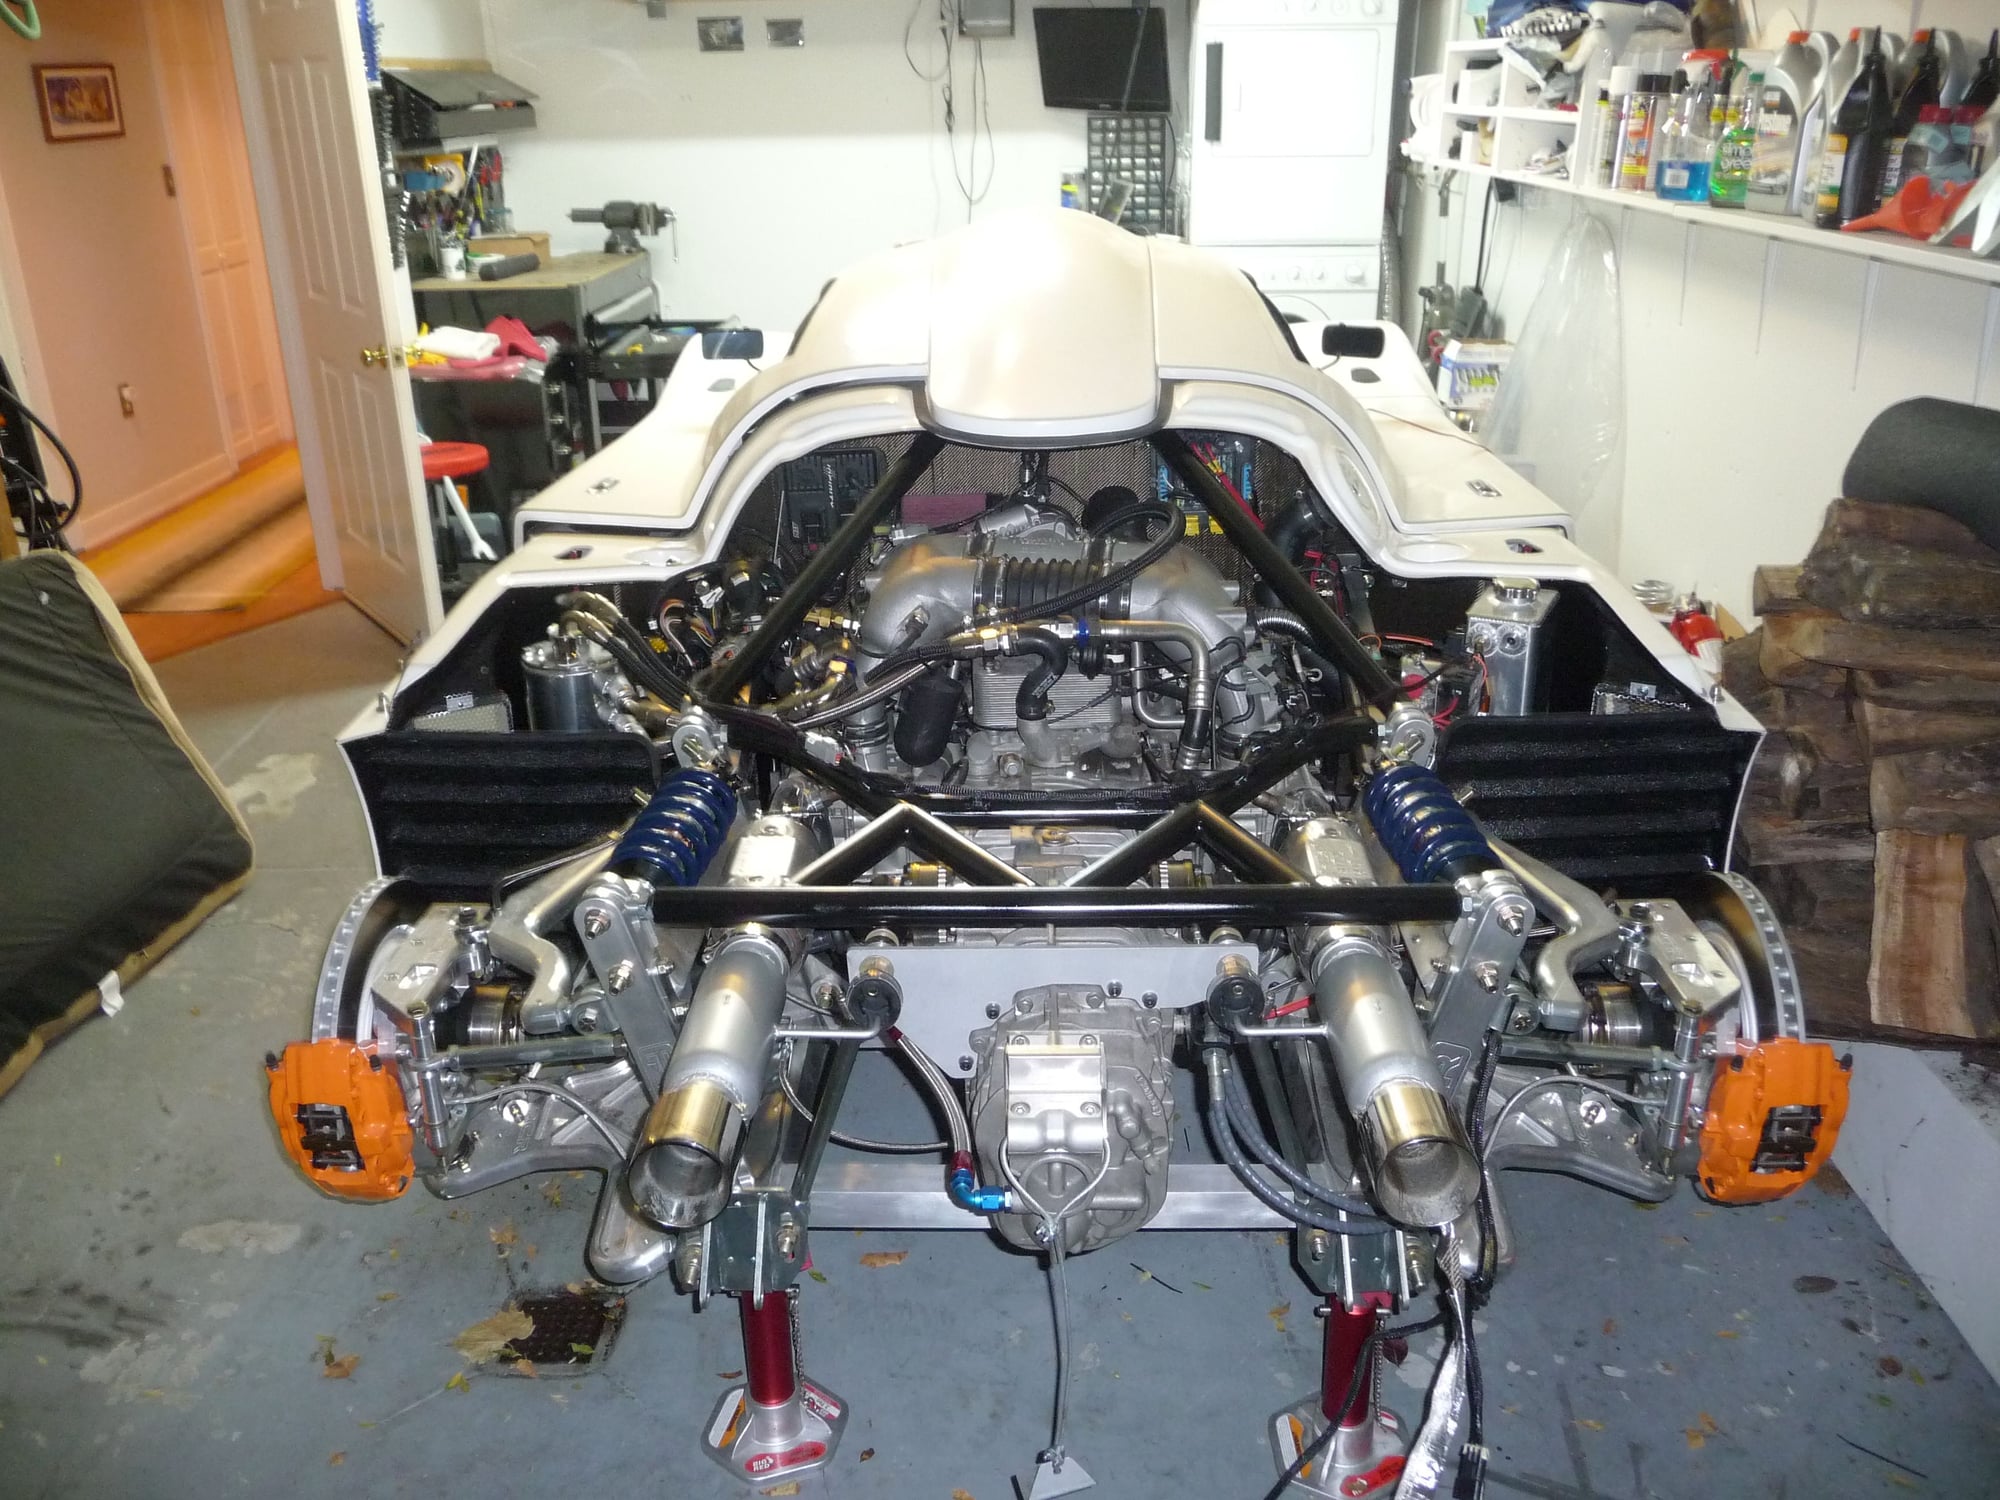
The car looks like this:
It's street legal and has a California SB100 registration already completed.
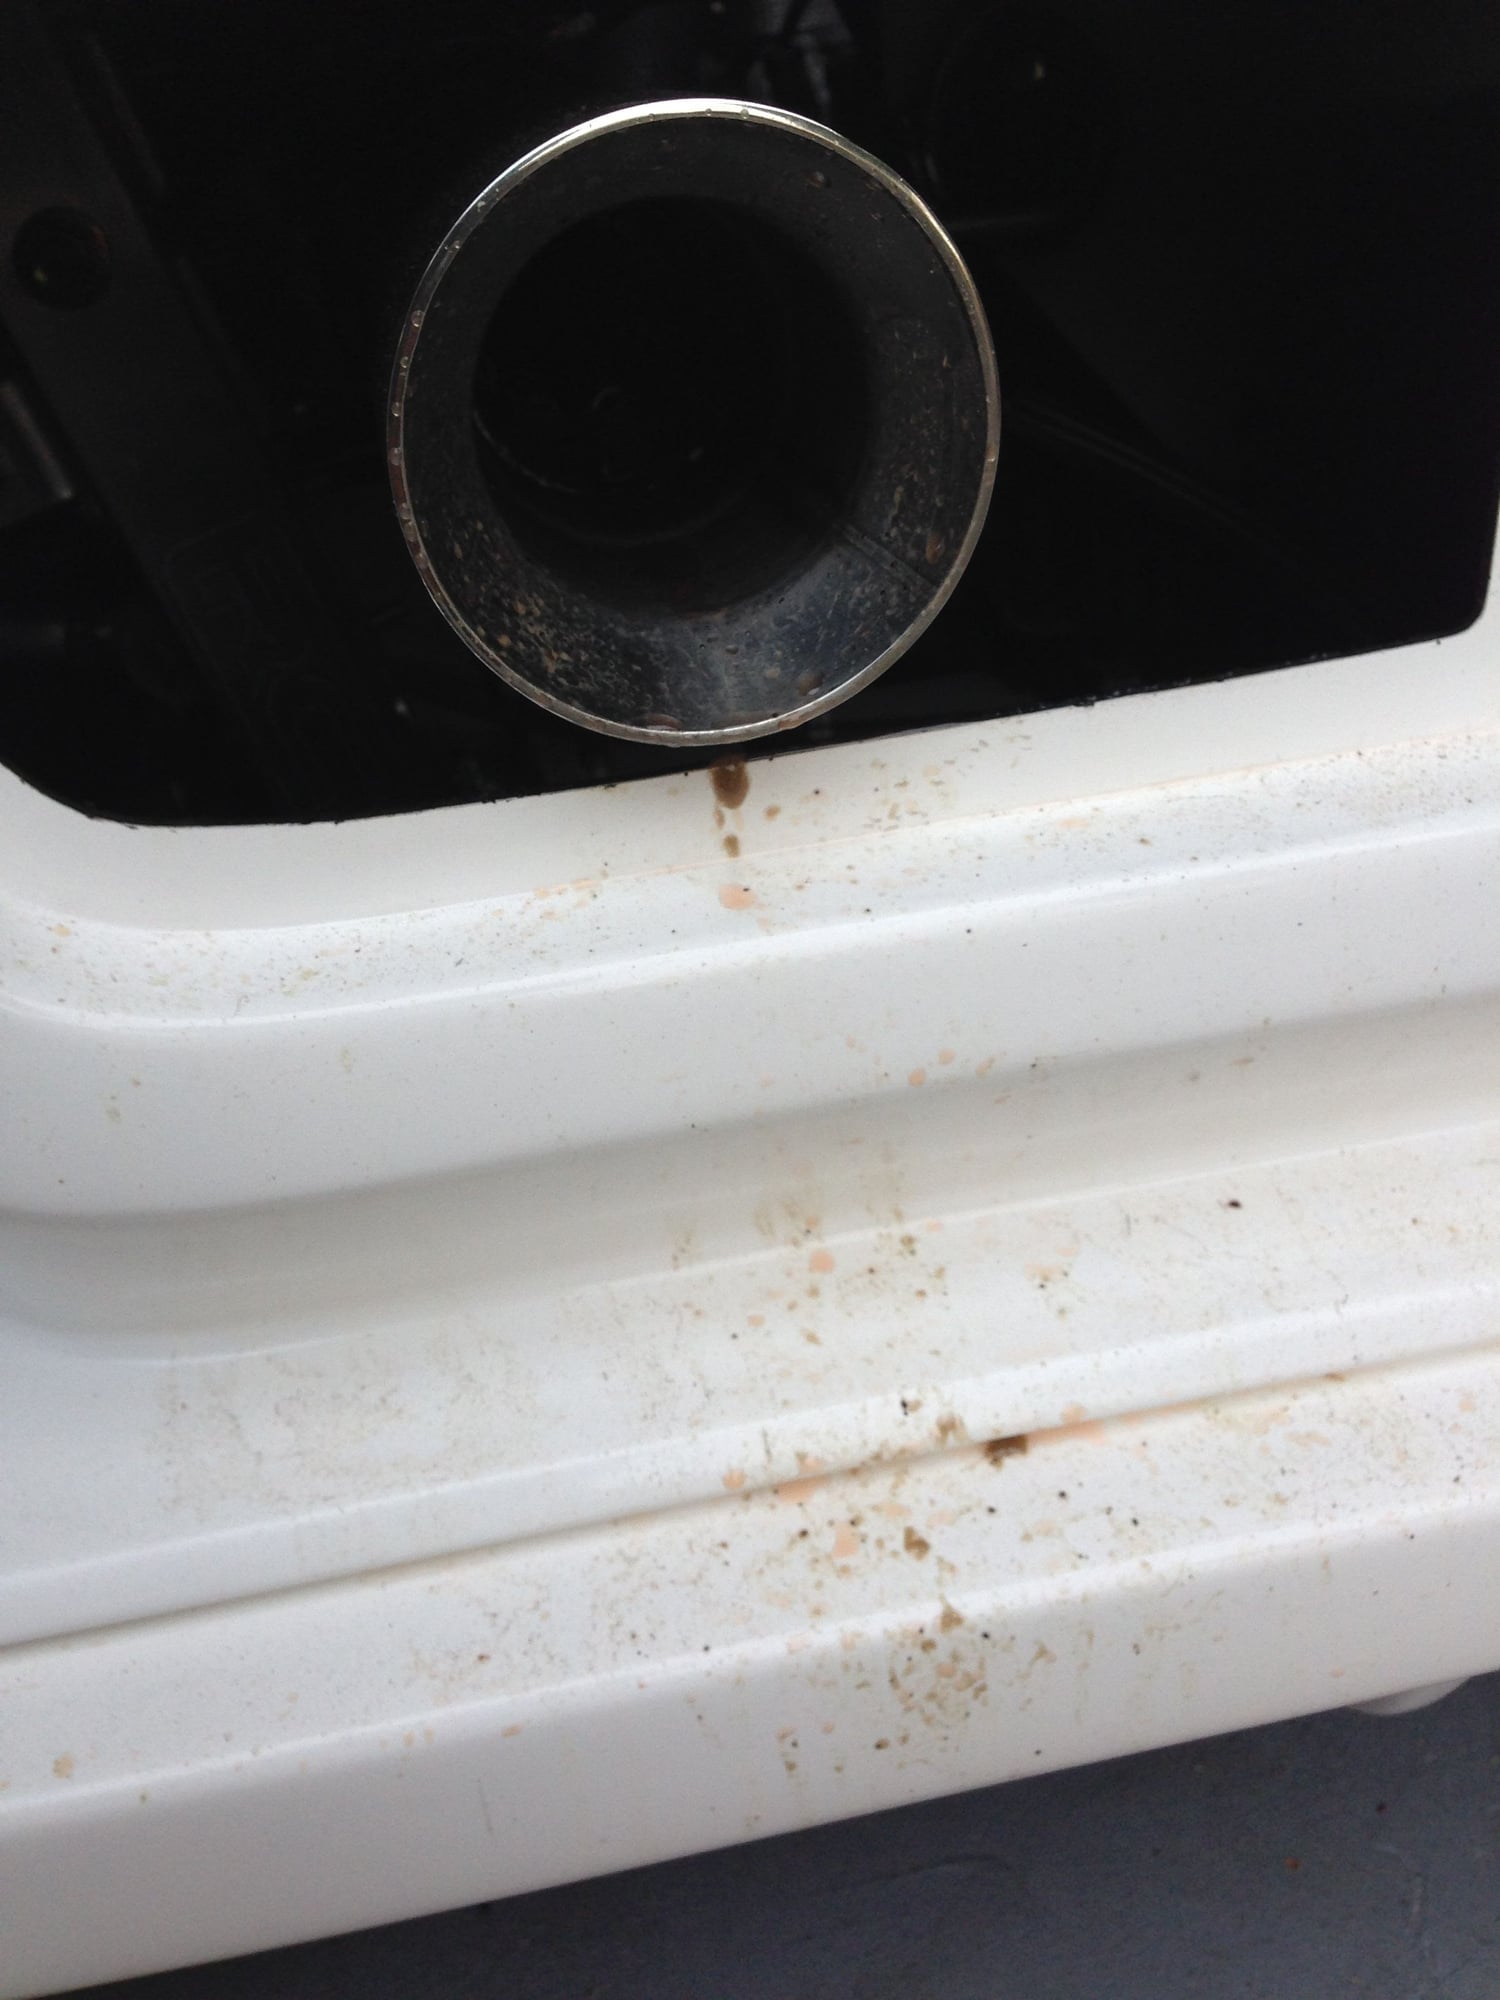
When I finally started it this weekend, my worst fears were confirmed and the moisture in cylinder 3 in indeed a coolant leak. It's spat a good ways out the back. Here are the remnants of that:
So it's time for a rebuild, at least down to the heads. I'm hoping to use this thread to get insight from the smart folks on this forum, figure out how far to tear down as I go and also to hopefully help others in the future. Here's where I stand thus far.
Research
1) Read Serge's 4-liter thread
2) Downloaded PET 7.2
3) I already had the workshop manuals
Tools
1) There's and engine stand yoke that supposedly fits all air cooled Porsche and VW engines for $89 new on eBay. Case is theoretically off an air cooled...
2) The two camshaft tools are around $320 together. They're tool number 9653 and 9653/1
3) I likely won't time the cams myself since the Stomski Racing tool is $800 and I'd rather have someone experienced do it. Hopefully I can find someone in the Bay Area that's willing to come over.
4) There'll be other tools if I need to pull the heads themselves.
Parts
1) Seals, gaskets, etc. as needed in teardown
2) RS pulley to match LWFW. RMS already done.
3) Welded bungs on water pump housing done already as well
What other preventative parts should I replace while I can? Any and all recommendations on what to do / not do are highly recommended.
I'll end with a few more pics of the start of the teardown.
Best,
Tim
Rear clam comes off to be stored out back
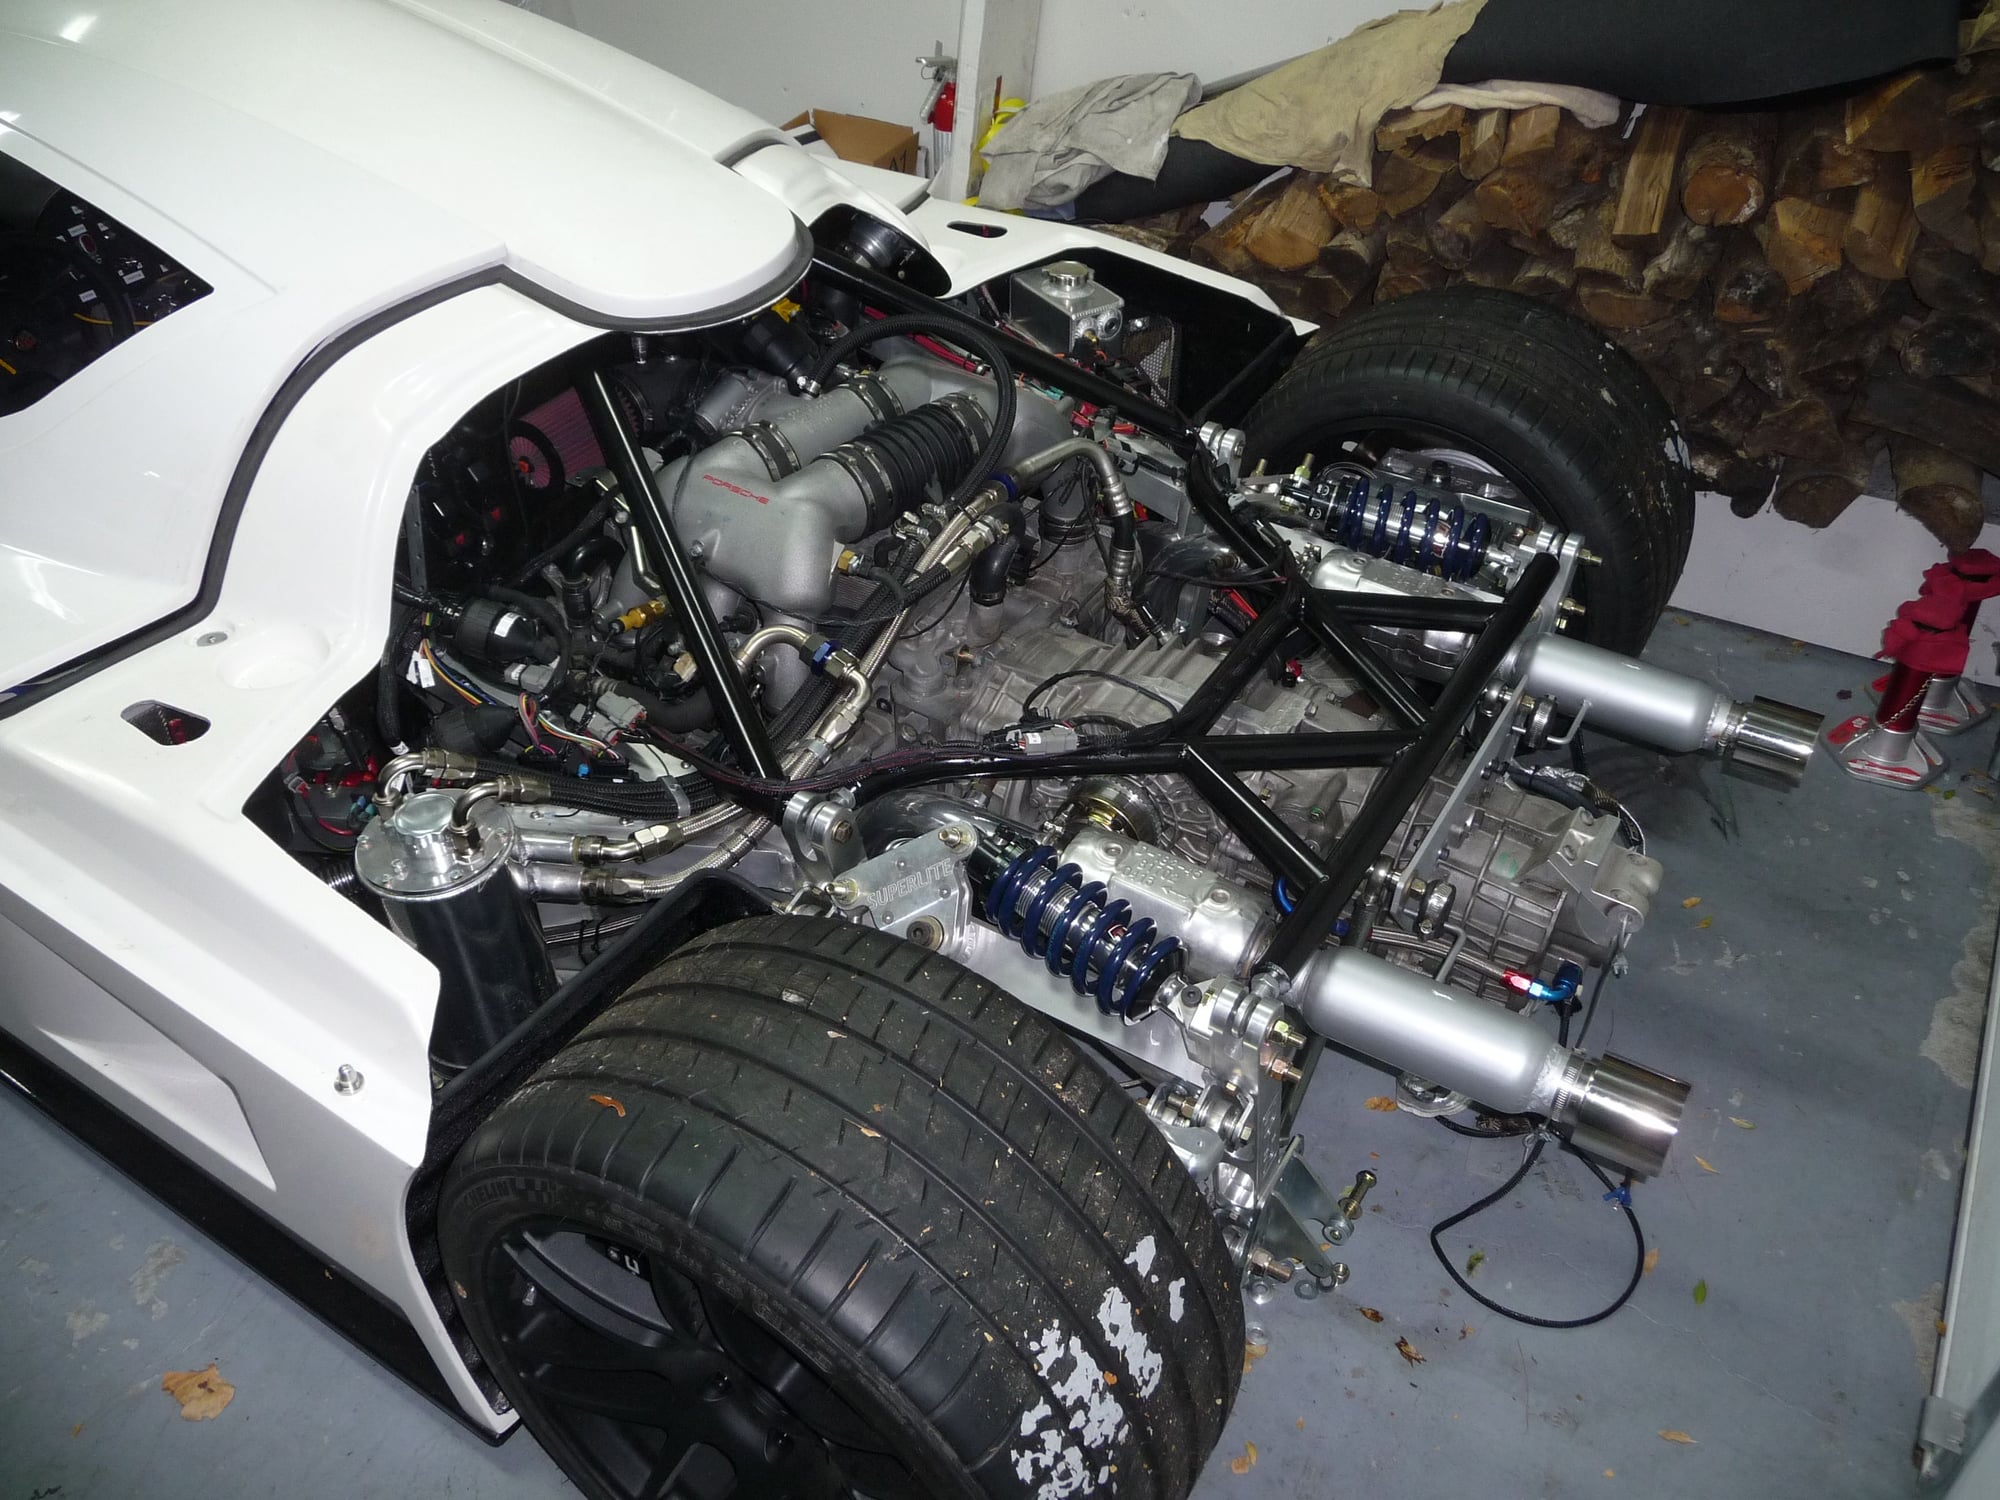
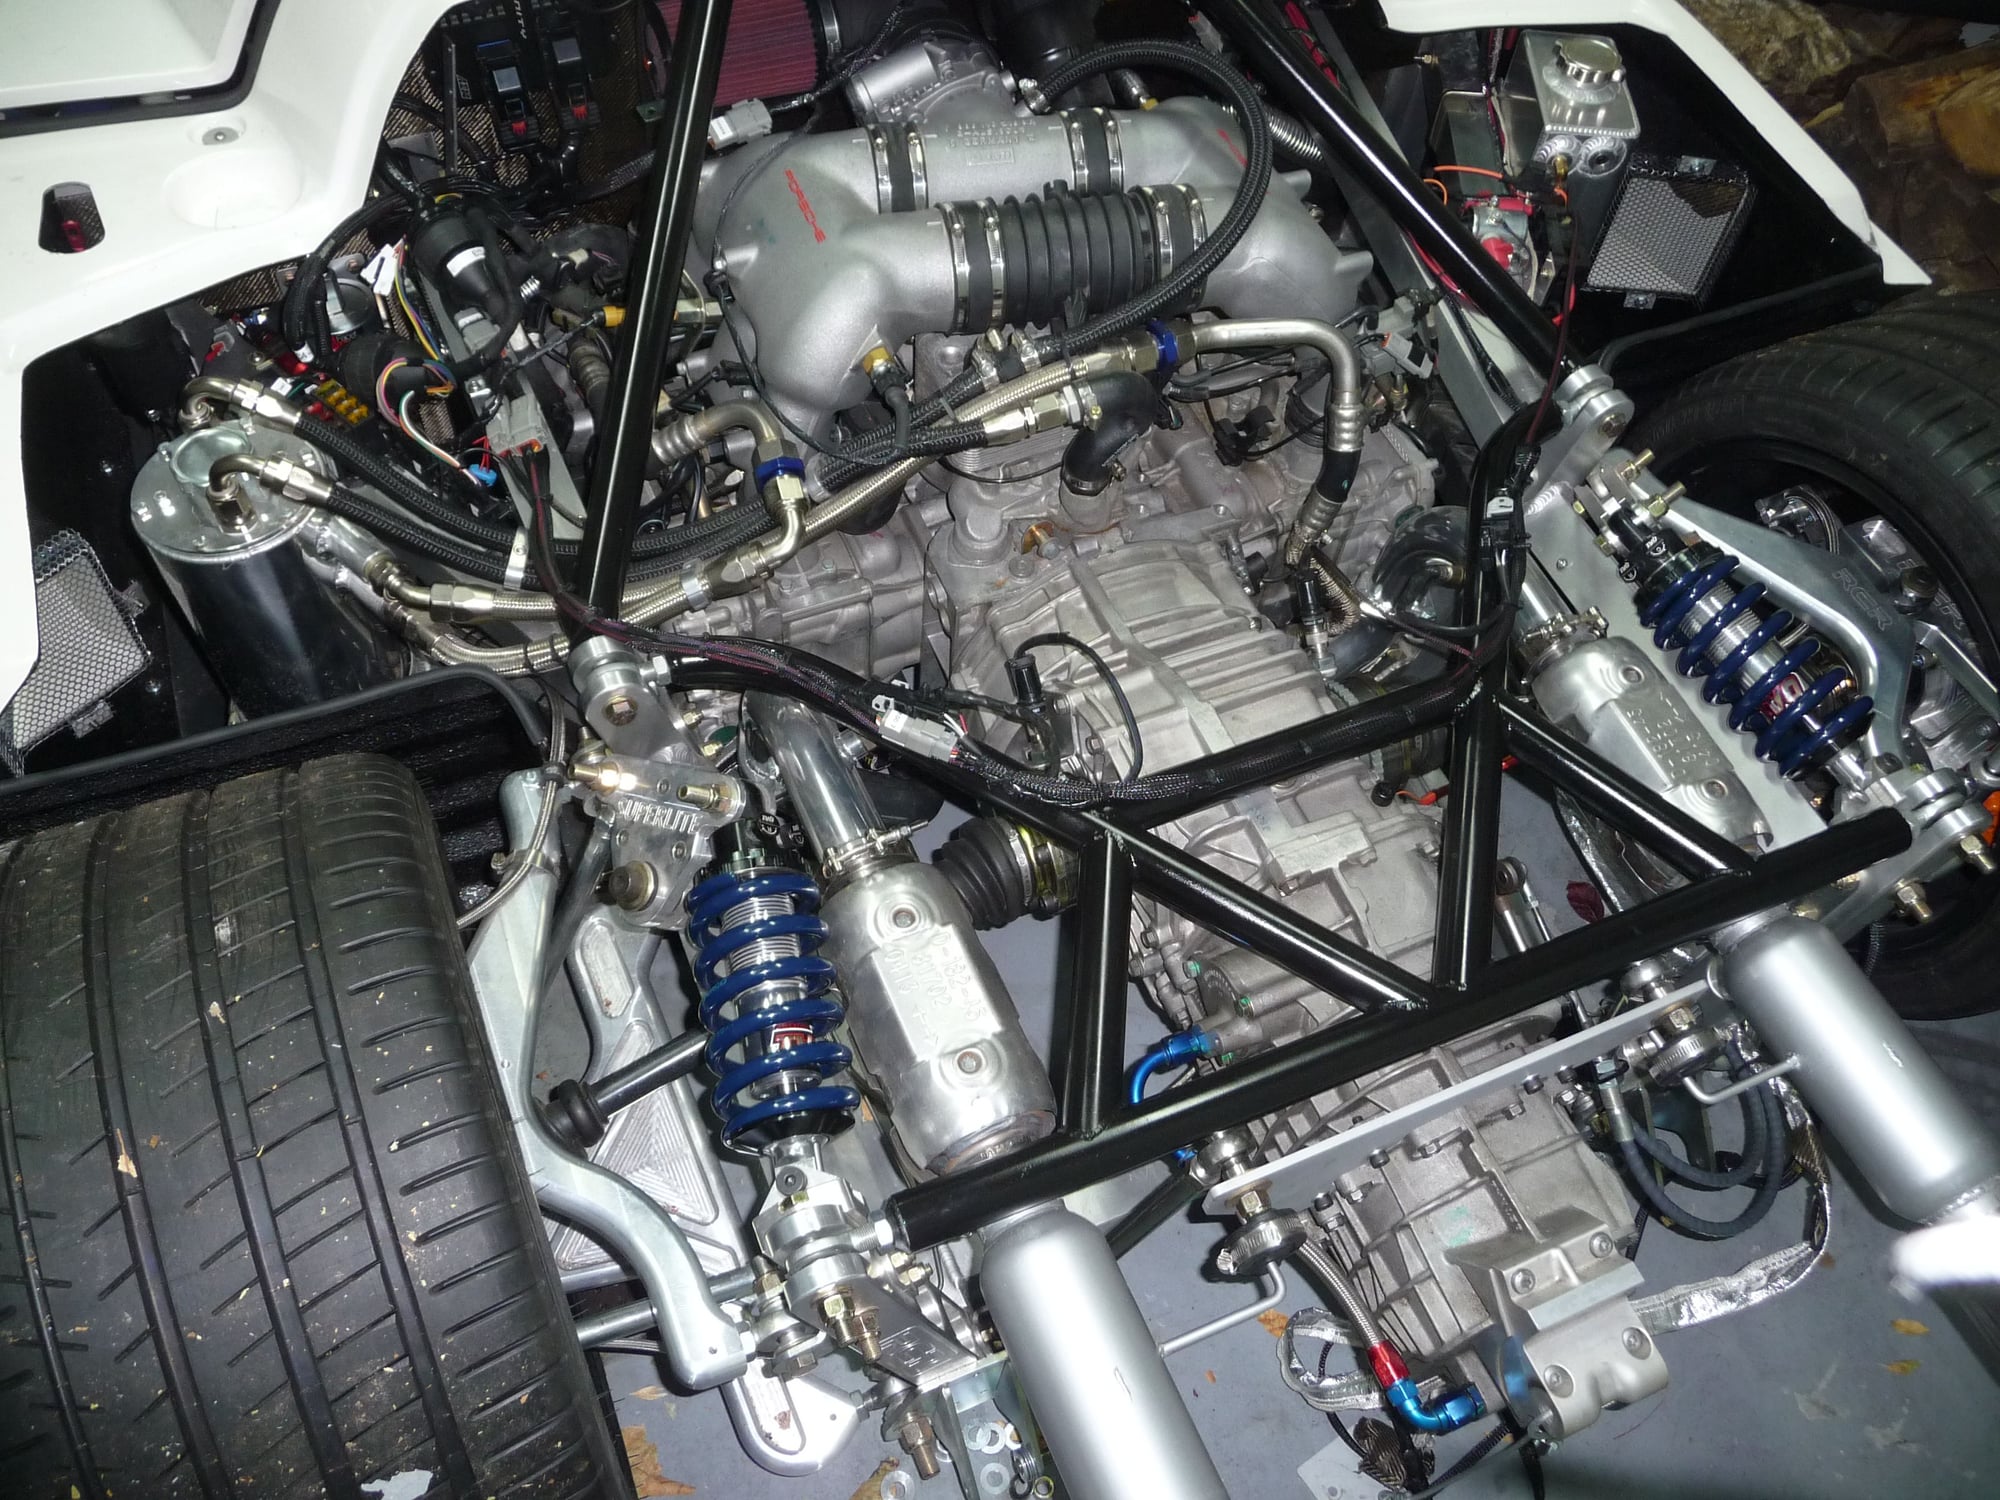
The engine bay. External oil tank on the left. Stock one doesn't fit in chassis.
More engine bay. Notice inverted transmission & pushrod suspension.
Wheels off. Take up too much space. I need every square inch I can get.
Wow Tim I really love what you have created here ,,,just awesome,,,I must confess I have thought about building something similar to this myself ,but do not have the skills or the time to pull it off ......Fantastic work ,you are a very skilled individual and I look forward to seeing the progress of your build ,,,,Sorry I can not help with your cylinder head issue but I am sure some one on this site will point you in the right direction.... best of luck
Oh And would love to see more pic,s of your work this car is mind blowing ,,,LMP street racer .....outstanding
Have you checked in with folks over at RennTech? I've not done anything as complicated as your project, but have found good local expertise (and tools) there.
Most people who know how to do this only want to sell their knowledge in the form of an engine rebuild.
You might contact Jerry Woods:
Jerry Woods Enterprise
491 E McGlincy Ln, Campbell, CA 95008
(408) 369-9607
and see if he would be willing to offer any assistance.
If Jerry Woods can't/won't maybe he can refer you to someone who can?
There is of course Jake Raby. Based on posts by him I do not believe he'll want to share his rebuilding knowledge with you -- understandably so as it was learned the hard way -- but I'm not qualified to speak for him, obviously, so give him a call. All he can do is say "no".
Or instead of asking him how ask him about his engine rebuilding classes. Maybe you could take one and become expert enough to do what you need to do?
It's relatively easy if you're just inverting. You essentially just need to plumb a new oil drain and filler on opposite sides of the case. Since the external oil cooler that runs of engine coolant is thought to be relatively useless, it was taken off and there's just an AN line from return to supply (see the pics). If oil temps become an issues, I can always add a Satreb later one. That's really it, especially if you're mating it to an adapter plate to mate to an LS engine, which many folks do.
On thing that did become an issue is that the horizontal main bolt spacing is not the same on these engines between the top an bottom bolt pairs. The front part of the transmission case therefore had to be redrilled. Found that one out the hard way...
Speak to Alex at Sharkwerks. I was at there shop two weeks ago.
Yea, I spoke to Dan yesterday. Alex wasn't around, but I hopefully can get some guidance from those guys as well. I just don't want to be that guy that's always asking questions, but isn't paying to get any work done... not my style.
Really cool built! We have a green one here that we've been doing a bunch of additional fabrication work to improve the basic kit, owner opted for an LS9 powerplant but after seeing this wish he'd have gone with the Gt3 Powerplant!
Since the external oil cooler that runs of engine coolant is thought to be relatively useless, it was taken off and there's just an AN line from return to supply (see the pics).
I tend to think this heat exchanger for the tranny that connects to engine coolant is probably there to heat the gearbox oil when the car is just warming up (improving cold shift quality) as much as it is there to provide cooling (210F isn't that cold). I think most race cars use cold air-cooled oil coolers/radiators instead.
Really cool built! We have a green one here that we've been doing a bunch of additional fabrication work to improve the basic kit, owner opted for an LS9 powerplant but after seeing this wish he'd have gone with the Gt3 Powerplant!
Thanks! Great to hear that you're familiar with the car and I'm curious what improvements you're making to it. LS9 is TON of power. Any traction control on the car? Part of going with a decent programmable ECU is that I have 4-wheel traction control wired in and it's very configurable.
This GT3 project is very much a labor of love though, as it's a ton of research and fabrication work. Here are some pics of the header construction for example. It's not only the fabrication, but all the research to get the tubing sizes right for proper back pressure, sourcing the flanges, buying the right mandrel bent tubes, etc.
I built a buck to get one cylinder tube connected to the flange and the collector. From here, the buck comes off since it's all aligned now
2/3's of the way through. Notice my awful welds. I got a little cocky and tried to do a final weld, but quickly learned that this is something I suck at and should only tack weld.
Completed header tack welded. I then had it professionally welded and ceramic coated.
 08-05-2014, 04:55 AM


 ,,,,Sorry I can not help with your cylinder head issue but I am sure some one on this site will point you in the right direction....
 best of luck


