
(SOLVED- Fuel pump hose failure) Trouble holding idle and won't rev?
 07-17-2011, 05:00 PM
#31
Nordschleife Master

 07-24-2011, 04:20 PM
#33
Finally got to take a look at my fuel pump... It has been so HOT around here... Still, today was in the 90's and I was sweating like a pig...
First of all, do this an assume all risks on your own. You are dealing with GASOLINE here. Be careful!!
Start with as little fuel as possible. Gasoline kind of burns your hands when they are submerged in it.
Start by removing battery. Then remove battery holding plate (4 nuts). Also remove two bolts (against bulk head, towards front of car) holding front part of L bracket in front of battery, this will facilitate the removal of tank lid. I was able to fold it up as it is held in place by some "goo".
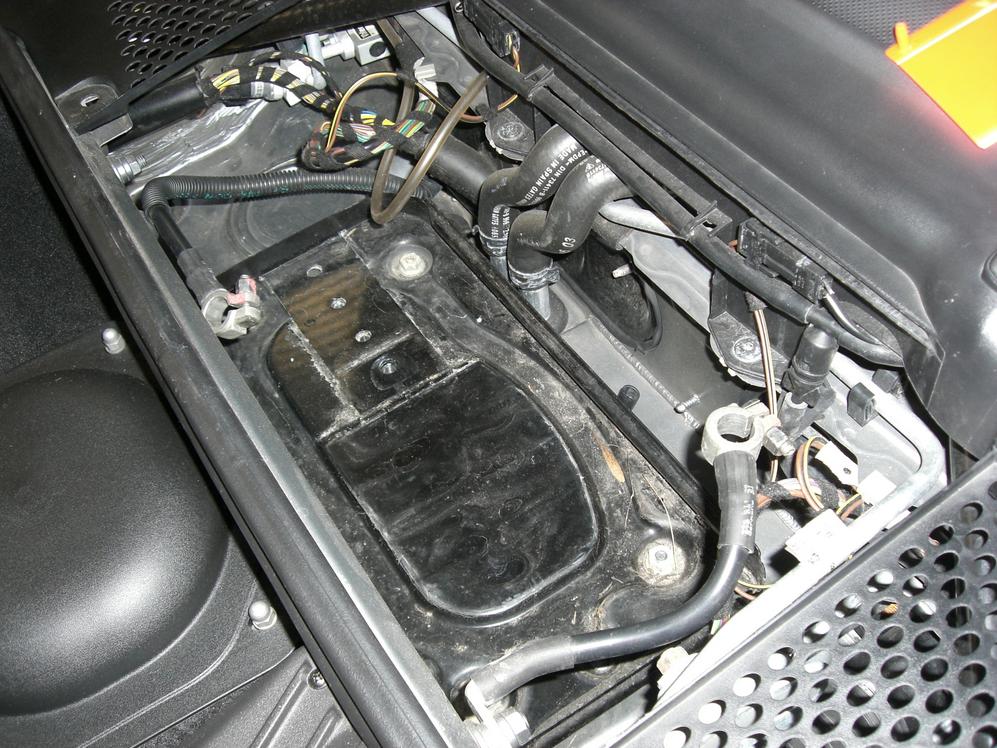
This would be a good time to inspect, clean water drainage holes near battery.
Disconnect electrical connector by pinching spring clips and pulling up. Disconnect hoses by pushing on little tab to unlock and pulling. You will need a small screw driver to push one of them since fingers will not fit.
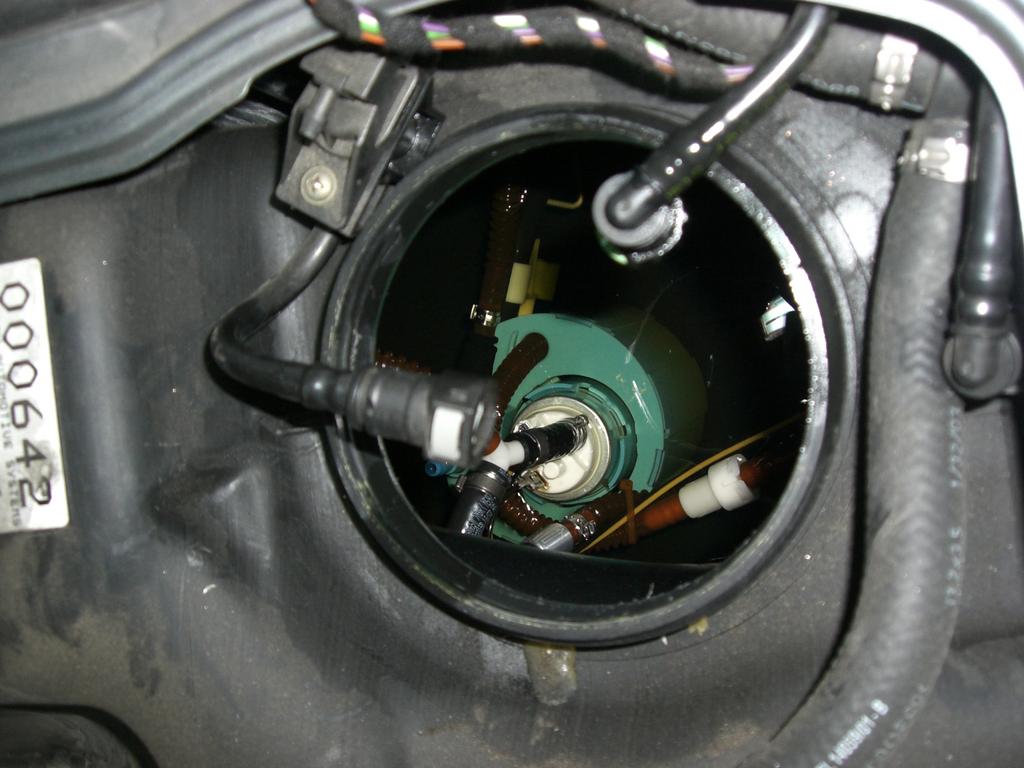
Since I did not have the P-tool, I was able to loosen tank lid ring by using a long brass punch and hammering it against the ring "nibs". Remove ring.
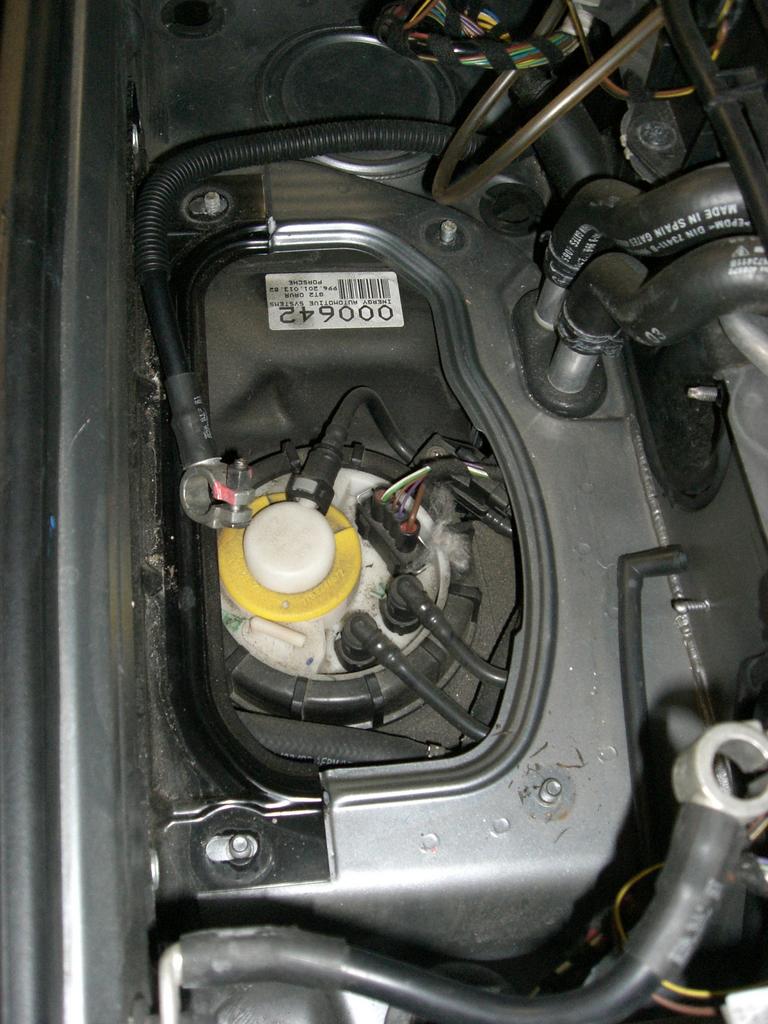
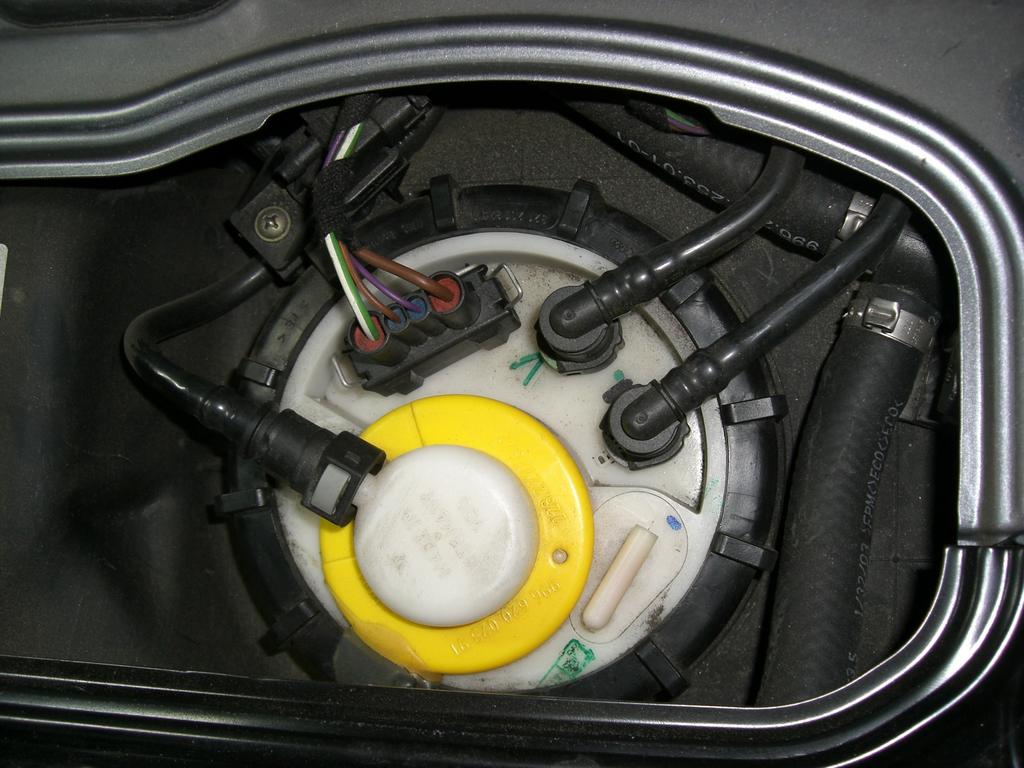
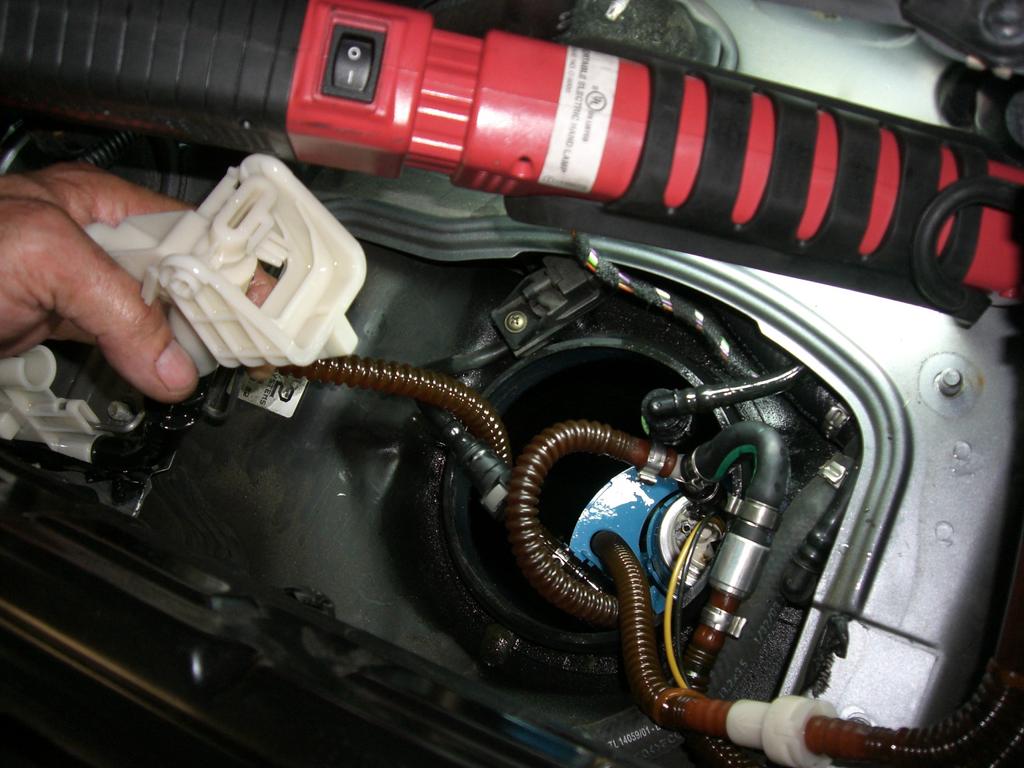
Pull up on the white assembly (top of fuel sender). Once you get some slack, disconnect double hose by simultaneously pushing lock tabs and pulling. Disconnect fuel level electrical connector. Remove fuel sender.
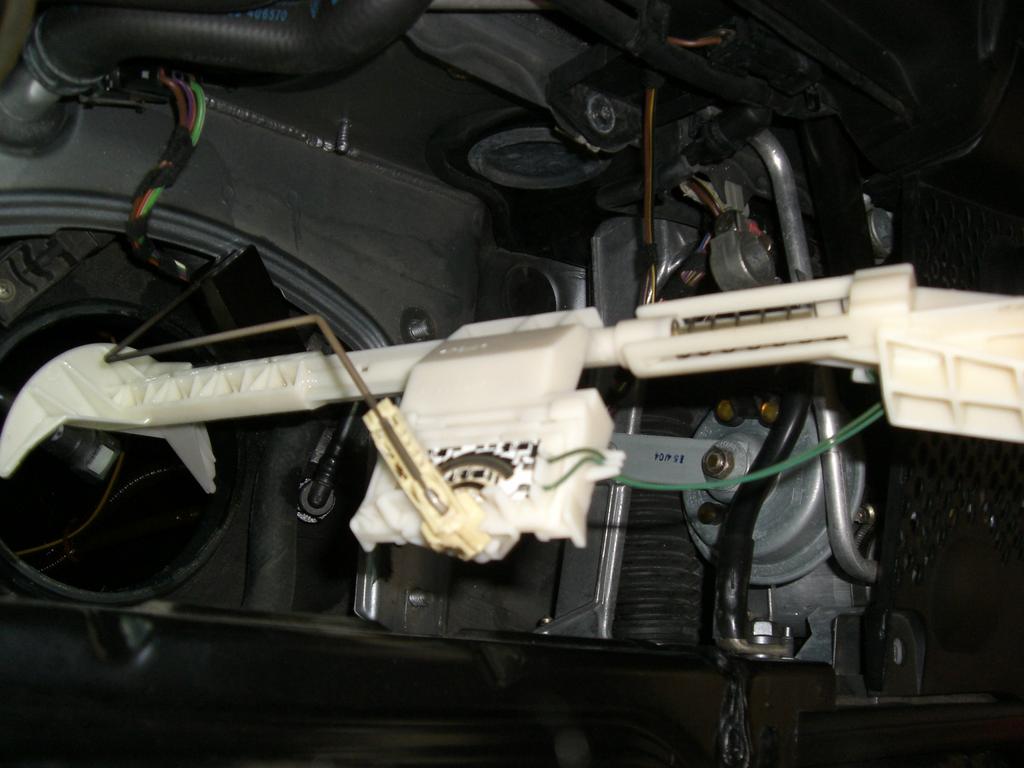
The pump is loosened by rotating CCW about 15 deg. While in the tank, you need to depress a little tab to disengage the pump pick up. Pay attention to how it is located. I spent 20 minutes tinkering with it to make sure that it was in the right position while reassembling it.
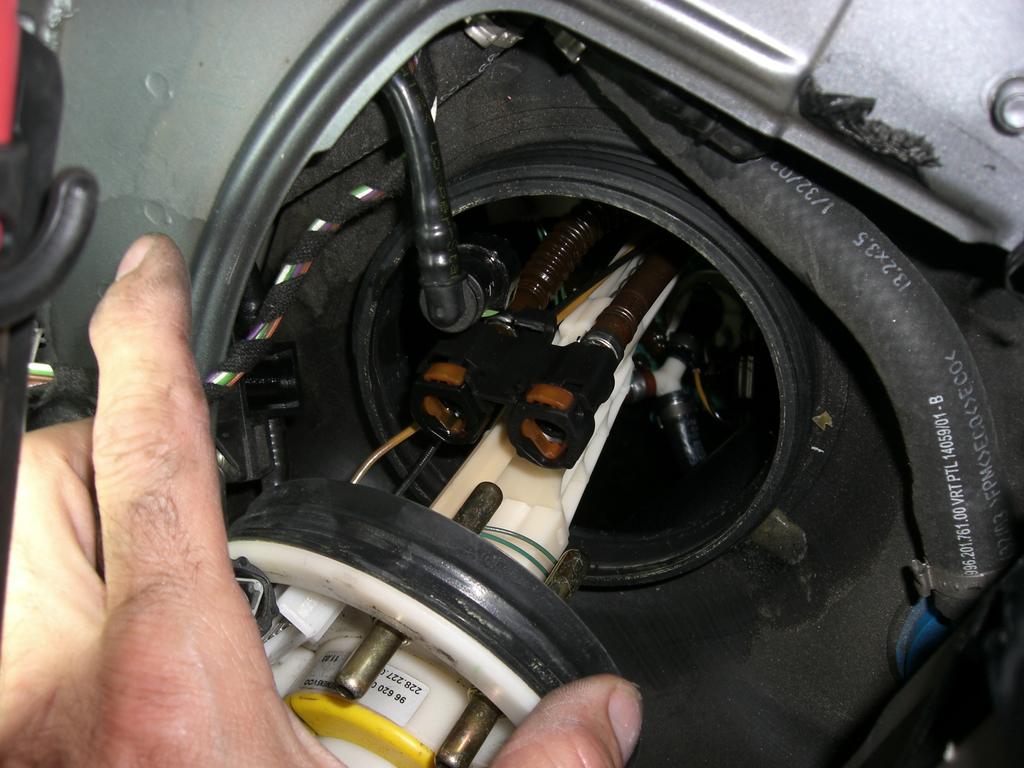
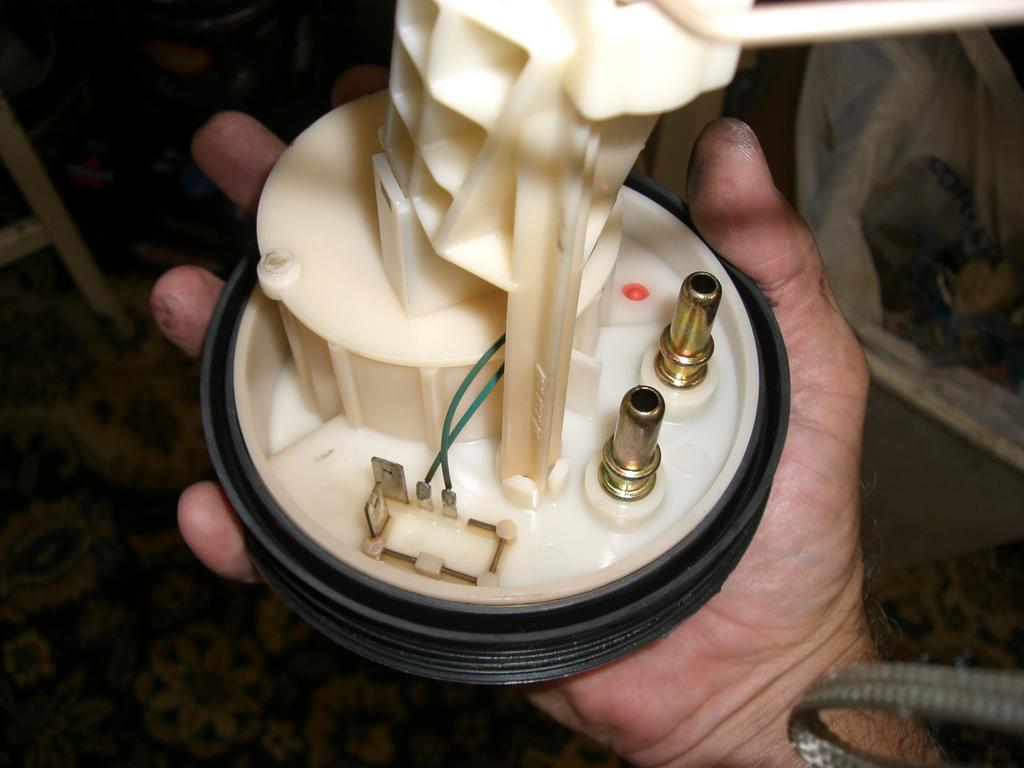
Maneuver the pick up, connector hoses and finally the pump out of the tank. Pump will have gas inside holder. You might want to tilt it inside the tank to remove as much as possible.
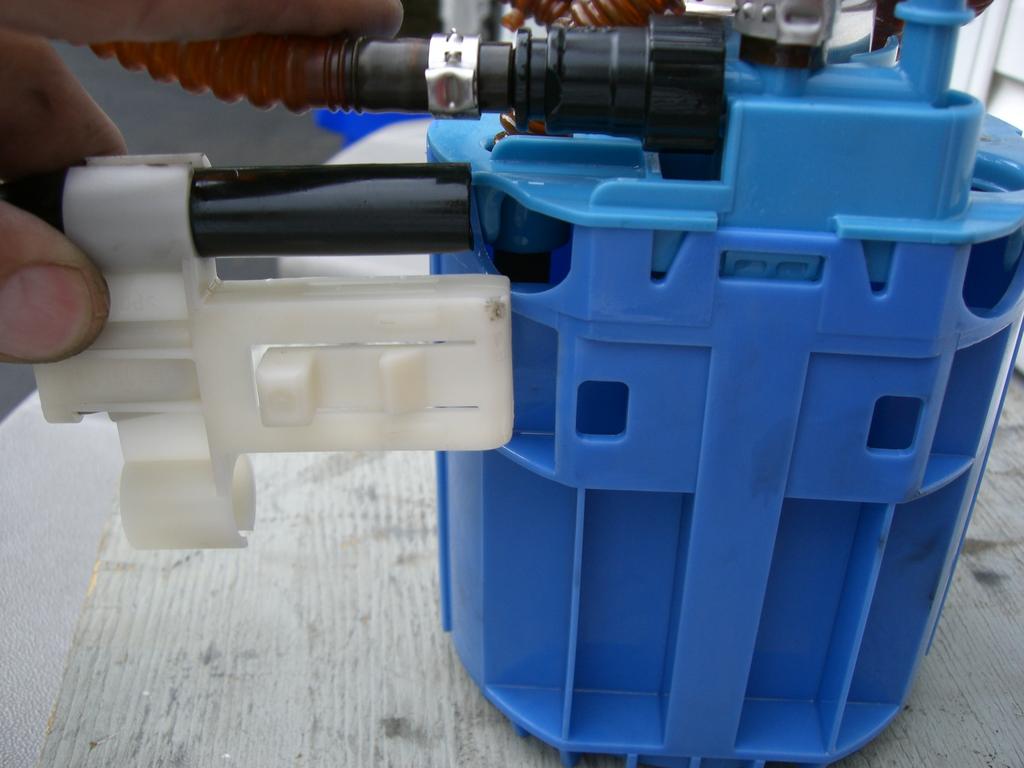
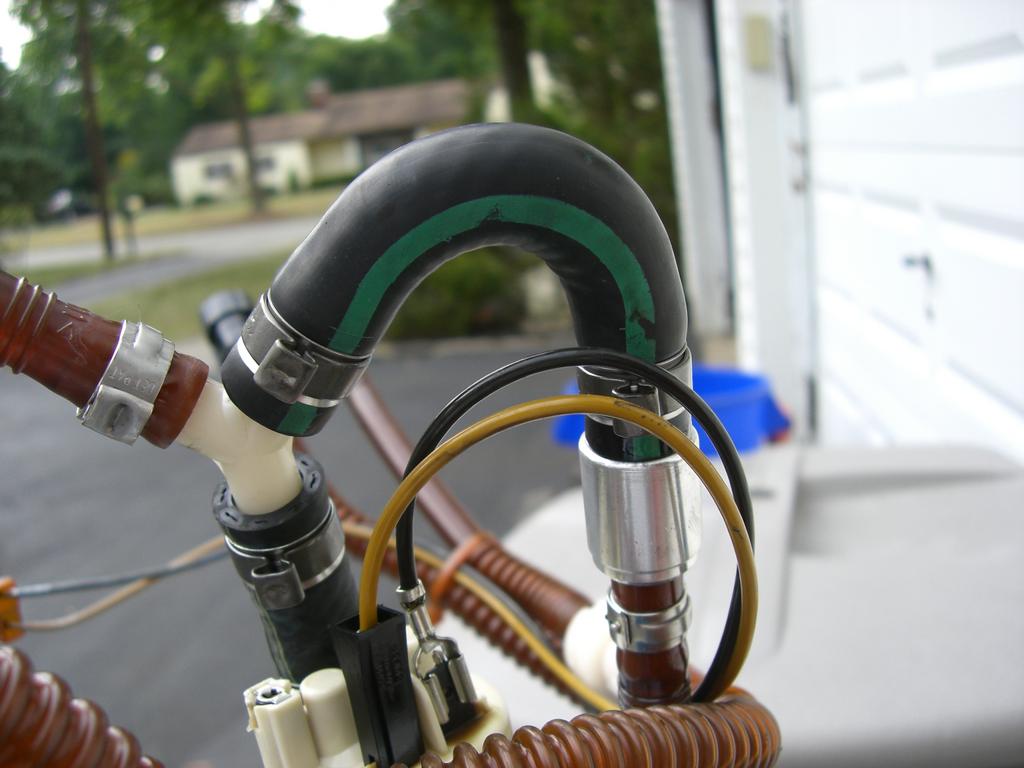
I found that my hose was in good shape after 45K miles and decided not to do anything with it. I put the hose & clamps in the trailer, if not for me, for someone else...
As the say, follow steps backwards to reinstall... I found it easier to leave the pick up loose until I locked the pump in place, then connected the pickup. Keep an eye on the rubber seal when reinstalling fuel sender/lid. I used a thin, narrow spatula to make sure that the seal was correctly in place. I was able to tighten the ring using my two hands.
Once completed, I loosely put battery in place and started engine and checked fuel gauge. Let car run for a minute or so. Remove battery and check for leaks. Replace battery holder and secure and connect battery.
My hose had a green stripe and my car was never track until we bought it last year. So do not know if hose failures are related to track miles or build date. Took about 1 hr to do taking pictures. Would have been done sooner if it wasn't by being unsure on how pump was located in the tank. Pay attention.
Good luck! Lou
First of all, do this an assume all risks on your own. You are dealing with GASOLINE here. Be careful!!
Start with as little fuel as possible. Gasoline kind of burns your hands when they are submerged in it.
Start by removing battery. Then remove battery holding plate (4 nuts). Also remove two bolts (against bulk head, towards front of car) holding front part of L bracket in front of battery, this will facilitate the removal of tank lid. I was able to fold it up as it is held in place by some "goo".
This would be a good time to inspect, clean water drainage holes near battery.
Disconnect electrical connector by pinching spring clips and pulling up. Disconnect hoses by pushing on little tab to unlock and pulling. You will need a small screw driver to push one of them since fingers will not fit.
Since I did not have the P-tool, I was able to loosen tank lid ring by using a long brass punch and hammering it against the ring "nibs". Remove ring.
Pull up on the white assembly (top of fuel sender). Once you get some slack, disconnect double hose by simultaneously pushing lock tabs and pulling. Disconnect fuel level electrical connector. Remove fuel sender.
The pump is loosened by rotating CCW about 15 deg. While in the tank, you need to depress a little tab to disengage the pump pick up. Pay attention to how it is located. I spent 20 minutes tinkering with it to make sure that it was in the right position while reassembling it.
Maneuver the pick up, connector hoses and finally the pump out of the tank. Pump will have gas inside holder. You might want to tilt it inside the tank to remove as much as possible.
I found that my hose was in good shape after 45K miles and decided not to do anything with it. I put the hose & clamps in the trailer, if not for me, for someone else...
As the say, follow steps backwards to reinstall... I found it easier to leave the pick up loose until I locked the pump in place, then connected the pickup. Keep an eye on the rubber seal when reinstalling fuel sender/lid. I used a thin, narrow spatula to make sure that the seal was correctly in place. I was able to tighten the ring using my two hands.
Once completed, I loosely put battery in place and started engine and checked fuel gauge. Let car run for a minute or so. Remove battery and check for leaks. Replace battery holder and secure and connect battery.
My hose had a green stripe and my car was never track until we bought it last year. So do not know if hose failures are related to track miles or build date. Took about 1 hr to do taking pictures. Would have been done sooner if it wasn't by being unsure on how pump was located in the tank. Pay attention.
Good luck! Lou
07-24-2011, 10:09 PM
#36
Repair kit is just the 1ft Gates submersible hose and 4 spring clamps for a 1/2" hose from ACE hardware...
Decided against screw clamps since I was concerned about them getting loose. Two clamps are better than one since it is a hi pressure hose.
Field repair only takes a 13mm socket, 10mm for battery terminals, small screwdriver to release one hose, diagonal cutters to cut band clamp, pliers to install spring clamp and a wrench (to be used as a drift/punch) & hammer to loosen tank ring. It all should be available on your track tool kit...
Like I said, I was in/out in like an hr... Glad I could be of help...
07-24-2011, 10:22 PM
#37
Rennlist Member
THX for the write up!
07-25-2011, 01:24 PM
#38
Admin
Lifetime Rennlist
Member
Lifetime Rennlist
Member
WM 206619 Removing and installing fuel pump
- Removing
- Installing
Removing
1. Undo battery terminals and battery holder. Lift battery out by holding strap.
2. Undo battery support cover (four hexagon nuts, wrench size 13).
3. Disengage fuel line and disconnect electrical plug connection.
4. Undo union nut with VW special tool 3217.
5. Extract residual fuel.
Information
Observe the safety regulations.
6. Lift fuel tank sending unit and disconnect electrical plug connection and fuel pipes.
7. Put on fuel-proof glove, hold the fuel pump fastened to tank floor, turn it to left (approx. 15�, bayonet lock) and remove fuel pump.
Installing
1. Position fuel pump; the edge of the fuel-pump housing faces the fuel level sensor installation-position markings.
2. Place fuel pump in this position on tank floor bayonet fixture and turn fuel pump to the right as far as the stop. Then check proper seating of fuel pump by pulling it up.
3. Insert fuel tank sending unit and turn until the marking on the sending unit matches the marking on the fuel tank.
4. Tighten union nut with special tool 3217. Tightening torque with new union nut and new sealing ring 70 Nm (52 ftlb.).
5. Attach fuel lines and electrical plug connection. The fuel lines must audibly engage.
Correct engagement must be checked with a gentle pull.
The colour-coded plug (green) must be fitted to the connection identified with "V".
 02-01-2014, 05:15 PM
#40
Rennlist Member
Big thank you to Lou for this. Managed to swap out the old style pump for new style (996 620 057 92) today. Not as intimidating as you would think and took me about 2 hours, that was cleaning out drainage holes and generally double checking everything.
Couple of things:
Maybe I did it wrong but when I pulled the hose with 'V' and green connector on top of the white sending unit a lot of fuel came out. Guess the system is still pressurised so maybe do like the filter change and pull the fuel pump fuse with engine running to reduce this. Ended up putting a plug in the pipe just in case.
In the workshop manual (Carrera 4) it has an extra hose and clip on top of the pump (step 5a and hose connector 1). Is this for the turbo/GT2 extra pick up? There is a free inlet on top of the pump on our cars, see photo and arrow. Can an extra pick up just be fitted to the pump with no additional mods, as shown in workshop manual? Just a thought...
Oh, and edit to add, no split on old style rubber hose (2004 @ 44600miles)
02-25-2016, 06:35 PM
#41
The Parts Whisperer
Rennlist
Site Sponsor
Rennlist
Site Sponsor
In the workshop manual (Carrera 4) it has an extra hose and clip on top of the pump (step 5a and hose connector 1). Is this for the turbo/GT2 extra pick up? There is a free inlet on top of the pump on our cars, see photo and arrow. Can an extra pick up just be fitted to the pump with no additional mods, as shown in workshop manual? Just a thought...
)
Anyone have a suggestion?
