When you click on links to various merchants on this site and make a purchase, this can result in this site earning a commission. Affiliate programs and affiliations include, but are not limited to, the eBay Partner Network.
What I did with my winter vacation or how I learned to love the Metzger engine
The tale starts sometime last summer (2017), my car (2004 GT3) developed a vibration, and shifting became not the easy affair I had grown to enjoy. This problem grew worse as the summer progressed. I figured it was a clutch problem, but I still stopped my season early last year.
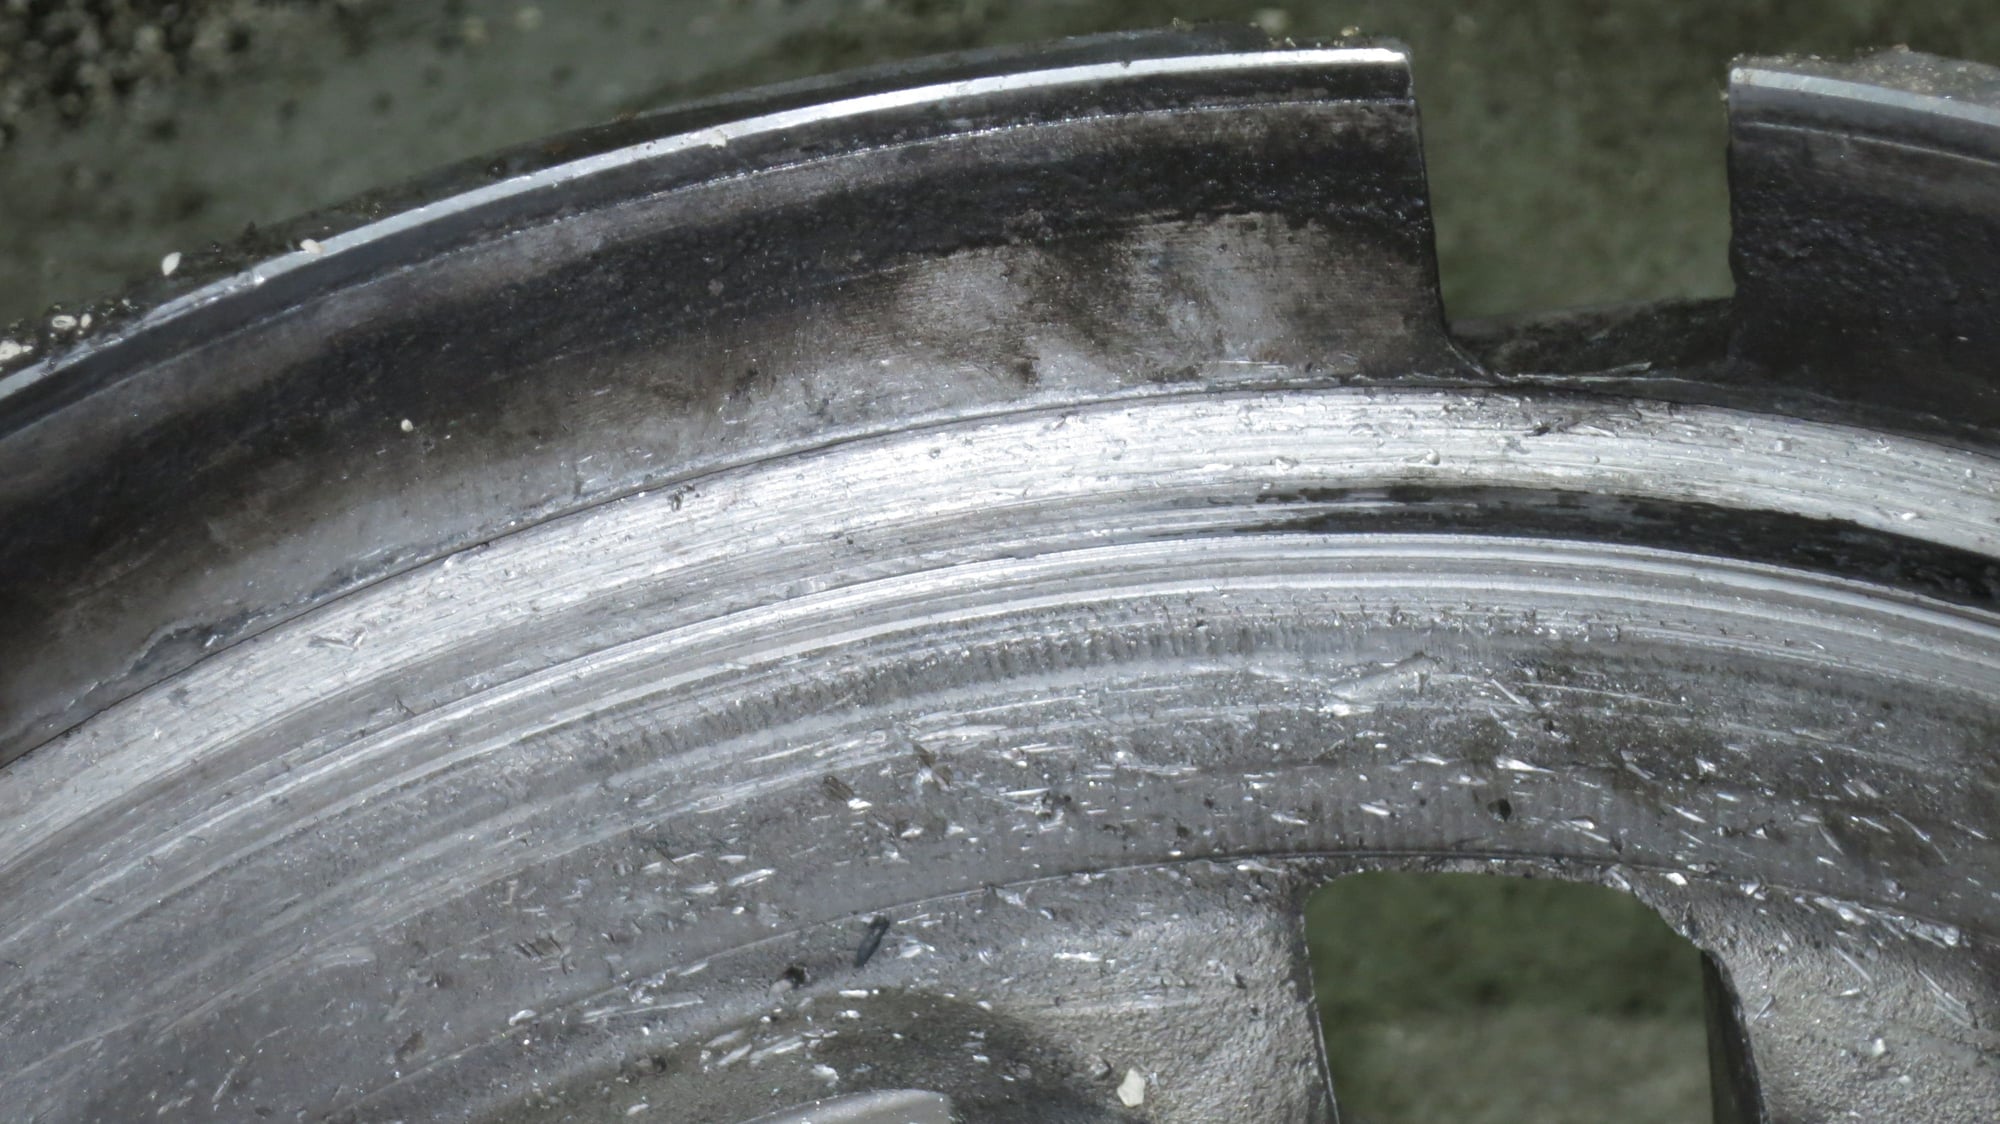
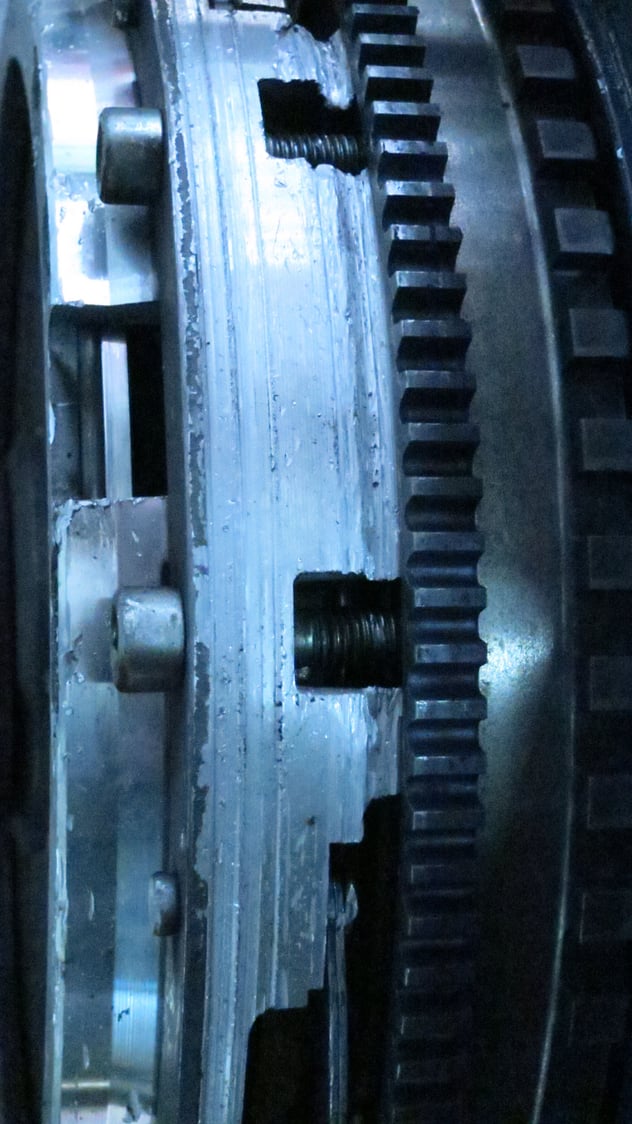
I pulled the motor / tranny and found this:
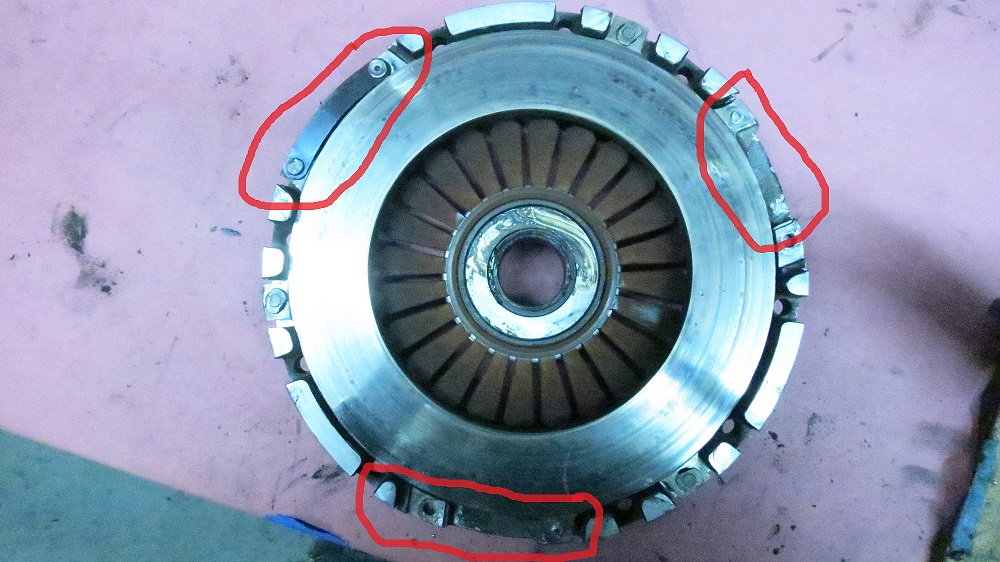
2 rivets had failed - one on each of two of the springs, leaving just one spring working. This turns out to be a problem with some of the Porsche pressure plates that everyone but me was aware of
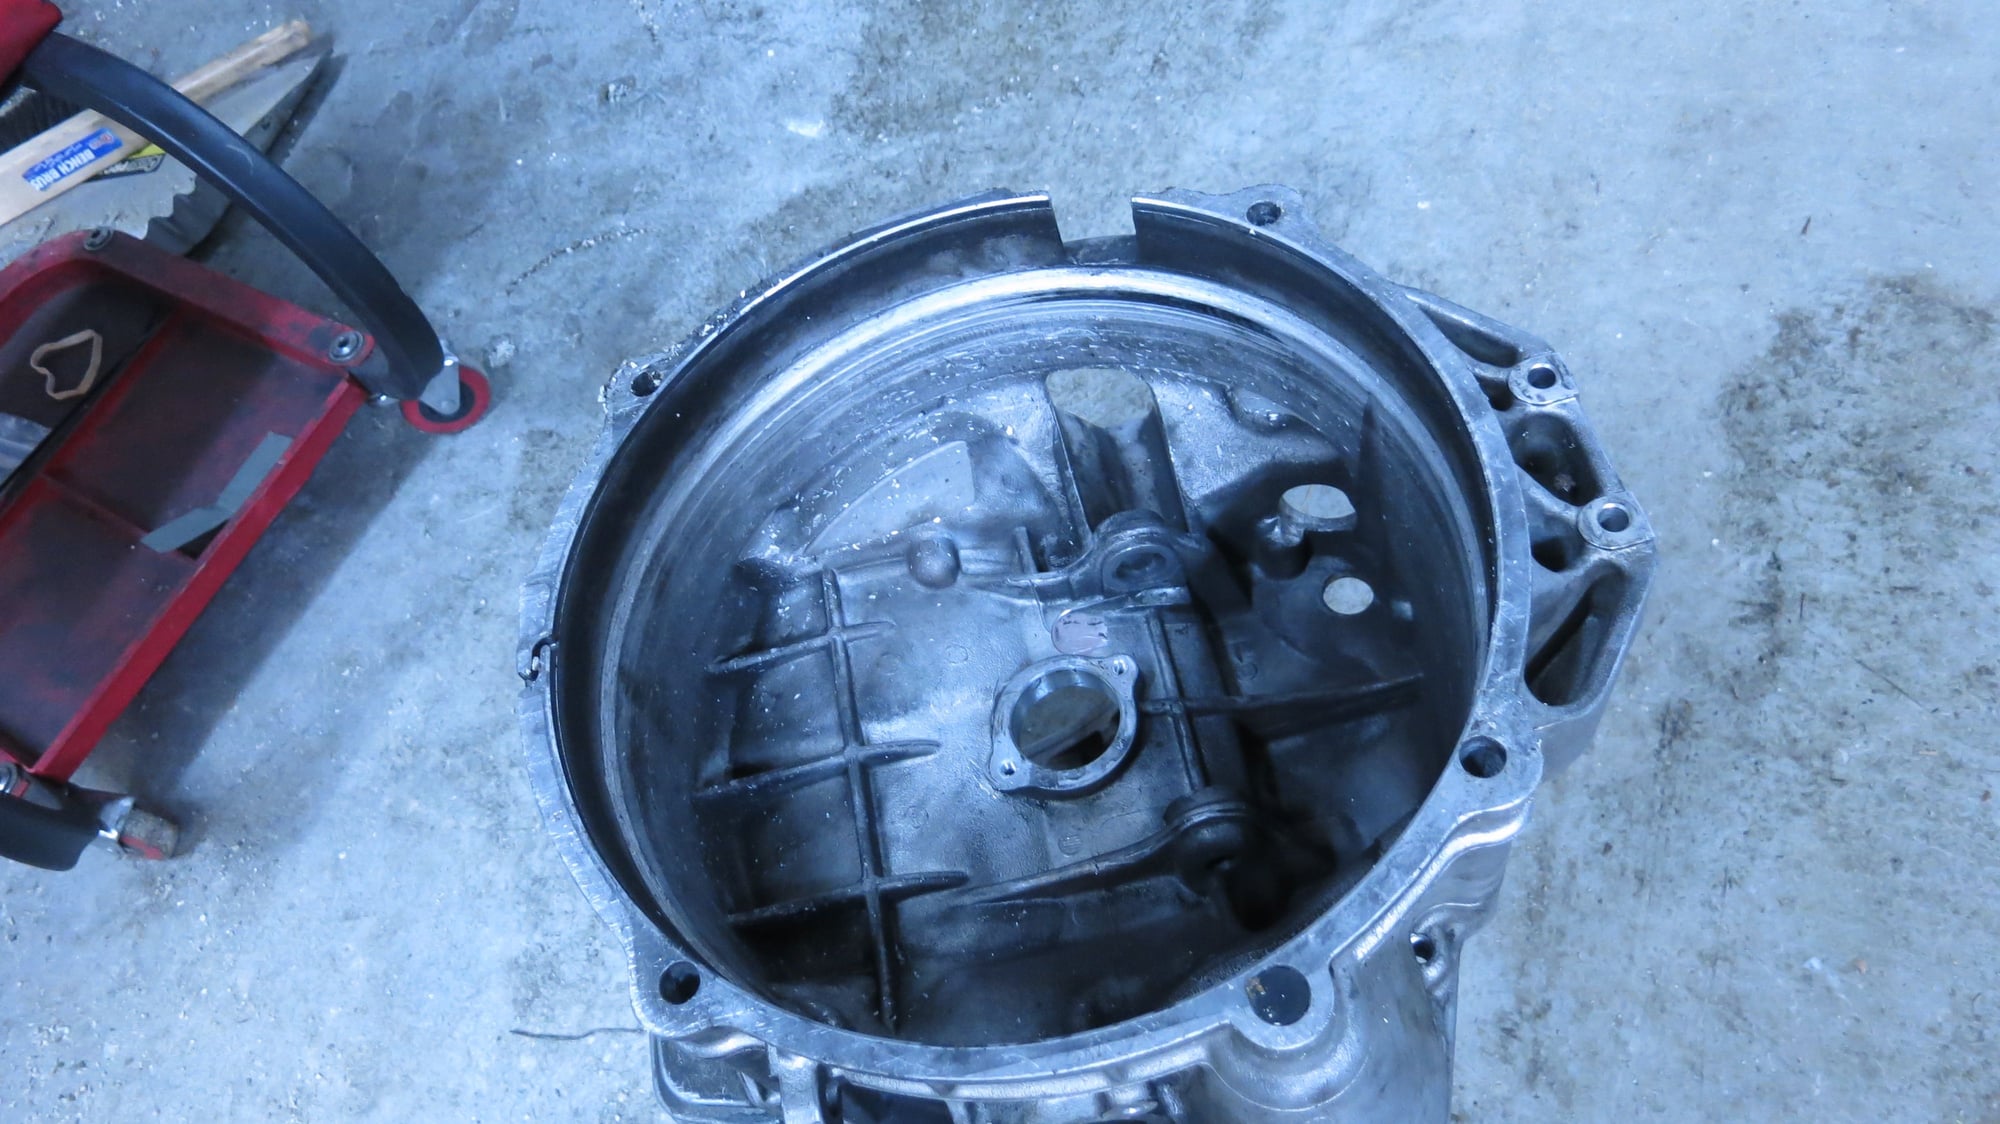
This by itself is not a 'big deal' except for the nasty little physics thing (centrifugal acceleration) that caused those spring steel springs to want to pivot outward where they found an appropriate resting place: the bell housing!
Turns out that these pictures don't do the mess justice. The cut was essentially through the bell housing - less than 1/3 of the material was left.
So, after some grumbling, I pulled the tranny apart (again), since to replace the bell housing, you start by removing everything before it! (NOTE: I wrote up my 1st transmission rebuild here: https://rennlist.com/forums/996-gt2-...nsmission.html)
While pulling things apart I decided that this was the opportunity to re-gear things as I rarely saw top speed .
I used the list of Porsche Motorsports Cup car transmission gears to pick a new 4th, 5th, and 6th gears. (There are probably 5-10 different gear sets for each of 3,4,5, and 6th gears - I picked ones that I could get used)
This would mean that I was running a TT/GT2 mainshaft (1st and second gear), the factory GT3 3rd gear, and a new 4th, 5th, and 6th gear set. This tightened things up considerably. Although this would have been a good time to change out the R&P, it was not in the budget - little did I know how that would come back and haunt me!
I also had to replace the bell housing, one synchro, and the 4 point bearing assemble (named because there are 4 points (bearings) being supported - 2 on the main shaft and 2 on the pinion shaft. This damage was caused by the loads put on the input shaft from the vibrations
Interesting note: When you buy a new bellhousing, it comes with absolutely nothing. There are studs, small bearing assemblies, plugs that need to be moved over or replaced!
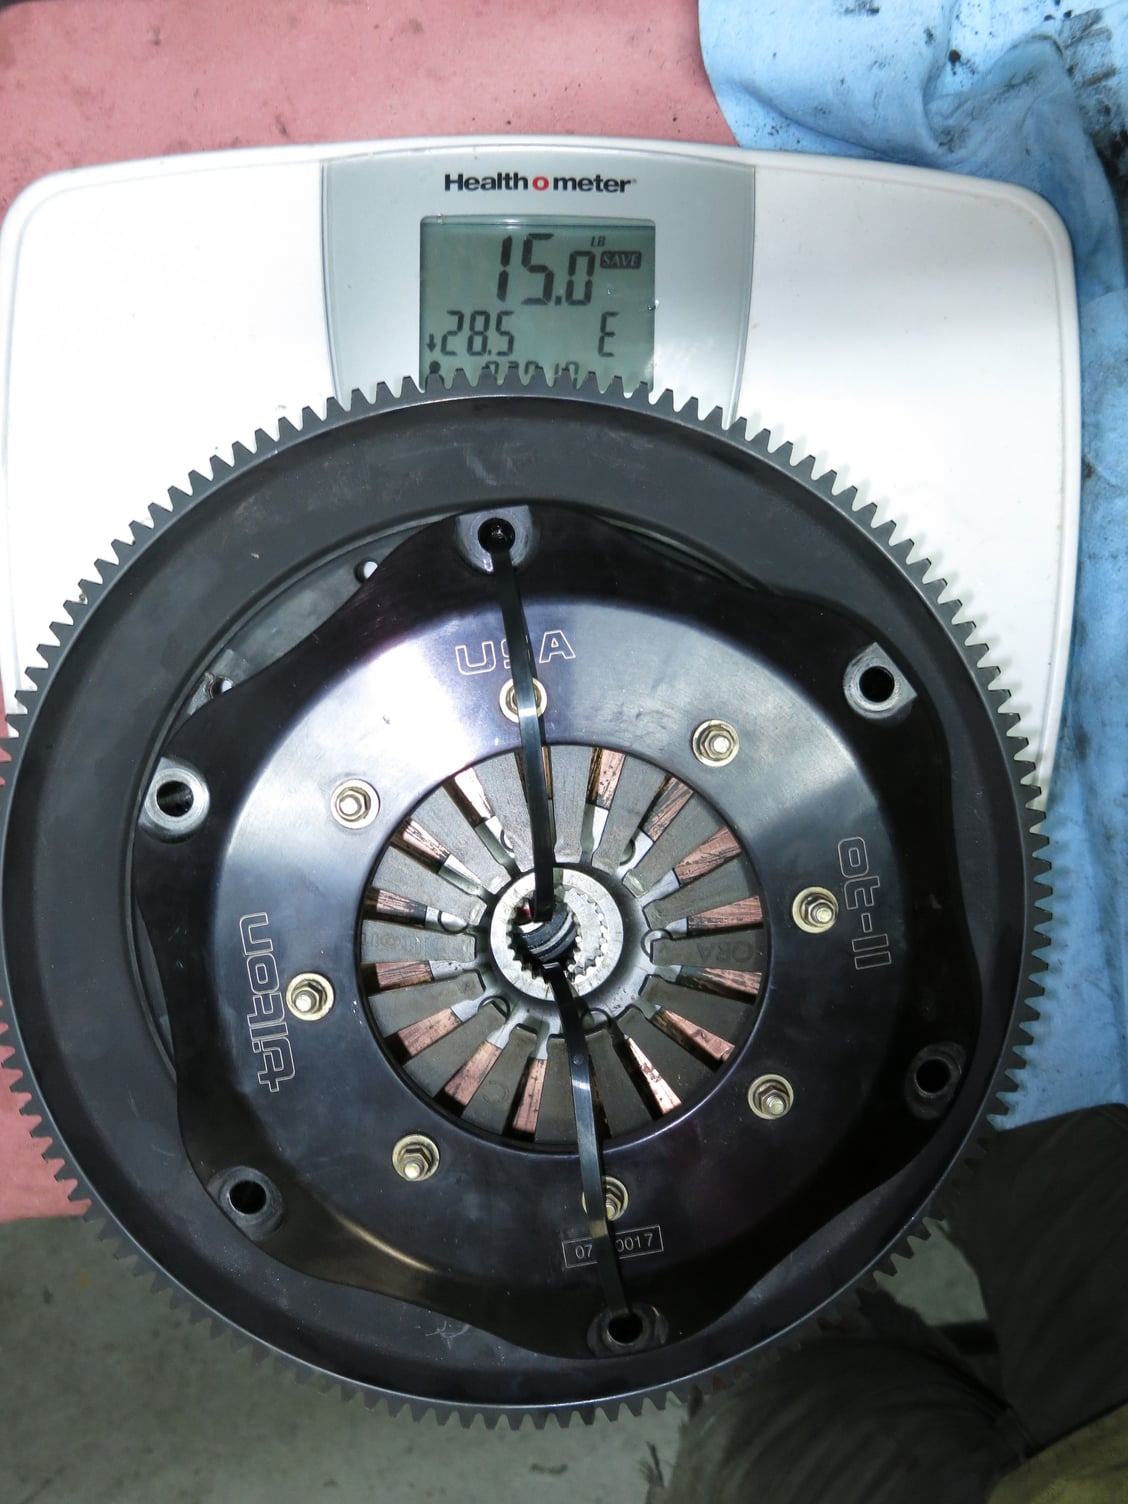
I reassemble the transmission, and since I needed to replace the clutch & PP due to the above mentioned problems, I dust off my brand new 4.0 pressure plate and start thinking that I had gone through the trouble of re-gearing, I might as well work a bit more magic here and paid a visit to the Tilton catalog and ended up with this:
Yep: Clutch, pressure plate, and flywheel are 15lbs as opposed to the 25lbs of the LWFW kit as opposed to the 56lbs of the OEM setup!
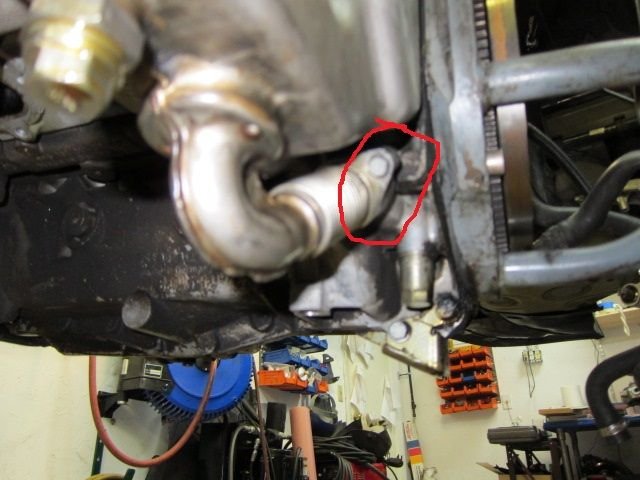
Now I think GREAT, time to button up the car and do some other simple projects for the winter, like an oil leak that started when I put the car on the trailer for the last time. It was down near the low pressure oil intake at the base of the oil tank.
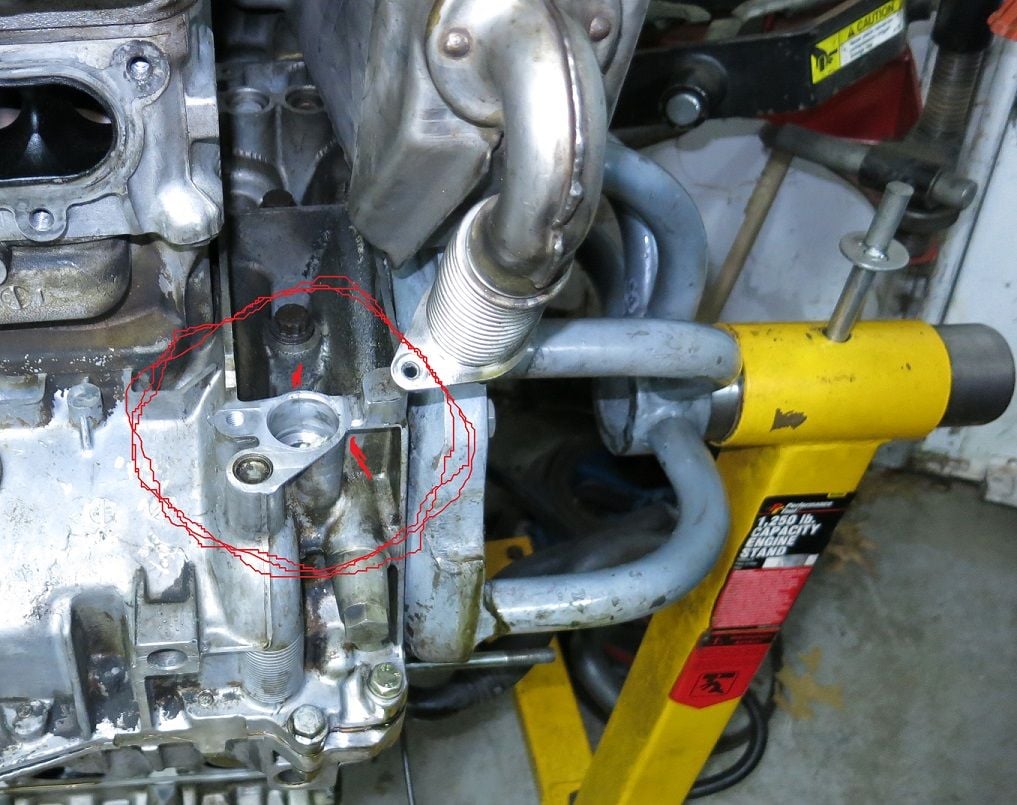
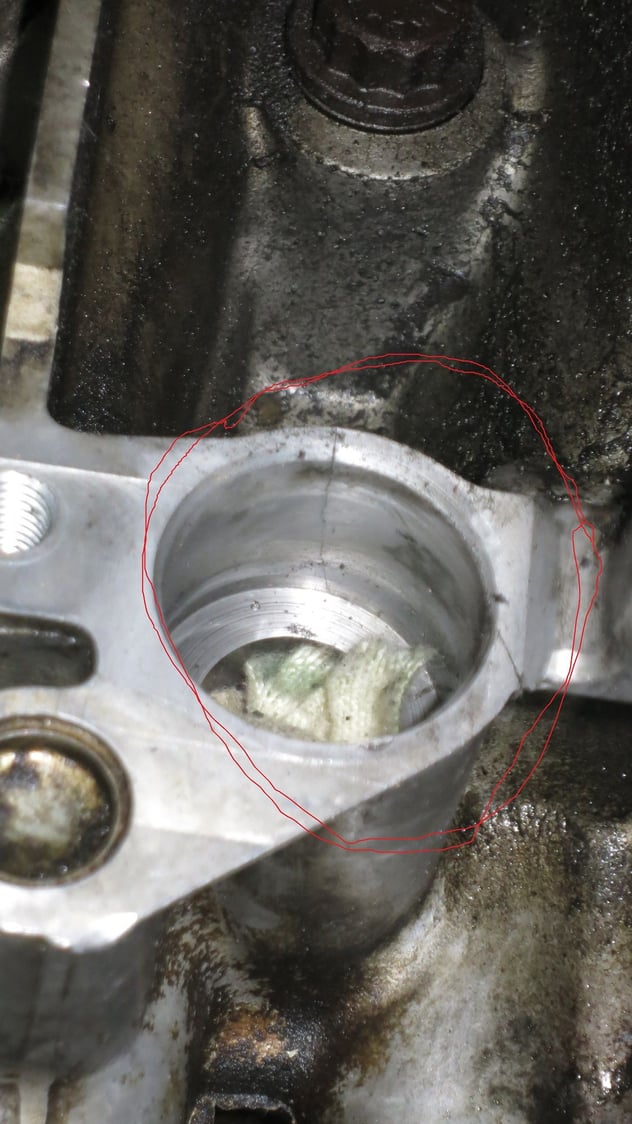
This is a small adapter part, and I picked one up, and removed the original one, and I found NOTHING wrong with it, absolutely NOTHING! What I did find were 2 cracks in the block, and suddenly my real winter project found me!!
Bill allowed me to work in his shop - which is far better than working in my cramped little garage. I did all the work, but Bill would provided suggestions. He is the consummate fabricator / technician. Although I am considered detail oriented, he helps me take it to a completely new level.
Dick Shine from Shine racing - Yep VW / Audi stuff - also a great source of guidance and suggestions.
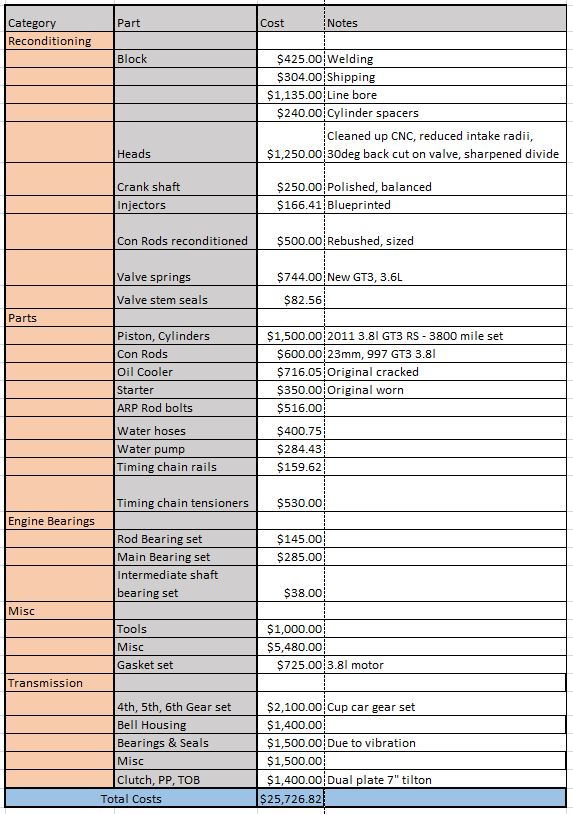
Ok, the 'How much does something like this cost?' question. I went into this project thoughtfully and with trepidation, and the expectation that the costs were going to be far more than I expected - let me tell you that I was not at all disappointed :-)
My attitude was: Replace anything that is worn (at all), and fix anything that is broken. In doing so, use only the best parts. I also decided to not be frivolous, and in that vein I decided that the best possible way to get a HP boost was to increase displacement (that frivolous thing obviously did not last long!).
Sooo, I sourced a used set of 3.8l pistons, cylinders, and con rods with under 4K miles, lightly used cup car gear set - Thanks Rodger!
The Tilton assembly had been used by someone for 1500 miles in a street car, and caused the knock sensor to have a nervous breakdown - 997's seem to have a bigger problem than the 996 cars with this. Any way, it was installed, threw a bunch of codes, and removed.
Here is the cost breakdown - there are several places I think I over paid, but all in all seems ok...
The car has 30k miles and I would say that most of that are track mile. I bought the car from some real jerks, so unbeknownst to me, the car was run hard and put away wet: https://rennlist.com/forums/996-gt2-...and-story.html
That said, these 'folks' were bigger butchers than I ever thought - more on that later!
Thanks - I didn't mean to imply anger - my reaction was more of an 'oh no, this is gonna be expensive'.
I will continue writing things up, bottom line is that this thing used to be pretty quick, but WOW! Between the new gears and the 200cc of displacement increase, a good valve job, this thing just giddy-up and goes
More on all that later, I hope to get it on a dyno some time soon as well.
something to remember . tilton is a fantatsic source for a lifelong clutch. need more pressure plate tension? send it back new fingers are cheap 700$ for complete rebuild. new clutch disc are 250$ new floaters are 125$ each. customer service is unbealiveable . hyd release bearing can be rebuilt for about 35$ i have a triple disc metallic with a 12 ft/lb double grey p/p. love it!
Thanks - I didn't mean to imply anger - my reaction was more of an 'oh no, this is gonna be expensive'.
I will continue writing things up, bottom line is that this thing used to be pretty quick, but WOW! Between the new gears and the 200cc of displacement increase, a good valve job, this thing just giddy-up and goes
More on all that later, I hope to get it on a dyno some time soon as well.
~$450 was welding the block
~$250 was for the special gaskets to accommodate the change in block geometry after line boring and surfacing
~$400 was the line boring
andd the rest was shipping.
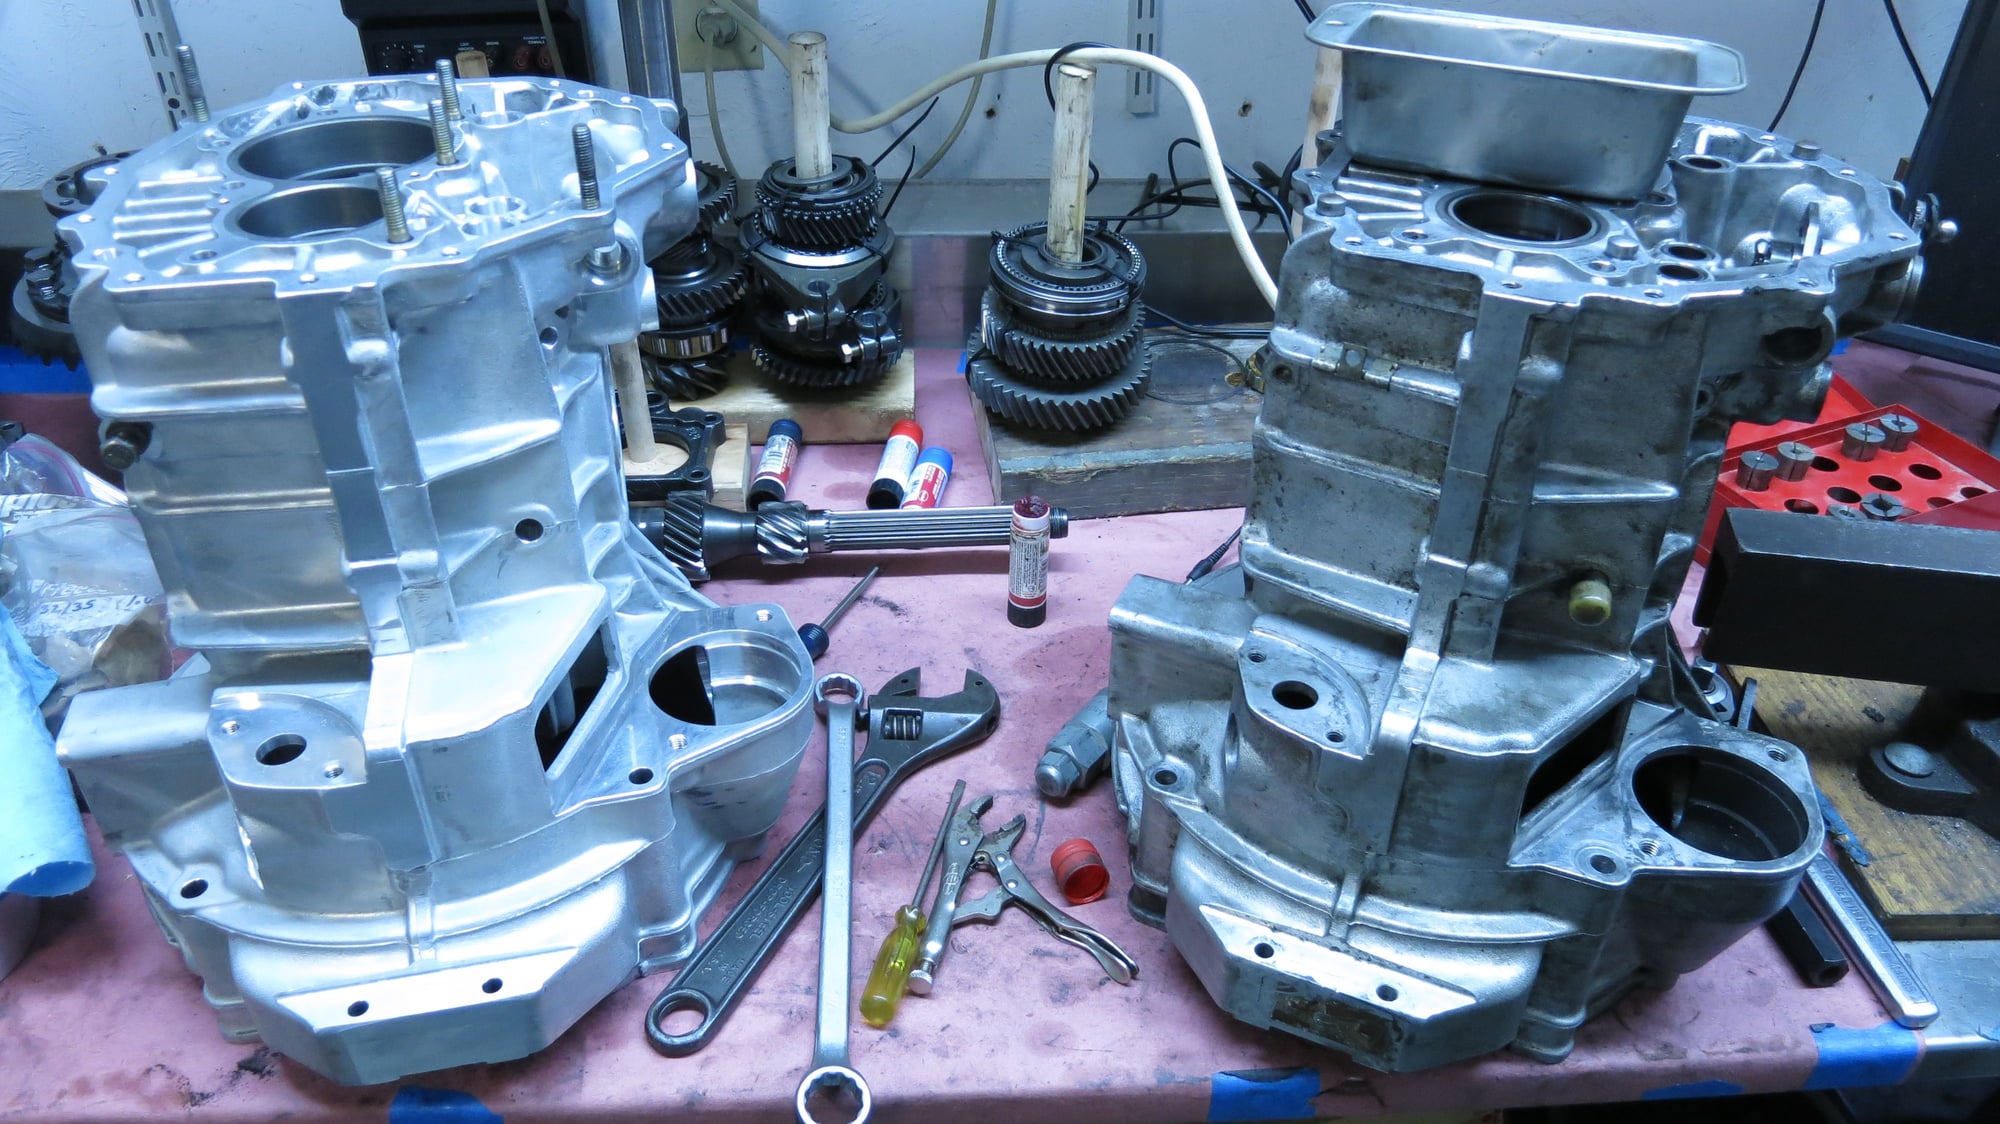
A new case - this is a problem because the 996 GT3 case, 964 part number, are NLA through Porsche - I did find one at a private party - but that would have been $6k - New they were just under $5k from Porsche.
A used case - but I would not know what I was getting, and at the least I would have needed to line bore it, AND there aren't a lot of used GT3 GT3 cases laying around.
Fix the broken case.
I started researching the 'Fix' option. Most places would not even consider it. I ended up talking to one organization who do high end restorations and could do it. We never actually spoke costs - but I was led to believe that it was going to be expensive - perhaps very expensive.
I also spoke with Ollie's Engineering. These guys are great and never shy away from a 'challenge' - great to know that one is a challenge :-) !
I decided that these guys would fix it as good or better than new - and they did.
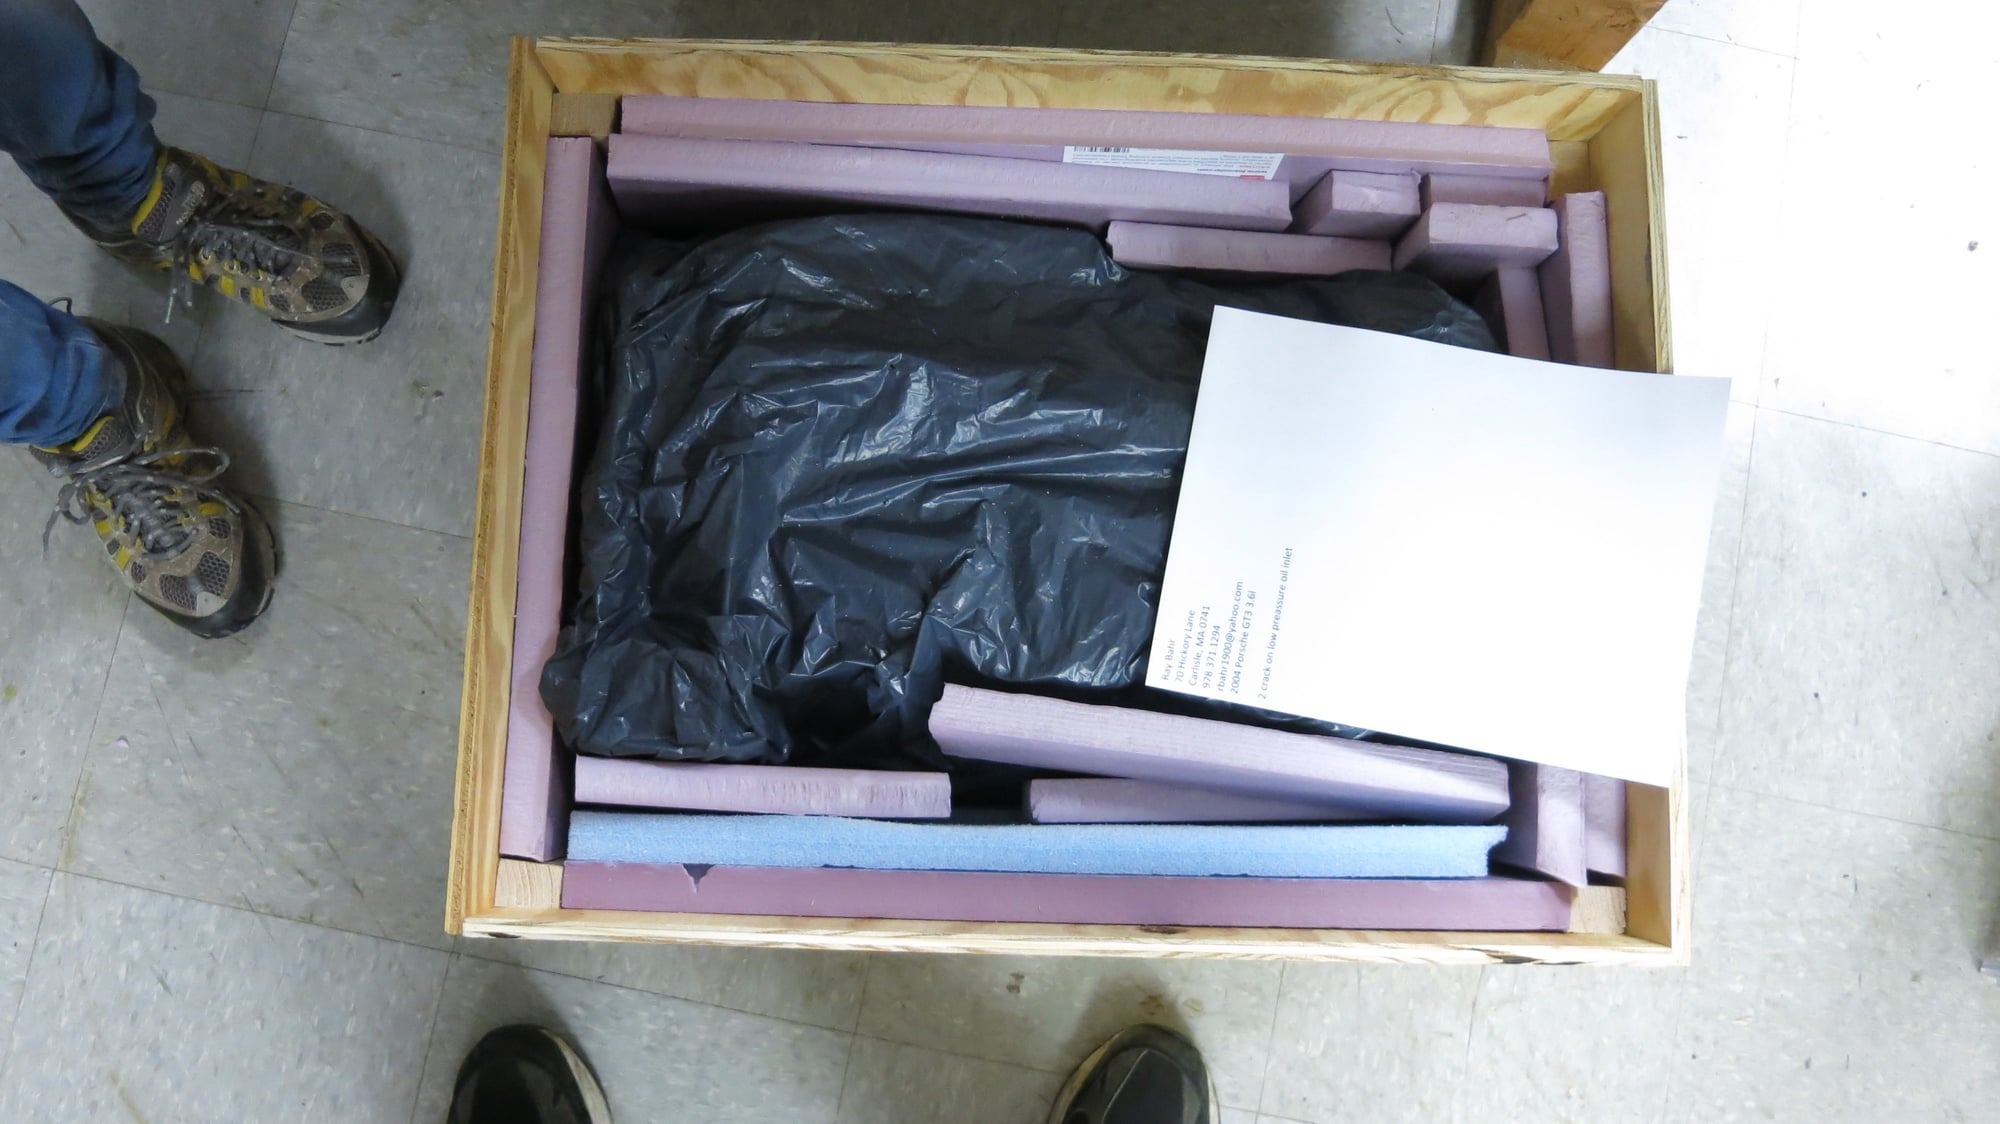
I pulled all the studs, made a box, and shipped the case off. I was told a 10 week turn around, but it was 1/2 that because it was a challenge
Block all packaged up and ready to go.
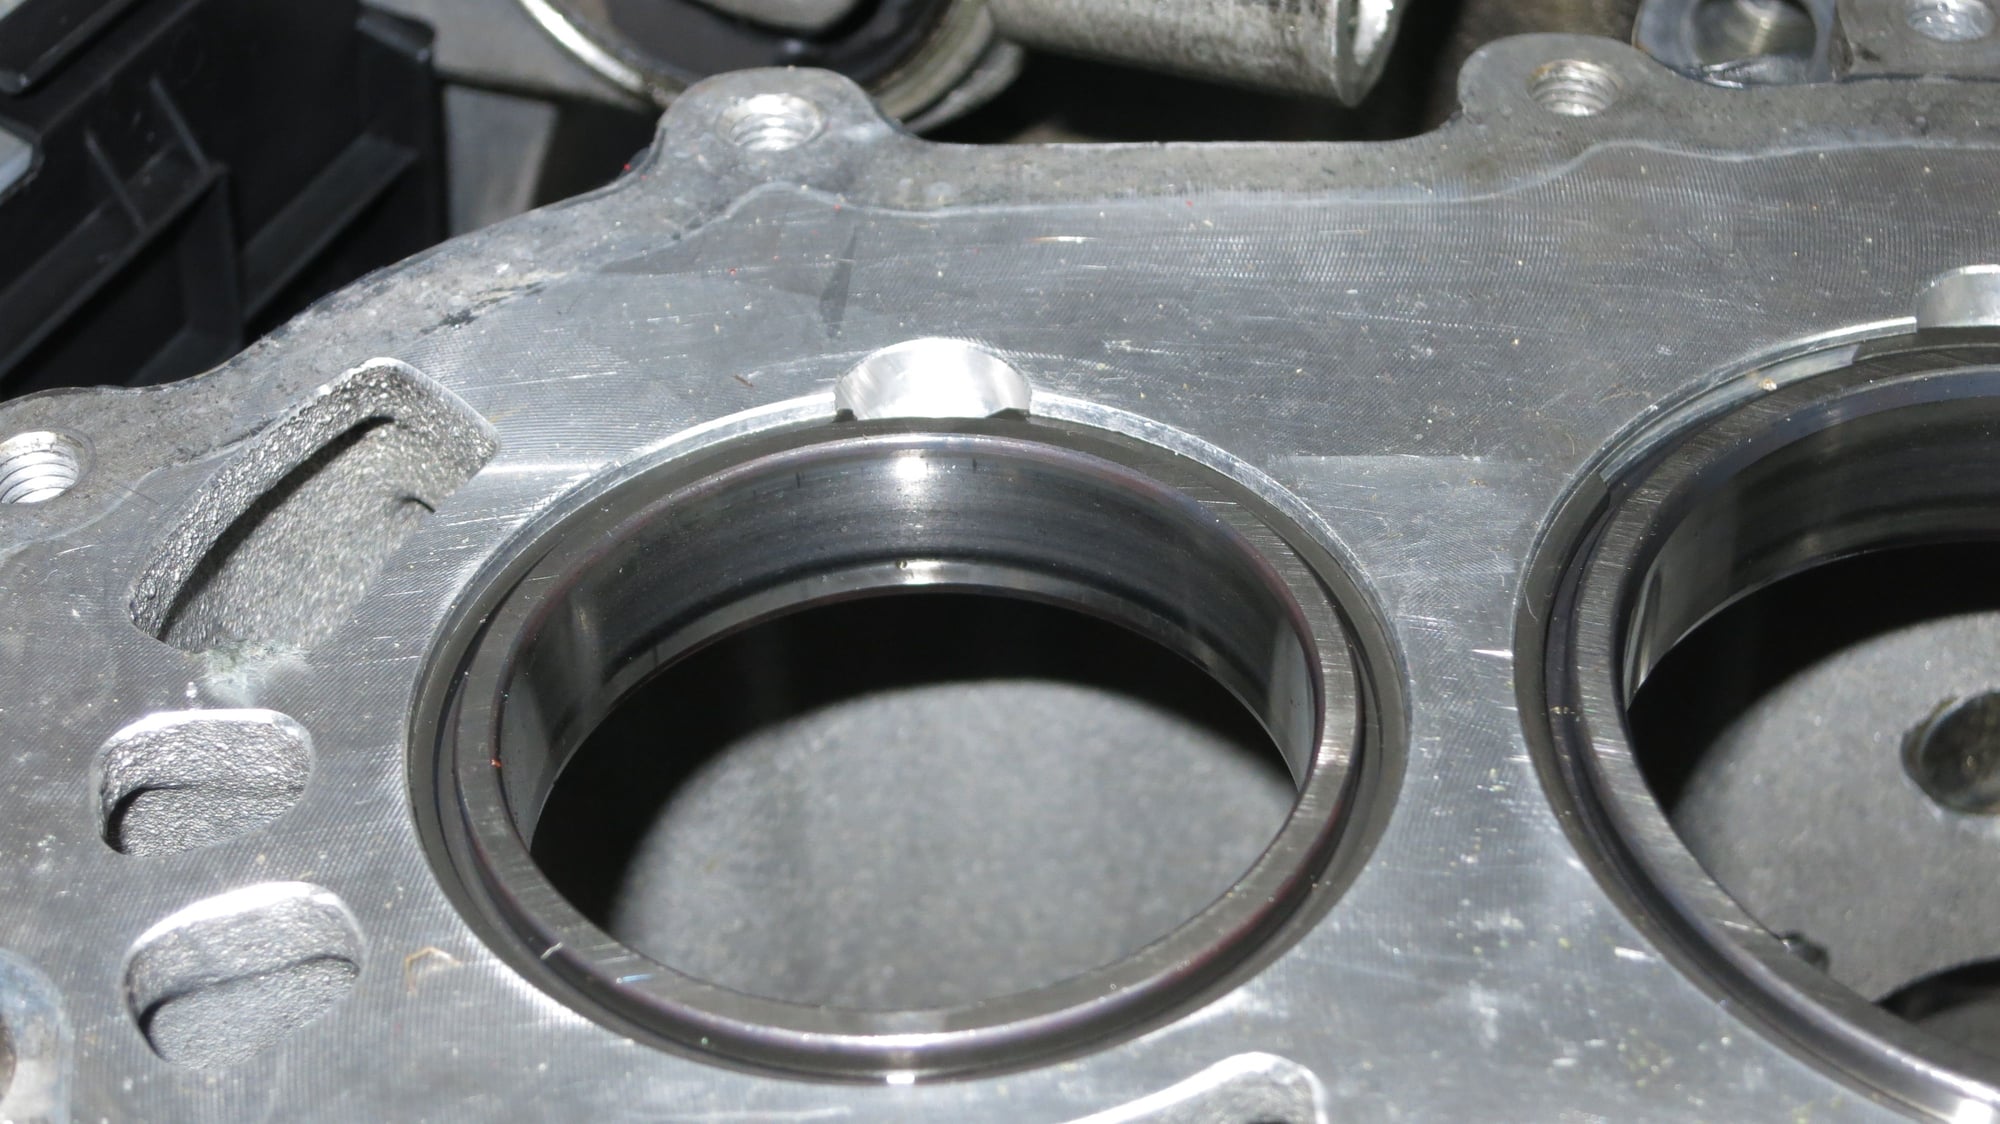
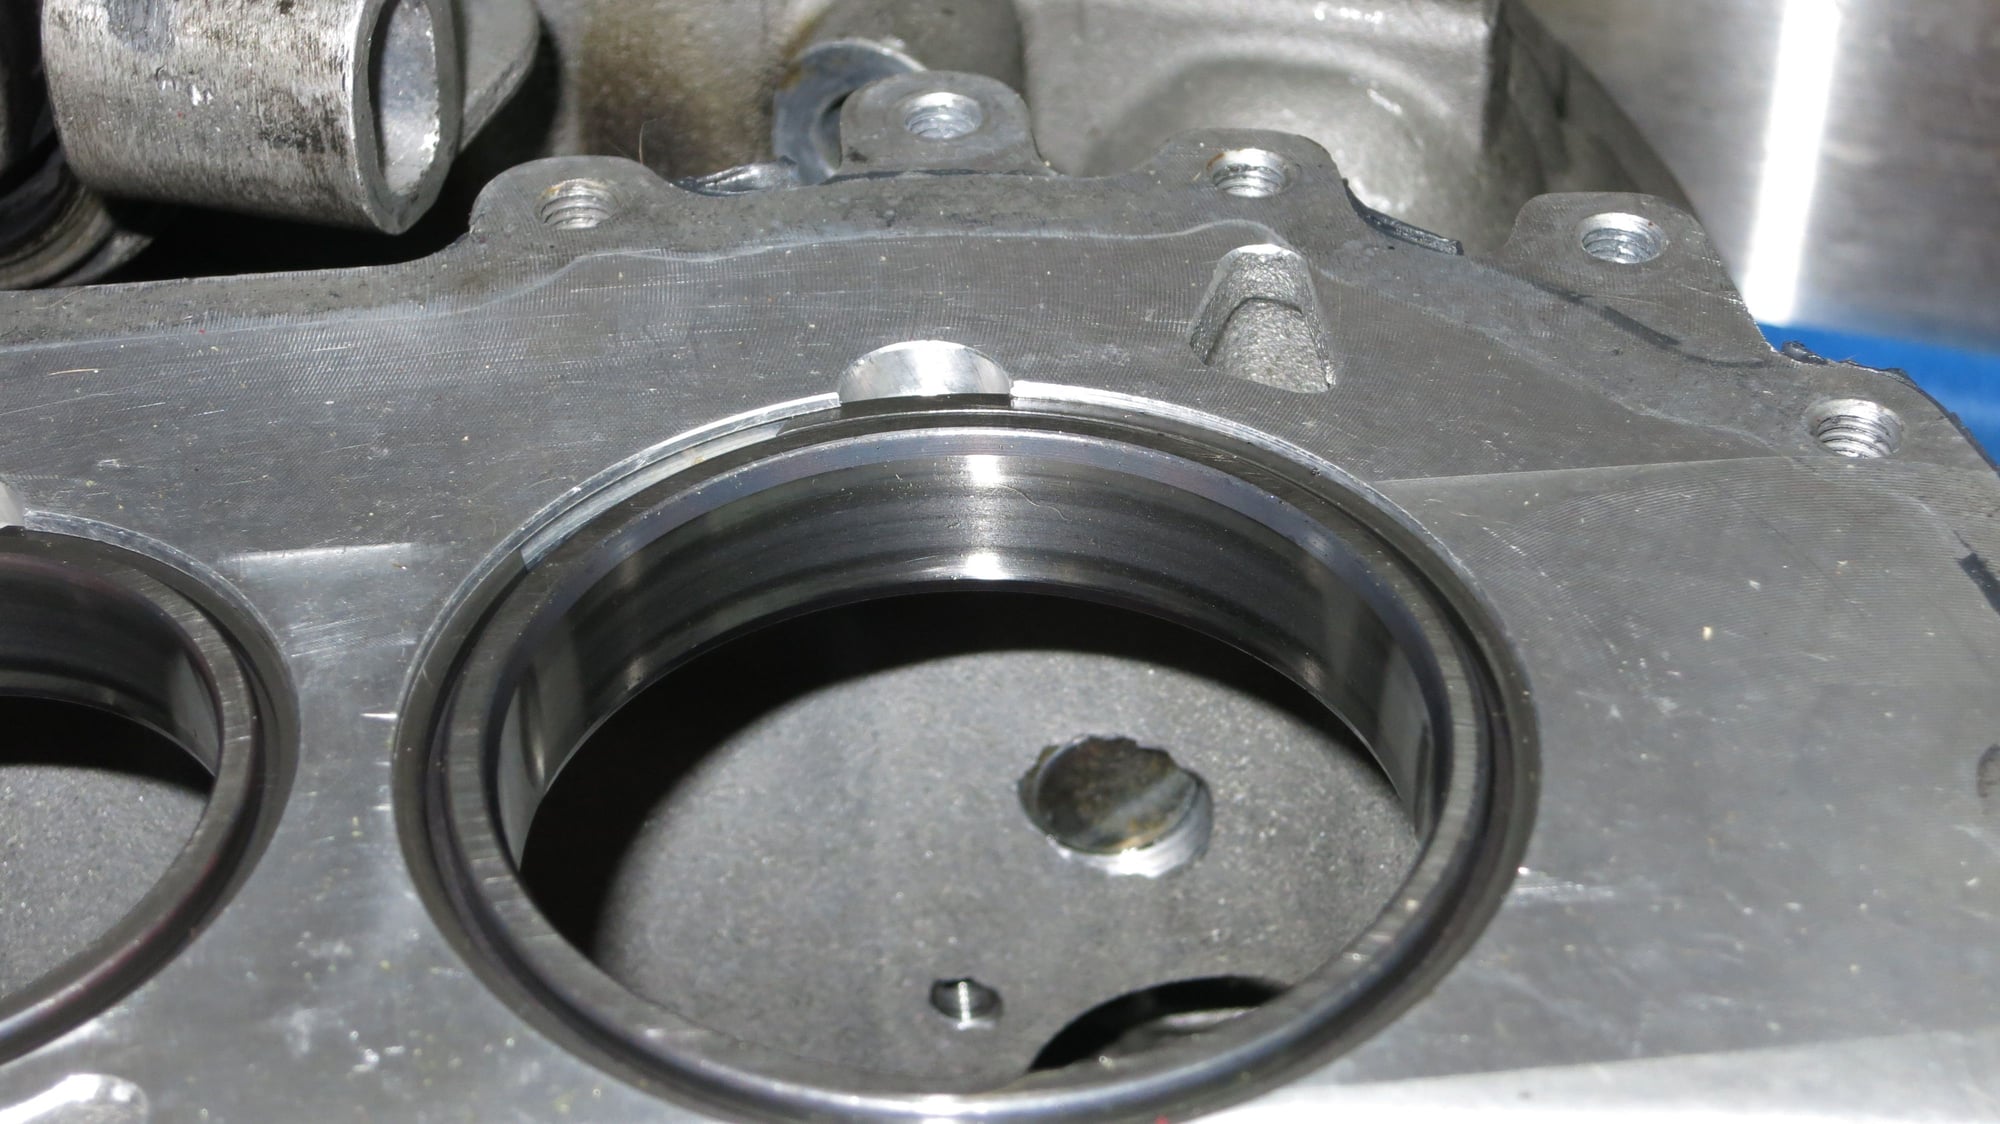
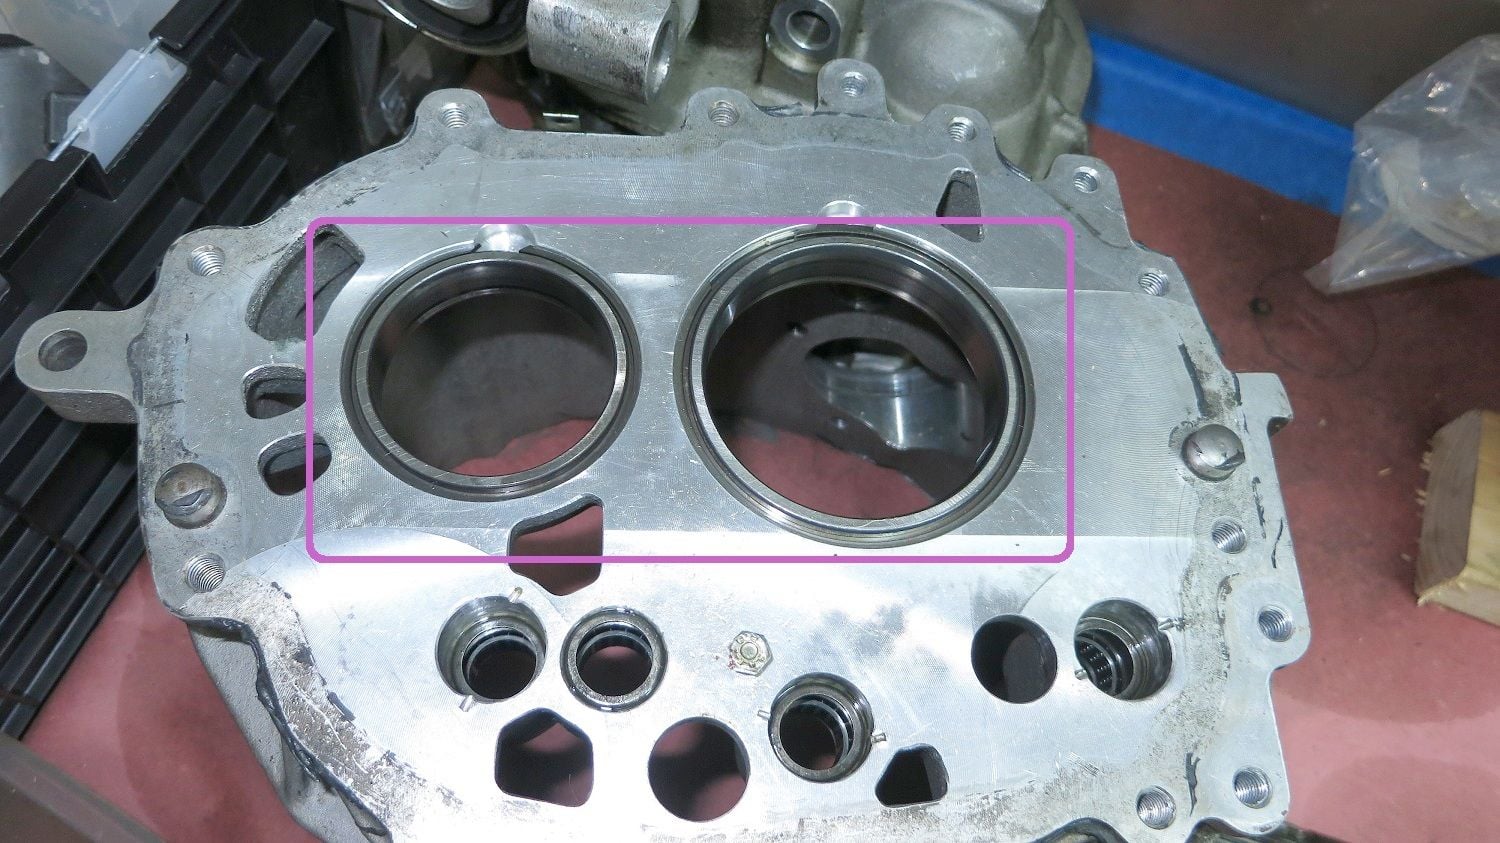
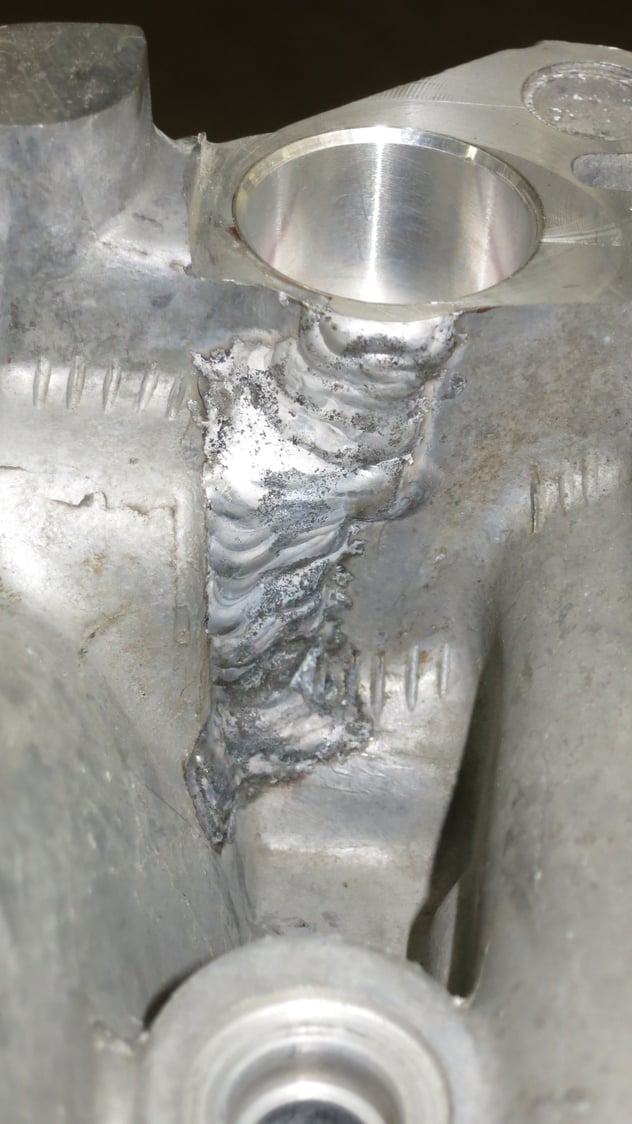
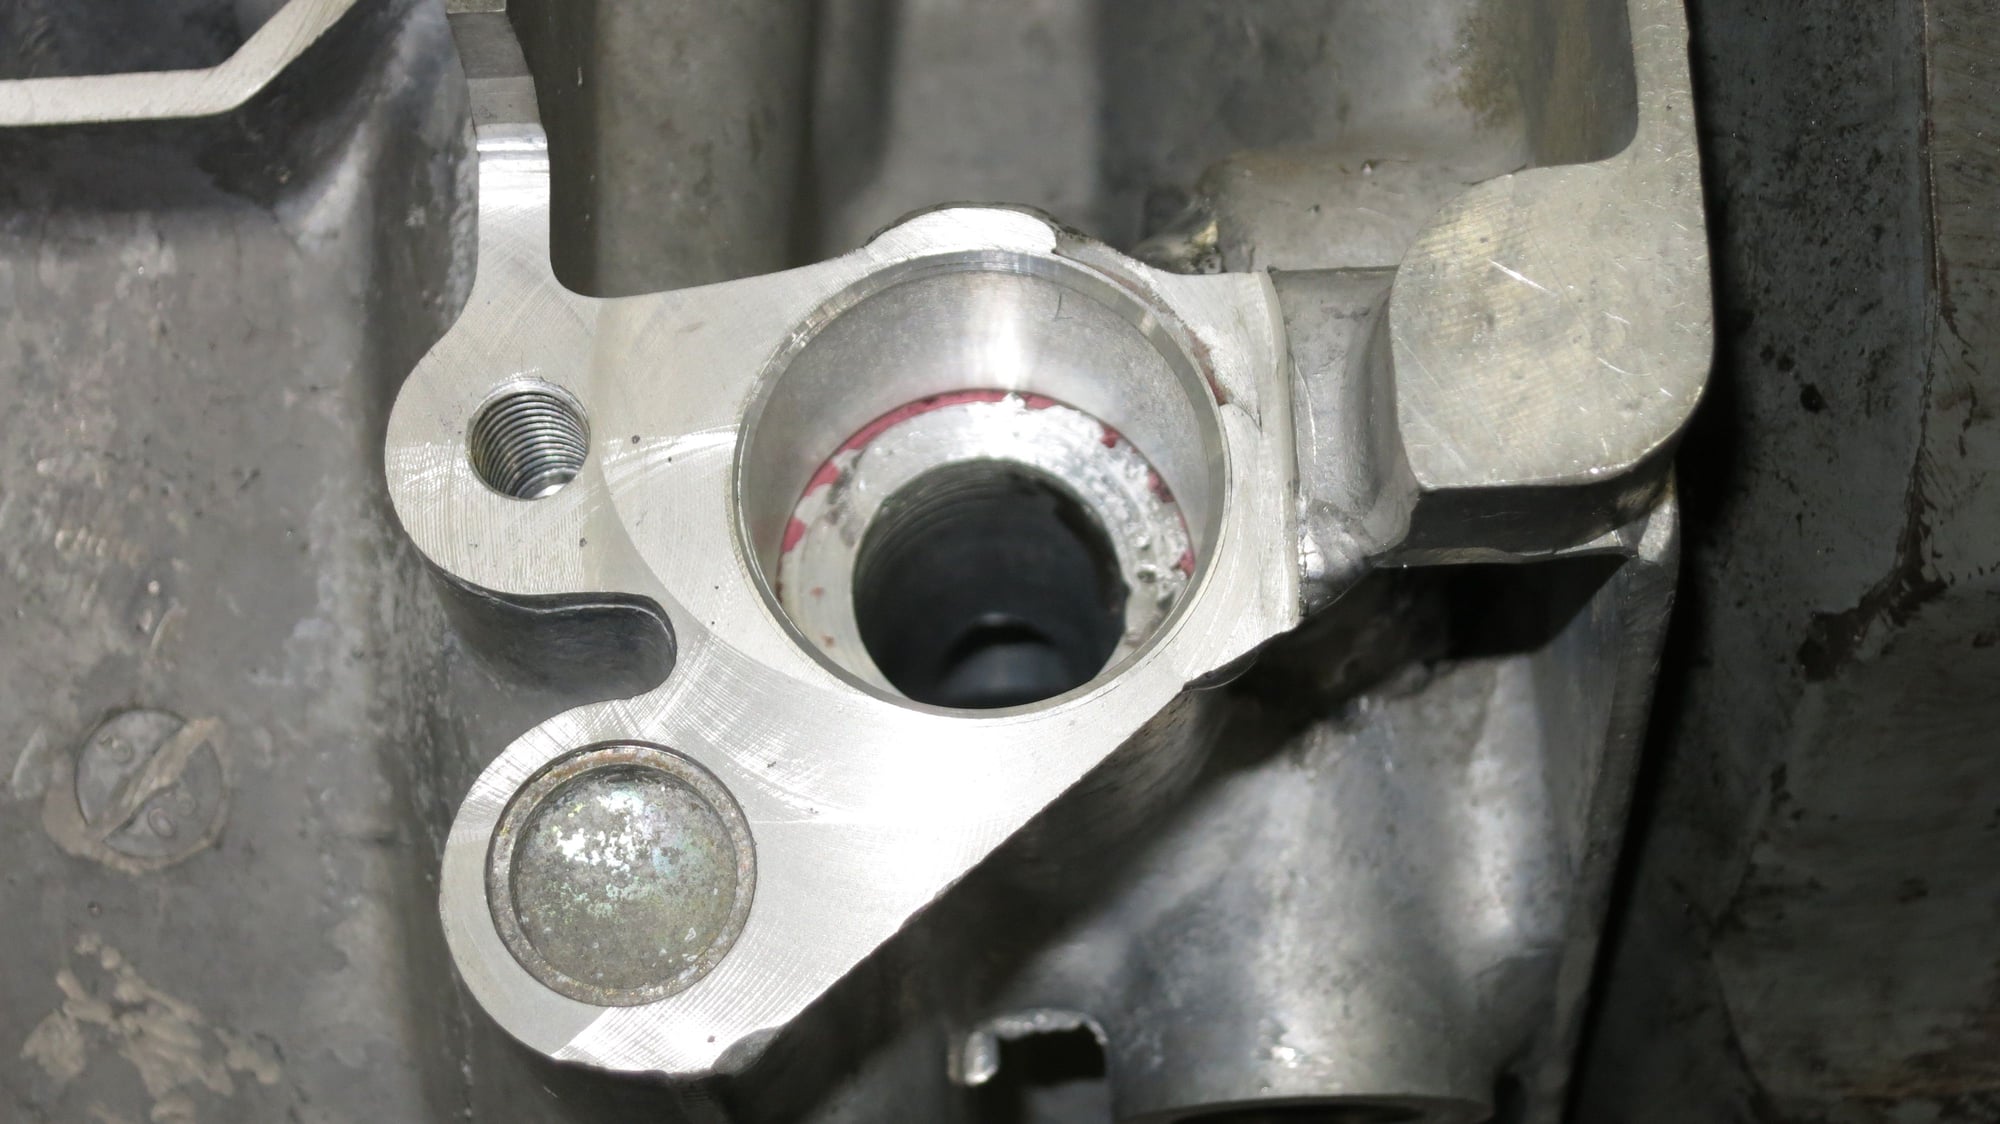
To do this repair, Ollie's ground away the material where the cracks were and built the area back up.
Then they made a sleeve just a tiny bit over-sized pressed it in with a good healthy dose of red locktite
And resurfaced the area. They then built a jig to pressure test it - which was successful! My opinion was that this was not a good design from Porsche, and that they should have threaded this area!
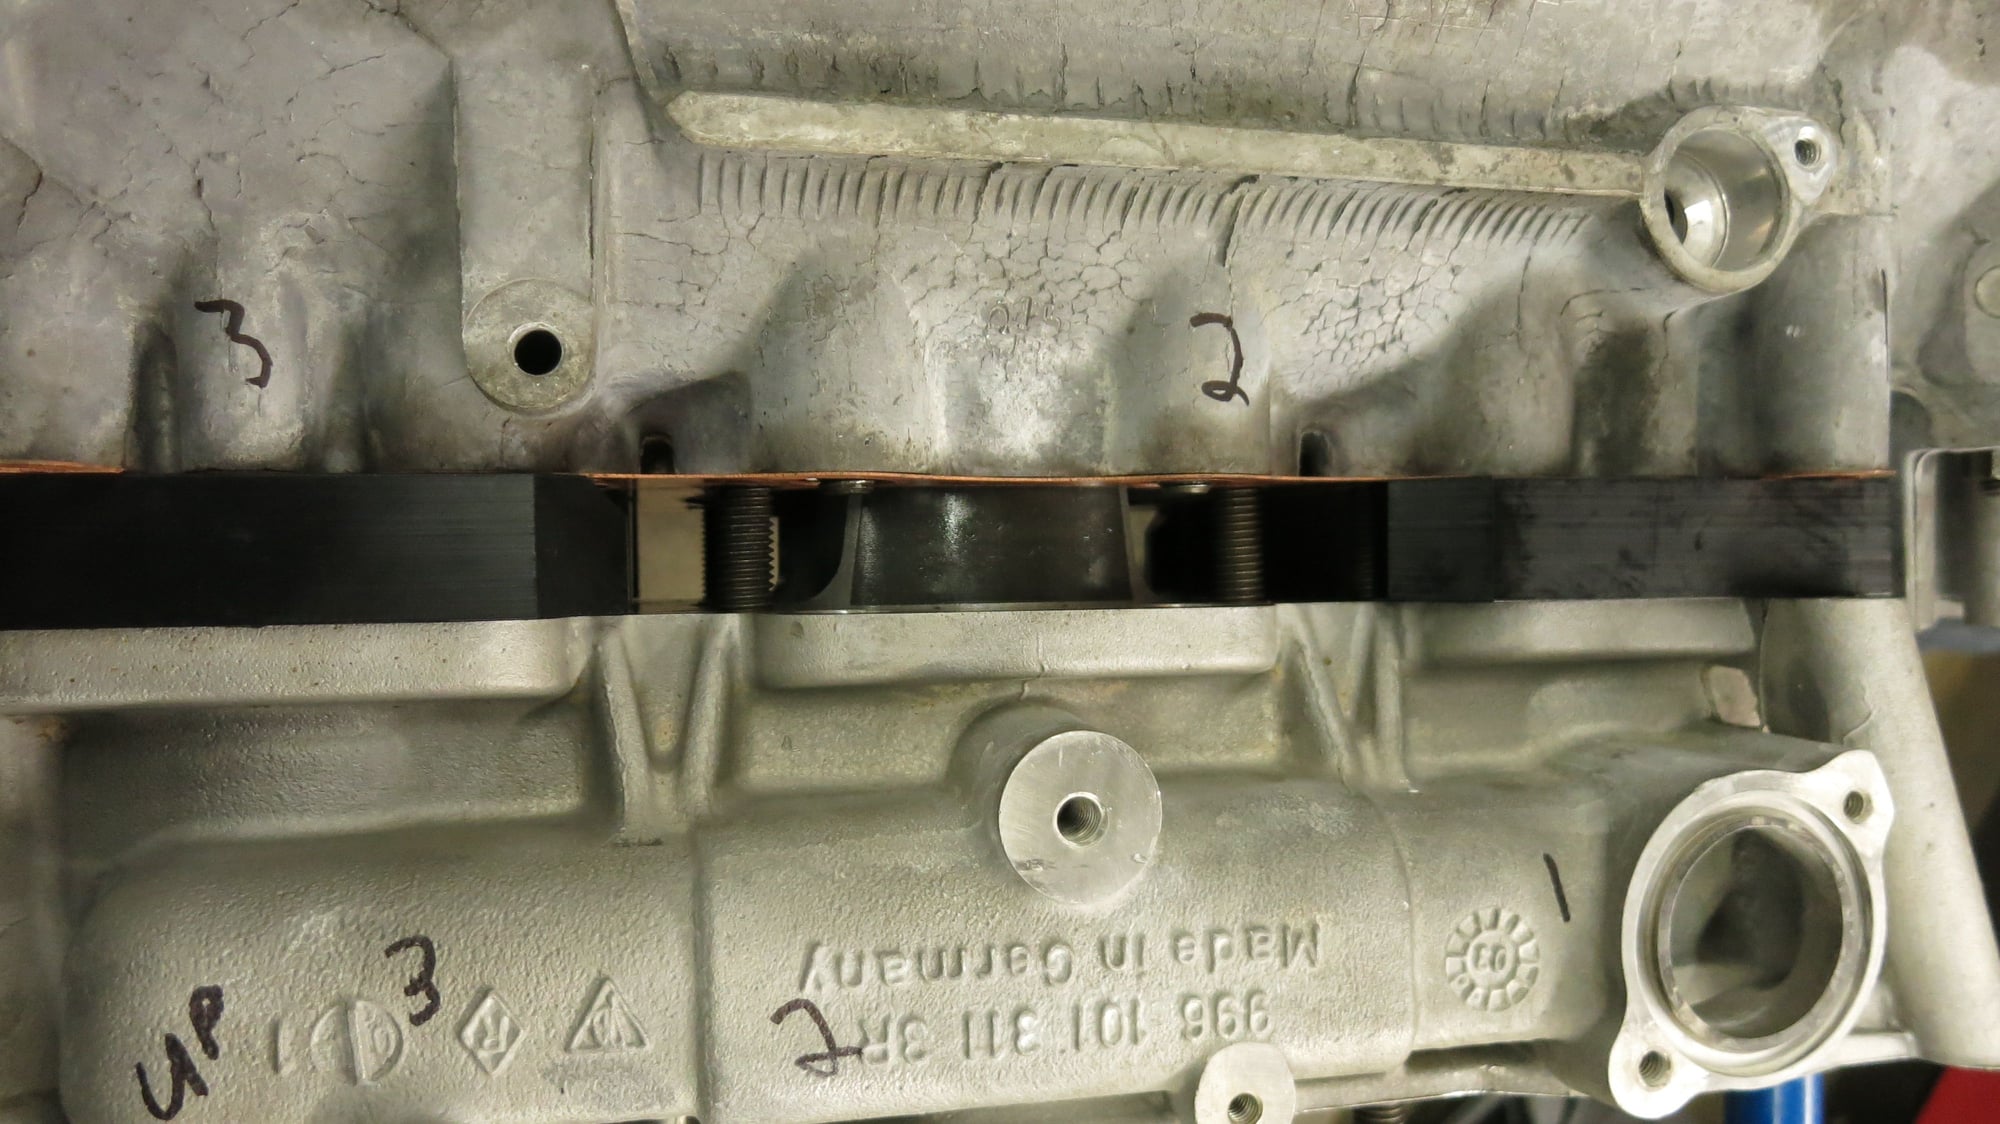
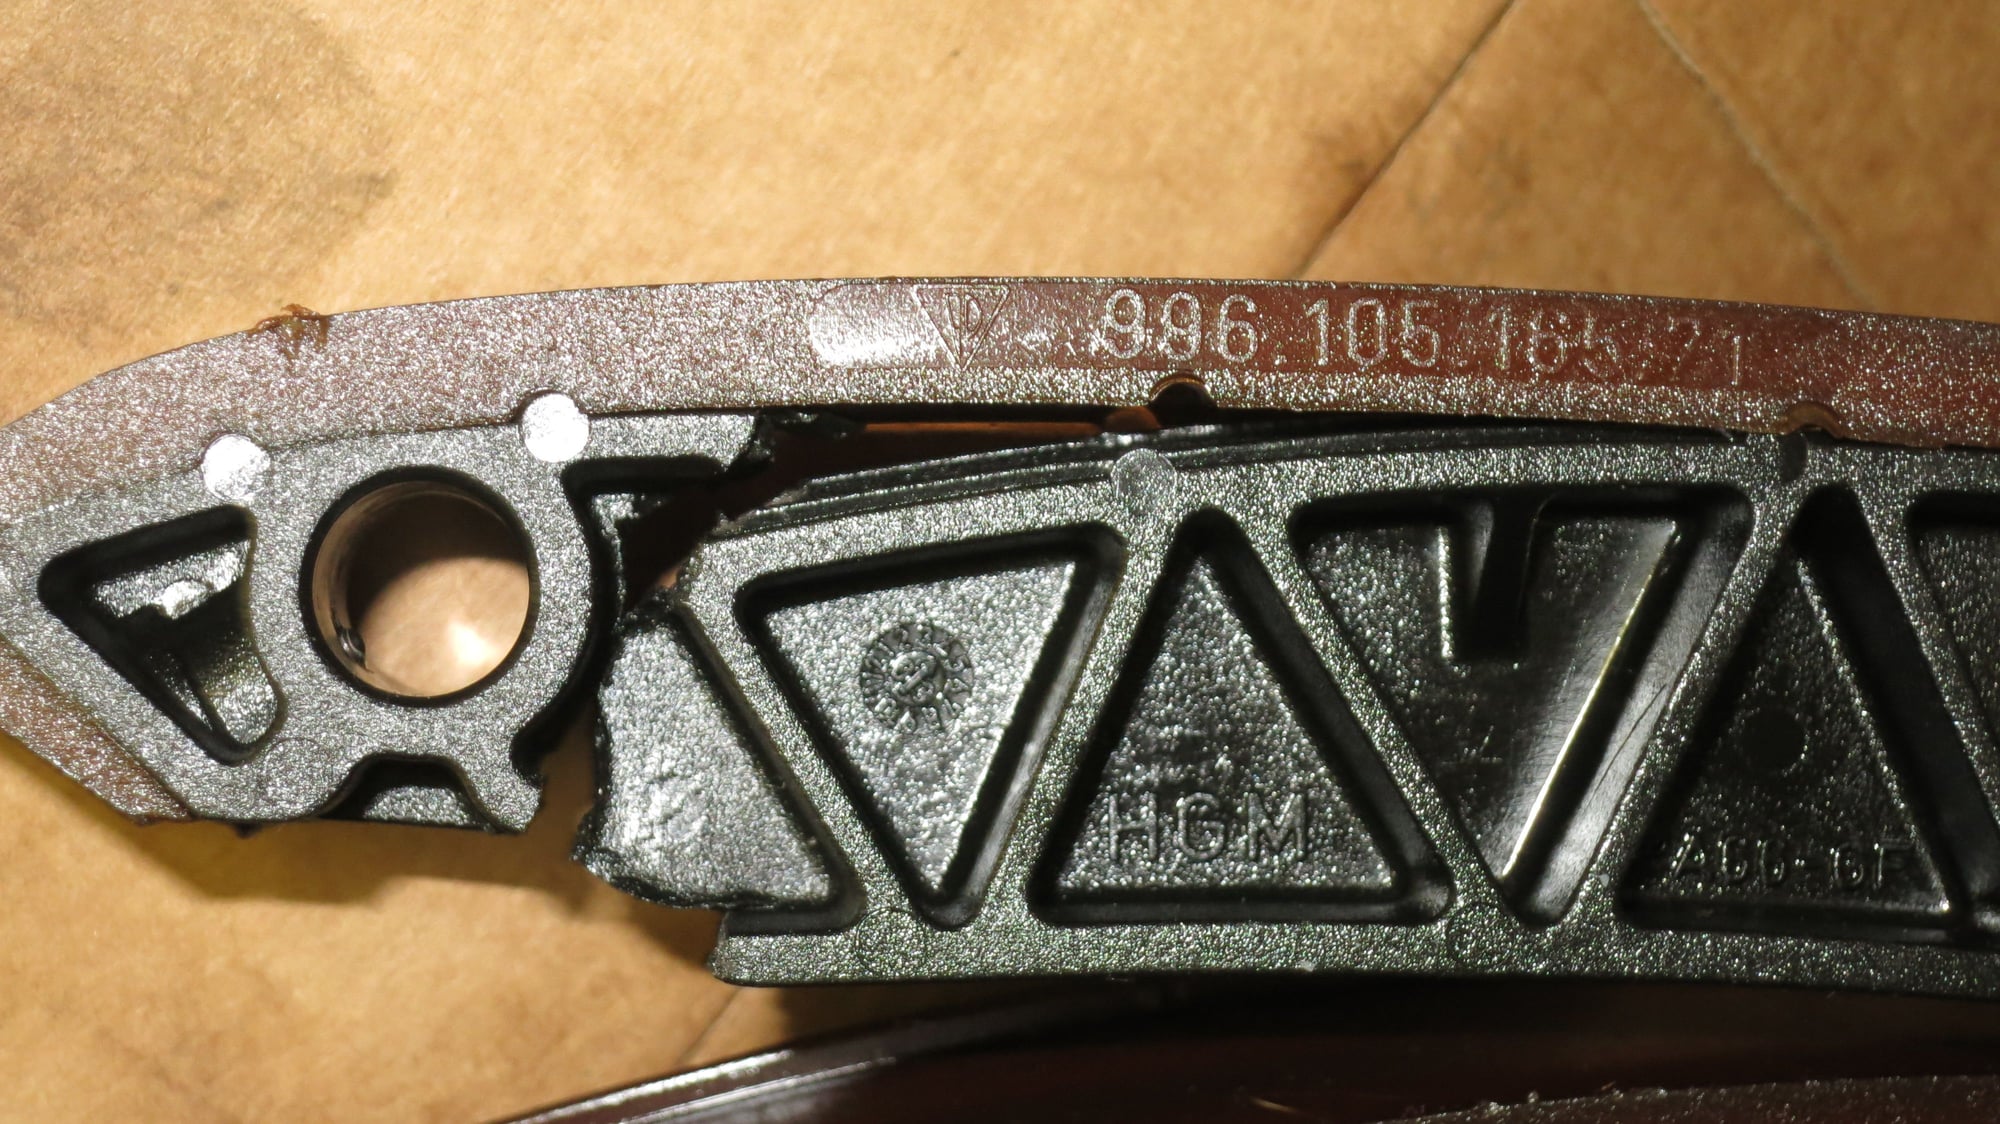
After this, they line bored the block, decked this with a light surface cut, and gave me some custom copper gaskets (0.025") to accommodate the removed material and allow for some crush (0.005"). You can see the edge here.
This was fun! Found a number of interesting things along the way...
This motor has had 3 valve jobs because the previous owners did not know how to use a standard, and they didn't care. 2 of these 3 were money shifts, and one was because someone didn't tighten down a spark plug, it blew out of the cylinder damaging the threads, and (fortunately for me) didn't know about Helicoils.
Bottom line is the shop that did all this work were as bad as one can expect - the used air tools to tighten small bolts the list goes on! They are in North Florida...
Some things I found:
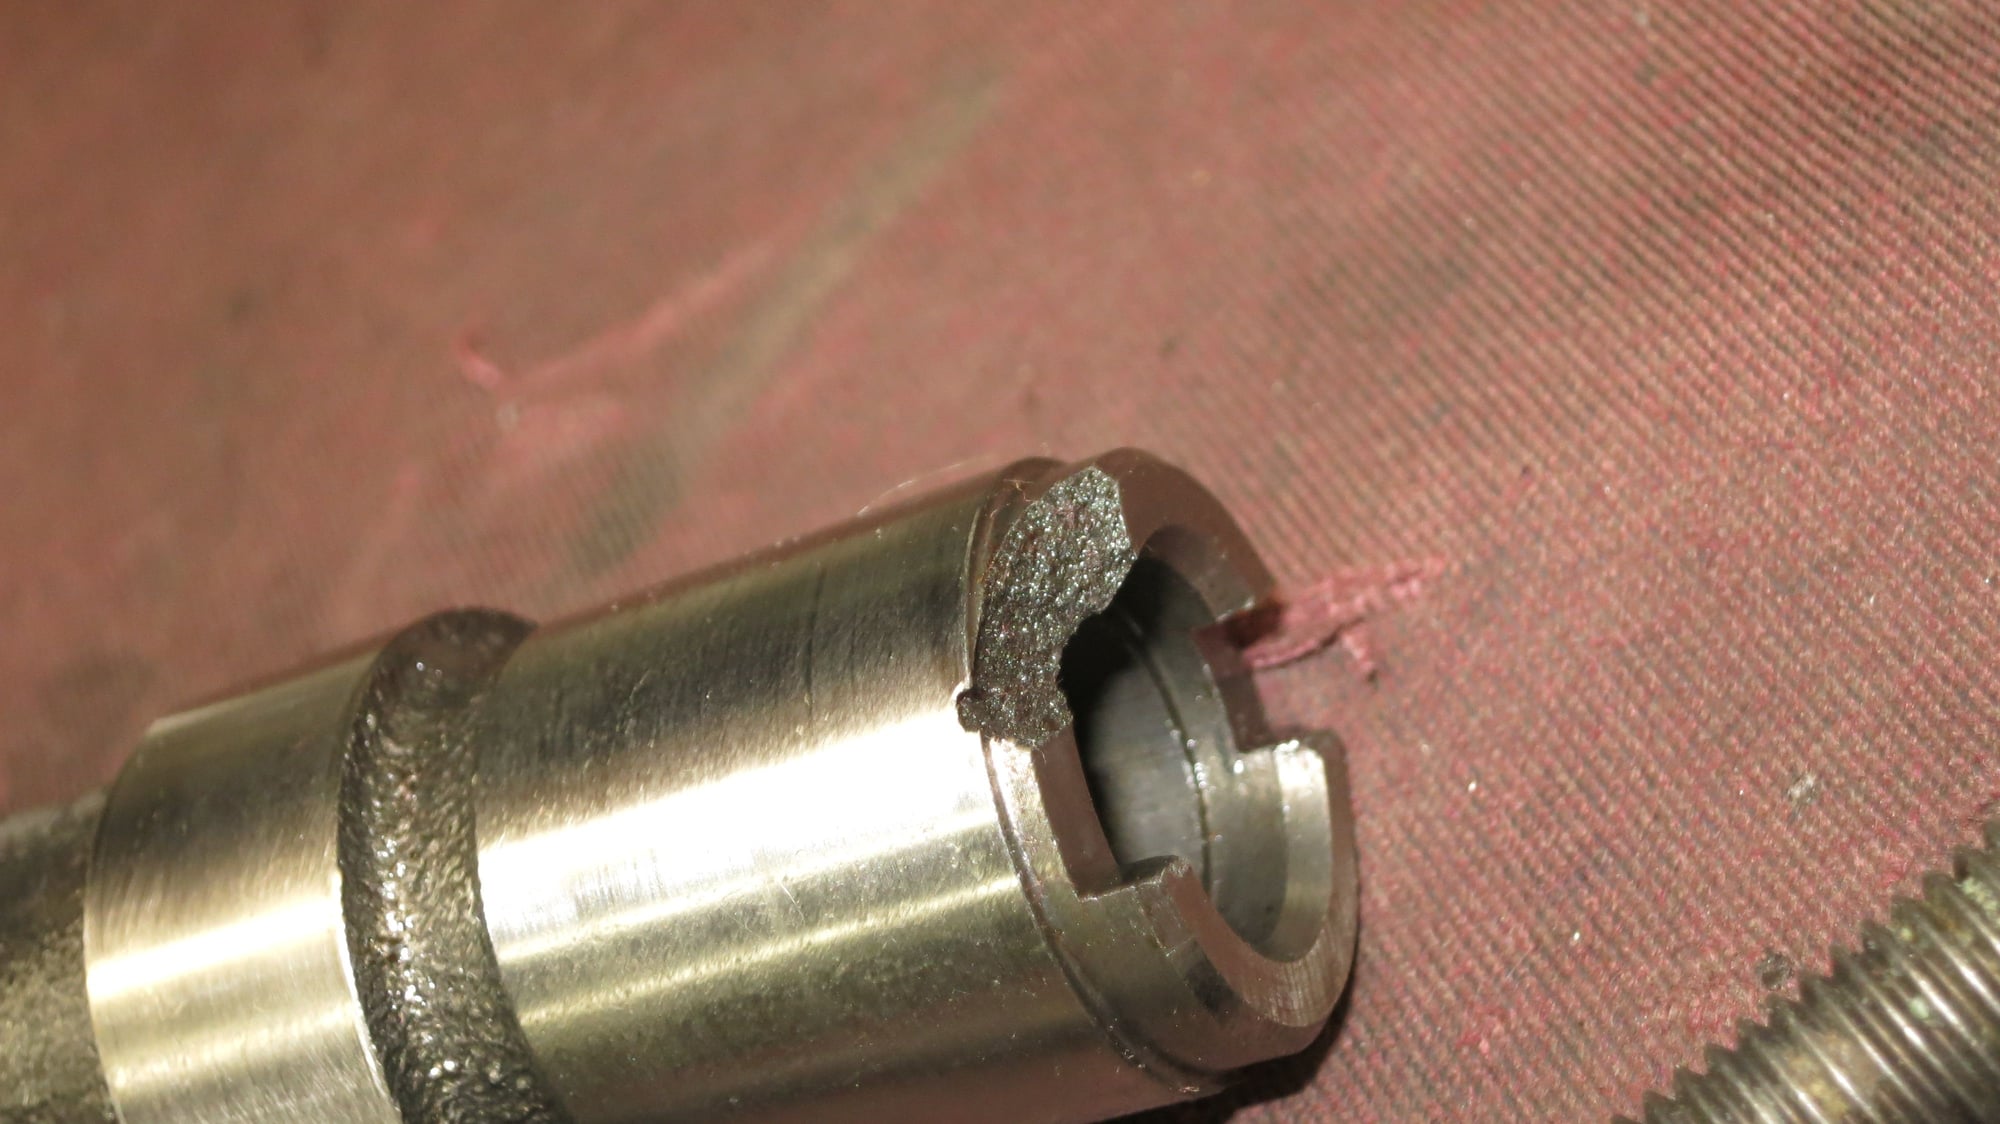
Someone used the factory cam timing tools to undo the monster timing chain pulley bolt (torqued to ~ 160lb-ft)
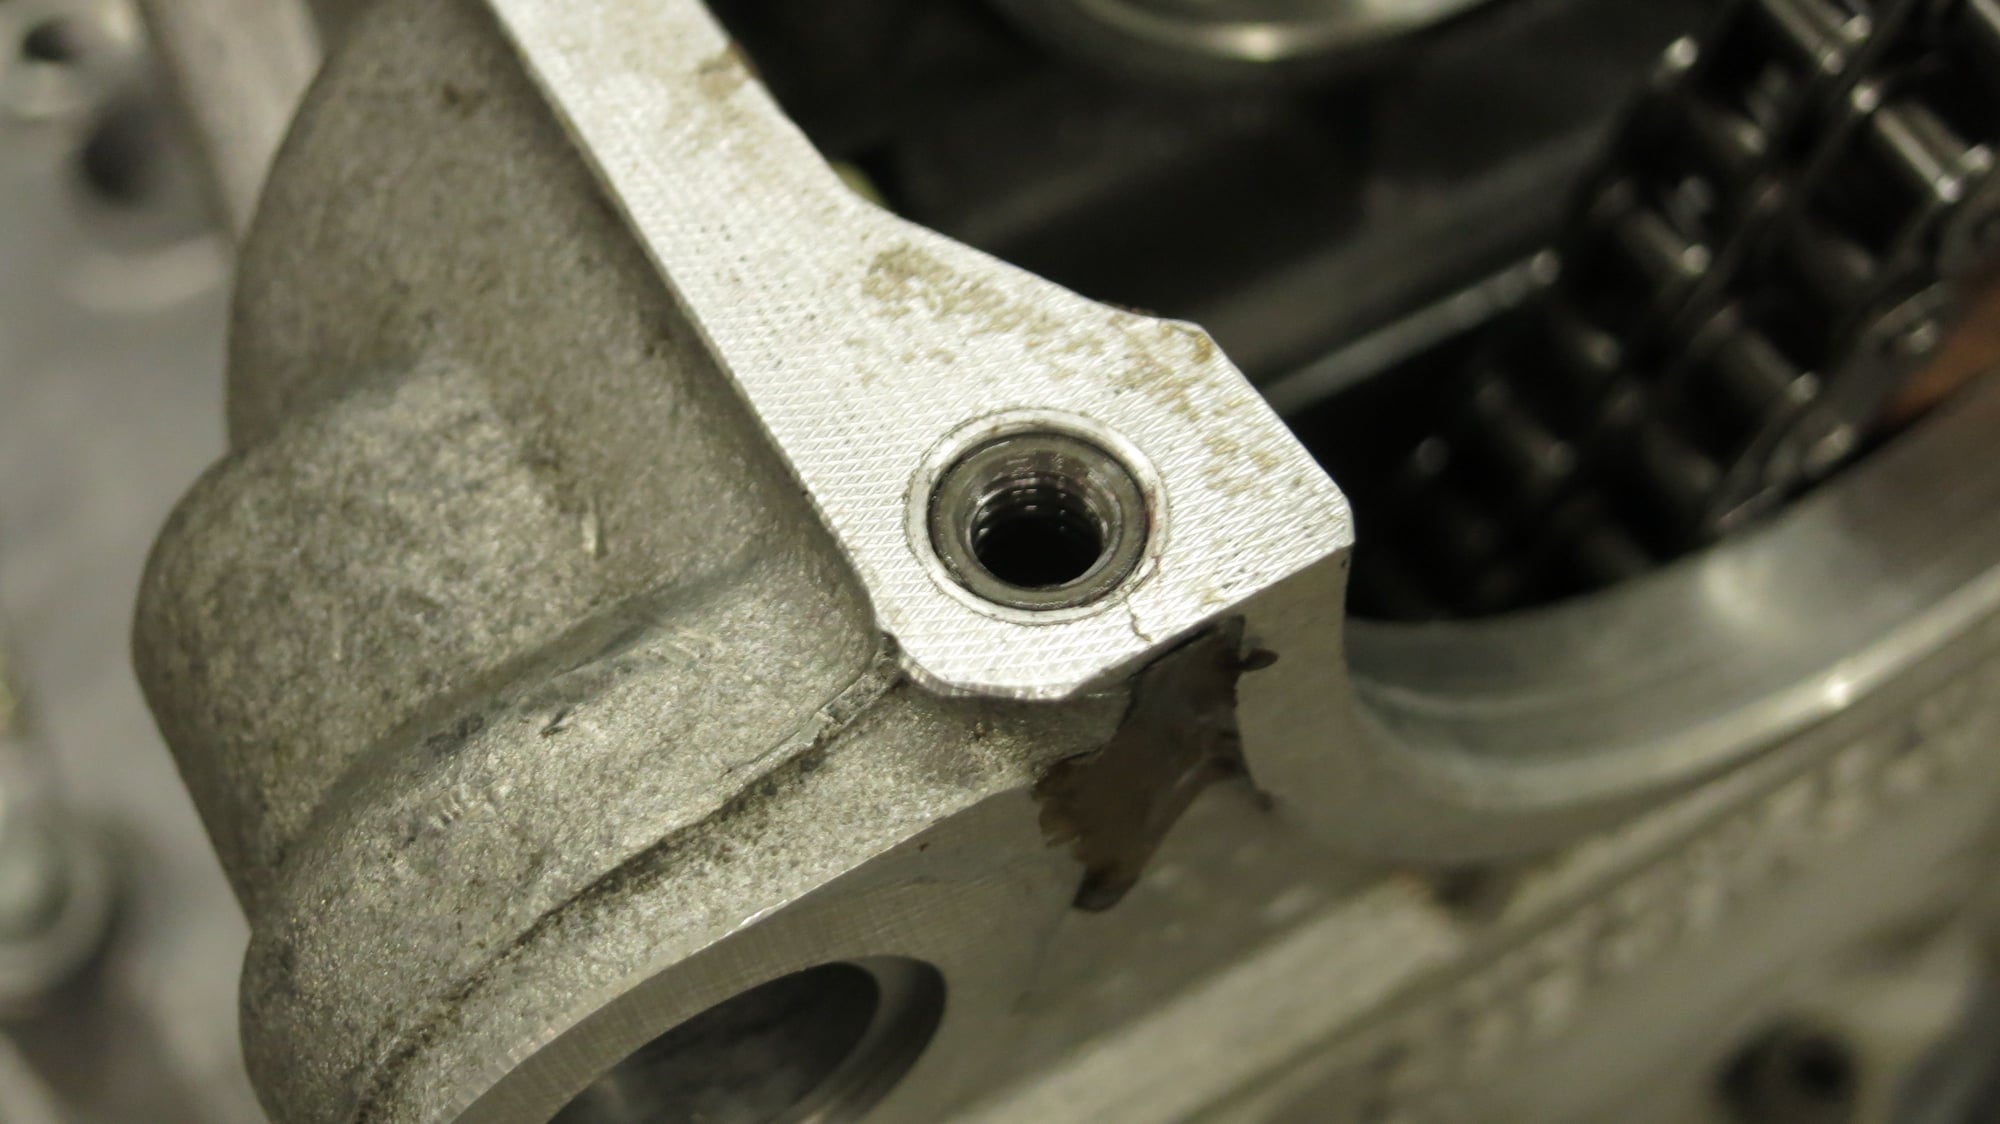
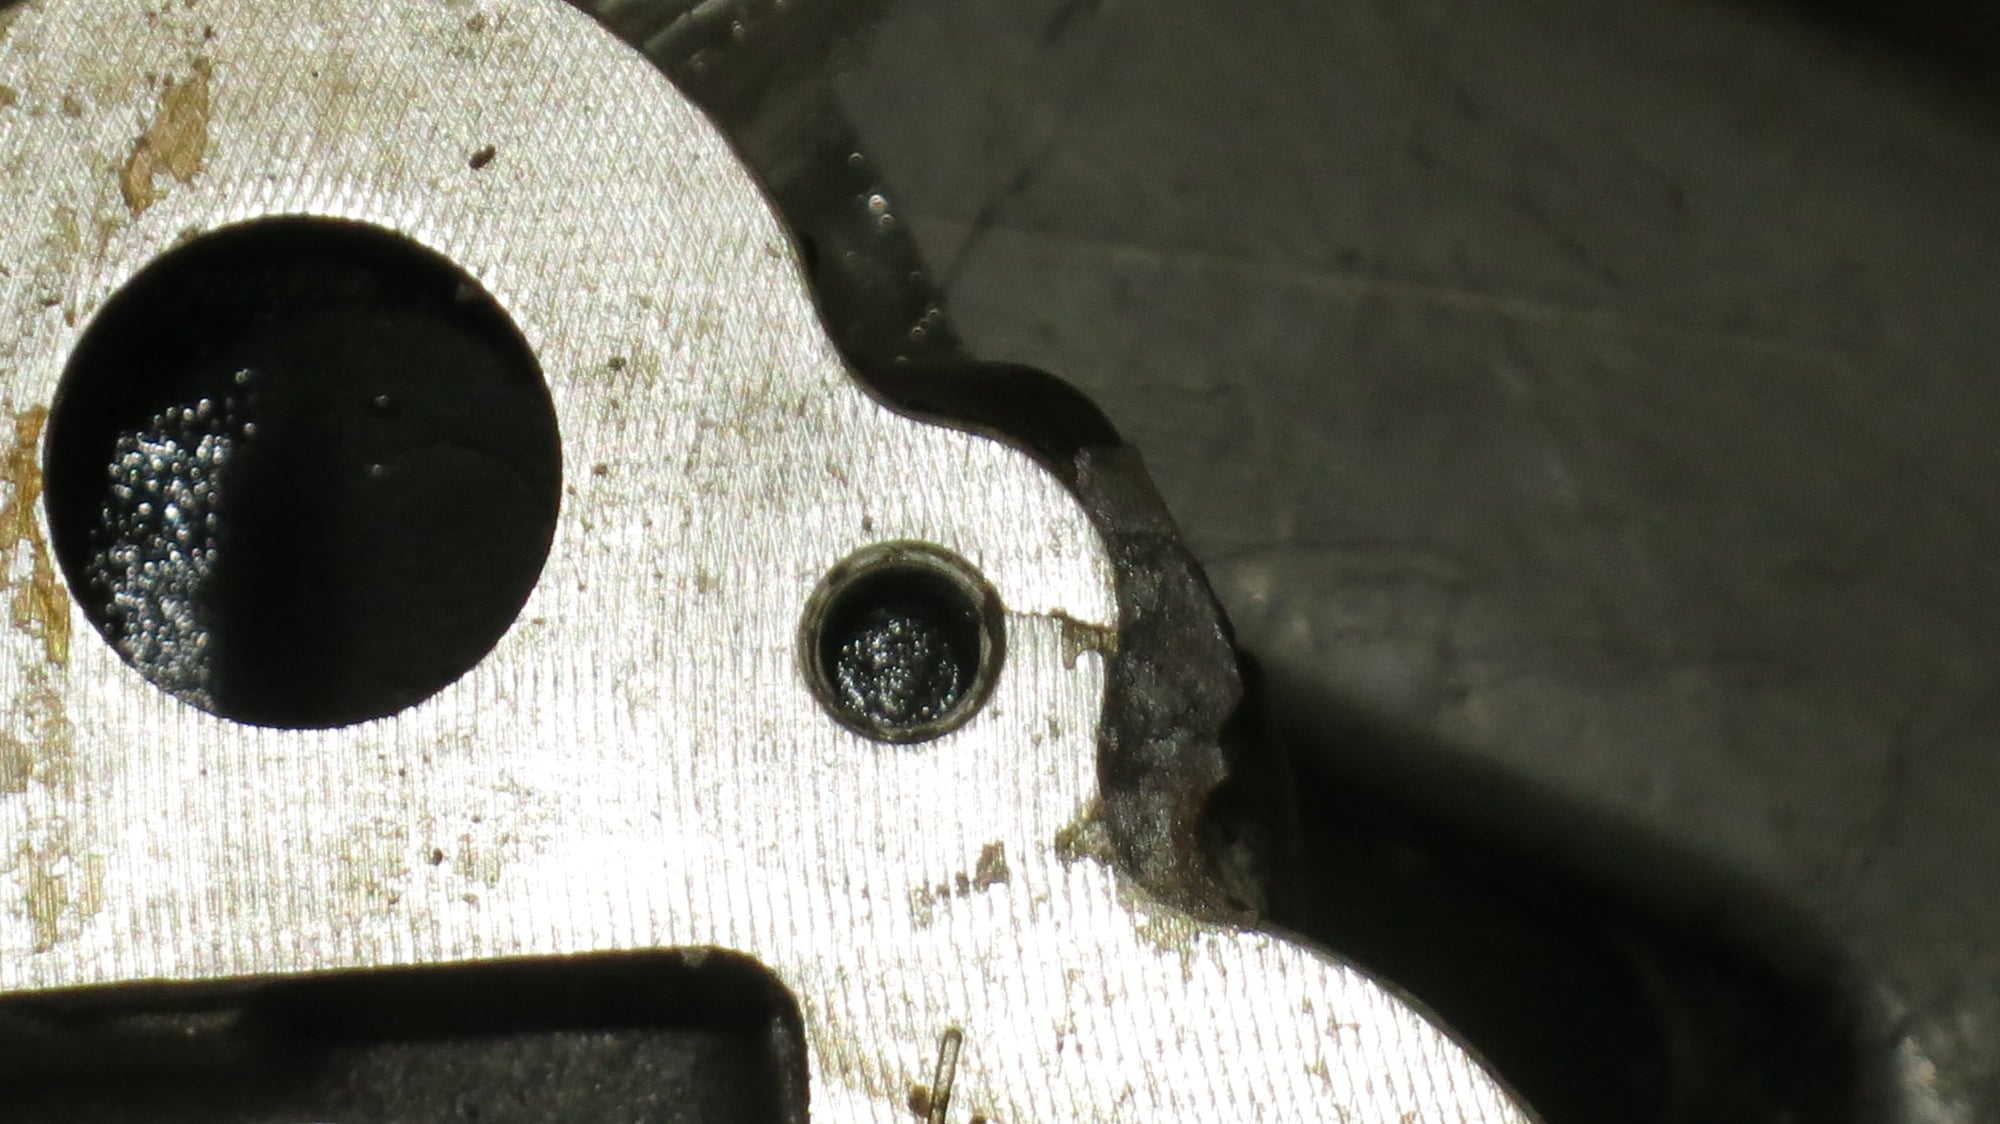
The cam cover to cam housing bolts were hugely over torqued causing cracks in the cam housing. they fixed this with a dab of JB weld - that's it. This was for at least 1/4 of the 18 bolts per head. I spent a long time installing Timecerts fixing all this
Note the JB Weld in the above picture. After I timecerted things, I cleaned that up!
And there were a host of other 'stupid mechanic tricks' that I found!
There was also the mess waiting to happen...
After everything was disassembled, everything was cleaned, brushes were used to clean the nooks & crannies, chased all the threads, then everything was cleaned again. A word about chasing threads - seems to be a debate out there about using 'real' thread chasers or just using a tap (or die). I already have enough tools, so I just use a tap and take a bit of care that I don't cross thread anything.
There is a guy here in the northeast who now operates by word of mouth and is mostly retired, and is remarkable! He did the heads for my 1st Porsche 30+ years ago - a lowly 914... He has done 959 heads and everything in-between!
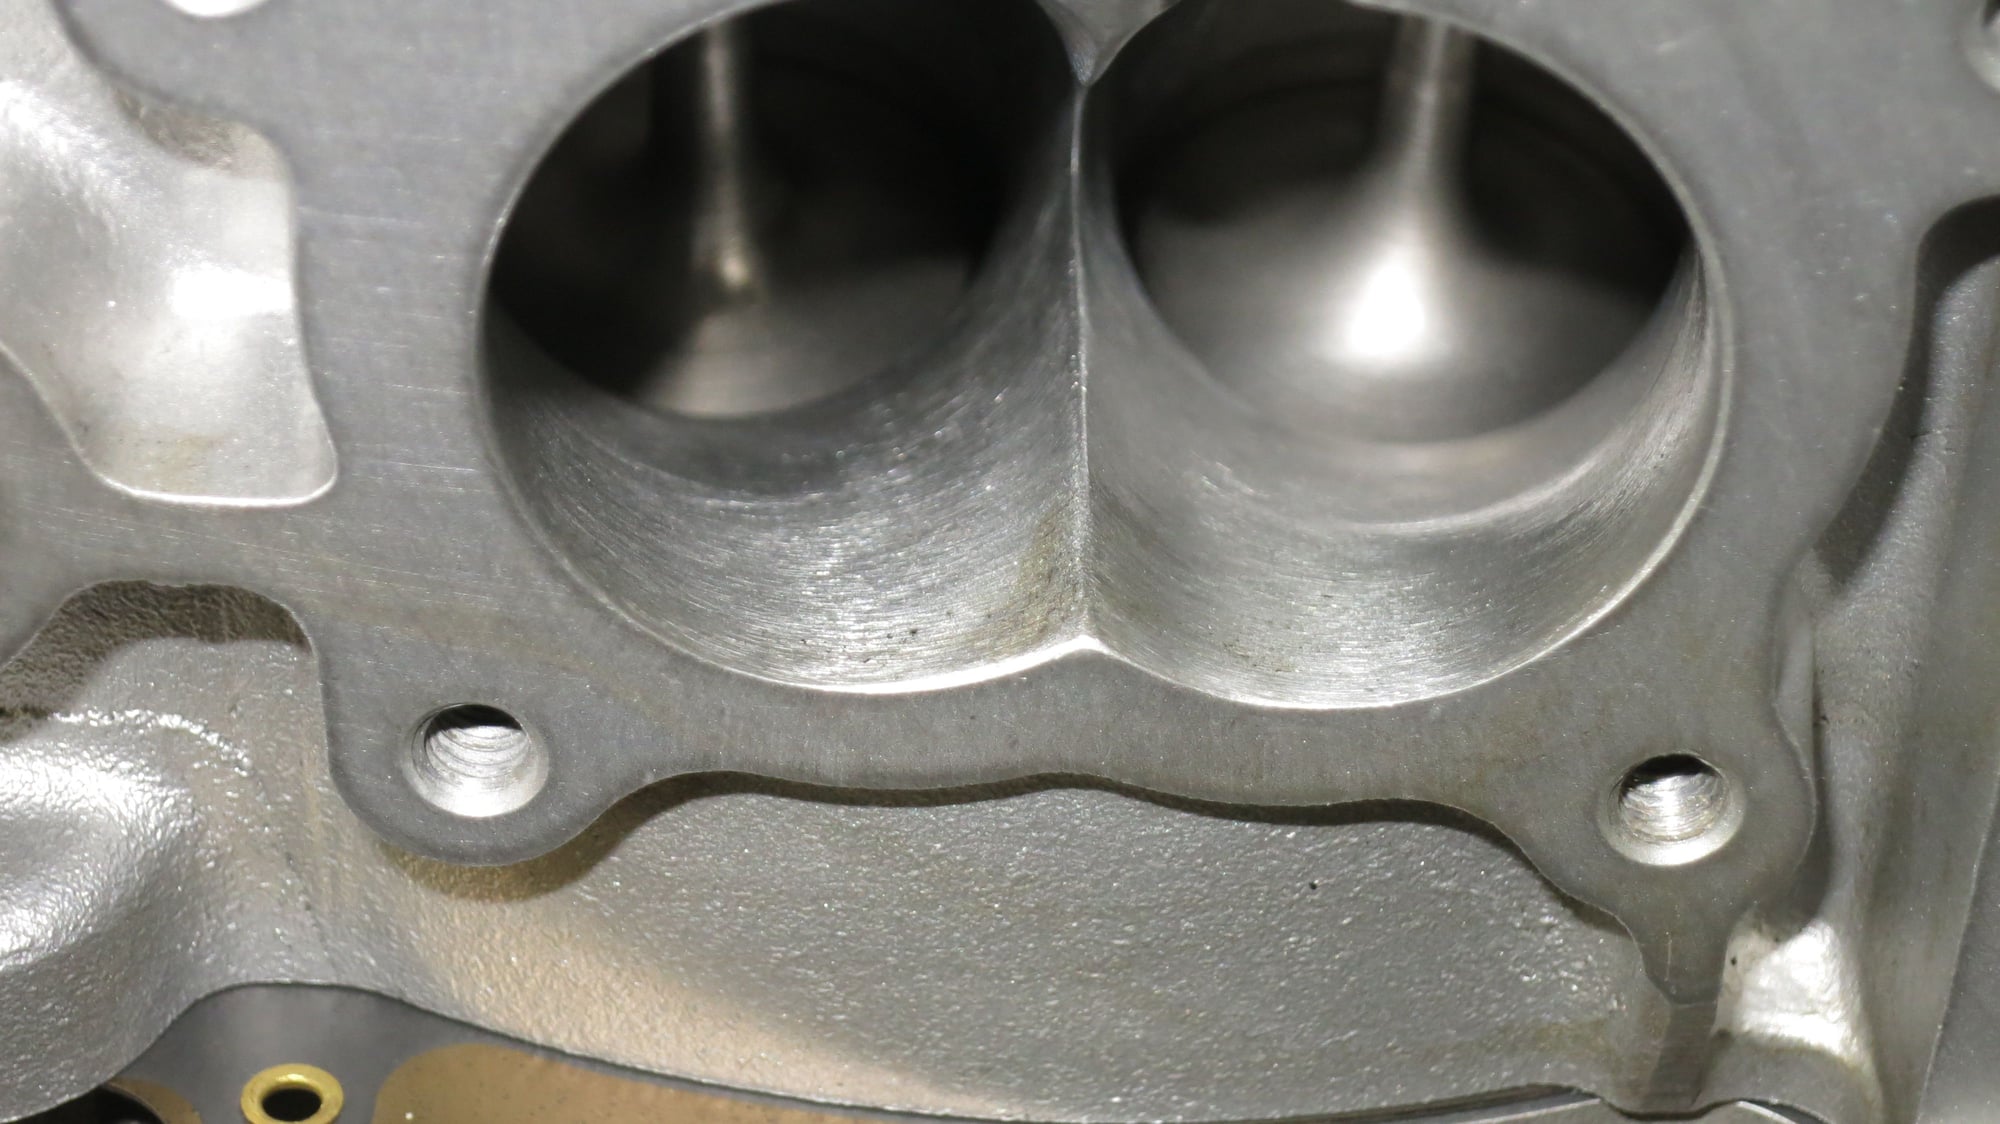
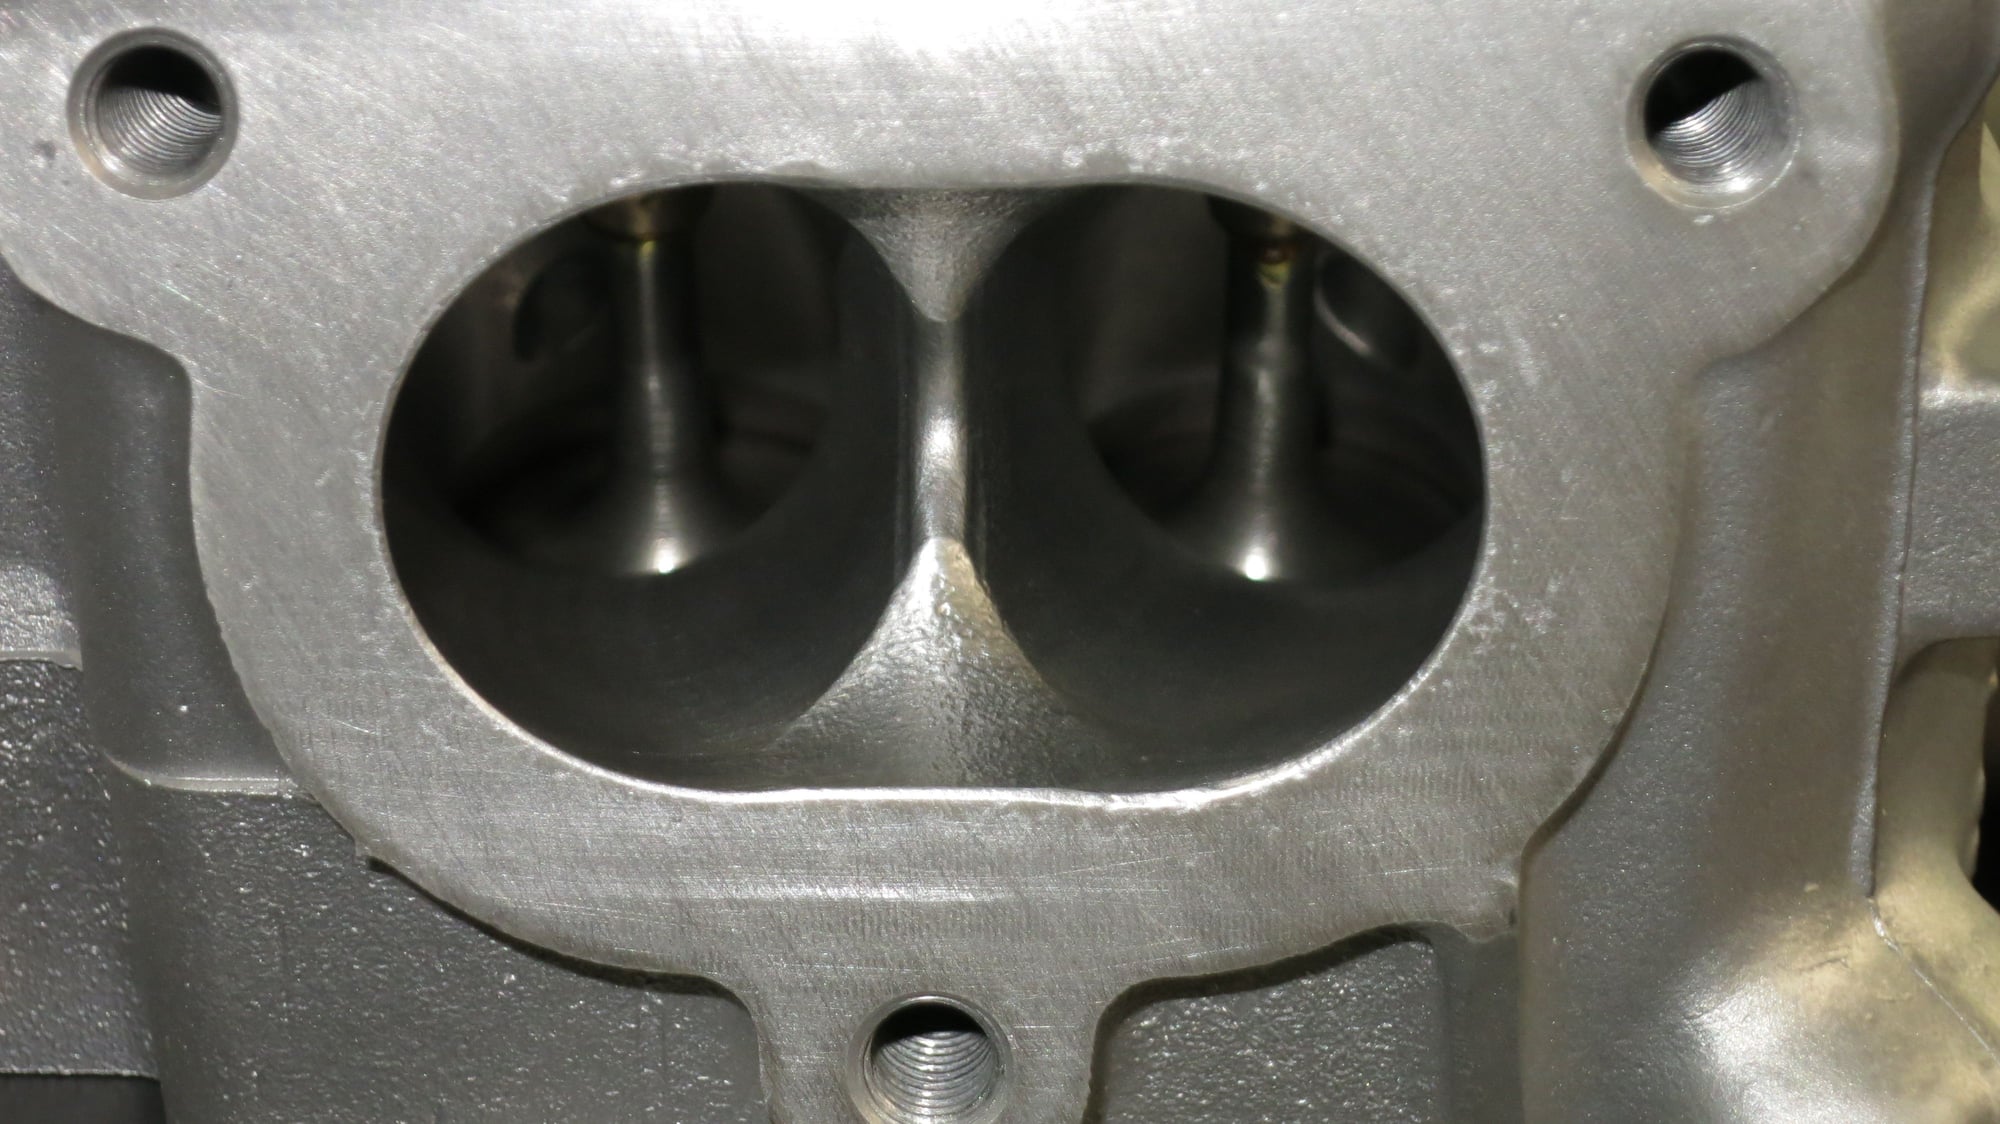
He got my heads and found that had I actually done a leak down, I would not have been happy as the heads were not holding a vacuum!
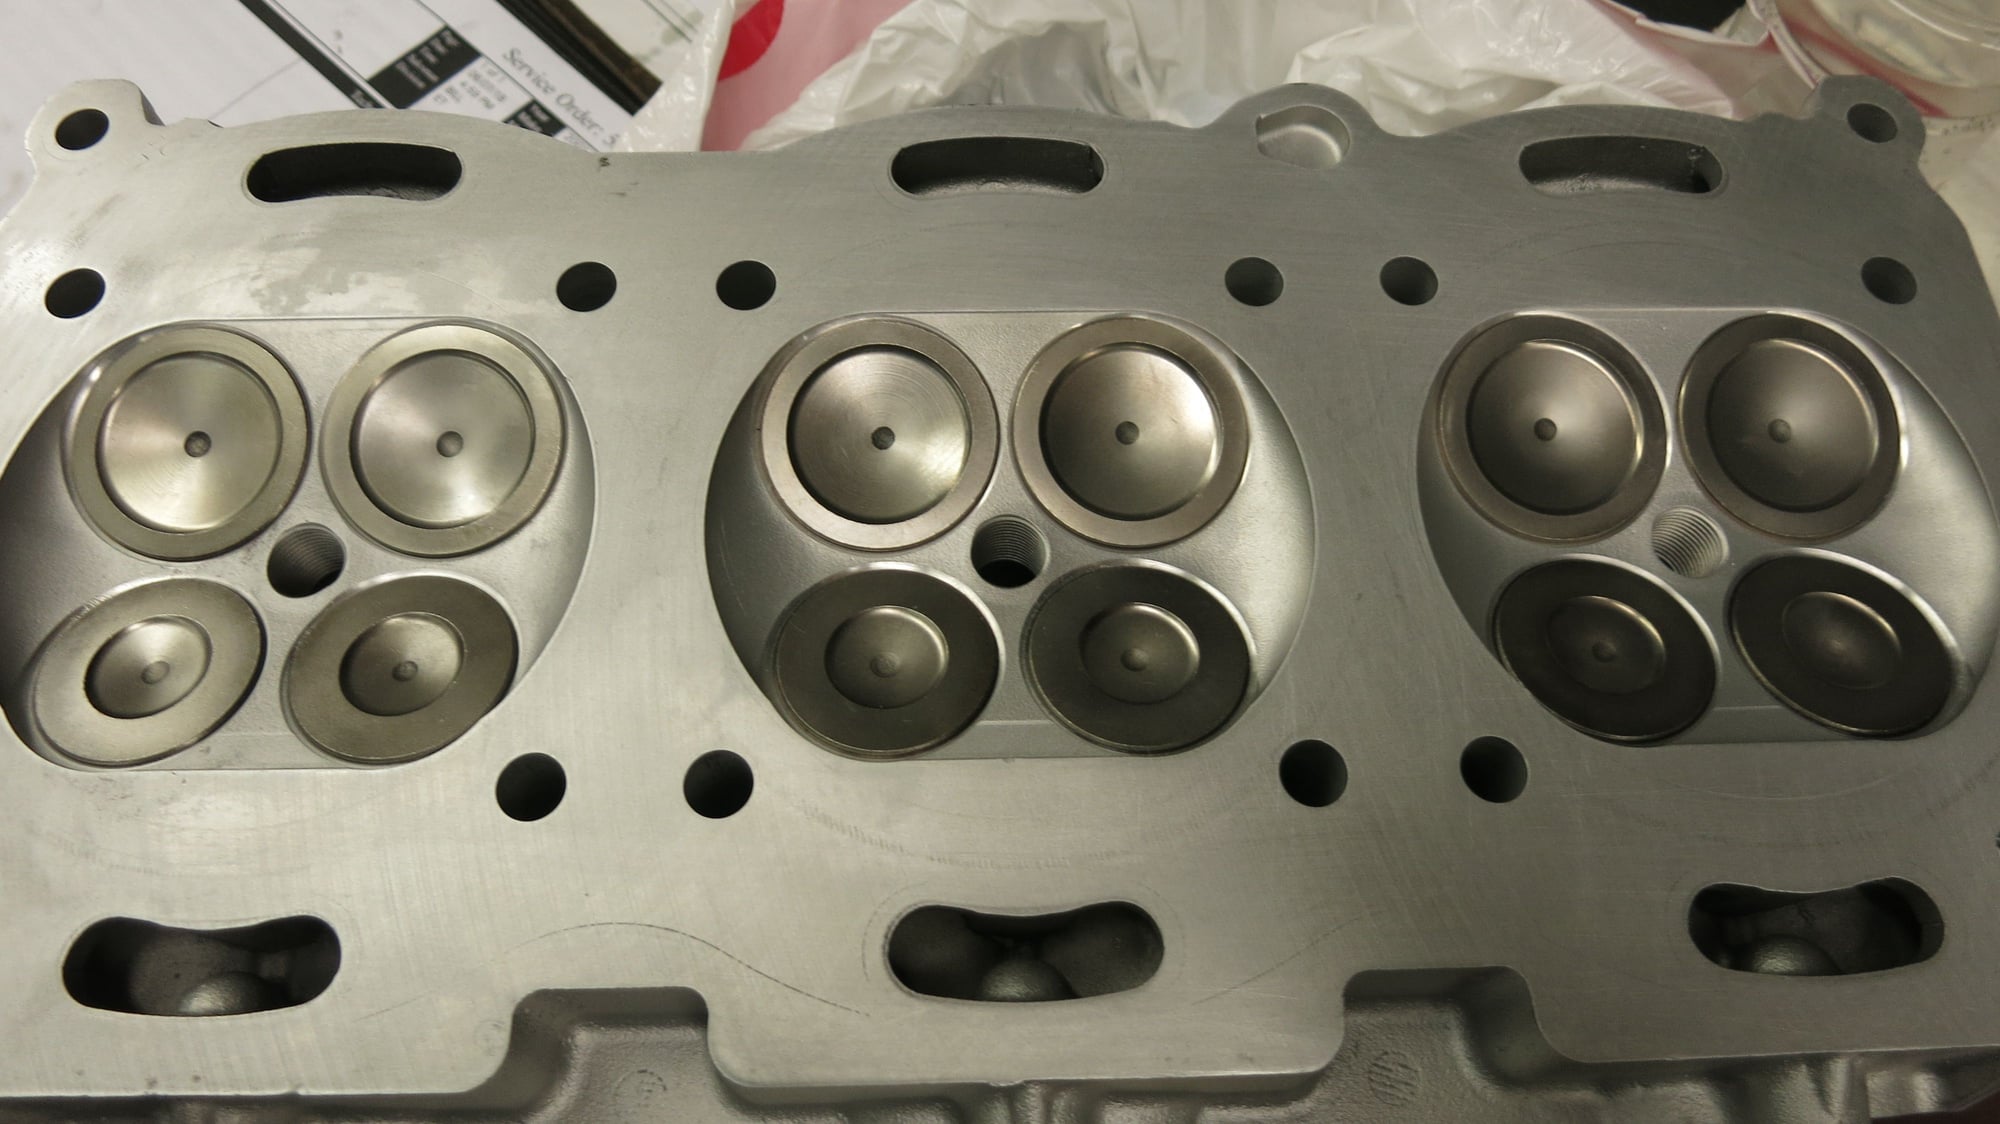
He worked his magic, and I ended up with this:
Exhaust smooth as a baby's behind, intake kinda roughed up a little
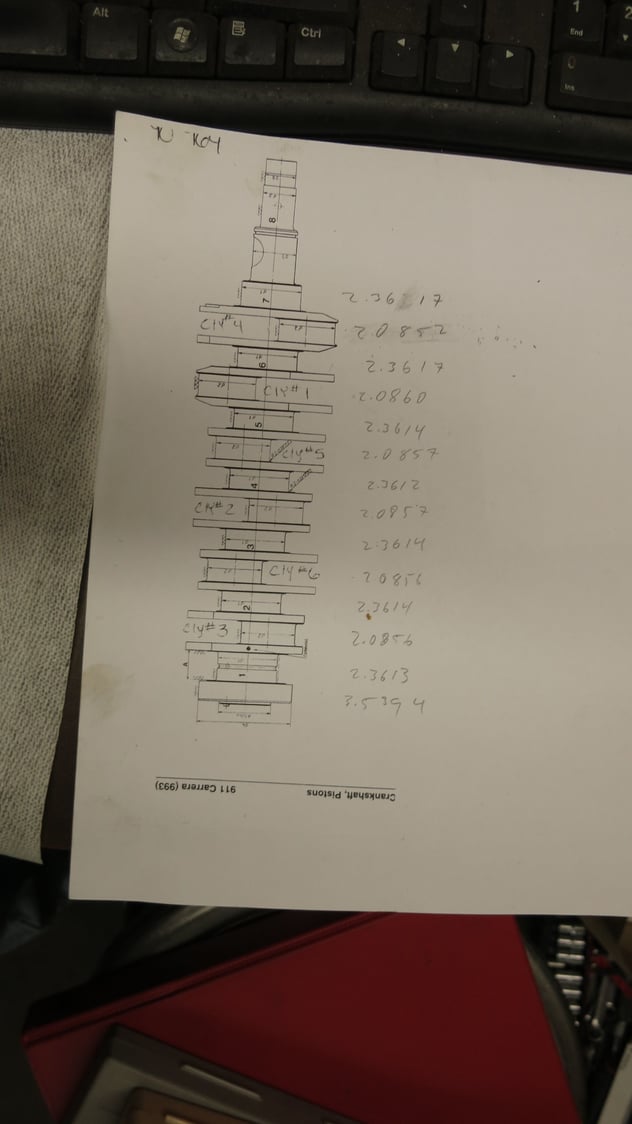
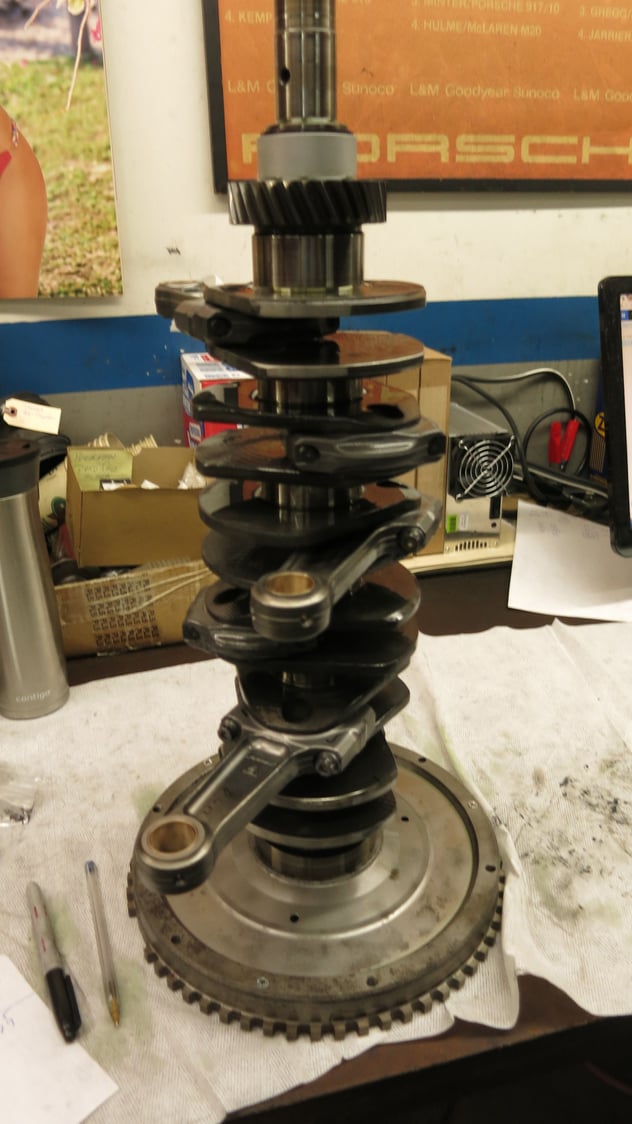
Crankshaft and con rods
The big differences between the 3.6l, 3.8l, and 4.0l motors are:
The 3.6l motor uses 130mm con rods, 22mm wrist pins, and 100.0mm pistons - the older 1st gen gt3 uses a shorter con rod ~127mm (I think)
the 3.8l uses the 3.6l crank with 130mm con rods, 23mm wrist pins, and 102.7mm pistons - the con rod is same length as the 3.6l, but the wrist pin is a bit larger in diameter.
The 4.0l introduces a new crankshaft with a different oil pump for clearance issues.
The OD of the 3.8l P&Cs is the same as the OD of the 3.6l P&C, which means that nothing needs to happen to the case. They just slip in!
As with everything on this motor, pay attention to everything:
I used ARP rod bolts. these get torqued to a value, loosened, then there is a final stretch, which in the case of ARP is .006". In fact, you don't need to apply a specific torque for the final stage, just tighten until you get the designated stretch.

 10-05-2018, 12:14 AM

 .
.