When you click on links to various merchants on this site and make a purchase, this can result in this site earning a commission. Affiliate programs and affiliations include, but are not limited to, the eBay Partner Network.
I had to call them. They wanted me to ship my cylinders first, but I can't do that since it's my daily driver. They did a great job working with me and were able to scrounge up a couple to send me (those may have been the only ones they had). I paid a $500 refundable core charge and another $50 to expedite.
I'm not sure what your time table is but I should have mine out next weekend (if all goes well). So CH should get mine back the following wed or so
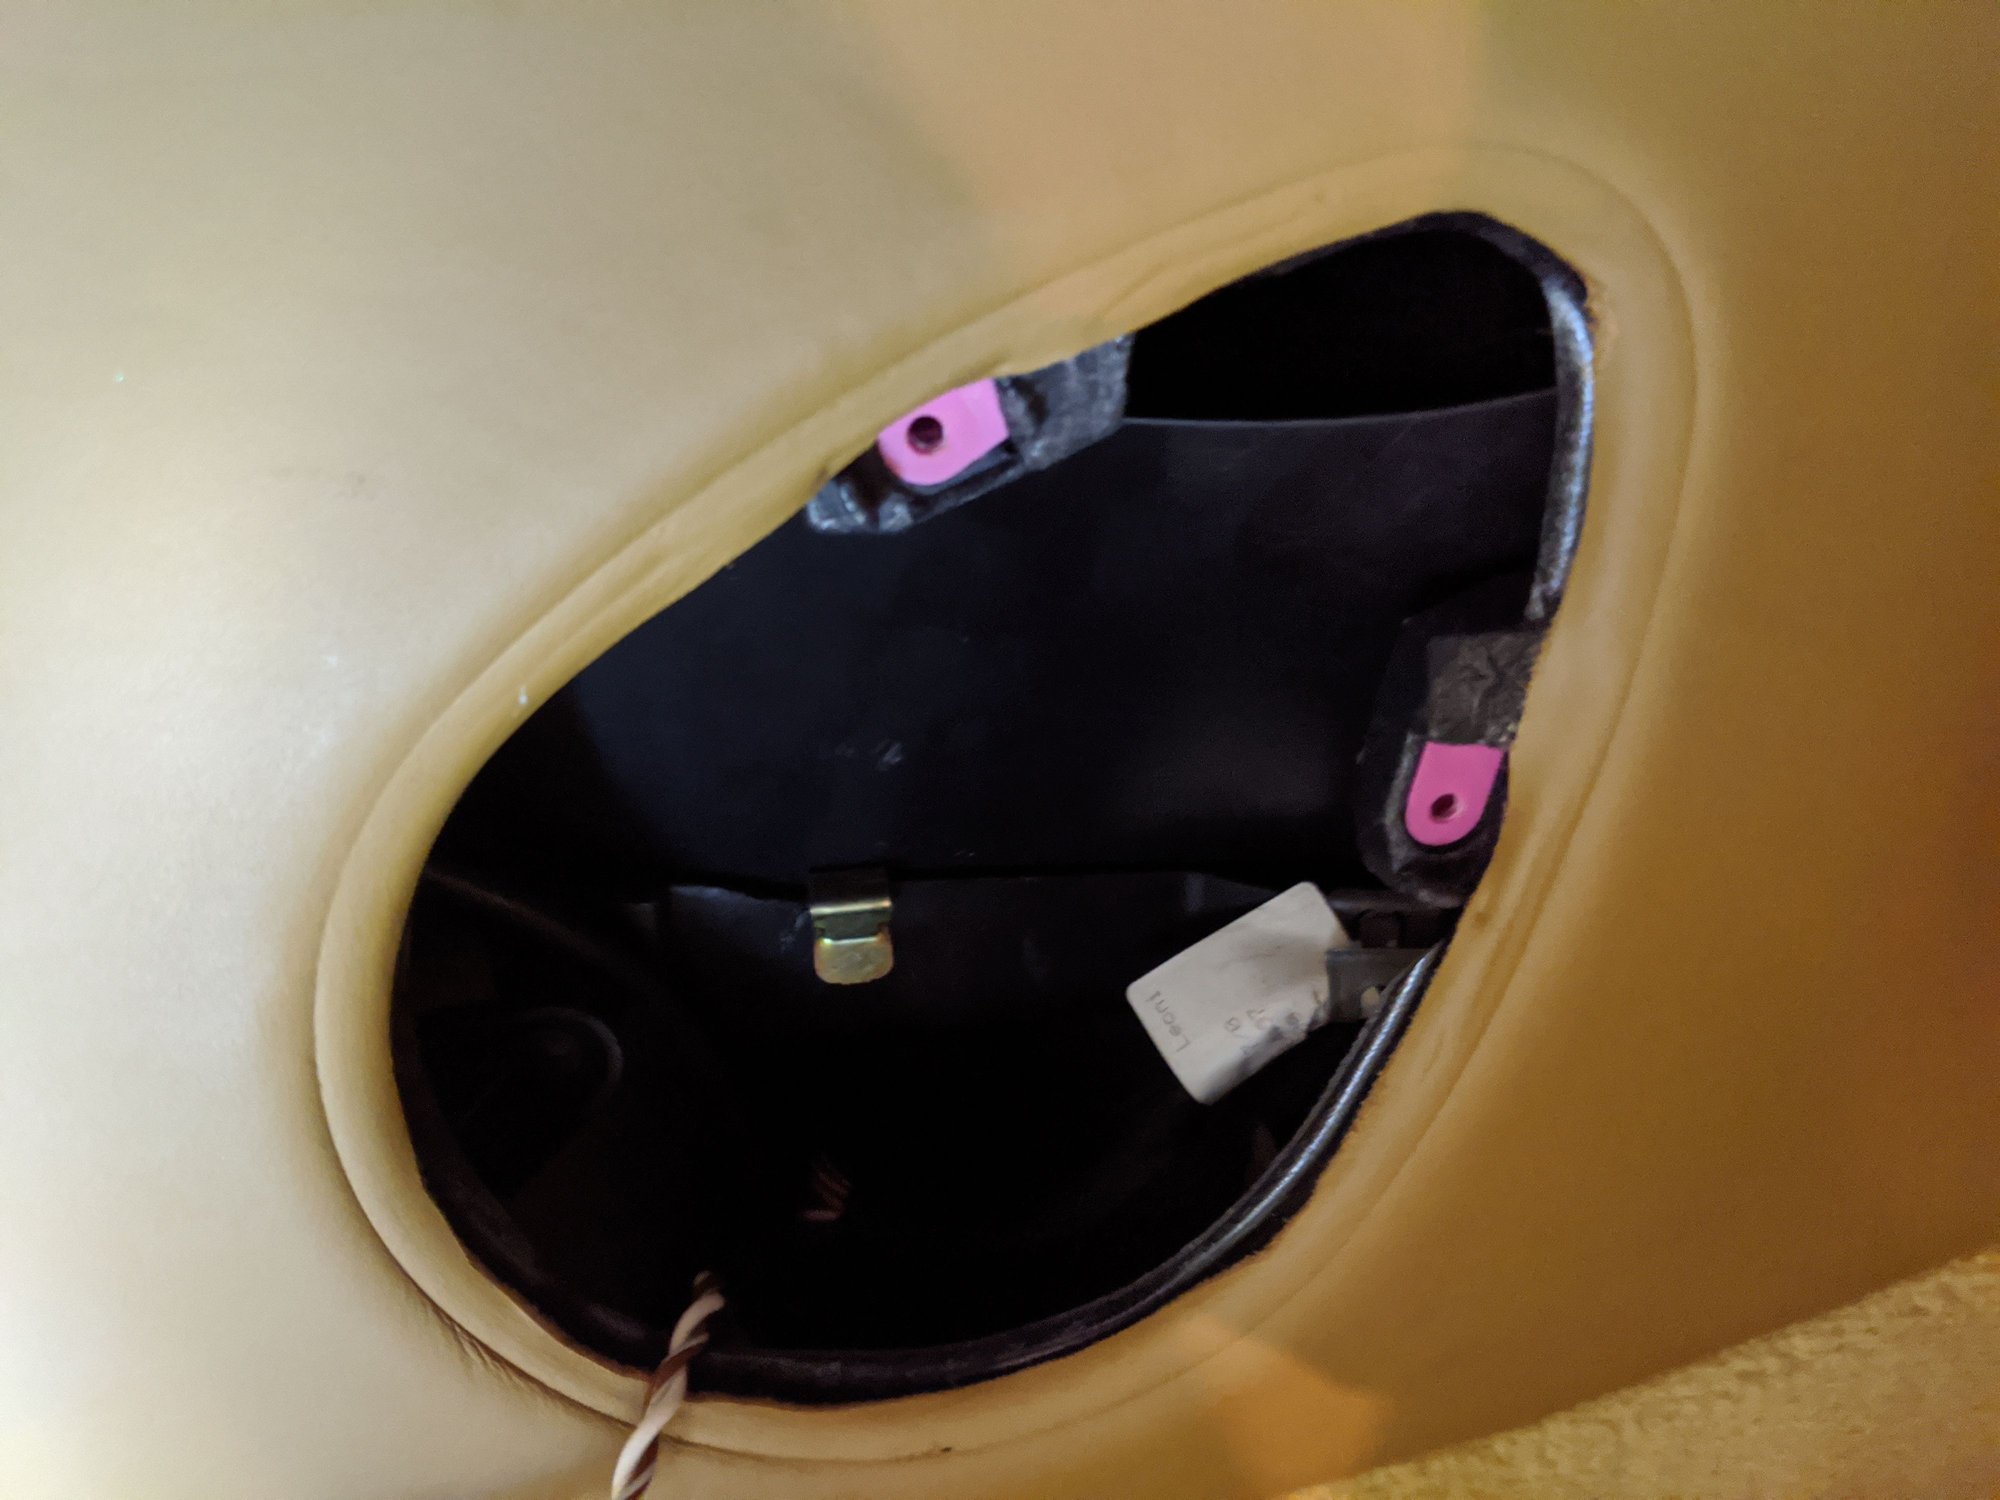
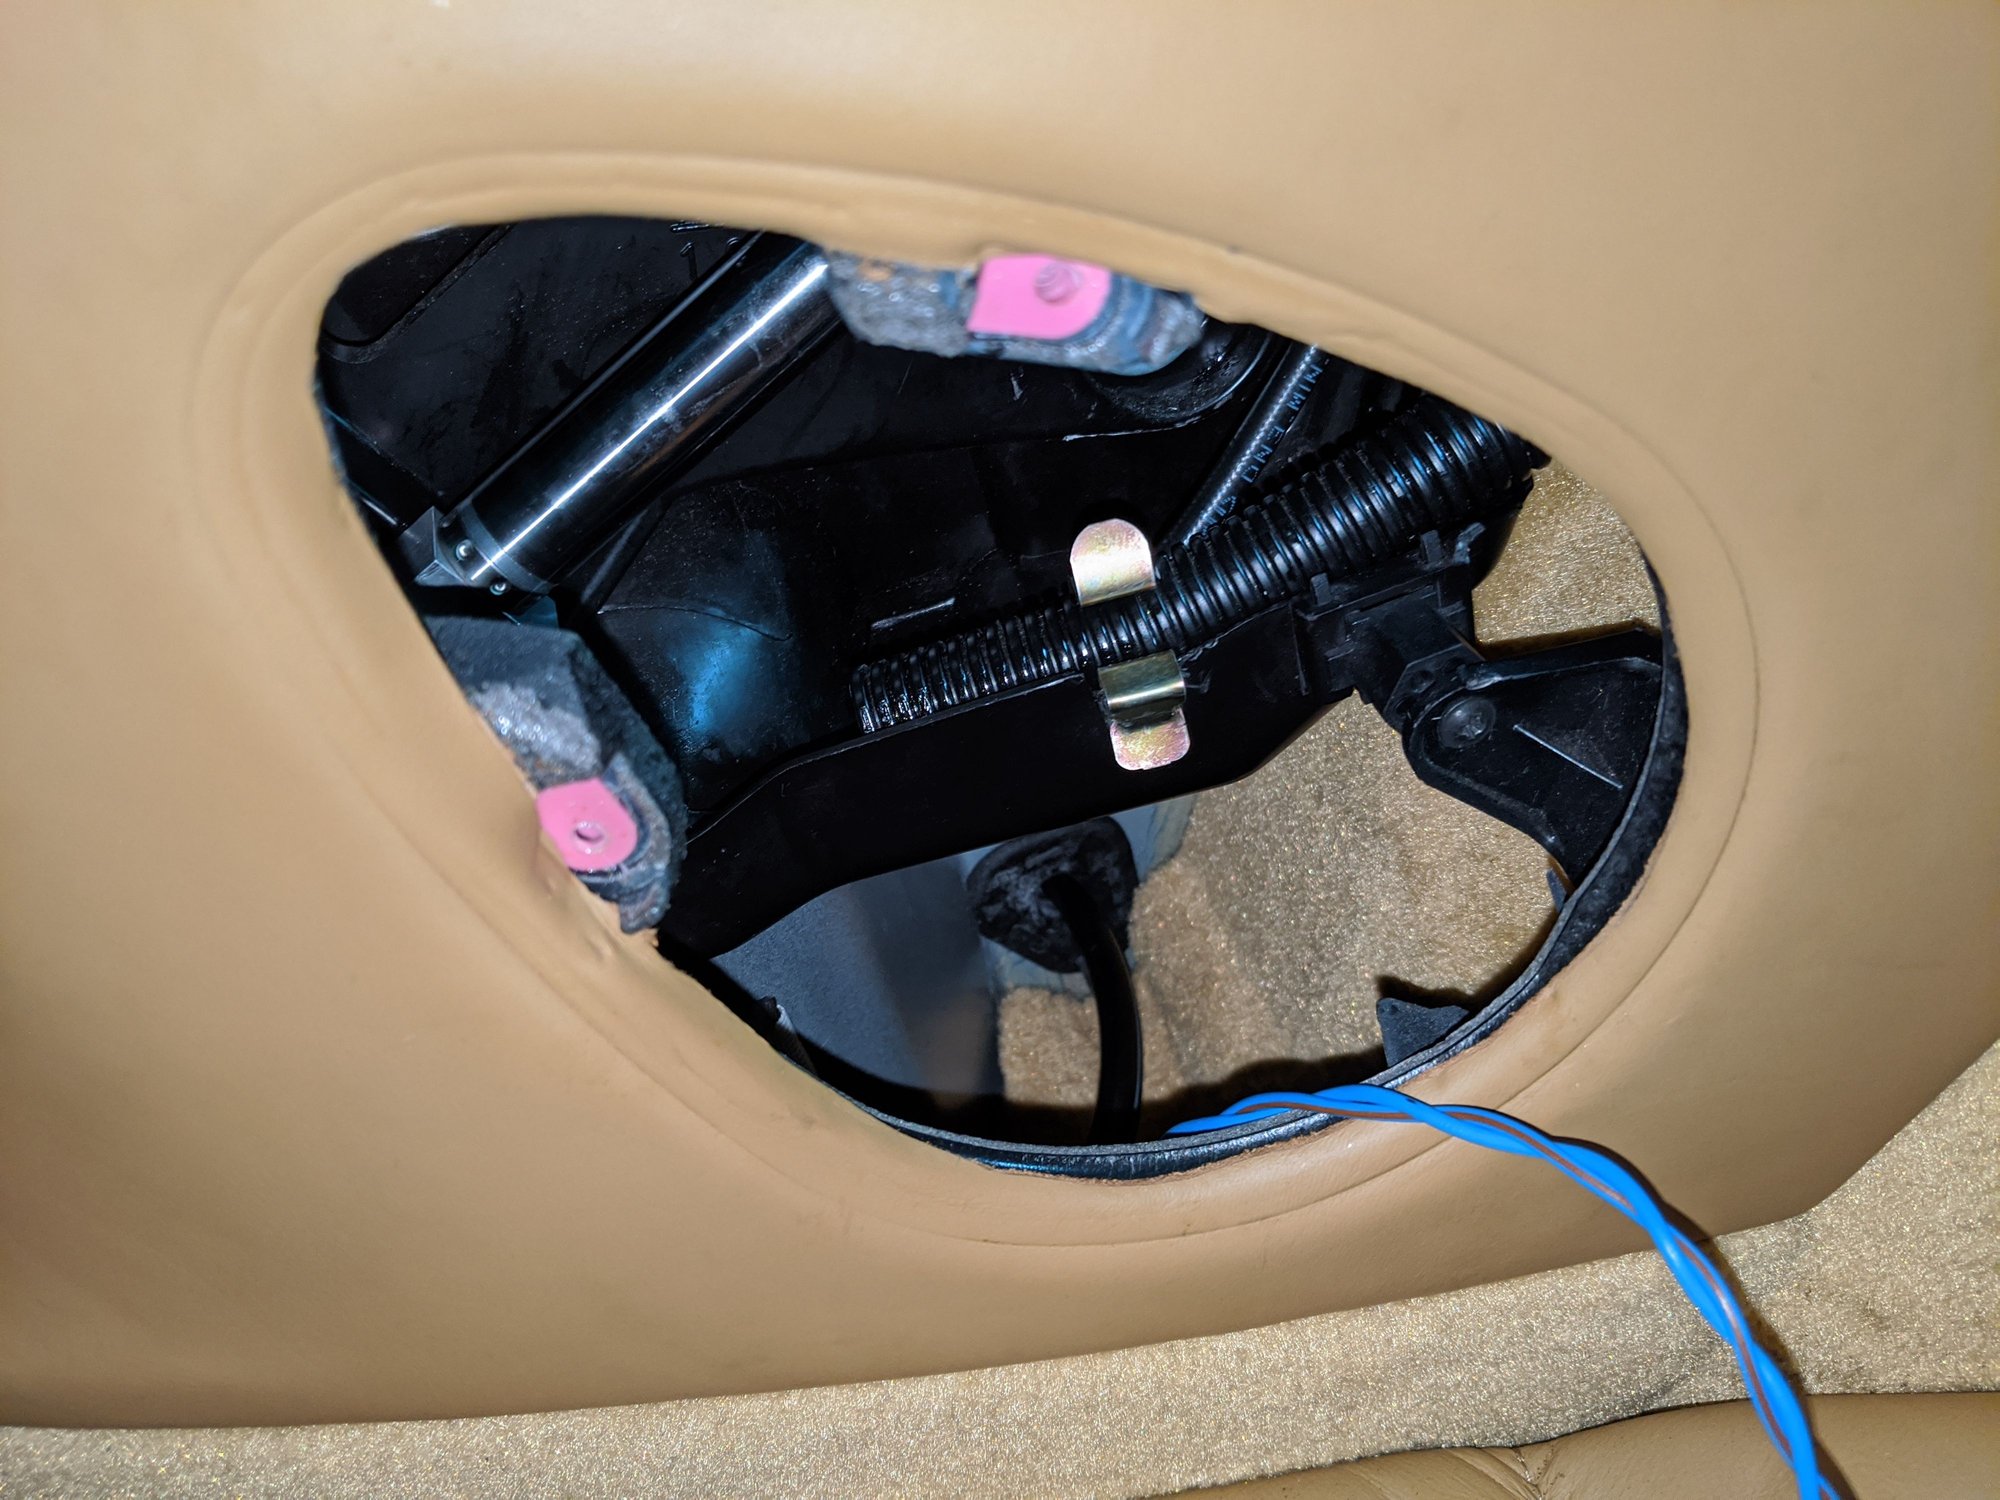
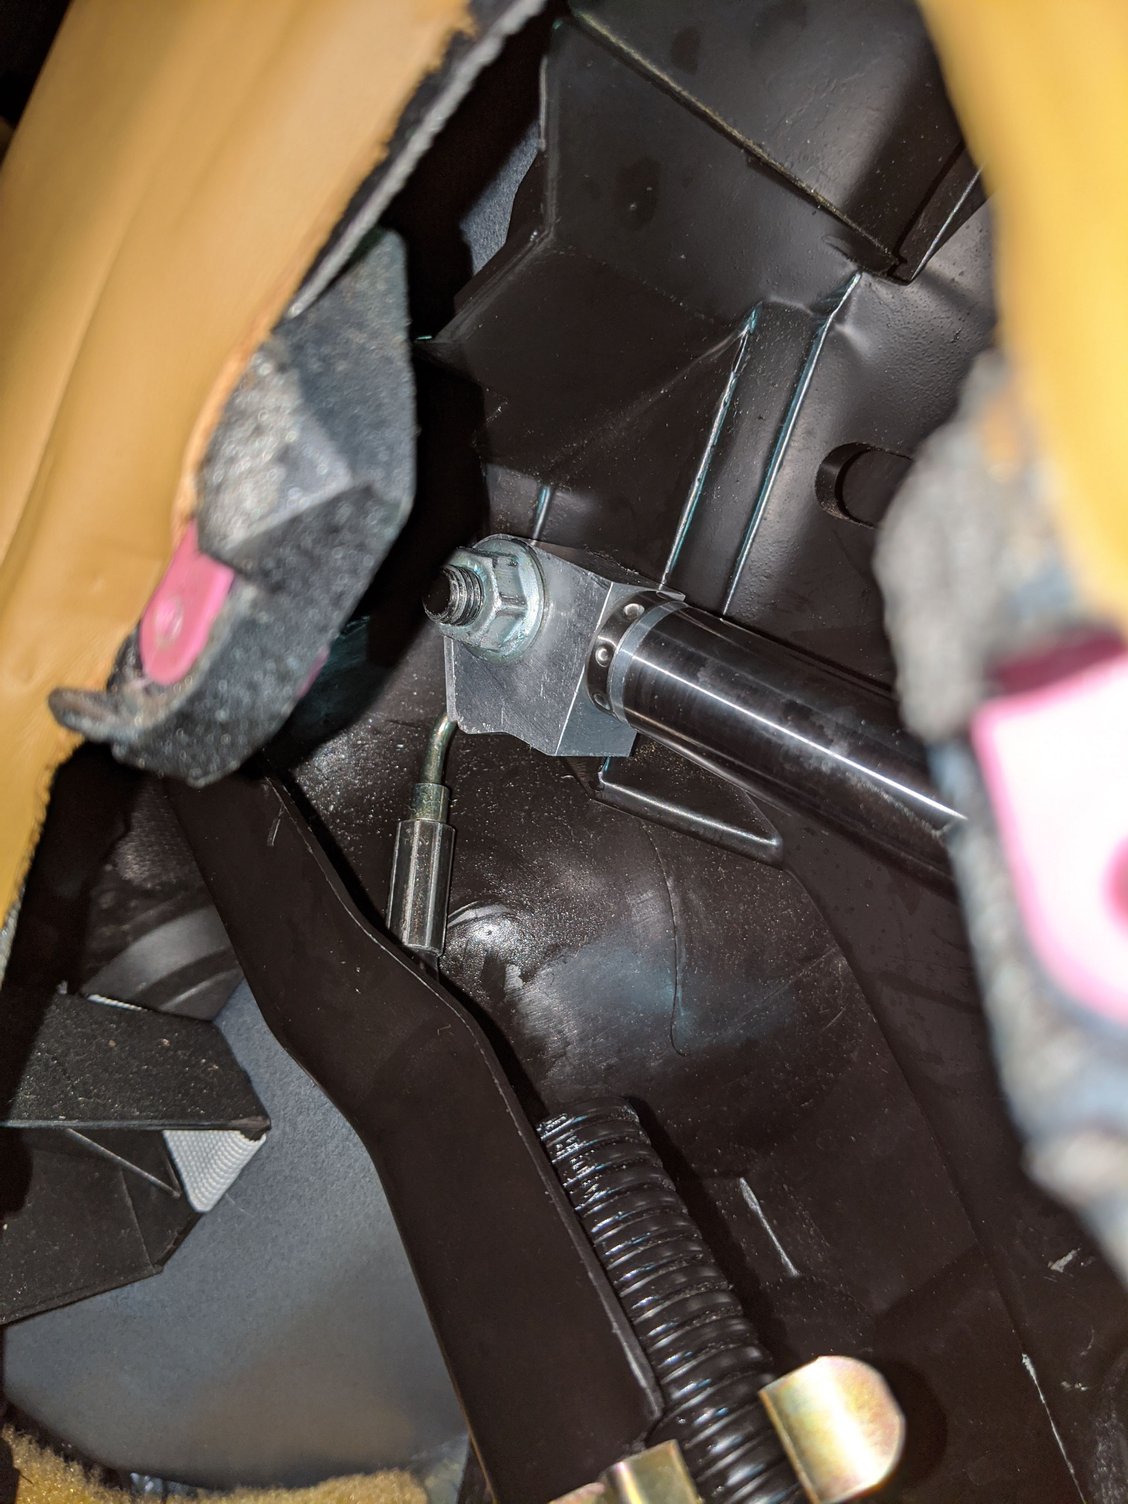
I just did the exchange took 3hrs all told. I would have been done in 2ish but it was very hot and my helper bailed on me. I’ll post some pictures but you can save a ton of time and likely some flesh by removing the back seat side speaker. The front 13mm piston nut is right there. The "c clamp" goes on way easier if you jiggle the top a bit.
also don’t leave your glasses on the top when you open it
I just did the exchange took 3hrs all told. I would have been done in 2ish but it was very hot and my helper bailed on me. I�ll post some pictures but you can save a ton of time and likely some flesh by removing the back seat side speaker. The front 13mm piston nut is right there. The "c clamp" goes on way easier if you jiggle the top a bit.
also don�t leave your glasses on the top when you open it
M
I never felt the need to remove the speaker. What year is your car?
2000 C4. I didn't try the other way since when I removed the speaker the nut was right there. Took maybe 30 sec. It was also nice as I could shine a light from the bottom which made it easier to catch the potentiometer
The DIY route is a pain in the butt.
Send�em to the Craig guy in YouTube. Turnaround took less than a week and they�ve worked great since install.
Wish I could sell ya the rest of Porsche hydraulic fluid I didn�t use. Didn�t take much for job.
Hope that helped
Been about a year since my earlier post up in this thread asking for thoughts on this. I ended up sending off my actuators to Craig, per fitman's recommendation. Got it done in June of last year, and they've worked like new since. Not an easy choice - I've gotten more cheap over the years, so I wasn't excited about throwing $400 toward something I might be able to do myself. But there's enough reports of pain in the rebuild (and my suspicion that Craig would still do a much better job than I could ever do on my first go-round), that I decided to put in someone else's hands. Glad I did! Good luck to everyone else with whatever route they choose, and much thanks to all the helpful posts on this thread with tips on how to get those things out (that removing the speaker bit would have been helpful for me - that bolt is tough to get to).
s
Sent mine to Craig also.He actually removes the. ‘Eye” off of the shaft and replaces the seal with a better version.There are a lot of hack fixes out there be careful.
A couple of weeks ago I barely got my top up before a deluge rained down from the sky. I just sent mine to Craig today. Will report back.
Craig rebuilt my cylinders and got them back to me very quickly. It would have been less than a week if it wasn’t for a screw up by the USPS. I highly recommend his service. I started to try to rebuild them myself but I quickly realized it was a bit out of my comfort zone and just decided to let someone do it who has done it a ton of times.
He gave me a couple of tips that helped me out quite a bit. There is a sensor arm on the driver’s side. The plastic wrapped peg that slides in the guide channel goes through this arm as well. It tells the computer what position the top is in. When I was removing my cylinders, I didn’t see the arm nor was I aware of it. It seems like it’s made of plastic and if you kinda wrestle the cylinder out you could break it I would think. Luckily mine was intact.
The other tip he gave was just stick the hose ends of each cylinder down in a container of fluid and slide them back and forth a few times. You will hear all kinds of tricks about how to prime the system, but this simple method worked fine for me.
I’ll share a tip about something I ran into. When you are reassembling everything, if you bolt the hose ends to the hydraulic pump before attaching the top control arms don’t fully tighten the bolts until you get the arms and clips back on. The position of the peg on the cylinder has to be just right to slide the arms back over both pegs, and leaving those bolts just a bit loose makes it much easier to move and wiggle things around. I found out the hard way.
Hope this helps.
Last edited by Dana Whicker; 05-04-2021 at 11:27 AM.
Sorry to revive an old thread but can the top be shut with the rams off? Want to send mine out to Craig but no garage to store it in in the meantime. Thanks!


 08-12-2020, 11:35 AM