
Doing AOS- rear intake plenum boot - how on earth to remove?
 11-07-2016, 02:30 PM
#61

I was pretty **** with putting the throttle cable back in place before I snapped it in, it's angled in the same way as your photo and the butterfly on the TB is indeed closed, so hopefully i have it. Thanks for the reminder though.
Oh gosh, the weather has been so nice even up here in Canadaland it's been killing me not driving it. Every day has been pushing 20C, sometimes warmer. I think I've got about one or two hours of work left until it's all buttoned up and begin refilling the cooling system... which, btw, any tricks I should know about for that?
Is it a crazy idea to keep its *** on stands to try to keep the rear a little higher for the air to come out?
Edit: Also, the bearings in the idlers are 3202, not 6202. I wasn't able to measure the width well until I pulled them. A really PITA to remove though, needed a press.
 11-07-2016, 02:48 PM
#62
Rennlist Member
Join Date: Apr 2010
Location: Ormond Beach, FL
Posts: 5,931
Likes: 0
Received 1,182 Likes
on
756 Posts
Yes, it is a good idea to keep the rear end up when filling the coolant system. I know others highly recommend the ULift vacuum filler system. But on the times when I have had to drain the coolant just on the engine side, slightly overfill the coolant tank, leave the coolant cap off, run the engine until it is slightly warm (less than five minutes), it will burp out some air and the coolant level will drop in the tank, refill to the max line, install cap and put the bleeder valve in the up position. Short drive to warm it up all the way (thermostat open) and then home. You want to be very careful on the short drive, i.e., short by meaning just until it gets to operating temp and no high RPM's. Our engines are very sensitive to hot spots in the heads and you do not want to stress the engine at all. Cool down, remove coolant cap and refill in between the max/min line. You may have to do this a couple of times. Watch the level over several drives and you should be good to go.
If I were doing the idler pulleys, I think I would just fork over the money for a whole new set. But that's just me.
If I were doing the idler pulleys, I think I would just fork over the money for a whole new set. But that's just me.
11-07-2016, 03:04 PM
#63
Normally I would absolutely agree, but I took a look at it and saw how easy the bearing should pop out I thought it would be a waste to replace the whole thing, so I never bothered ordering any. Then I went to replace it, holy smokes.
I'm ordering a couple next time I do a parts order
I'm ordering a couple next time I do a parts order
11-08-2016, 02:03 AM
#64
Well, at around 21:30 the never ending Project, let's do an AOS, RH timing chain tensioner and alternator/starter cable on the 996 came to an end.
Finished installing and double checked everything (god, that AC Compressor was almost as much of a pain as the AOS itself), dumped in some coolant and PS fluid, held my breath and turned the key.
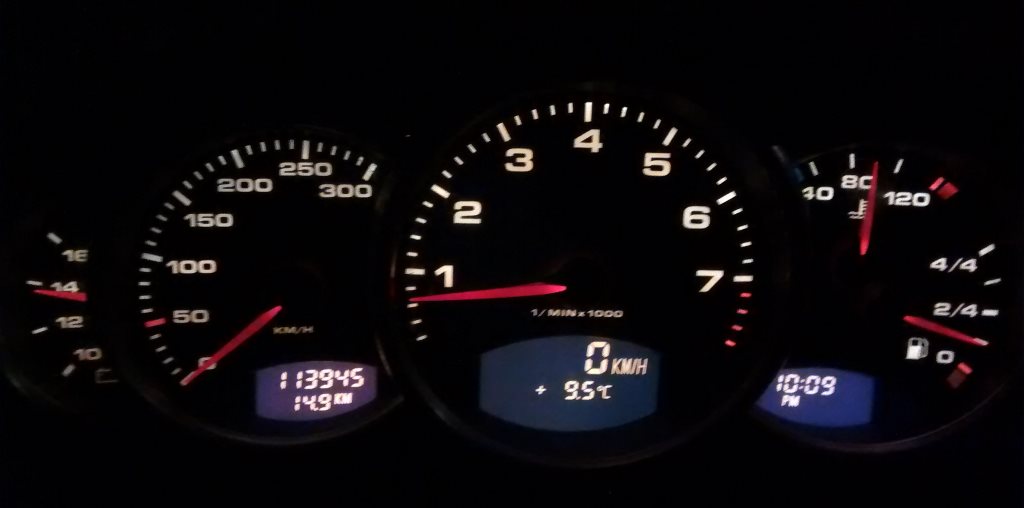
Roared to life instantly and no warning lights. After a few minutes settled to a smooth idle. Let it warm up, took it for a rip. No stumbles, hesitations, shuddering, nothing. Only thing at all were some smells that I am sure just the coolant and PS fluid roasting on the block. Going to make sure there are no leaks as it sits overnight, but other than that go through torque a couple things down and DONE

First time it's been on the road for about 2 months (due to my only working on it an hour here and there) and it felt great.
I would like to thank all those guys that helped out with some tips and tricks. I hope to pass it along going forward!
Finished installing and double checked everything (god, that AC Compressor was almost as much of a pain as the AOS itself), dumped in some coolant and PS fluid, held my breath and turned the key.
Roared to life instantly and no warning lights. After a few minutes settled to a smooth idle. Let it warm up, took it for a rip. No stumbles, hesitations, shuddering, nothing. Only thing at all were some smells that I am sure just the coolant and PS fluid roasting on the block. Going to make sure there are no leaks as it sits overnight, but other than that go through torque a couple things down and DONE
First time it's been on the road for about 2 months (due to my only working on it an hour here and there) and it felt great.
I would like to thank all those guys that helped out with some tips and tricks. I hope to pass it along going forward!
11-08-2016, 10:23 AM
#67
11-08-2016, 01:20 PM
#69
11-08-2016, 04:32 PM
#70
Advanced
Join Date: Jun 2012
Location: Boca Raton, FL
Posts: 97
Likes: 0
Received 0 Likes
on
0 Posts
Lol, she's a Colombian princess....had never been that close to a starting engine. An assault on the senses. The pressure reading meant nothing to her. good videographer though.
I've read several procedures for AOS change, all very similar. I'm wondering two things....1) possible to do from below, lowering engine as during water pump change? When I repaired a leaking AOS clamp from below I checked access and it was tight but accessible and, 2) with all the effort a few more hoses, cables, and fasteners one could drop the engine/transmission and knock out several projects while there. It looks like about 4-5 hours of labor additional to drop the drive train and more fluids but great access for maintenance/upgrades. Looks like you could suspend the a/c compressor and not lose the charge.
Thoughts?
Last edited by Jackstand Louie; 11-08-2016 at 05:14 PM.
11-08-2016, 05:36 PM
#71
Good to have the wives helping so they will appreciate the challenges
I can confirm with the tranny removed, you can work from the bottom alone and not touch anything above. The other way is like you said during water pump change you lower the engine as much as you can and work from both the top and the bottom. You still have to remove the left intake manifold though.
Yeah, dropping the engine is not that much longer. I don't think I will drop the engine just for the AOS but if you need to replace the ims and clutch, definitely drop the engine.
Lol, she's a Colombian princess....had never been that close to a starting engine. An assault on the senses. The pressure reading meant nothing to her. good videographer though.
I've read several procedures for AOS change, all very similar. I'm wondering two things....1) possible to do from below, lowering engine as during water pump change? When I repaired a leaking AOS clamp from below I checked access and it was tight but accessible and, 2) with all the effort a few more hoses, cables, and fasteners one could drop the engine/transmission and knock out several projects while there. It looks like about 4-5 hours of labor additional to drop the drive train and more fluids but great access for maintenance/upgrades. Looks like you could suspend the a/c compressor and not lose the charge.
Thoughts?
I've read several procedures for AOS change, all very similar. I'm wondering two things....1) possible to do from below, lowering engine as during water pump change? When I repaired a leaking AOS clamp from below I checked access and it was tight but accessible and, 2) with all the effort a few more hoses, cables, and fasteners one could drop the engine/transmission and knock out several projects while there. It looks like about 4-5 hours of labor additional to drop the drive train and more fluids but great access for maintenance/upgrades. Looks like you could suspend the a/c compressor and not lose the charge.
Thoughts?
11-08-2016, 07:01 PM
#72
Rennlist Member
Having recently done all of this stuff, I would definitely +1 on dropping the engine if you have 2 or 3 tasks, one of which is AOS (or coolant tank!). Especially if you are due to flush the coolant anyway.
11-09-2016, 05:00 PM
#73
I've never dropped the engine completely yet, but I concur. If I had to do this and one other hard to get at thing and if dropping the engine made both super easy? Yeah, I'd probably drop the engine too.
05-09-2017, 09:39 PM
#74
Instructor

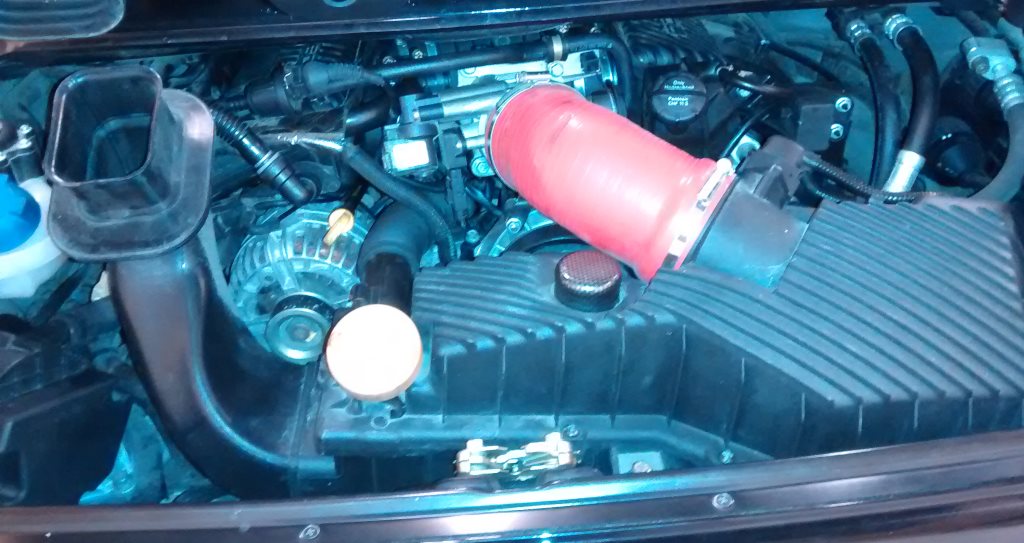
That rear plenum is a major pain in the rear, but it can be removed and put back in without loosening an intake manifold. To remove, remove the hose clamps. If the hose clamps are pointed in a way that you can't loosen them, then you'll have to cut them off and replace them.
Once the hose clamps are off, you can use a pry bar to move the boot as far to the side as possible working either side. Eventually it will come off.
Putting it back on, you have to put the boot on the left side completely over until the edge of the boot is inline with the intake. Its not easy to do, but it can be done. Then the right boot front edge has to be put on as far as possible with the front of boots' edge lined up with the edge of the intake. Then you have to carefully manuver the left side of the plenum on while getting the right side started. Eventually you'll get it to pop into a position where you can lever the boots onto the plenum and put the hose clamps on. Its a real pain but I was able to do it as I had to when I removed my tiptronic transmission. It was much easier to get to the upper bell housing bolts by removing the rear plenum.
05-15-2017, 08:12 AM
#75
For that last bolt (closest to the AOS) on the left intake manifold, you need to do two things
1) lower the engine enough to get your hand from above. Use a 1/4" drive ratchet, an extension and a socket
2) loosen the AOS and push it up a bit. Otherwise it will block that bolt
Coincidentally I just replaced my AOS ('03 3.6L so it's a bit different and even more difficult due to the rearmost bolt on the AOS) while my trans is out. I was able to do everthing from the bottom but it's still not easy due to that rearmost bolt on the AOS.