When you click on links to various merchants on this site and make a purchase, this can result in this site earning a commission. Affiliate programs and affiliations include, but are not limited to, the eBay Partner Network.
So, after much reading around the whole "dirty rads" subject, decided to tackle this DIY today. Overall it went relatively smoothly, although one of the wheel well rivets disappeared into another dimension when I popped it out.
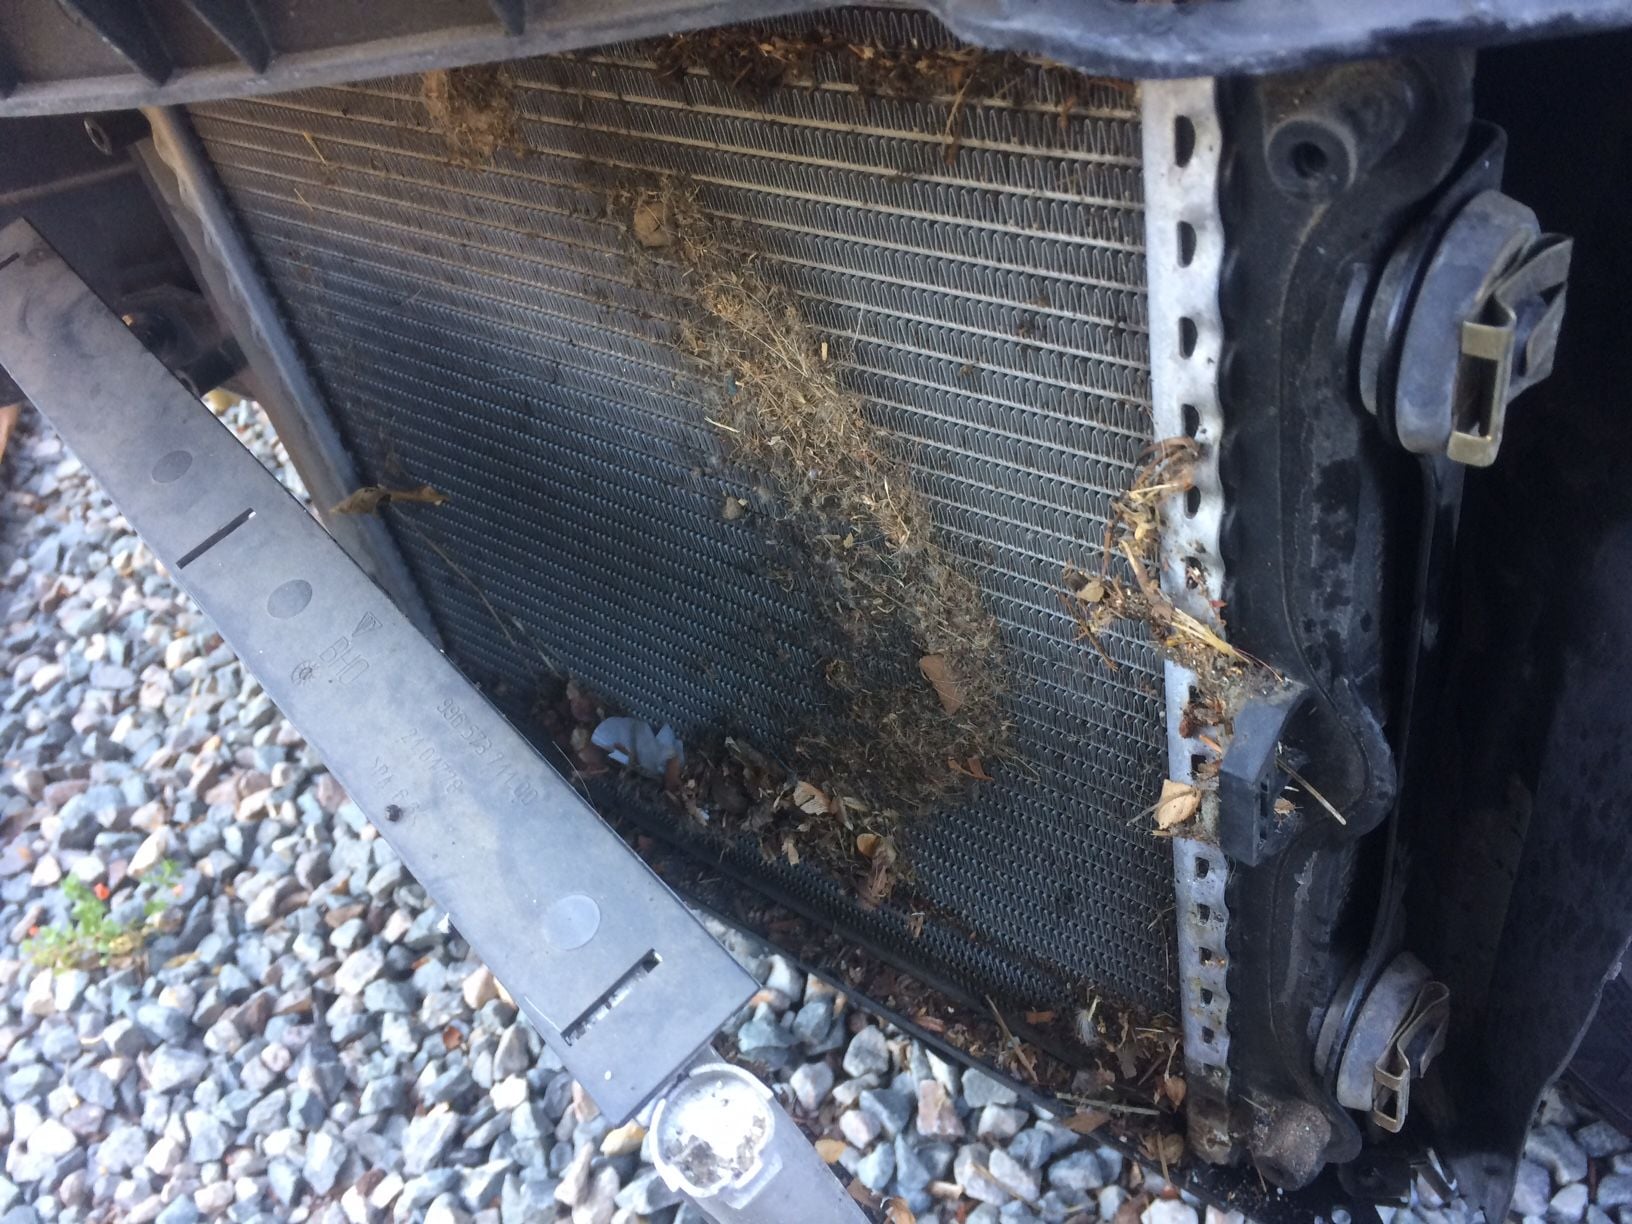
Left rad was relatively clean compared to the right one. Which I deduced to mean the PO drove in the fast lane more often than the slow lane on highways.
I don't have any reason to believe these had ever been cleaned, '99 with 65k miles.
One interesting note I didn't see mentioned in the existing DIY videos was two tubes that dead end connected into a mounted plastic plat directly in the middle of the underside of the cover. I pulled them off and no fluid came out. Not sure where they lead to.
Finally, I discovered every single screw for the bottom was broken/gone. Will be getting some new screws and giant sized washers to help strap the underside back on.
Here is the right rad before:
And after:
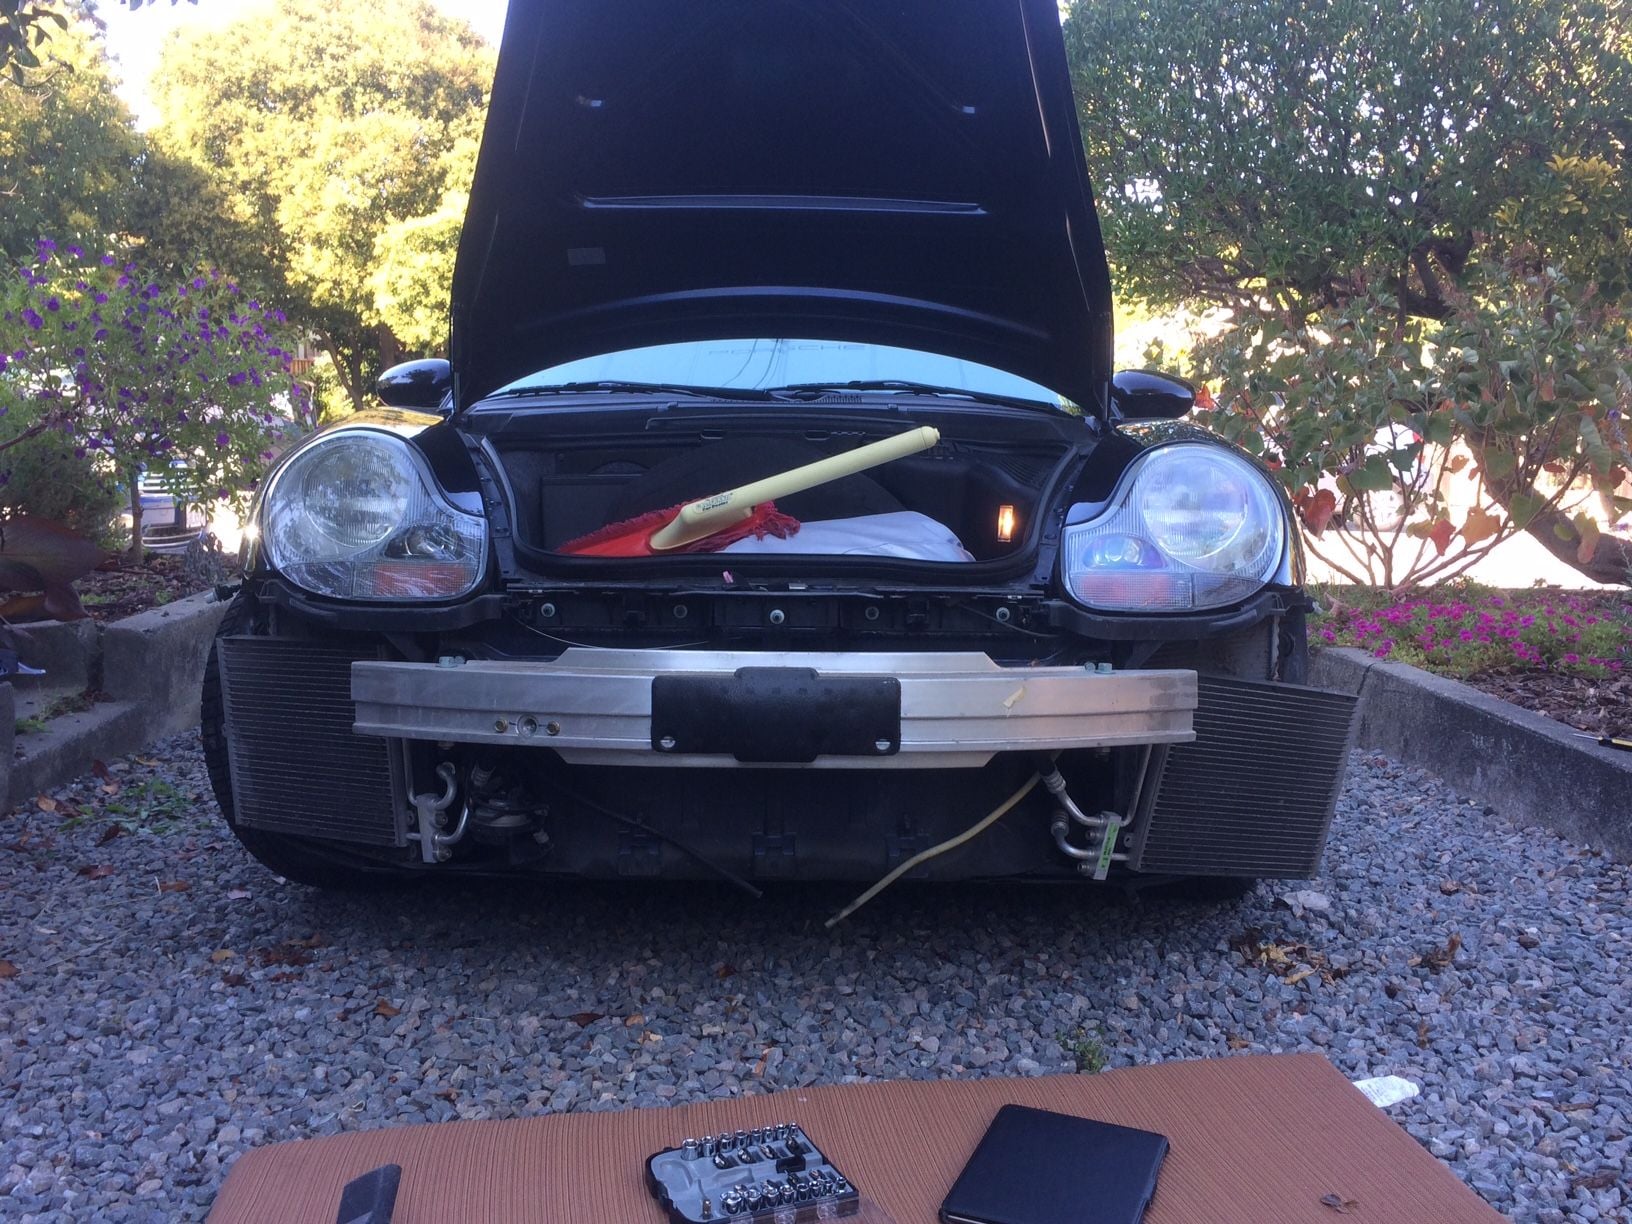
Looking naked - and you can see those two tubes I mentioned previously:
And my nice scraped up bumper cover acting as a garden feature. See those two black stubs in the middle? That's where those tubes were connected.
EDIT: Woke up this morning and realized I might have forgotten to re-insert the outside temp unit in the air scoop. Crap.
Yep, not a hard one to fix, but is frustrating. I experienced the same thing. First, make sure all mounting bolts are loose. Then start with the two that are around the frunk latch. While pushing the bumper towards the rear of the car, tighten the two bolts. The gaps should match the side gabs of the frunk.
this thread has been entertaining. I need to clean my rads and replace the fans (car runs slightly over half when a/c on and stage one fans not working) Did you figure out what those hose lines went to? im guessing they are for headlight washers if so equipped??
Yep, not a hard one to fix, but is frustrating. I experienced the same thing. First, make sure all mounting bolts are loose. Then start with the two that are around the frunk latch. While pushing the bumper towards the rear of the car, tighten the two bolts. The gaps should match the side gabs of the frunk.
Thanks b3freak.
Wish I could do it without having to get those pesky side marker screws behind the wheel well covers...
this thread has been entertaining. I need to clean my rads and replace the fans (car runs slightly over half when a/c on and stage one fans not working) Did you figure out what those hose lines went to? im guessing they are for headlight washers if so equipped??
I didn't actually track down their source, but I was able to reattach them.
On a side note, I forgot to pull the outside temp sensor back into the scoop, too, but was able to reach in from below and get it taken care of.
Not that it matters because I have to repeat the dang process to realign the cover with the trunk...

 11-16-2016 | 03:50 PM