When you click on links to various merchants on this site and make a purchase, this can result in this site earning a commission. Affiliate programs and affiliations include, but are not limited to, the eBay Partner Network.
You guys are getting into way more than I did. Mine sounded like a power saw when ever it ran. Greased the bearings and its run fine for a few months now. For the cost a tube of grease and 30 minutes of your time, I think it's worth doing to see if it fixes the problem. Sounds like you already have it out. Sorry if missed anything.
Btw, you said your vacuum hoses are supple. Are those stock? Stock ones are hard plastic....just want to see if it has been mosified.
Yeah, my lines are hard plastic, I was referring more to the rubber elbows that join the plastic bits together. I'd expect those to all be kind of dry and flaky/fragile by the age of 17, but they all look and feel like nice gooey new rubber, so I'm really kind of doubting there's a leak somewhere. Perhaps the reservoir though, or some other plastic bit.
What are the conditions under which the SAI pump should run? Mine doesn't fire up on EVERY cold start, I'd say just "most". Like this morning it did not, but the ambient temperature was pretty warm...does it need to be below a certain temperature outside to be a "cold" start?
For now my inclination is to just drive it and see if the issue continues to come back, or until I have another reason to start taking things apart. Whatever extra bit of pollution may be happening in the first 90 seconds after a start is paltry compared to what I'm doing to the environment by tracking the car
Update: I took this apart last night, targeting the mechanical combination valve, the electronic switchover valve, and the vacuum reservoir, since all of those things reside behind the alternator and it makes sense to replace them all while it's apart. Combo valve and electronic valve seem okay. I found a crack in the vacuum reservoir, so I'm hoping that proves to be the issue. It was very difficult to see at first, but I noticed a berm of dirt in one area of the bottom of the reservoir, caused by vacuum suction pulling dust/dirt up against the tank in that one area where there was a crack. After cleaning it it's quite clear that there's a big crack, so probably a fairly significant vacuum leak, which may have increased/decreased depending on temperature as the tank expands and contracts slightly.
The bracket that holds the electronic valve was also cracked, allowing that valve to float around and just be supported by vacuum hoses and wiring. I don't think this has an effect, but I'll secure the new one in place better so it can't rattle around.
I'll upload some photos of it all tonight, and report back on how it runs after reassembly.
Great update. I suggest that you double check/test the valves because if you have to go back in ......
Another suggestion is to use brass fittings to connect the vacuum tubes and use new ,high quality USA-mad silicone tubing. I wrote this up some time ago but IIRC you can find the tube and fittings on EBay or Amazon.
The old plastic T's & EPDM tube will be brittle . .You may need to improve the connection where the vacuum tube enters the intake pipe.
If all else fails there is an electronic hack to eliminate the CEL while you continue diagnosing
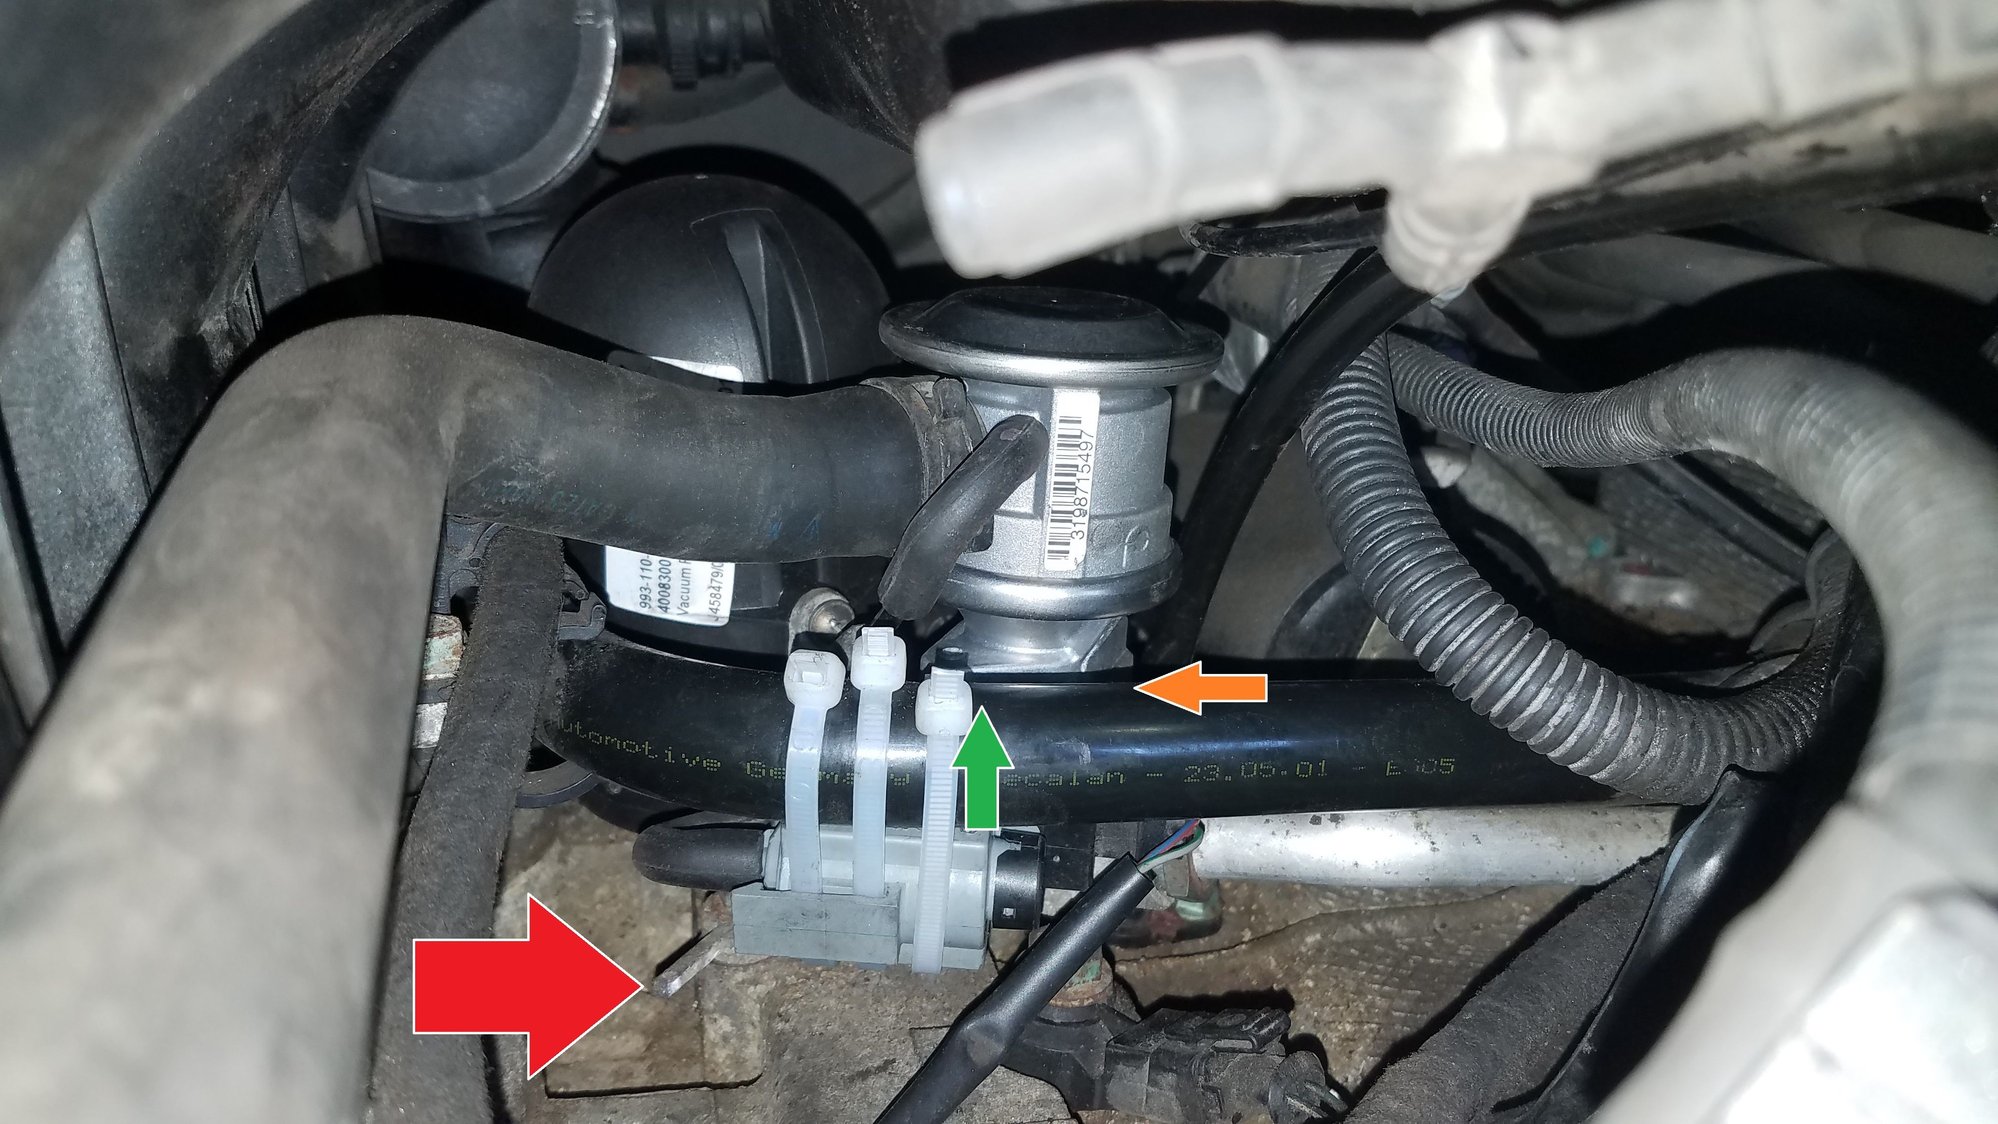
The red arrow shows the broken bracket where the switchover valve is supposed to attach. I just attached it to the pipe shown with wire ties to keep it in place, rather than floating on the vacuum lines and wire harness like it has been for who knows how long, while still functioning. I don't see any harm in that. I considered using a hose clamp but decided if that vibrated it could erode the pipe, whereas plastic wire ties won't.
To replace the combination valve you can get pretty much any 10mm wrench on the left screw (green arrow), but you'll need a very stubby one to get on the right one (orange arrow). Anything longer than about 4" and you won't be able to swing it, and you're going to want a 12-point box wrench so you can swing it 30 degrees at a time; there isn't room to move it the 60 degrees at a time required for a 6-point wrench, since you're constrained on the left by the valve itself, and on the right by the dipstick tube. You'll need some very deft fingers and/or some tricky magnetic tools to avoid dropping the screws, and to get them threaded to put everything back together. Don't forget to replace the metal gasket that goes between the combination valve the distribution piece it attaches to; the old one on mine stuck to the distribution piece but came off cleanly when picked with a razor blade.
While you're working on all this I recommend wiring the oil filler tube up to the engine cover so it's out of the way and you aren't constantly bumping it. It's in the way of this job, and known to be fragile, so it's best to just get it completely out of the way so it avoids abuse. Also be careful with the plastic vacuum lines. They seem pretty robust but I'm sure it wouldn't be hard to crack one, and when you're moving them around it's easy to lose track of how they're connected, so take some notes or photos so you know how they all reconnect.
When removing the alternator, I was unable to get the famous bushing on the back to move by hammering on the screw as all the DIYs recommend. I beat the life out of it and it just wasn't moving. I came up with an alternative method; I put a 2-jaw puller in place to push on the screw while pulling on the front right alternator mounting tab. This allowed me to apply pressure in a controlled manner rather than just beating on it, and it opened up the alternator bracket enough to get it loose. All you're looking for is 1/2 a millimeter or so, and then you can rock the alternator up out of its mounting. Be extremely careful doing this; too much pressure and you could snap the mounting tab off the alternator. Once it was off the car I used a vise and a socket to pop the bushing back a mm or so to make it easier to reassemble. Based on how much pressure I had to apply to get it to move in the vise, I don't think any reasonable amount of impact was going to make it move. I don't like swinging hammers that hard around expensive parts anyway.
Before installing the combination valve and reservoir, I tested them via a homemade vacuum pump, AKA my lungs and a piece of spare vacuum hose. After installing the switchover valve, I activated it via Durametric to ensure it worked. Would hate to button all this back up and then find out one of the new parts was DOA!
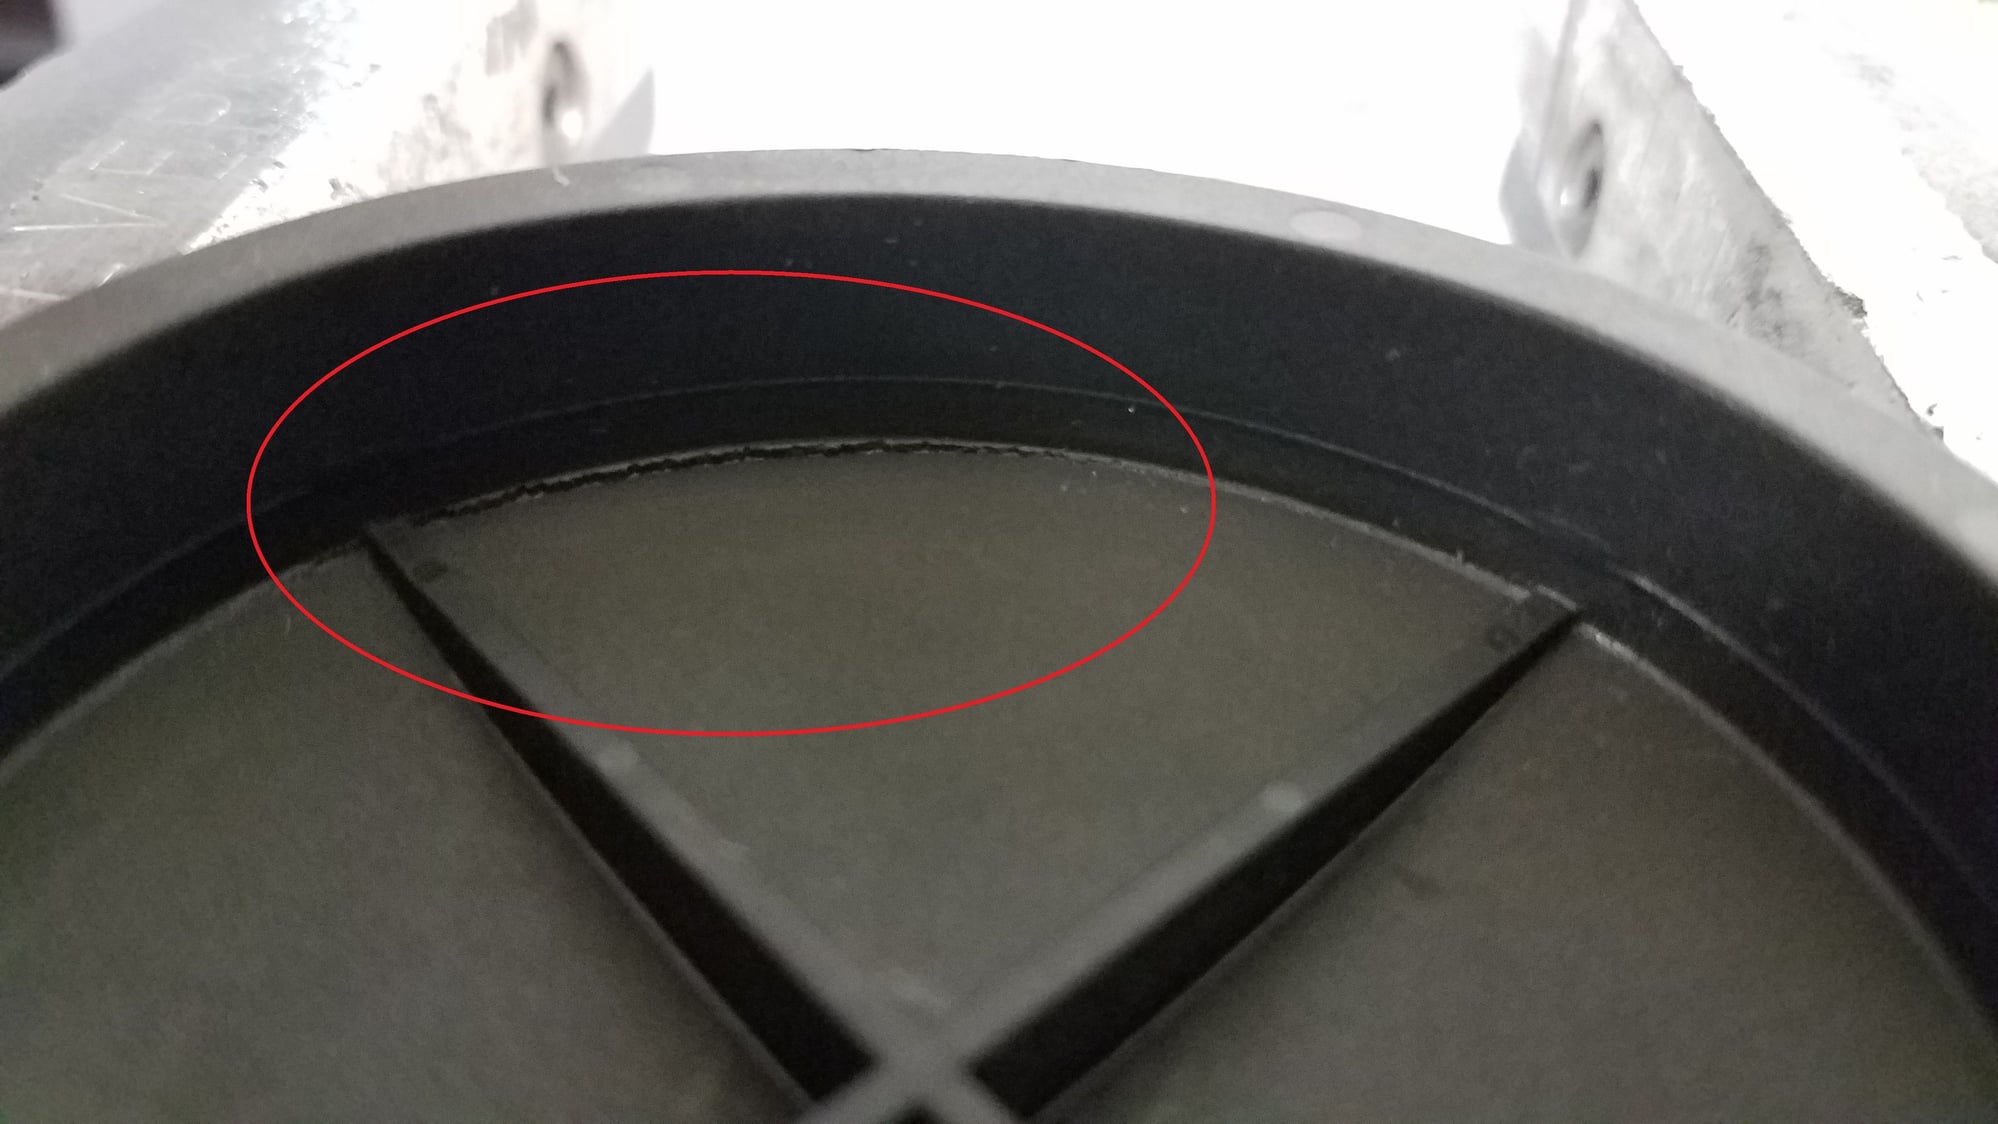
Here's the offending piece, the vacuum reservoir:
You can see there's a crack along the perimeter of the "floor", almost 25% of the way around. For what it's worth this is on the area of the perimeter closest to the mounting flange. This was creating a pretty massive vacuum leak.
After replacement the car runs fine, no CEL so far. I believe I detect a smoother and slightly faster idle. Before my idle would be around 750 RPM and bounce up and down +/- 50-70 RPM. Now it seems to be more like ~790 RPM with only a +/- ~20 variation. Very little data so far though, I've only driven the car about 5 miles since the repair. I'll report back if the CEL comes back, or in a couple months if it seems to be gone for good.
We really need to find a generic vacuum to replace the Porsche one. A seamless spherical design?
Maybe it would be prudent to put a fillet of epoxy in that interior corner all the way around the bottom on a new part? But who knows, that could introduce more thermal expansion/contraction stress and make things worse.
If all else fails there is an electronic hack to eliminate the CEL while you continue diagnosing
This case would seem to be an argument against the electronic hack to disable the SAI fault checking; if it's indeed caused by a vacuum leak, that's not completely contained to the SAI system and could have a negative effect on other systems like the intake resonance flap, etc. If it was a fried SAI pump and one was looking at hundreds of dollars to replace that, then I could see the argument for patching it, but it still seems risky that it could mask other problems that actually affect performance or health of the engine.
Now if only we could find a place to mount it and reroute the vacuum hoses, would be the end of the plastic reservoir forever and its location way back in there. Tempting... https://www.summitracing.com/parts/sum-g1461
As part of the SAI hack you plug the Vacuum hose where it enters the intake.The Summit link is excellent becuse it is the same price as the plastic oem style part.
 05-25-2018, 12:22 AM


 -) Aftermarket ,yes but I would be concerned that the inexpensive tank may be short lived.