When you click on links to various merchants on this site and make a purchase, this can result in this site earning a commission. Affiliate programs and affiliations include, but are not limited to, the eBay Partner Network.
Tutorial: How to clean and test trunk/engine lid electric switches
Hi everyone,
Im not sure if it has been posted already but I would like to share my experience on cleaning testing trunk and engine lid electric switches on the 996.
After buying a front trunk actuator instead of repairing a faulty switch I want to make sure others wont do the same mistake.
Theses switches are well made and only need a simple clean-up to work perfectly.
I wont really explain how to remove the door sill in order to access the switch as I think this fellow member already did a great job to explain it in details for the 997 which is basicly the same.
Only point is that my 996 had the T30 Torx screw instead of regular Allen.
Here's the link: https://rennlist.com/forums/997-foru...uff-plate.html
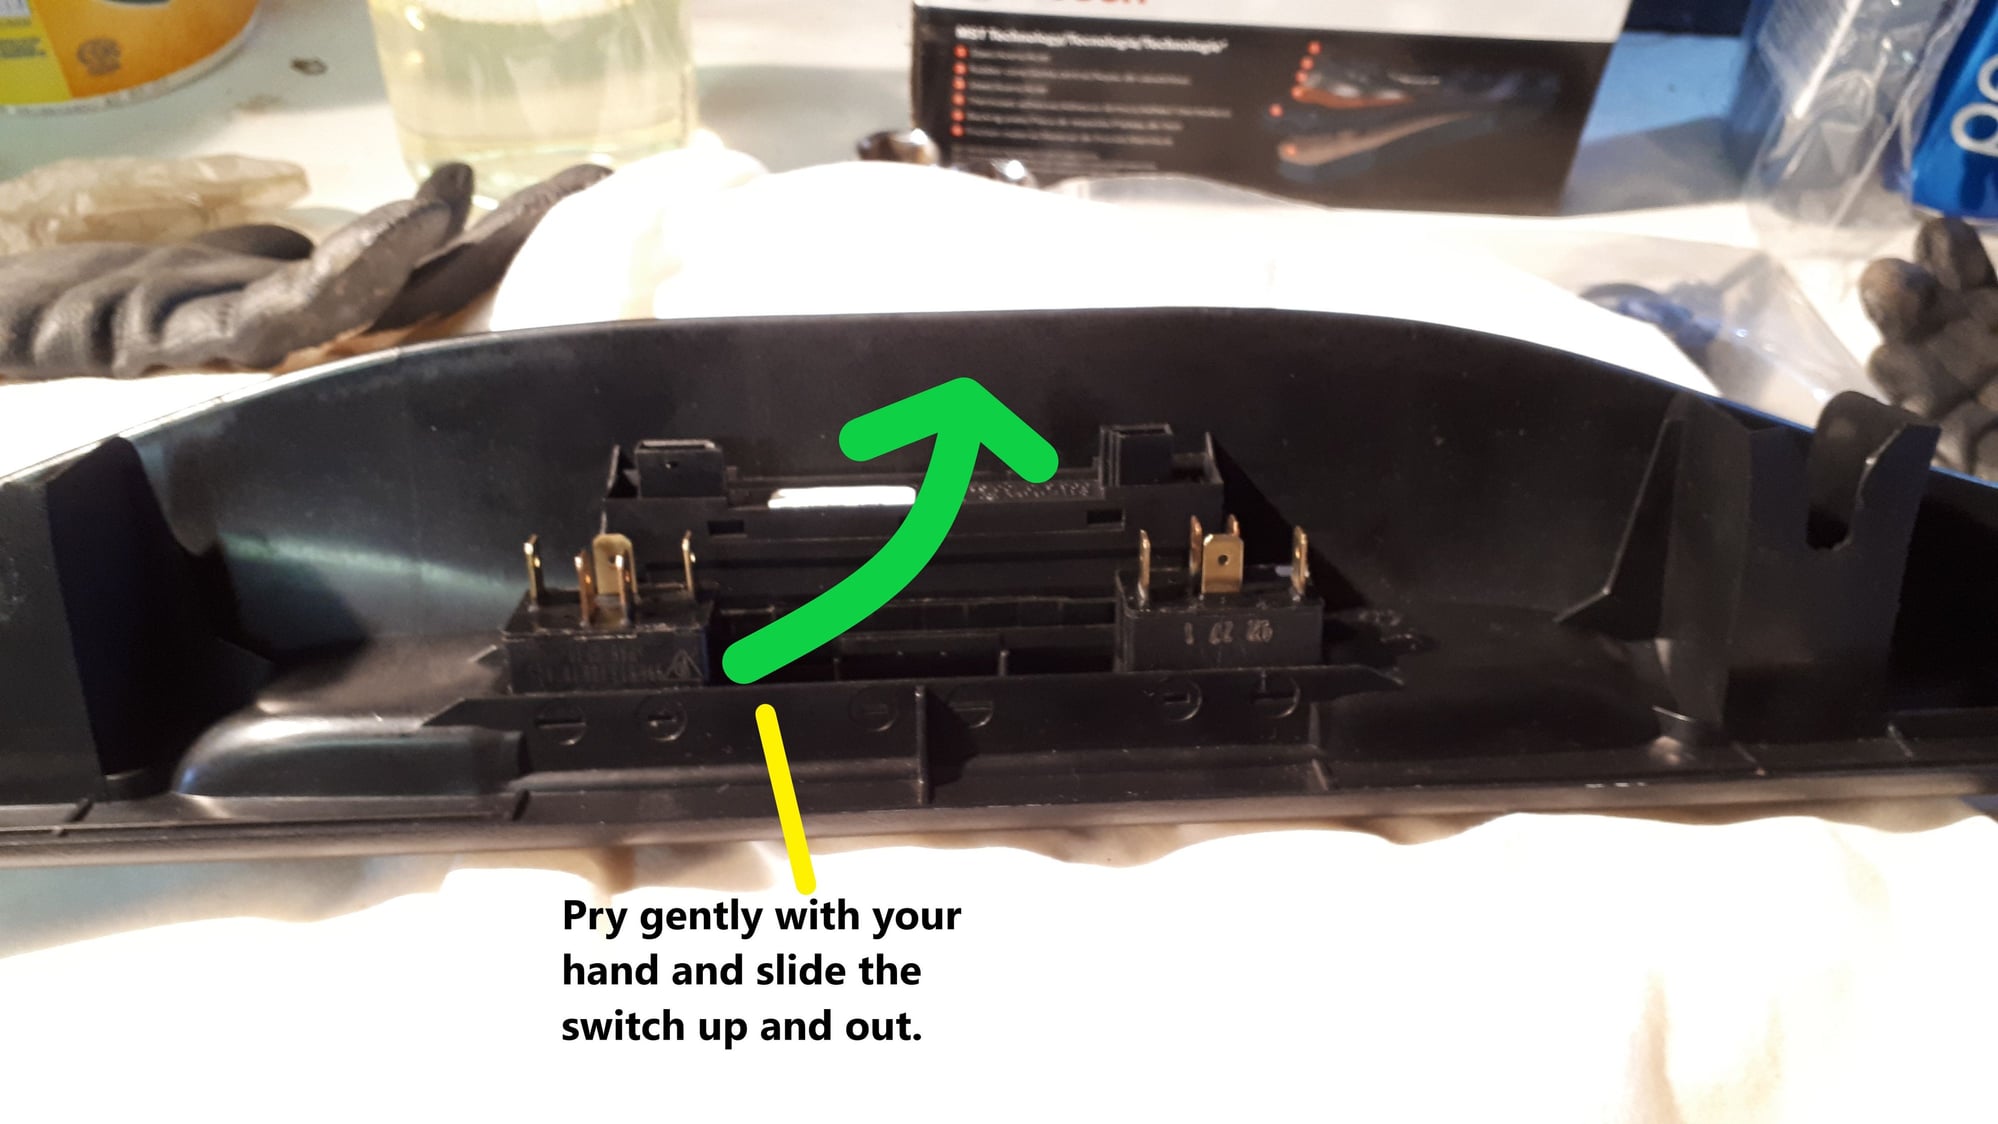
So once the sill plate has been removed its time to remove the switches.
Technique to easily remove the switches
If it doesnt work you can try to bend the plastic with a small screwdriver but dont work it too hard.
You can do that for both truck and engine lid switches.
The seat memory control have to be removed also and removing it is quite straight foward
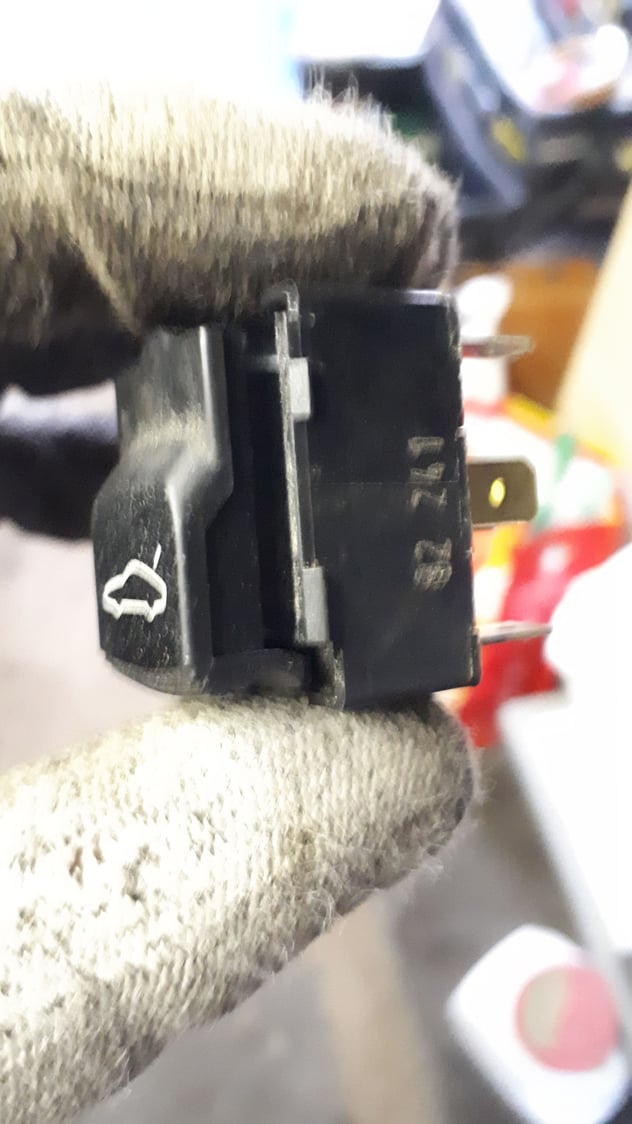
So here's the switch out
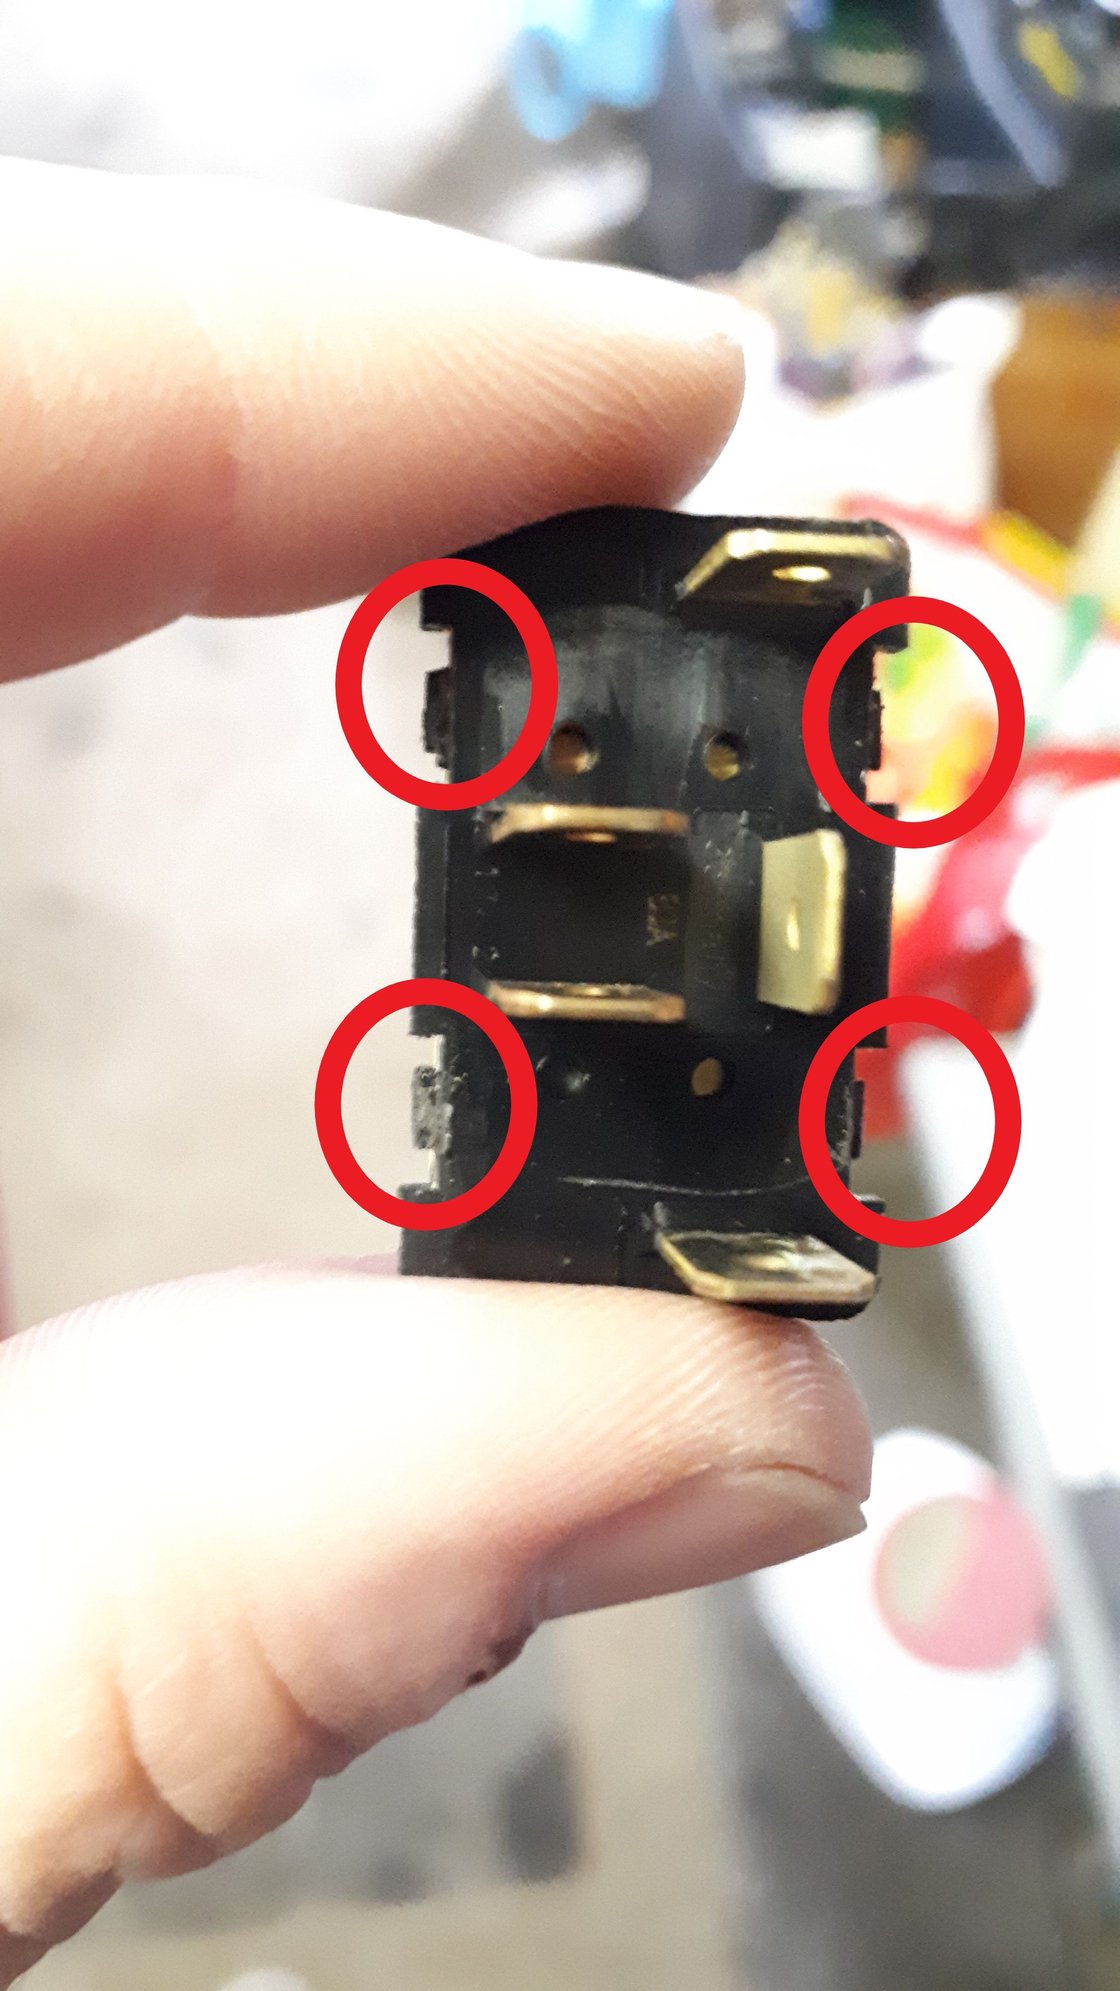
Next step is to open the switch by using a small thin flat screwdriver and pry out the side lock of the switch.
It can require some patience but its quite easy if you do one side after the other.
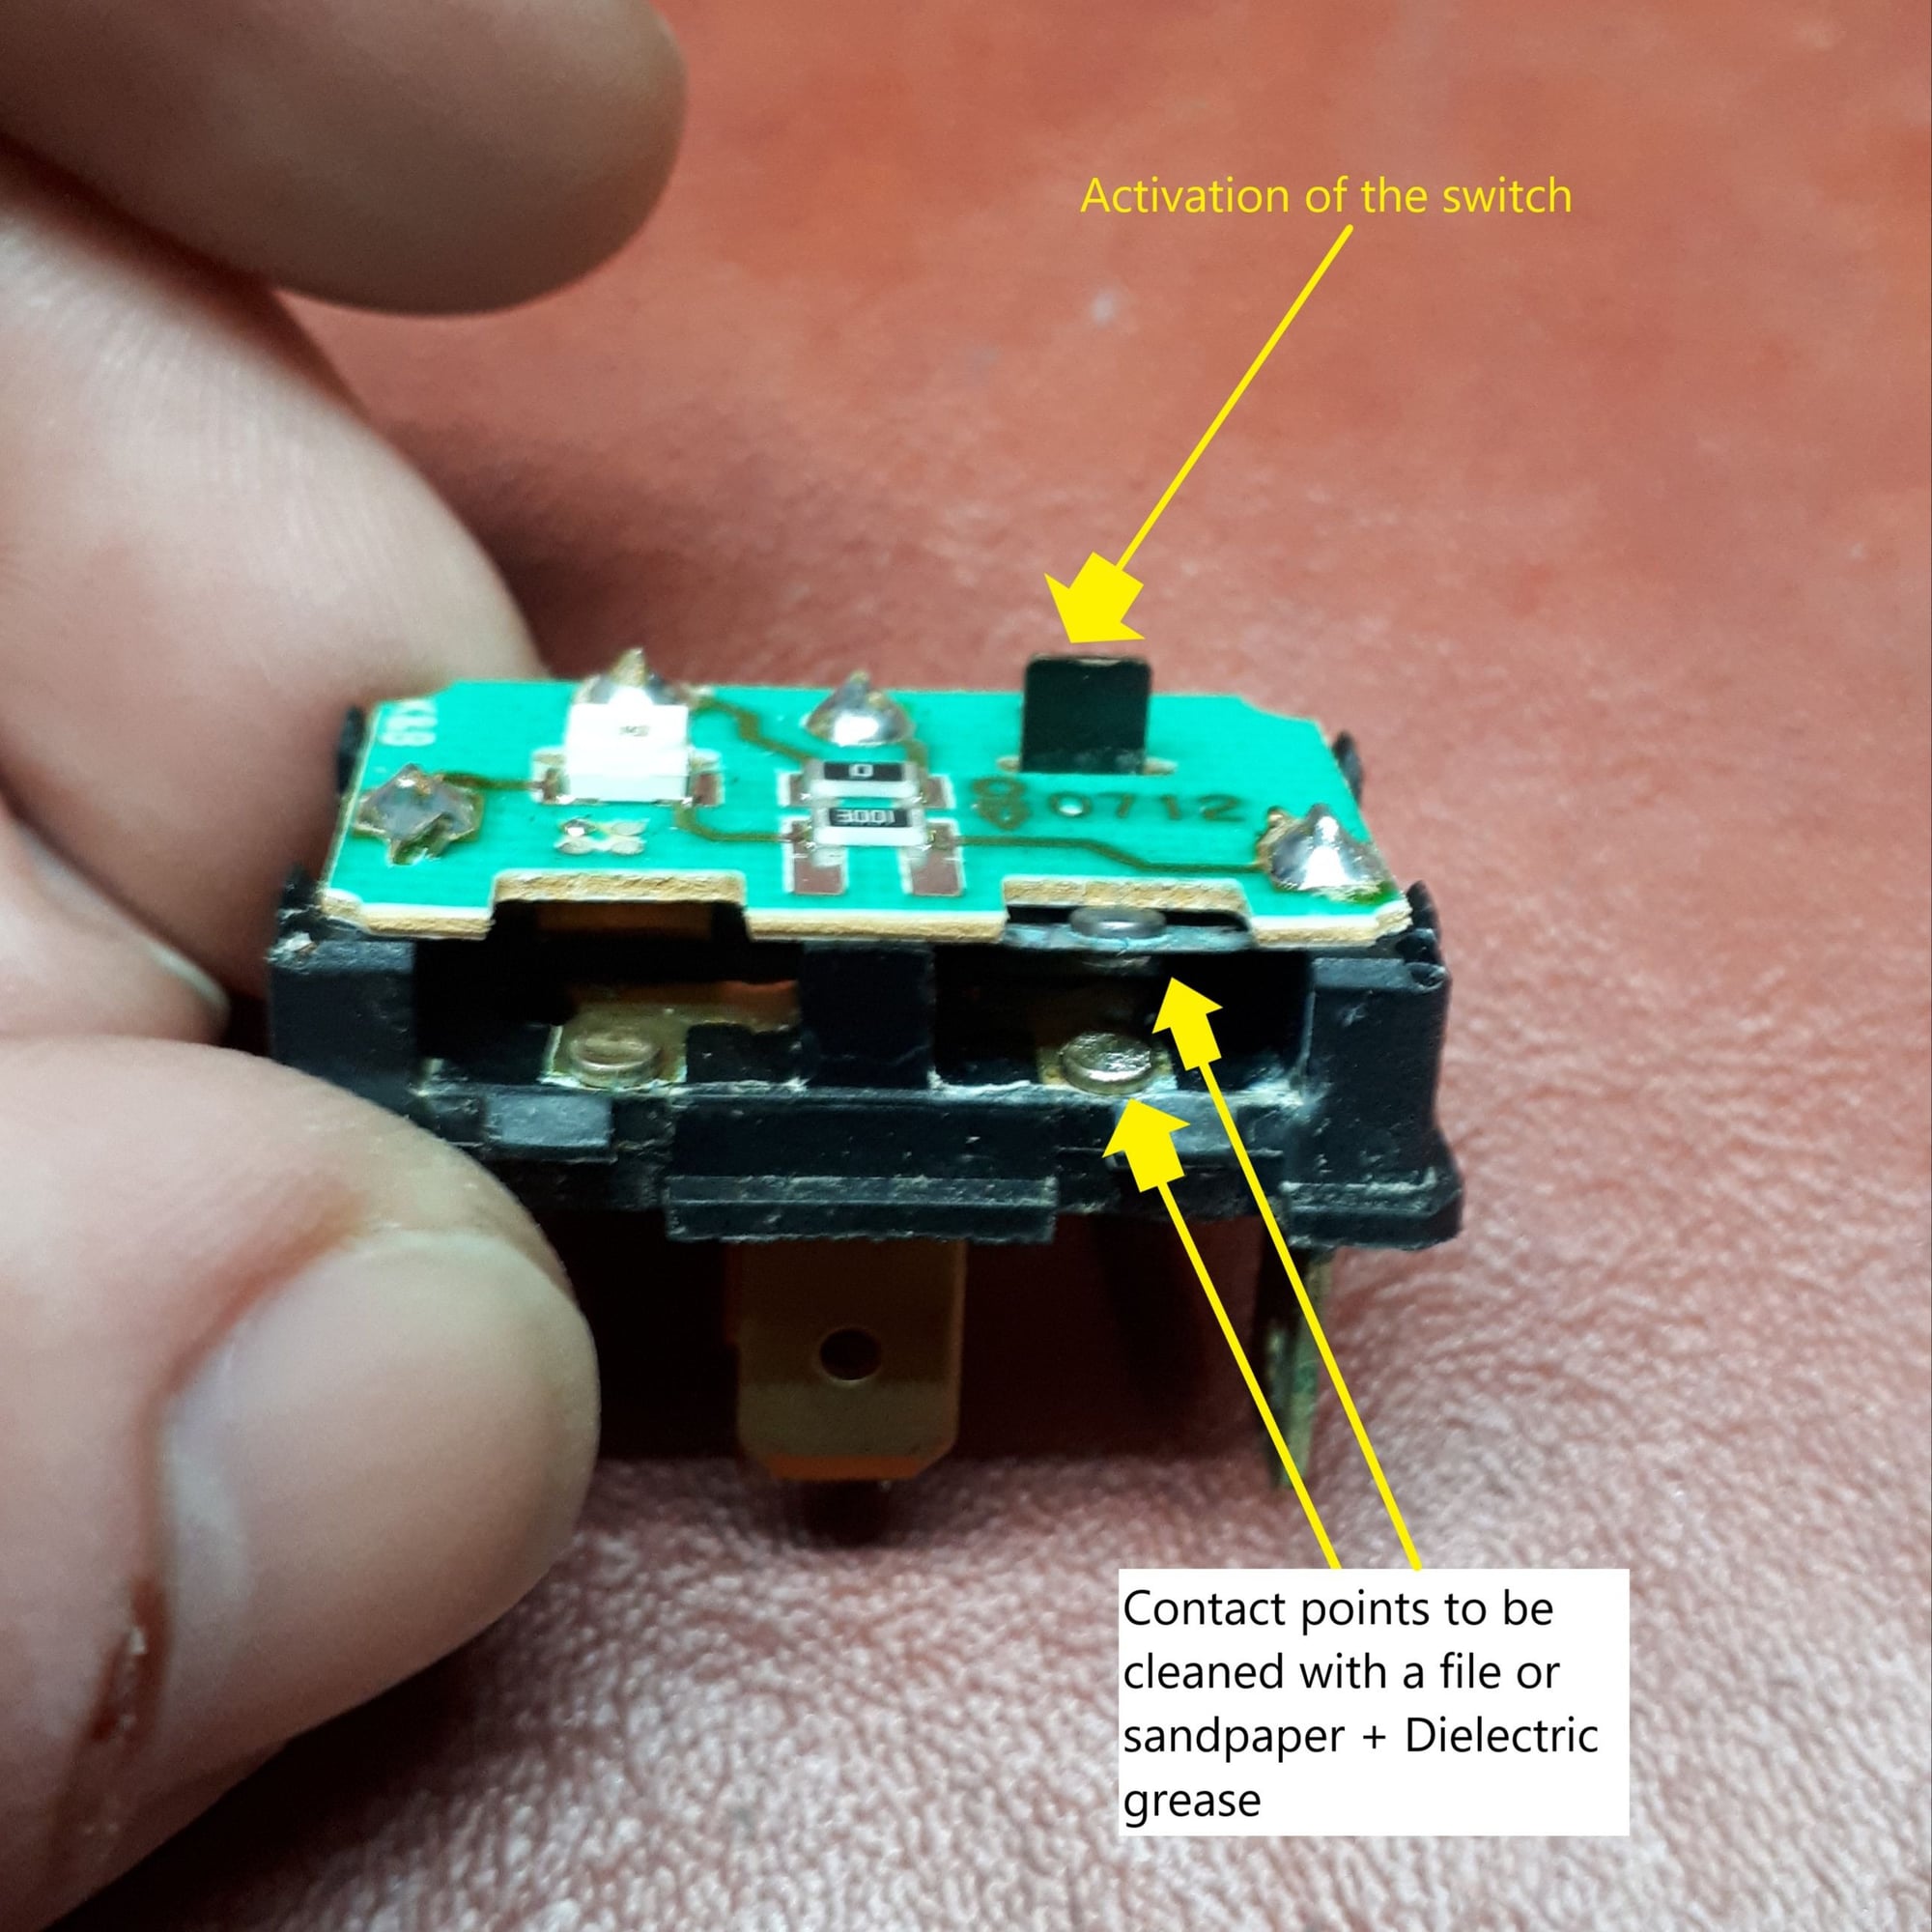
Here what it will look like once opened.
You can use a small file or snadpaper to clean the contact points.
I also used isopropyl alcohol to clean the swtich board contact points, the cover inside and out plus the surface of the door sill.
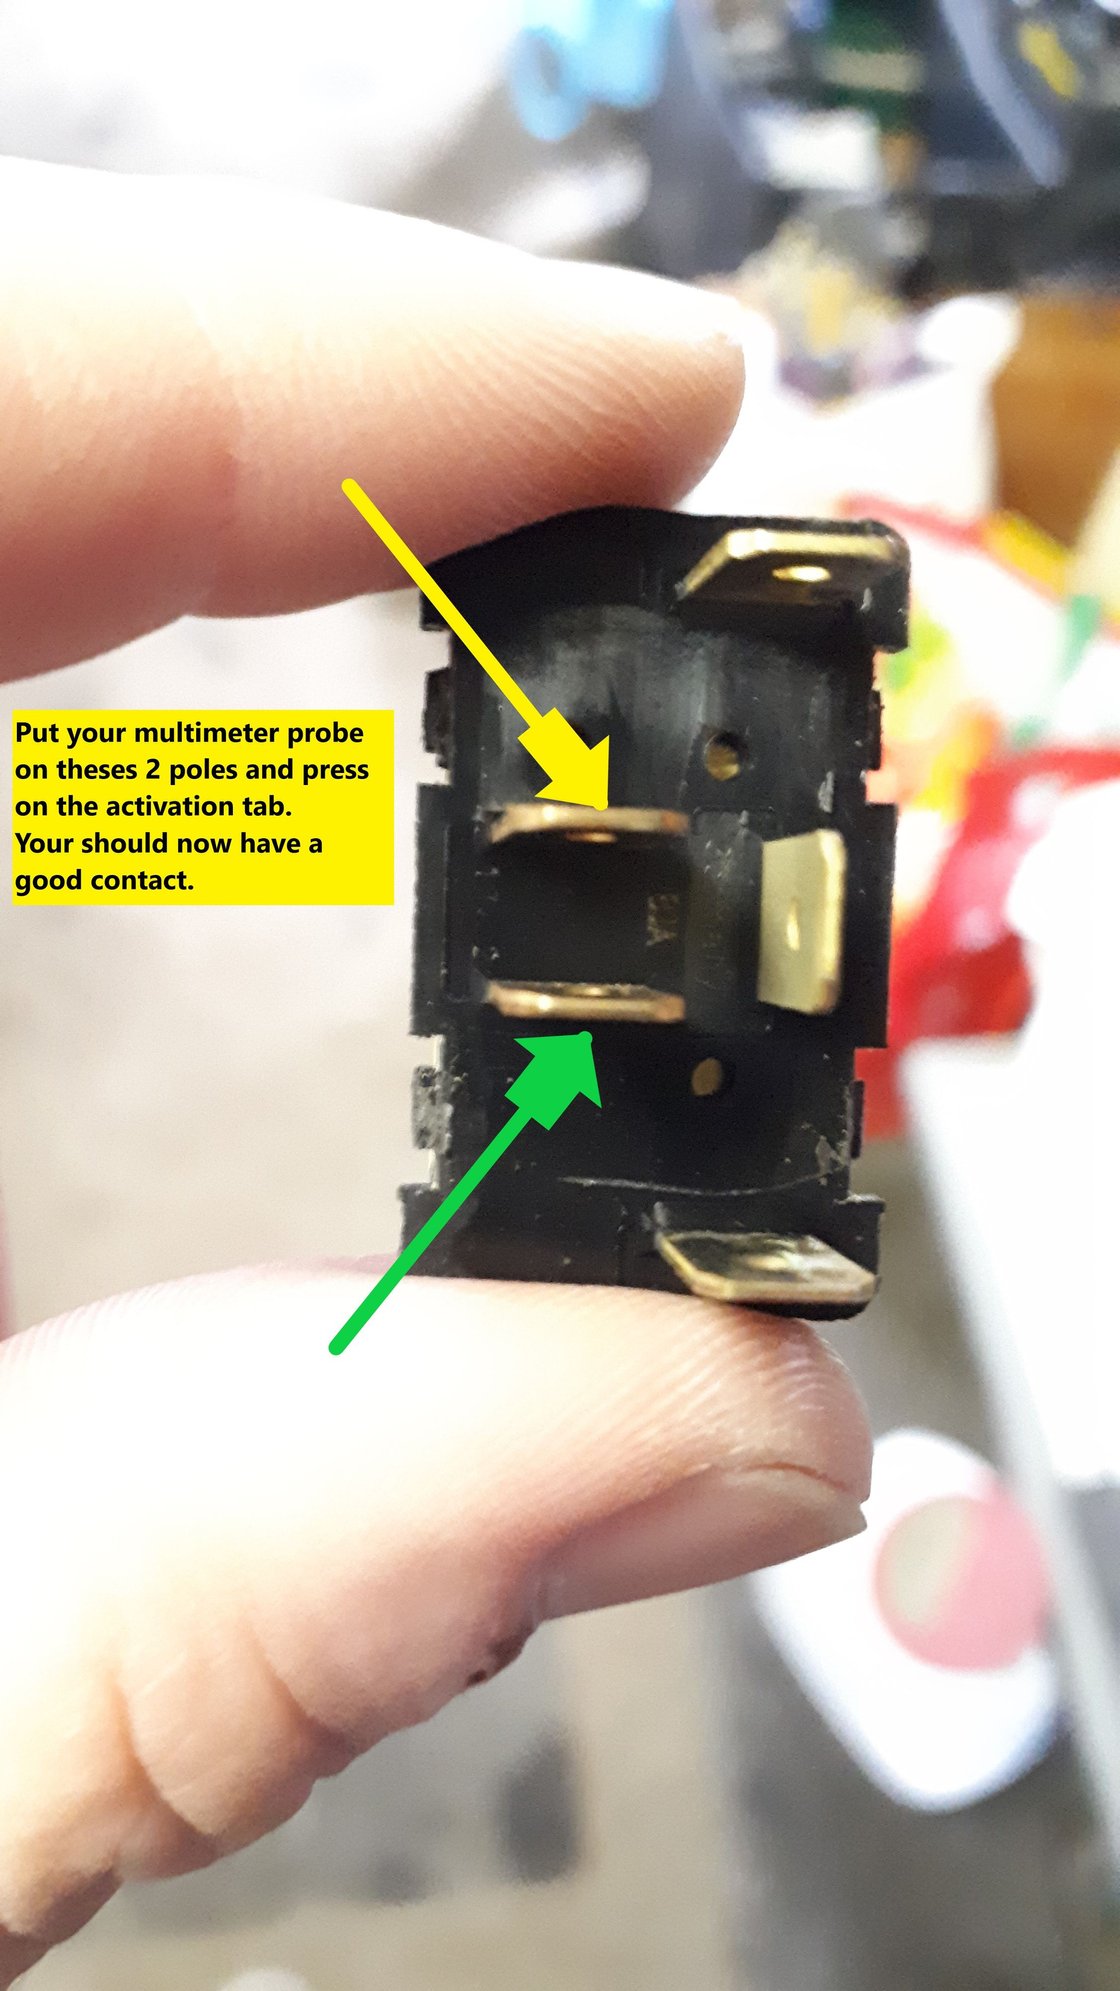
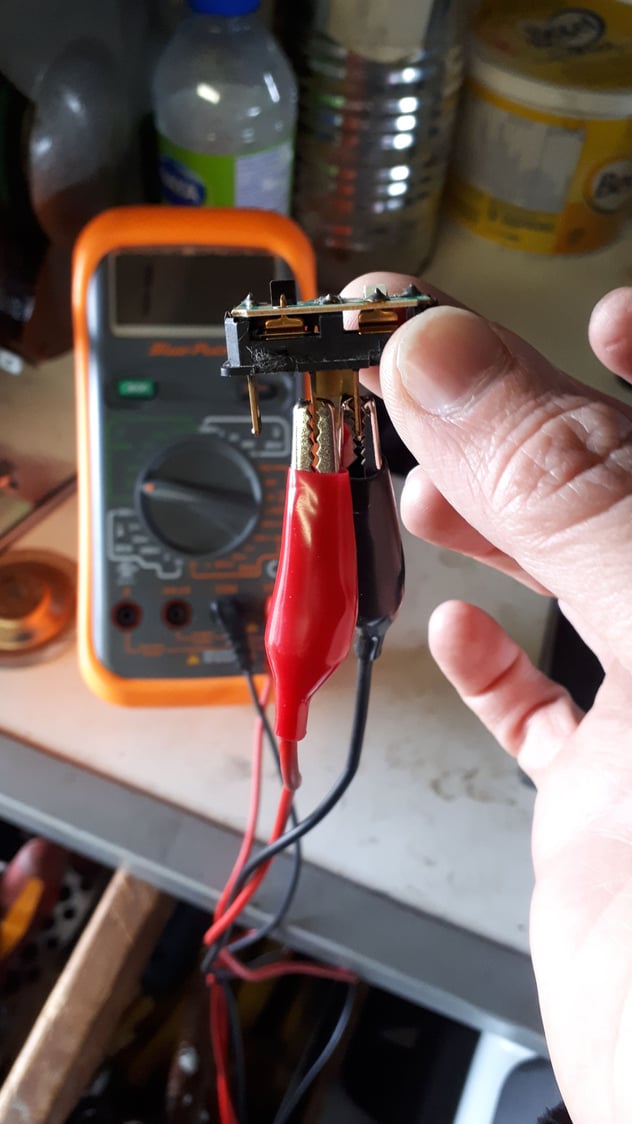
After applying the Dielectric grease you want to test if everything work as it should with a multimeter.
Once everything as been tested you can re-assemble and re-test.
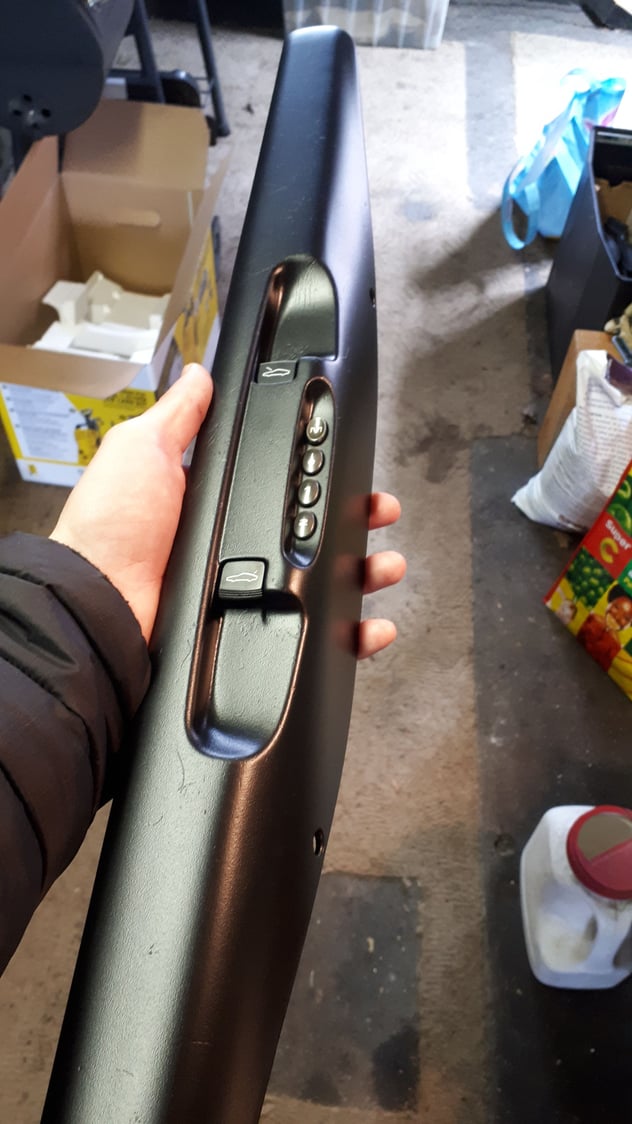
Here's what it look like once cleaned and re-assembled.
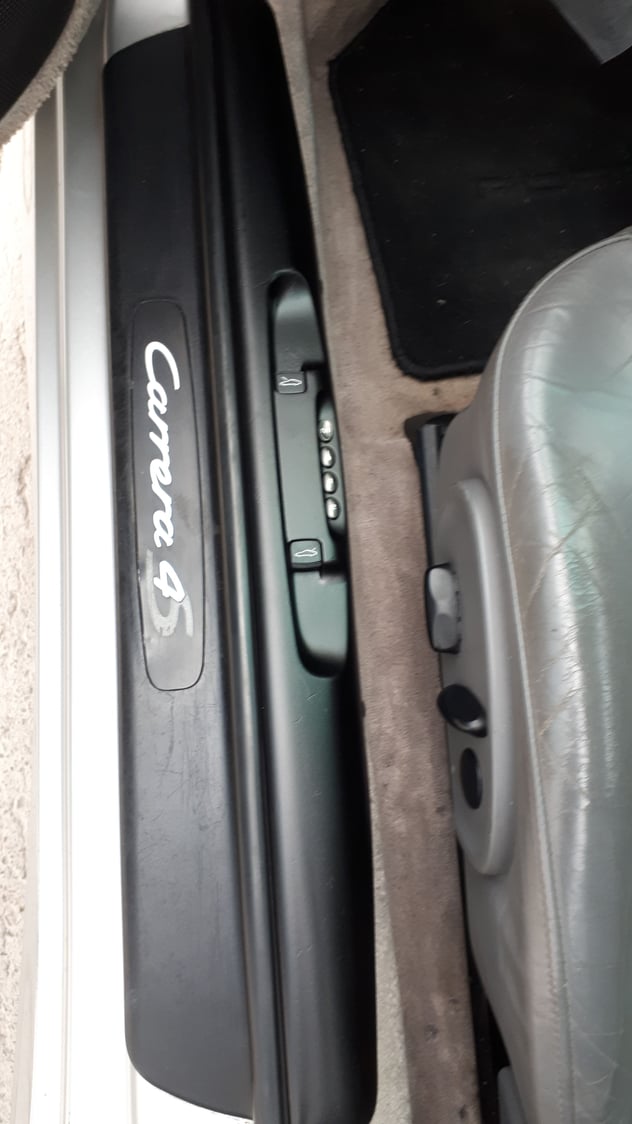
My door sill is not in perfect conditions but atleast the switches are working perfectly!!
As you can see the scuff plates still have to be done! I heard they are PITA to remove.. I will see that soon!
Do not hesitate if you have any questions
Hope this help
Hugo
 05-15-2019, 03:54 AM