When you click on links to various merchants on this site and make a purchase, this can result in this site earning a commission. Affiliate programs and affiliations include, but are not limited to, the eBay Partner Network.
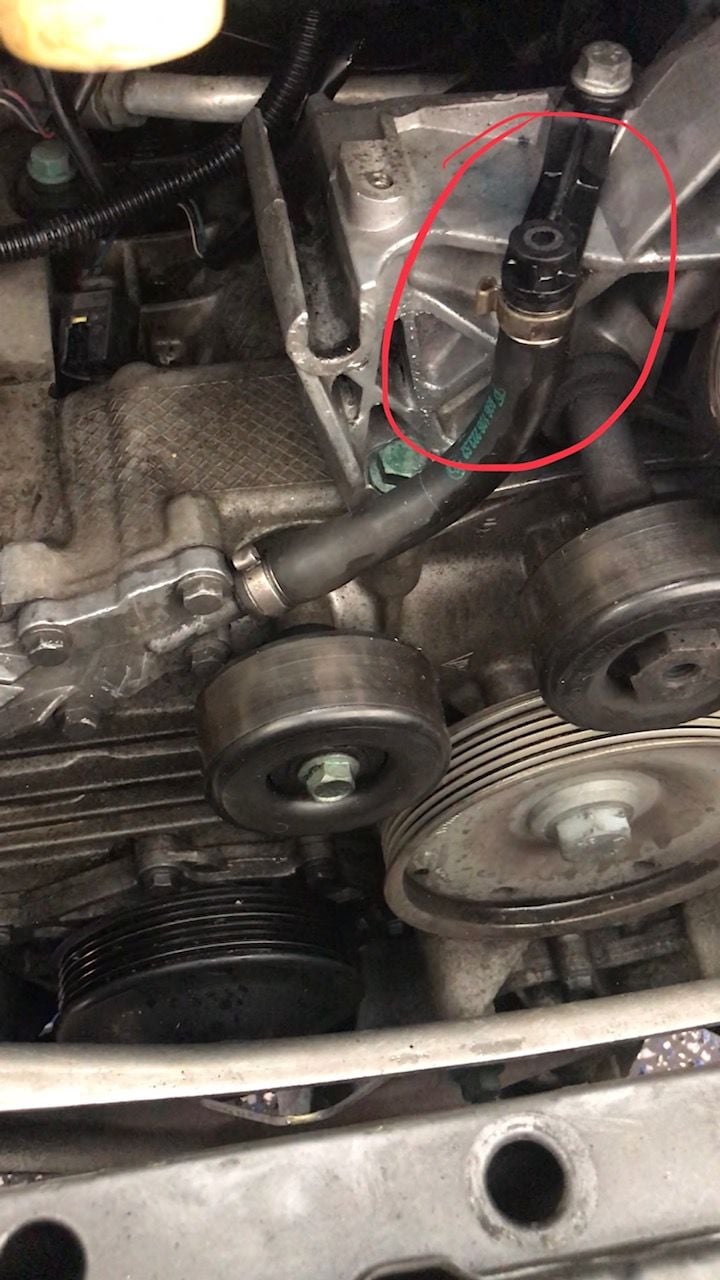
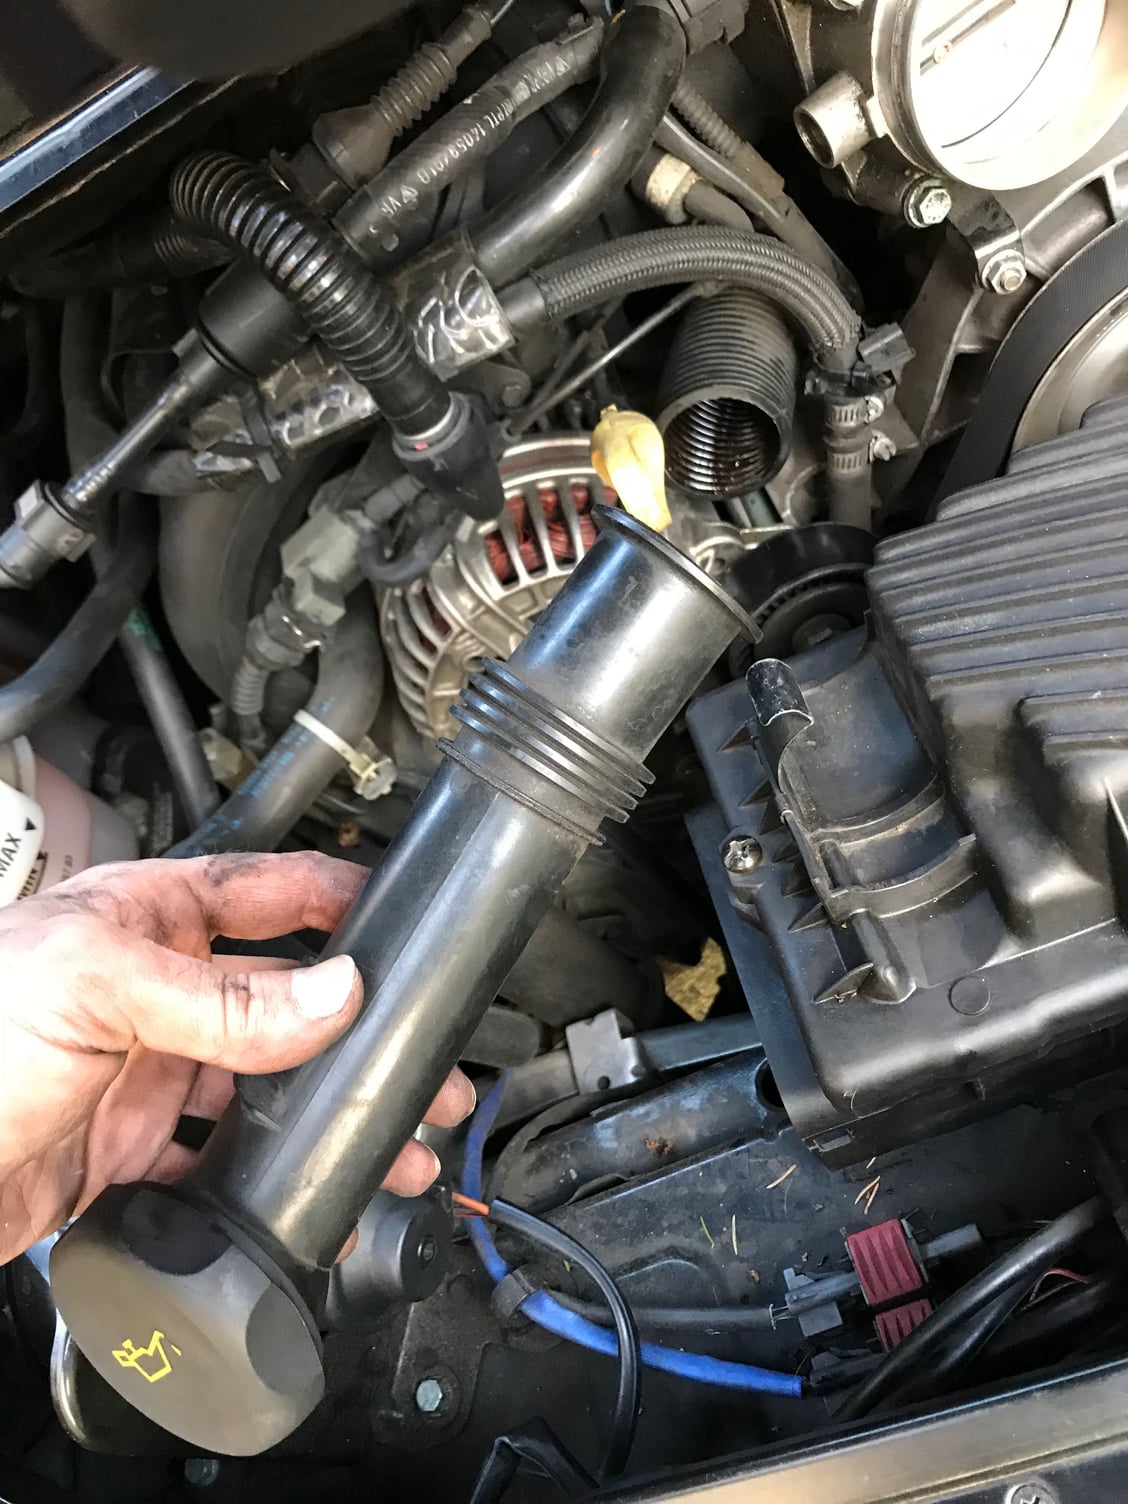
Quick post before I spend my evening Googling this... Long story short, Took the airbox out to install the Fabspeed intake hose and filter, put the oil filler tube aside (didn't touch it as far as I know, wasn't being a gorilla about it) then when I went to put thing back together I noticed it completely broke off! Strange. Known to happen? Old and bridle? Seems a flexible hose should not have broken off like that...
Anyways, is this common or am I the only one? Are there ways to fix it? Permatex, silicone, tape? I can think of ways to Macgaver it but will it work? I know vacuum is an issue... Or, get a new one?
If so, where? How hard to replace?
It happens quite a bit. The part is pretty inexpensive, but it�s a PITA to replace. You�ll need to (re)move the alternator. I found that I could do it using a mirror, magnet, several swivel/extension pieces. It bolts into the engine in a very inopportune location. If all goes well, you�re looking at a decent chunk of your evening. I think mine took 2 or 2.5 hours. Getting the alternator off is no walk in the park. I think Pelican Parts has a photo tutorial. Be sure to order a new o-ring with the filler tube. You may even want to order a new bolt or two in case you drop one & can�t find it. That almost happened to me! Good luck.
Pretty common much like the plastic coolant connection to the right of your broken end. It looks like someone already fixed that one. Brass barb, hose clamps and a wire tie or two is one fix.Oil Filler Pipe
Thanks.... just read all the threads on it. Looks like I will be Macgayvering this.... might post a tutorial. Probably will take as long as the legit way and cost half as much but I won't cuss as much and be as frustrated/angry.
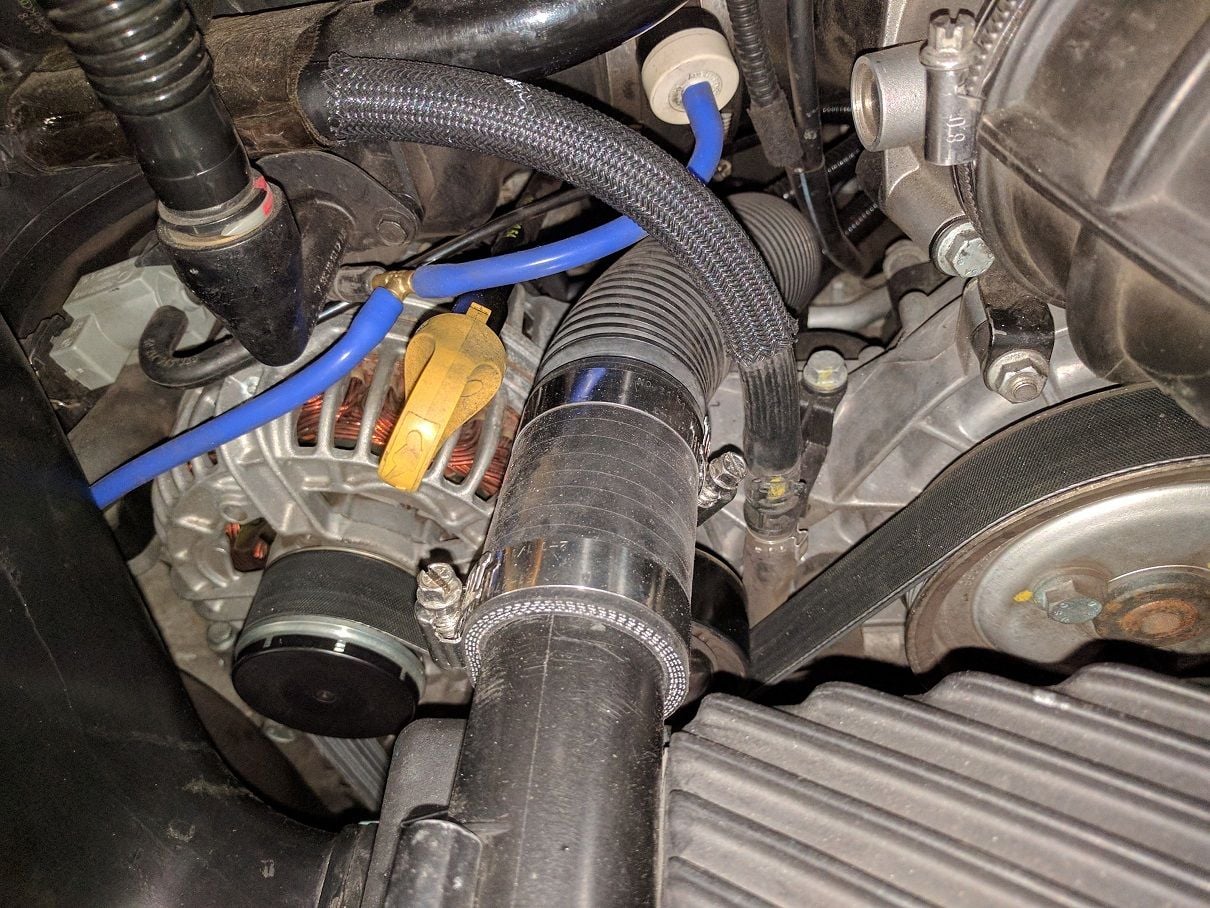
Same experience ... I decided on this temporary fix until I have time to do it properly (when I'm in there fixing something else). Need a 40mm silicon coupler and 2 hose clamps.
I'm not in any rush to change this though as it is convenient to be able to remove the oil filler tube to prevent it breaking again.
Go the way of silvergrey951. Do not even consider removing the alternator as you will most certainly break the very brittle evap lines around the alternator. Then your troubles will really start. I broke mine but if I had my time to go over I would repair not replace.
Are those Great Danes? How do you get three in the P-car? Good luck with fix.
im guess king corsos by the ears. Still not a small dog. I got 2 danes, i figure i would have to pull the seat just to get one in . Sorry 4 the hijack, good luck with the repair.
Go the way of silvergrey951. Do not even consider removing the alternator as you will most certainly break the very brittle evap lines around the alternator. Then your troubles will really start. I broke mine but if I had my time to go over I would repair not replace.
Check out his pic someone already Macgyvered that.
Guys, trust me, Jimmy rigging **** drives me nuts too. I already ordered the filler tube and o-ring off Amazon last night, $66. But, I will have my mechanic swap it out next time it goes in for something, its just not worth my time and frustration anymore.
My babies are in fact Cane Corso Italiano, and they ride in my daily, '17 TRD Pro T4R! (swallowed my pride a little and traded my G wag for it, talk about a trouble FREE car!) Cheers!
I idid it too. It is a major pain in the butt getting the alternator out. Once I did I ended up having to replace it after putting it back in and it making a terrible whining noise. I guess beating on it for a day put it to pasture after 110,000 miles. Good luck and just be careful taking apart the little stuff.
Same experience ... I decided on this temporary fix until I have time to do it properly (when I'm in there fixing something else). Need a 40mm silicon coupler and 2 hose clamps.
I'm not in any rush to change this though as it is convenient to be able to remove the oil filler tube to prevent it breaking again. Amazon
Actually I have thought about this and kind of like it. My thought was to buy a new oil filler tube and replace the whole corrugated section that eventually will break with a section of silicone pipe. I have already broken mine and replaced it, but as always, trying to think of a better long-term solution. This just might be it. The oil filler pipe could be cut at the base with enough room to clamp on the silicone hose, and then the oil filler cap part could be joined with the hose and clamp. Almost seems better than a brittle plastic part that is doomed to fail again.
There are two bolts that secure the oil fill tube to the block. With thre alternator our=t, the rear one is pretty easy to access. The forward one was easiest to ge to (but still a struggle) using a ~14" flexible drive, bent so the end of it was near the throttle body at the top of the engine compartment. Once the forward bolt was loosened a ahalf, turn, it could be removed by fingers.
When the filler is removed from the block, the usual practices to avoid dropping items into the crankcase apply. Rub a bit of lubricant on the O-ring before placing it on the block.
One thing also to remember. To do this, you need to move many things around to get the right angle on some bolts. Be careful on the coolant line that runs around the filler tube. I had a lapse in focus and placed too much stress on it and snapped the connector trying to get under the filler tube... coolant everywhere. Set me back 2 days to find the correct part. Save yourself and unbolt this bracket from the engine block so it can move freely.

 02-26-2018, 10:49 PM


 Amazon