When you click on links to various merchants on this site and make a purchase, this can result in this site earning a commission. Affiliate programs and affiliations include, but are not limited to, the eBay Partner Network.
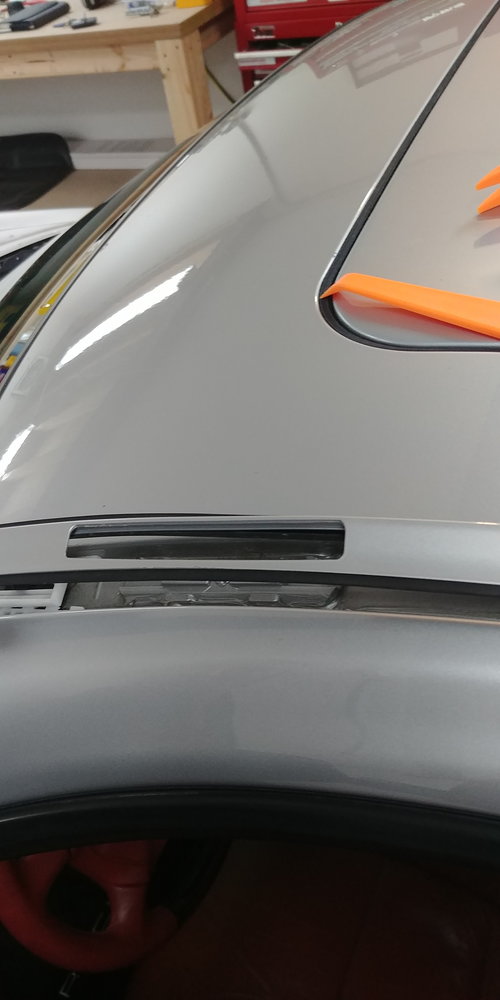
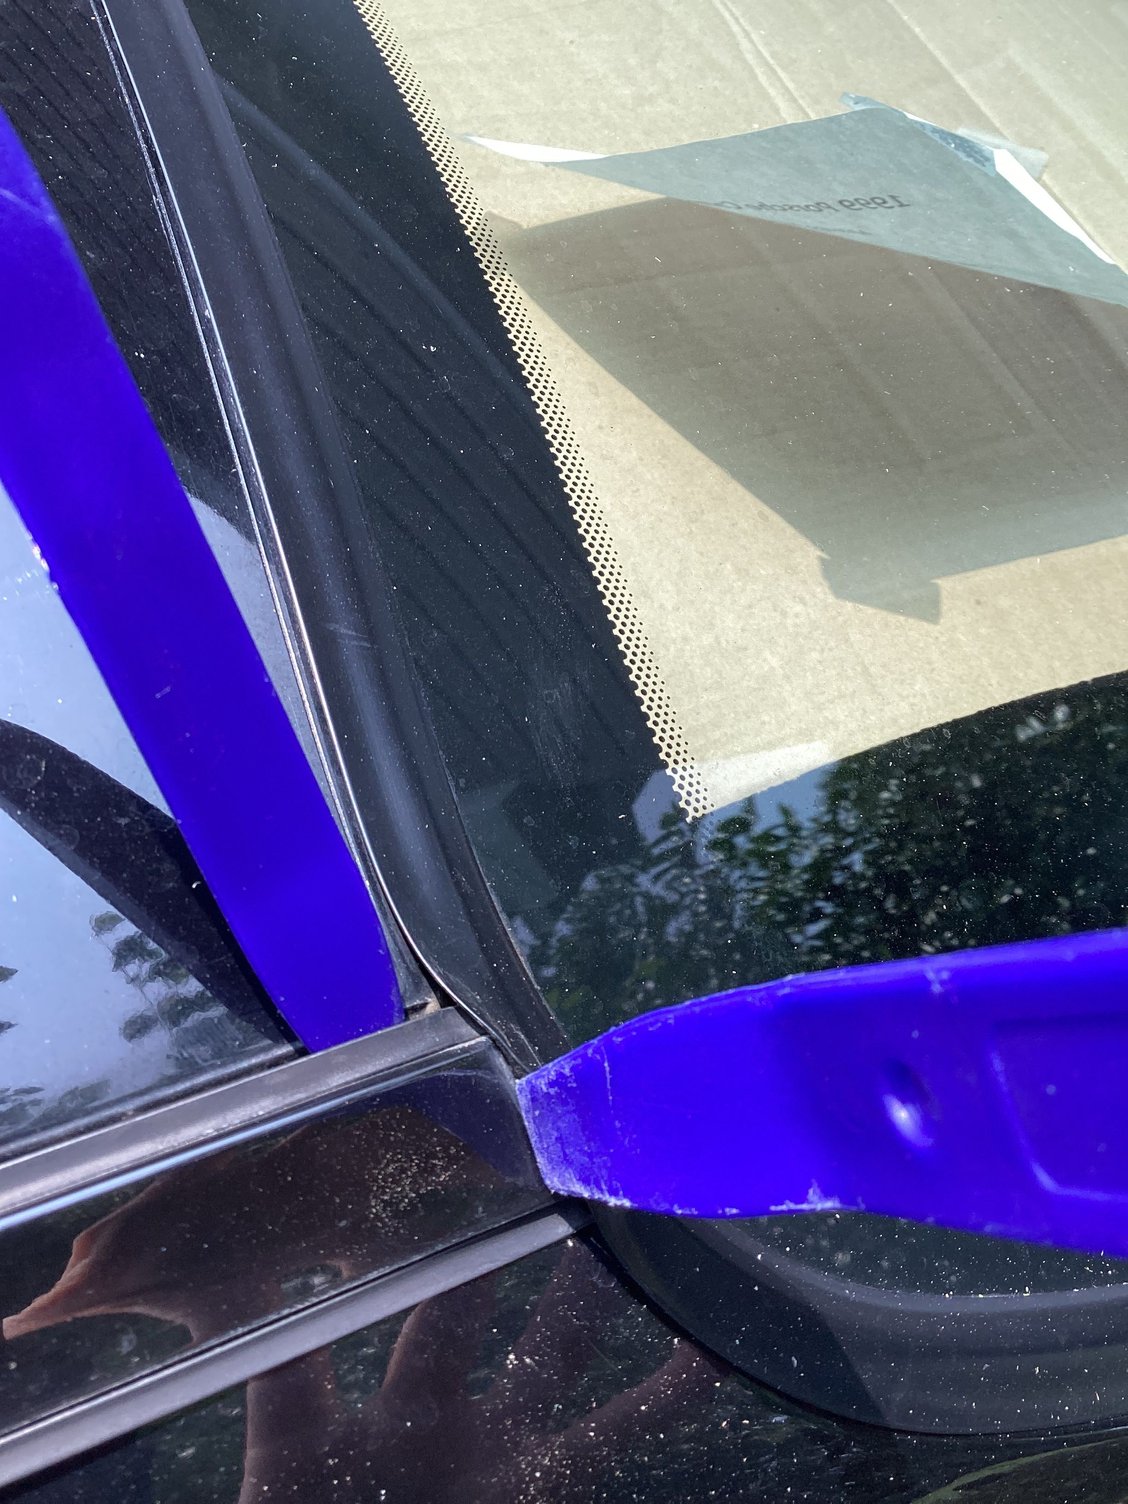
I removed trim per shop manual instructions, which is to pry front first, then along outside edge. I tried to work with it half way up but it was easier to fully remove it, plus clean inside there. Getting it to snap on wasn't so easy, but it went.
plastic trim removal tools really help. Also, if you read the directions, it says to press/pry along outside edge to release each clip. Everyone, including the dealer, said these clips always break upon removal. Well, not if you pry as directed. The clips don't go in or out in a straight up/down movement, but rather more like a 45* angle from inside to outside. If you examine the clips once moulding is out, you'll see what I mean. Just take it slow.
Could you kindly post the part numbers and pictures again, unable to see them and was hoping to fix one of the flip panels on the rails
I'm not sure what you are not seeing because your reply included my pics. I'll try and post again what I have in hopes it will help you. Feel free to email me if you need me to send you pics and instruction printout directly. For P/N's, I'll look, but you can just call the dealer. They know what P/N it is. These break often!
Thank You for posting this along with the PDF @AdamIsAdam.
I ordered the parts online thru suncoast, so should be a DIY for the next weekend.
Thanks again
You're welcome. Just paying it forward. Enjoy. It's the little things that bring big enjoyment. Flaps that close. My front door and storm that close smoothly and put a smile on my face every time I use them. Yup. Little things.
I did two on my car when I first got it. I don't remember exactly what I did, but I know I didn't remove the trim strips. From what I remember, I opened the flap and removed it, then just popped the white "clip piece" out ( I think it was already broken - hence the flap not staying closed) and popped the new one in... I remember I tried to unscrew the mounting point first, but had no luck (the small flat head screw was totally seized - tried all kinds of penetrating oils). Good Luck
I'll revive this thread as I successfully repaired my luggage flap today.
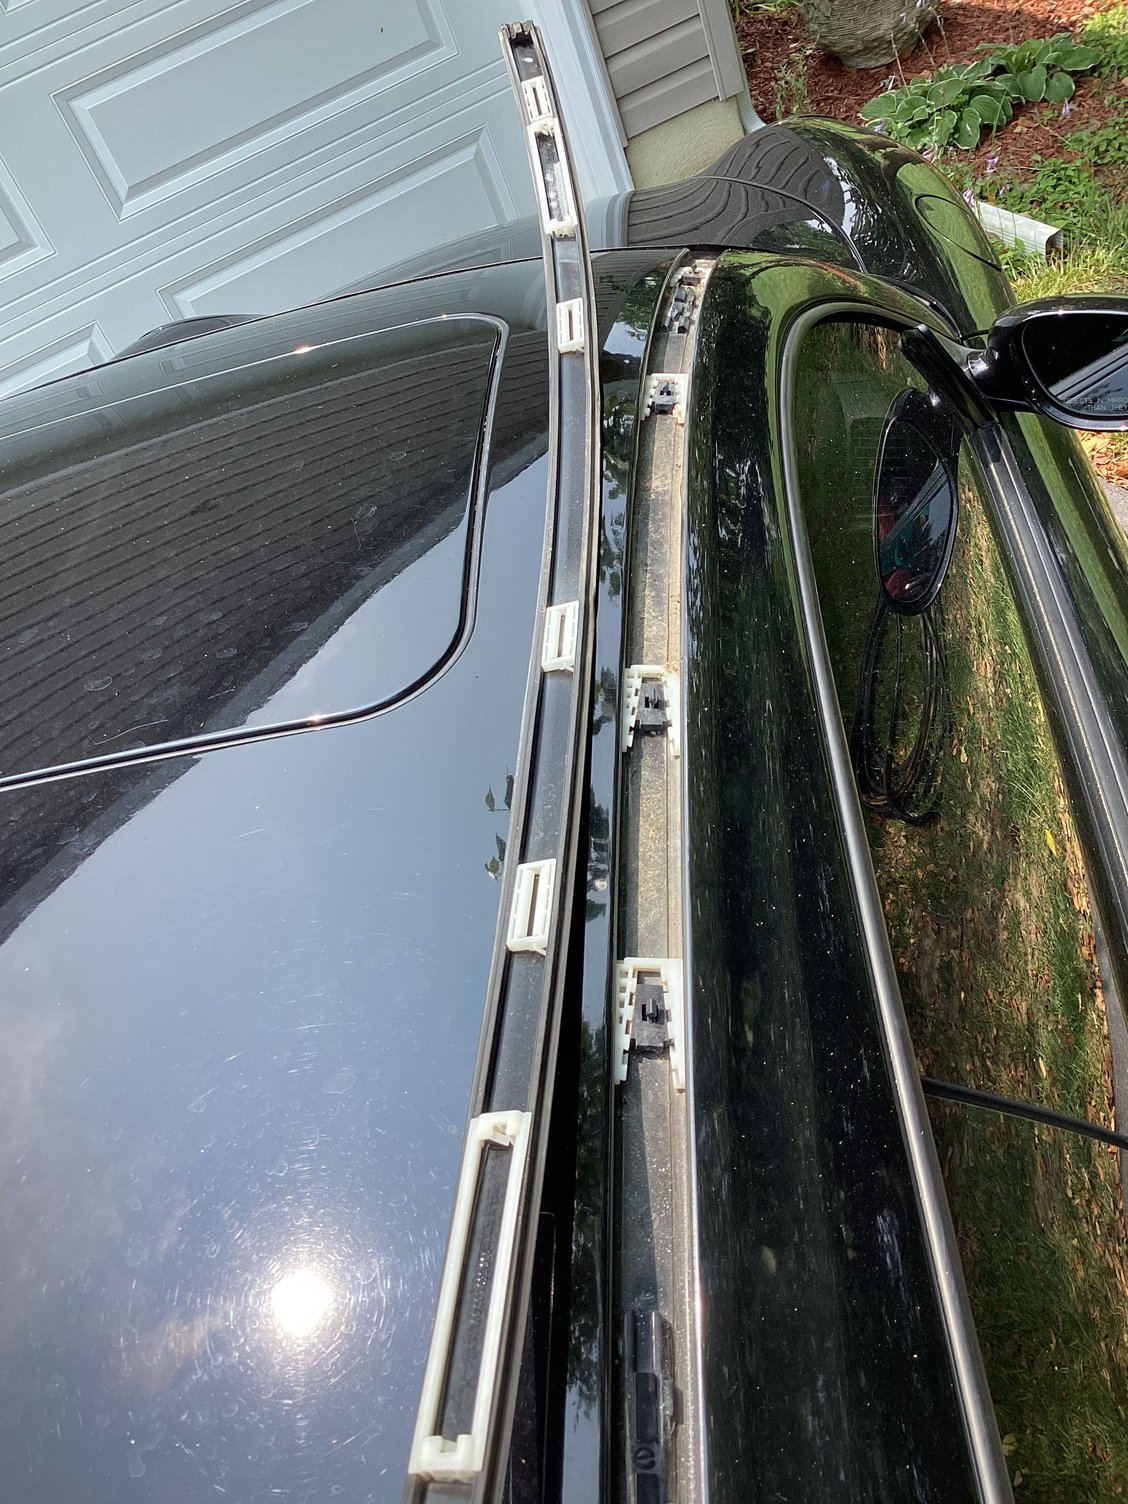
1. Remove the roof trim strip by gently prying from the near side starting at the rear using a proper plastic tool. There are five clips that will release to patient firm pressure and probably won't break.
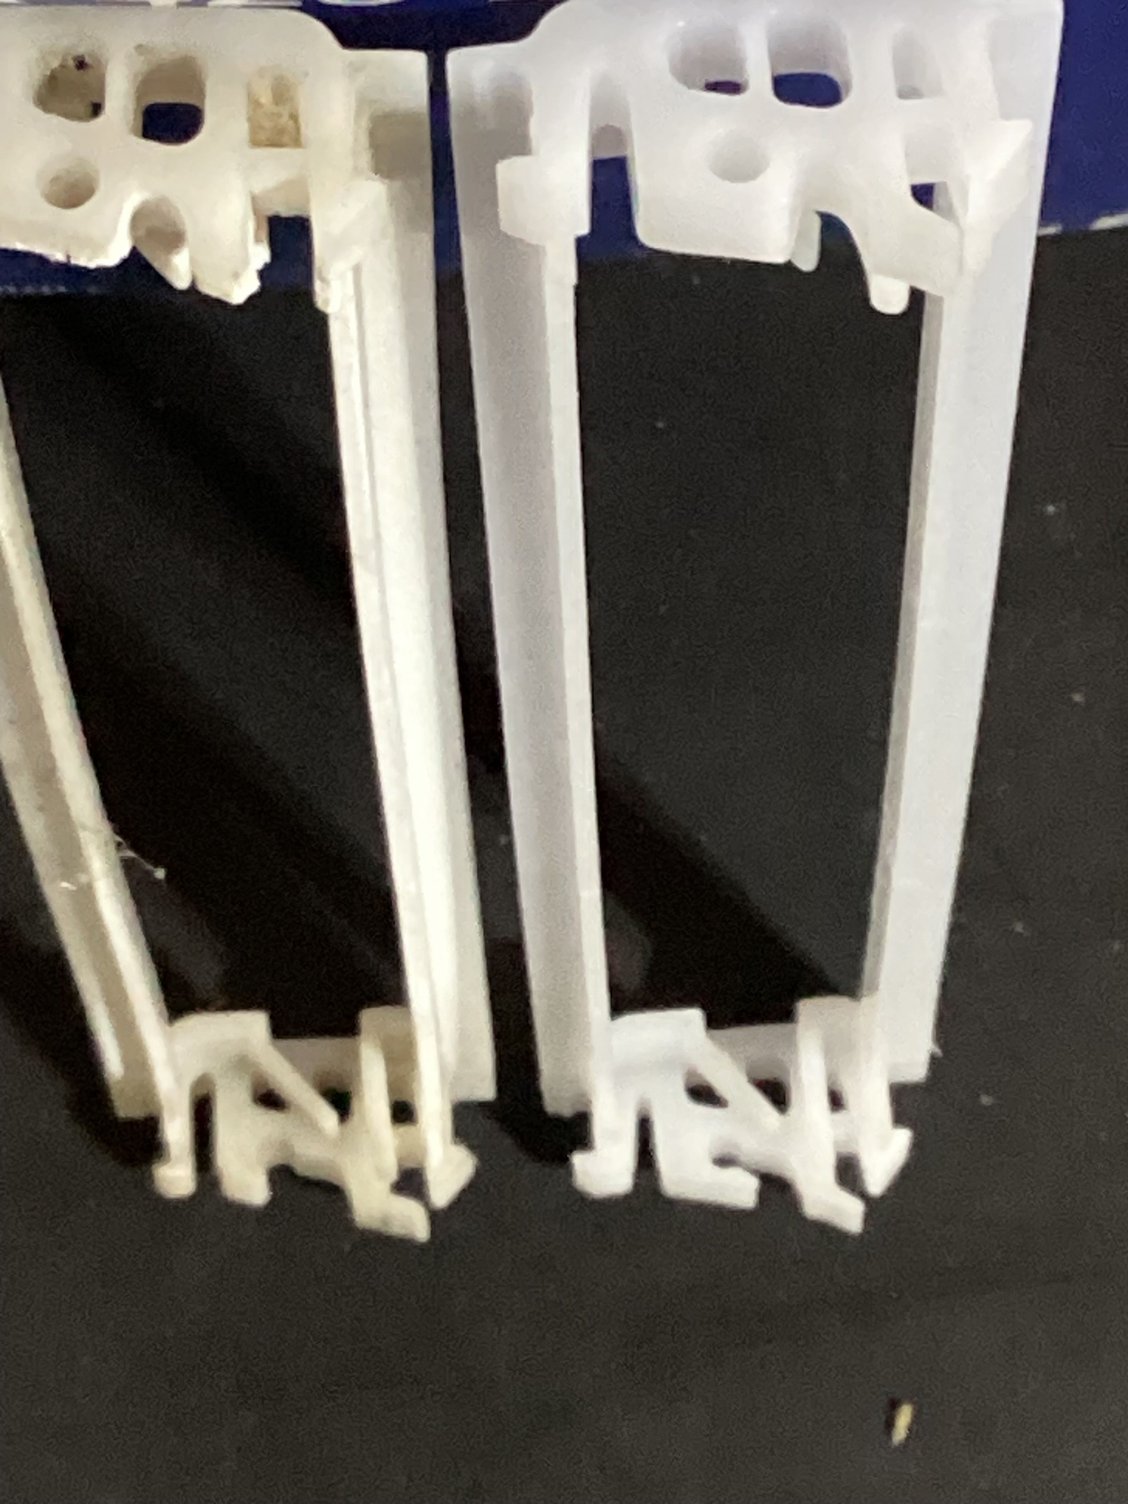
2. Remove the flap from the broken white plastic hinge. If it was like mine it will come right out because the hinge is broken.
3. Pop the hinge out of the trim channel.
4. Install the new hinge and flap by pressing it into place - notice that the hinge fits in the channel one way. Look at the way it clips in, one side has a beveled clip - put the other side in first capturing the rubber edge strip as you push it into place then press the other side into place. I didn't get a photo of this but if you look at the new hinge you will see what I mean.
5. Reinstall the roof trim strip. Align the clips and press down firmly starting from the front of the strip working to the rear. They will snap into place.
Do yourself a favor and purchase both hinges if you are doing one side. It is likely they are very brittle so replace both while you have the roof strip off. They don't cost much.
When I first had this problem (99 C2 over 10yrs ago), I learned that the screws fixed into the roof CAN rust into their mounting (I am referring to the screws which must be removed to attach the roof rack feet). This experience taught me about removing the long trim strip and about the joys of drilling out screws and tapping new holes. Good fun.
So now, with my 03 C4S, I have seen that the screws have changed a bit (some plastic coating on the head), but still are rusting in their holes. Took these out last night and applied oil to reduce corrosion.
My advice: don�t wait until you need to use them. Preemptively remove the screws and oil them now. Your future self or the next owner will thank you.
I had to replace 2 out of the 4 roof mounts - wasn't too bad of a project and was much better than drilling/tapping badly rusted mounts. Took the time to replace all 4 door hinges and a few of the strip mounts as well. I recommend using some anti-seize on the screws; that will protect the threads long term.
Thank you all for this thread,...been working hard to figure out how to attach this trim piece....cant wait to try now!!!
Did anyone use locite when they fixed this? I can not find loctite 241, what is an alternative?
Thank you!
MY one questions here is did you lay the rubber seal on the roof then press metal into it or did you attach the rubber gasket to the metal piece and then clip to roof?
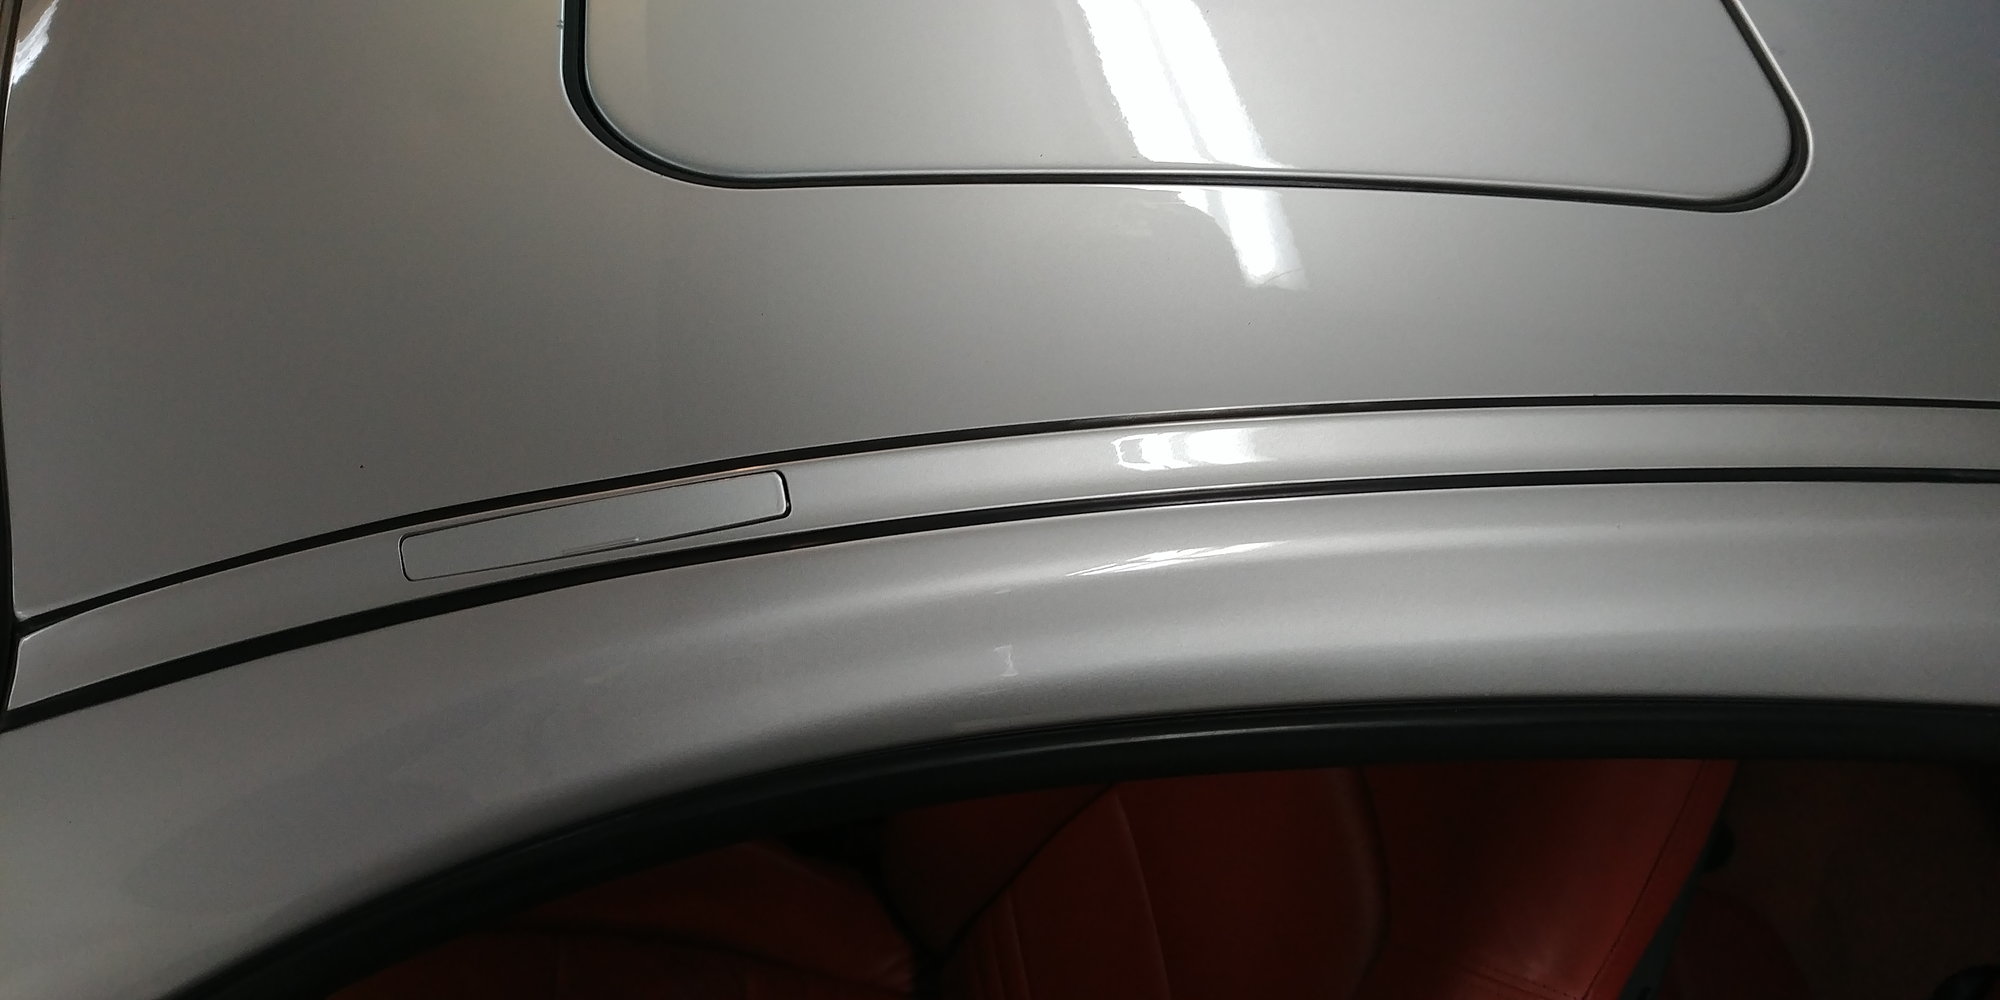
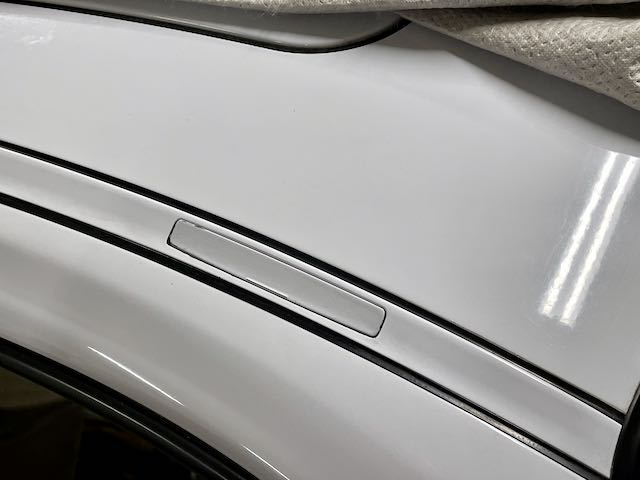
Just did this, easier than I thought. I had the car in the sun prior to removal to heat the strip & tabs up. Using plastic tools, the strip popped up, replaced white piece that holds the flap, lined the clips back up and popped the trim back in using the palm of my hand.
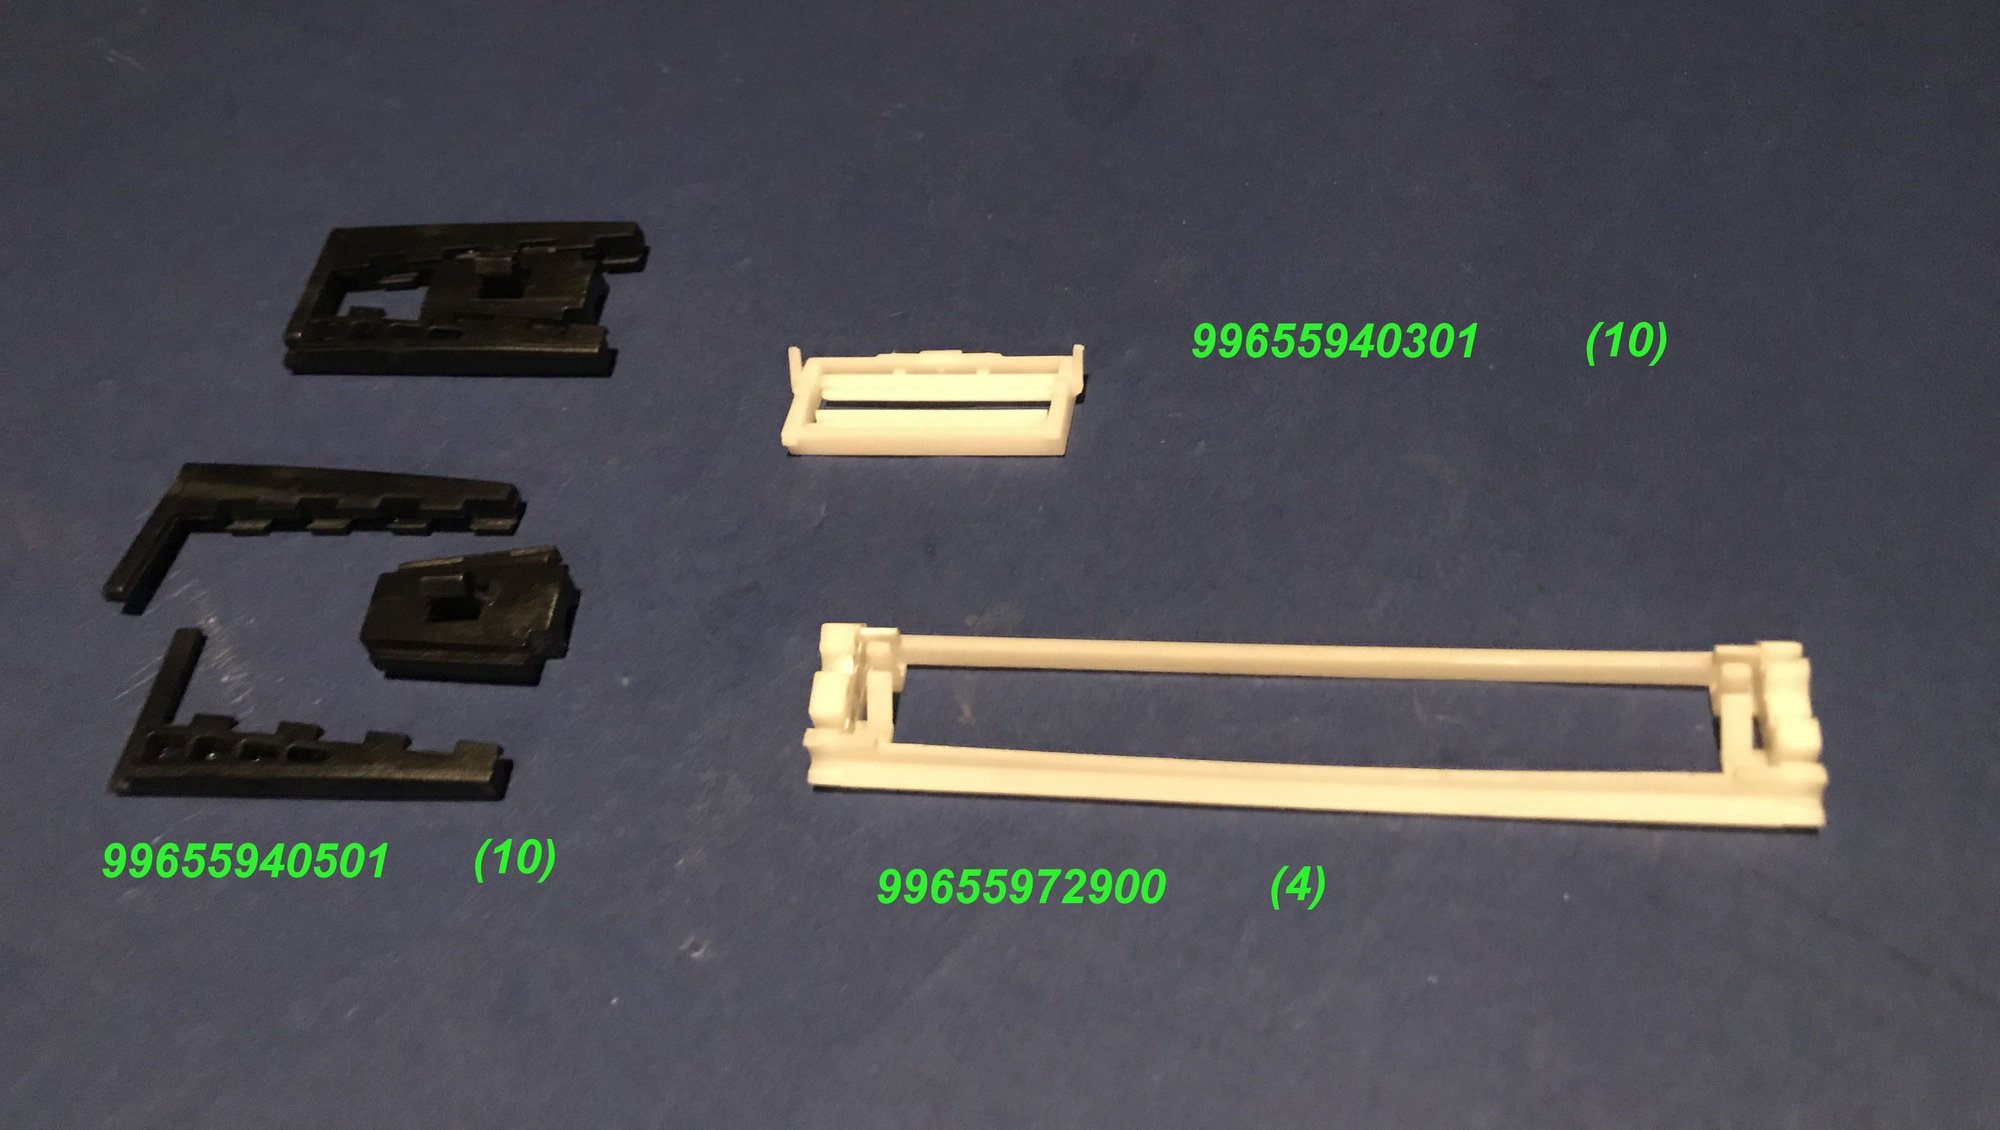
Pry up Piece out and you can see the clips that snap together. Plastic pieces fit in the underside channel. One side goes in first, the other side has a clip piece than snaps in. It�s obvious when you see it. My clip had a broken tabs at the top & bottom. All done Part #

 05-09-2018, 09:20 AM