When you click on links to various merchants on this site and make a purchase, this can result in this site earning a commission. Affiliate programs and affiliations include, but are not limited to, the eBay Partner Network.
That's the switch I used for my garage door opener, as noted it actually looks like an opening garage door.
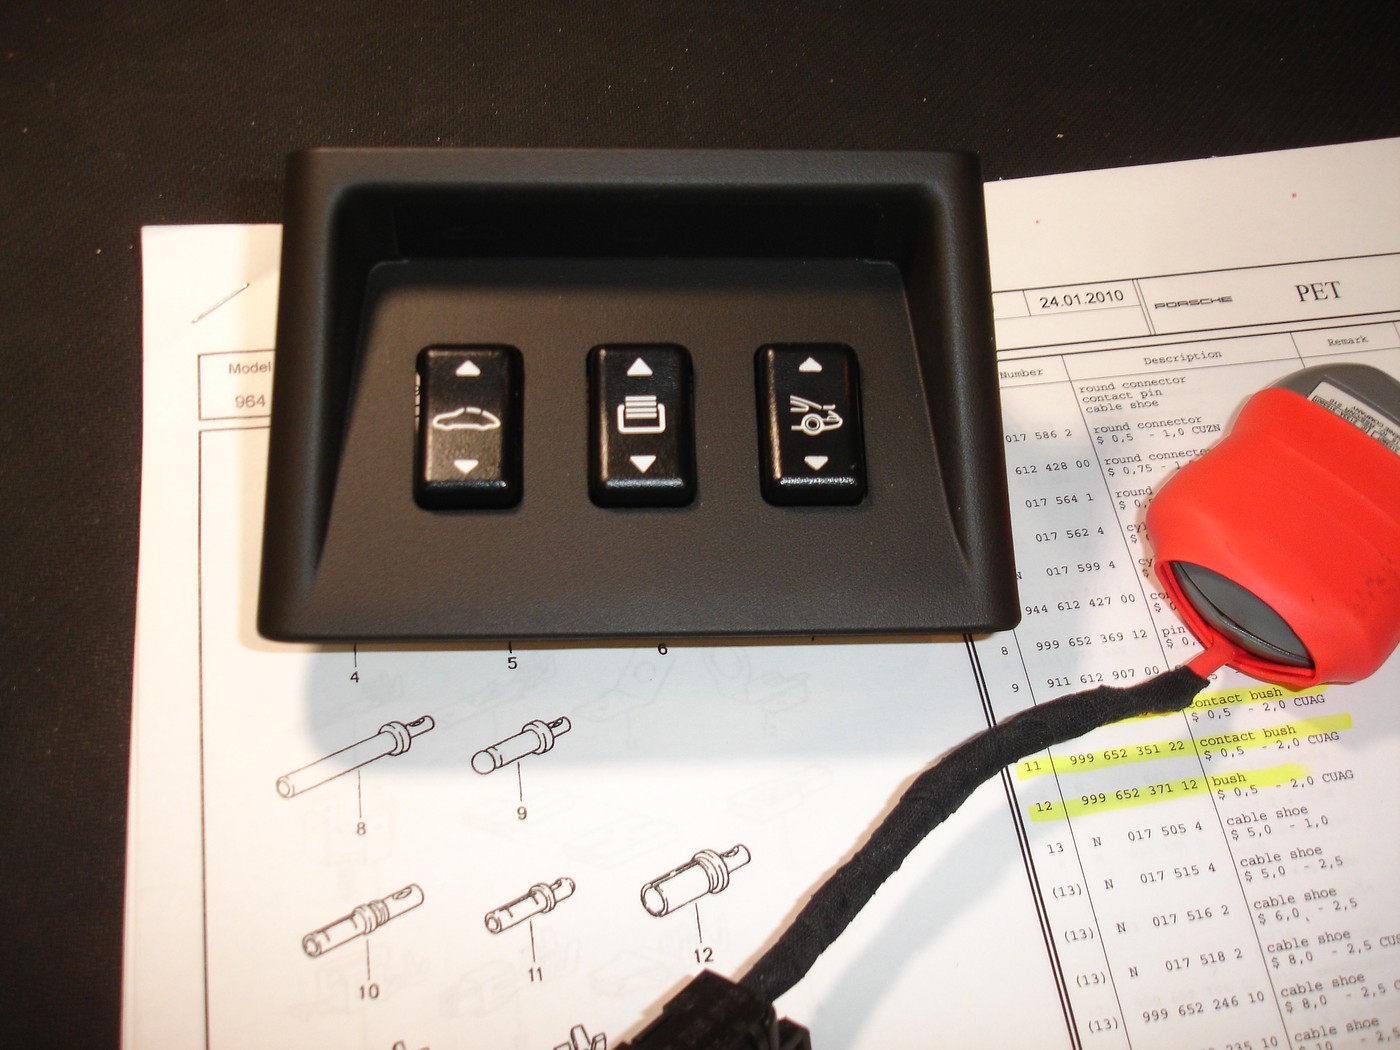
Be warned though, next you will want the correct trim piece with the identical set of symbols (illuminated of course):
993 632 071 20
My wife conveniently broke the original trim with her brick-filled purse while getting in the car, giving me the perfect excuse to buy the new trim with the shade / garage door symbol above the middle switch. The trim goes great with Tore Bergvil's LED kit btw.
Both the switch and trim can be found on Katalog / PET at illustration 903-05, you can download PDF katalog here if you don't have it already:
Can you order the lens separately? Without the whole black plastic trim piece? Did you order Tore's LED kit? Pix? Thanks!
Unfortunately the lens (more of a plastic decal, really) does not appear to be available separately - that is what I was hoping for originally, but no go.
Then through sheer serendipity my wife broke the trim piece so I had to buy a new one anyway.
I did put in Tore's kit, much brighter than the original bulbs (but not enough to be distracting at night).
Can any of you guys elaborate on the homelink install? How'd ya do it and what did you use?
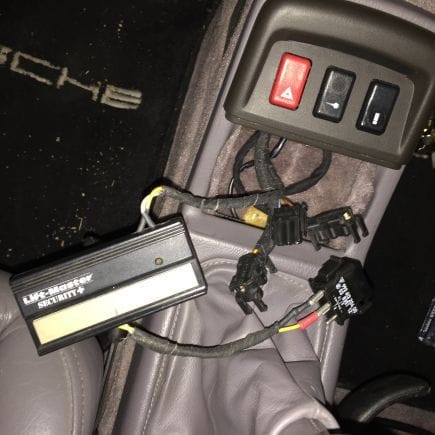
My car is still in storage, so I haven't had a chance to install it. However, my plan is to hardwire a Homelink unit, and replace the blank switch in the console with a Targa shade switch to operate the garage door function. There are quite a few links that explain the general idea, but none specifically for the 993. I hope to do a How-To with photos later.
Here are a few links that I Googled:
Using a traditional garage door opener operated by a Targa switch: http://p-car.com/diy/opener/
So I just finished this little mod on Sunday. Overall it's pretty straight forward although it did take me close to 6 hours to do but that's mostly because of my OCD and my really sh!tty soldering iron (note: buy a proper mini butane soldering torch!!!).
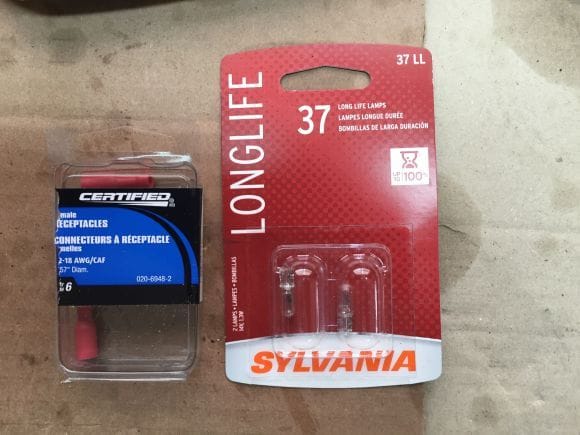
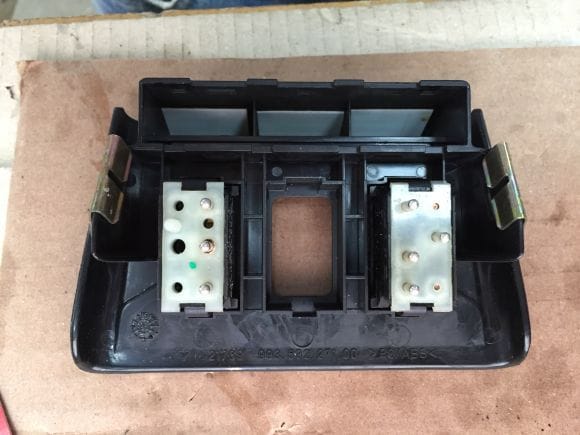
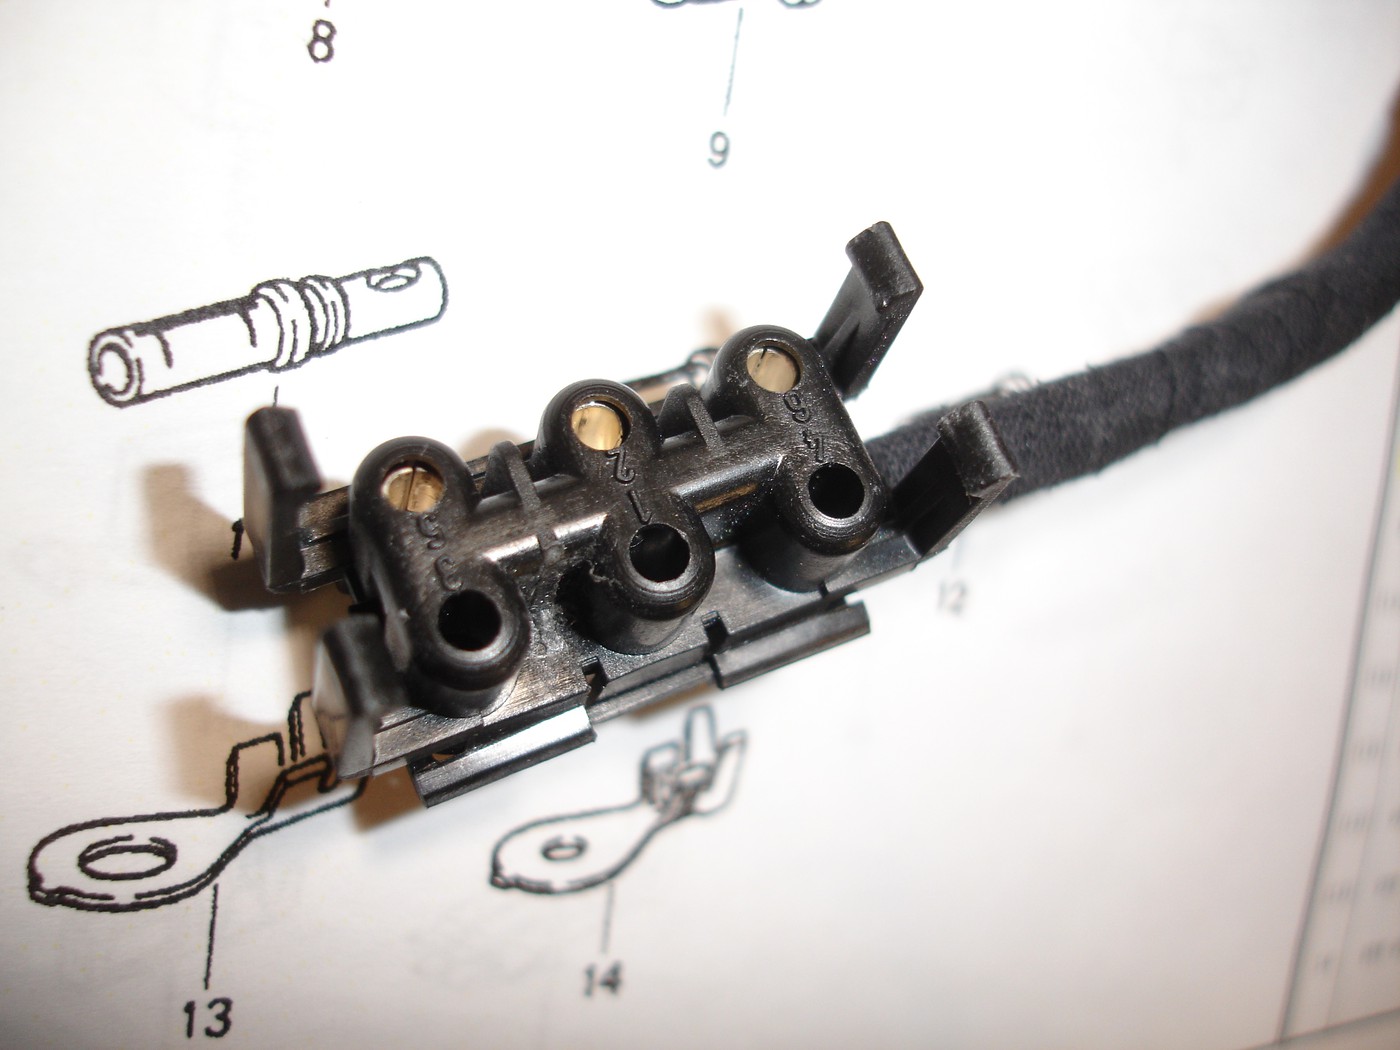
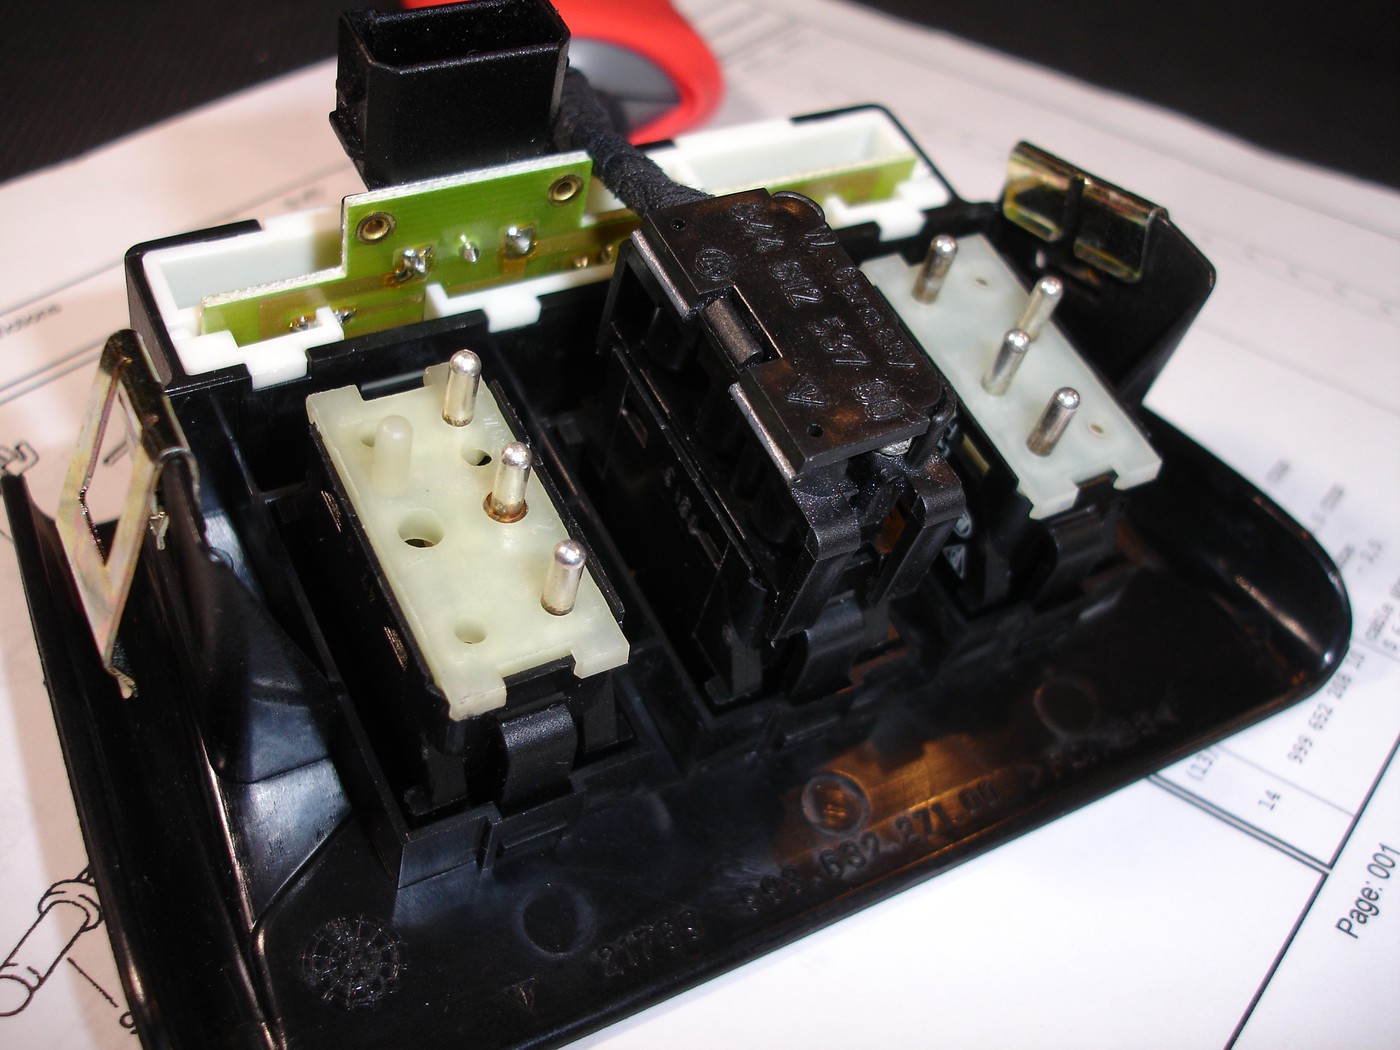
I bought the switch and the film as described in this thread. Disassembled the panel by taking out the white plastic piece as well as the circuit board inside it.
Here are the female plugs and the bulbs that I bought at my local crappy tire. The plugs are too big to fit the studs on the switch so I compressed them for a nice snug fit.
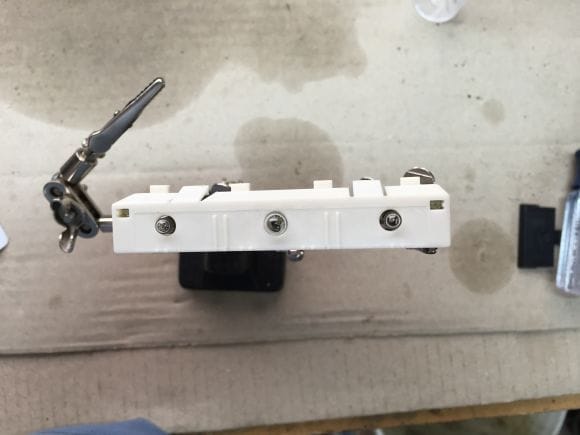
The bulbs are also too big so I bored out the hole in the plastic piece so the bulb would fit. I then bent out the two leads and soldered the bulb in place. Then re-installed the board back into the white piece. You can see the middle bulb is a little larger than the outside bulbs. There is a very very slight difference in light output but even my OCD decided it wasn't enough to remove the stock bulbs and refit all new ones.
Before installing the white piece back in the trim panel I took a white sour cream container lid and cut out a rectangle to place in the middle slot like the outside ones. My guess is that helps with the light reflection or maybe a bit of a heat shield.
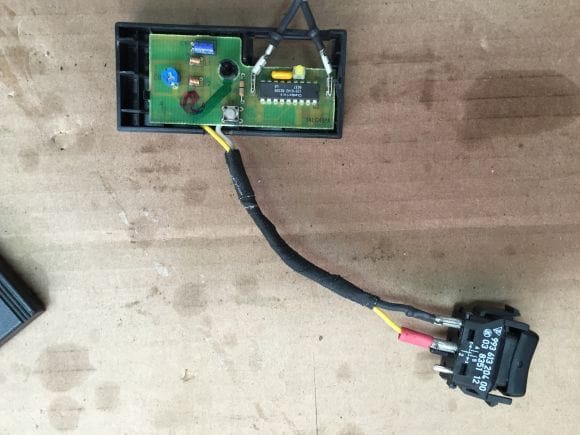
I then took apart my craftsman garage door opener and traced the back of the board to see where the the little switch was. With the battery still in place I found the ground and positive solder points and did a quick test with a piece of wire. Connecting the two would raise/lower the door. I then proceeded to solder the wires taking not to use too high heat and also to make sure I would make contact with only one point at a time.
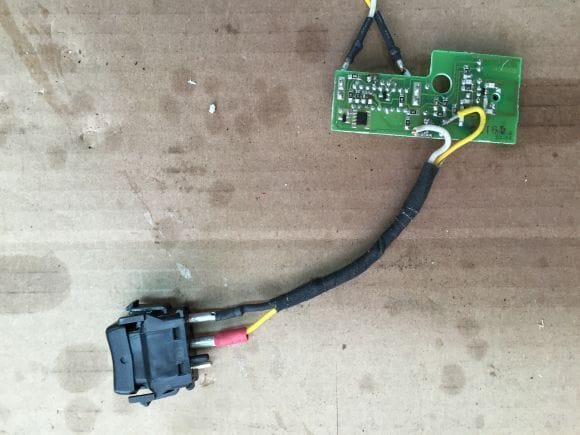
Above you can also see how I used the female plugs for the targa switch. Both ends are soldered and heatshrinked. I then wrapped the two leads together with friction tape to mimic the stock wrapping.
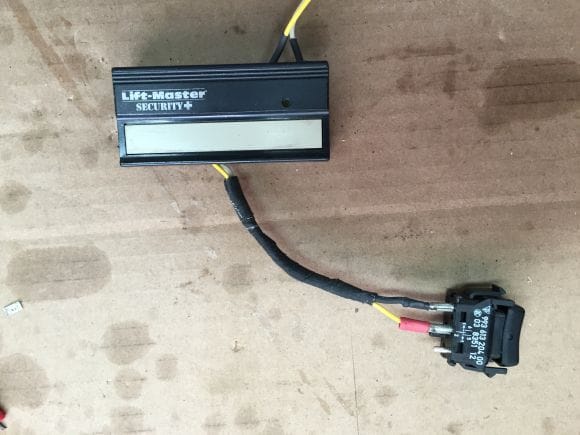
Flipping the door opener to the other side you can see what I did with the power leads. I tapped into the warning light switch harness where I found an easily accessible ground and a hot switched wire. I tapped into those and again soldered and heatshrinked the connections. On the opener side I straightened the clamps that held the battery and then trimmed their length so so they would accept a regular red spade connector. (I took the red jacket off so that I could solder and heatshrink better).
Once all that was done I realized I could basically re-assemble the casing of the garage door opener if I just cut out the edges a little bit to accommodate the wires. Why you ask? Because OCD.
Once all that was complete all I had to do was re-assemble the whole thing.
IMPORTANT NOTE: On the p-car side it says that you can remove the LED to get more POWAH (Clarkson voice) to the transmitter. I tried this and lost all power. Looks like in my opener the LED completes a circuit and without that LED you cut all power to the transmitter. So I resoldered the LED back into place and everything worked as it should.
Hopefully this helps anyone wanting to do the same. Overall it's about a 3/10 if you're comfortable doing some soldering and have some finesse tools like precision screwdrivers to remove trim etc.
Well done ----- and creative use of the old sour cream container.
You know if you were REALLY REALLY REALLY OCD, you would have avoided the use of the female plugs ---- you would have purchased all the switch sockets out of a wrecked car from a dismantler (say..... Parts Heaven .... for $30 ..... ask me how I know ..... ) and rewired the socket appropriately....
That thought had actually crossed my mind but the need for instant gratification won out over the OCD this time. That and the fact that the local dismantler was already closed helped.
That thought had actually crossed my mind but the need for instant gratification won out over the OCD this time. That and the fact that the local dismantler was already closed helped.
Maybe that will be the 2nd iteration.
MartinC2S --- PM me your address and I'll send the spare socket that I have in the mail to you. Looking forward to seeing v2.0.

 01-05-2016, 05:02 PM