When you click on links to various merchants on this site and make a purchase, this can result in this site earning a commission. Affiliate programs and affiliations include, but are not limited to, the eBay Partner Network.
There are several how to threads on this subject (nod to FlatSix911 and Pelican), but I thought I would post this up on the board with a few more pictures and some helpful techniques. This is typically done in connection with an upgrade from the 993 4 spoke steering wheel to the 996 3 spoke steering wheel, but in my case I removed a 996 3 spoke wheel to replace it with the original 4 spoke 993 wheel while returning the car to stock. With the right tools and a 4 spoke with a working horn I rate this DIY a 2 out of 10. The 4 spoke I installed had a defective horn contact, so I got lots of practice doing this procedure twice.
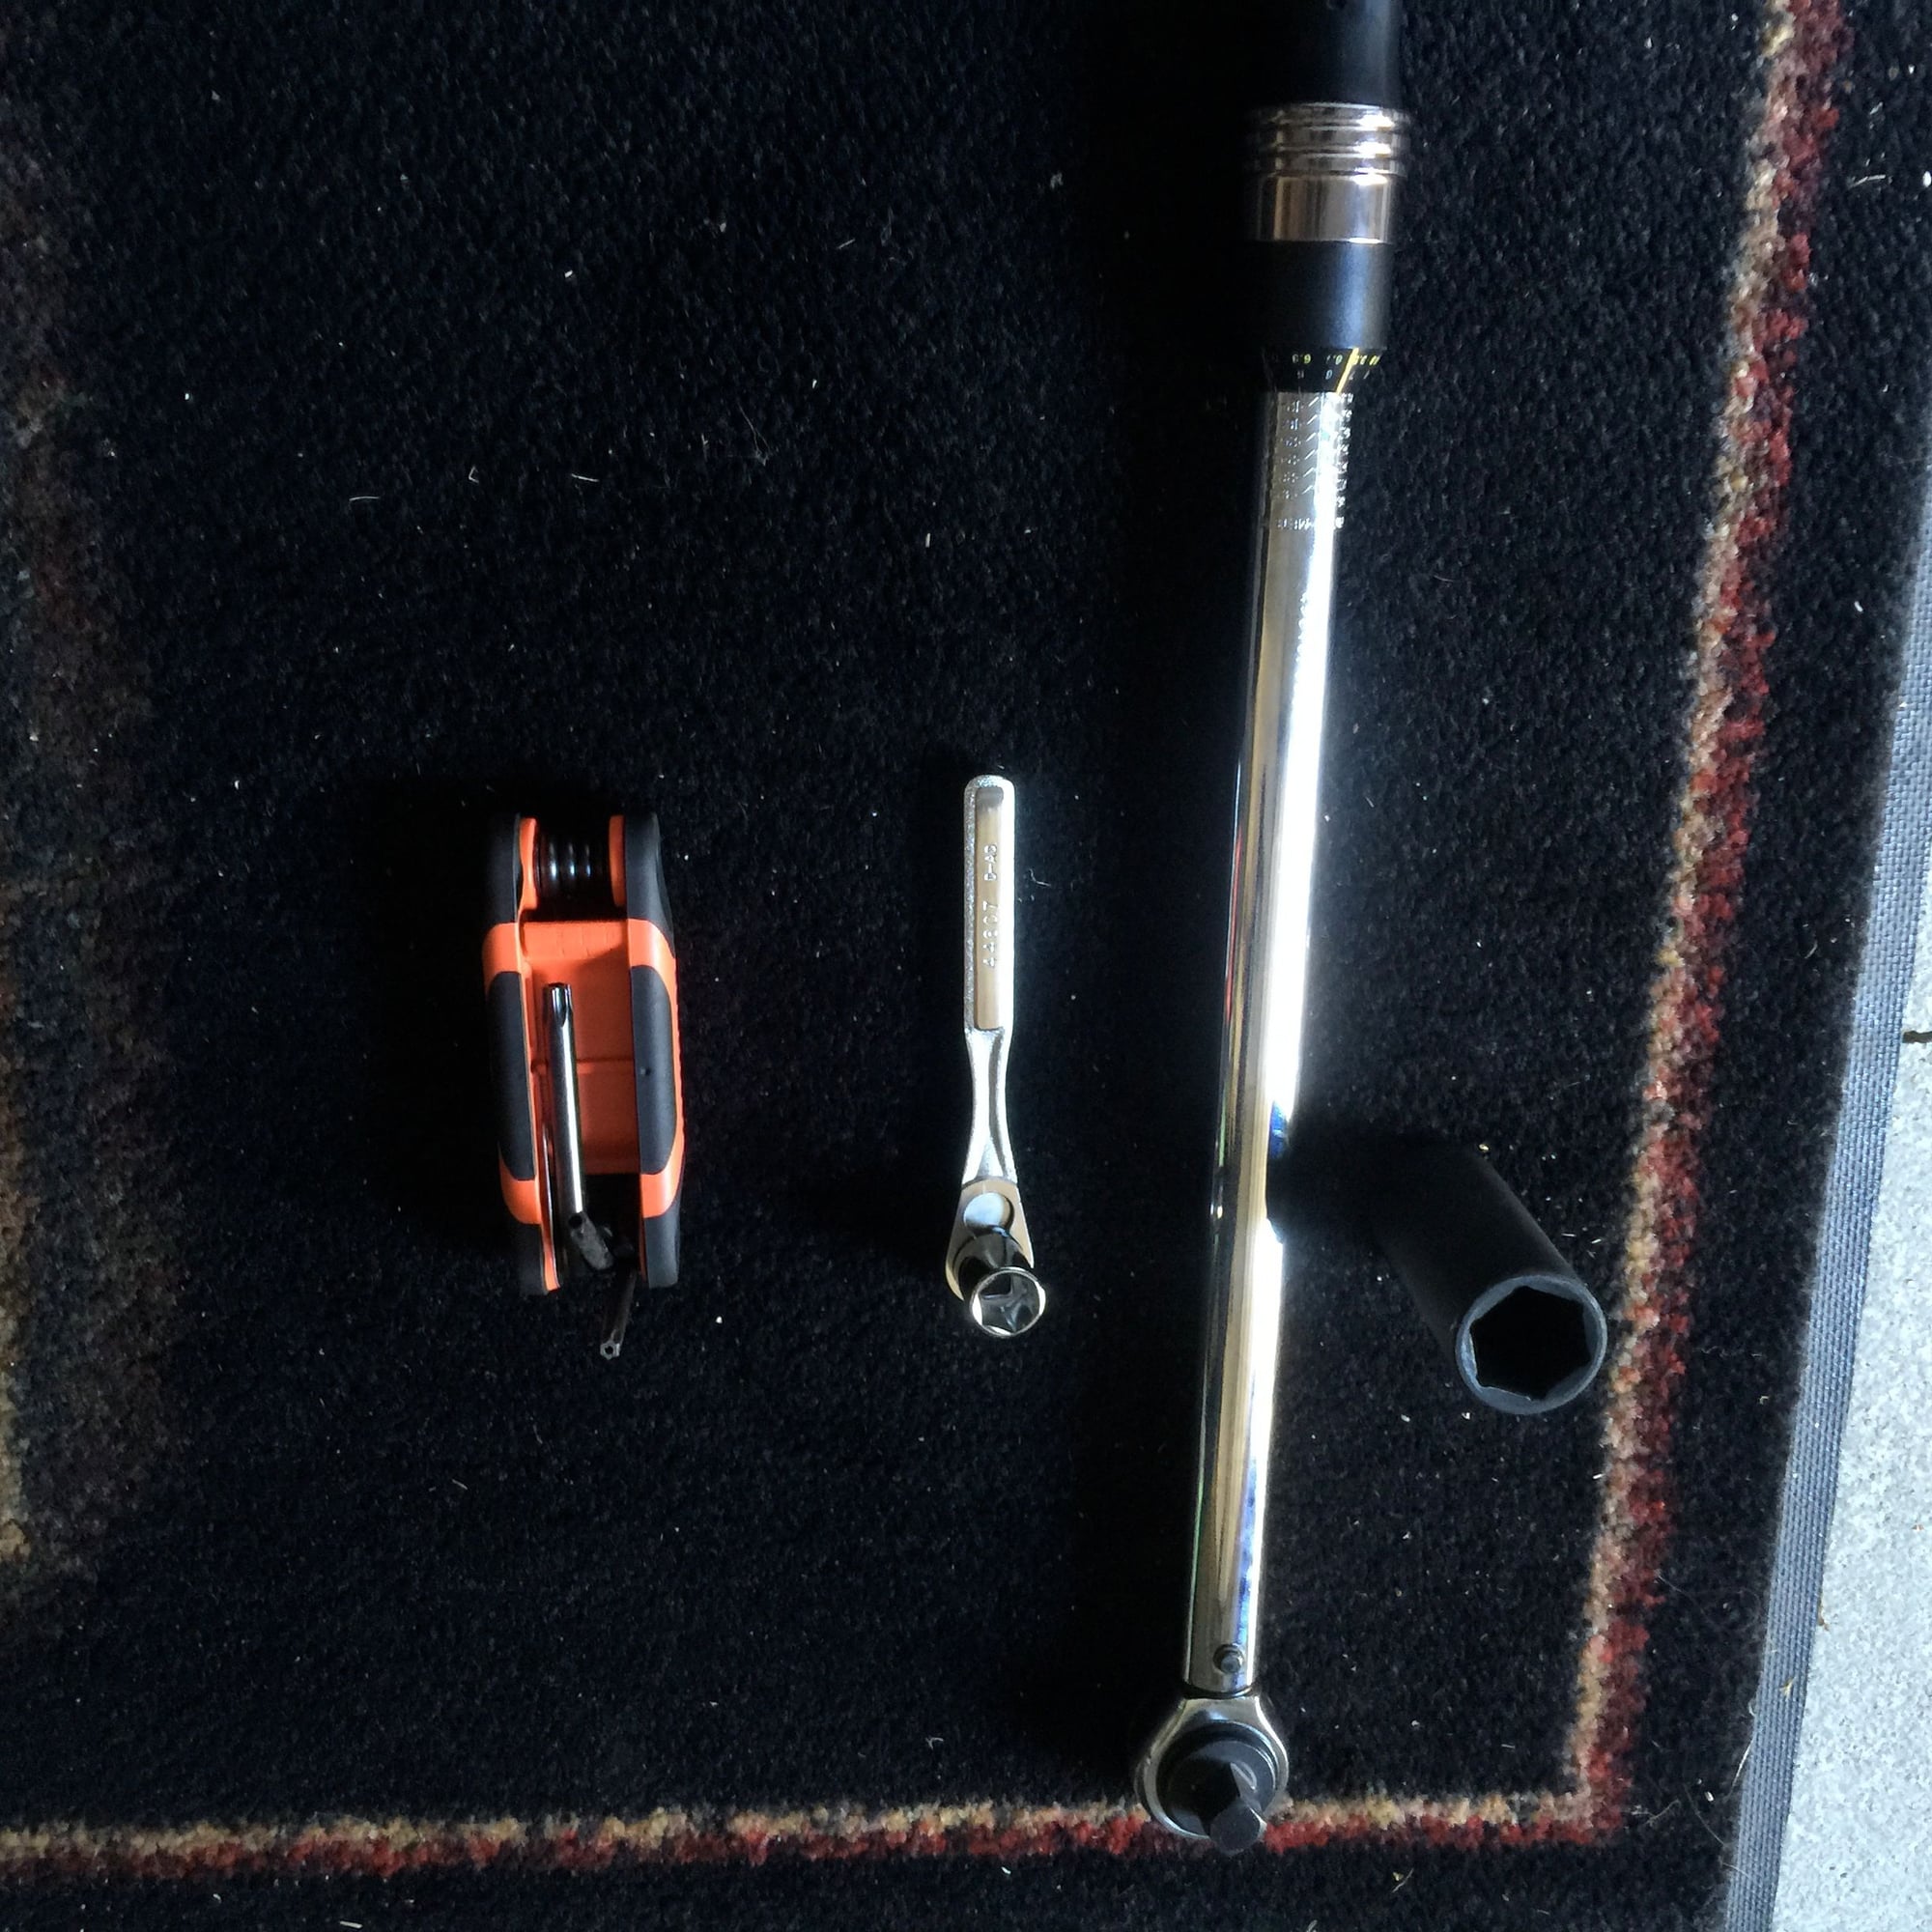
The job only requires a few tools. You'll need a #27 torx wrench for the 993 4 spoke wheel, and a #30 torx wrench for the 996 3 spoke wheel. You'll need a 24mm deep impact socket wrench to loosen the nut on the wheel. Sears craftsman makes a solid handy hex key that won't snap in half like the Pittsburgh junk I bought from Harbor Freight, and its the perfect size to get in there and have some leverage to do the job. You'll also need a small socket wrench to disconnect the battery.
Fist step is to disconnect the battery by disconnecting the negative terminal. Make sure to tuck it up out of the way behind an insulator to avoid any incidental contact with the battery. The battery cables have a tendency to to find their way back to the battery post. Wait 15 minutes, or 30 minutes if you're paranoid like me. Make sure you have your radio code on hand before you disconnect the battery, as you will have to enter the code when you are done to preserve the presets on the radio. And when storing the airbag away, always remember to keep the padded side up.
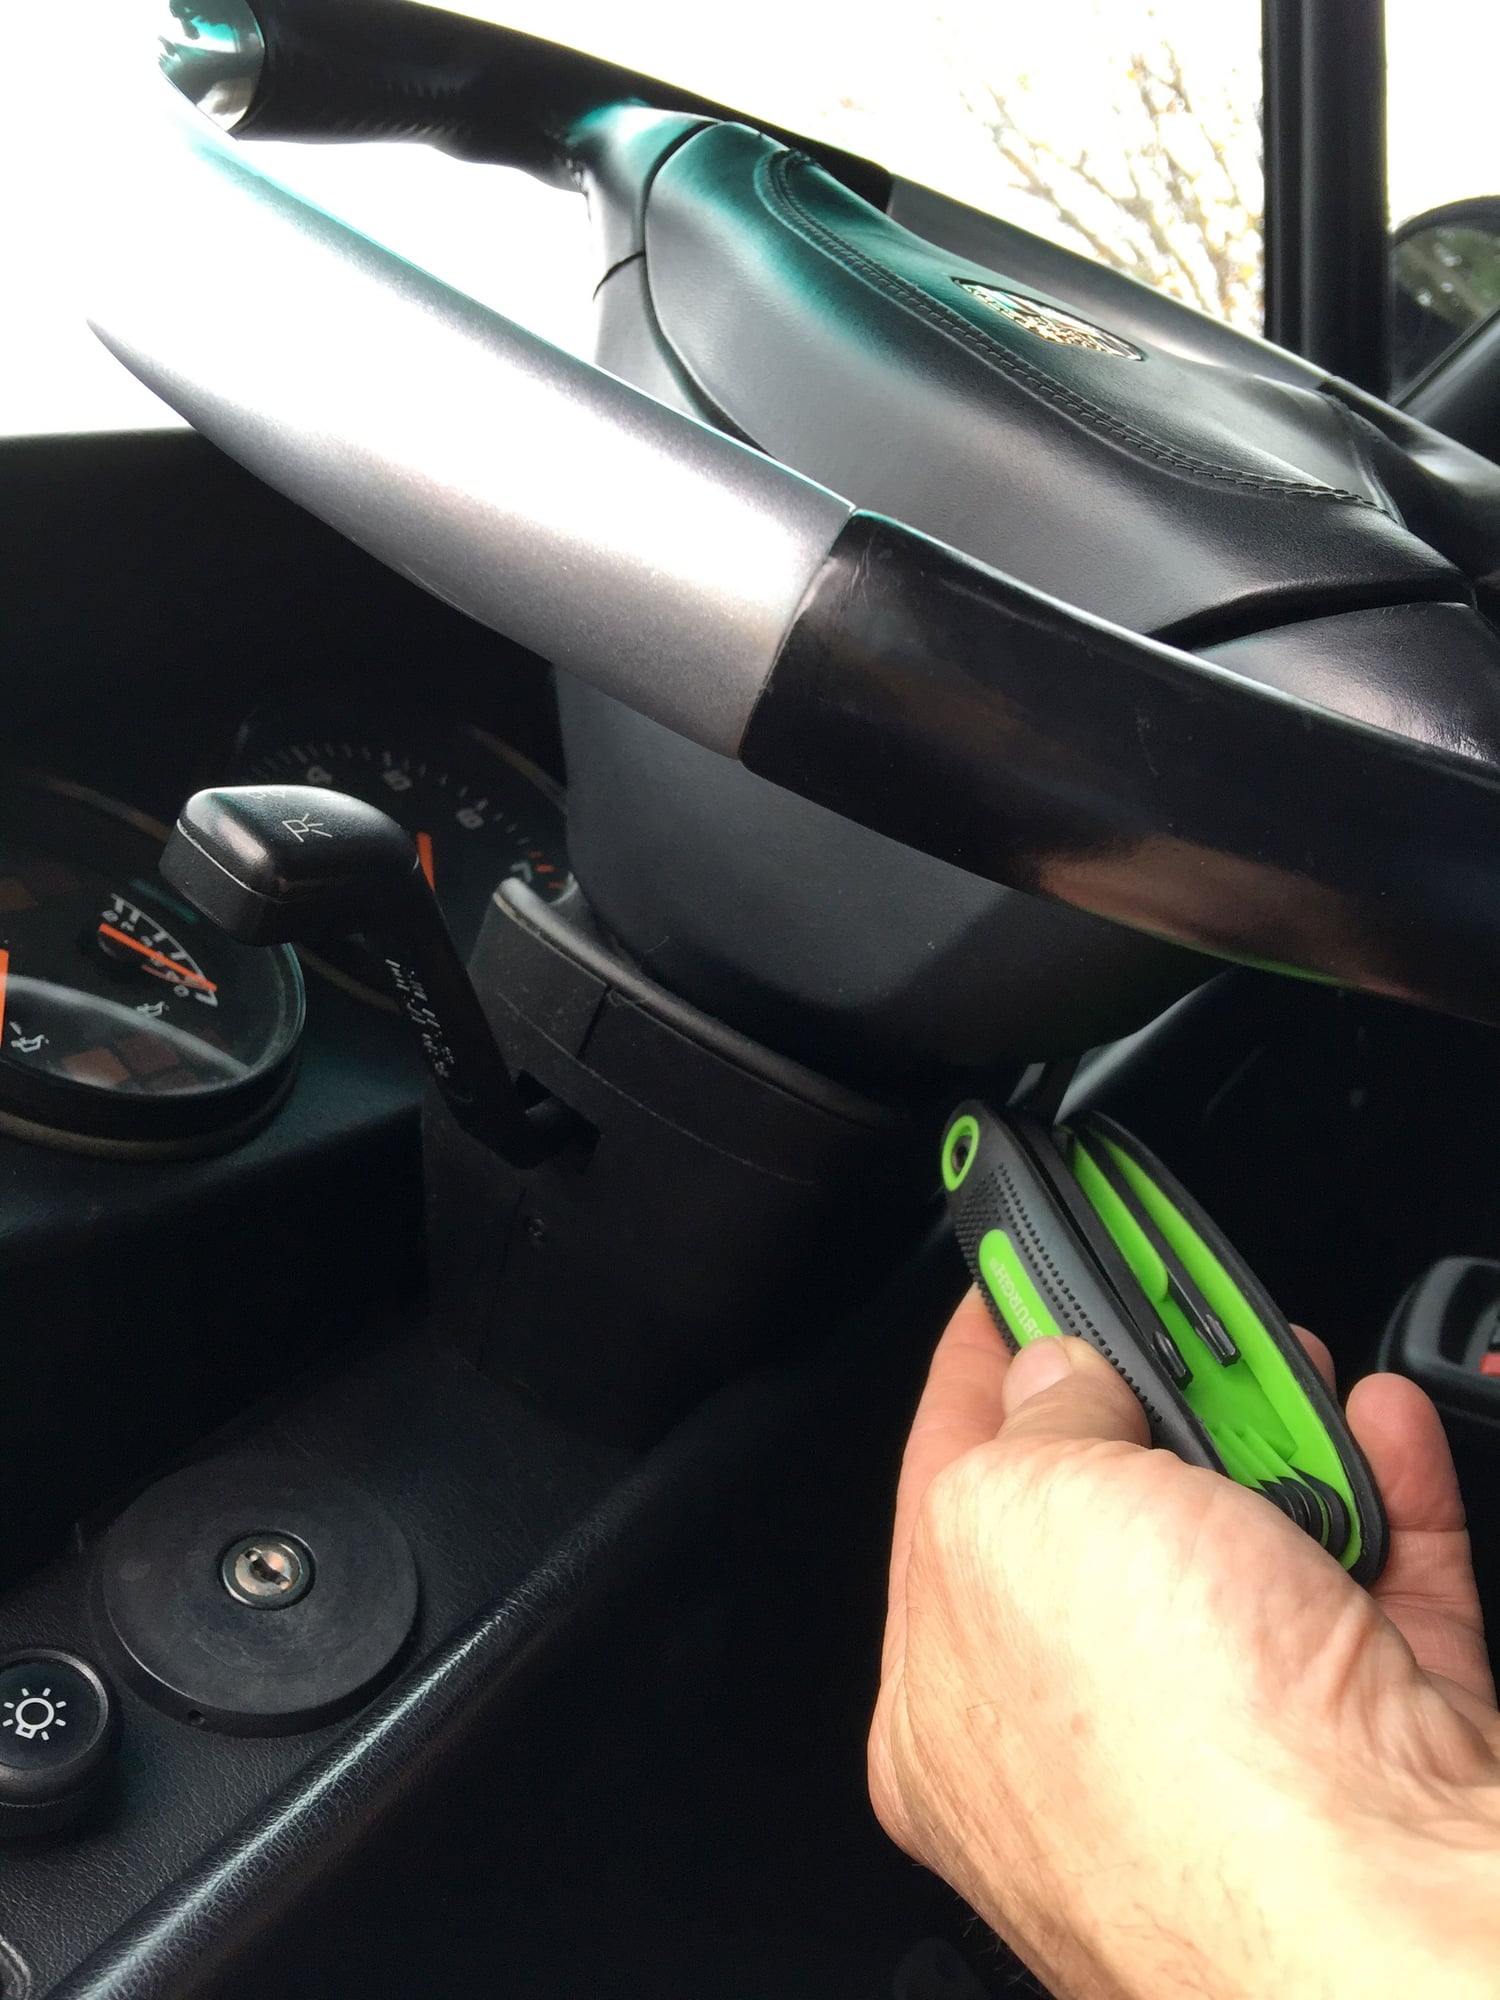
Next step is to loosen the two torx screw from behind to remove the airbag. Remember, the 993 4 spoke wheel requires a #27 torx wrench while the 996 3 spoke steering wheel requires a #30 torx wrench. I found it helpful to turn the steering wheel all the way to either side until the wheel locks in order to access the torx screws. You'll need to turn the wheel a bit, and turn the ignition key in order to unlock the wheel and turn the wheel to the other side. Don't force turning the key, simply pull on the steering wheel a bit and the key will turn freely to unlock the wheel.
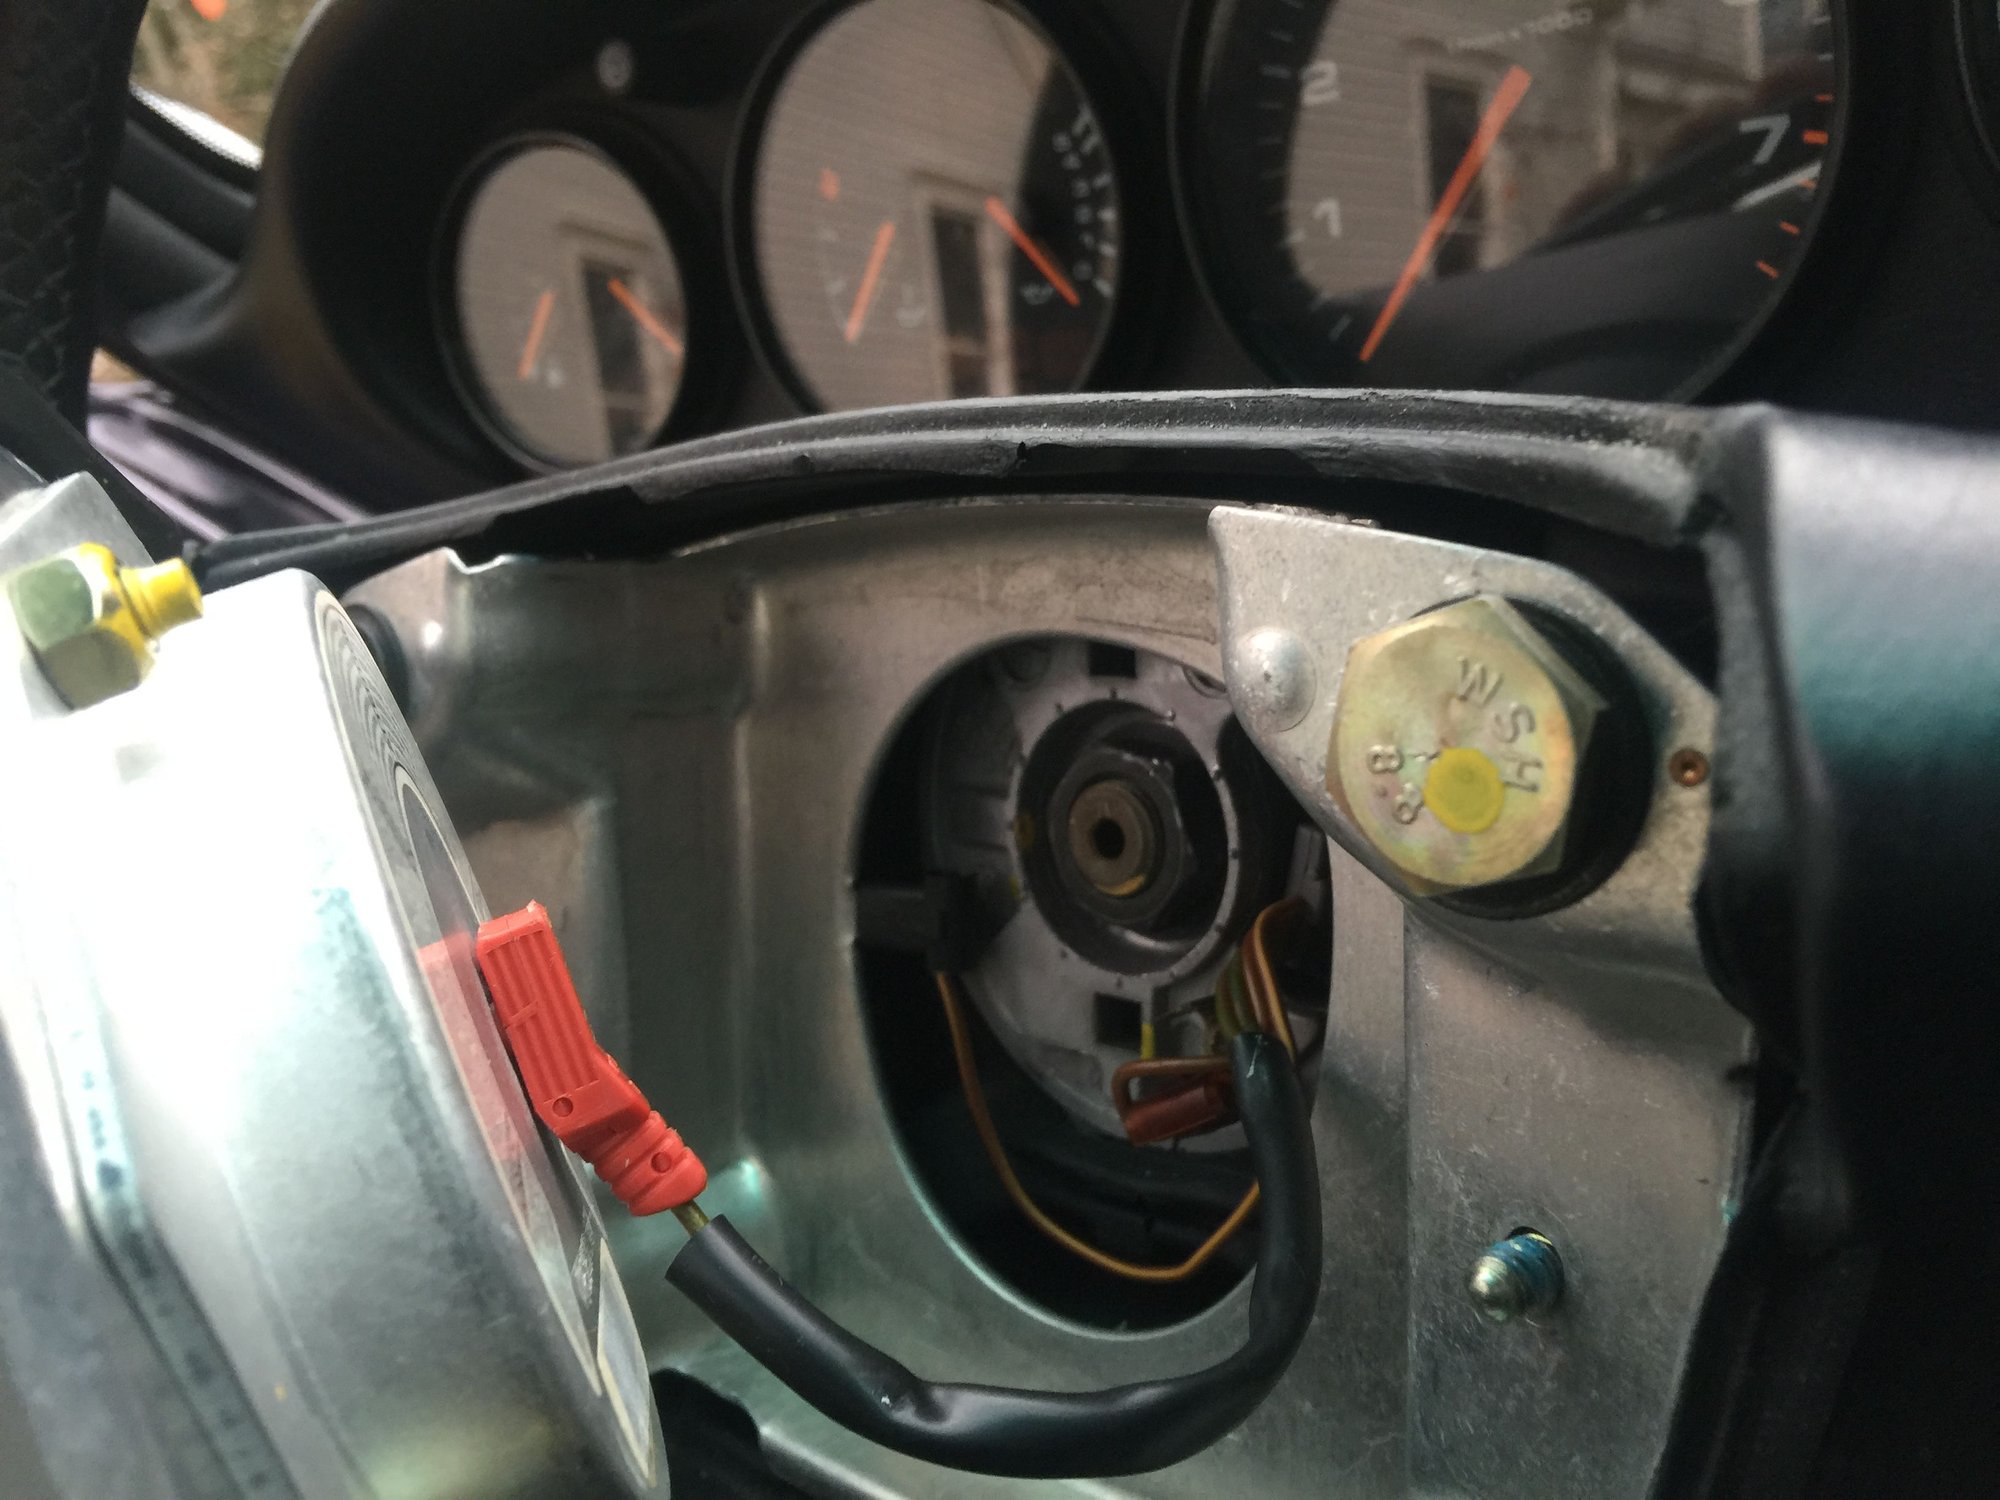
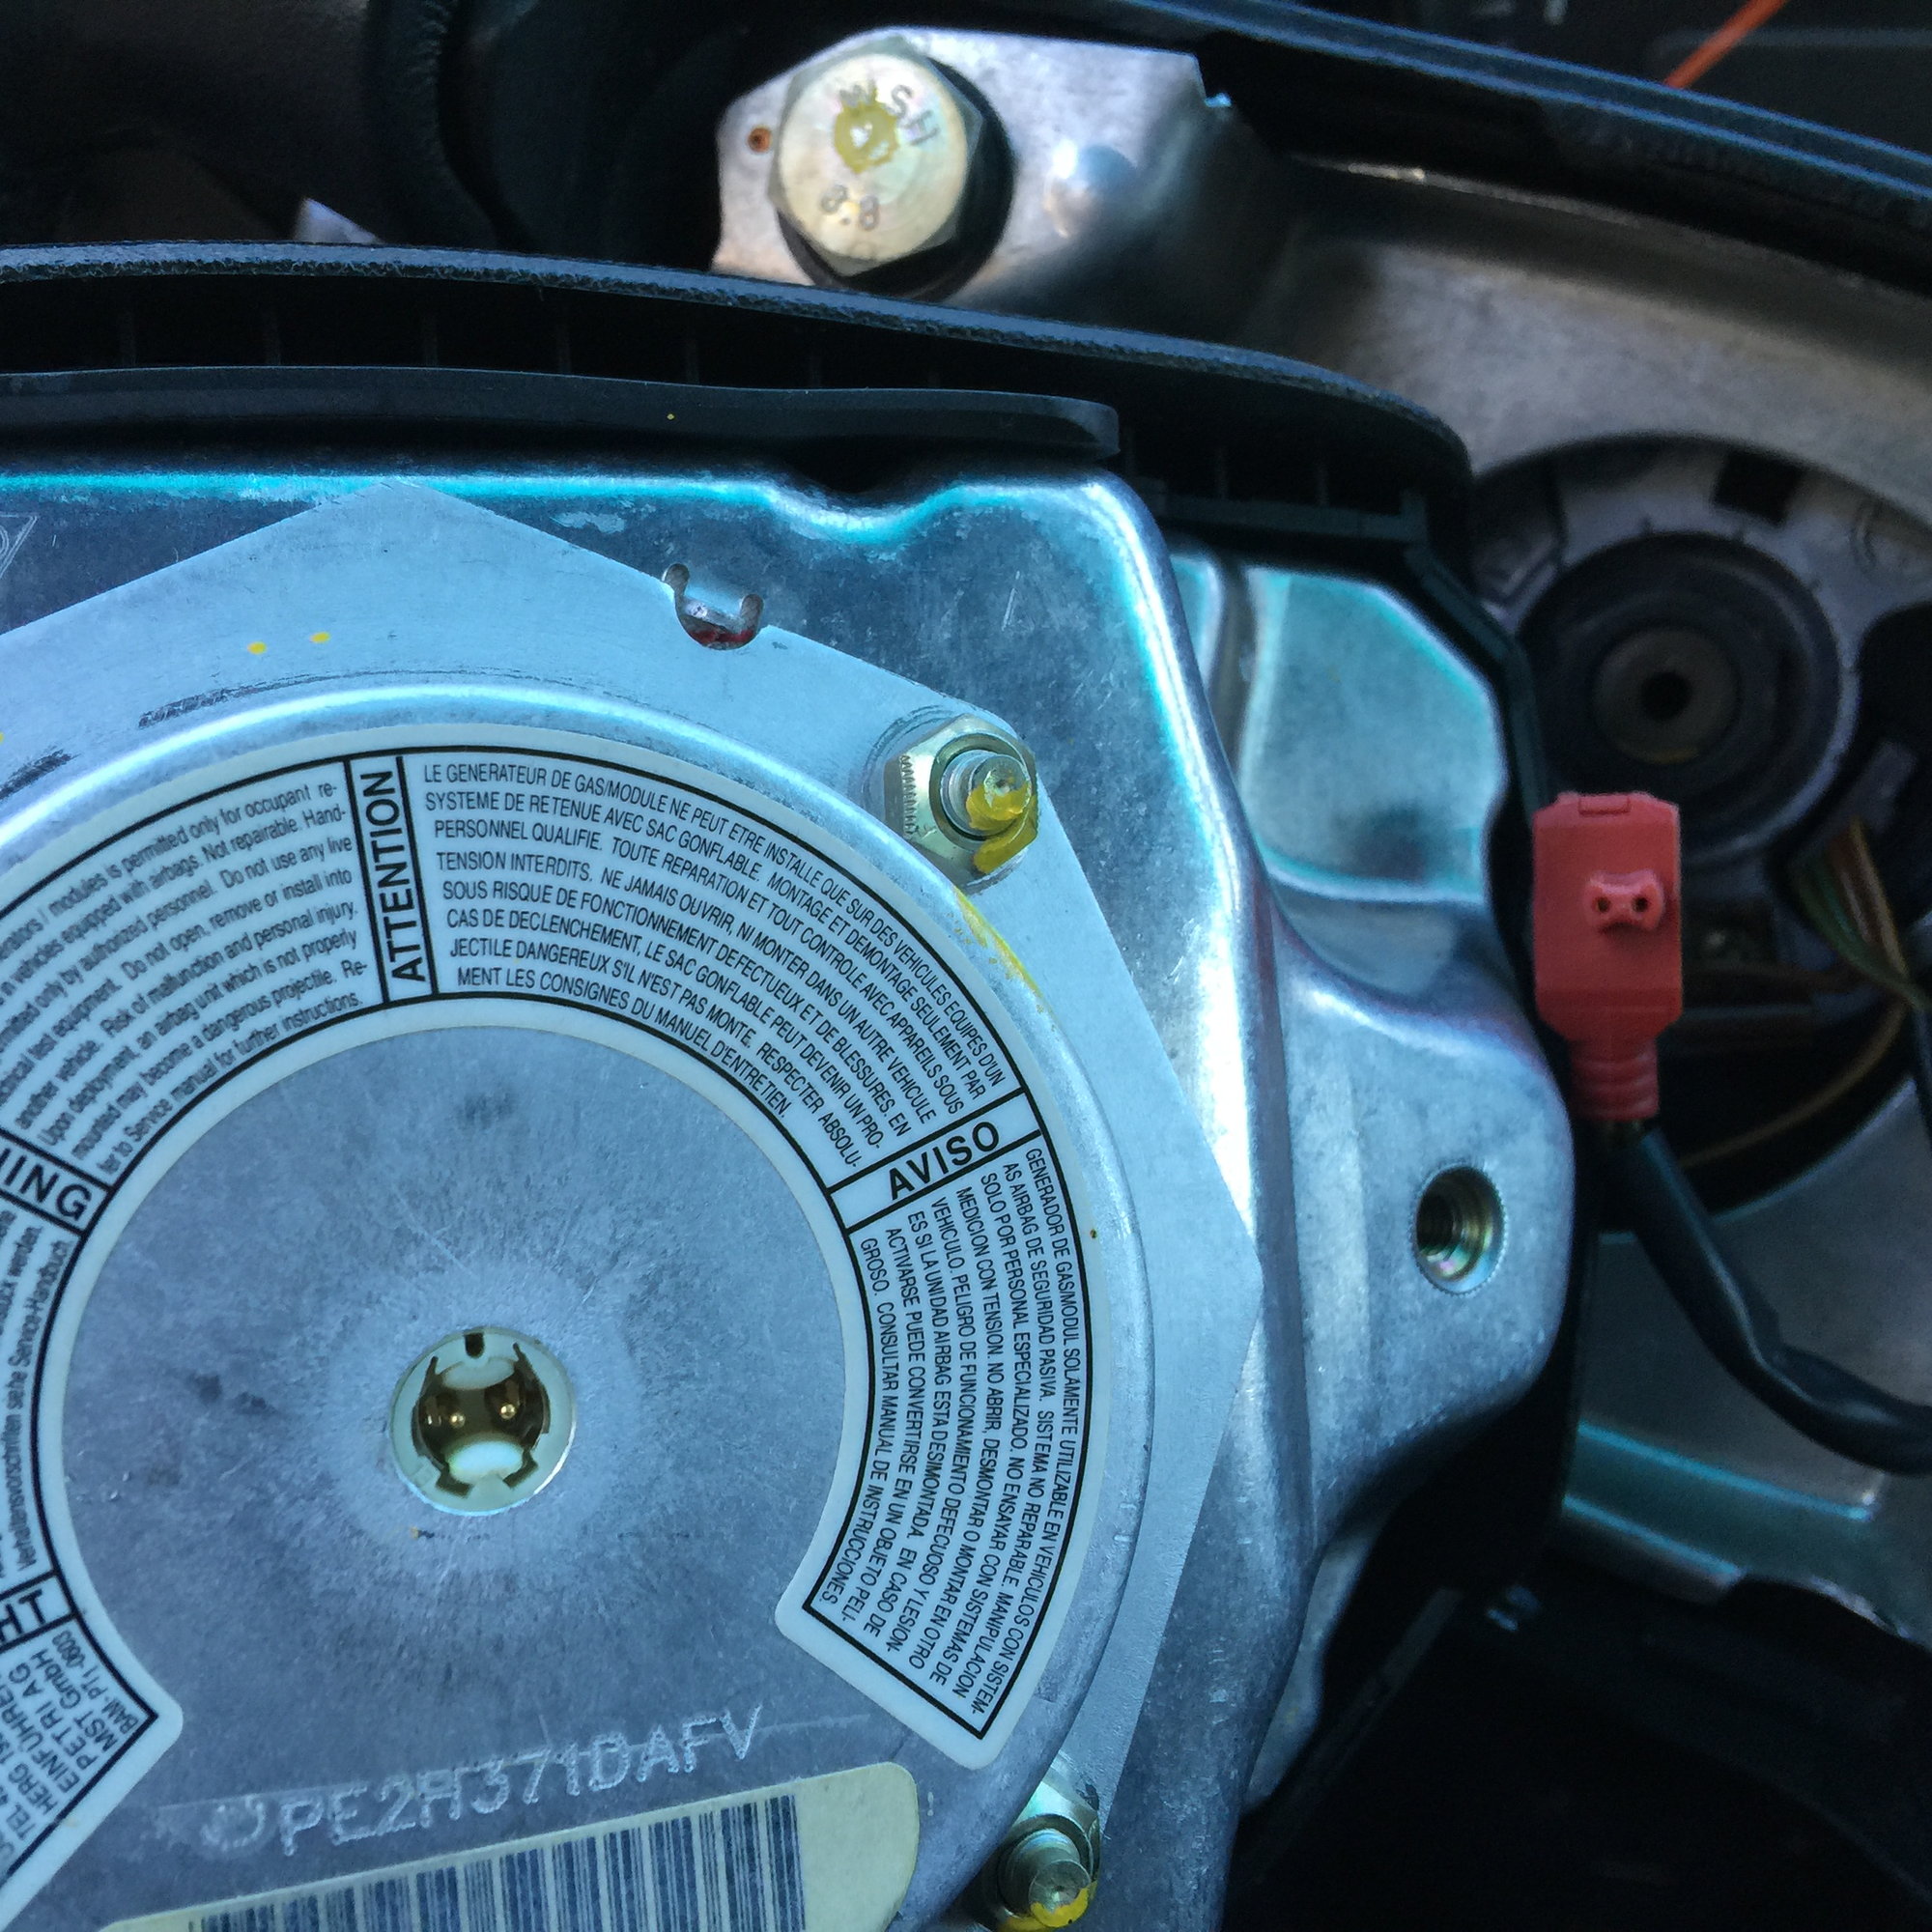
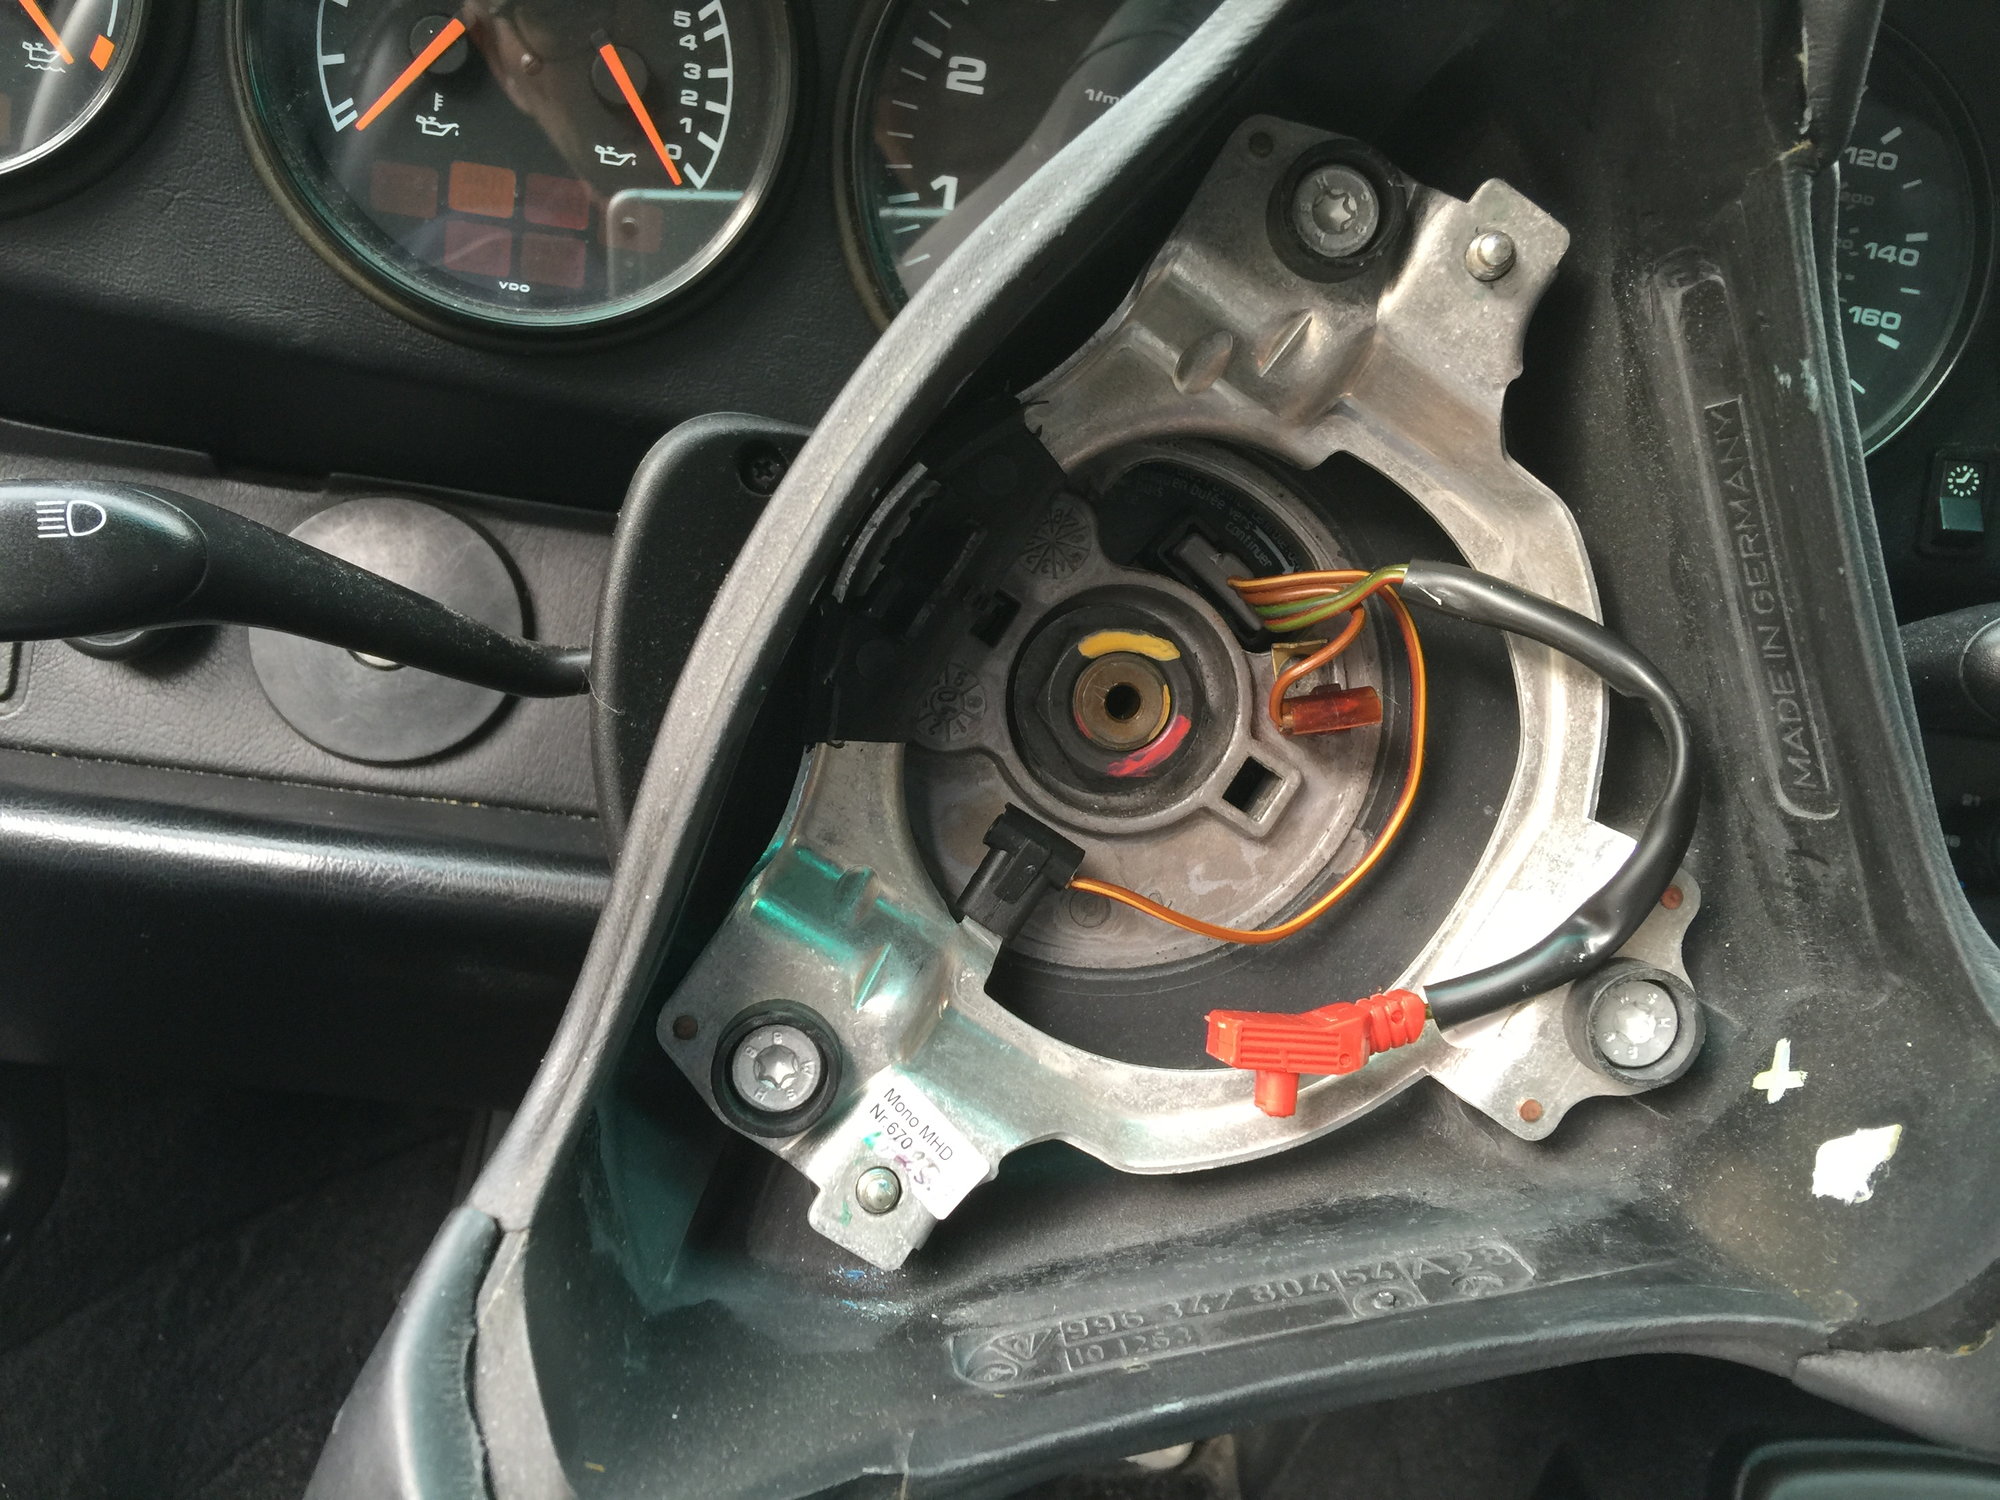
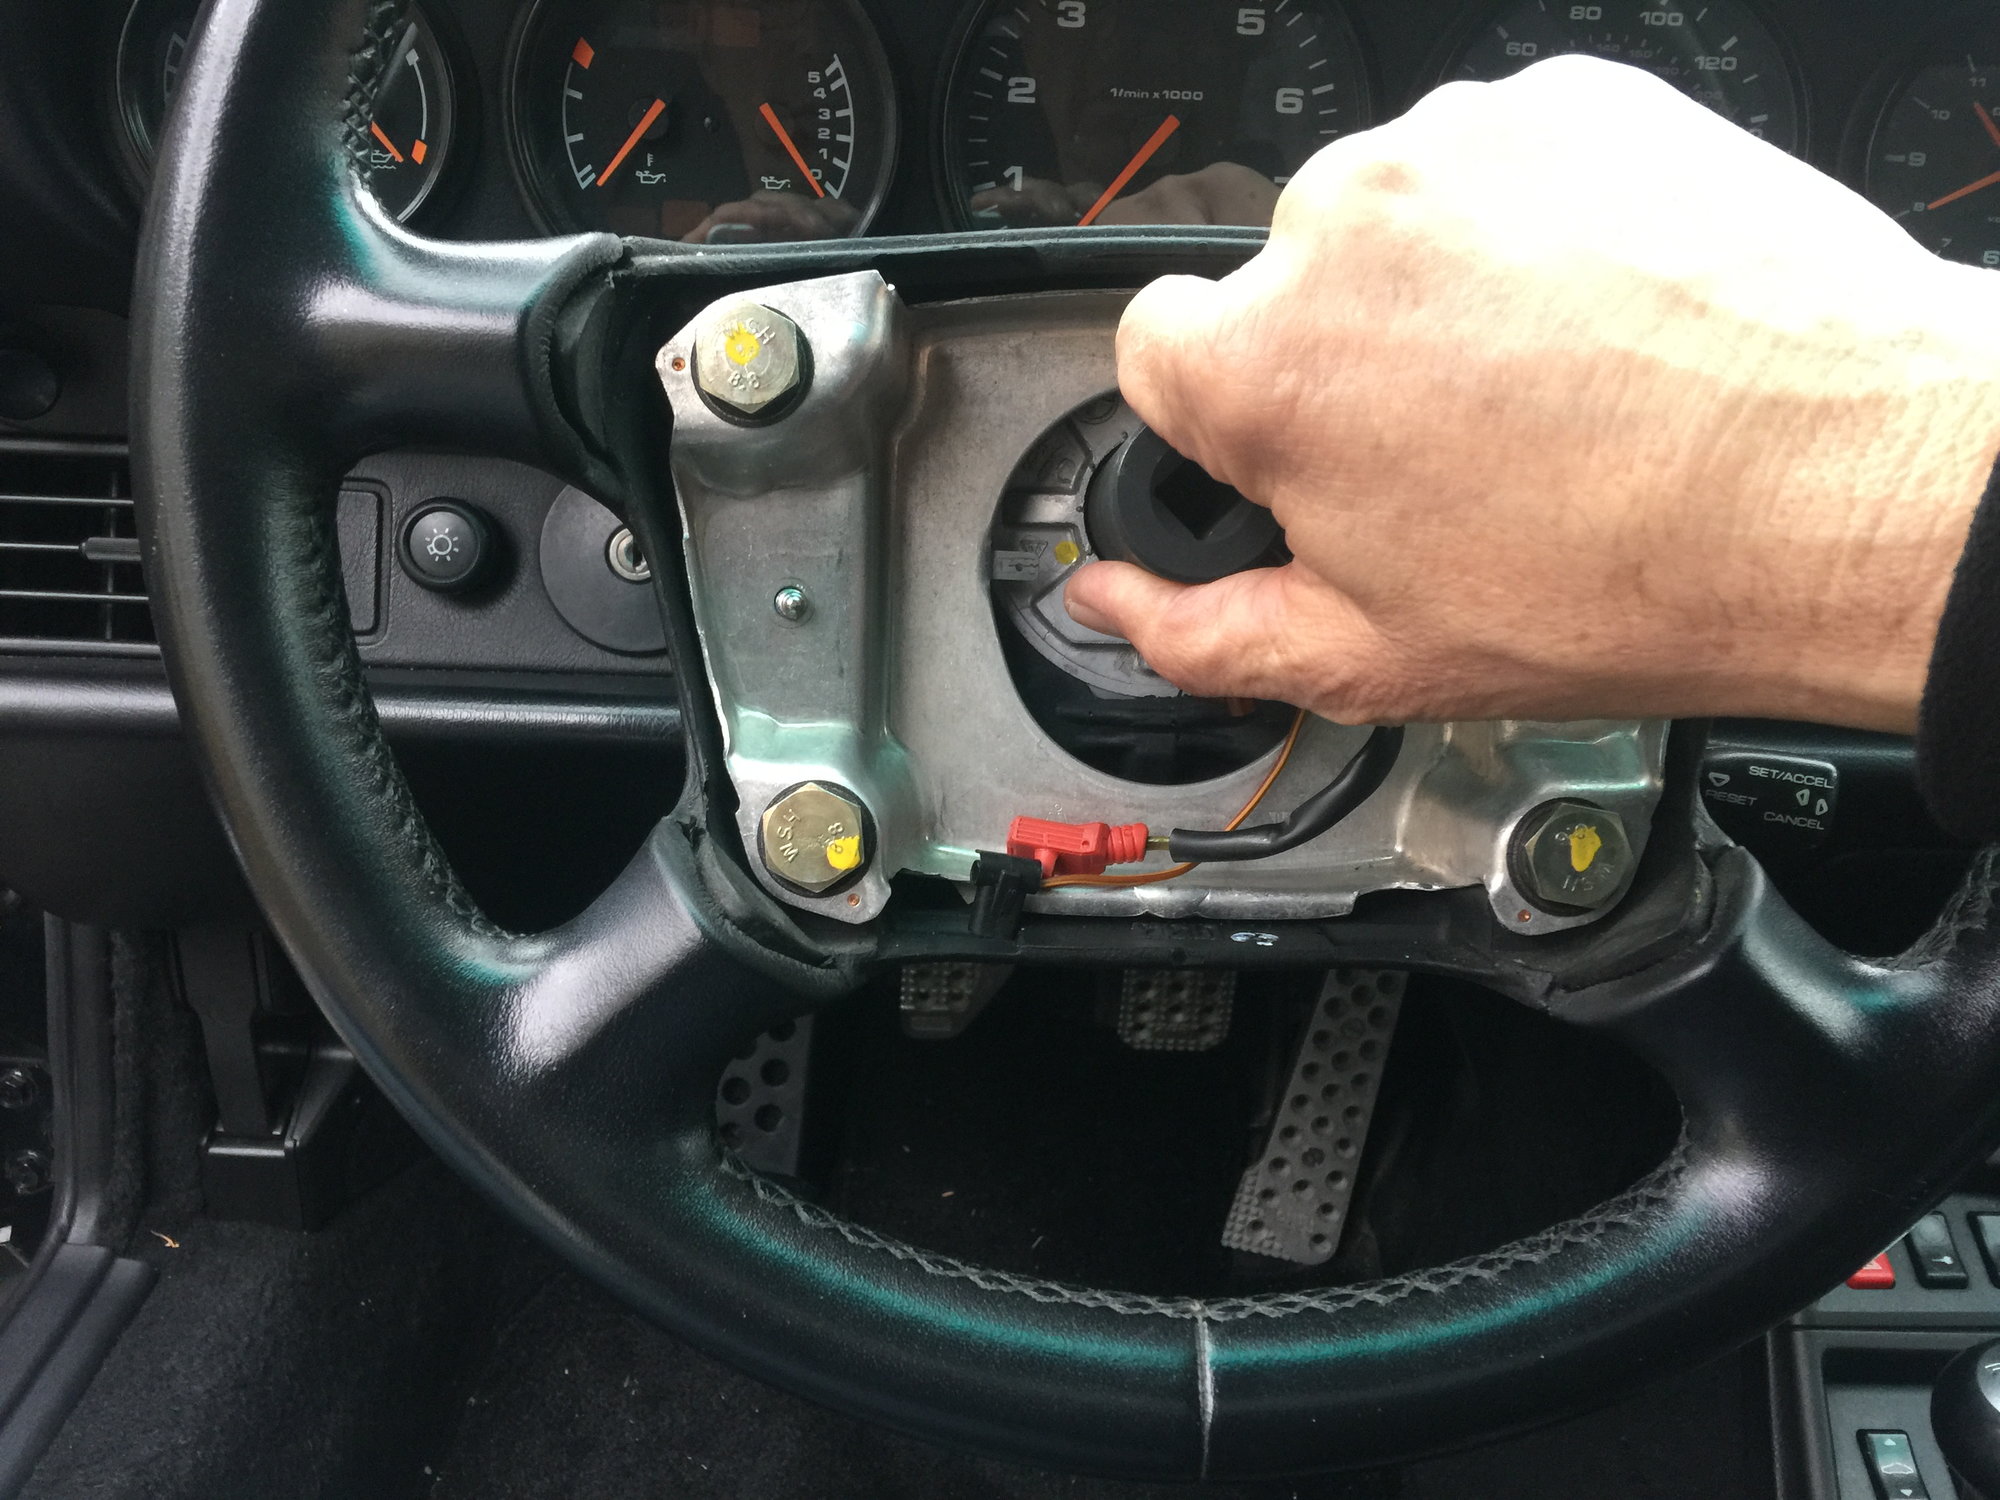
Once you have loosened both torx screws you're ready to remove the airbag. Be careful because there is an electrical connection still tied to airbag, and if you just yank the airbag out you may damage the connector or the clock spring. Pull the air bag a few inches away from the wheel and simply pull out the small red plug attached to the back of the airbag. Disconnect the two horn connections by simply pulling them off the male leads.
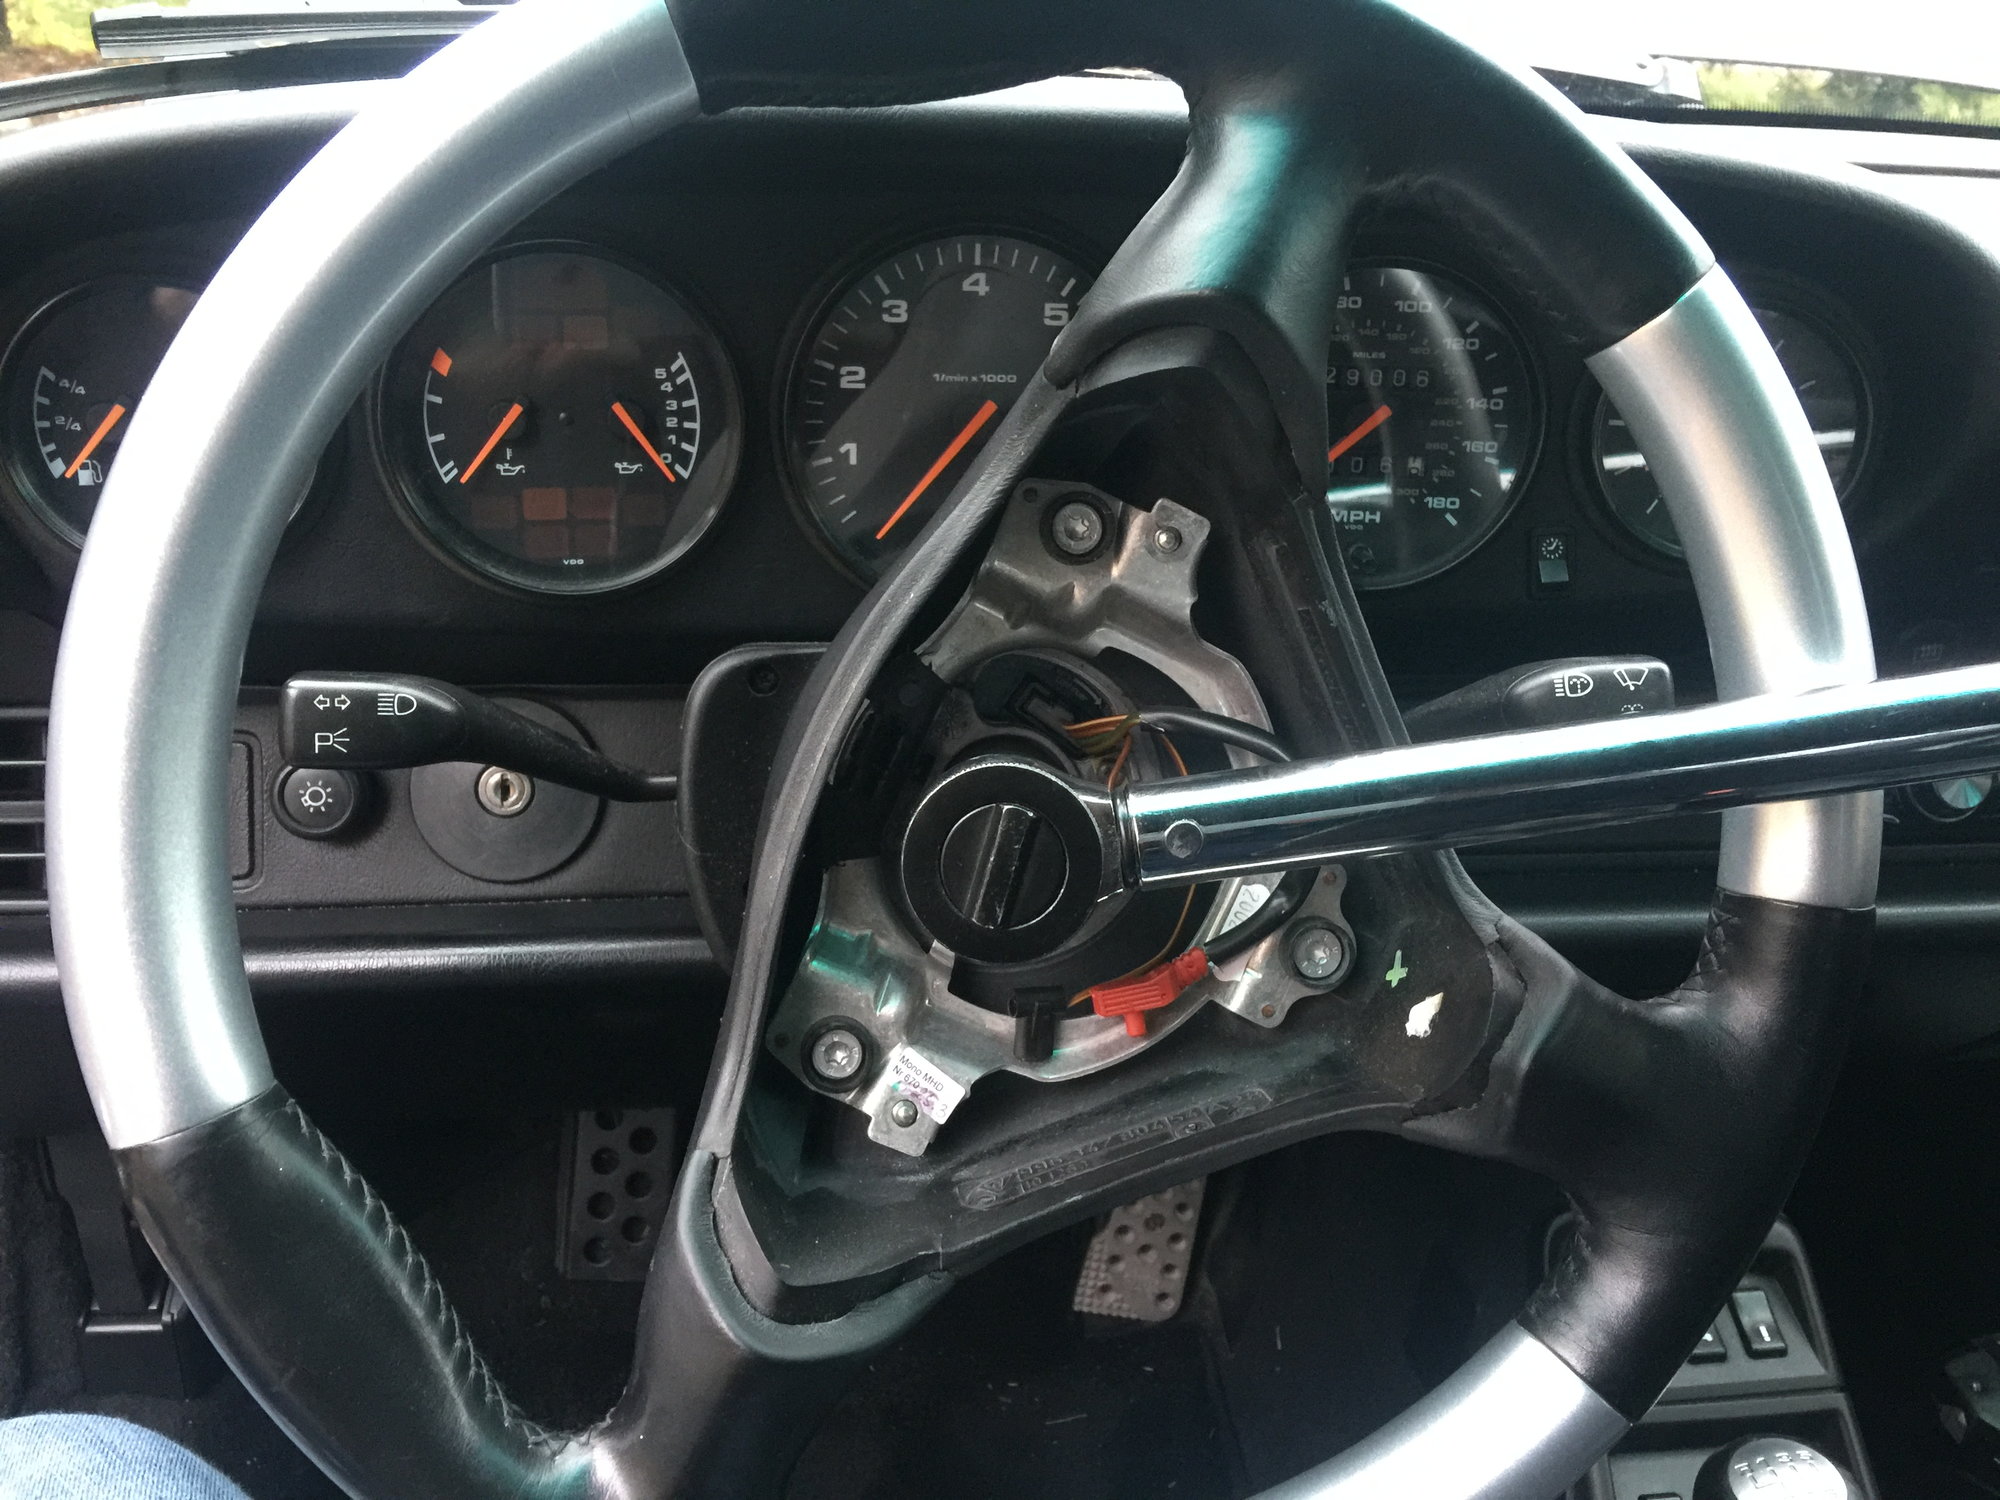
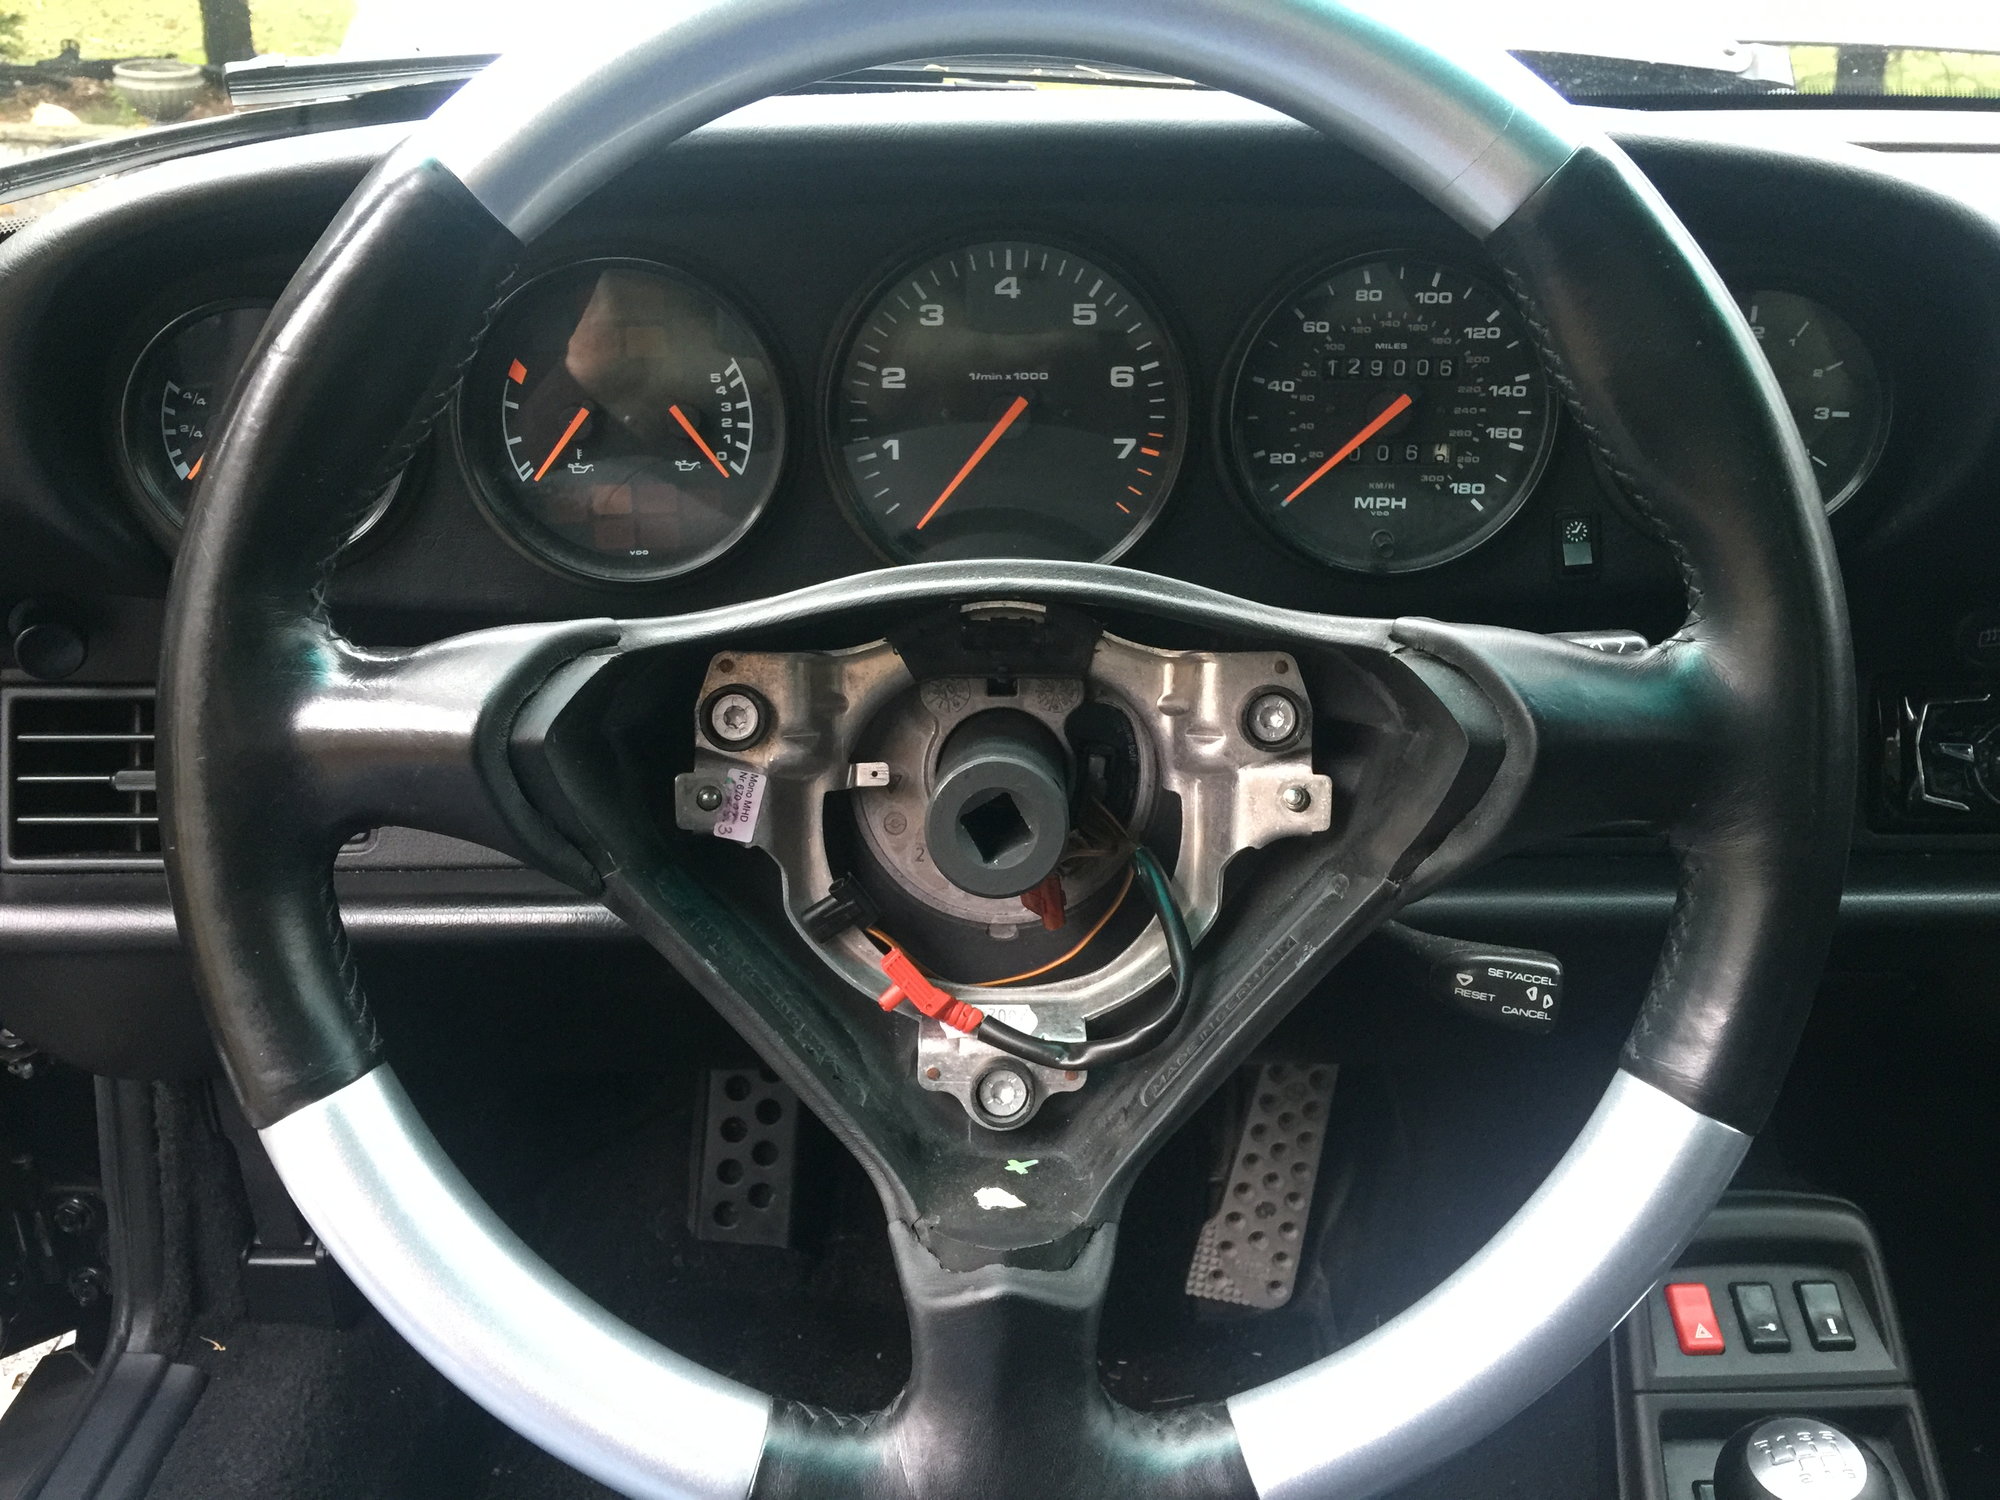
The next step is to remove the wheel from the hub with the 24mm deep socket wrench. Harbor Freight does make a good deep socket wrench for this job. I found it helpful to continue to leave the steering wheel locked while loosening the 24mm nut. But before you remove the wheel from the hub make certain to unlock and center the steering wheel. If you are just one spline off you will have to do the job all over again, so get it centered and right the first time. When you're ready to pull the wheel of the hub, carefully pull the two horn connectors and the red airbag connector through the hole in the wheel while removing the wheel.
Installation is reverse of removal. Be careful not to over-tighten the torx screws. They only require 7 ft. lbs. of torque, and remember you are working backwards from behind the wheel. On at least one occasion I found myself tightening instead of loosening the screw. I actually snapped a torx wrench in the process, and tightened the darn screw I thought it would never loosen free. Thank you Sears Craftsman.
The tools for the job
Lock wheel to left and remove left torx screw, then lock wheel to right and remove right screw
Carefully reach behind airbag pull out the red airbag connector
Note the two prongs that the airbag connector snaps into
Now disconnect the two horn connections
Use 24mm deep socket to loosen nut on wheel
Unlock and center the wheel
Remove the nut and washer and carefully pull the wheel off the hub while guiding wires through the hole
Installation is reverse of removal
Reconnect the two horn connections
Reconnect airbag connector
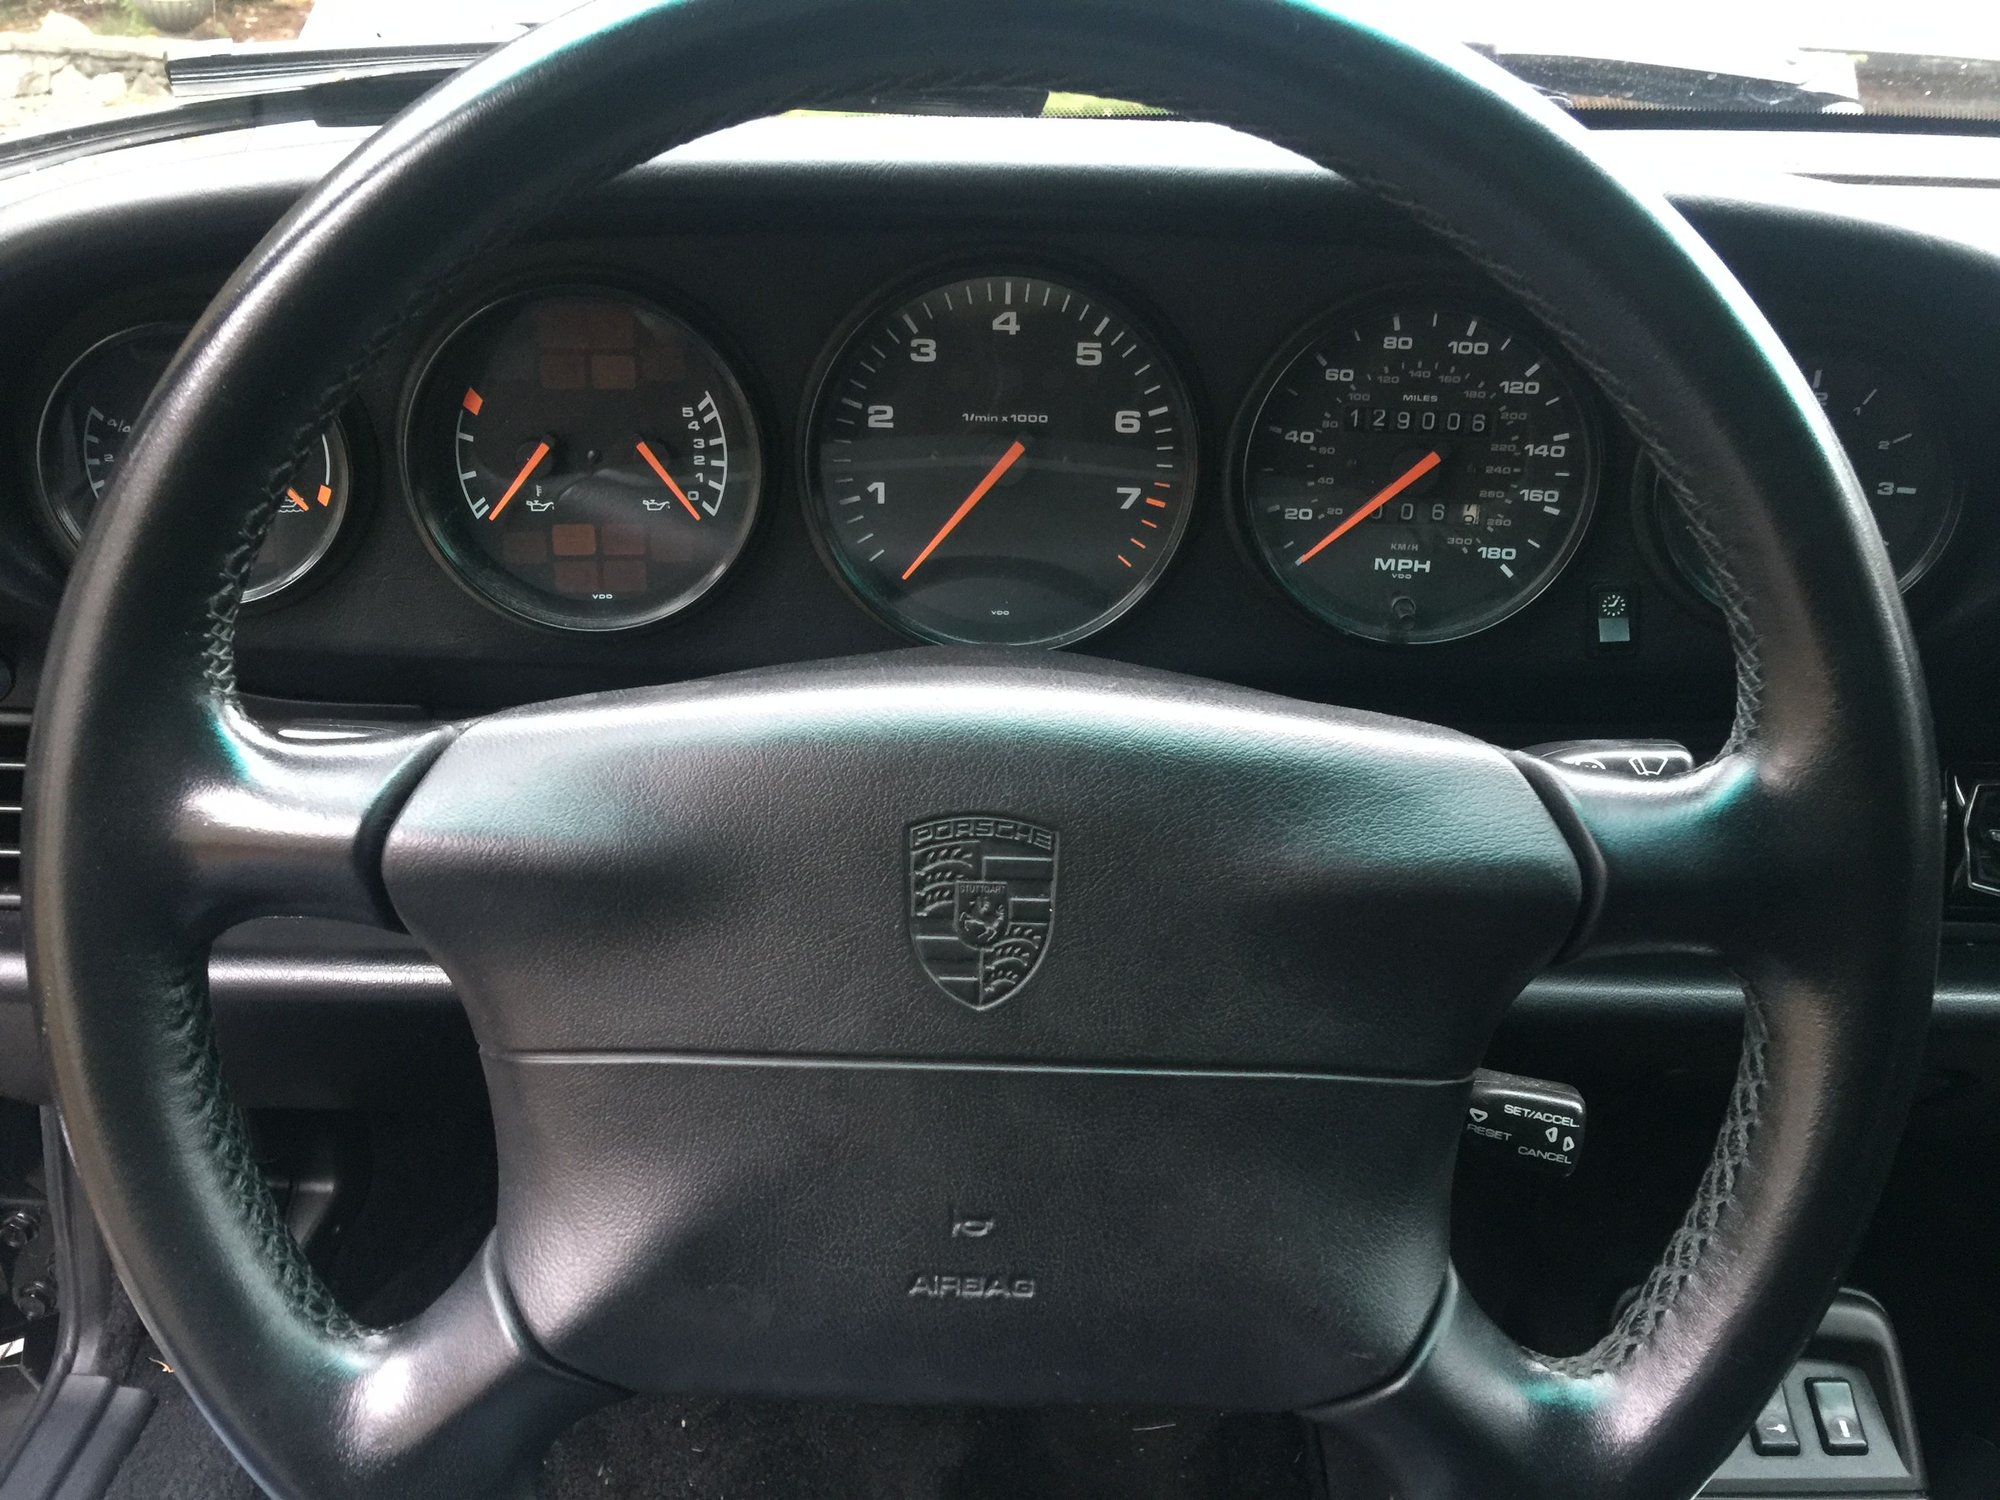
Screw in both torx screws from behind the wheel to secure airbag, and you're ready for a beer!
Question, I did this recently to replace the lights in the tach (OBC) and I made the mistake of turning the key to check the light's operation. When I finished the install my airbag light was on, so I unplugged the battery and disconnected the airbag and reattached it, then reattached the battery. The light stayed on does anyone know whats wrong? Do I need to replace the clock spring?
Question, I did this recently to replace the lights in the tach (OBC) and I made the mistake of turning the key to check the light's operation. When I finished the install my airbag light was on, so I unplugged the battery and disconnected the airbag and reattached it, then reattached the battery. The light stayed on does anyone know whats wrong? Do I need to replace the clock spring?
Note to self: never turn the key while battery is connected and airbag is disconnected. Once the airbag fault light has been tripped, it needs to be re-set by dealer or someone with the right equipment. Ask me how I know.
Note to self: never turn the key while battery is connected and airbag is disconnected. Once the airbag fault light has been tripped, it needs to be re-set by dealer or someone with the right equipment. Ask me how I know.
I came to the same conclusion, I guess in the same way too.
Thanks for the tip
Foxman,
I just installed my 996 steering wheel. Thanks for the post! I was wondering if you experienced
any chafing when turning the wheel. Maybe its the clock spring rubbing something? Sounds like plastic on plastic. Not crazy loud, but its noticeable. Do you know the 24mm Torque specs? Maybe I overtightened it a bit. Thought you might know a remedy.
Thanks!
Last edited by 911F1; 12-08-2015 at 04:53 PM.
Reason: additional info
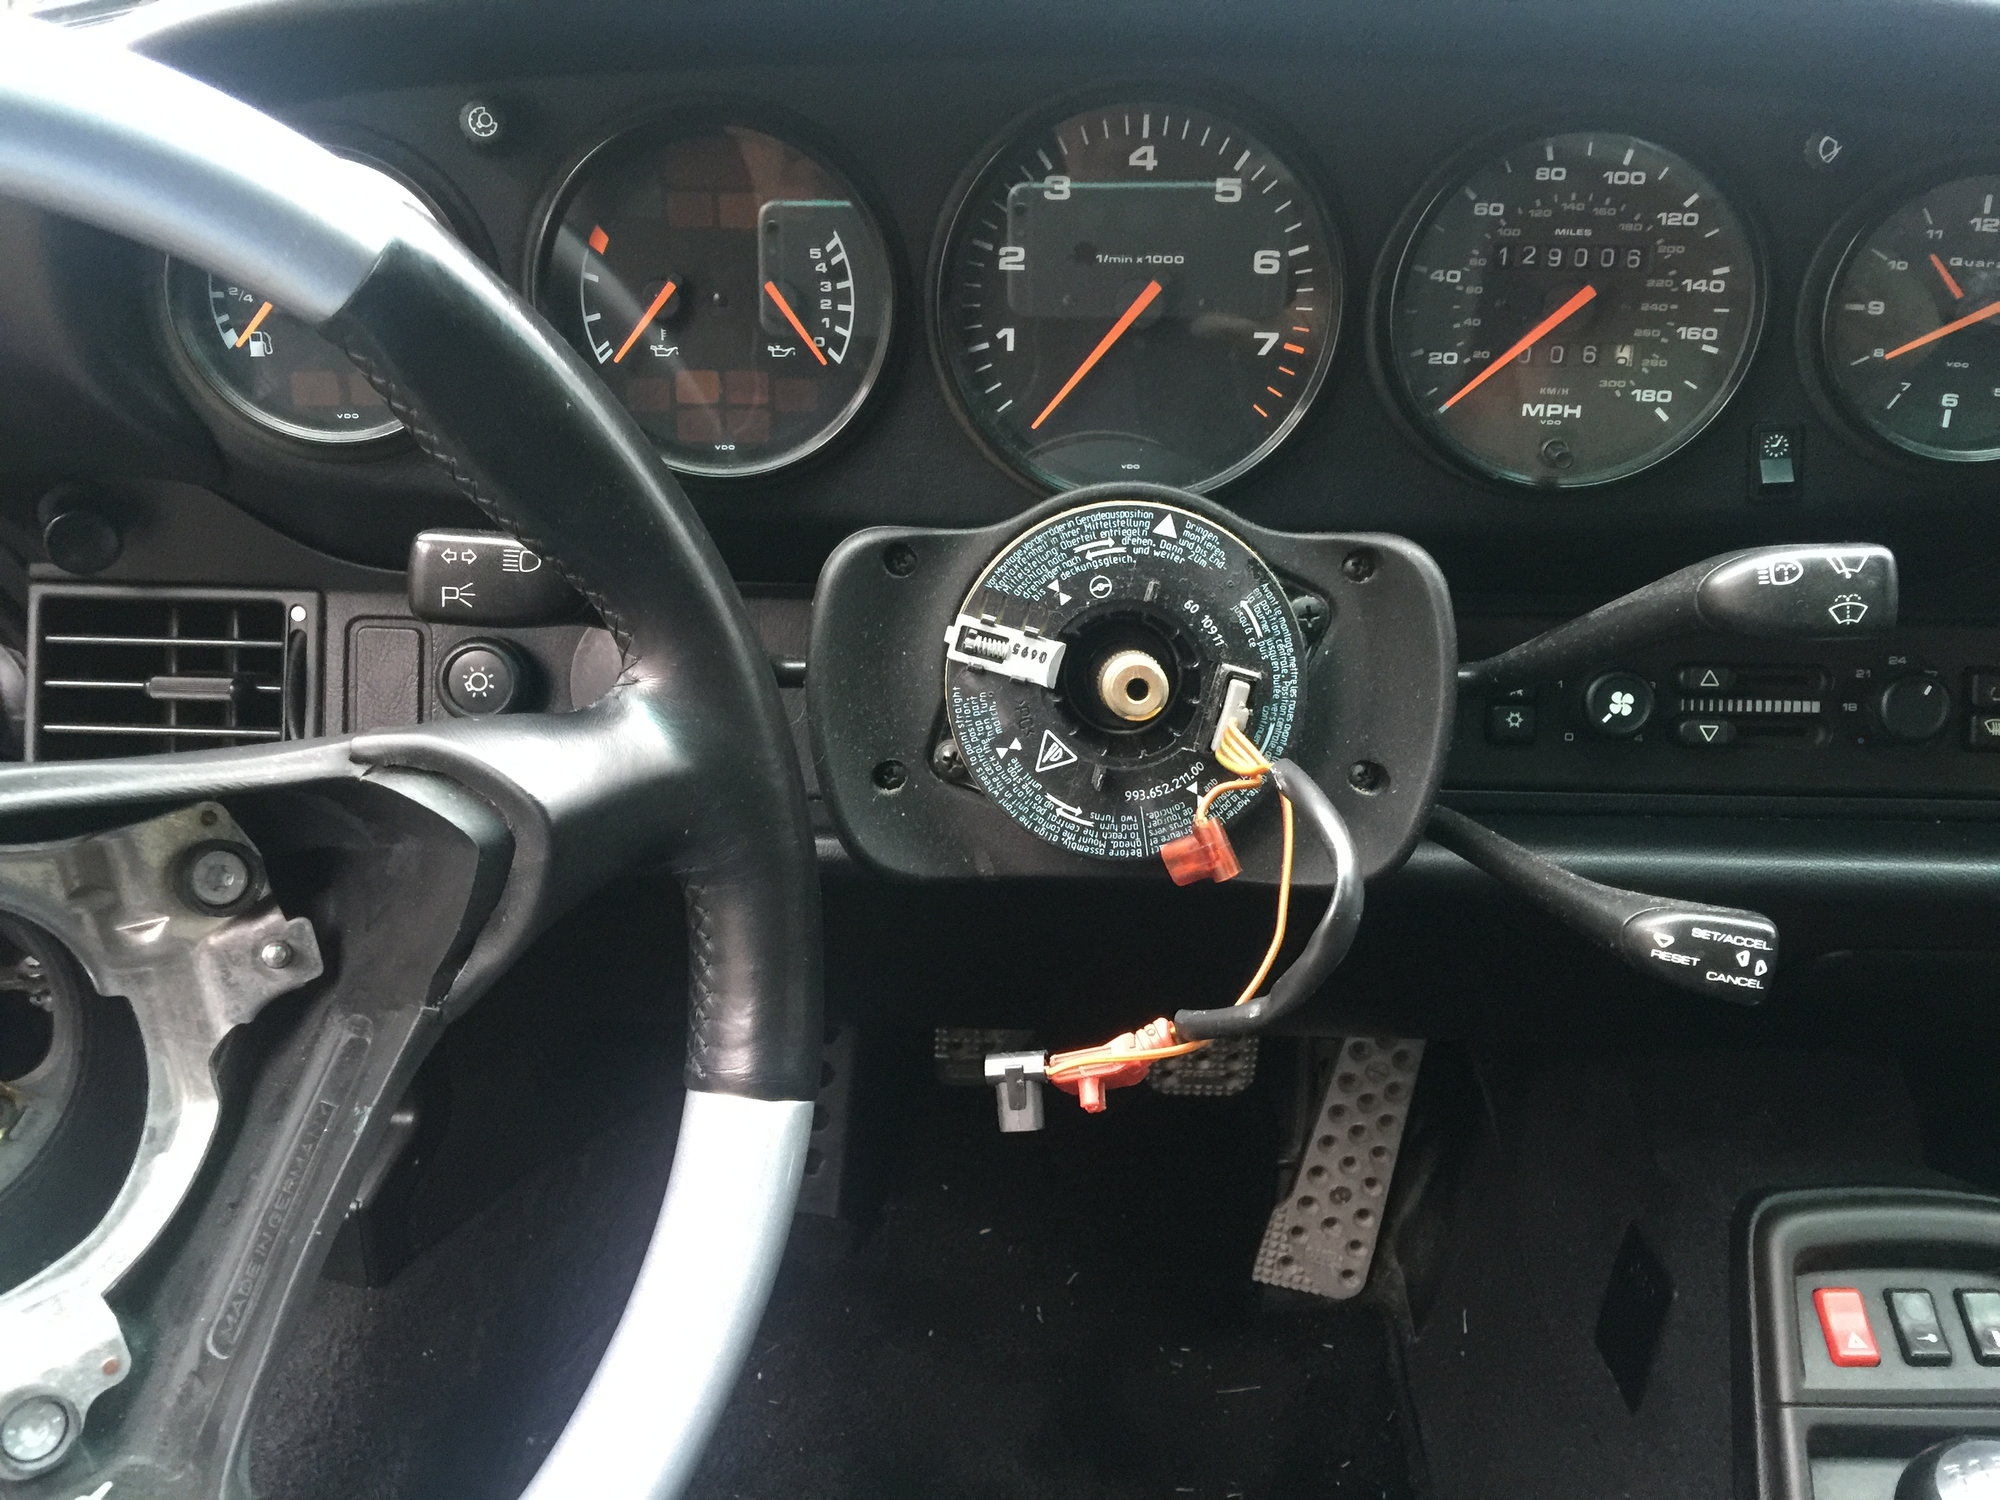
There are two plastic tabs on the clockspring that extend outward into the butt end of the steering wheel. It is very easy to overlook these when installing the steering wheel and these tabs are quite fragile. They bend and fracture easily. Perhaps you have part of one of these tabs wedged between the wheel and the hub.
In fact the clockspring featured in the photos above have both of these tabs partially broken off.
Foxman,
I just installed my 996 steering wheel. Thanks for the post! I was wondering if you experienced
any chafing when turning the wheel. Maybe its the clock spring rubbing something? Sounds like plastic on plastic. Not crazy loud, but its noticeable. Do you know the 24mm Torque specs? Maybe I overtightened it a bit. Thought you might know a remedy.
Thanks!
911F1, the wheel is plug and play and there should be no chafing whatsoever. I'm assuming this chafing just started? Torque spec is 33 ft lbs. for the 24mm with washer. Make sure that all of the wires are free and not trapped. Did any of the wires get pulled on when you removed the wheel? Sounds like you need to re-install and carefully double check all this... This link may prove helpful: http://www.porscherepair.us/porsche-...el-airbag.html

 11-08-2015, 11:17 PM