When you click on links to various merchants on this site and make a purchase, this can result in this site earning a commission. Affiliate programs and affiliations include, but are not limited to, the eBay Partner Network.
I am wondering about changing out that seal on the front diff (the one you can see). Any advice? Leave it alone or replace it since it's probably the best time ever to do so?
I decided to do mine as PM. Would have been a LOT easier with the diff pulled out rather than in place. Not expensive to do and never a better time than where you are right now, though OTOH not a common problem area. Depends on your risk preference.
Just a bit more of an update. Last week I took a bit of inventory and ordered some maintenance parts that I want to switch out. Plus I got my Optimoly and Olista Longtime 3EP
This morning I started to put together the new clutch and release bearing. Thanks to Kevin and UMW for the LWFW and clutch kit.
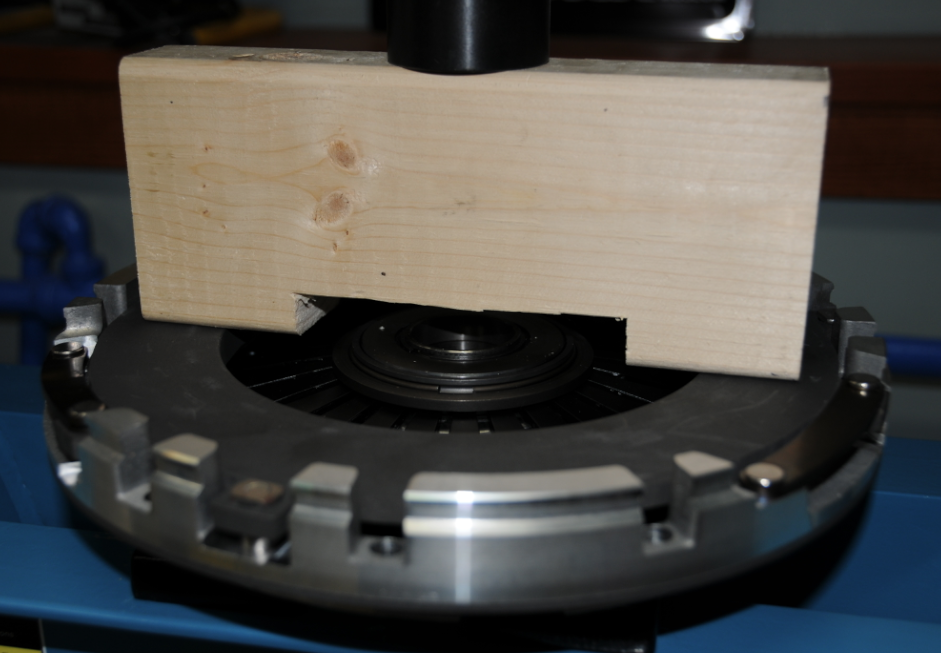
I ended up simply following the advise from the factory workshop manuals. Release Bearing-spacer-spacer-spring washer pointing towards release bearing-pressure plate-thrust washer w/ bevels pointed towards snap ring-snap ring. I cut a notch in the 2x6 to allow access for the snap ring and for clearance.
It all really went together pretty easily. Very smooth, gentle pressure by the press made it easy.
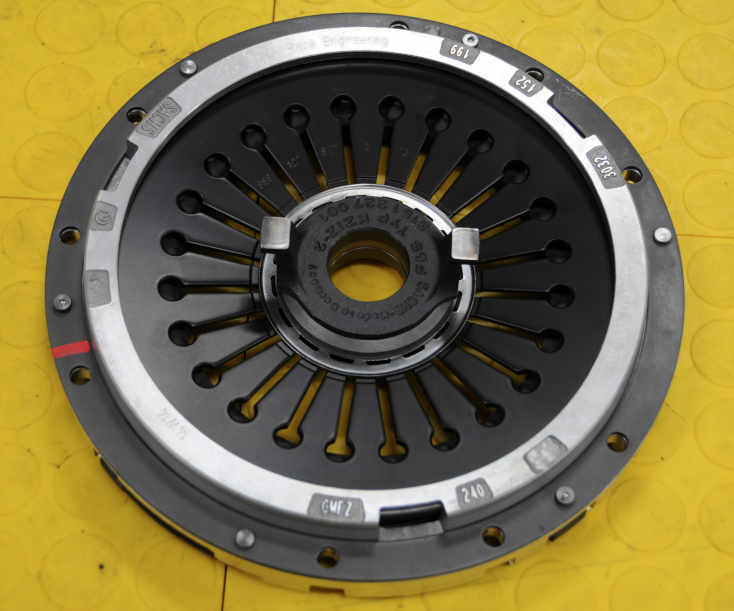
Here's it all together:
Top- One thing I noticed when setting up the parts was that because the release bearing was a smaller diameter than the hole in the fingers of the pressure plate I needed to try and center it best I could before pressing it and installing the snap ring. (That locks it in.) Is there a better way than eyeballing it and does it matter that much? I looked on my original pp/release bearing and it is offcenter just a touch too.
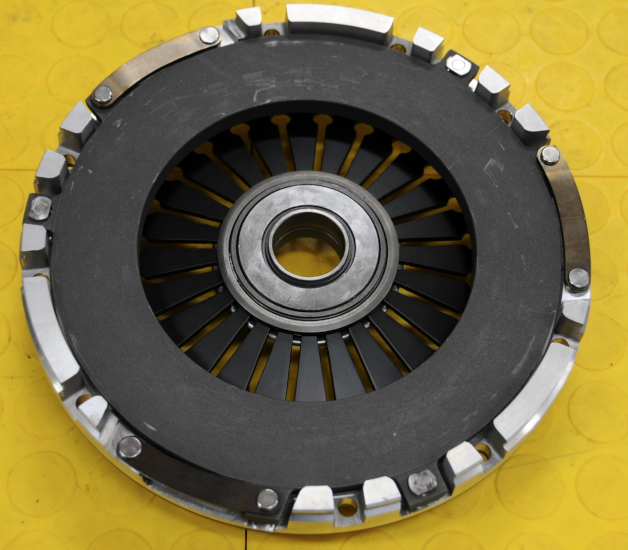
..and Bottom.
Here's a snap of old and new:
I'm planning to pull off the old clutch, flywheel and hopefully get the rear-main seal replaced today.
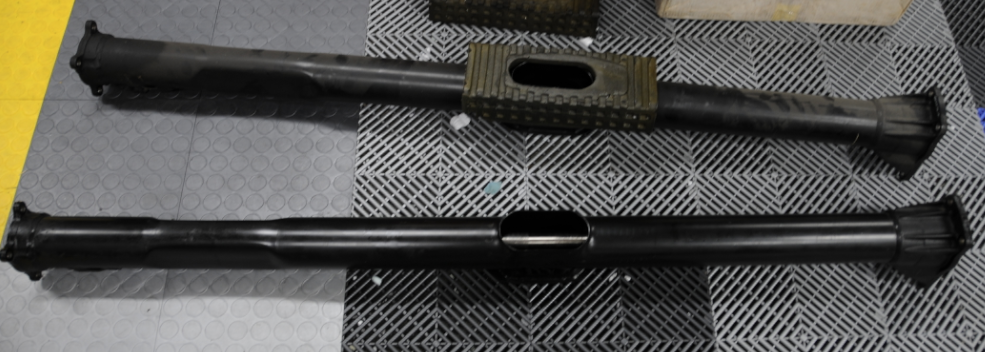
Thanks for everyone's recommendations and own experience w/ the SSK. Mine is on my way thanks to FD Motorsports. Also thanks to fellow rennlister Joe who helped me out with a replacement center tube. Next week hope to get front half of the drivetrain back together.
Thanks for everyone's recommendations and own experience w/ the SSK. Mine is on my way thanks to FD Motorsports. Also thanks to fellow rennlister Joe who helped me out with a replacement center tube. Next week hope to get front half of the drivetrain back together.
-Jeff
Looking good Jeff. Your method is so much more elegant than the method I used to press the bearing in
Glad to help with the torque tube. Looks like it's set to arrive tomorrow.
Thanks Joe! I know I'm taking 2-3 times longer to get this done but I'm trying to check and double check everything.
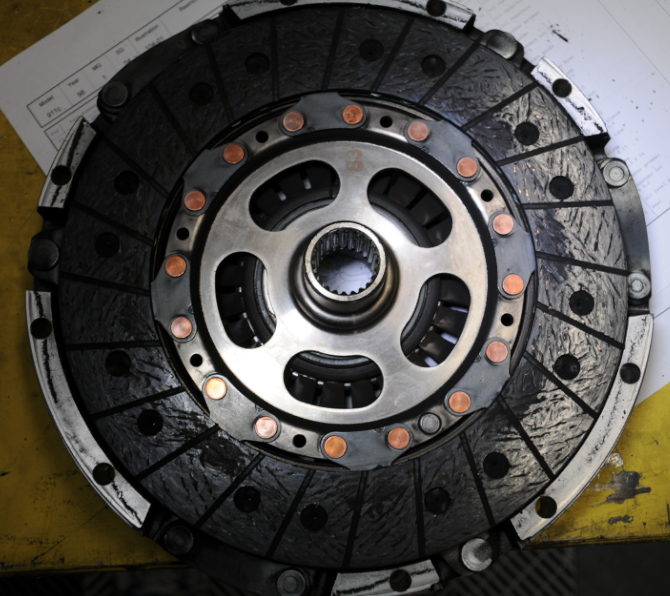
More progress today. Removed the pressure plate, clutch disc, and old dual mass flywheel.
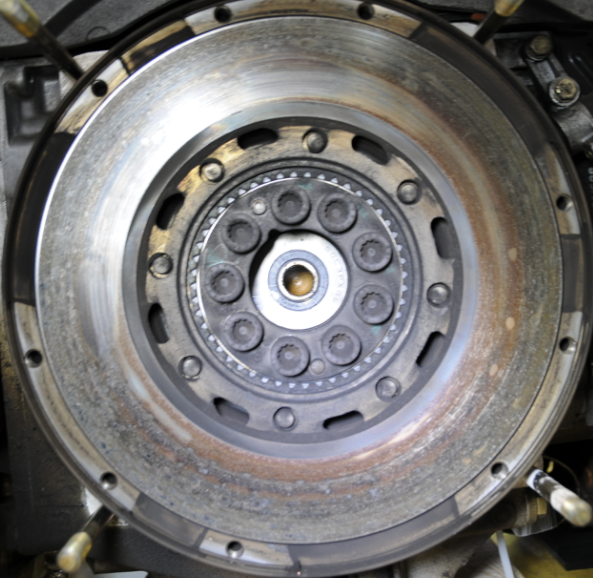
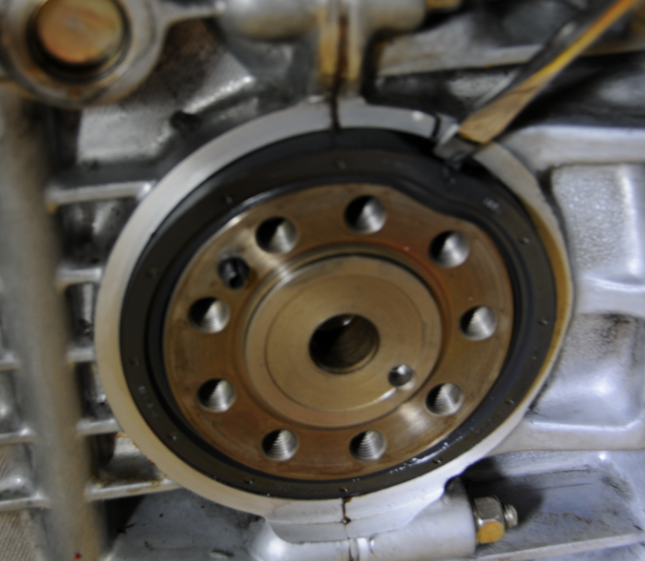
Here's the old flywheel after taking off the pressure plate and clutch disk.
The clutch disk has a few irregular patterns- is this typical?
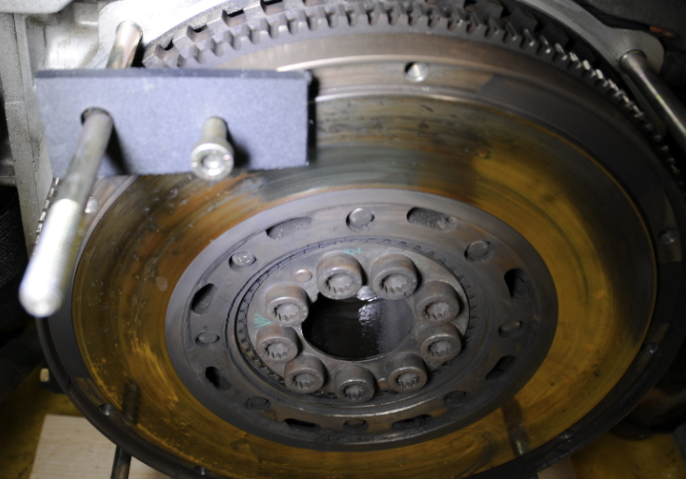
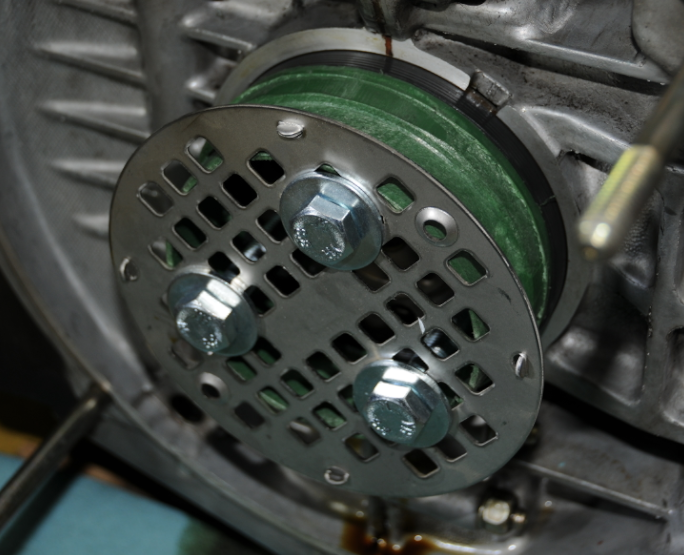
Following a tip, I made a little tool out of plastic to prevent the flywheel from turning while removing the tight bolts. (Thanks Rennlist!) Very simple and worked well.
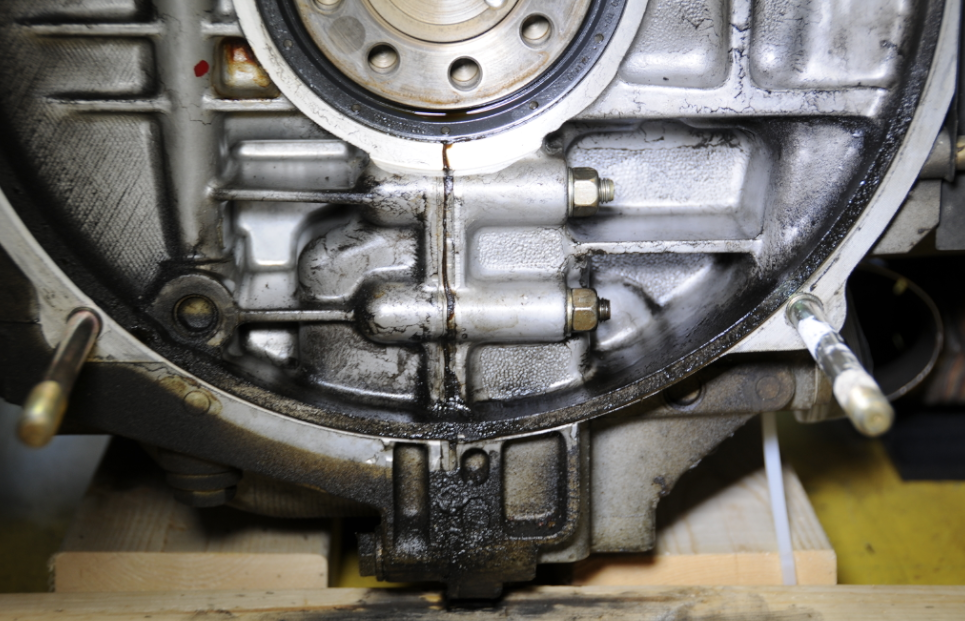
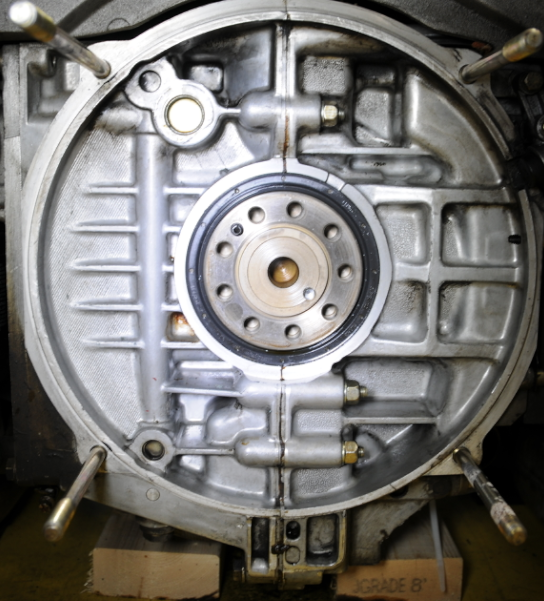
With the flywheel removed I could get to the rear main seal and see the source of the weeping.
But everything cleaned up really well with a bit of carefully applied carb and brake cleaner (careful not to get on any plastic parts/electronics).
The rear main seal was actually pretty easy to get out. I started with my seal puller but couldn't get it to grip on. The factory service manual says simply to get a drift in there to deform the seal and then pry it out. I used a screwdriver and was careful not to get near the casing. A couple of wacks with the mallet deformed the old seal and then was easy to pry out with the seal puller.
I'm going slower with getting the new one in there. I don't have the Porsche Special Tool to press in the seal. So after coating the inner and outer lips with oil, used the old seal and gentle taps with the mallet to work around the new seal to try and place it. I found that I could get 80% of the edge in pretty easily but the last 20% would be tough to get in. I didn't want to hammer it too hard and risk deforming the seal. I have been careful to try and evenly tap the seal around the entire circumference to drive it in equally all around.
But it's not in yet.
Last edited by SeaJeff; 10-04-2014 at 09:44 PM.
Reason: updates
It is not clear whether you were successful in getting the new seal into place. If not, and it is slightly cocked, you can right the ship by taking a small block of wood (say a 1x3 by about 6" long) you can lay that block across the case and tap the seal in properly. It is important that the new seal is installed "squarely".
When I pulled my motor out last year to do a rebuild, it took me over 20 hours to get the power train onto a bench. And, my car is a two wheel drive! Quite a bit more complicated than the old 911's which used to require about 4 hours to get to the same place!
Forgot to mention that you are going to love the LWF. Changes the entire "attitude" of your motor. Ditto the FD shift linkage assists.
On the engine mounts, I elected to go back with the RS mounts; mostly due to the fact that the stock mounts were over $400. Now that I have the RS mounts, there isn't the movement that was there before. There is a little bit of more transmission of engine noise into the cabin.....but, hardly noticeable and not offensive.
Your clutch disc looks like it has very wear, but agree with earossi that an LWF is a great upgrade. I personally would never install a DMF in any 993.
RE RMS: I use a similarly sized socket to drive the RMS in.
Thanks earossi for your encouragement. As with any projects like this I end up taking 2x as long to try and get it just right. Hey, you mentioned you went to back with the RS mounts- did you try something else? I was looking at either the RS or the rennline solid mounts. I'm super excited to experience the lightweight flywheel and the shifter upgrades.
From what I've pulled together from all the posts I've read my goals with the RMS are:
1) make sure its square
2) set it in about 2mm (not flush)
3) only lightly lube the sealing surface with regular motor oil
I tried a bit of hammer and wood last night but I was fearful of damaging the seal. So I made up a press using some parts from lowes that bolted to the flywheel mounts. I ran into 2 issues- 1) I accidentally lubed the outer rim of the seal. (The factory manuals indicate to lube only on the sealing surface.) Also, when checking for burrs, I missed a very small lip that formed on the edge of where I used a screwdriver to deform the old seal. That lip caused the seal to drag a bit. So I'm going to deburr that and get another seal and make sure it goes as perfect as I can manage. This is one part I don't want to take any chances on.
Joe, when you mentioned a socket- do you mean a 4" diameter socket?
Alas no work on the pcar today. I have a bunch of old campervan parts that I have left over from another project that I really need to get rid of so I ended up snapping pics and getting ready to post for sale.
There is lots of discussion as to whether you lube the OD of seals before setting them. I guess there is the possibility that the lubed seal will push out since the friction holding it in place is less. I personally have always installed seals dry; but, many will tell you that the oil film gives a more positive seal.
I understand your hesitancy using a wood block to drive in the seal. But, once you have done it a couple of times you'll gain confidence. Of course, if you have a full contact driver such as a socket, then the seal will go in straight, as long as you are able to maintain contact between the socket and the seal. This is actually the best way. But, if you have a seal that has gone in slightly cocked, it is difficult to right it using a full contact socket; whereas, the small wood block works like a champ. Just place the block on the high spot of the seal, and tap it lightly, and it will move. The block needs to bridge over the seal and contact the case on both ends. This assures that the seal is installed flush with the case. The wood is soft and without a cutting edge, so it won't tear up the rubber. Just take your time and use light taps with a small ball pein hammer. Once the seal is installed plumb and flush with the case, you should switch to a socket or some other round item that will allow you to set the seal below the case edge.
And, you do need to remove any gouges or burrs. I use a small hand held honing stone to work the burrs down to smooth. Any sharp edge or burr will screw up your seals for sure.
Nice work ! I have the factory tool to install the RMS, it works wonders, pushes the seal in perfectly square, and protects the seal - I used to do it by hand, but always dreaded it because even by tapping it in, you are not evenly forcing the seal in. and the seal edge is not protected. The manual method does work of course, but I do want to have to drop the transmission again (I do not drop engines to do the clutch..)..
I have sometimes used a tiny bit of Curil-T on the outside edge of the seal, but given I have done it dry as well with no leaks so far (cross my fingers) not sure how much difference it makes.
Lube is really important on the RS clutches - make sure the splines on the transmission shaft are very clean then put on the Optimoly - use the clutch disk to wipe the spines back and forth to distribute the grease. Also lightly lube the clutch tube - the DMF throughout bearing does not need this but I do it for the RS throwout bearing guide. Not too much though. I have had to take apart a few cars now that were previously done without much lube (not me) because the clutch was sooo heavy, and just cleaning/lubing made a world of difference. Those cars were not gummed up, but just totally dry.
My replacement rear main seal arrived today. I also broke down Sunday night and ordered the SirTools P234 oil arbor to (hopefully) lower the risk of my RMS leaking in the future. I figure $100 is somewhat cheap(er) insurance.
On Saturday, I did pursue the less expensive route (that I mentioned above) and the tool worked OK but had some other issues.
But in my research, I noticed that the P234 actually has an interior lip that spreads the seal's inner spring over the engine shaft instead of dragging over it. And the central bolt based press applies a bit more even pressure than my offset triple bolts. I read a lot of posts about the Porsche/SirTools tool tax but in this case I hope it pays off. I also wonder if the P234 will work on a >'95. The spec says through 94 and the 964 looks a bit different than the 993. I'll report back how it works.
In the meantime, here's my tool (again, cobbled from parts from Lowes and recalling a few other Rennlist makeshift RMS mounting tools). This took about 20 minute to make and cost about $20.
So I'll wait until the P234 arrives and do the RMS then.
But I digress from this evening's adventures...
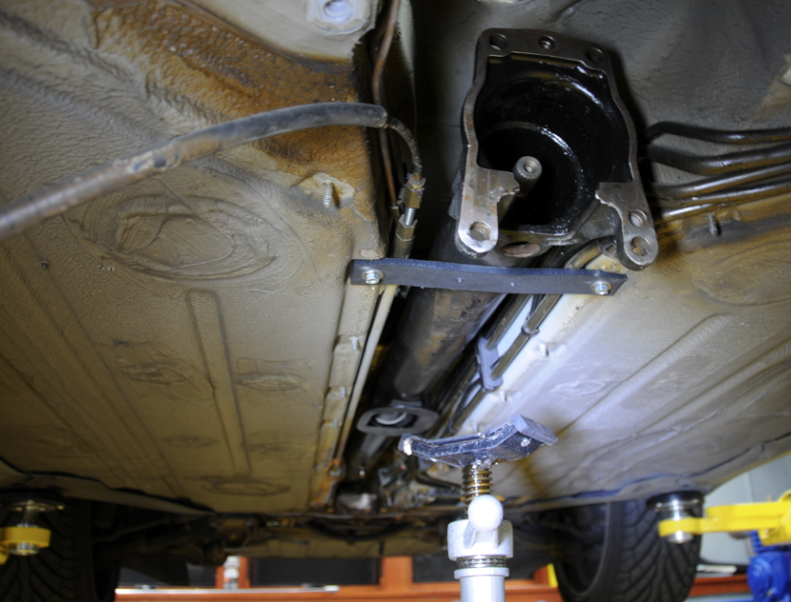
Yesterday I received the replacement torque tube- and it looks great. (Thanks again Joe!) I cleaned it up and applied just a bit of Olista Longtime 3EP on the front diff splines.
I also cleaned out the interior shaft that the shift coupling slides on (not the splines for the center shaft- this is actually a part of the shift linkage.)
Any recommendations for what grease was used to lube this part? It seems more viscous than Olista and a bit less viscous than white lithium.
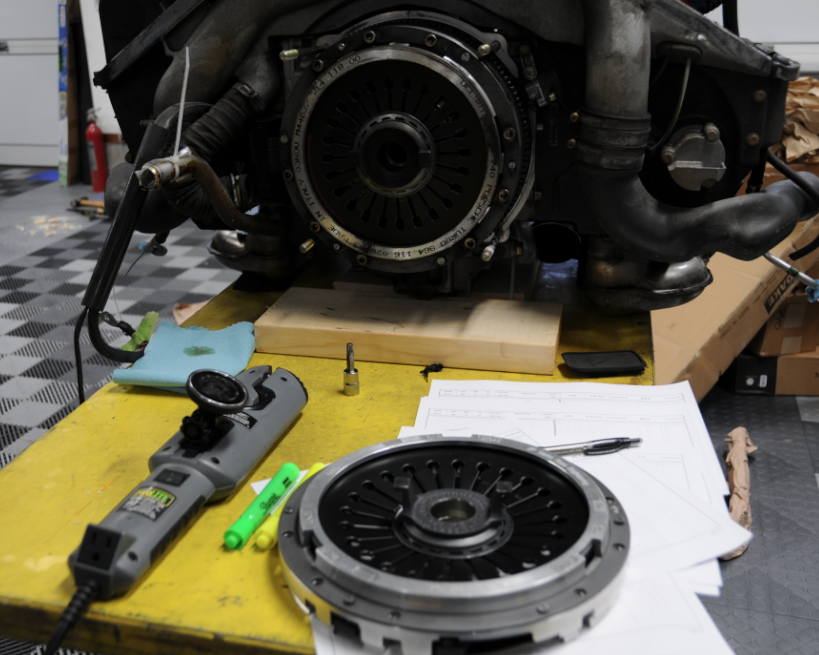
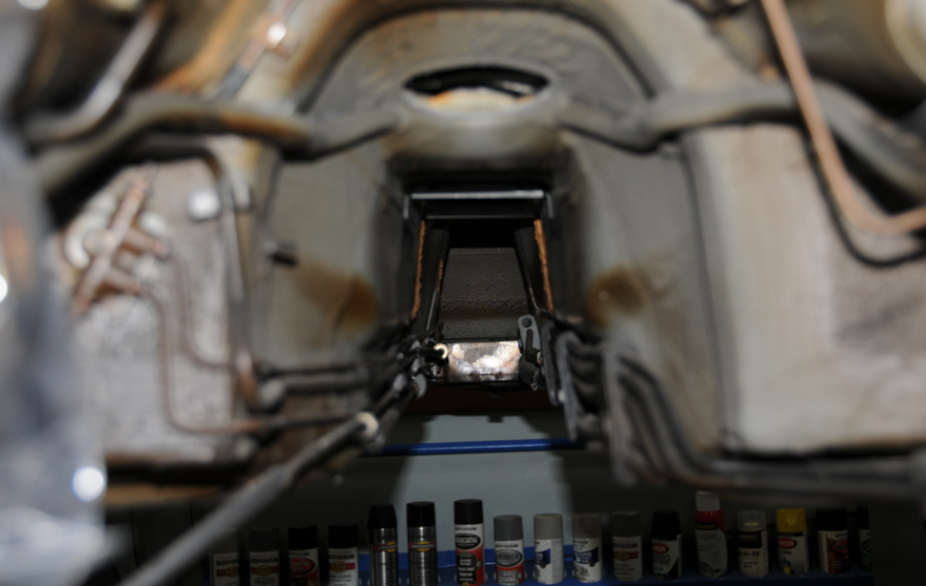
Here is where it is going to go. This is my artistic shot of the night.
Next, I wrangled the torque tube into place. Pretty easy once you get the geometry right (that I figured out when removing the torque tube.)
Getting the front diff back into its tiny cavity was still a challenge. The power steering line (and bushing) plus a few other lines and the front sway bar all made it a bit difficult. But it made it.
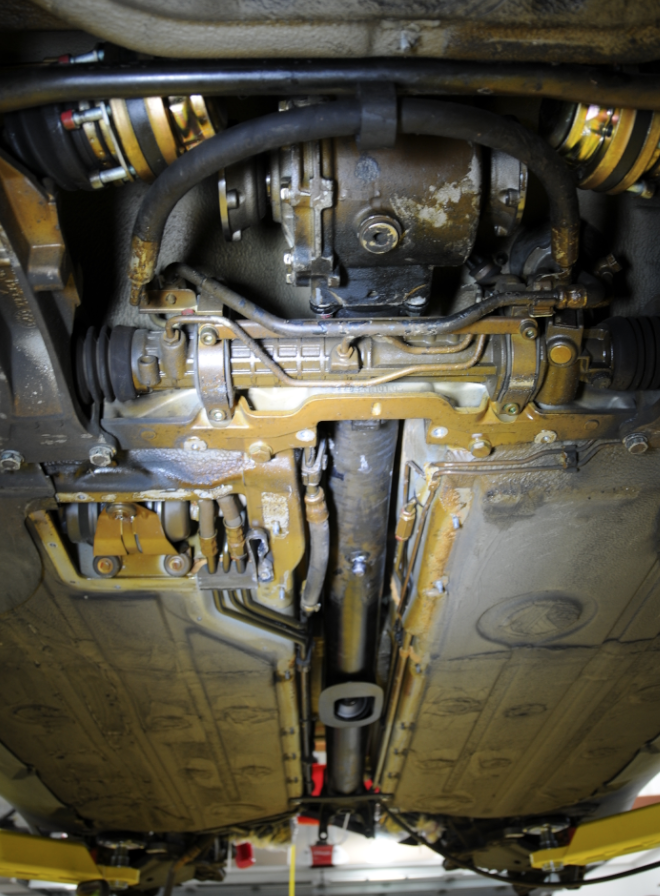
I also lubed the splines of the front diff w/ olista and wiped down the half shaft mounting surfaces.
Some of the front diff transmission fluid leaked out upon removal (through the pinion gear seal) so I will drain and refill that fluid once everything is back in place. If there are any gotchas with that, please share!
Here's a final photo of the nights work.
Thanks Mike, Ernie, and Joe for your recommendations. I appreciate your past experience! Mike, in this maintenance window I'm also going to replace the cam cover gaskets and upper and lower valve cover gaskets and will read more about people's experiences with using any sealants. I've read dry for the valve covers but a bit more mixed advice on the cam covers due to possible pitting in the gasket grooves. I still need to research that too and also check the Factory workshop manuals.
One thing I also need to double check (and I've seen different posts) is using Olista Longtime 3EP versus Optimoly.
wish i was a mechanical as you. last time i attempted to impersonate a mechanic i went back to the local repair shop with my tail between my legs asking them to fix my mistake. i learned to let the pros do it. that was over 25 years ago lol
Glad to see the tube arrived safely. It looks a lot better in your car than lying in my garage.
Re your question about lube for the shift linkage: Others may have different suggestions, but I've had good success with synthetic grease such as Mobil 1.


 09-30-2014, 03:59 AM