Evaporator Removal
 07-13-2014, 08:37 PM
#1

My wife's 1997 cab has no ac. So, the evaporator is definitely leaking. Removed the pollen filter placed electronic leak detector in evaporator area and it was screaming. Double checked and it won't hold a vacuum either.
So have the gas tank removed, firewall, radio, ac CCU, etc. I am having hell getting the box removed. I have all the electronics detached. I have the two ducts removed . I was following the DIY page on Pcar workshop. Great write up, however not sure what to do next. Help!
Is this supposed to be split in place or completely removed and then separated?

 07-14-2014, 11:23 AM
#5
Three Wheelin'
07-14-2014, 05:44 PM
#6
Not difficult, just time consuming.
I followed the write up on http://p-car.com/diy/ac/. Great info. Just a couple of tips-
Draining the fuel tank. I bought a $12 siphon pump at the auto parts store, worked great but the hose had been curled up in its packaging. It kept curling and sucking air. I took a piece of 3/4 pvc pipe and cut the bottom at a 45 deg. angle. I then placed the siphon hose inside the pipe. This kept it from curling and helped remove all of the fuel except a cup. I went thru the level sensor that has a white fitting on top. This made it easy to get the fuel out.
I made sure I had the CCU removal tool, $7 at auto parts store. I have an aftermarket radio that required a special tool to remove, thankfully the PO had left the tool in the glove box.
The hardest part was getting the air box separated from the two ducts on the bottom. I jacked with this for 1.5 hours. It is impossible to get to the tab behind the duct. I was able to get the air box off of the front tabs and then used a pry bar to lift the air box. After that it is a matter of many clips to remove and torx head screws. A couple of the torx head screws aren't obvious, just take your time and locate al of them.
I bought the Griffiths evaporator. I plan on reassembling the air box and replacing the drier and then pulling a vacuum before I re-install the firewall and gas tank. I don't want to get this back together and then find a leak that will require removing the gas tank again.
I am lucky, I own an HVAC company and have access to high quality leak detectors, vacuum pumps, gauges etc.
Impossible to do this job without a good vacuum pump and gauges.
07-14-2014, 05:49 PM
#7
Rennlist Member
TexPorsche, be sure to let us know how you like the Griffiths evaporator! I take it with that screenname you are in Texas, if so, what part of the State are you in?
Trending Topics
 07-15-2014, 10:19 AM
#10
Rennlist Member
Good place to be in the ac business 
So do Griffiths recommend recharging with the same amount of refrigerant when you get done as you would a stock system? I believe Porsche spec it to a certain number of grams?
So do Griffiths recommend recharging with the same amount of refrigerant when you get done as you would a stock system? I believe Porsche spec it to a certain number of grams?
07-15-2014, 10:45 AM
#11
RL Community Team
Rennlist Member
Rennlist Member
So do you think I should plan on an hour or two to pop the new one in and button things back up on a Saturday morning? ;-)
07-15-2014, 11:43 AM
#12
AutoZone loans out vacuum pumps. I borrowed it with a deposit to make sure the system held vacuum overnight. I then took the car to an AC place and have them put in the appropriate amount of refigerant. Easy peasy.
07-15-2014, 07:22 PM
#13
PP if you can do this in a couple of hours I have a plane ticket and all the BBQ and beer you can handle!
As far as charging....I am going to use a temp/pressure chart and charge at 2,000 rpm's. I have the shop manual and am going to compare this to how much volume is actually used.
As far as charging....I am going to use a temp/pressure chart and charge at 2,000 rpm's. I have the shop manual and am going to compare this to how much volume is actually used.
07-15-2014, 08:23 PM
#14
Advanced
Replaced my evaporator core and followed the DIY directions to a "T" worked well and still works well, just gotta be patient and small to sit in the boot and do the work. Vacuum pump was set up with a compressor, it worked. The bar / temp charts are important to follow as well as a 5 thermometer I stuck into the ac vents in the dash.
P-Car DIY is the first place I go for help.
P-Car DIY is the first place I go for help.
08-06-2014, 12:43 AM
#15
Nordschleife Master

I'm currently doing this on a 964, but I assume the 993 is similar. I'm getting hung up on a handful of the fasteners holding the HVAC unit together.
I've removed a bunch of the torx screws throughout the HVAC unit and removed all the metal clips, however, I still can't get the halves to separate. I believe the culprit is this one screw in the center of the unit, right behind the top intake, and it resides deep inside the box.
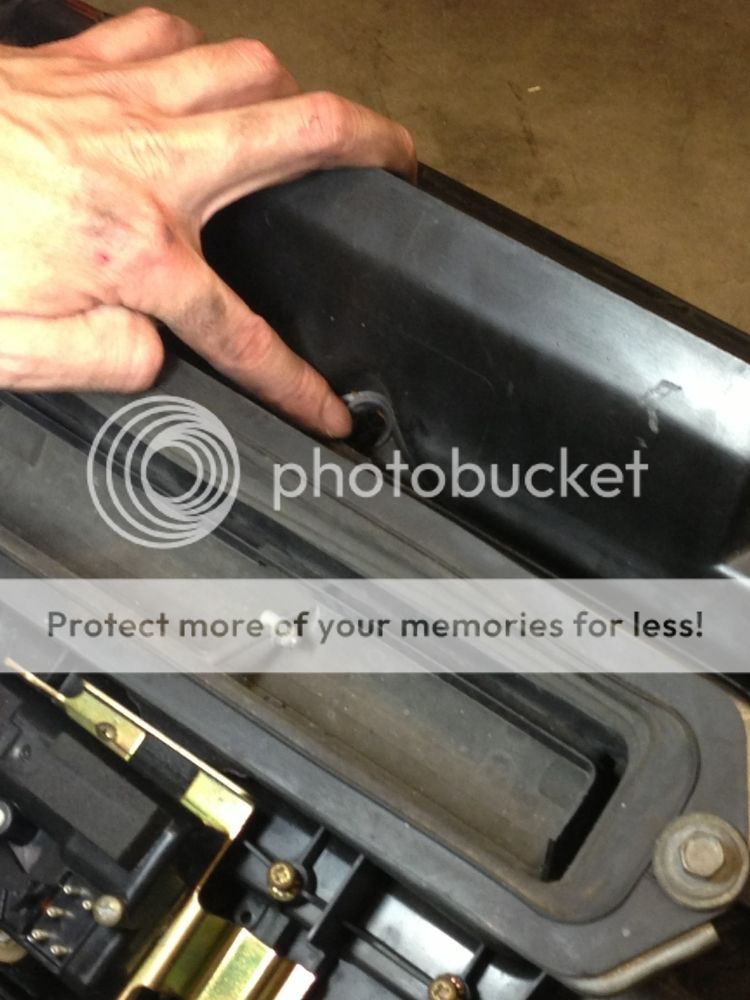
The screw head appears to be pretty much rotted away and I can't get any grip on it w/ a torx or allen head driver. The head of the screw doesn't really appear to have a torx shape either.

I assume this fastener needs to be removed and it is what is holding me back from splitting the case? It's going to be a pain in the d' to drill this out since it is so deep in there, you can't really see what you're doing...
Also, what about these two fasteners that are on the leading edge of the unit, right in front of the expansion valve?
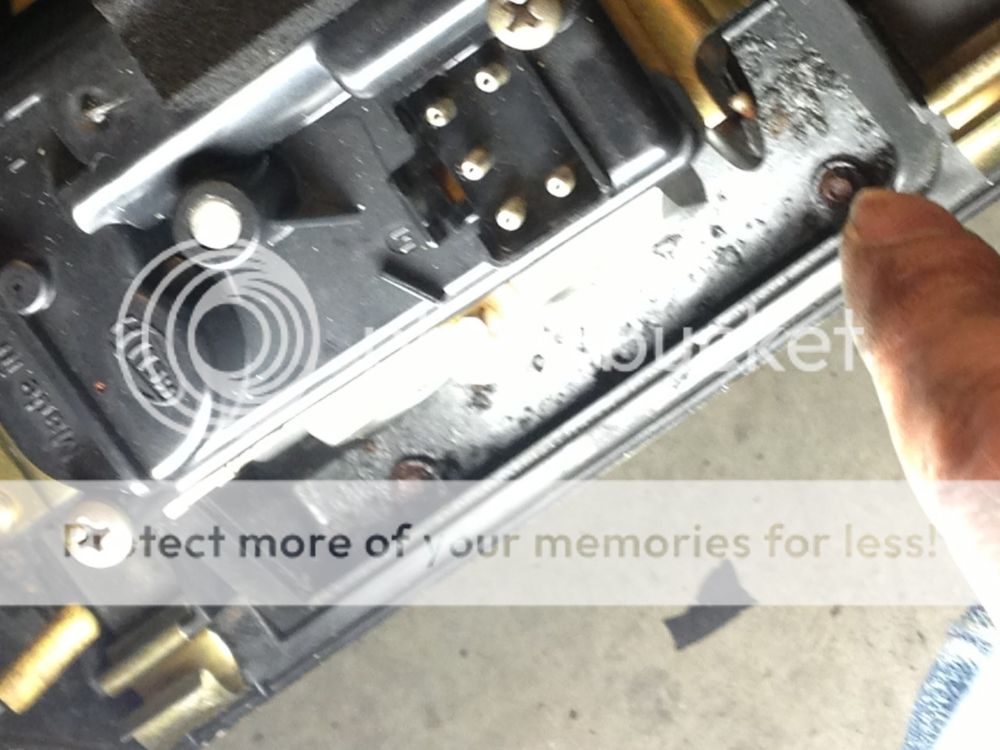
Similar to the center fastener above, these fasteners are corroded, but even then, they do not appear to have a torx or allen head. They seem like they have no grip on the head. Is that the corrosion, or is that the fastener design? Do I need to remove (i.e. drill) these too?
I've removed a bunch of the torx screws throughout the HVAC unit and removed all the metal clips, however, I still can't get the halves to separate. I believe the culprit is this one screw in the center of the unit, right behind the top intake, and it resides deep inside the box.
The screw head appears to be pretty much rotted away and I can't get any grip on it w/ a torx or allen head driver. The head of the screw doesn't really appear to have a torx shape either.
I assume this fastener needs to be removed and it is what is holding me back from splitting the case? It's going to be a pain in the d' to drill this out since it is so deep in there, you can't really see what you're doing...
Also, what about these two fasteners that are on the leading edge of the unit, right in front of the expansion valve?
Similar to the center fastener above, these fasteners are corroded, but even then, they do not appear to have a torx or allen head. They seem like they have no grip on the head. Is that the corrosion, or is that the fastener design? Do I need to remove (i.e. drill) these too?