When you click on links to various merchants on this site and make a purchase, this can result in this site earning a commission. Affiliate programs and affiliations include, but are not limited to, the eBay Partner Network.
Got these terminals guys, they were available at Porsche dealership. For anyone's future reference part # 999-652-871-22. The silicone plugs I found at Audi/VW.
I can't remember where I purchased them other than ebay. Do an images.google.com search on the picture and you'll find it. I did both my headlight connectors a couple of years ago. You need to snap across the red bit near the edge to unlock the pins then push the connector out from the front. It can be a bit stiff but it will move.
First - to remove the white cover, there are silicone plugs inserted around each cable from the back, you have to slide those out and back, if not, the white casing won't go back. Unclip the white housing and slide it back.
Unlock the two red tabs on the plug facia, and introduce the porsche terminal removal tool to flatten the two whiskers holding the metal terminal.
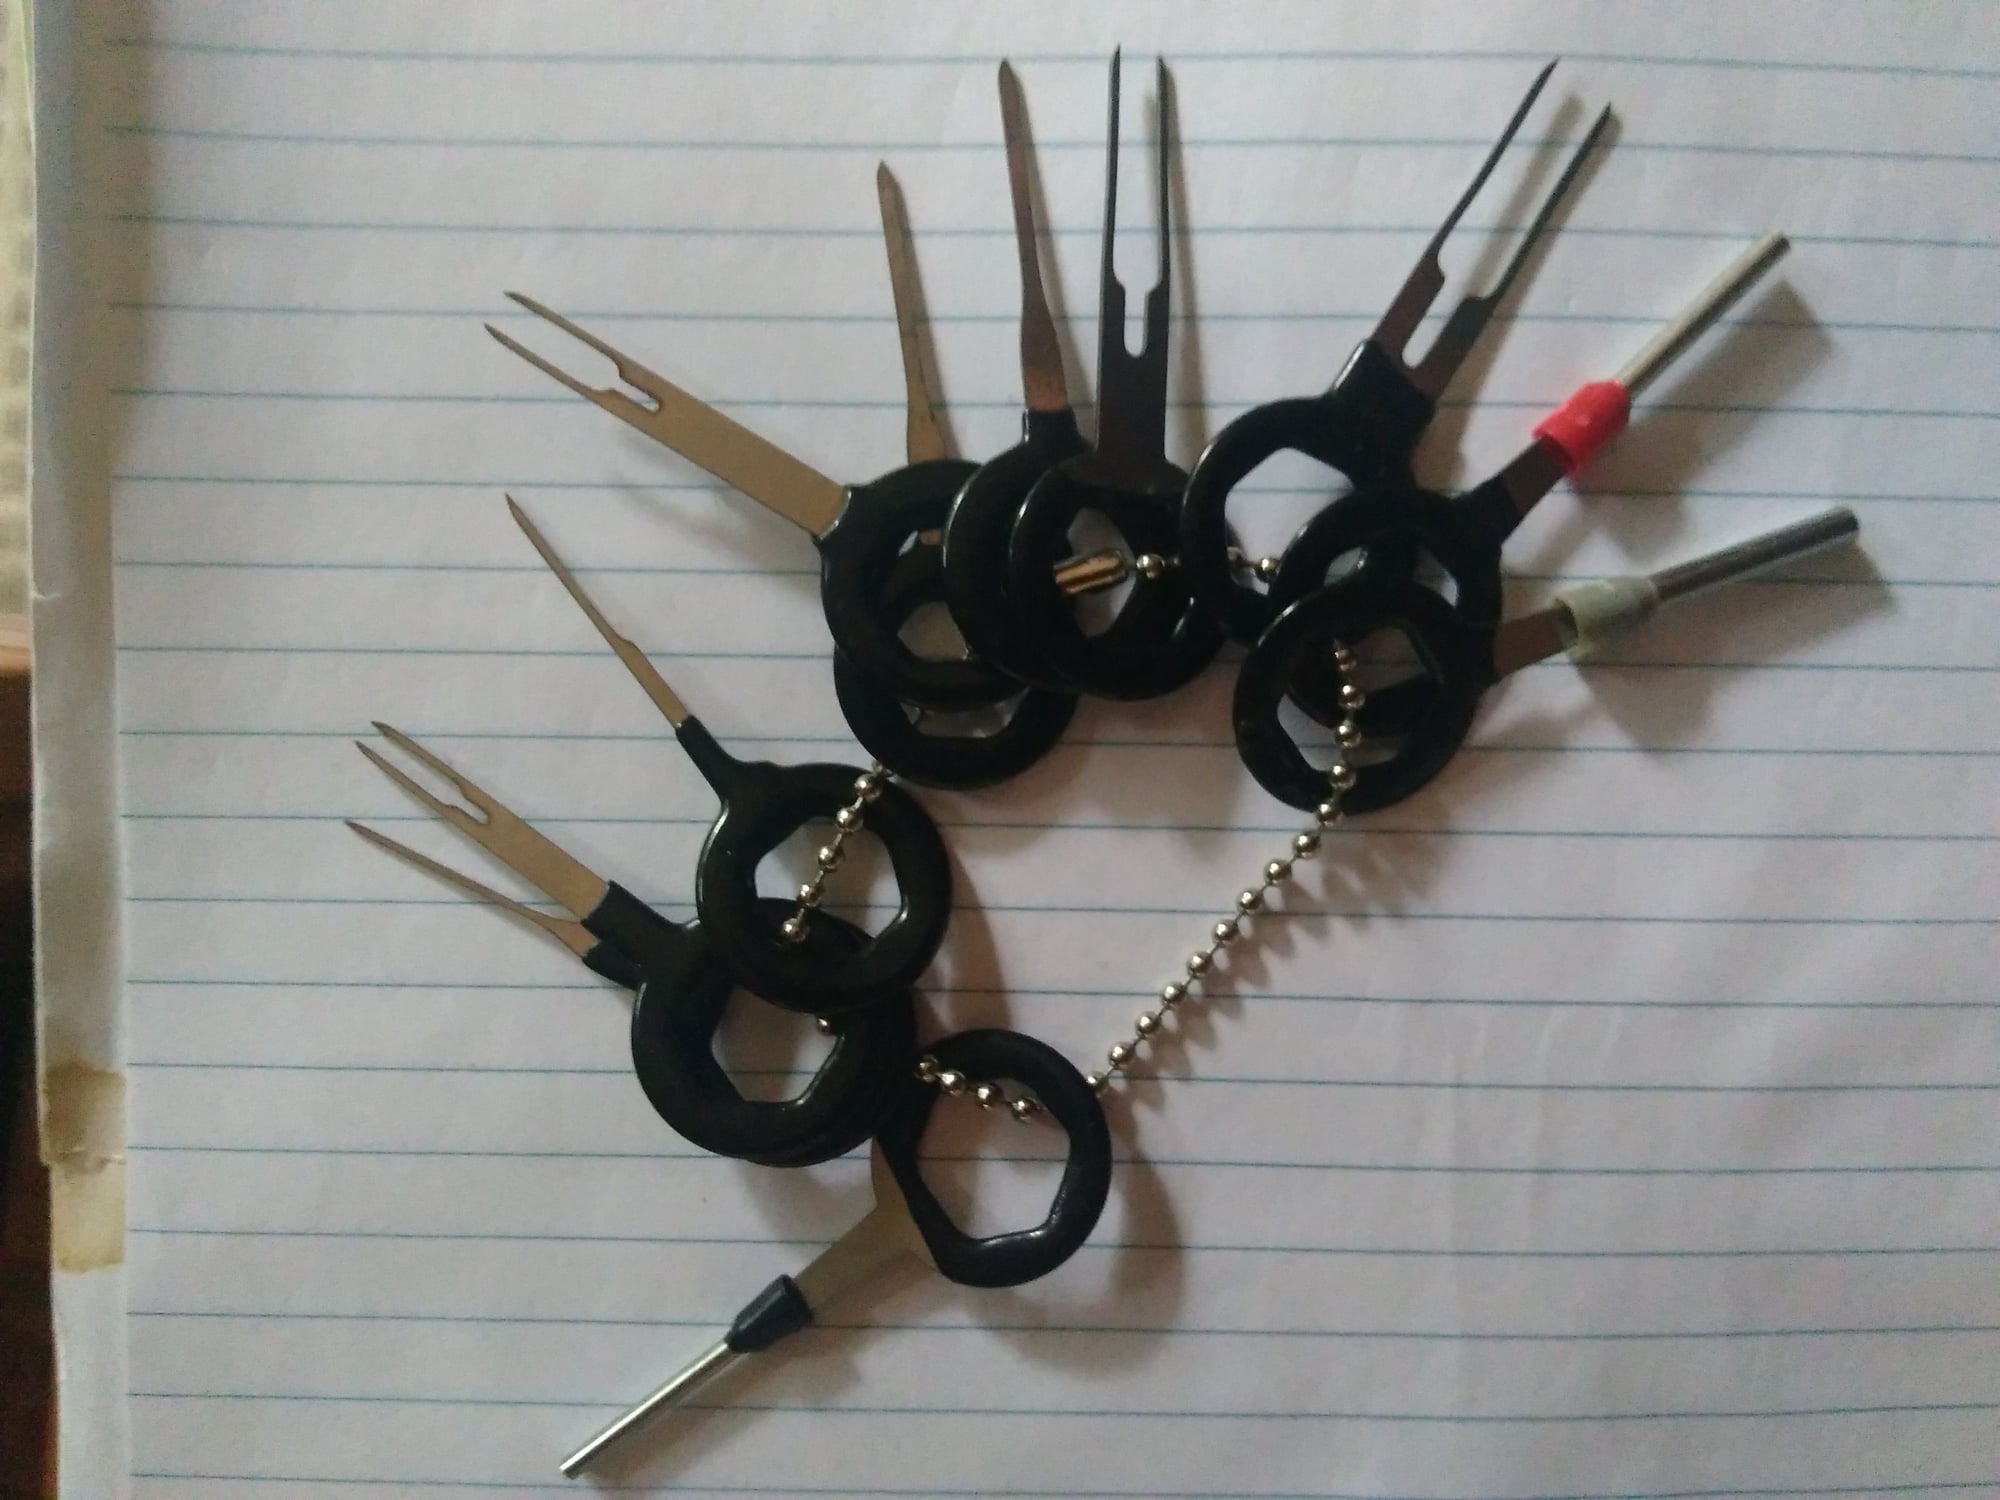
I have purchased this tool kit long time ago for $60ish, make sure it includes the 1" micro metal tubes visible on top right of picture. There are the same kits, without the mini tubes.
beside the first screwdriver on the right, there is a small cavity with three metal tubes. You will need those on the 993 (heated window washer terminal for example)
impossible for any paper clip to enter the tabs, very hard to do it without the tool.
Don't even try with inserting something , and pulling on the cable, There will be Blisters and broken whiskers
Hello!
I am hoping for some clarification of the text above.
What I did is move the two little red tabs, then introduce the stabbing-tool into the front-face of the black housing and then tried to pull on the wires from behind. After 45 minutes of fruitless stabbing and pulling, I gave up.
I am confused about the text above indicating that to "unclip the white housing and slide it back" ?
May I ask:
Unclip the white housing from what? Do you mean to unclip the white housing from the black black headlight guide that is mounted to the sheetmetal? Or do you mean to unclip the white housing from something else?
When you indicate that you can "slide the white housing back" what does this mean? Does this mean that the white housing of the old connector (and by corollary, the blue housing of the new connector) can MOVE relative to the black plastic housing that contains the electrical connectors?
I struggled with this a fair bit today, and I cannot believe this is so difficult. I must be missing something obvious. Thank you.
No it doesn't. By moving the red tabs you are unlocking the fittings allowing you to insert the appropriate tool to compress the metal tabs on the side of the fitting and push/pull it out. It will be tight but it will move. When I did mine I did one at a time, out with the old and into the new.
No it doesn't. By moving the red tabs you are unlocking the fittings allowing you to insert the appropriate tool to compress the metal tabs on the side of the fitting and push/pull it out. It will be tight but it will move. When I did mine I did one at a time, out with the old and into the new.
Thank you. Did you pry out the silicone plugs that encapsulate each wire from the back before pulling the wires out? I�ve been trying to pry out the silicone plugs with a pick, but I think I am just puncturing the plugs - these plugs are so reluctant to move.
These break all the time. I made my own connectorn/harness which had more play due to an extended wiring harness. Removed both sides of the connections.. now when they pop out just disconnect the wiring harness ….easy
"Did you pry out the silicone plugs that encapsulate each wire from the back before pulling the wires out?"
No - it will come out as one piece. Have patience, they are tight but they will move. Push in with the tool and pull out from the back.
Thank you! I was able remove the electrical contacts and insert them into a new blue connector. In my case things were complicated by the fact that one of the red lock tabs SHATTERED (from age and heat) when I tried to unlock it. Key things I learned which were not abundantly clear in the directions at the top:
In my case it was not possible to pry out the white silicone plugs. As one can see from my photos, the plugs are themselves crimped to the electrical connectors.
In my case I had to use pliers to remove the individual wires/electrical connectors while using the stabbing tool at the front. No amount of finger strength would have removed the wires. Zero. Not even Herculean finger strength. Even then, an unusual amount of force was needed using pliers to remove the wires!

 04-14-2014, 02:55 PM