When you click on links to various merchants on this site and make a purchase, this can result in this site earning a commission. Affiliate programs and affiliations include, but are not limited to, the eBay Partner Network.
I used a spatula which was pretty wide and made it go faster, but still a PITA.......really makes car look better though.............I think it is a every 4 year maintenance repair in general.......
I had 22yo guards-used the steamer, plastic spatula and goof off, along with about 8 microfiber towels. I was probably 1.5 hours on the first one, maybe 1 hour on the second. The steamer was the key-slow and monotonous-one little chunk at a time.
Found this old thread helpful before I tried to remove my original stone guards. I had set up an appointment to take it to a pro and then decided to at least try to get one started today. Used a Shark steamer and they both came off in a single piece in about 10 minutes per side. I had build this up to be about the toughest job on the planet (tougher than taking my engine out last winter and doing a new LWFW/clutch ). So, get a little laundry steamer, put the microfiber thing on the end and steam, then pull, steam then pull....10 minutes. Done.
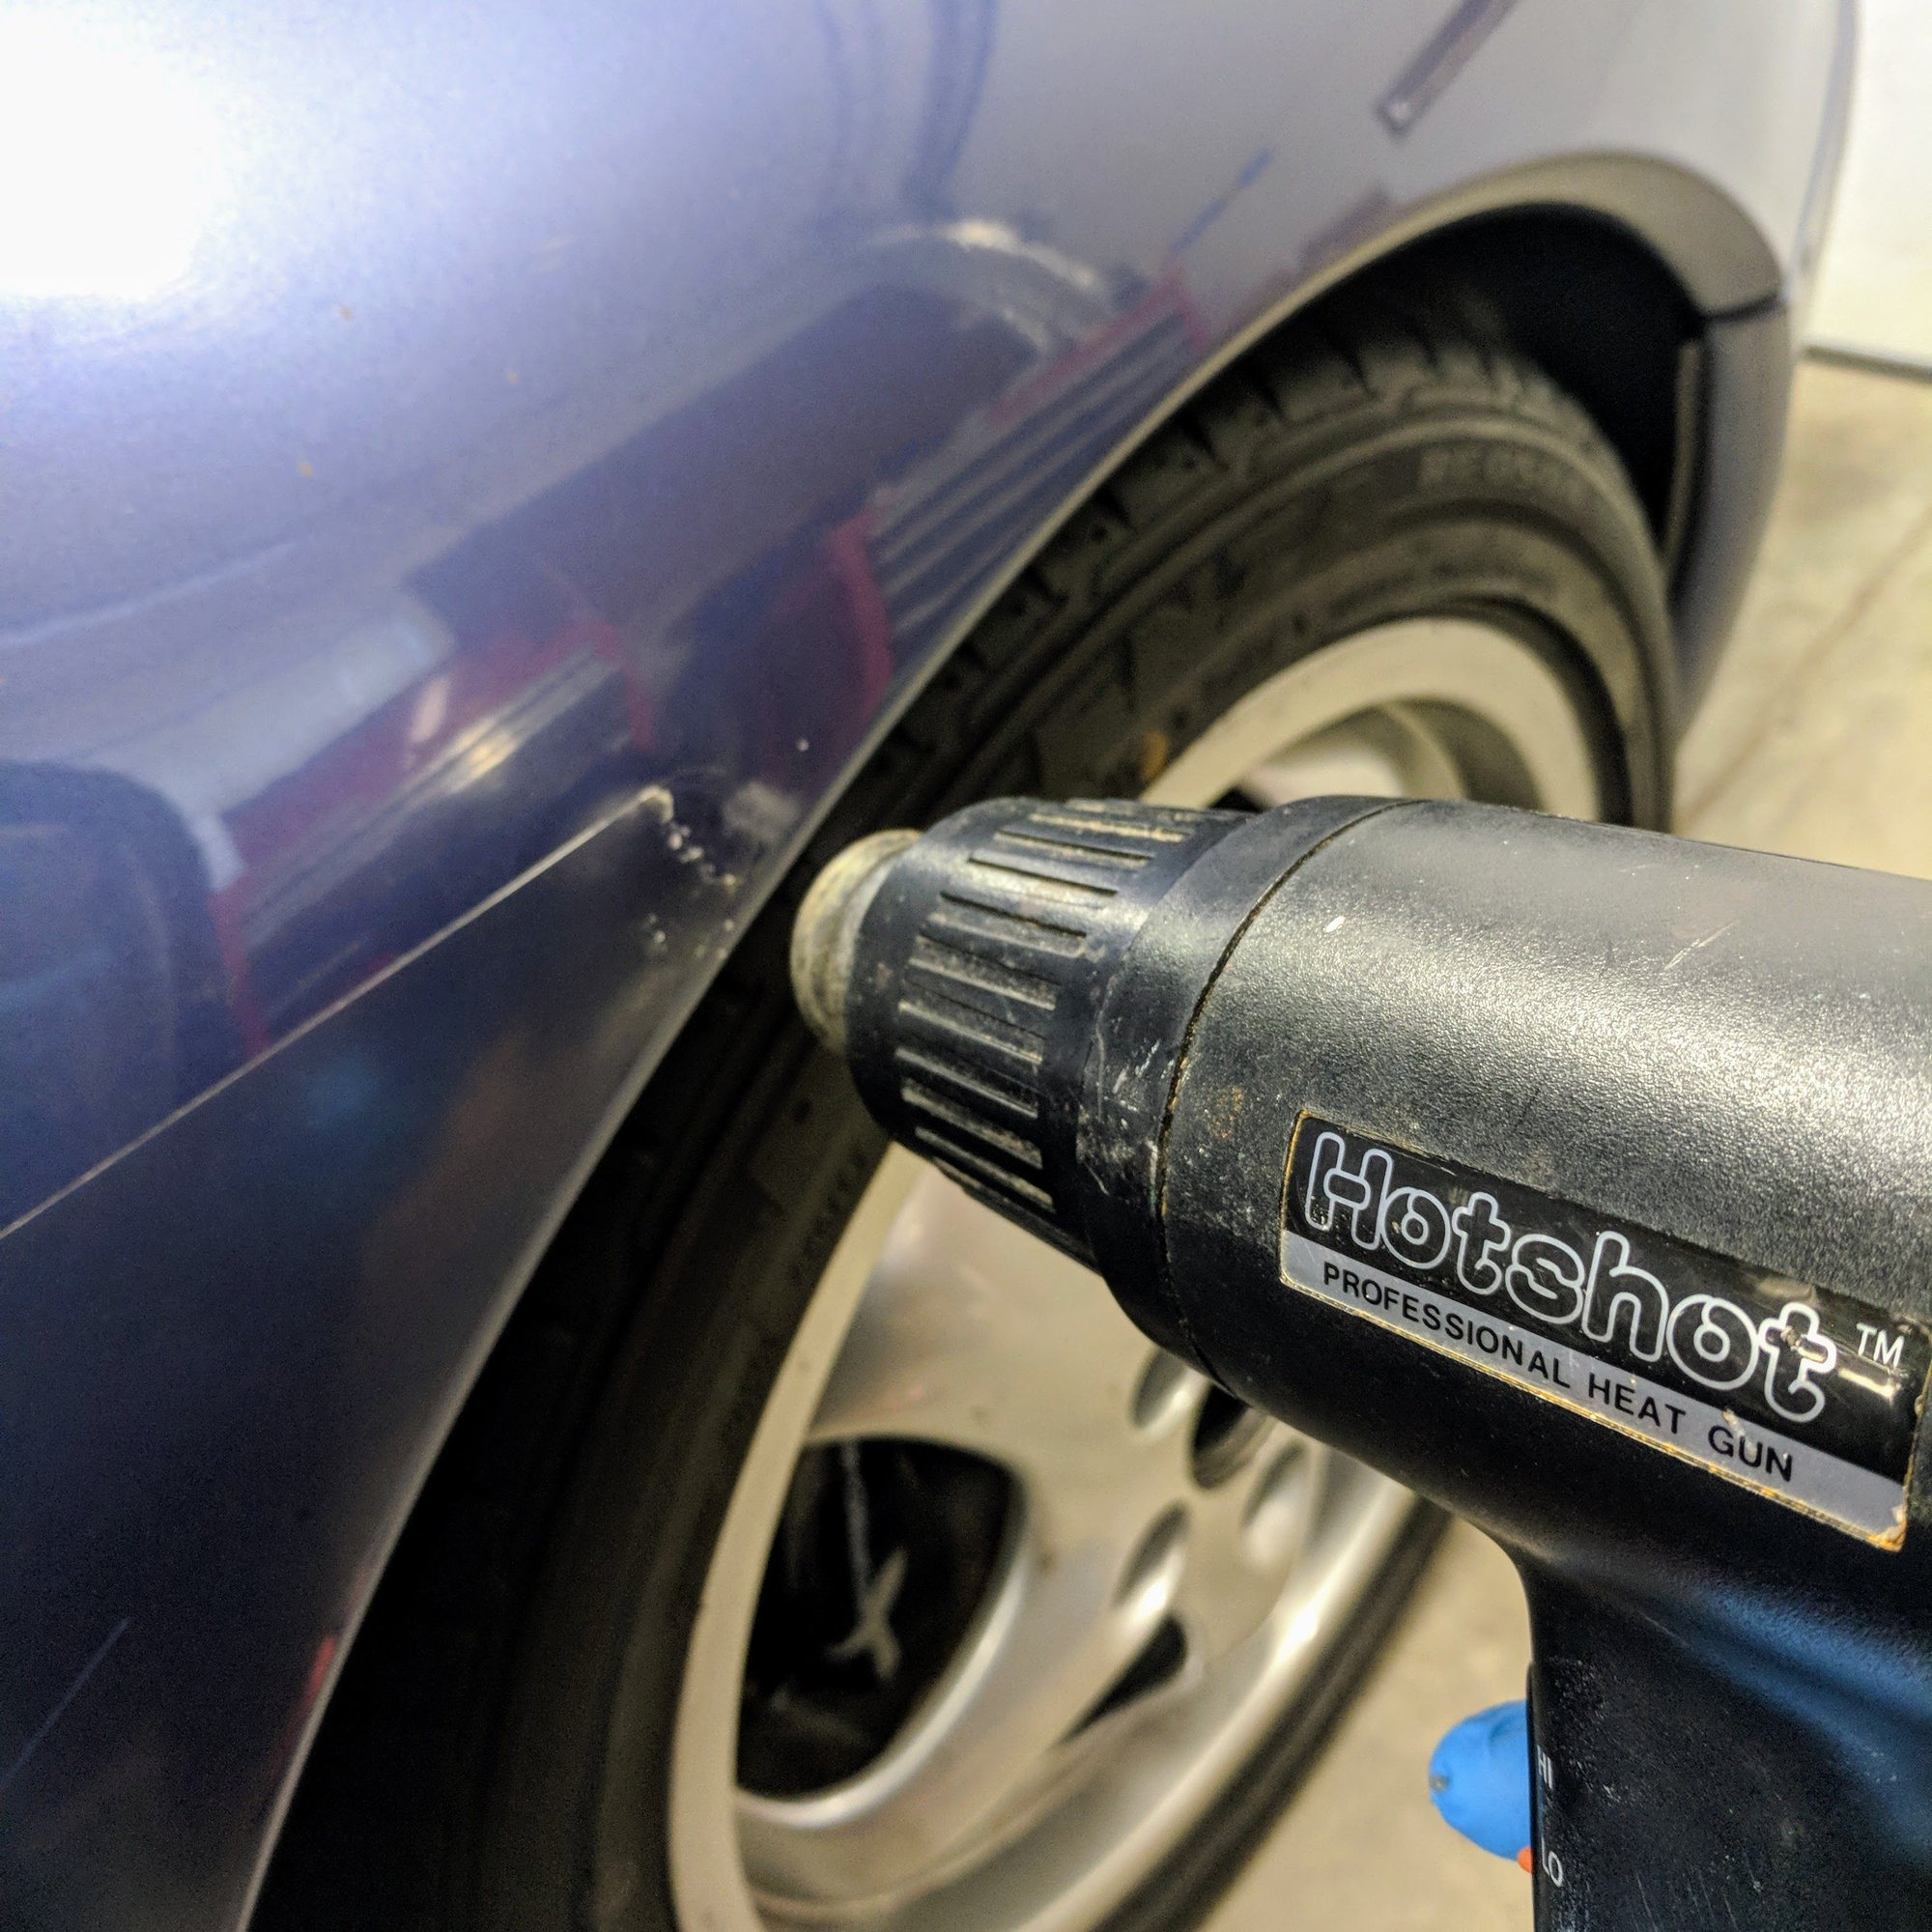
Thanks Kent! I did this recently too and was a PIA. One side had an original stone guard at it was time to replace it as it was discolored and cracked. I used a heat gun (used to strip paint). Lightly heated the surface to loosen it and peeled it off. Then used an old plastic to scrape it off. I then cleaned up the remaining residue with some xylene which came off with a few wipes.
Not sure due to age of the guard or the heat gun, mine came off in little strips and pieces so it was very time consuming.
Interesting...one of the big benefits of the steamer was that it kept the stone guard pliable during removal and left no glue residue behind. I think the heat gun def helps but also dries it out more which probably led to the tearing and glue. In the end, just feels good to get them off so nice work!
They are all different in how they age and what works removing. Age, climate, etc, all differ. I used the steamer and a plastic scraper, but they came off in little chunks, leaving a lot of residue to clean up after. Mine were 23 years old when I did, spending life in San Diego and Central Oregon. Having said that, maybe 1 hour per side, if I recall.
I had mine done maybe 8 years ago?
Originals were painted, replacements clear.
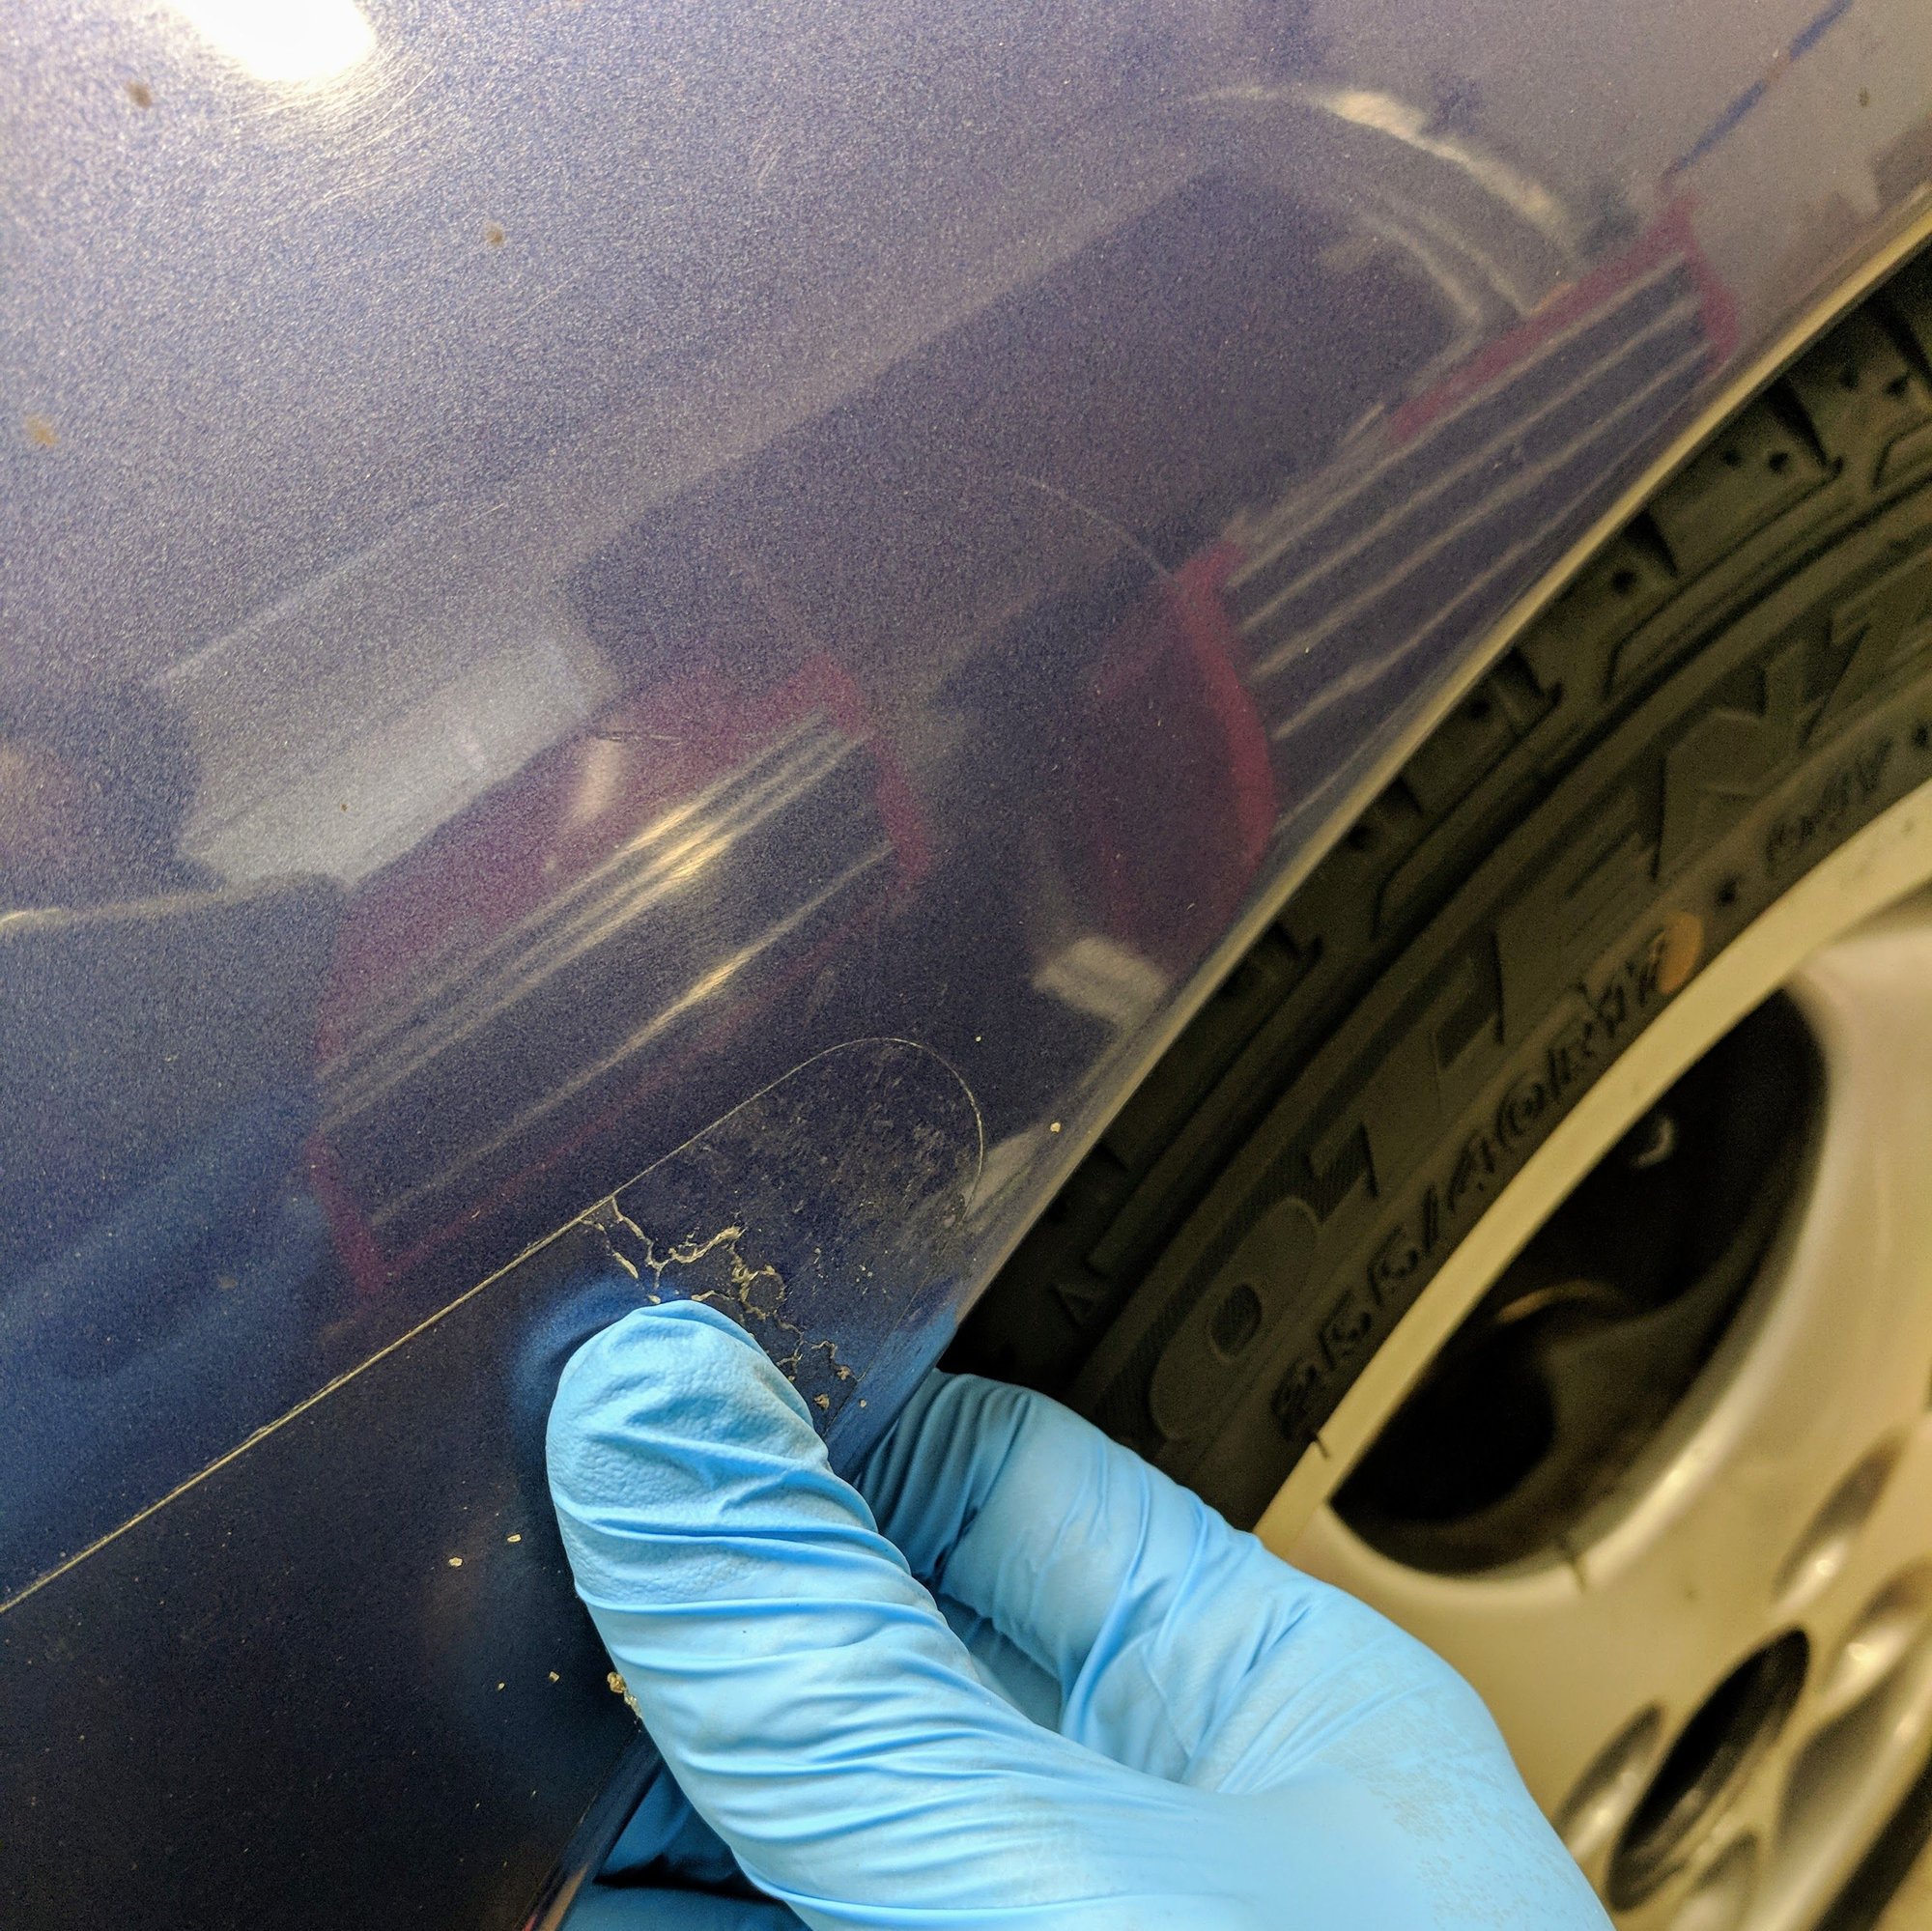
Unfortunately I had the problem others have had with the passenger side - some of the paint actually lifted, but not the primer.
Car is polar silver and I elected not to repaint at the time because I didn't want to do any paint work. It is really only noticeable from a few feet away.
The replacement ones I bought from the Porsche dealer are already starting to Yellow. This car sees VERY little sun.
Considering how much of a PITA these are to remove when they get old, and the fact that others have had the same problem as I had with paint lifting -
It might make sense to replace the stone guards in more frequent intervals.
I'll be interested to see how the guards come off this time if I decide to replace them this year.
This may be way off base but has anyone tried the 3M Stripe Off Wheel? I recently watched an episode of Wheeler Dealers where Ant used one of these to remove the wood grain decal from an old Jeep Wagoneer and thought of the many posts here about what a PITA the stone guards are to remove. My guess is the stone guards are much thicker but just wondered off anyone went down this road:
This may be way off base but has anyone tried the 3M Stripe Off Wheel? I recently watched an episode of Wheeler Dealers where Ant used one of these to remove the wood grain decal from an old Jeep Wagoneer and thought of the many posts here about what a PITA the stone guards are to remove. My guess is the stone guards are much thicker but just wondered off anyone went down this road:
I used one of these last year with a heat gun and some lacquer thinner..took about an hour and a half total for both sides. The wheel is made for thinner decal material but the stone guards are many mils thicker and now very hard after 20 plus years. It did not damage my paint however the cracked stone guard was so hard it made impressions in the paint, only noticeable at very close inspection and in the correct light. Use the wheel on a hammer drill for the most torque and not a regular drill or you will be wasting your time. Be prepared, it is a workout and you will need to brace your arms against your leg to keep the wheel from kicking off the stone guard area. Heat, wheel, thinner, heat, rub/scrape/pull off the excess, repeat.
I used a hand clothing steamer and the red plastic non-marring chisels from Harbor freight. Took a while but it worked. If you have melted the clear cot paint on your car it cam be lightly sanded with 1500/2000 grit wet sandpaper and buffed and polished out.
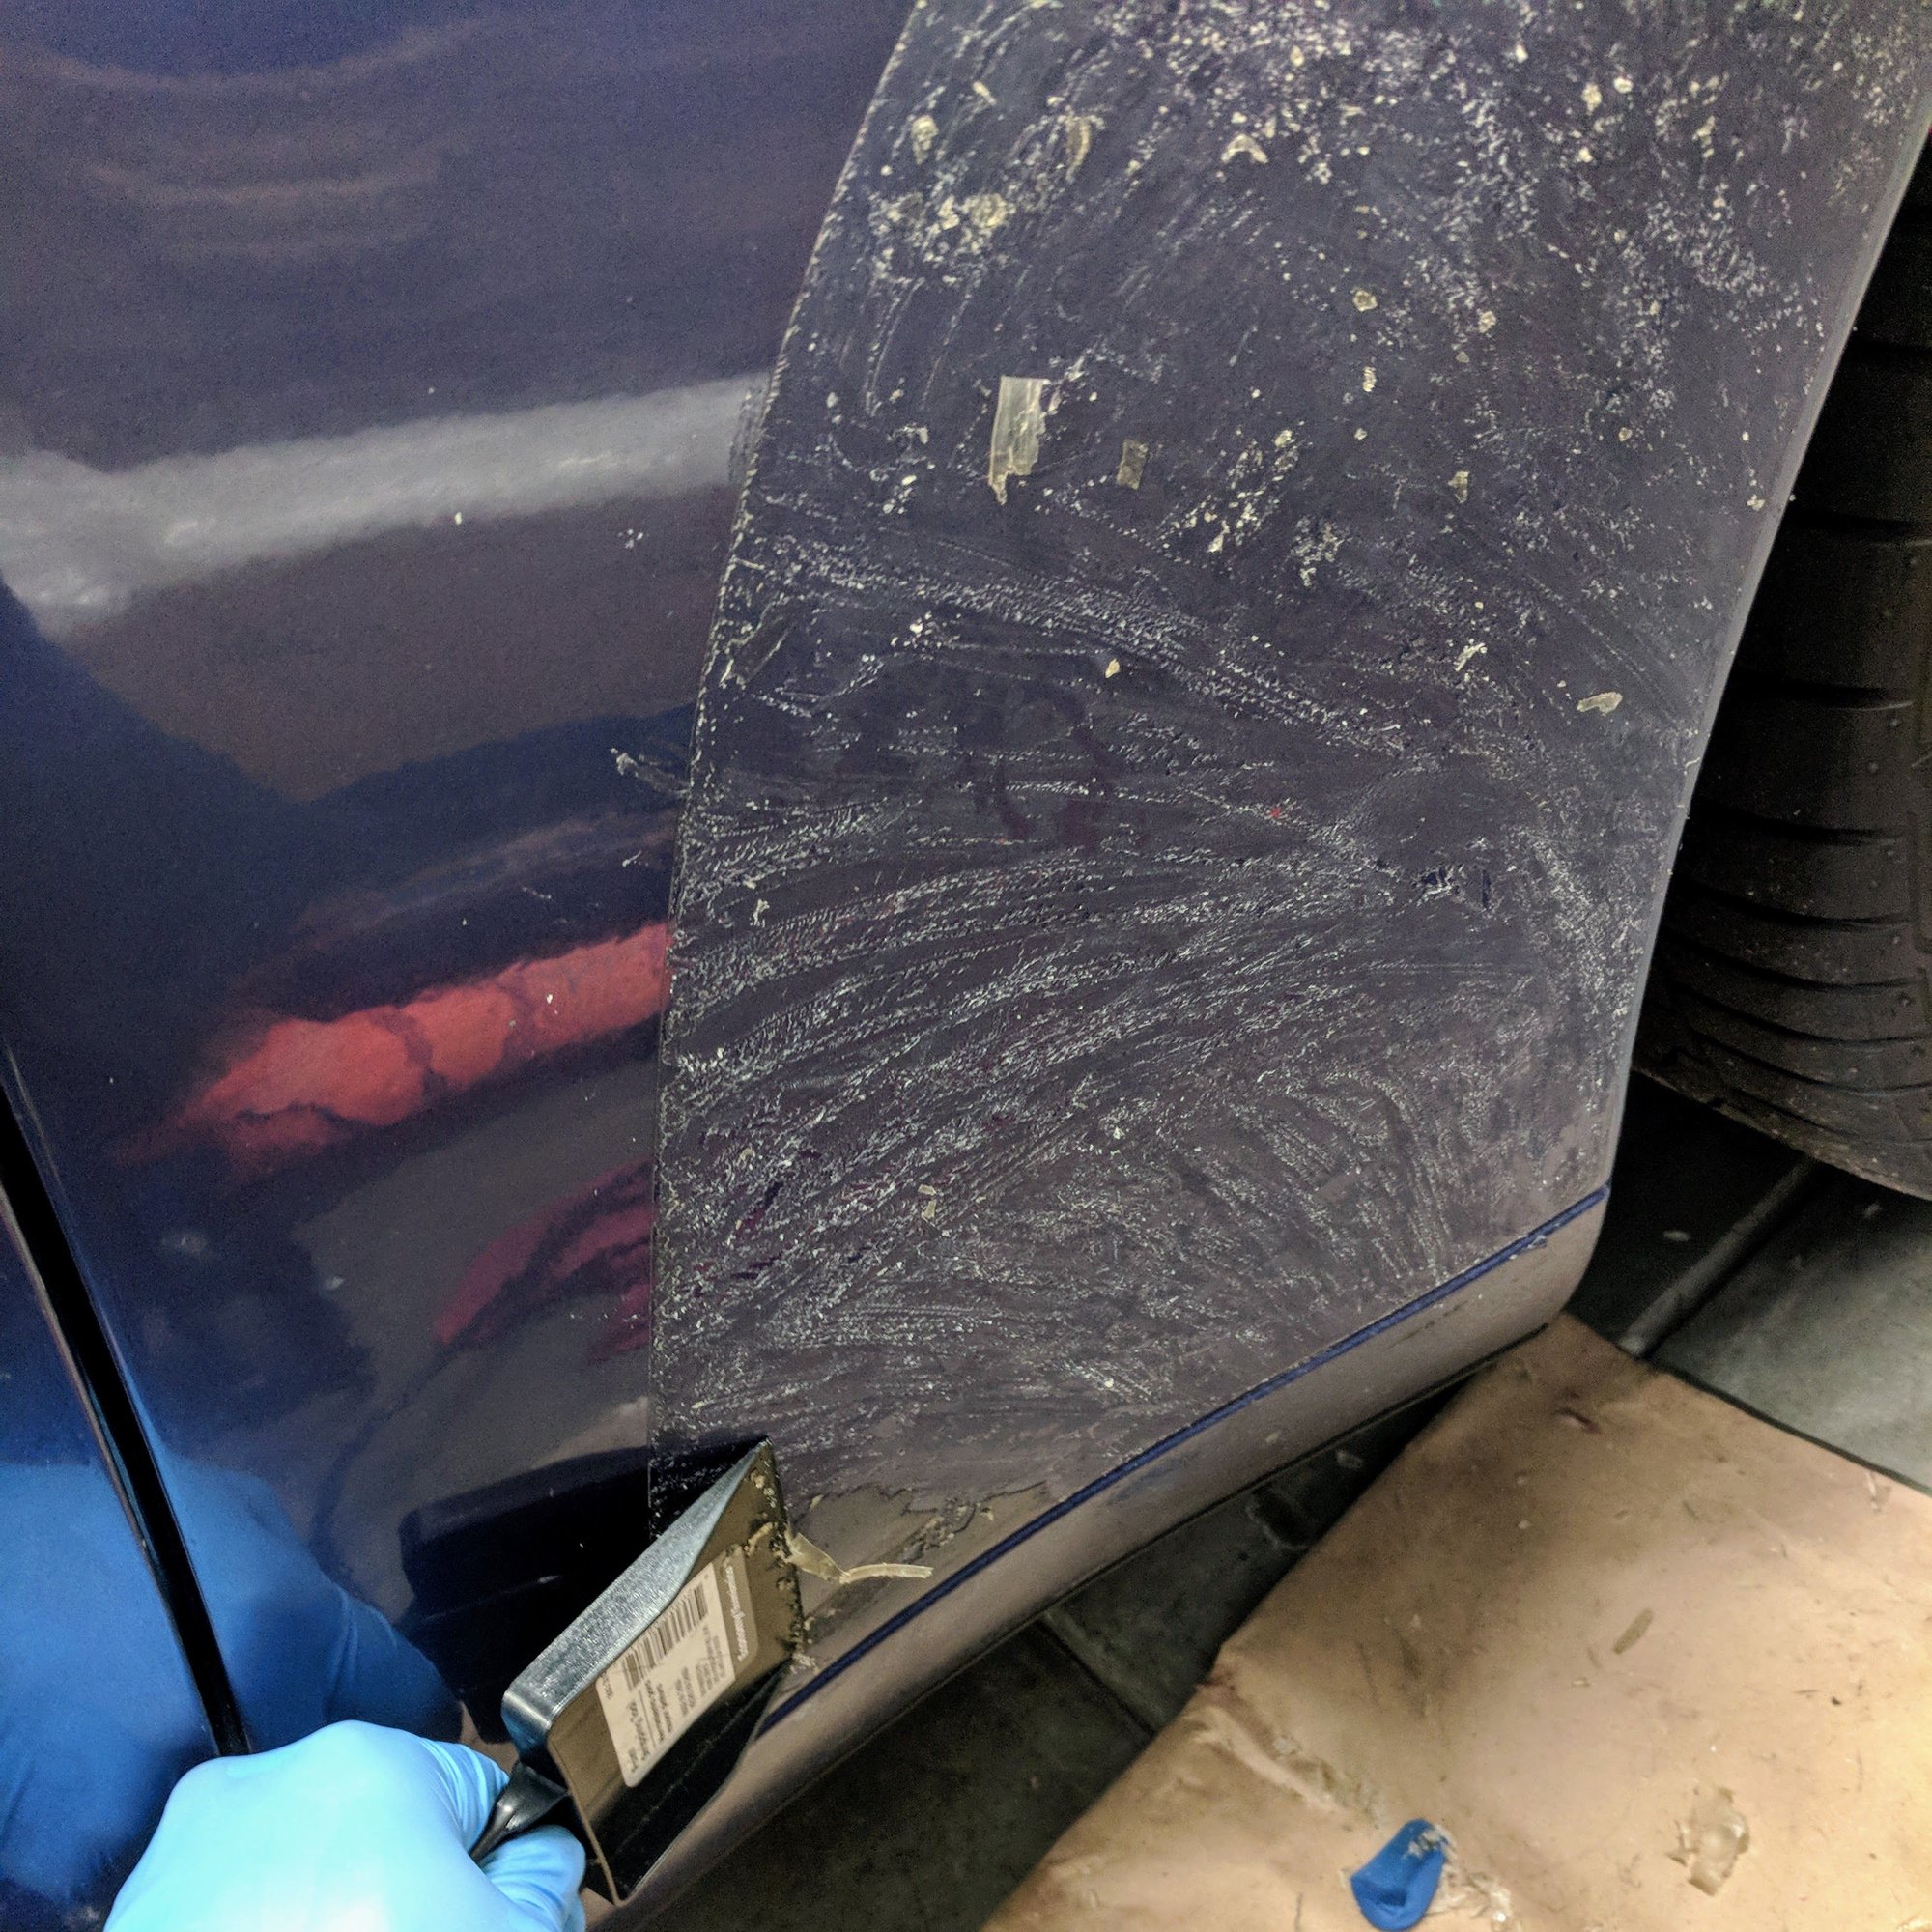
I removed my guards this afternoon. The passenger side came off quite easily with a heat gun and a plastic putty knife. It peeled off in larger pieces and took about 30 min to take it off. I then used a citrus based adhesive remover to remove the glue. The drivers side was a different story couldn't get it to budge and it was coming off in small pieces. after only removing about 4 sq inches I got smart went to the local vinyl wrap supplier and purchased 4 inch plastic razor blade and a strong adhesive remover $25 total. Went home fired up my steamer to 325 degrees and heated a 1-2 inch strip then I was able to quickly carve 1/2 inch strips with the razor blade. it only took 15 min to remove. to remove the adheasive I sprayed the remover on, let sit for 1 min then scraped a layer off with the razor blade. repeated this 2 more times until I was down to paint the sprayed remover on a microfiber towel and buffed off the remaining glue. When you have the right tools it goes quickly.
Tools:
Steamer / heat gun capable of 250-300 degrees
plastic razor blade - Lidco big blade pearl
adhesive remover - Rapid Remover
 08-05-2016, 10:10 PM

 ). So, get a little laundry steamer, put the microfiber thing on the end and steam, then pull, steam then pull....10 minutes. Done.