Notices
993 Forum 1995-1998

How to Remove Tamper Proof ECU Bolts

Thread Tools
 
Search this Thread
 
Old 08-11-2012, 12:14 AM
  #1  
earossi
Burning Brakes
Thread Starter
 
earossi's Avatar
 
Join Date: Dec 2003
Location: Chicago, Il
Posts: 1,037
Likes: 0
Received 11 Likes on 9 Posts
Default How to Remove Tamper Proof ECU Bolts

There are (4) hardened tamper proof bolts that secure the cover over the 993 ECU under the drivers seat. I've done a search but cannot find any discussion of the easiest way to remove these bolts in preparation for removing the ECU. Will someone share how to remove those bolts easily?
Old 08-11-2012, 04:16 AM
  #2  
jenskleis
Rennlist Member
 
jenskleis's Avatar
 
Join Date: May 2004
Location: Lausanne, Switzerland
Posts: 528
Likes: 0
Received 1 Like on 1 Post
Default

Hi Ernie,

I removed mine a few weeks ago, using a sharp chisel and a hammer. You need to hit them from the side, at a sharp angle, in order to push them free. Then simply unwind using your fingers.

I hope this description makes sense to you. Unfortunately, I don't have any photos.

Try to do a search on Steve Wong tuning chips. I got the instructions from a thread about installing chips.

Good luck!


Jens
Old 08-11-2012, 04:58 AM
  #3  
Neil Perry
Racer
 
Neil Perry's Avatar
 
Join Date: Jul 2010
Location: Sydney Australia
Posts: 400
Likes: 0
Received 0 Likes on 0 Posts
Default

Hi
I suggest a dremel and a fine grinding wheel and ground a slot in the heads and then used a flat head screwdriver.

Good Luck
Old 08-11-2012, 05:28 AM
  #4  
superformance
Track Day
 
superformance's Avatar
 
Join Date: Aug 2012
Posts: 15
Likes: 0
Received 0 Likes on 0 Posts
Default

Agreed with Jenskleis. I've used chisel to remove those anti-theft bolts.
Old 08-11-2012, 07:34 AM
  #5  
Mark in Baltimore
Rennlist Member
 
Mark in Baltimore's Avatar
 
Join Date: May 2002
Location: Baltimore, MD
Posts: 23,303
Received 496 Likes on 320 Posts
Default

RyanPrisco is the same spammer who used the name "ClaraJohnson" on the 993 board a few days ago. https://rennlist.com/forums/993-foru...ml#post9739221

A quick check of his posts shows that he answers with near monosyllabic words such as "bump", "agree", "thumbsup", "support", etc., just like Clara did. A latent hyperlink (I will not post it here and have deleted it in the quoted text) is embedded in the responses if you do a search on his posts, but the links are not visible or active when you look at the actual posts in a thread. (If you quote his post, the link will appear in the quoted text.)

Mods, please remove this post? Also, can you block the IP address to try to get rid of this lowlife? Thank you.
Old 08-11-2012, 11:52 AM
  #6  
Mike J
Addict
Lifetime Rennlist
Member
 
Mike J's Avatar
 
Join Date: May 2001
Location: Vancouver, BC
Posts: 8,362
Received 66 Likes on 55 Posts
Default

I have ground the heads off with air tools and a small bit - then remove by hand once the cover is off..
Old 09-01-2019, 12:09 PM
  #7  
s2racer
Addict
Rennlist Member

 
s2racer's Avatar
 
Join Date: Aug 2002
Location: St. Petersburg, Fla
Posts: 395
Received 17 Likes on 12 Posts
Default

my update on removing the security bolts...dremeled a groove in the heads, used a chisel to loosen (striking lefty-loosey) then used a screw driver to remove them. Wasn't really too comfortable with using forceful chiseling around the electronics (which I assume are somewhat sensitive to vibration). Worked like a charm. Will replace with proper bolts.
Old 09-01-2019, 02:40 PM
  #8  
autobonrun
Rennlist Member
 
autobonrun's Avatar
 
Join Date: Mar 2003
Location: kansas
Posts: 2,712
Received 405 Likes on 256 Posts
Default

Originally Posted by s2racer
my update on removing the security bolts...dremeled a groove in the heads, used a chisel to loosen (striking lefty-loosey) then used a screw driver to remove them. Wasn't really too comfortable with using forceful chiseling around the electronics (which I assume are somewhat sensitive to vibration). Worked like a charm. Will replace with proper bolts.
Congratulations, not an easy job. I had to use every method described in this thread. At one point I considered explosives.
Old 09-01-2019, 02:46 PM
  #9  
samurai_k
Rennlist Member
 
samurai_k's Avatar
 
Join Date: Aug 2014
Location: Norcal
Posts: 1,623
Received 180 Likes on 124 Posts
Default

The easiest is drill a hole on the bolt head and then use a sprial bolt extractor.

https://www.homedepot.com/p/Drill-Am...waAnE0EALw_wcB
Old 09-01-2019, 02:49 PM
  #10  
autobonrun
Rennlist Member
 
autobonrun's Avatar
 
Join Date: Mar 2003
Location: kansas
Posts: 2,712
Received 405 Likes on 256 Posts
Default

Originally Posted by samurai_k
The easiest is drill a hole on the bolt head and then use a bolt extractor. Easy peasy.
At least for me, the problem was the smooth hemispheric shaped head. I couldn’t get a pilot hole started. The bit kept slipping off.
Old 09-01-2019, 02:55 PM
  #11  
samurai_k
Rennlist Member
 
samurai_k's Avatar
 
Join Date: Aug 2014
Location: Norcal
Posts: 1,623
Received 180 Likes on 124 Posts
Default

Originally Posted by autobonrun
At least for me, the problem was the smooth hemispheric shaped head. I couldn’t get a pilot hole started. The bit kept slipping off.
Use a pointed steel punch. I agree if you don't the drill bit will wander and screw up

https://www.homedepot.com/p/TEKTON-7...6084/205820519
Old 09-01-2019, 09:42 PM
  #12  
inkatouring
Three Wheelin'
 
inkatouring's Avatar
 
Join Date: Oct 2008
Location: nowhere, but at least I'm getting there fast!
Posts: 1,382
Received 59 Likes on 39 Posts
Default

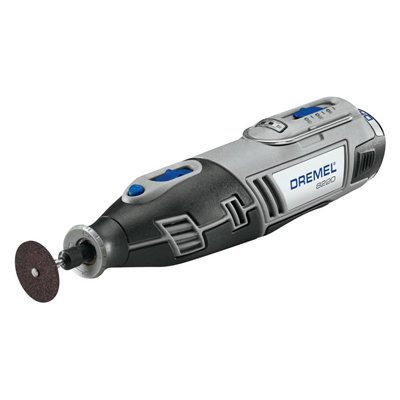
I just did this a month or so back and tried all the various methods listed here. The easiest, IMHO, was to use a rotary dremel tool with round blade (?) to cut a notch in the center and unscrew it with a screw driver. I was able to unscrew without needing force -- chisel or otherwise, just unscrew it. See the pic below for the right blade....

Old 09-01-2019, 10:00 PM
  #13  
s2racer
Addict
Rennlist Member

 
s2racer's Avatar
 
Join Date: Aug 2002
Location: St. Petersburg, Fla
Posts: 395
Received 17 Likes on 12 Posts
Default

That's what I did, but the screws were in too tight...I need to get a new bit socket (never have enough tools )


Quick Reply: How to Remove Tamper Proof ECU Bolts


All times are GMT -3. The time now is 06:52 AM.