


Engine Drop Time Lapse
Thread Starter
Pro

Joined: Oct 2010
Posts: 626
Likes: 0
From: Seattle, WA
Plan? PLAN? We don't need no stinking plan!
Actually I did have a plan, up until yesterday. Now I am just kind of blindly taking things apart.

Nordschleife Master

Joined: Dec 2008
Posts: 5,490
Likes: 45
From: In front of you and to the left ...
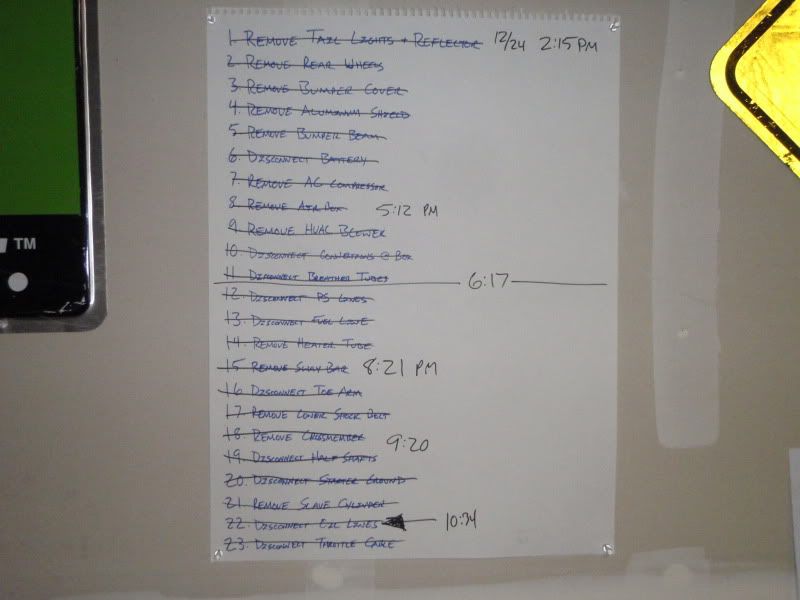
^^^ Wow! I'm totally impressed by a list. That at least implies that you knew what had to be done .. at least up to Item 23!  And, the best part of your story is, and correct me if I misunderstood, but this is your only car so you've basically thrown down the gauntlet and given yourself a week to 'git'er dunn'!
And, the best part of your story is, and correct me if I misunderstood, but this is your only car so you've basically thrown down the gauntlet and given yourself a week to 'git'er dunn'!
Burning Brakes
Joined: Feb 2010
Posts: 1,143
Likes: 29
From: Apex, North Carolina
Absolutely Superb!
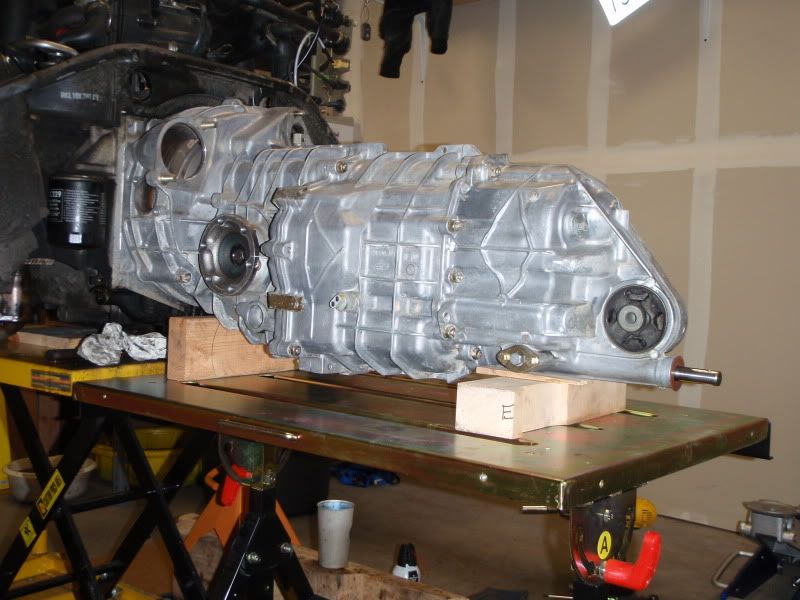
Everything from the planning, the transmission cleaning to the video to the cat....And that music!
Great show! Brought back memories of when I did this myself (and not nearly as well!)
Everything from the planning, the transmission cleaning to the video to the cat....And that music!
Great show! Brought back memories of when I did this myself (and not nearly as well!)
Thread Starter
Pro
Joined: Oct 2010
Posts: 626
Likes: 0
From: Seattle, WA
^^^ Wow! I'm totally impressed by a list. That at least implies that you knew what had to be done .. at least up to Item 23! And, the best part of your story is, and correct me if I misunderstood, but this is your only car so you've basically thrown down the gauntlet and given yourself a week to 'git'er dunn'!
And, the best part of your story is, and correct me if I misunderstood, but this is your only car so you've basically thrown down the gauntlet and given yourself a week to 'git'er dunn'!
And while this is a big project, what gave me the cajones to dive in was my old Dodge Neon that I had in school (excuse me, collage!). It spun a rod bearing three days before the semester started, 200 miles from my apartment. I just plain couldn't afford to have it fixed by someone else,so I had the car towed to my friend's dad's latest obscure purchase; an old firehouse. So I at least had a big, dry place to work. I spent the next months planning and coordinating a engine rebuild I would have to pull off over Thanksgiving break..

Like my jack stands?

I suppose if I hadn't gotten it done, it could have waited a couple more weeks until the winter break, but I didn't look at it that way. But, fact of the matter is, I pulled off a total top-to-bottom engine rebuild by myself over the course of four working days (that is my step dad in the back, but he had Alzheimer's so I was basically just entertaining him for a while to give my mom some time to herself). They were long days, but it went almost seamlessly, down to firing the engine literally an hour and a half before I had to hit the road to get back to school. Until then, I had only done pretty basic maintenance stuff like brakes, bushings, etc. so it was largely new territory..it was also my first time really working on a modern engine. I credit relentless planning and preparation, attention to detail, and of course luck was definitely with me there as well.
But you want to know the crazy thing? I really do miss that car!

Nordschleife Master
Joined: Dec 2008
Posts: 5,490
Likes: 45
From: In front of you and to the left ...
Ha. Yes, I believe I've owned a pair of those in the past, Cinderjacks :-)... but you just reminded me why I like this project so much. I had a 914-6 DD when I was in Junior College which was my only car at the time, and I used to remove the headers to adjust the valves which had become a monthly maintenance routine because it had 160K miles on it .. and one afternoon during a semester break, I snapped the head off of one of the header bolts, clean into the head ... so, that came off. I remember lying on my chest on the garage floor in a pool of oil thinking 'uh, oh ... ' then I realized that I might as well do the valves/heads .. so the other side came off, then the barrels just kind of fell off... then there were the pistons/rings just dangling there .. and I ended up doing an entire top end, and it all had to be finished before the new Semester started which gave me basically a week and a half ... so I bought a 'Chilton's' manual and the '911 Engine' book and just made it happen! And, surprisingly, I got it put back together and it ran like a scalded duck ... BUT ... I sure could have used Charlies help ..
BUT ... I sure could have used Charlies help ..
Thread Starter
Pro
Joined: Oct 2010
Posts: 626
Likes: 0
From: Seattle, WA
Day 5 could have gone better, was hoping to get farther than I did, but I still made progress.
On the plus side, I got the injectors dropped off to be gone through and will be ready tomorrow (after 2am, today I guess!). The engine is basically bare, and I am ready to start actually doing what needs done now. I also got the spark plug wires together, a much easier job than I anticipated, and all the boots checked out ok (I used IXLR8's replacement lead kit).
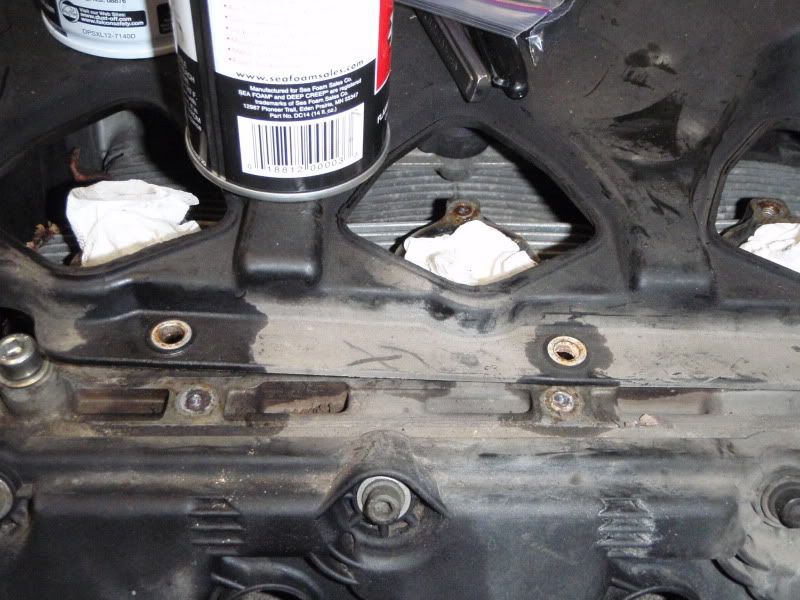
The day did not go without a hitch, I've got four broken bolts on the left side of the engine. I'm not sure what would cause that, it's strange that it's only on one side that I've found stuck bolts. Anyway I've managed to have never extracted a broken bolt before, and frankly I will say I'm pretty nervous about learning on a car like this! Of the four, I'd say three are really non-critical; the engine tin bolt that goes in the A/C bracket, and the two middle-left engine shroud bolts. The fourth, however, is an intake stack bolt. Obviously I will be doing the intake bolt last, haha.
The intake bolt that broke is the one just to the right of the SeaFoam can. The one on the bracket is roughly in the center of the picture..not really the greatest, sorry.
On the plus side, I got the injectors dropped off to be gone through and will be ready tomorrow (after 2am, today I guess!). The engine is basically bare, and I am ready to start actually doing what needs done now. I also got the spark plug wires together, a much easier job than I anticipated, and all the boots checked out ok (I used IXLR8's replacement lead kit).
The day did not go without a hitch, I've got four broken bolts on the left side of the engine. I'm not sure what would cause that, it's strange that it's only on one side that I've found stuck bolts. Anyway I've managed to have never extracted a broken bolt before, and frankly I will say I'm pretty nervous about learning on a car like this! Of the four, I'd say three are really non-critical; the engine tin bolt that goes in the A/C bracket, and the two middle-left engine shroud bolts. The fourth, however, is an intake stack bolt. Obviously I will be doing the intake bolt last, haha.
The intake bolt that broke is the one just to the right of the SeaFoam can. The one on the bracket is roughly in the center of the picture..not really the greatest, sorry.
Rennlist Stories
The Best Porsche Posts for Porsche Enthusiasts

Porsche's Top 5 Most Questionable Naming Decisions
Verdad Gallardo
Pogea Racing's 964 Porsche 911 Reimagination Stands Out in a Crowded Field
Verdad Gallardo
6 Convertible Top MYTHS Most People Don't Understand!
Michael S. Palmer
2026 Porsche 911 Club Coupe is Spectacular, And Everything Wrong with the Porsche Market
Joe Kucinski
Talos Takes Your 991 Porsche 911 GT3 to the Next Level for a Cool $1.13 Million
Verdad Gallardo
9 Vehicles Porsche Helped Engineer that Aren't Porsches
Verdad Gallardo
9 Features and Characteristics That Only Porsche People Understand
Verdad Gallardo
I've Written 500 Rennlist Articles: Here's How Porsche Has Changed Along the Way
Joe Kucinski
10 Most Unnecessary Porsches Ever Built (And Why We Love Them)
Verdad GallardoNordschleife Master
Joined: Dec 2008
Posts: 5,490
Likes: 45
From: In front of you and to the left ...
The day did not go without a hitch, I've got four broken bolts on the left side of the engine. I'm not sure what would cause that, it's strange that it's only on one side that I've found stuck bolts. Anyway I've managed to have never extracted a broken bolt before, and frankly I will say I'm pretty nervous about learning on a car like this! Of the four, I'd say three are really non-critical; the engine tin bolt that goes in the A/C bracket, and the two middle-left engine shroud bolts. The fourth, however, is an intake stack bolt. Obviously I will be doing the intake bolt last, haha.
Addict
Lifetime Rennlist
Member
Lifetime Rennlist
Member

Joined: May 2001
Posts: 8,365
Likes: 82
From: Vancouver, BC
You would find this sort of work quite a bit more easier if you had an engine stand where you can rotate the engine - that way for example you can have the valve covers facing up when doing them, etc.
That broken bolt is an issue - its likely that the steel bolt has "frozen" in the aluminum case due to heat cycles and the long time its been sitting. Why are you removing the stacks from the engine? That is not a regular service item, did you suspect you have a leak, or you trying to get the plastic cover off the engine?
Luckily, the steel bolts are relatively soft, so you can drill and then use a bolt extractor - you can use the other bolts and holes as a good measure on how deep the bolt goes when you drill it. I find it can be tricky if a bolt has sheared off, since the surface you are drilling is not flat, so the bit will wander.
Best of luck!!
Cheers,
MIke
Thread Starter
Pro
Joined: Oct 2010
Posts: 626
Likes: 0
From: Seattle, WA
I use my old cell phone with an app that takes photos at whatever intervals you chose (for these, I have it set to 30 seconds). I then use a freeware program called PhotoLapse 3 which turns all the stills into an AVI file, which I upload to YouTube and hope it looks good because I can't seem to watch them on my computer..and then I find obscure stock music YouTube has for the soundtrack. Somehow, at least in my eyes/ears, it just works.

At the risk of sounding obvious, soak the crap out of them with Liquid Wrench, and tap outside on the case where they're stuck before attempting extraction. If it doesn't go well, you can always take as much weight as possible off the engine and haul it down to a machine shop ...
Yes, they've been soaking ever since I felt more resistance than usual. All I know is I really hope to avoid the latter!
You would find this sort of work quite a bit more easier if you had an engine stand where you can rotate the engine - that way for example you can have the valve covers facing up when doing them, etc.
That broken bolt is an issue - its likely that the steel bolt has "frozen" in the aluminum case due to heat cycles and the long time its been sitting. Why are you removing the stacks from the engine? That is not a regular service item, did you suspect you have a leak, or you trying to get the plastic cover off the engine?
Luckily, the steel bolts are relatively soft, so you can drill and then use a bolt extractor - you can use the other bolts and holes as a good measure on how deep the bolt goes when you drill it. I find it can be tricky if a bolt has sheared off, since the surface you are drilling is not flat, so the bit will wander.
Best of luck!!
Cheers,
MIke
That broken bolt is an issue - its likely that the steel bolt has "frozen" in the aluminum case due to heat cycles and the long time its been sitting. Why are you removing the stacks from the engine? That is not a regular service item, did you suspect you have a leak, or you trying to get the plastic cover off the engine?
Luckily, the steel bolts are relatively soft, so you can drill and then use a bolt extractor - you can use the other bolts and holes as a good measure on how deep the bolt goes when you drill it. I find it can be tricky if a bolt has sheared off, since the surface you are drilling is not flat, so the bit will wander.
Best of luck!!
Cheers,
MIke
Yeah, I found myself thinking an engine stand would be pretty awesome for this. I might have to get one, although there's not much I really need to do under the engine other than clean, and I am also trying to avoid collecting more one-time use stuff (and spending money!). The table lifts high enough that it's not too bad to work on the sides. I was thinking about pulling the heat exchangers off but...I don't really NEED to, and at this point it seems like an invitation for more broken hardware that I don't really want to deal with now.
Anyway I took the stacks off so I could remove the shroud. with as many leaves as there were in the engine bay, I figured there would be a ton under the shroud. It wasn't as bad as I thought it would be, but there was enough crap under there that I won't regret taking the time to do it*.
As far as that intake bolt goes..I think I came up with a decent idea last night. The jig idea was great, but I wasn't sure how to go about making one accurately. But I then realized the intake stack should be (relatively) accurate; probably just as good as something I'd throw together. I think I'm going to use a Dremel to grind the top of the bolt as flat as I can get, then use the stack as a drill guide, using the broken bolt head as a bit guide (putting a perfectly centered hole in the bolt head should be pretty easy, thankfully I picked up a small metal lathe at an estate sale last year!).
(*Assuming I can get that intake bolt take care of without too much drama!)
