

Paint Chip Repair--DIY
 09-11-2010, 03:35 PM
#1
button queen
Thread Starter
Here is what might be a helpful tip for those dealing with this scourge.
When I got my GR 993, there were several very noticeable stone chips on the hood, fender and mirrors (maybe 8-12), not to mention the usual scene on the spoiler. The PO had a Dr. ColorChip kit but had not tried it. I dithered too fearing I'd ruin something, and finally started to try some ideas on the lower spoiler; not so easily noticed.
EDIT: I found another way to deal with the clean up on these. Tried this on my DD and it worked like a charm. Here goes:
1. This time place a small "blob" in the chip large enough to fill the hole but not so large as to creat a large "mound" effect--just to fill the hole and then some.
2. Let this blob set for at least an hour--longer is better and I haven't yet found a time that is too long.
3. Now use the edge of the plastic credit card to shave or plane off the blob at the level of the paint. Start gently and then get more aggressive as you work it. The older the blob the more aggressive you'll need to be. The older blobs tend to come off in one piece while the fresher ones tend to shave off in stages.
This approach does not pull the paint out of the chip, and leaves you with a site that is very nice. I have not yet tried multiple passes of this technique on the same chip site, but will soon.
I'll skip the details of less-than-satisfactory tries and cut to the chase. The final and very effective method is this:
1. After preping the spot with a degreaser (to assure good adhesion), take a toothpick (or your favorite tool for this task) and place a small blob of paint above (meaning "up hill" from) the chip.
2. Now with a striaght edge (I used the edge of an old plastic credit card) drag the blob into the chip filling it as you pass over. Continue the blob to create the "thin smear" described in the instructions in the kit. The thinner and more uniform the smear, the easier the cleanup.
3. Let stand to dry for at least 1 hour. Then go back and use the cleanup solution (they call it "Sealact") to remove the smear. They recommend a tee shirt material which I use, and I understand they now send you a cloth for this purpose. You don't have to rub hard; simply wipe gently with a circular and then linear motion. Clean up with your favorite surface product; I use Girot's Speed Shine.
4. For deeper chips, do this again and again until you build up a surface level with the original finish. Wait at least 24 hours before you do this to permit the paint to cure properly. I did this on the fender (a larger one) and it's not perfect; I can find it and I bet you can't!!
Notes:
1. The Dr. ColorChip product matches extremely well (on both my 14 year old 993 and my 3 year old Acura RL DD).
2. For those nervous about the smear drying and ruining the paint, I have been successful in removing week old smears with the Sealact--it takes a bit more time but it works.
3. The ColorChip folks give you a rubber glove to smear the paint; I found that the curviture of my thumb pulled some paint out of the chip and that's why I went to the straight edge.
4. In thinking about the straight edge, I think a small squeege would do better and might conform better to those curvy surfaces we love, but the paint would build up over time and I clean the credit card with the Sealact after use.
5. ColorChip folks say you can do this in sunlight. I found doing it in the garage with a work light is better for finding chips and those smears.
NO affilations, yada, yada--just worked very well for me.
Last edited by DanL993; 10-18-2010 at 09:04 AM.
 09-11-2010, 04:03 PM
#2
Drifting
Dan, thanks for the tips. Good idea with the straight edge, I'll have to try that next time. This is a subject close to my heart, I hate chips. The problem I've had is that when removing the excess paint, it is nearly impossible to get the chip built up to be flat with the surrounding area. Even using the t-shirt they include, it tends to scoop out the chip a little. I've thought a semi-hard porous substance would do the trick, just haven't come up with one yet. Maybe some thick leather might do the trick, pliable yet firm, and hopefully wouldn't scratch.
09-11-2010, 06:09 PM
#3
Addict
Rennlist Member
Rennlist Member
Thanks for this Dan. I was on a drive a couple of weeks ago and got 'sprayed' with some stones, resulting in 8-10 chips on the hood. I've been trying to get the courage up to fill them in. Wasn't sure of the technique to use. This is good info.
chuck
chuck
09-11-2010, 07:35 PM
#4
Drifting
Hi Dan,
I have one of their kits and the paint matches nicely. The problem is that after letting the paint dry for a few minutes (the instructions say minutes and not an hour IIRC) , the wiping with their solution just drags the paint out of the chip. I'm worried that if I wait much longer I won't get the excess paint off. Did you really wait for an hour?
I have one of their kits and the paint matches nicely. The problem is that after letting the paint dry for a few minutes (the instructions say minutes and not an hour IIRC) , the wiping with their solution just drags the paint out of the chip. I'm worried that if I wait much longer I won't get the excess paint off. Did you really wait for an hour?
09-11-2010, 08:00 PM
#5
Nordschleife Master
I have also used the Mothers Paint Chip Repair version which is the Langka product in a Mother's bottle.
Here is a visual aid to outline the key steps in the repair process ...


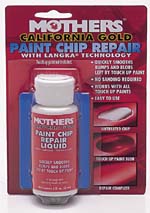
Here is a visual aid to outline the key steps in the repair process ...
09-11-2010, 08:09 PM
#6
Addict
Rennlist
Lifetime Member
Rennlist
Lifetime Member
I also have used the Mother's Langka product on the 993 with fairly good results. Too bad they quit making it. It does tend to drag paint out of the chip at times if you get impatient and hurry too much.
I am in the middle of a 10K mile trip around the US - when I get back, the '95 525i will be ready for the Dr Colorchip "wipe away the tiny sand chips" procedure.
I am in the middle of a 10K mile trip around the US - when I get back, the '95 525i will be ready for the Dr Colorchip "wipe away the tiny sand chips" procedure.
Trending Topics
09-12-2010, 12:48 AM
#8
Seared
Rennlist Member
Rennlist Member
09-12-2010, 07:36 AM
#9
button queen
Thread Starter
Yes, you may lose a very small portion of the paint in the chip when you remove the smear. I wipe very lightly there after waiting an hour or two to let the fresh paint harden as much as possible. Wipe over a few times very lightly. To effectively cover a deeper chip or larger one, it will take several applications. The fender job took four or five.
In fact I happened to let smears dry for over two hours yesterday while I was struggling to replace that freakin' spoiler wall and they came off just fine.
I have, and the ColorChip folks have, had success removing week old smears (I called them to discuss these techniques). I kind of freaked out when I found it but got it off fine--just a bit longer to remove it.
In fact I happened to let smears dry for over two hours yesterday while I was struggling to replace that freakin' spoiler wall
and they came off just fine.I have, and the ColorChip folks have, had success removing week old smears (I called them to discuss these techniques). I kind of freaked out when I found it but got it off fine--just a bit longer to remove it.
Last edited by DanL993; 09-12-2010 at 10:49 AM.
09-12-2010, 10:47 AM
#11
Racer
Join Date: Nov 2006
Location: Arlington, TX
Posts: 279
Likes: 0
Received 0 Likes
on
0 Posts
Thanks for the credit card tip Dan!
I recieved my Dr. color chip kit a while back and was not able to do very well using the supplied gloves. A flat card makes great sense - can't wait to try it again, thanks!
I recieved my Dr. color chip kit a while back and was not able to do very well using the supplied gloves. A flat card makes great sense - can't wait to try it again, thanks!
09-12-2010, 11:02 AM
#12
Rennlist Member
Do they use a touch-up paint that isn't your normal everyday automotive paint ? If it removes the touch-up paint and not the existing paint, I would think so.
As for their kits, it looks like the Basic Touch-Up Paint Kit is all you would need.
09-12-2010, 11:47 AM
#13
Three Wheelin'
Have used both (Langka and Dr. Colorchip) -- and can attest that both work satisfactorily. I will agree, wholeheartedly that - in order to get a 'completely level' paint-job that you MUST 'do it' several times.
G.
G.
09-12-2010, 05:55 PM
#14
Drifting
I bought the Dr. Colorchip and it took them several tries to get it right. The second batch is still a little light but acceptable. One thing I do like about the Colorship is that when you wipe it off, you don't get the silver metallic base showing through as compared to a regular touch-up paint.
09-12-2010, 07:02 PM
#15
Addict
Rennlist
Lifetime Member
Rennlist
Lifetime Member
Dr Colorchip uses their own paint (according to them, required for their remover to work.)
I can tell you that it is a lot less stressful that colorsanding and then buffing the touched-up spot.
Last edited by Pete Lech; 09-13-2010 at 10:05 AM.