When you click on links to various merchants on this site and make a purchase, this can result in this site earning a commission. Affiliate programs and affiliations include, but are not limited to, the eBay Partner Network.
Thanks all for your help in this.
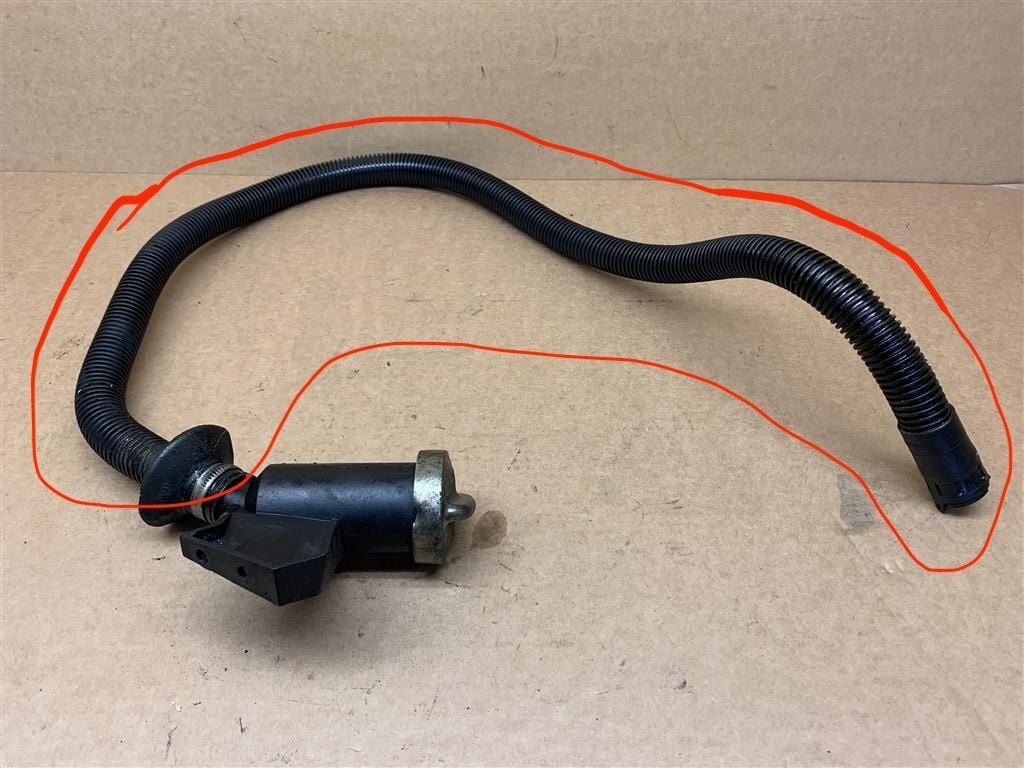
I have now changed this hose. I have seen funnier DIY work, I'll leave this to my workshop if I have to do this again.
I used the old hose to pull the new one through, and used duct tape to merge them. I agree with the above comments. This is PIA job, remember to lube the hoses, and be prepared to really struggle with the narrow passage.
The oil have to be drained to get the oil tank level below the filler hose outlet. I drained about 4 liters.
Cheers,
Tore
I'm having the same issue with filling hose (part number 993-207-212-02 in page 34) where it breaks at the neck attaching to the filler neck. Is there a DIY documented for this? Thanks in advance.
i replaced the oil filler hose also, for me it a long time. I took off the back bumper and pulled it out from the motor end. I made the mistake of not attaching a rope to the hose as I pulled it out. This way you can use the rope to pull the hose back through.
i used all kinds if flexible wire,rope, nylon, to get through the frame, I finally used a camera to get the fish tape through, then pull a rope through taped to the hose
i have a few pics on the above thread.
good luck
glenn
I did this job today on my 993TT, so I had to remove the intercooler, but otherwise all the same. Just some notes on this:
- Drain oil
- Remove oil filler entry assembly (two 10mm on the passenger side inner engine compartment and a 7mm clamp)
- Old tube is tough to get off the tank. I used a flat head to start and with the help of a buddy, he pulled on the engine compartment side and I wiggled it off, but not into the frame, but just enough to get it off the tank and attach the tape and rope.
- Oil will drip out and cause the tape to be slippery and not attach well, so stick an old rag in the tube basically plugging it, apply some brake cleaner and wrap it with duct tape. This step doesn't need to be crazy secure as you are just dragging the rope through the frame out to the engine compartment.
- Once the rope is secure, pull the tube from the engine compartment side out. It helps if you shove the few inches of tube on the tank side in the frame first.
Re-entry: I pulled the tube in reverse order I removed it, so I started in the engine compartment and pulled it down to the tank.
- Once you pull the old tube out, you should have a long piece of rope hanging out two ends of your car and an old tube on the engine compartment end of the rope.
- Disconnect the old tube from the rope.
- Pull the rope all the way through the NEW tube and out the other end. Let there be a few feet of excess rope. Last thing you want is to be pulling it hard and the rope disconnects from the new tube and gets pulled all the way through.
- With the rope inside the tube, coming out both ends, tape the end that will enter the frame first and ultimately attach to the oil tank. Make it clean, so it's not super fat and doesn't add much girth to the tube itself. But I suggest going pretty far up the rope. I went probably 8" up the rope and back down just because. Also, not sure if this was beneficial, but when I was done, the tube to rope tape job almost looked like a rocket. Meaning it had a bit of a coned transition which I thing may have helped it self guide around in the frame.
- Lastly, USE LUBE. I was stuck for 20 minutes, but added lube and she slid right into place.
Once you pull it through, you really just have to brute force it onto the tank's (large) nipple. Again, adding lube inside the tube and on the nipple helps.
Overall, it took around 2-3 hours, half of which was hitting roadblocks at pulling the new tube through and attaching the new tube to the tank. In both cases, lube helped.
Just replaced my oil filler tube. Overall spent about 2 hours in the process. Let me tell you there is no way this tube is going in without a good amount of lube 😂😂😂. I tried installing it without it, spent about 35-40 minutes in the process. Lubed it everywhere and within 10-15 mins went all in! Now you know! Lube is a MUST.
The oil filler tube is a bit like the engine under tray. The best practice is to simply remove it. The plastic tends to get brittle, and eventually disintegrates. This is not something you want in your engine oil.
Remove it? Perhaps you're confusing with the retractable filler spout which sits inside the filler neck under the oil cap?
What's being discussed is the long ribbed hose which connects from the bottom of the filler neck, runs through the chassis and exits out RR fender well and connects to the oil tank. It's a bear of a task to run it through and that's what all the fuss is about.
 07-11-2016, 05:14 AM