Rear Lexan instalation with flush mount frame.
 12-26-2009, 08:36 PM
#1
Burning Brakes
Thread Starter
Join Date: Aug 2007
Posts: 955
Likes: 0
Received 0 Likes
on
0 Posts
I am installing a flush mount lexan kit from GT racing. Thought Id put up a few pics and how I did it. Im sure there is/ are better ways of doing this but here is what I came up with.
First pic is of my glass removal technique. Since its glued in I figured Id just remove it the easy way.

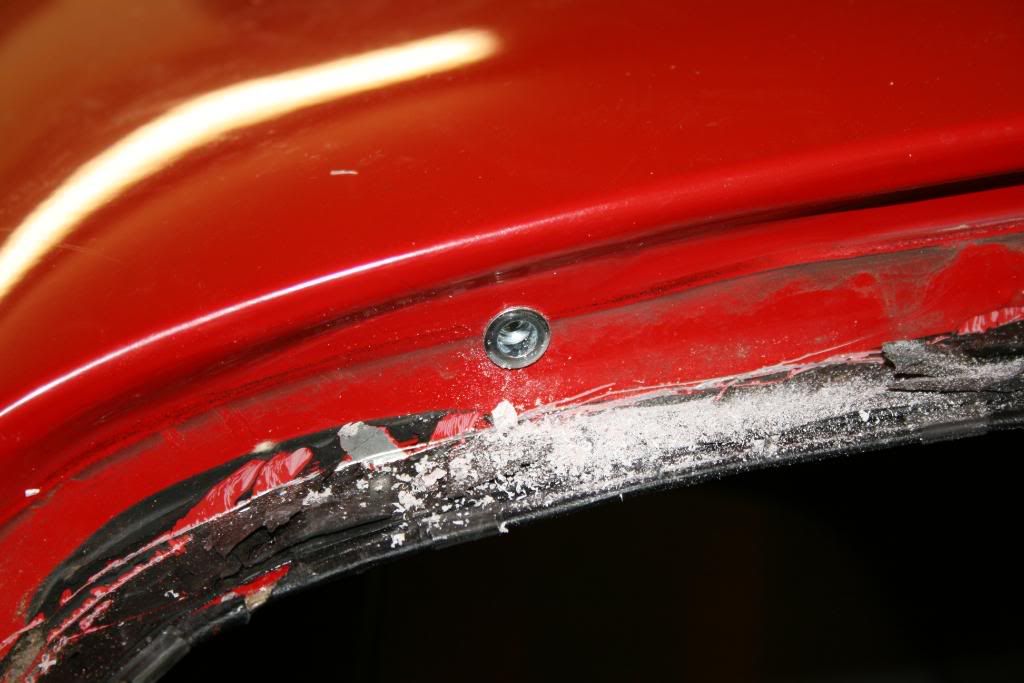
Next I test fitted the frame and started drilling holes for my rivnuts that will allow me to take this thing off and on if I need to work in the back of the car.


I next bolted in the frame and fitted the Lexan to fit the frame better. All this plastic stuff requires a little fitting to be "good enough" for me anyway. Im sure others would make it perfect but its a race car after all. I have to be carefull as my **** nature will get the best of me.
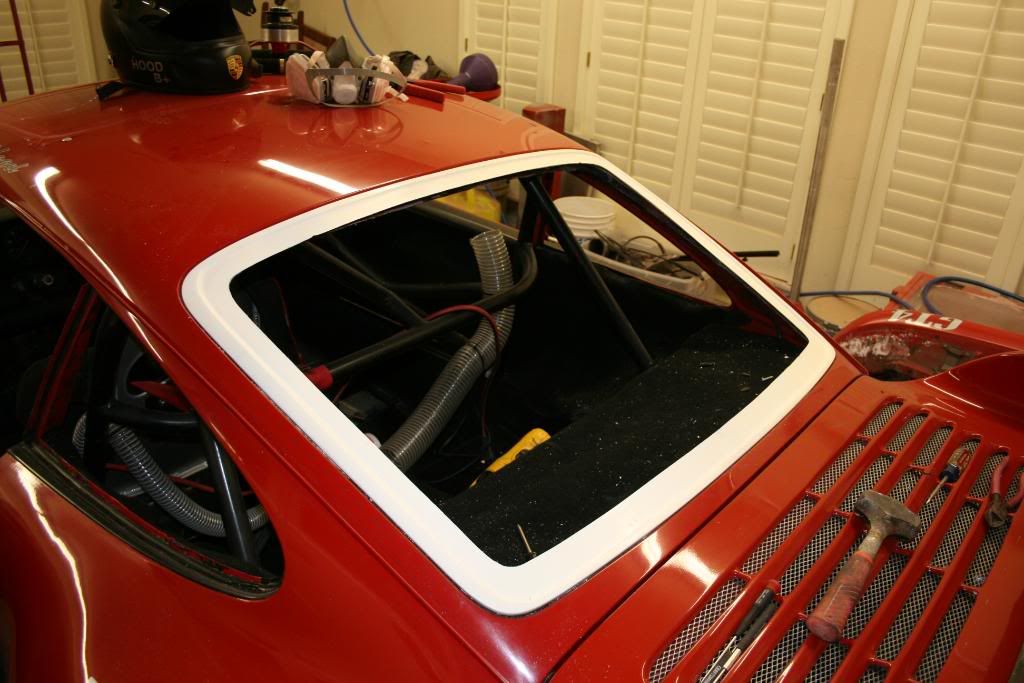

I next drilled all the holes to bolt down the lexan itself and then painted the frame black using bed liner. This stuff works pretty well and looks like black rubber when done. Again, good enough...
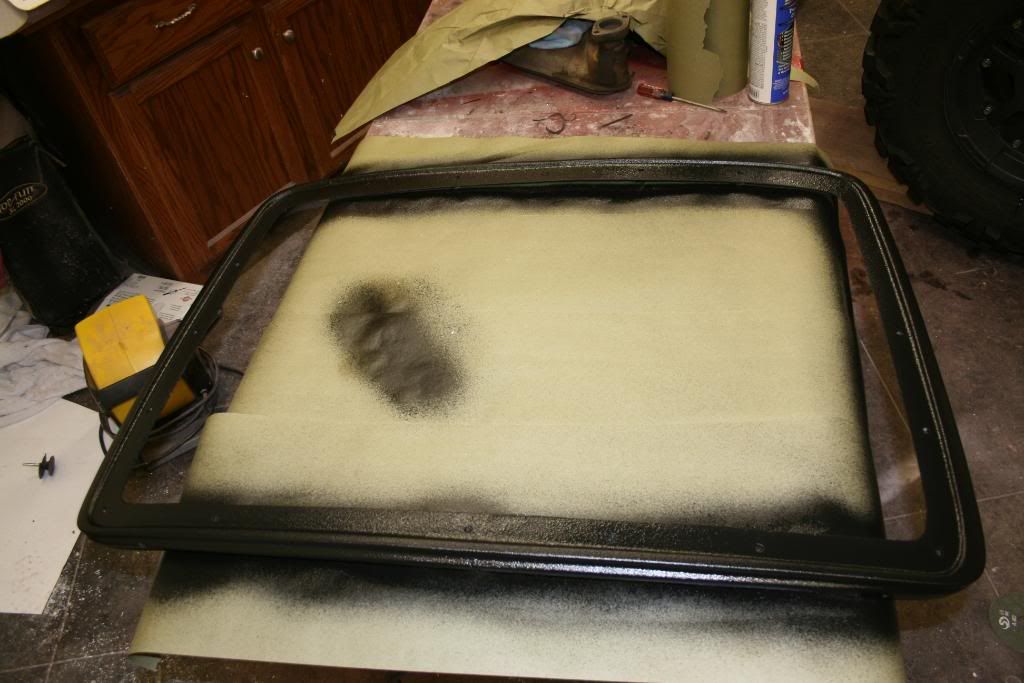
I will put rivnuts in all the holes and screw the lexan to the frame. I also plan on making a middle support to keep the lexan from pushing in at speed as many have experienced.
I have a lot more to do so Ill post more pics as progress happens. I have to order more rivnuts so it will be a week or two before I get all this done but moving along pretty good so far.
Jeff
First pic is of my glass removal technique. Since its glued in I figured Id just remove it the easy way.
Next I test fitted the frame and started drilling holes for my rivnuts that will allow me to take this thing off and on if I need to work in the back of the car.
I next bolted in the frame and fitted the Lexan to fit the frame better. All this plastic stuff requires a little fitting to be "good enough" for me anyway. Im sure others would make it perfect but its a race car after all. I have to be carefull as my **** nature will get the best of me.
I next drilled all the holes to bolt down the lexan itself and then painted the frame black using bed liner. This stuff works pretty well and looks like black rubber when done. Again, good enough...
I will put rivnuts in all the holes and screw the lexan to the frame. I also plan on making a middle support to keep the lexan from pushing in at speed as many have experienced.
I have a lot more to do so Ill post more pics as progress happens. I have to order more rivnuts so it will be a week or two before I get all this done but moving along pretty good so far.
Jeff
 12-26-2009, 08:42 PM
#2
Burning Brakes
Thread Starter
Join Date: Aug 2007
Posts: 955
Likes: 0
Received 0 Likes
on
0 Posts
Oh from my scale at home, so far have saved another 17 +/- pounds off the rear of the car with this kit. This includes the rear and quarter glass and flush mount frames in both places. I thought that was pretty good. Total to date off the rear is close to 70 pounds off the rear alone.
Jeff
Jeff
12-26-2009, 10:29 PM
#4
Race Car
Boy look at you go, its been a busy few weeks, first the new exhaust and now the window. That 70 lbs is going to be noticeable coming down from you previous weight.
Have you documented all of the weight loss modifications you have made to your car? If so can you share pm me if you have something.....
Really nice work.
Have you documented all of the weight loss modifications you have made to your car? If so can you share pm me if you have something.....
Really nice work.
12-27-2009, 04:07 PM
#6
Burning Brakes
Thread Starter
Join Date: Aug 2007
Posts: 955
Likes: 0
Received 0 Likes
on
0 Posts
Yup, cleaned it all off, taped it up and put bed liner all the way around. Good thing too is I can remove all this in about 10 min to inspect the metal at any time.
More pics to come in the next week or so...
More pics to come in the next week or so...
Trending Topics
12-27-2009, 07:15 PM
#8
Racer

Join Date: Oct 2005
Location: Oceania
Posts: 477
Likes: 0
Received 0 Likes
on
0 Posts
12-28-2009, 04:11 PM
#10
Burning Brakes
Thread Starter
Join Date: Aug 2007
Posts: 955
Likes: 0
Received 0 Likes
on
0 Posts
Do you mean the GT racing parts? or my hardware parts? If you go to GT racing website look under 911 parts all the way to the bottom. The weights they quote on stock parts is off but the fiberglass piece fit pretty well. The side window pieces are not as good but will still work fine. I would never do this on a street car but a track car, it is a nice option and no broken glass potential. I can tell you, when I broke the window out, there was glass everywhere.
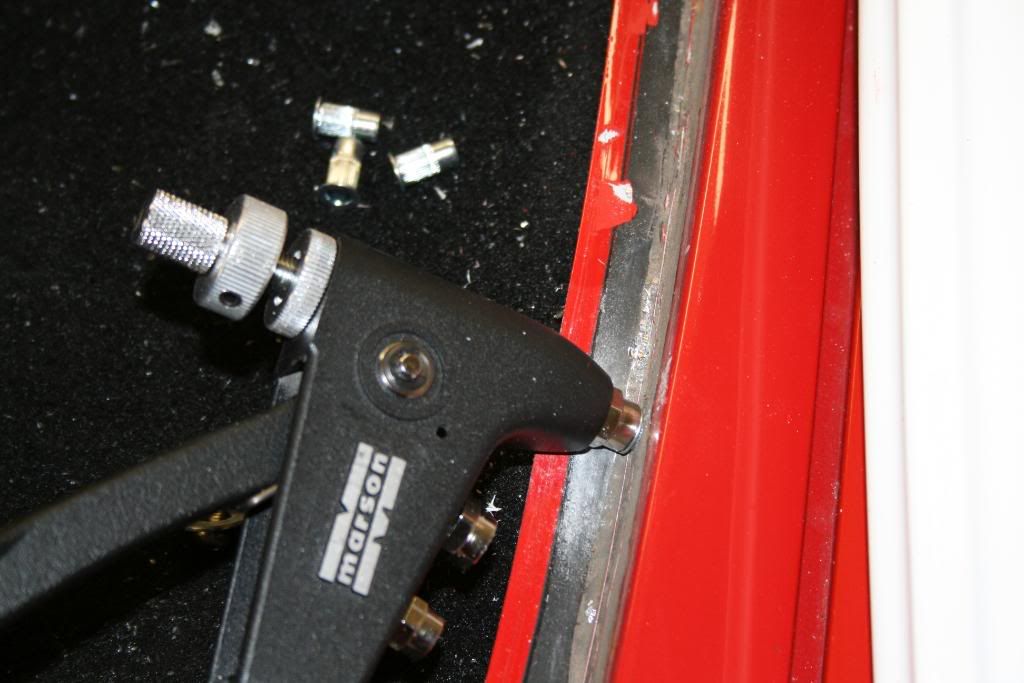
the Hardware I used was bought at Fastenal and these are just #10 32 pitch Nut certs or rivnuts. I ordered some #8 size to put the side windows in. You could also use some Dzus fasteners for the lexan but these worked well for me and I already had them. I used #10 Stainless steel screws and washers with an allen head. You need the special tool to install the rivnuts but they sell one thats pretty cheap.
the Hardware I used was bought at Fastenal and these are just #10 32 pitch Nut certs or rivnuts. I ordered some #8 size to put the side windows in. You could also use some Dzus fasteners for the lexan but these worked well for me and I already had them. I used #10 Stainless steel screws and washers with an allen head. You need the special tool to install the rivnuts but they sell one thats pretty cheap.
01-03-2010, 03:27 PM
#11
Burning Brakes
Thread Starter
Join Date: Aug 2007
Posts: 955
Likes: 0
Received 0 Likes
on
0 Posts
Still waiting on hardware to come in to finish the install of the rear parts so I decided to remove my glued in front glass windshield. I know glass has some benifits but after taking it out Im really glad I did for several reasons.
1. It was glued in and if I had a break at the track there would be NO easy quick replacement.
2. Im sure some could take this glass out with out breaking it but that was impossible for me because how thick and tough that black urathane glue was. When it broke, little shards went everywhere in the cabin and outside the cabin. Way more than I thought. So getting the glass out really seems like a BIG safety improvement. If you race with out a visor behind glass, good luck if something strikes your windshield at speed...
3. Saved another 13 pounds off the top of the car. Windshield with rubber and most of the glue removed weighed 26 plus pounds. Some of the weight is in the shop vac and still have some glue to cut out...") New lexan and frame is only 13 pounds total.
New lexan and frame is only 13 pounds total.
Total weight off the top of the car since going from a stock class car to now is 63 pounds. Plus all the exhaust weight, my winter weight loss has a grand total of around 90 pounds, most off rear and up high. Still have to weigh 2670 so a good cornerbalance with ballast down low is in short order, along with some minor cage additions. Dry I should be sitting at the mid 2350 range... Good thing I saved my lead ballast. Also gives me room to add structure to my cage to the suspension pick up points etc...
Pics to come when back from vacation. Be three weeks or so...
1. It was glued in and if I had a break at the track there would be NO easy quick replacement.
2. Im sure some could take this glass out with out breaking it but that was impossible for me because how thick and tough that black urathane glue was. When it broke, little shards went everywhere in the cabin and outside the cabin. Way more than I thought. So getting the glass out really seems like a BIG safety improvement. If you race with out a visor behind glass, good luck if something strikes your windshield at speed...
3. Saved another 13 pounds off the top of the car. Windshield with rubber and most of the glue removed weighed 26 plus pounds. Some of the weight is in the shop vac and still have some glue to cut out...
New lexan and frame is only 13 pounds total.Total weight off the top of the car since going from a stock class car to now is 63 pounds. Plus all the exhaust weight, my winter weight loss has a grand total of around 90 pounds, most off rear and up high. Still have to weigh 2670 so a good cornerbalance with ballast down low is in short order, along with some minor cage additions. Dry I should be sitting at the mid 2350 range... Good thing I saved my lead ballast. Also gives me room to add structure to my cage to the suspension pick up points etc...
Pics to come when back from vacation. Be three weeks or so...
02-06-2010, 07:56 PM
#12
Burning Brakes
Thread Starter
Join Date: Aug 2007
Posts: 955
Likes: 0
Received 0 Likes
on
0 Posts
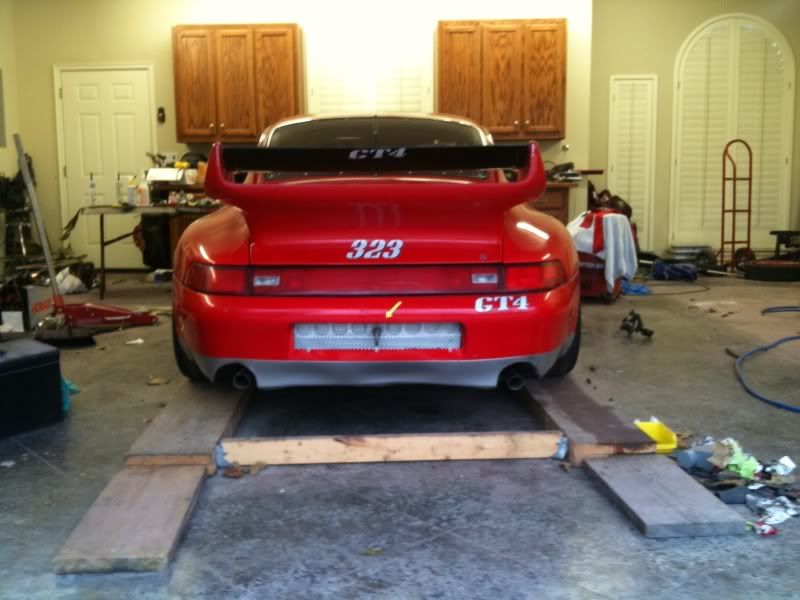
Finall got around to finishing my project. Fit really was pretty good. Had to trim all the lexan to fit the frames but turned out looking good.
Put one aluminum support in the center of the rear window. I can add more if needed but will start here. I also drilled out the rear bumper and took all assorted junk from bumper cover. I removed around 100 pounds from the rear and roof of the car.
I can now add back my passenger seat and just a little ballasst and still make minimum weight for GT4. Dry weight was 2391. With me, seat and 40 of lead I was right at 2680 and min fuel.
It will be easy too put the lead where ever I need it to get the corner weights to come out right.
Any advice on corner balancing and fuel load. Do it with full fuel, min fuel, half tank? I may start another thread in the racing forum to discuss this after a good search...
Here are some almost final pics. The inside will be stripped and painted after I have the cage gone over and add just a few extra supports etc...
Enjoy.\

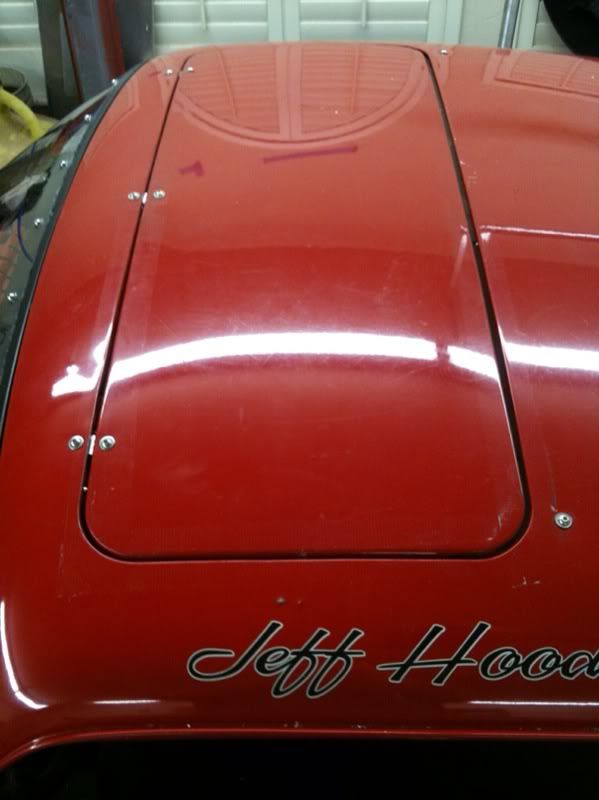
 I decided to mount my sunroof skin in a MUCH stronger way. Its really stout now. Bolts match the rest of the car.