Finally a plug-n-play LED solution for 964/993 gauges
#226
Burning Brakes
resurrecting an old thread (one that I suppose I would be directed to if I started a new one, lol).
Anyway, this option from Carmagic is awful. Far from a plug-and-play option, they are fragile and poor-fitting. If you don't get the bulb housings seated right the first time, and you attempt to bend the metal tabs a SECOND time, they will likely break off. That's what happened in my case.
Money down the drain. Caveat emptor.
The following users liked this post:
will007 (02-01-2021)
#227
Rennlist Member
I have a Ď03 996 convertible, and really canít see my gauges w/ top down in daylight and would really like to upgrade to ledís. Probably warm white, (unless thereís a much brighter orange or red). Does anybody make a kit to convert over to ledís? I appreciate your time and help in advance. Any extra bases etc. I would need also. Thanks.
#230
Intermediate
Yet another resurrection. The Superbright LED's work great and I replaced all of my warning lights (except airbag) with colored LED's that match the respective filters. The fog/defrost/headlight ***** were plug and play with other bulbs from Superbright as well. I'm holding off on the console until I can gain a little confidence with my soldering iron! Only troubles were bending the tiny wings a tiny bit for better fitment/contact, as well as the 50/50 chance on polarity. Just put them in, if they don't work, rotate 180.
As has been mentioned many times, the bases for the general lights are the PITA. I ordered them from CrazyLED (the UK site), but because of troubles beyond their control, they cannot currently ship overseas. Does anyone know of a decent US source for these bases? I have the bulbs from Superbright, but no bases. If it's an impossibility, I have a buddy in Luxembourg that can play middle-man with the CrazyLED gents, but I hate to call in a favor for something so simple!
As has been mentioned many times, the bases for the general lights are the PITA. I ordered them from CrazyLED (the UK site), but because of troubles beyond their control, they cannot currently ship overseas. Does anyone know of a decent US source for these bases? I have the bulbs from Superbright, but no bases. If it's an impossibility, I have a buddy in Luxembourg that can play middle-man with the CrazyLED gents, but I hate to call in a favor for something so simple!
#231
Rennlist Member
Yet another resurrection. The Superbright LED's work great and I replaced all of my warning lights (except airbag) with colored LED's that match the respective filters. The fog/defrost/headlight ***** were plug and play with other bulbs from Superbright as well. I'm holding off on the console until I can gain a little confidence with my soldering iron! Only troubles were bending the tiny wings a tiny bit for better fitment/contact, as well as the 50/50 chance on polarity. Just put them in, if they don't work, rotate 180.
As has been mentioned many times, the bases for the general lights are the PITA. I ordered them from CrazyLED (the UK site), but because of troubles beyond their control, they cannot currently ship overseas. Does anyone know of a decent US source for these bases? I have the bulbs from Superbright, but no bases. If it's an impossibility, I have a buddy in Luxembourg that can play middle-man with the CrazyLED gents, but I hate to call in a favor for something so simple!
As has been mentioned many times, the bases for the general lights are the PITA. I ordered them from CrazyLED (the UK site), but because of troubles beyond their control, they cannot currently ship overseas. Does anyone know of a decent US source for these bases? I have the bulbs from Superbright, but no bases. If it's an impossibility, I have a buddy in Luxembourg that can play middle-man with the CrazyLED gents, but I hate to call in a favor for something so simple!
#232
Intermediate
I know nothing about the 996's, but SuperBrightLEDs.com has almost anything you might be looking for! Now if they just had the bases we need...
#233
Rennlist Member
it seems my year ‘03, was the first to get LED’s, and of course mine are soldered in, so, it’s a pain to find someone that would do a swap to the bright white that I’d like to have, so I can actually see them in daylight and with my top down. It’s frustrating for sure. I’m 81, and at my age I’m not that good at soldering fine wires. I’ll come across someone some day that can help. Thanks.
#234
Rennlist Member
Oh I can actually contribute here! I reached out to the person who works on the B8.5D 509T plugs.
For folks in the US there is an eBay link that he referred me to: https://www.ebay.co.uk/itm/195549945310 Hope it helps someone else take on this project!
For folks in the US there is an eBay link that he referred me to: https://www.ebay.co.uk/itm/195549945310 Hope it helps someone else take on this project!
#235
Rennlist Member
Oh I can actually contribute here! I reached out to the person who works on the B8.5D 509T plugs.
For folks in the US there is an eBay link that he referred me to: https://www.ebay.co.uk/itm/195549945310 Hope it helps someone else take on this project!
For folks in the US there is an eBay link that he referred me to: https://www.ebay.co.uk/itm/195549945310 Hope it helps someone else take on this project!
This has been a great post and thought I should add my experience to help those coming after me.
1. Components
Bulb Holder -- I ordered them from the UK -- http://www.crazyleds.co.uk/
a. Holder Type : 509THOLDER > B8.5D 509T Twistlock Bulb/LED holder
b. Ordered 40 of them to have spares (I did break a couple)
c. They are about $0.35 each. With shipping to CA the cost was $20.00
LED Lights -- I ordered them from the US -- https://www.superbrightleds.com/
a. 74-WWHP3 : Warm White > 16 (extra to do the Climate Control Unit as well)
b. 74-BHP3 : Blue > 1
c. 74-GHP3 : Green > 4
d. 74-AHP3 : Amber > 4
e. 74-RHP3 : Red > 13
f. the total with shipping was $99.00
2. Install -- Instrument Panel
Bulbs into holders
a. A bit stiff, so you have to force the LED into the holder.
b. Keep the bulbs organized by color. You can tell the Warm White from the others. However, the LEDs look the same for the other colors.
Remove instruments
a. Use a flat blade screwdriver or similar to pry up either the clock or fuel indicator gauge (starting from left or right), careful to not damage the rubber gasket which "holds" the gauge in place or the gauge or panel. I use a plastic blade for removing interior panels. "Greasing up" the rubber also helps -- ad good time to clean them and freshen them up at the same time. Once you get the first out, you can push from the rear to get the other gauges out.
b. The difficult one is the Tach gauge as it will bump up against the steering column. The trick (I believe Tor was the originator) is to push the gauge out and REMOVE the rubber ring in order to get to the back of the gauge.
c. TIP! -- before removing the gauges turn on the car ignition and take a photo of each gauge to get an idea of what color the warning lights are and their position.
Remove factory bulbs
a. The easiest way is to use a small flat head screwdriver -- there is a slot in each bulb socket. Just turn 90 degrees counter-clockwise.
b. IMPT! -- do not change/remove the bulbs for the AIRBAG, CHECK ENGINE or AUTO DOOR LOCK/REMOTE warning lights. Especially the AIRBAG and CHECK ENGINE -- it will cause a code failure and you will see it and the "!" warning light go on each time you start the car. Eventually it does go off. The only remedy is to have the code reset. I had my local Porsche garage -- Hi-Tec Automotive -- do it and it was free and took them 2 minutes to do.
Install LED bulbs
a. The holders I am using are a bit tight to get in and be able to turn. So you have spread open the metal tabs on both ends a little bit. Just using your thumb to push up is sufficient. Not too loose or you won't get a good connection. Tight is fine, just not so tight that it starts to rub away at the contact on the gauge board.
b. TIP! -- Just remember to take your time to get the bulb flush into the hole before turning.
c. I also used a pair of needle nose pliers to help twist the bulb in -- clockwise.
d. TIP! -- Test that the light works before moving on to the next bulb or gauge. Turn on the ignition switch and you can see if the bulbs light up or not. If not, remove the bulb and turn it 180 degrees and try again. The LEDs have a polarity, so if they are in "backwards" will not light up. My first time in success rate was about 50%.
Install the instrument gauges
a. Clean the rubber gaskets to bring them back to new.
b. Push the gauges back in by hand -- visually keeping them level.
c. For the Tach, you need to install the rubber gasket first.
d. TIP! -- Sometimes it is helpful to "wet" the opening so that the rubber slides back in smoothly vs. wanting to slide to the front and over the gauge.
DONE! The light is much brighter and still has that warm look to them (not as warm as factory but not cool at all). I especially like that I can now see the turn signal light as I can't really hear the flasher, so I rely on the light to see if on or not. (side note -- would love to update the indicator stalk to make them a 3-peater when you tap it like the new cars -- anyone done that? PM me!)
It's about a 1 hour job if you prepare the bulbs first and follow a systematic approach. I'm going to do the CCU later after I refurbish it (send it to Tor?)
Great update for under $150.
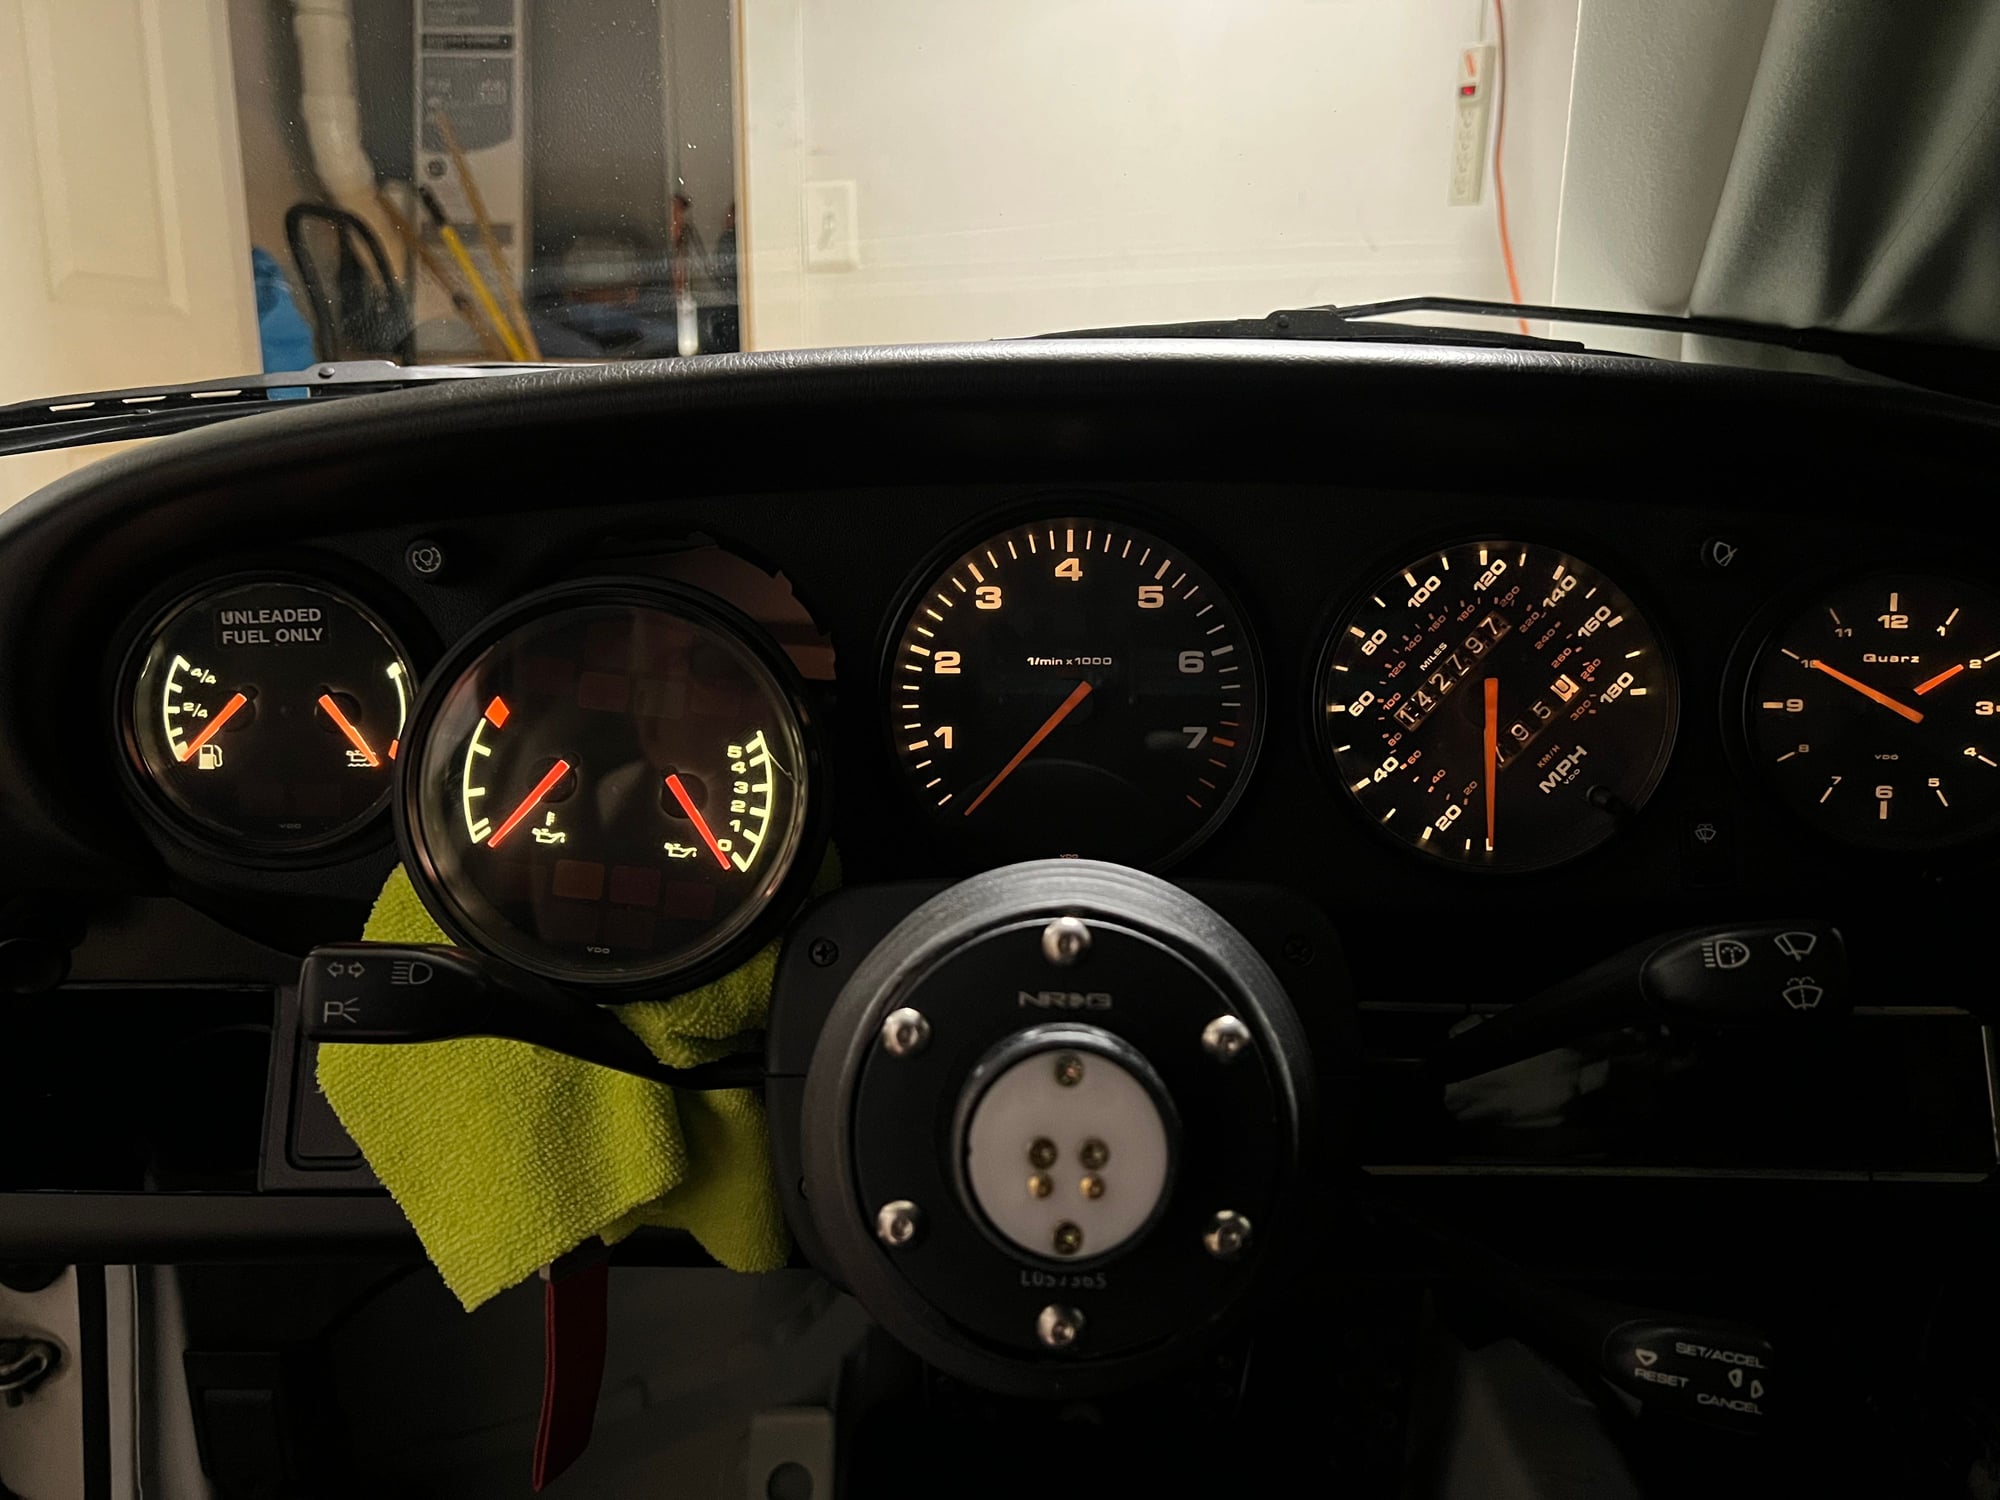
Compare two gauges on left to analog lights in other instruments
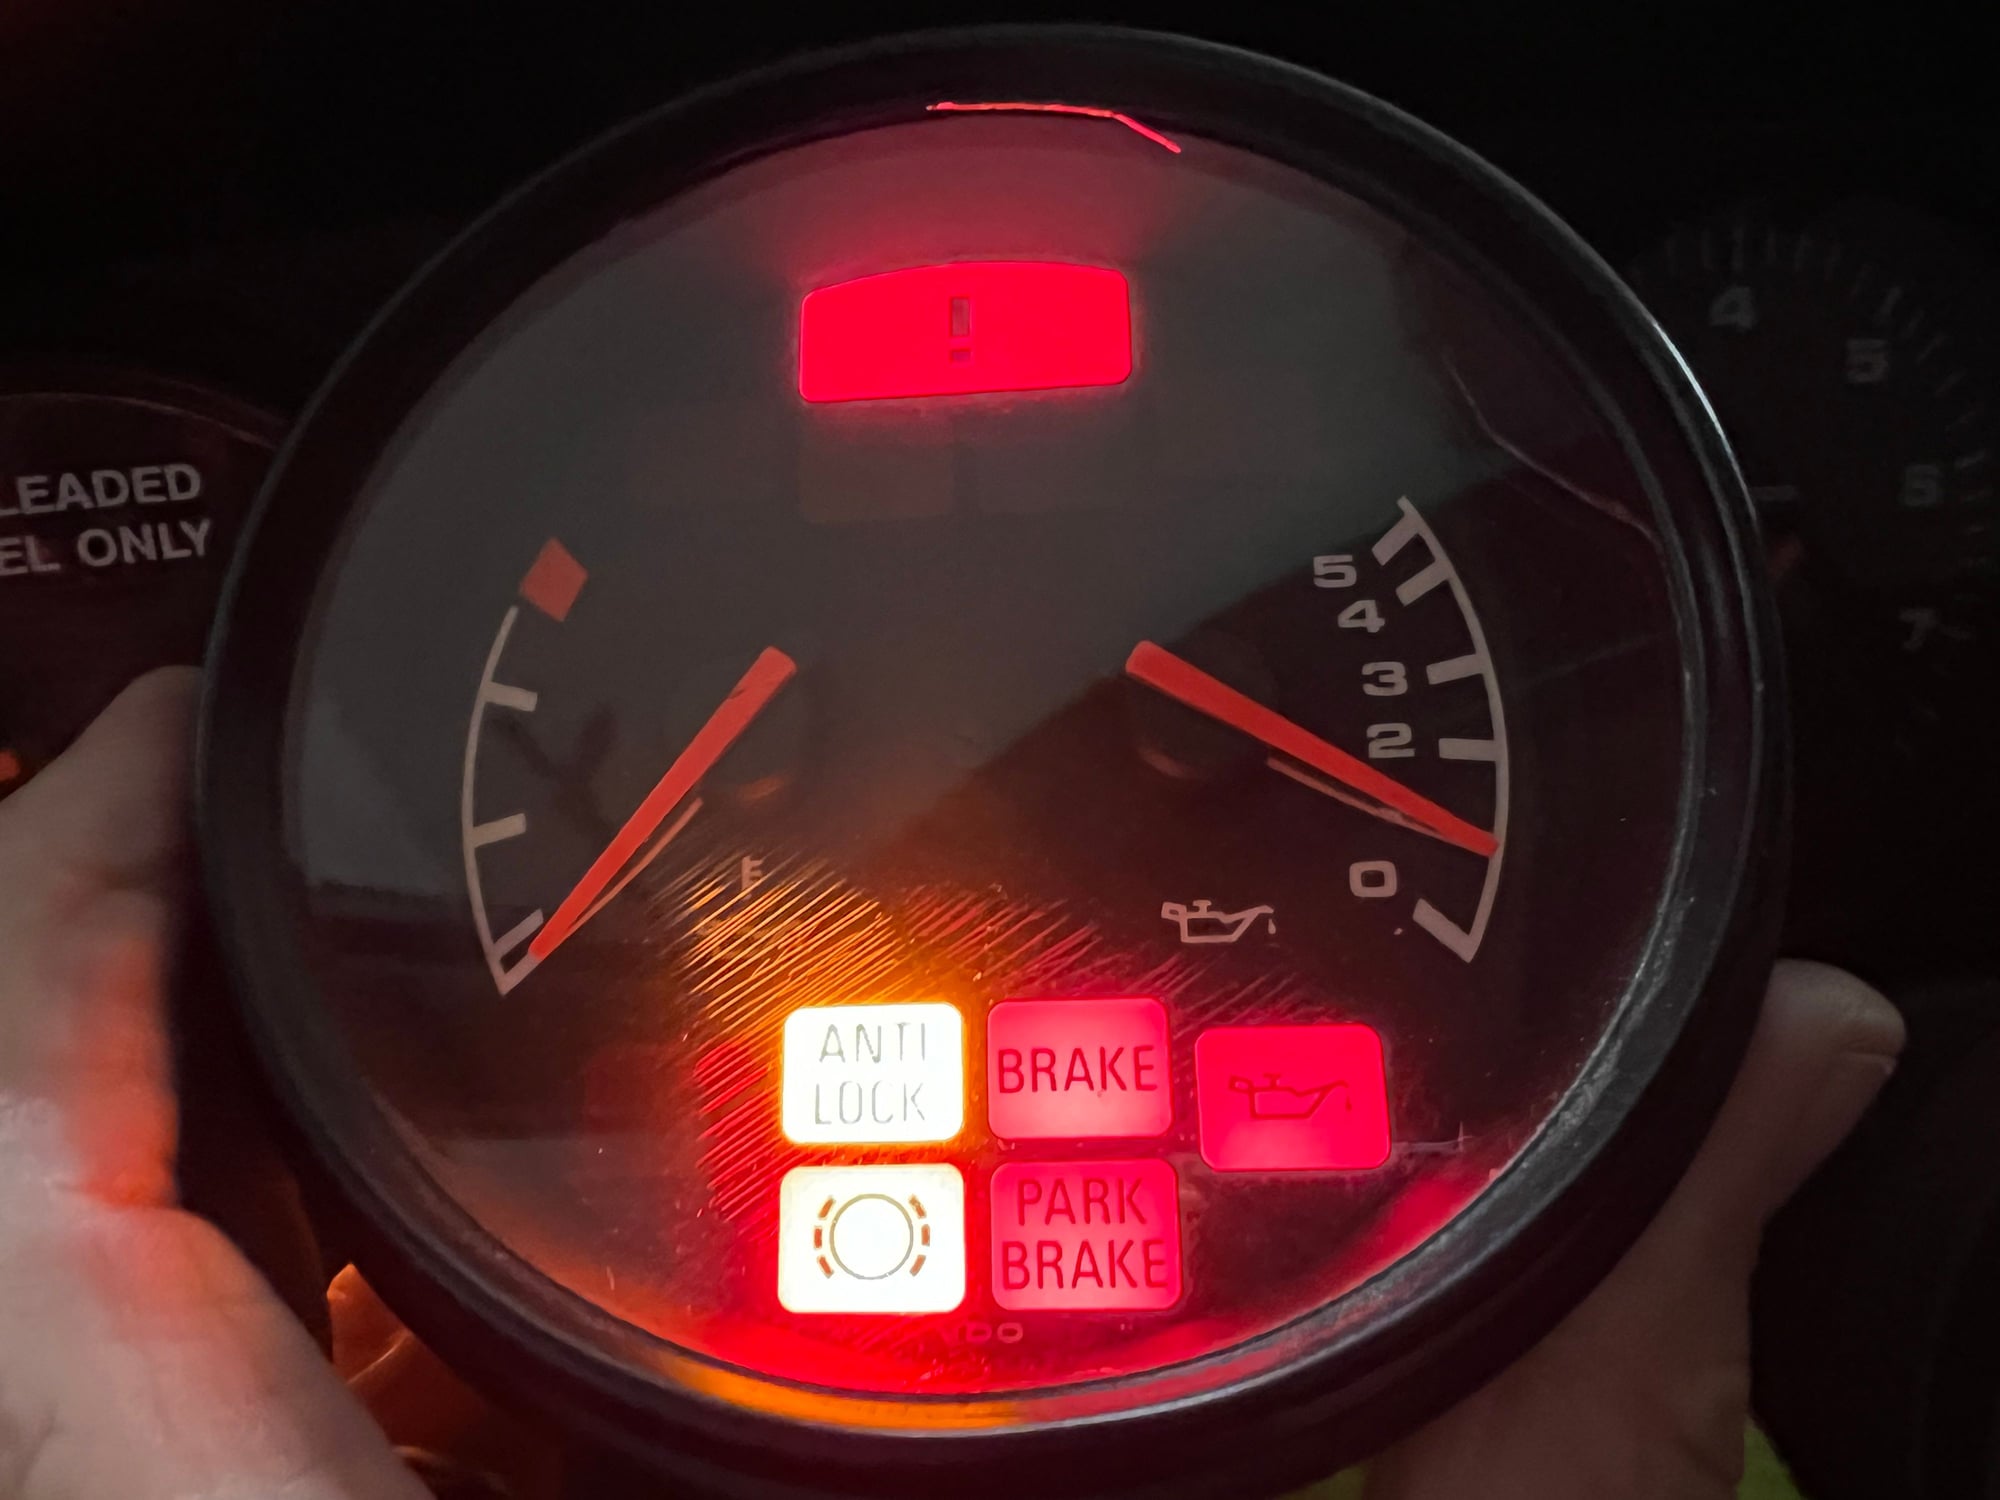
Two warning lights replaced
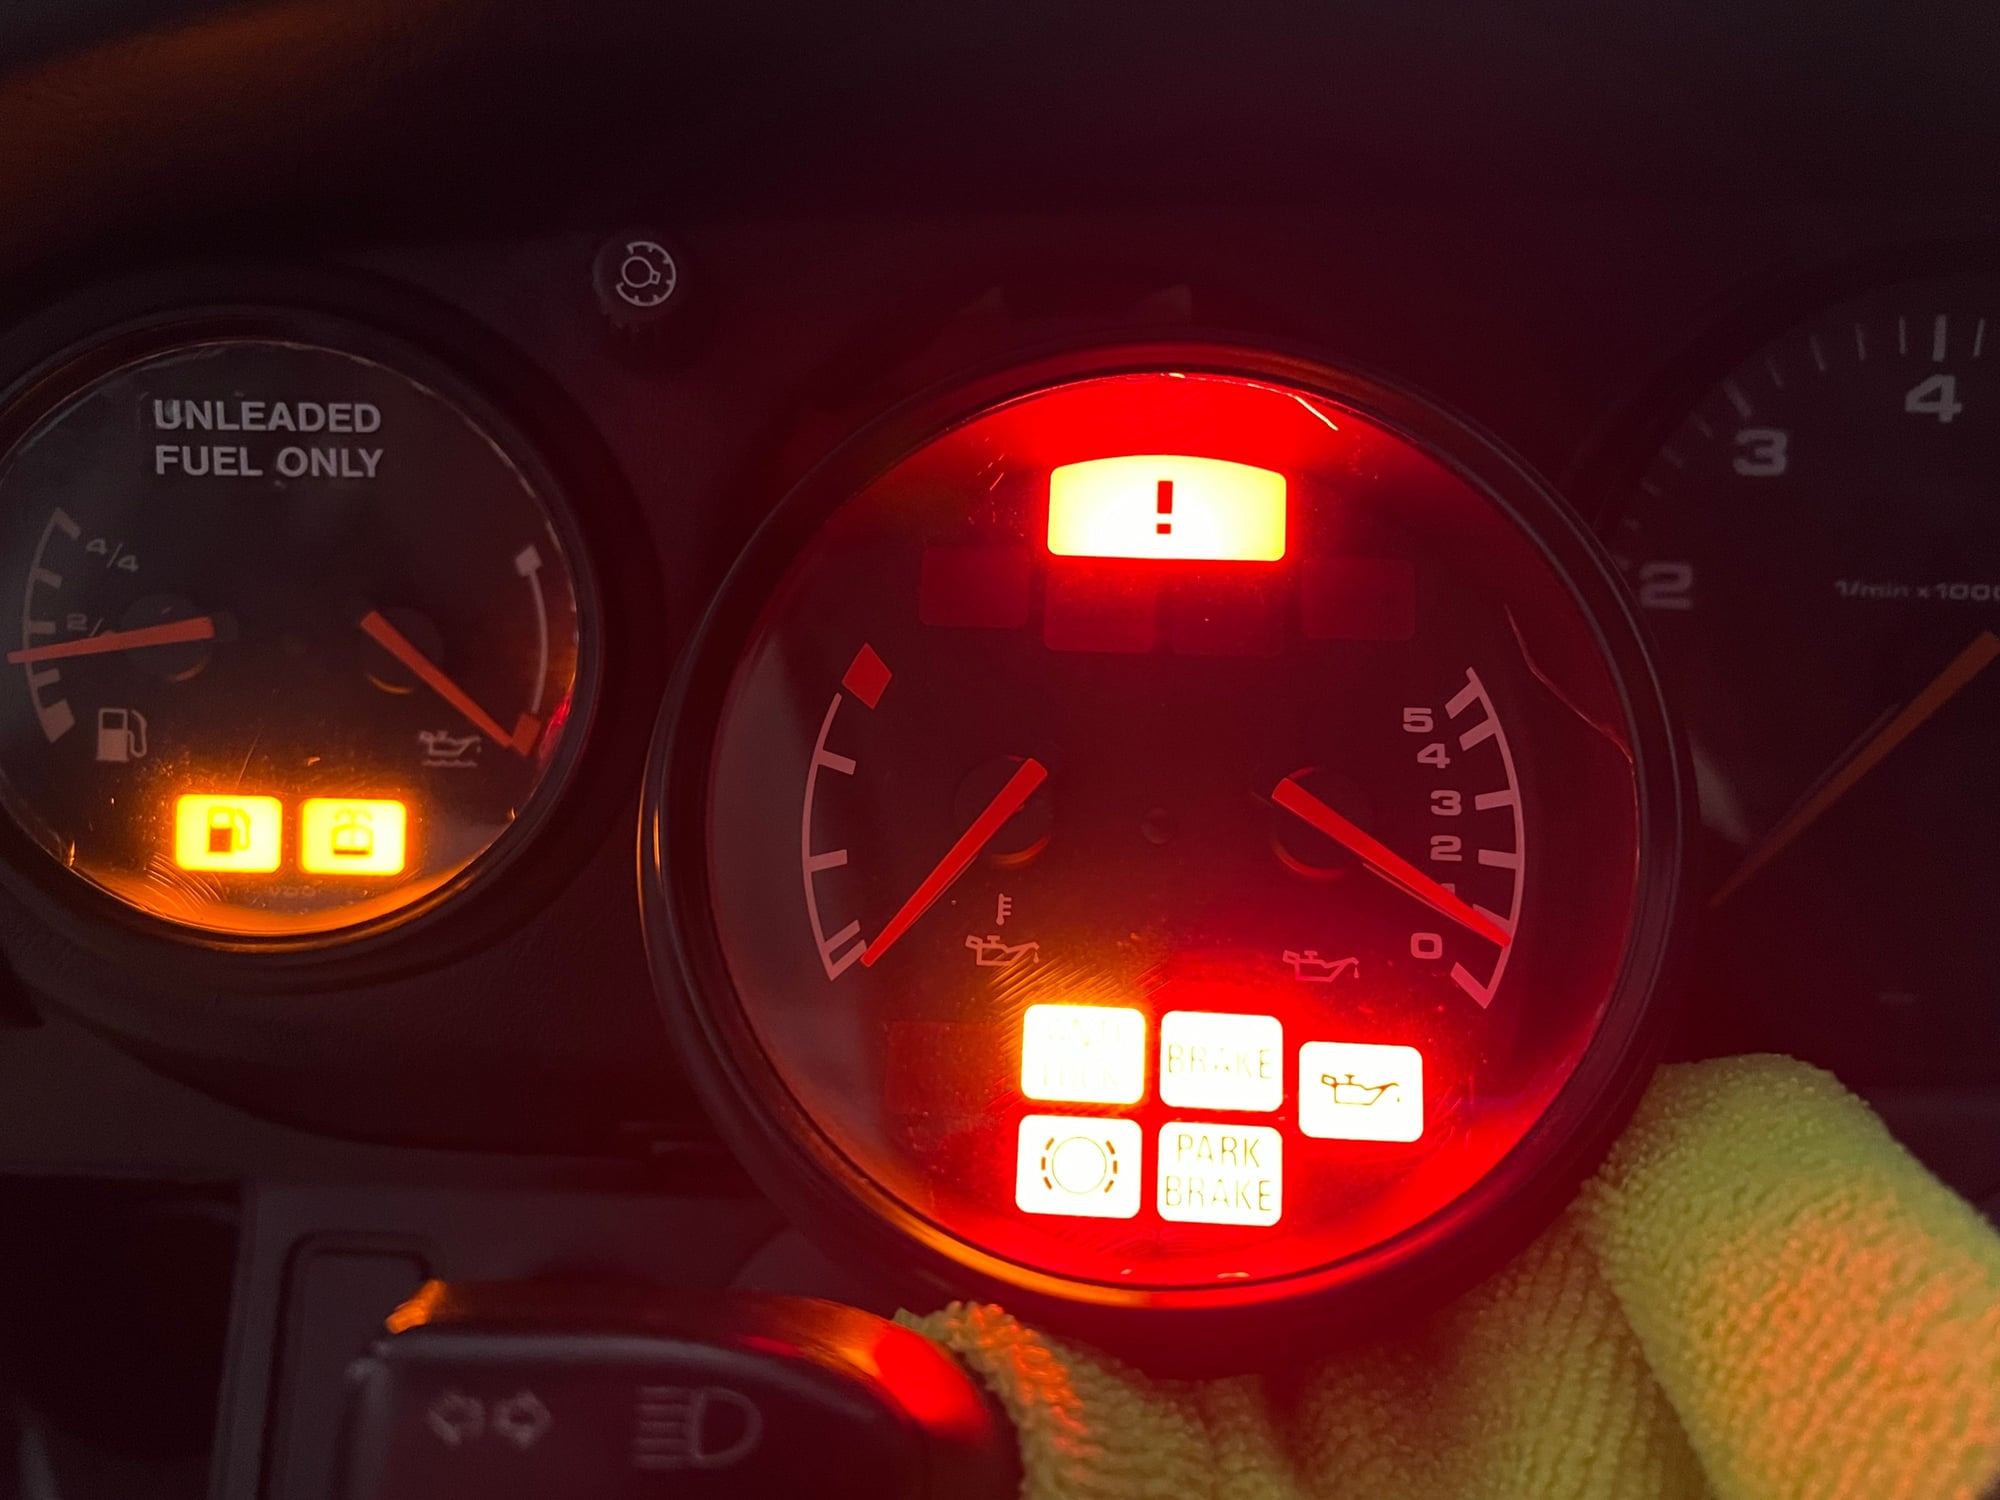
All warning lights replaced
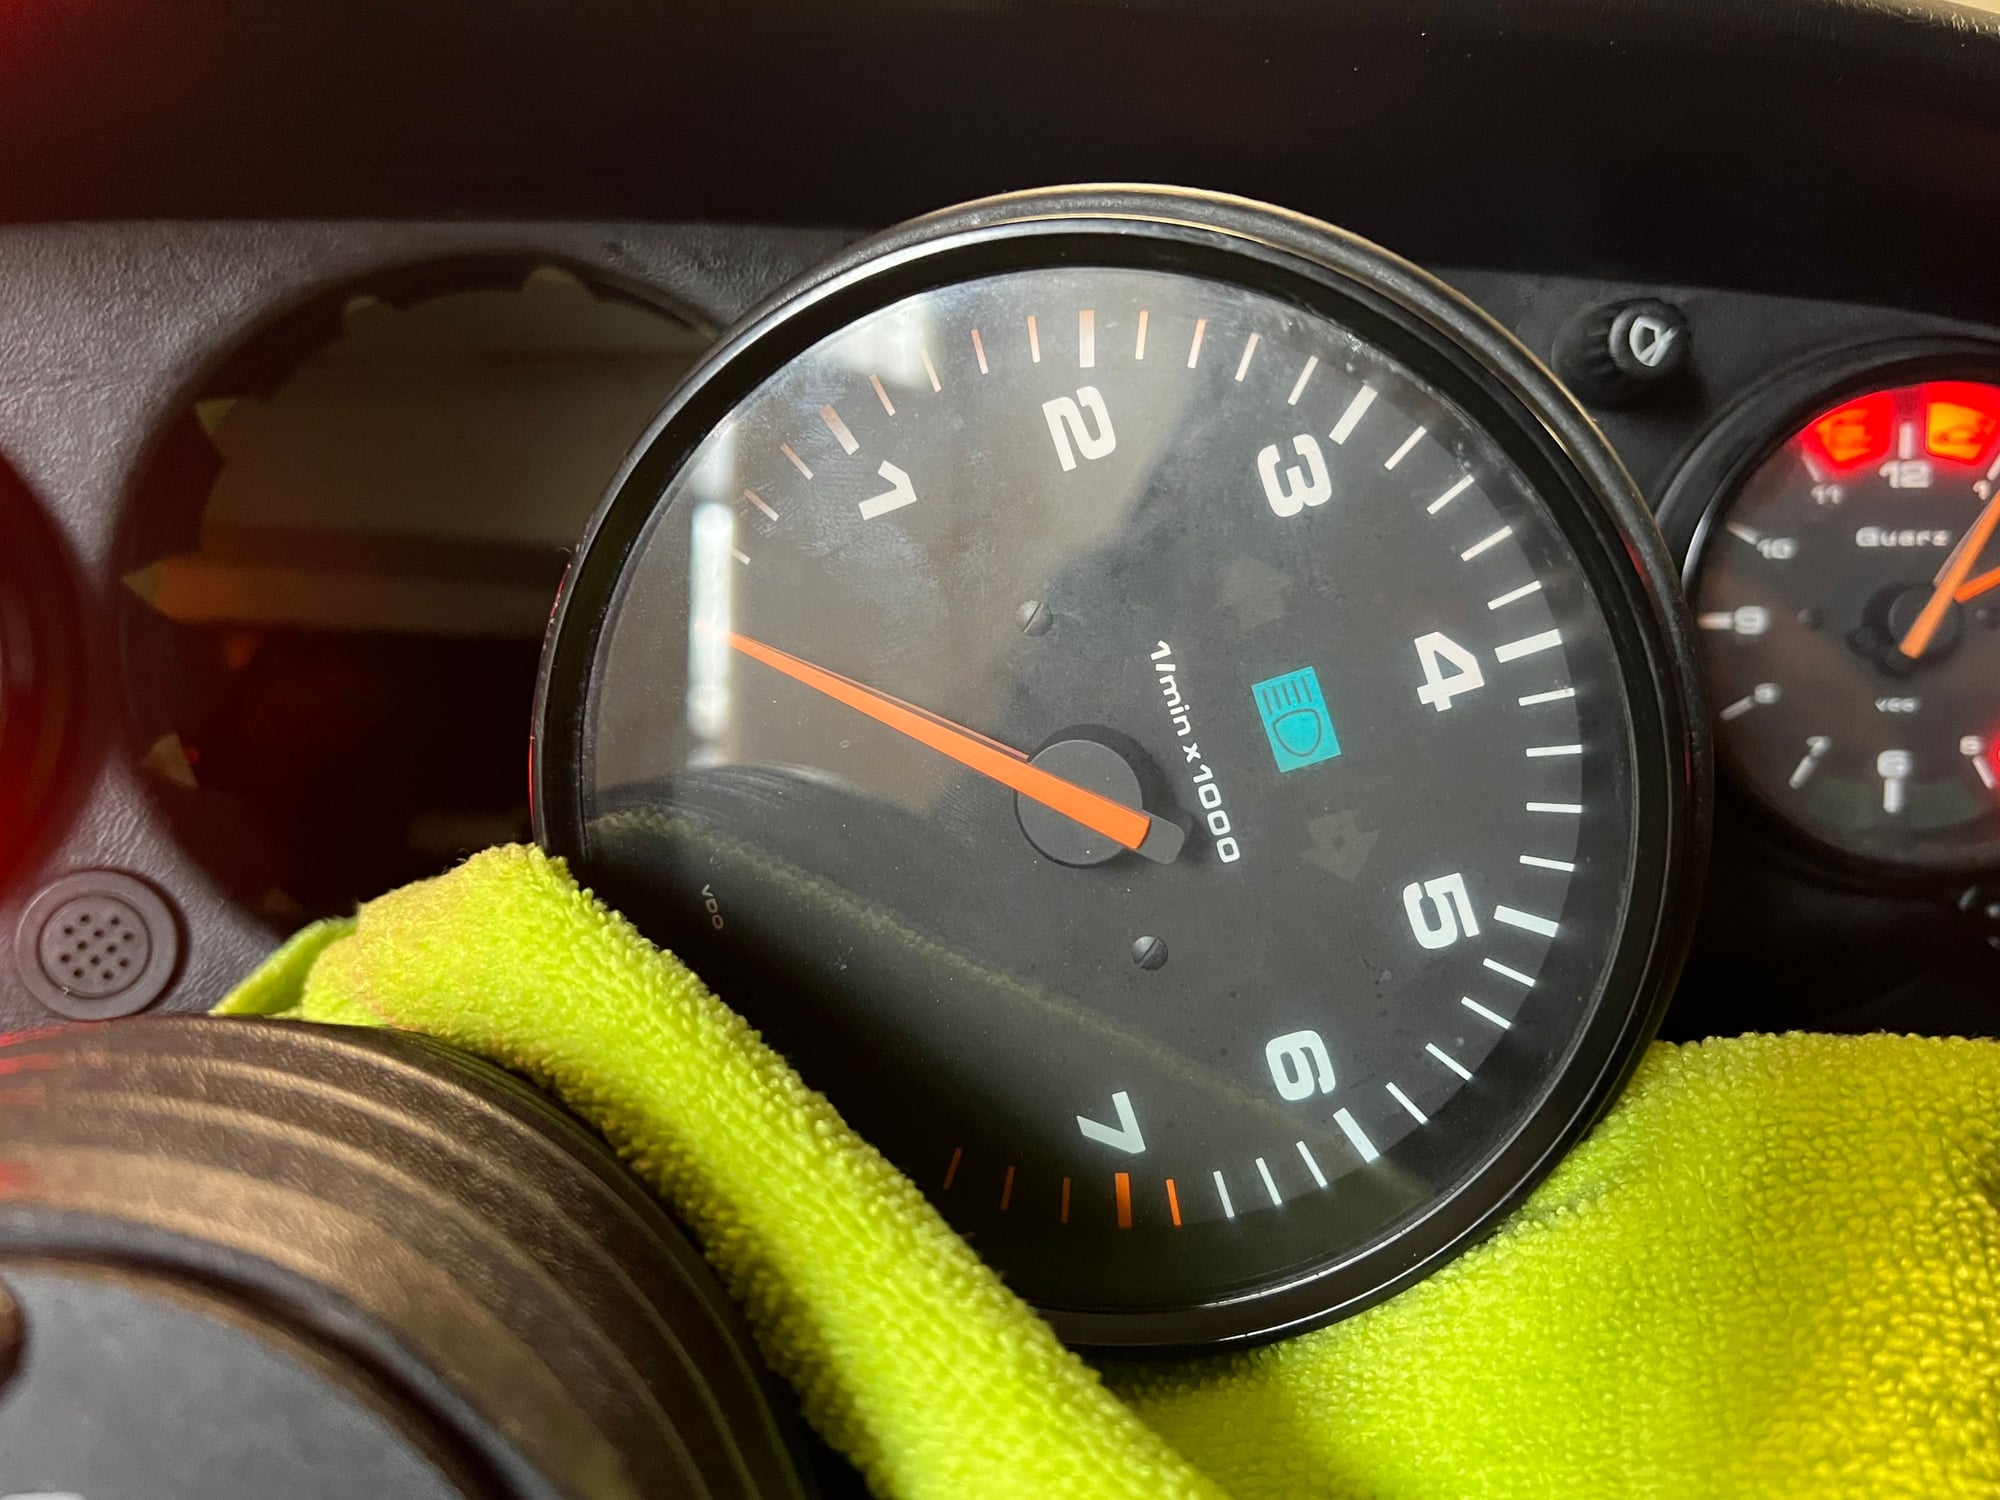
Old high beam indicator
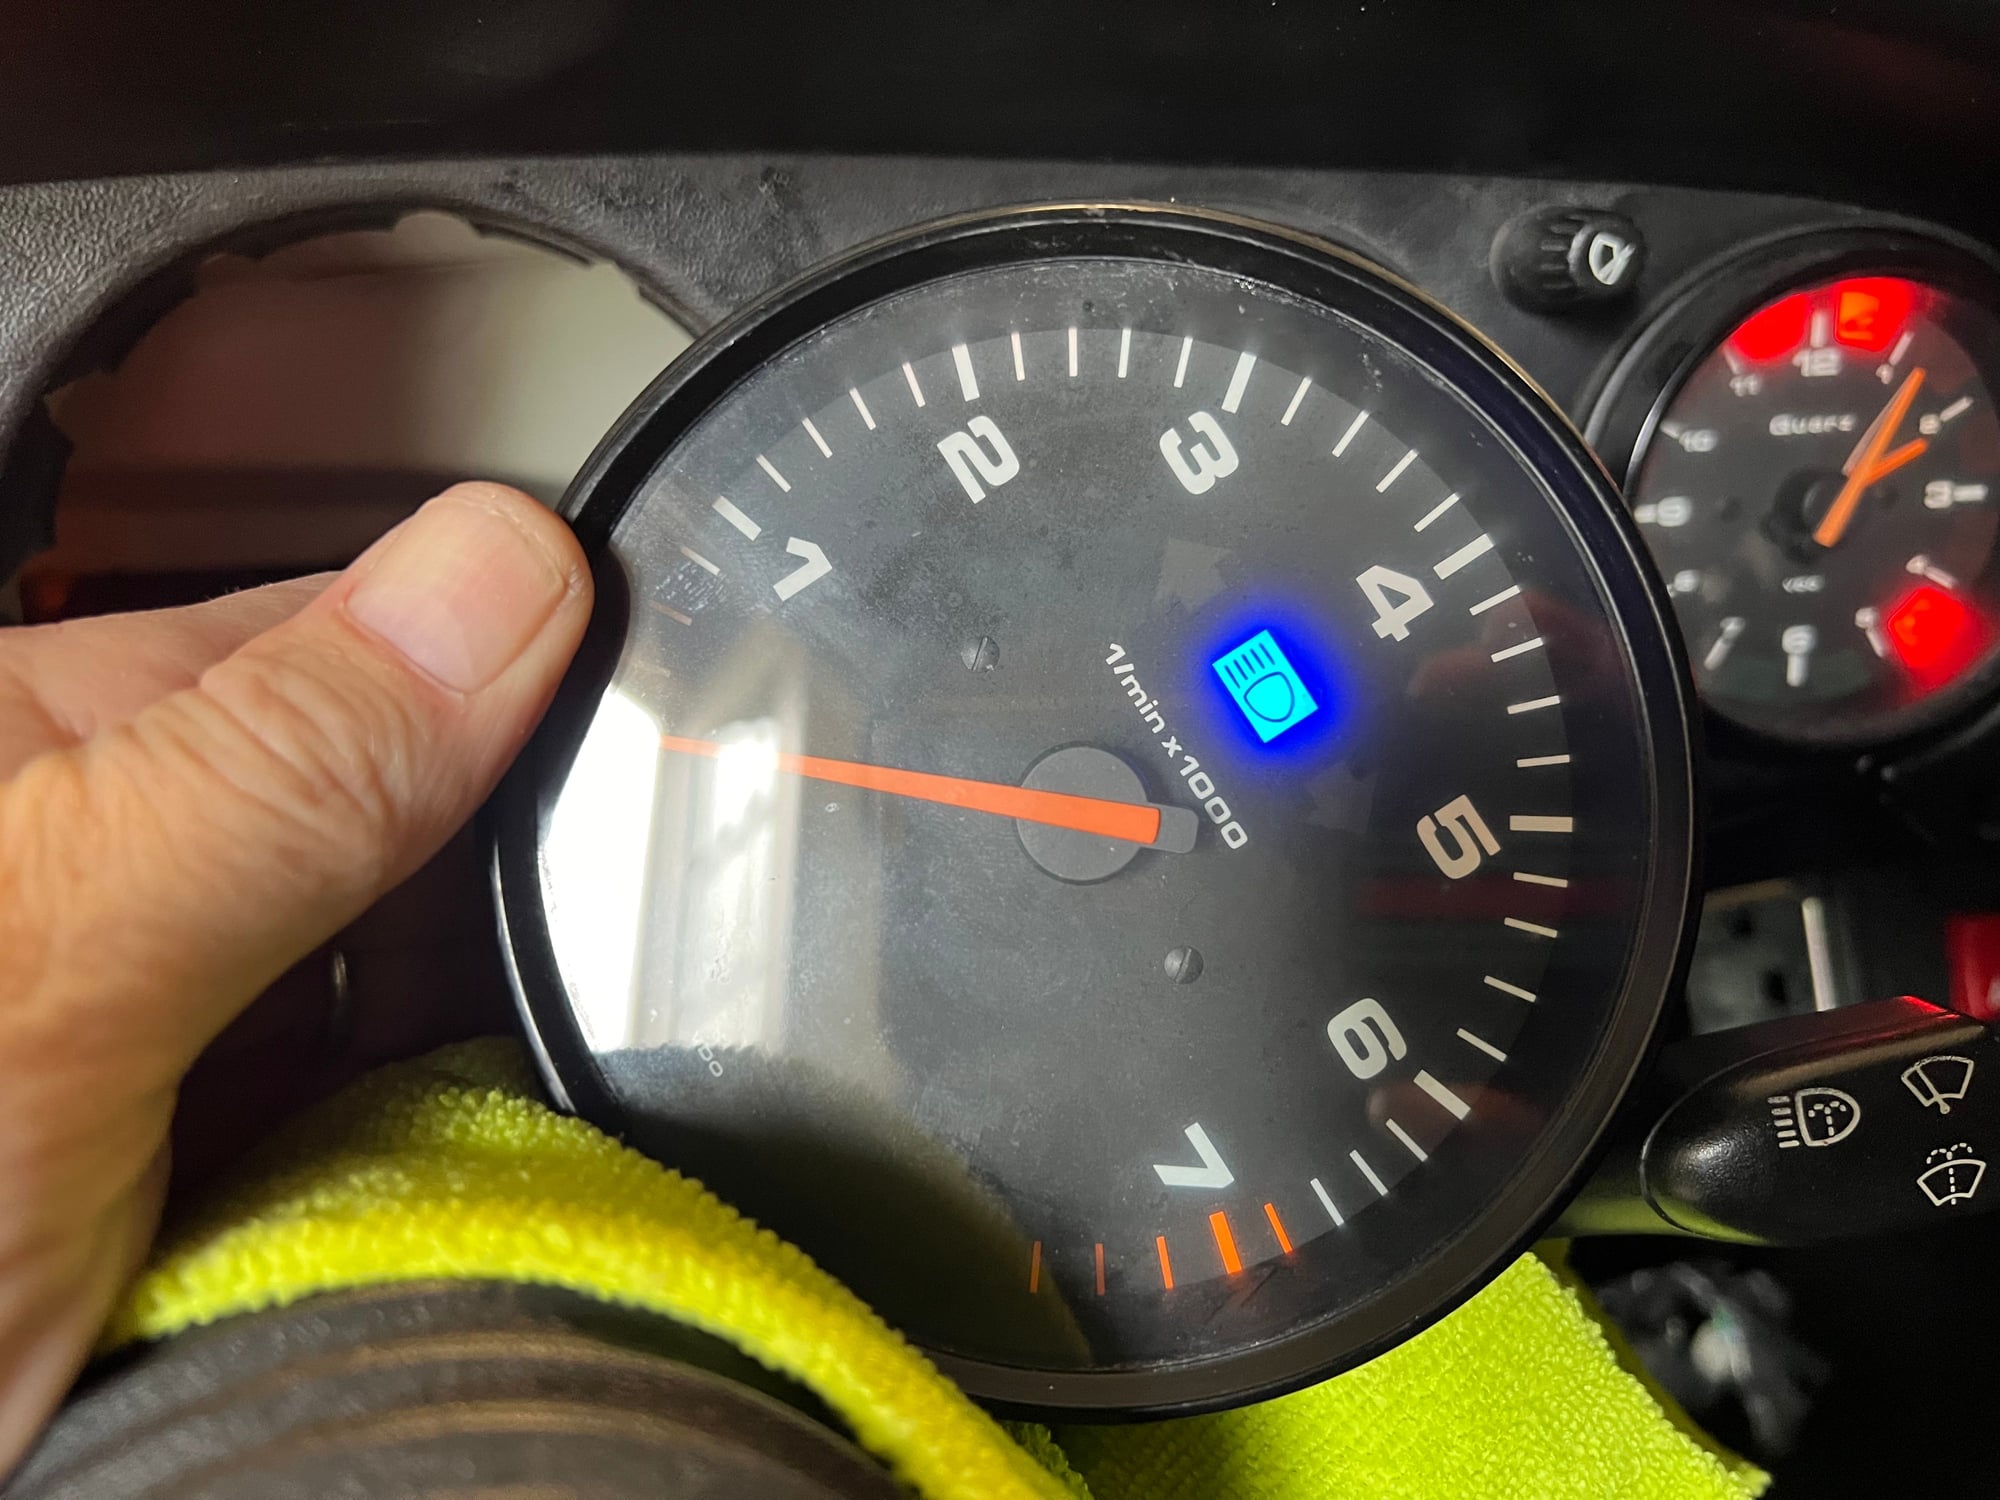
New high beam indicator
#238
Rennlist Member
The iPhone really picks up on the light, especially the warning lights. Itís not too bright, but a noticeable difference from the stock lights. Crisp and clear. I got tired of people honking at me for driving with my turn signal on. It was invisible. Now the turn signals are clearly noticeable. Not distracting, but noticeable.
Thank you. The information for the bulbs and bulb holders is included above. As noted, best to order the bulb holders on eBay as you will get blocked out of the UK link. The bulbs from Superbright LEDís arrived in just two days. The bulb holders were in back order for a bit, but the seller in UK, Crazy LEDís, was kind enough to keep me posted on inventory.
My fingers are still numb. The bulb holders really need a good pry upwards to clear the soldering board. Especially the three lights recessed n the tachometer, my hands are just too big for that work.
#239
Instructor
I see references to B8.5D and 509T in this thread. Which one did you guys order from the EBay store link?
Thanks
Jordan
Thanks
Jordan
#240
Rennlist Member
Itís the B8.5D 509T holder. I was also confused but itís both. 509T Holder. Do not try to use their website unless youíre in the UK.
The following users liked this post:
TheFatArmadillo (04-30-2024)

