
Varioram valve replacement
 07-25-2008, 03:37 PM
#1
Racer
Thread Starter
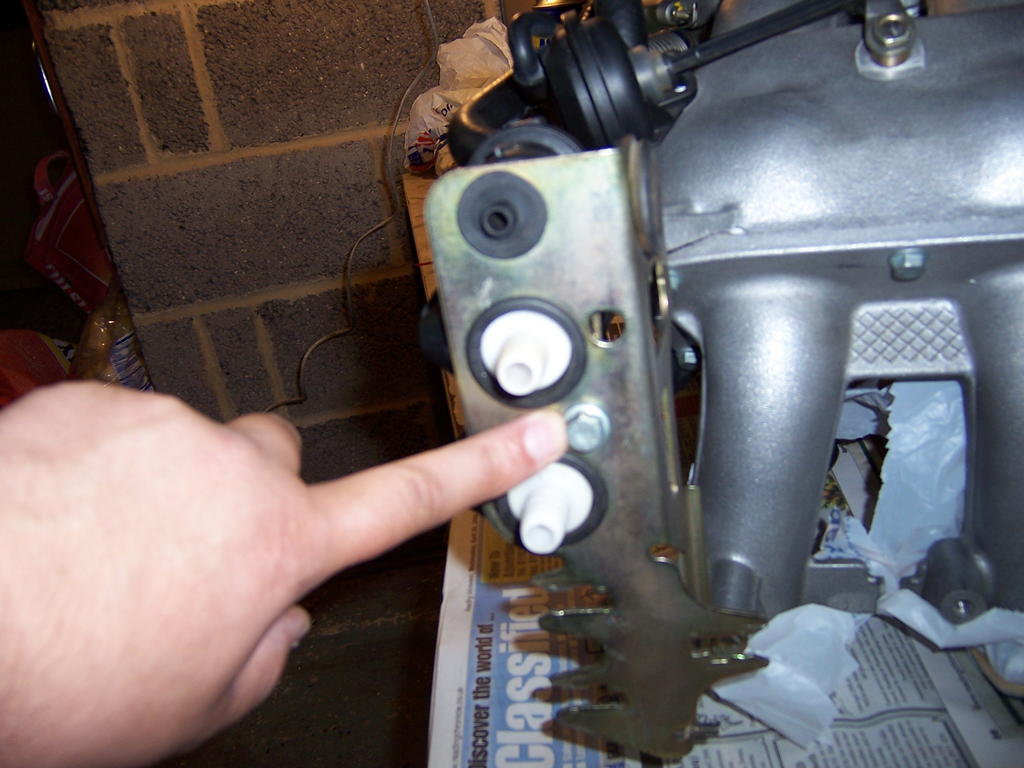
Some of you may recall my previous post from a week or so ago asking for help diagnosing a problem with my varioram and the fact it was losing vacuum from the resovoir cannister with a few seconds of turning the engine off. I initially thought I had disturbed a pipe whilst trying to check that I had full throttle (don't ask). Anyway, after much checking and head scratching it turned out to be be the check valve from the engine to the varioram. It's job is to act as a one way valve between the engine and the resovoir for the varioram. Failure means that the system operates spasmodically at best and leaves the engine hesitant and rough. Here's a picture of the valve in question
Attachment 293315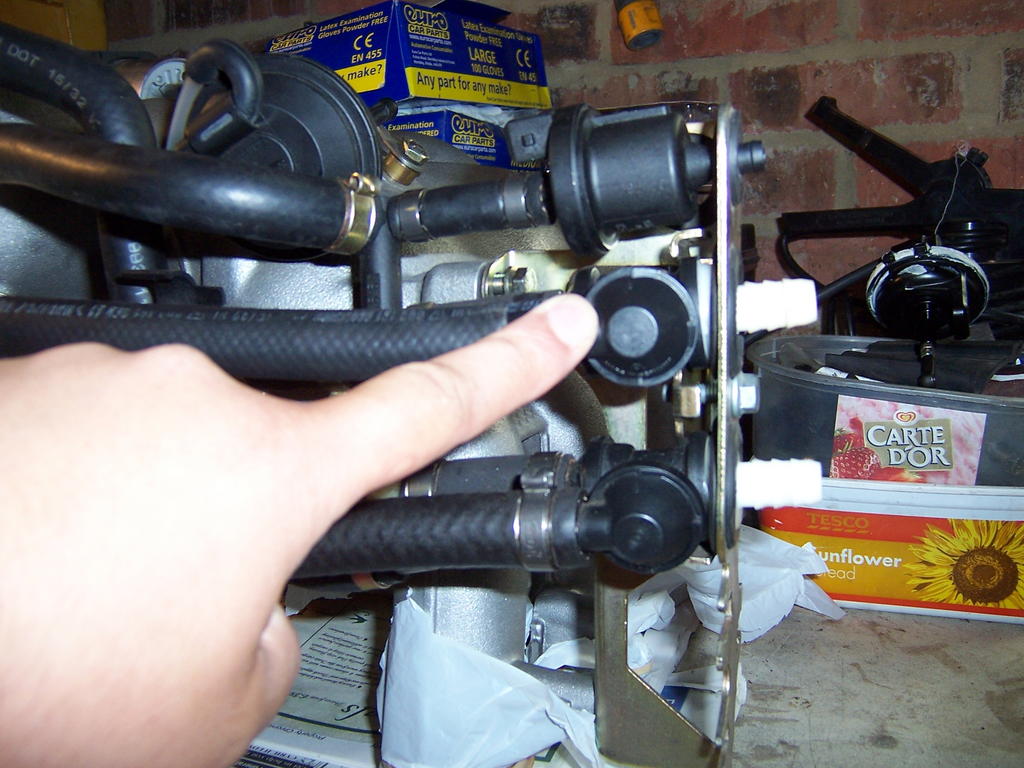
Easiest way to check it is to take off the rubber elbow at it's end, the notorious collapsing one and attach a pipe to it. Once you done that either suck or blow into it (depending on your own preference!) and any leak at all means it's toast. The leak will be minor, but if you blow into it you should have your cheeks puff out, your face turn red and no loss of air at all. If you're unsure, you can check against the identical valve immediately above the varioram one for the brake booster vacuum. Here's another pic:
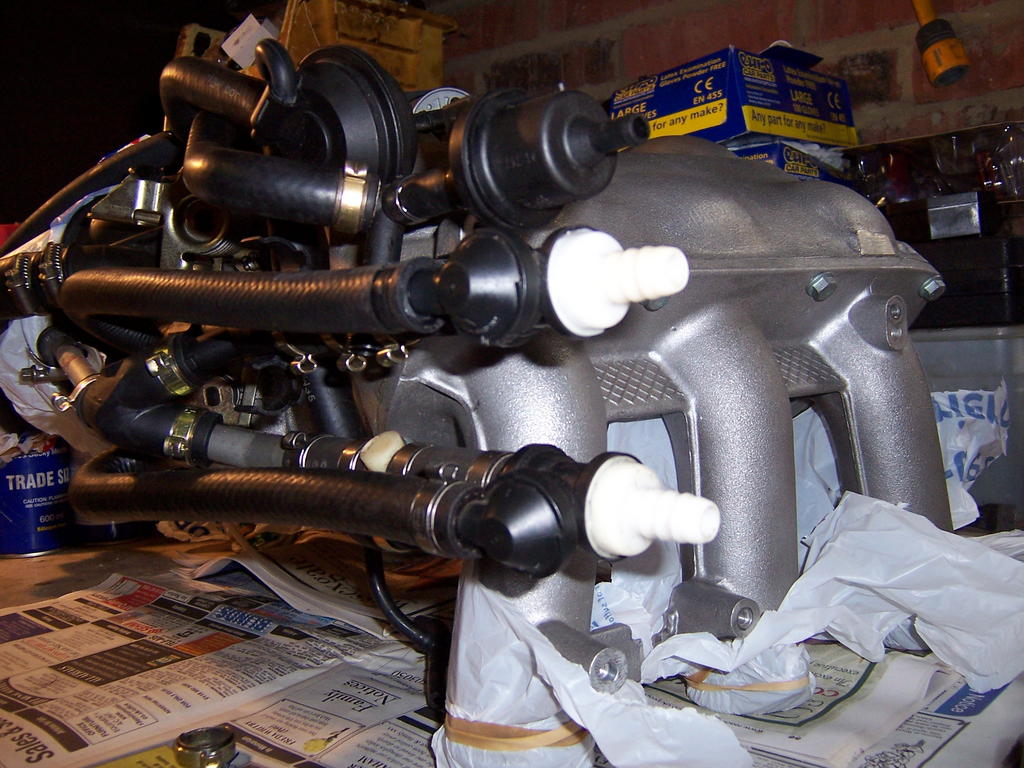
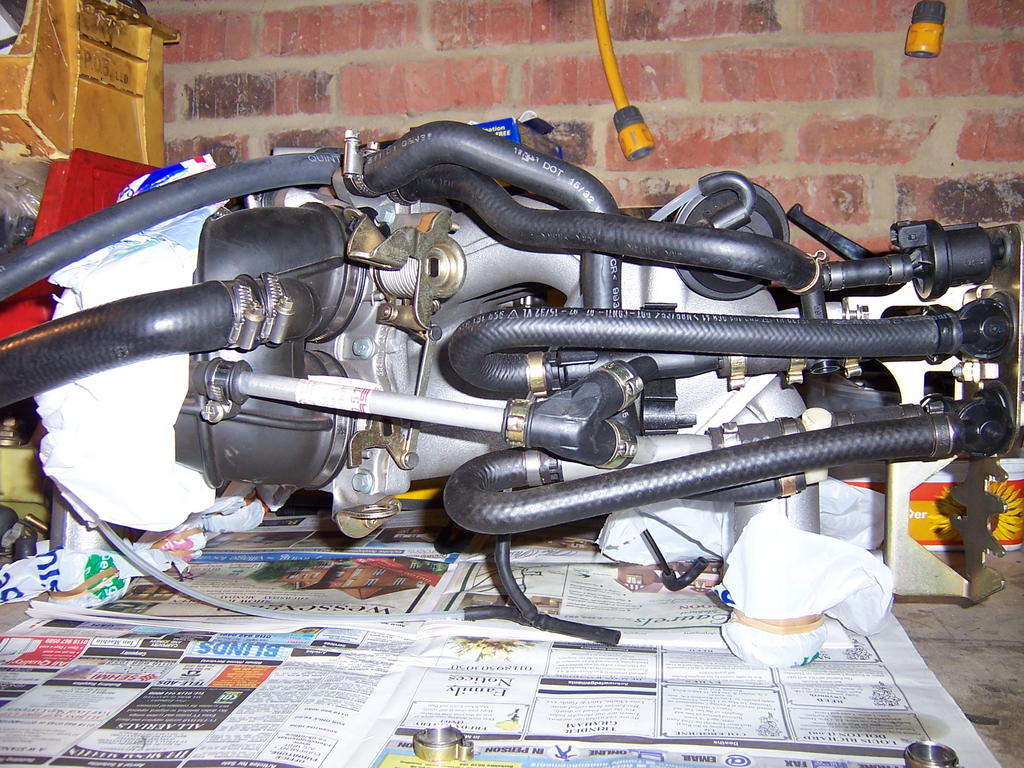
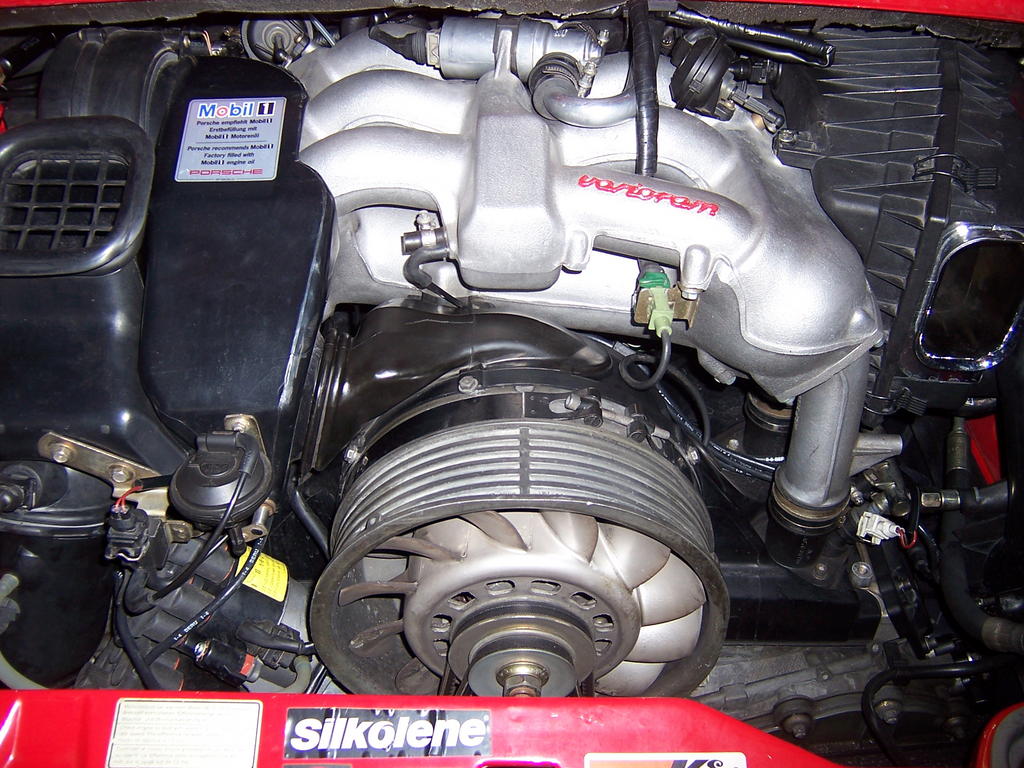
Note, the lower valve is only fitted to the C2 as the C4 has an electric brake booster pump and doesn't require a vacuum booster. I removed the entire manifold to change the valve as i had to change a venturi too, but with some dexterity you may be able to change the valve in situ by removing the mounting "tree" that houses these valves. Once you've removed the heater blower motor and other gubbins, you'll find the tree at the back of the engine on the left hand side of the engine bay. Here's a pic of what it looks like:
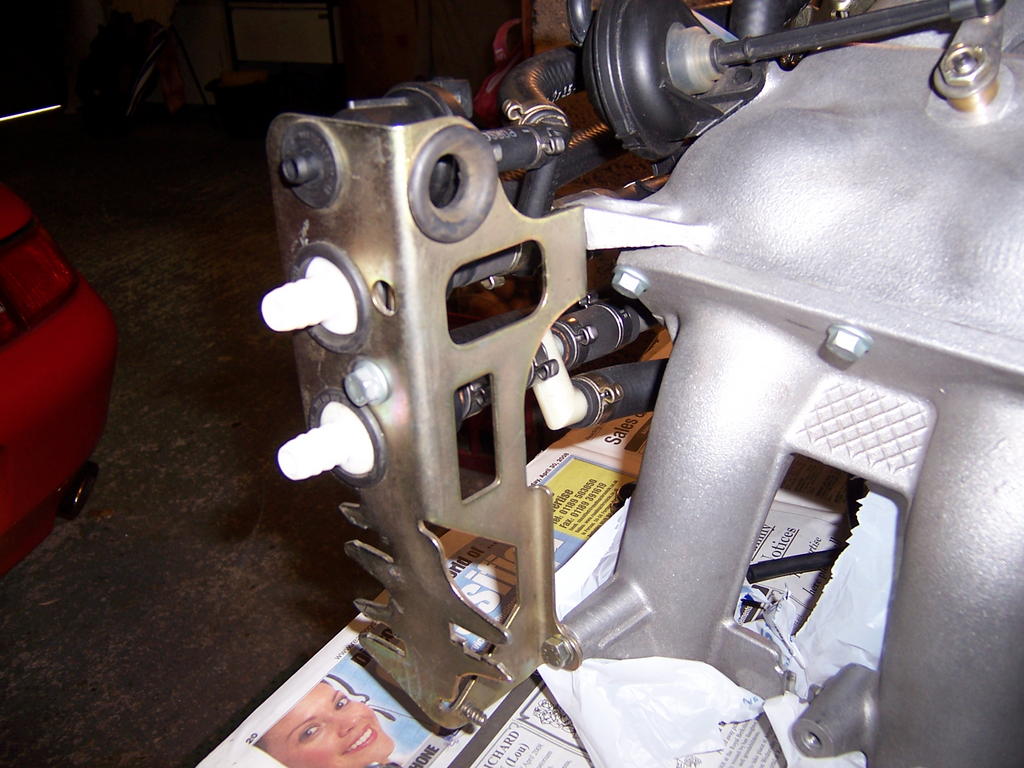
To remove the tree, you need to undo to 10mm bolts holding the frame to the manifold:
You also need to undo a bolt at the front of the frame which undoes a small bracket keeping the valves in place on the frame:
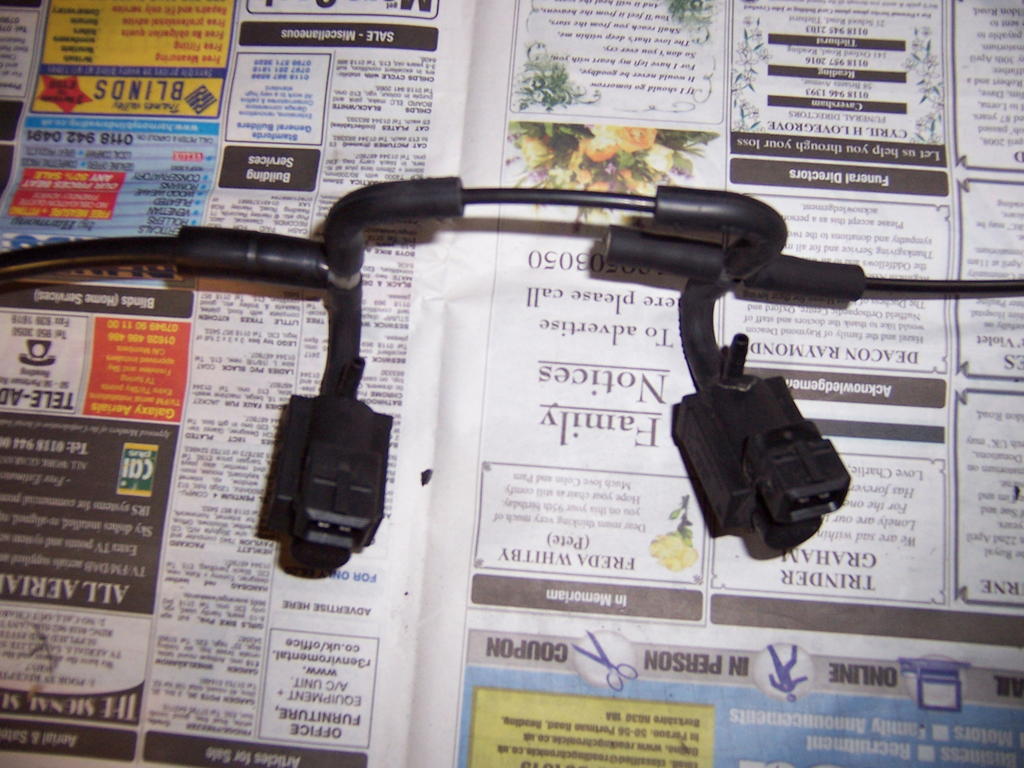
Once you have taken the bolts out, removed the frame and the small bracket, the valve will be fully exposed. However to remove the valve, you will need to take off the metal compression clamps which is best done with a Dremel or such given the restricted space. Not particulary hard to do and it has transformed the performance of the engine. I'd forgotten how good it could be. Here's some other pics of the back of the system and other misc photo's:
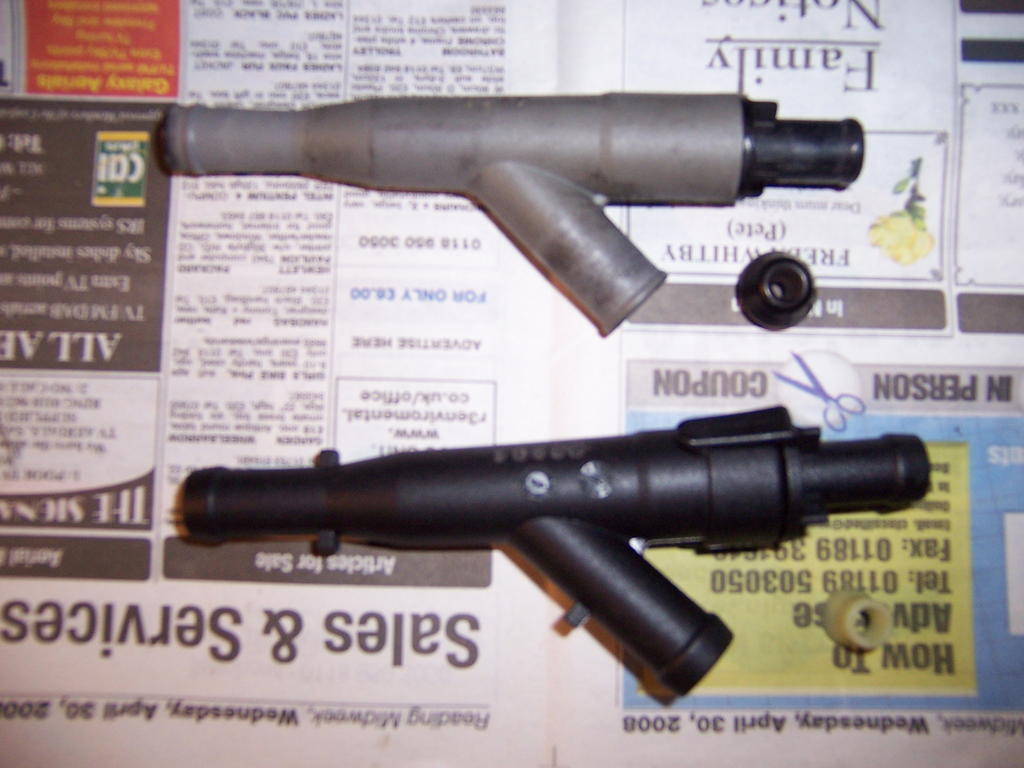
I changed on of the venturis, something I doubt anyone will need to do, here's a pic of old and new. The grey one is the old one:
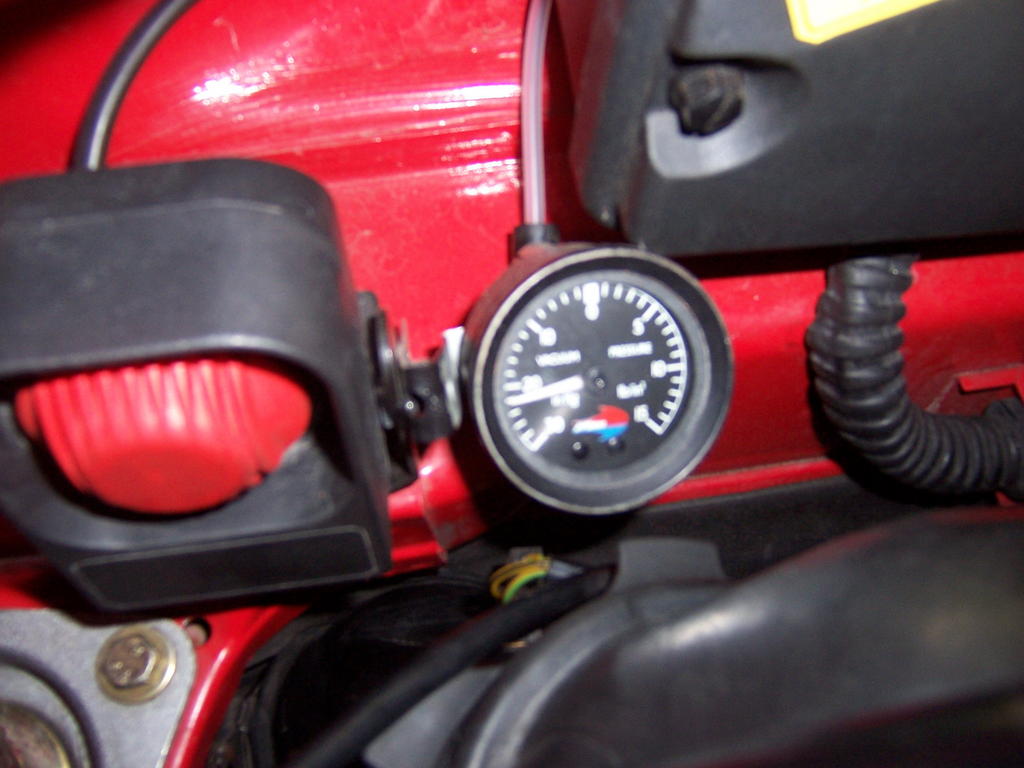
Any finally my vacuum gauge after, with the engine shut down showing healthy vacuum. The guage stays this way for many days with no change or drop.
I hope the above helps someone, if you have any questions let me know. this is my first effort with pics etc, so be kind! i have part numbers to if they help.
Regards
GR
Attachment 293315
Easiest way to check it is to take off the rubber elbow at it's end, the notorious collapsing one and attach a pipe to it. Once you done that either suck or blow into it (depending on your own preference!) and any leak at all means it's toast. The leak will be minor, but if you blow into it you should have your cheeks puff out, your face turn red and no loss of air at all. If you're unsure, you can check against the identical valve immediately above the varioram one for the brake booster vacuum. Here's another pic:
Note, the lower valve is only fitted to the C2 as the C4 has an electric brake booster pump and doesn't require a vacuum booster. I removed the entire manifold to change the valve as i had to change a venturi too, but with some dexterity you may be able to change the valve in situ by removing the mounting "tree" that houses these valves. Once you've removed the heater blower motor and other gubbins, you'll find the tree at the back of the engine on the left hand side of the engine bay. Here's a pic of what it looks like:
To remove the tree, you need to undo to 10mm bolts holding the frame to the manifold:
You also need to undo a bolt at the front of the frame which undoes a small bracket keeping the valves in place on the frame:
Once you have taken the bolts out, removed the frame and the small bracket, the valve will be fully exposed. However to remove the valve, you will need to take off the metal compression clamps which is best done with a Dremel or such given the restricted space. Not particulary hard to do and it has transformed the performance of the engine. I'd forgotten how good it could be. Here's some other pics of the back of the system and other misc photo's:
I changed on of the venturis, something I doubt anyone will need to do, here's a pic of old and new. The grey one is the old one:
Any finally my vacuum gauge after, with the engine shut down showing healthy vacuum. The guage stays this way for many days with no change or drop.
I hope the above helps someone, if you have any questions let me know. this is my first effort with pics etc, so be kind! i have part numbers to if they help.
Regards
GR
 07-26-2008, 04:47 AM
#4
Pro
Great write up. Thanks for the pics.
~ The Eagle ~
---------------------
'96 Polar Silver/Black C4S, manual, litronics, LED's in the positioning lights, alu/leather shifter & handbrake,
silver face gauges with alu rings, "GT" sport seats, full leather interior, motor sound airbox, stainless door sills,
front protection bar, with split rear grill and layered with Meguiar's NXT Tech Wax
__________________
'92 Carrera 2 (Sold)
'89 Carrera 3.2 (Sold)
Trending Topics
07-26-2008, 11:22 AM
#9
Racer
Thread Starter
Hi Dennis,
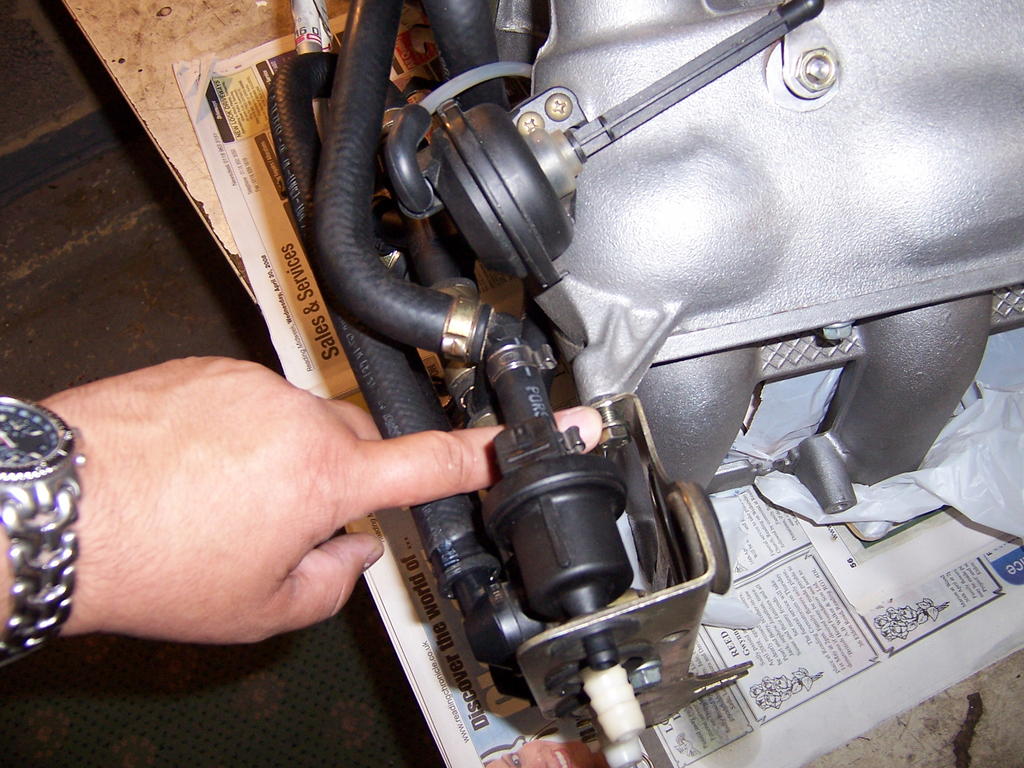
My car is actually a '95 993 and accordingly is not fitted with the varioram system. I retrofitted it which involved all new associated parts, reservoir pipes electric controllers etc. However the '95 993 requires only one venturi to operate the brake booster, the varioram requires two in C2 form. Unfortunately Porsche changed these and the part numbers are different. I originally used the old one along with a new one but I was never happy with this mis-match and so I used the opportunity to rectify this mistake. If you look at the picture of the venturi, old and new, you'll see a little plastic "nipple" next to both, these are different too and these variances are what persuaded me to change the old venturi to match the one new one already fitted. Here's a pic of the old one in place and connected to the brake booster. This is why I originally let it in place as it serviced the brake booster and i assumed nothing would change but as the two are connected downstream, some differences were noticed (less assistance to brake) -


The venturi is pretty much just a tube with a decreased diameter internally to speed up the flow of air. The "nipple" customises this movement to a degree for the Porsche application as the part is marked "Audi/VW" too. There's nothing in it to wear out or break which is why I don't see any one else needing to ever change it. The only thing I would check is the valve at the end. This has internal diaphragms which will eventually degrade and leak.
GR
My car is actually a '95 993 and accordingly is not fitted with the varioram system. I retrofitted it which involved all new associated parts, reservoir pipes electric controllers etc. However the '95 993 requires only one venturi to operate the brake booster, the varioram requires two in C2 form. Unfortunately Porsche changed these and the part numbers are different. I originally used the old one along with a new one but I was never happy with this mis-match and so I used the opportunity to rectify this mistake. If you look at the picture of the venturi, old and new, you'll see a little plastic "nipple" next to both, these are different too and these variances are what persuaded me to change the old venturi to match the one new one already fitted. Here's a pic of the old one in place and connected to the brake booster. This is why I originally let it in place as it serviced the brake booster and i assumed nothing would change but as the two are connected downstream, some differences were noticed (less assistance to brake) -
The venturi is pretty much just a tube with a decreased diameter internally to speed up the flow of air. The "nipple" customises this movement to a degree for the Porsche application as the part is marked "Audi/VW" too. There's nothing in it to wear out or break which is why I don't see any one else needing to ever change it. The only thing I would check is the valve at the end. This has internal diaphragms which will eventually degrade and leak.
GR
07-26-2008, 01:15 PM
#10
Rennlist Member
GR-great photographic representation of your project. The plumbing on the back of this (my) engine is still somewhat mysterious to me and not very accessible.