When you click on links to various merchants on this site and make a purchase, this can result in this site earning a commission. Affiliate programs and affiliations include, but are not limited to, the eBay Partner Network.
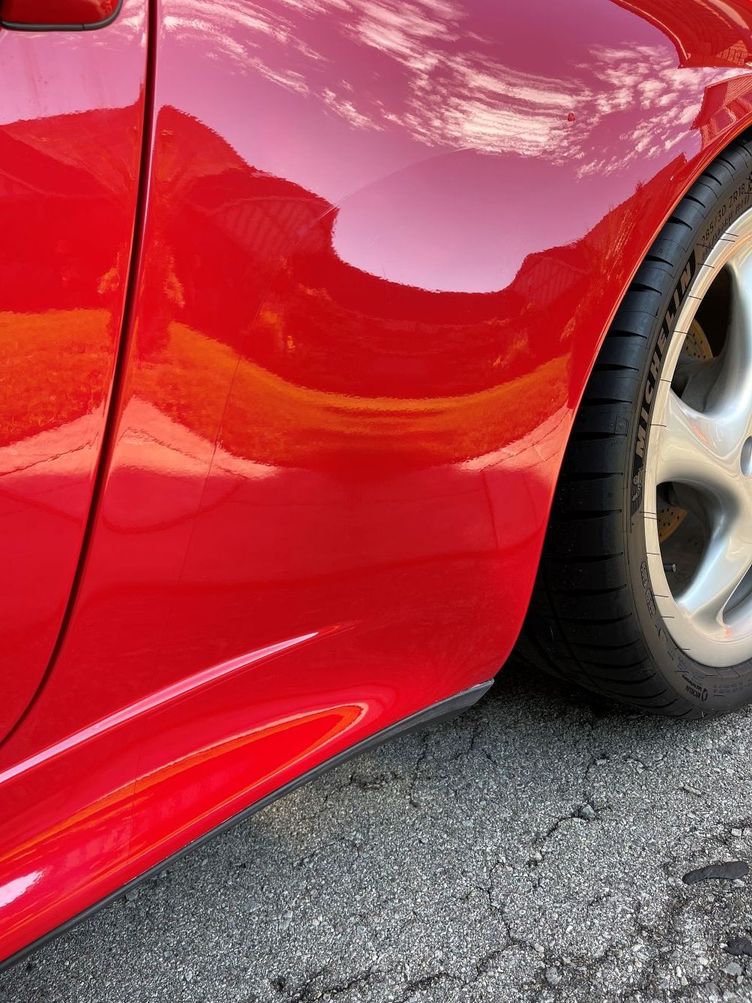
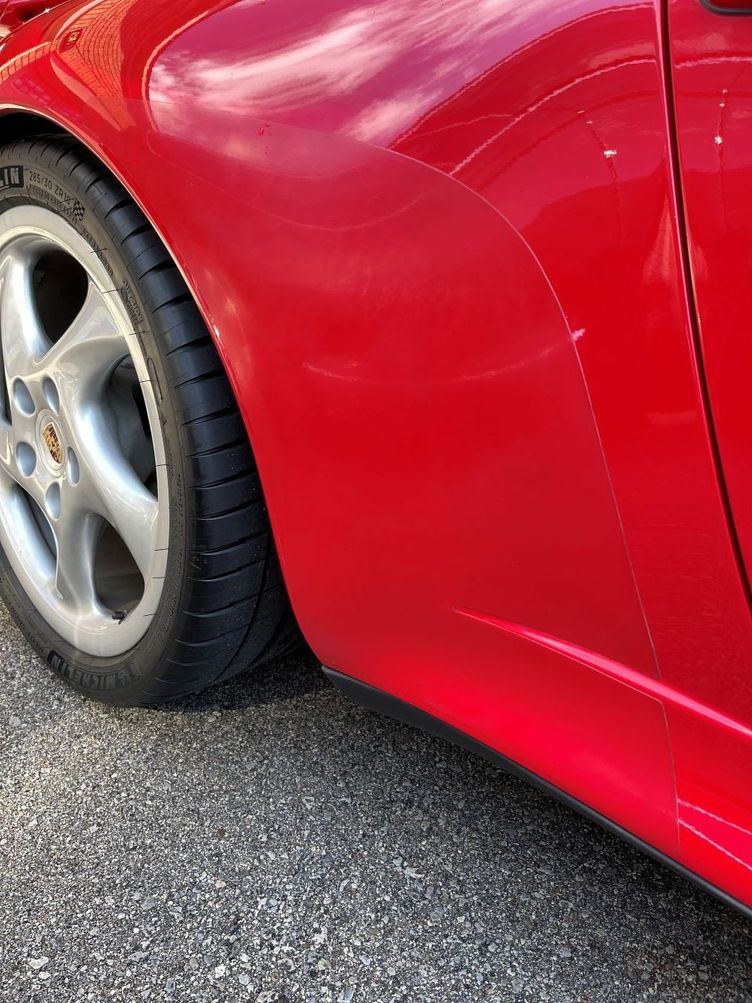
My stone guards appeared to be original and very tired looking. Faded, hazy, very noticeable. Also had some cracks. I bought replacements from FD Motorsports.
Read a few threads here to see what I was getting into. Decided to do it myself. The entire process is rather easy. I had no issues with paint peeling or any of the tools I used negatively effecting the paint. YMMV. Well worth the work, looks so much better, barely see the film on the car now.
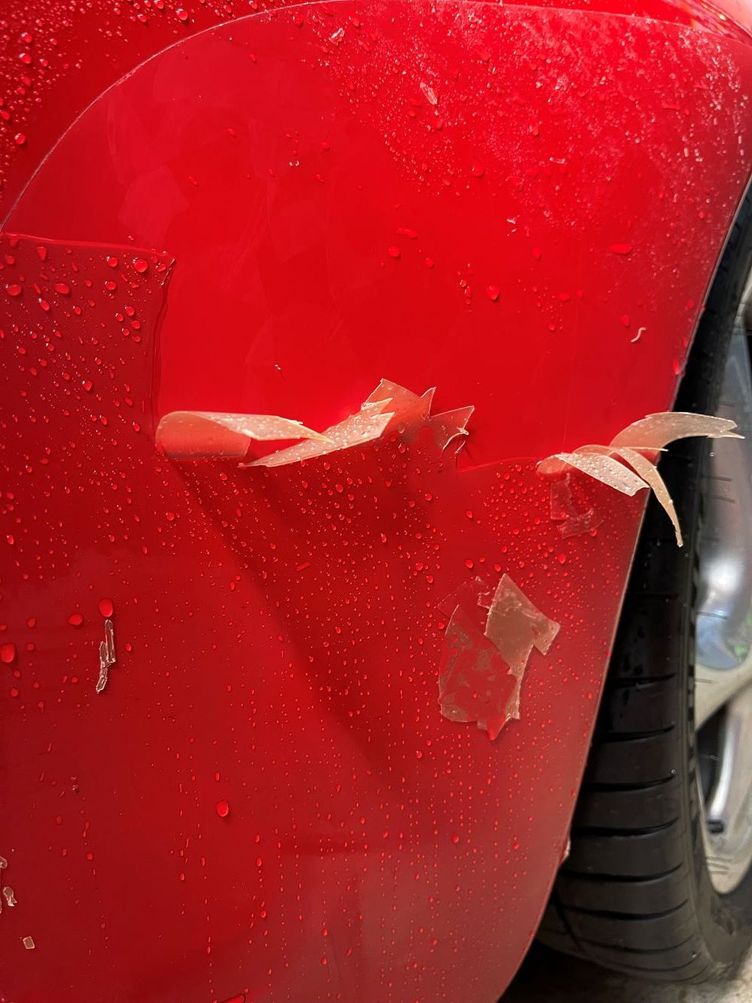
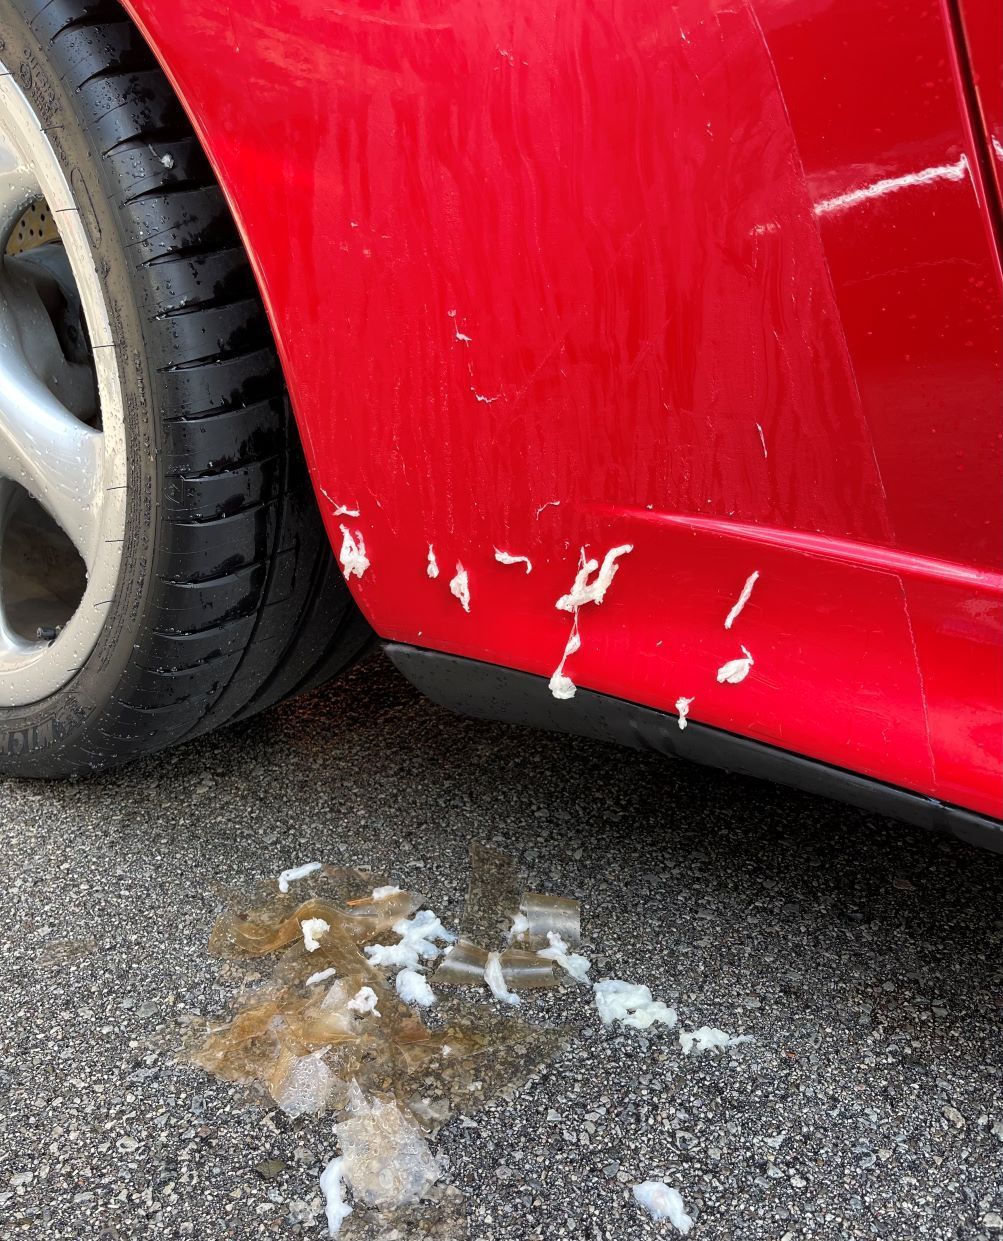
I started out scraping the old stone guard with a thin plastic tool, similar to a drywall putty knife. Old film broke off in small pieces with that. Plastic razor blade made it super easy, like butter when steamed! Go with that.
Work outdoors if possible for the removal or well ventilated area. VOCs are plenty from the chemicals and a little bit from the old PPF being steamed. I'm sure some don't care, but I prefer not to inhale crap.
Rapid Remover was far better than the 3M product. I like that it's a spray liquid rather than aerosol spray, get better coverage and remains on the surface longer than 3M product which evaporates quickly.
3. Rapid Remover
4. 3M Automotive Adhesive Remover
5. Microfibre Towel
6. Shop Towels
7. Replacement Stone Guards
8. Menzerna 3 in 1
9. Green Polish Pad
10. Orbital Polisher (I have a Porter Cable)
11. Slip Solution (2-3 small drops of dish soap with water in a spray bottle)
12. Tack Solution (1:10 - 99% Isopropyl Alcohol and water)
13. Car Soap Solution
14. Steamer
15 -
16. Safety glasses - for the chemical application, wouldn't want that stuff in your eyes.
Steps
1. Apply steam for seconds over area to be peeled.
2. Use plastic razor to peel back old stone guard.
3. Continue above 2 steps until complete.
4. Spray Rapid Remover and let sit 60 seconds or so, to allow it to penetrate and loosen adhesive
5. Scrape adhesive off with plastic razor
6. Complete entire area following step 4-5. I had to do some areas 2-3 times to get all the adhesive off.
7. Spot remove remaining adhesive with Rapid Remover or 3M Automotive Adhesive Remover. Spray chemical and wait few seconds, scrape or rub off with microfibre towel.
8. Rinse area periodically as you are removing adhesive. I did this to cleanse the area of Rapid Remover, as I completed the complete removal. Otherwise residue remains in areas already done. Perhaps just a precautionary measure to protect finish.
9. Wash area with car wash solution
10. Ensure area is free of all film and adhesive. If not, follow applicable steps above.
11. Wipe down area with Isopropyl Alcohol and Water solution - I used roughly a 50/50 solution. This to remove any residues.
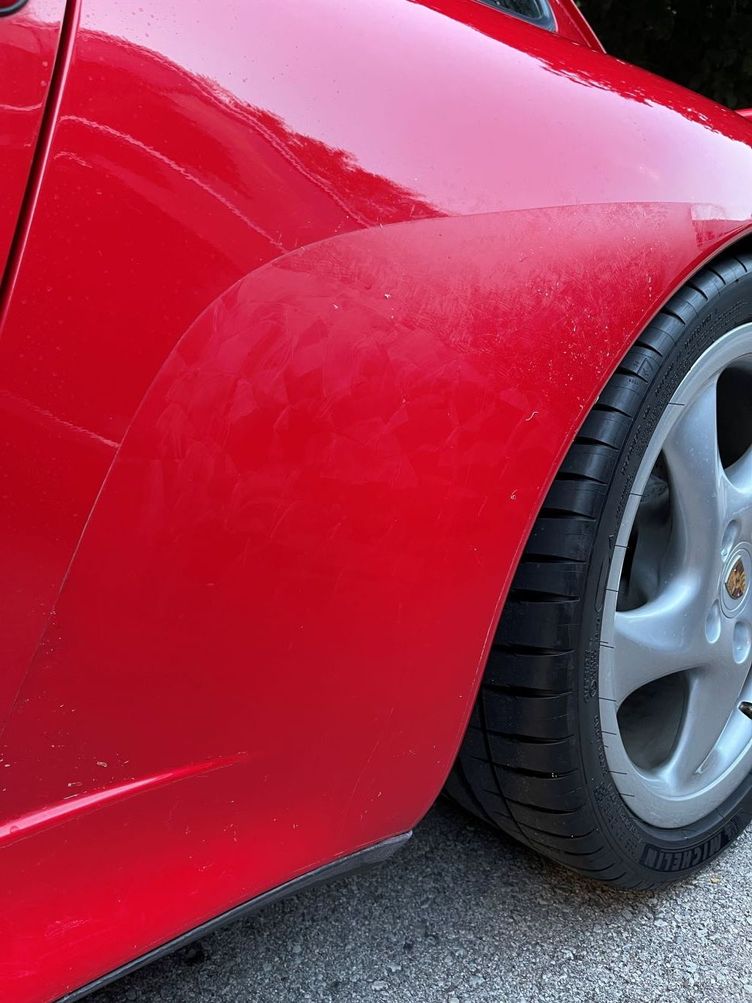
12. Polish stone guard area, I went slightly beyond. I used Menzerna.
13. Wash with car wash solution.
14. Spray area with the 50/50 Isopropyl Alcohol/Water solution - I did 2 passes. To remove polish residues.
15. Apply slip solution to fingers, keep them wet to avoid fingerprints on the new stone guards
16. Keep stone guard area wet with slip solution along with new stone guard (front and back).
17. Position new stone guard.
18. Use tack solution to help it adhere to surface, this to hold an edge while you work the other areas. I found I didn't have to use tack solution, mostly.
19. Wipe stone guard with film applicator tool to push out water, start from middle and work your way to the edges.
20. You can still peel back the stone guard at this point if you need to reposition, just keep fingers, film and car wet with slip solution.
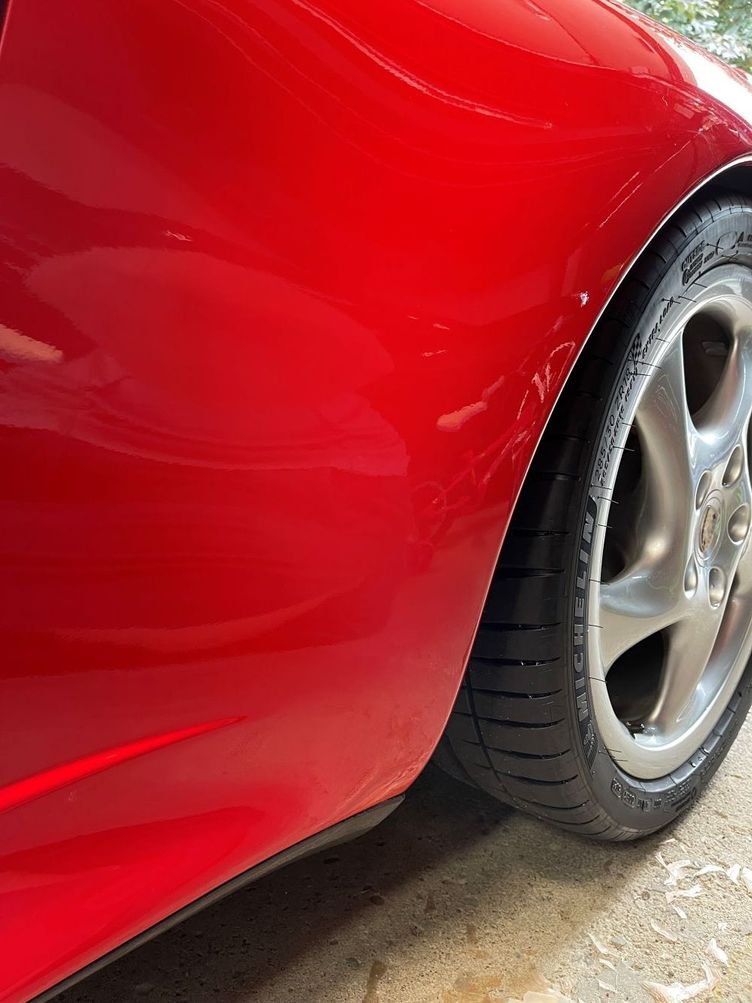
21. Enjoy your work and results. 1000% better with new ones.
Pictures below are reduced size and quality, just for posting.
Good job and good step by step......my stone guards peeled right off the last two times I have replaced...LLumar clear guards...I am ready for set 4 in a few years....
Clear Mask has the best prices by far......around $46 total to do mine.....and the new ones peel off easy as mentioned....
My OEMs, which I took off 15 years ago were a tedious process with small sections coming off......it was a painted stone guard in exterior color......no damage to the paint underneath......
Really does make the side of the car look new..........I make sure to use a ceramic wax on them to keep them looking great.
I also use 70% alcohol around all of the guard edges to clean or dissolve the dirt collected in the edges, which extends the life of the stone guard, as far as looking good or freshly applied....
Good job and good step by step......my stone guards peeled right off the last two times I have replaced...LLumar clear guards...I am ready for set 4 in a few years....
My OEMs, which I took off 15 years ago were a tedious process with small sections coming off......it was a painted stone guard in exterior color......no damage to the paint underneath......
Really does make the side of the car look new..........I make sure to use a ceramic wax on them to keep them looking great.
I also use 70% alcohol around all of the guard edges to clean or dissolve the dirt collected in the edges, which extends the life of the stone guard, as far as looking good or freshly applied....
Thanks!
I plan to replace them on a schedule to keep it easy to come off. Will see how they wear over the coming years.
When I first started without the plastic razor blade, it came off in splinters, rather than sheets.
I have to take my car in for a single stage correction and will likely ceramic coat the whole thing. So that'll help with the freshness. You can also polish PPF. FDM's are 3M (don't know which 3M film he uses).
Good idea on the isopropyl alcohol to get rid of grease/dirt build up at the edge.
Nice work! I�m getting the detailer to change out mine next week 😀
Thanks!
Yes that's definitely an easier option. I want to take mine in for detailing and ceramic, but it's not local, time is tight to drop and pickup. That stuff may wait until Spring at this point. So this gave me a quick win at home, and it's fun to do stuff.
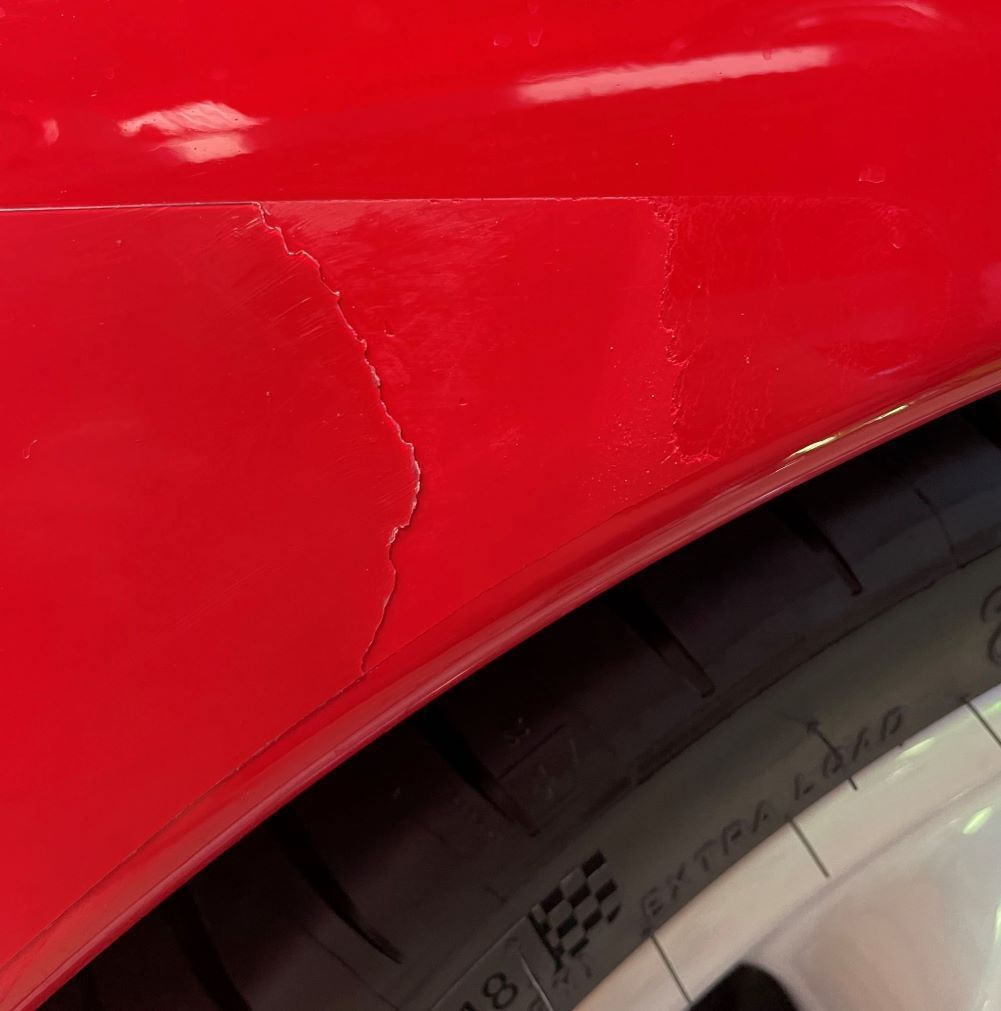
For anyone new to this - this is what the "best case" looks like. There are other scenarios that range from a bit of a hassle to a disaster.
/
I read a bunch of threads before starting, my fear was paint peeling. But I have original paint, so should not be an issue and wasn't an issue. From what I gather, people aren't using the right tools for the job. Goo Gone, Goof Off, isopropyl alcohol, steam doesn't remove the adhesive - tried it just to see the impact, like nothing even if you work away at it (minimal effectiveness). I saw Rapid Remover recommended on RL and on detailing forums, looked into it more, it's really what you need to use. Second is the plastic razor blade, world of difference when compared to using a tool similar to a plastic putty knife. It was shi*ty until I used the plastic razor blade. Some also use heat guns, but steam works really well and I'd wager gentler.
I also read threads about tint removal. Kinda of the same as this stone guard removal, all kinds. But people aren't using the right tools. I removed the tint on this 993, will post a thread about how I went about it sometime. Mine did not come off in one shot, 2 layers, tint and adhesive layer. But it was easy to do and wouldn't hesitate buying a car with tint again.
Best case from what I read is people that don't have all the adhesive remain on the paint, I had all the adhesive remain on the paint. I'd bet those people don't have original stone guards. Worst case is paint peeling, possible repaint situation. I also think some people might call my process and experience a hassle.
YMMV is a key point, really depends what the person does.
Yes that's definitely an easier option. I want to take mine in for detailing and ceramic, but it's not local, time is tight to drop and pickup. That stuff may wait until Spring at this point. So this gave me a quick win at home, and it's fun to do stuff.
I just don’t have the patience for that work, but you did a great job!
the detailer quoted $350 to remove and replace the stone guards including the film. I bought OEM guards, so it might be a little cheaper. I’m on the fence regarding the ceramic coating. It’s a lot of money and I’m not sure it will make a difference on Polar Silver.
I just don�t have the patience for that work, but you did a great job!
the detailer quoted $350 to remove and replace the stone guards including the film. I bought OEM guards, so it might be a little cheaper. I�m on the fence regarding the ceramic coating. It�s a lot of money and I�m not sure it will make a difference on Polar Silver.
What do OEM ones go for? I didn't even think about that route, went straight for FDM...probably from all the reading about them before I bought my 993.
I didn't elaborate much in your thread about ceramic. But I too have been on the fence each and every time because it's costly getting it done and adds up doing multiple cars. However have done it each and every time except for my DD. Red/White/Black/Miami Blue cars. It does a really good job of sheeting water, makes washing/drying easier, repels dirt and has great gloss. This being said, I have used CarPro Reload and the like (silica base) and that does a decent job as well on non-coated cars and maintains coating on coated cars. But for ease, ceramic coating is the way to go with periodic maintenance of it somewhat required.
The OEM guards were $225 Cdn tax in from PCO. I wanted them quickly, so that is why I went that route - 2 business day lead-time.
ceramic starts at $700 at the Refinery vs $80 for wax. Given how little I’ll drive my car, I just don’t know if it’s worth it. $400 for PDR, $950 for 2 stage correction, $300 for stone guard re & re, $225 for the guards…making your car shiny adds up fast!
Did them myself as well. One side came off in a nice sheet. One side came off in little tiny pieces. I had some etching along the edge of mine, fixed with some wet sanding and polish.
Etching can look like pulled up clear coat if you have not seen it before.
Did them myself as well. One side came off in a nice sheet. One side came off in little tiny pieces. I had some etching along the edge of mine, fixed with some wet sanding and polish.
Etching can look like pulled up clear coat if you have not seen it before.
Very cool. Did you measure paint thickness before and after wet sanding? Curious on the results and impact of wet sanding.
I should've measured mine before and after polishing, missed that. Just a fun fact to have.
Very cool. Did you measure paint thickness before and after wet sanding? Curious on the results and impact of wet sanding.
I should've measured mine before and after polishing, missed that. Just a fun fact to have.
I did not. In fact this project made me a little over confident in wet sanding. I ended up going too deep in another area while attempting to fix an anomaly in the clear.

 09-08-2021, 06:16 PM