When you click on links to various merchants on this site and make a purchase, this can result in this site earning a commission. Affiliate programs and affiliations include, but are not limited to, the eBay Partner Network.
It'n not very difficult once you know the steps. I would probably estimate 30-45min for the first side and then 20-30min for the second side. Maybe a 3 or 4 out of 10 as far as difficulty.
I'm hoping to put together some install videos that will illustrate the process a lot more effectively. Should have those posted by the end of next week.
A video would be helpful especially on the pillar removal. The rest is self explanatory except for whatever is going on to release the pillar.
How thick is that black sound deadening material along the door and door panel?
It's not very thick... perhaps 3/8"? But it's also compressible. I installed min with a roller so it's definitely more compressed. As a result, I didn't have much issue getting my door card back on. It was definitely a tighter fit, but not difficult at all to reinstall. Here's picture of how the material looks after being rolled. You can see the outline of the "X" so it's been compressed to maybe 1/8"+ thick?
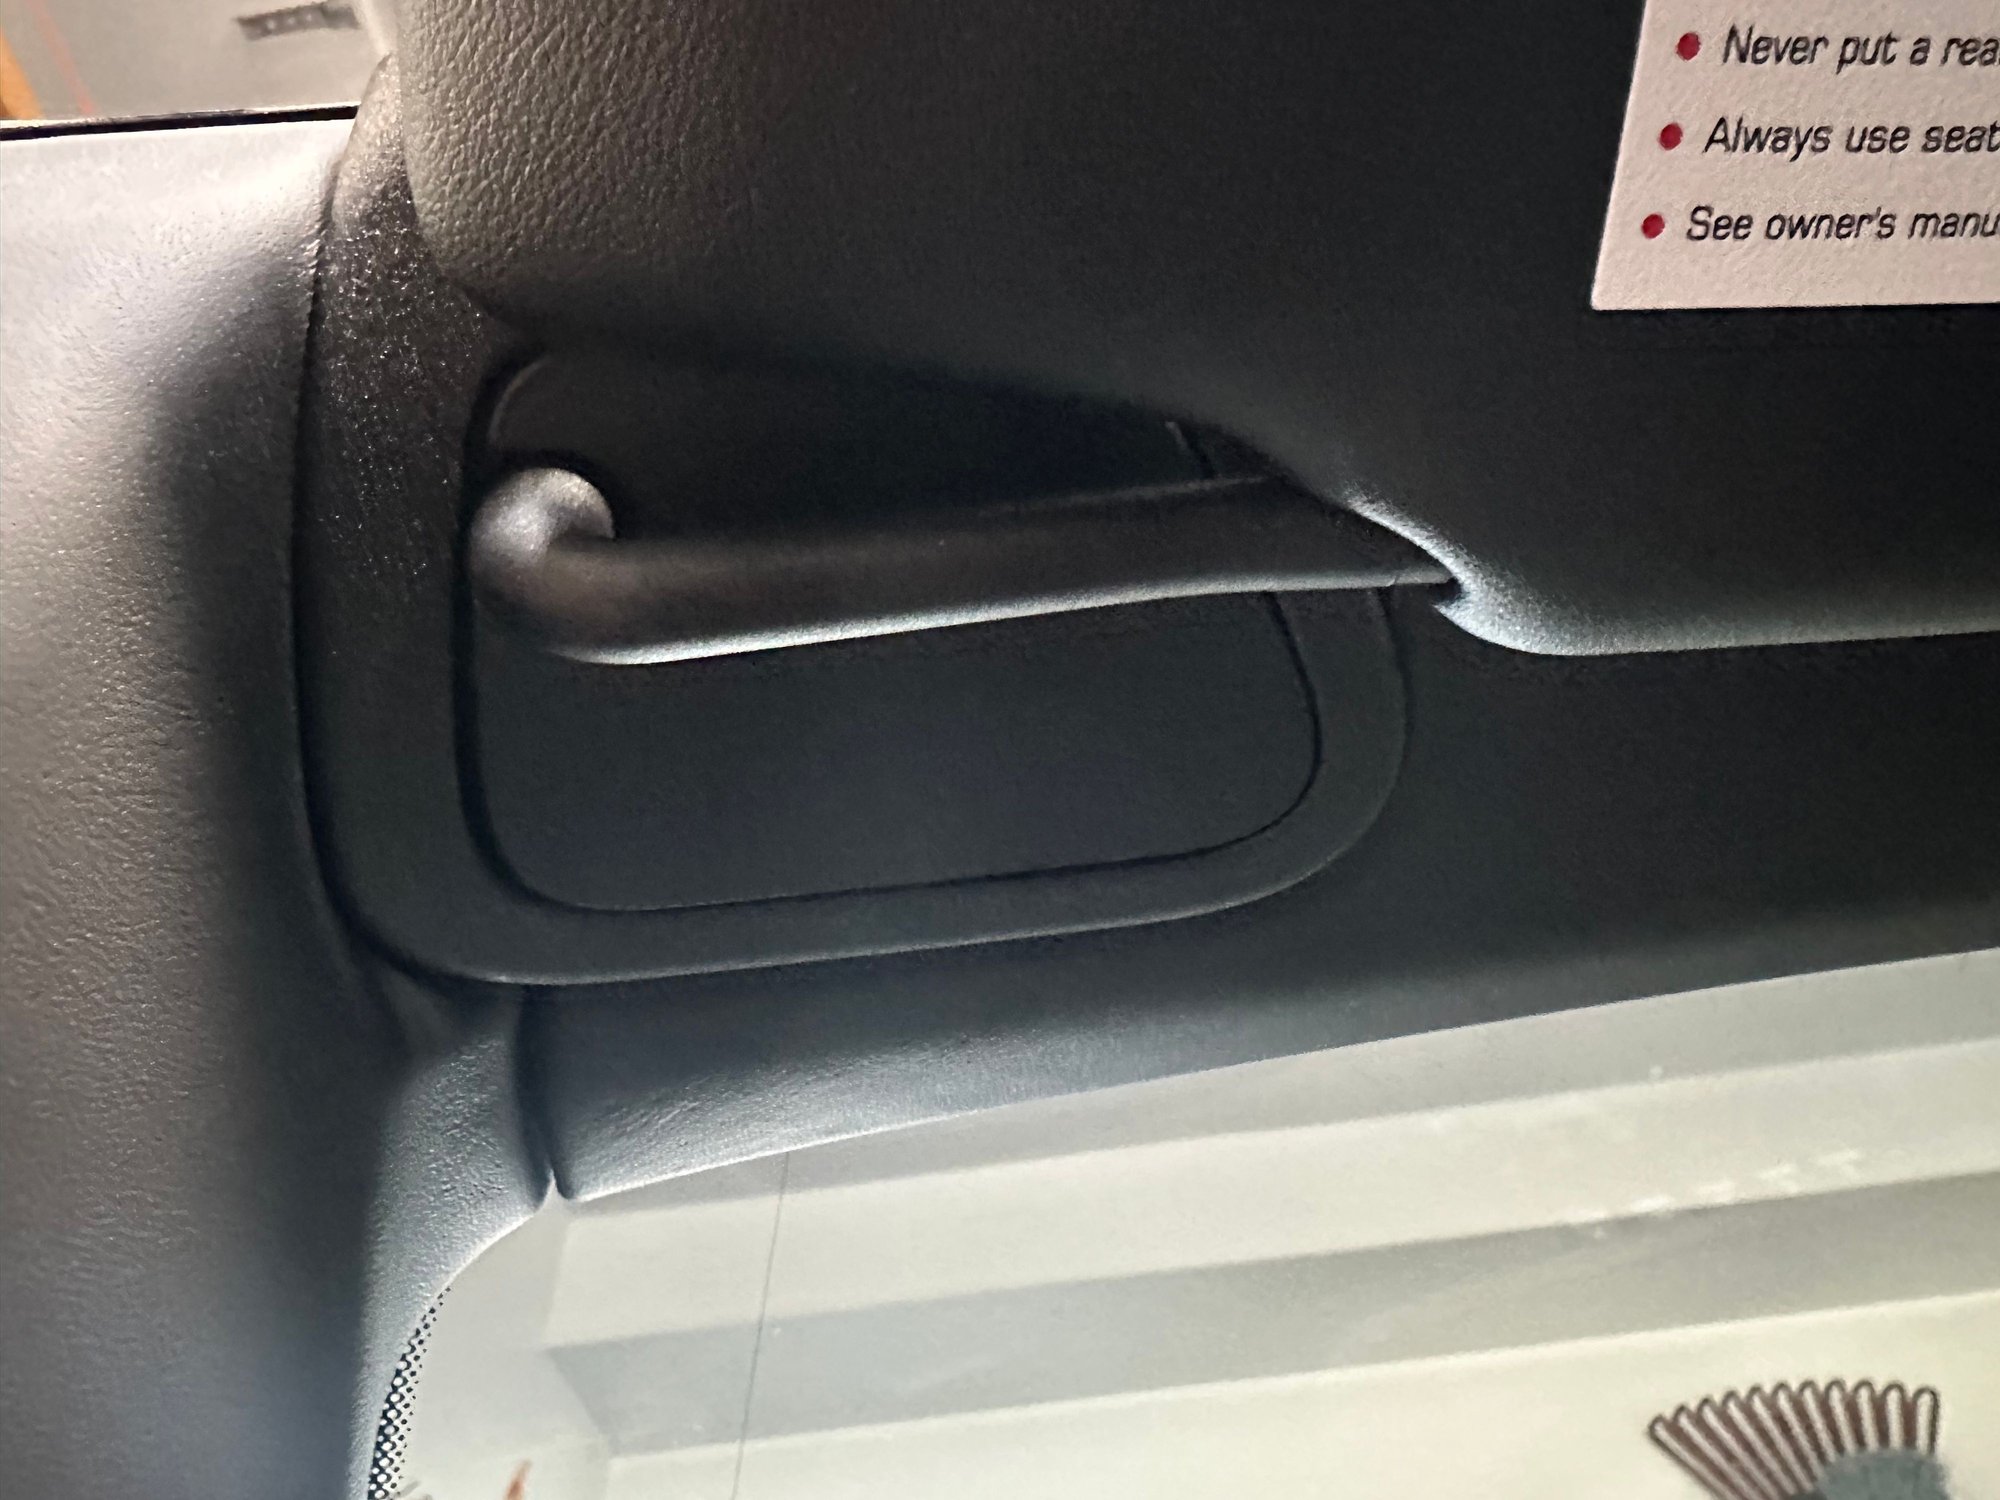
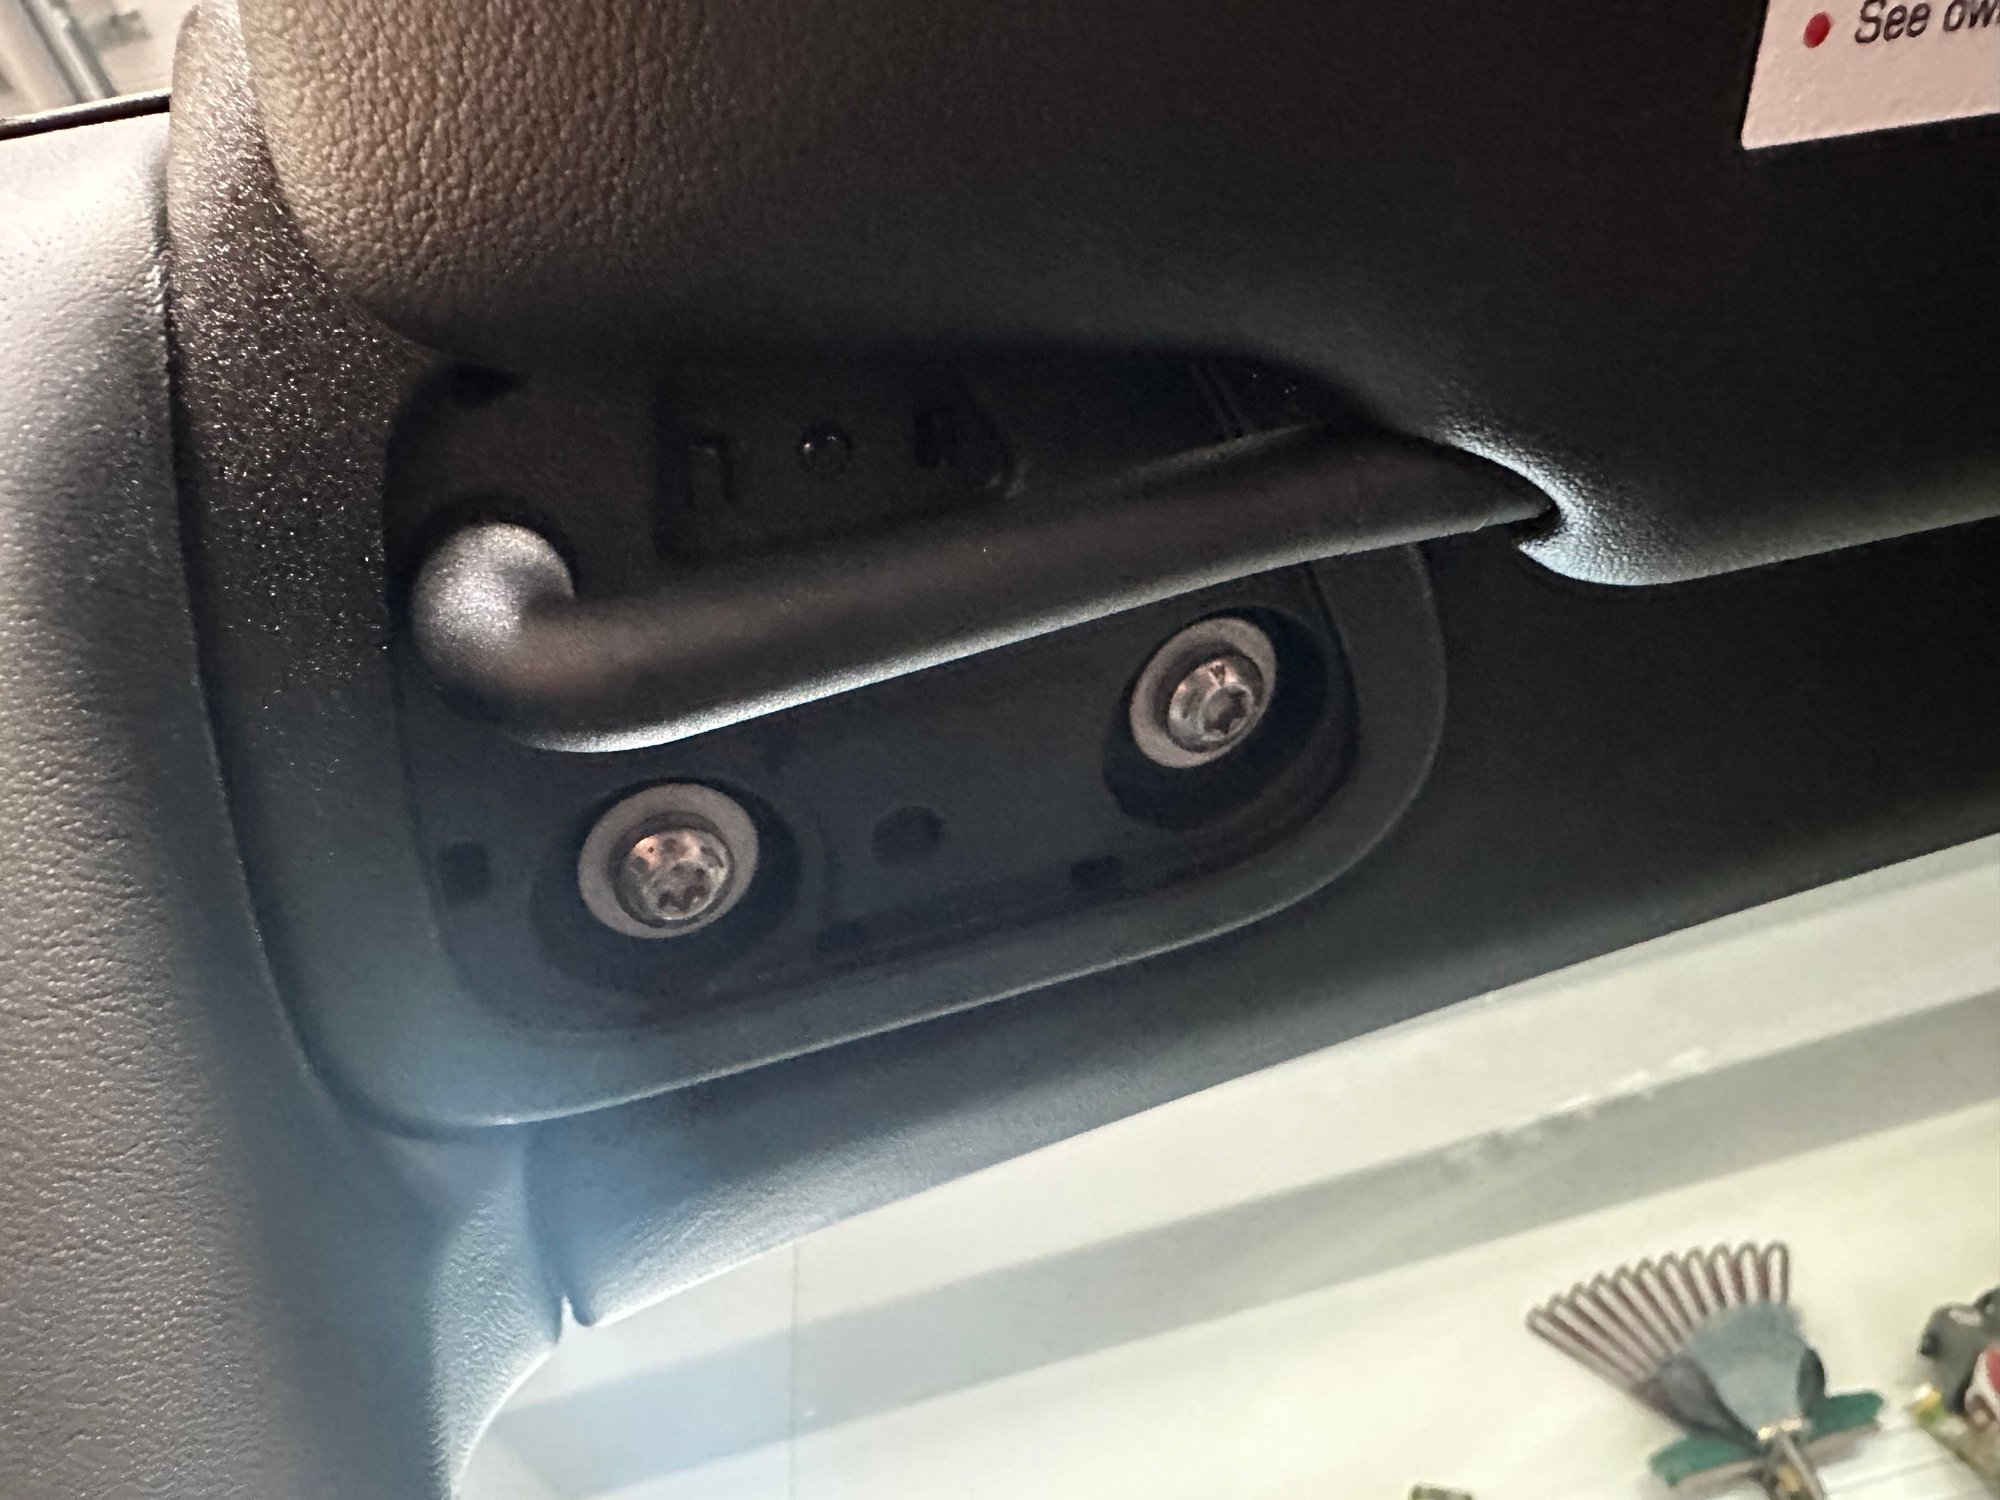
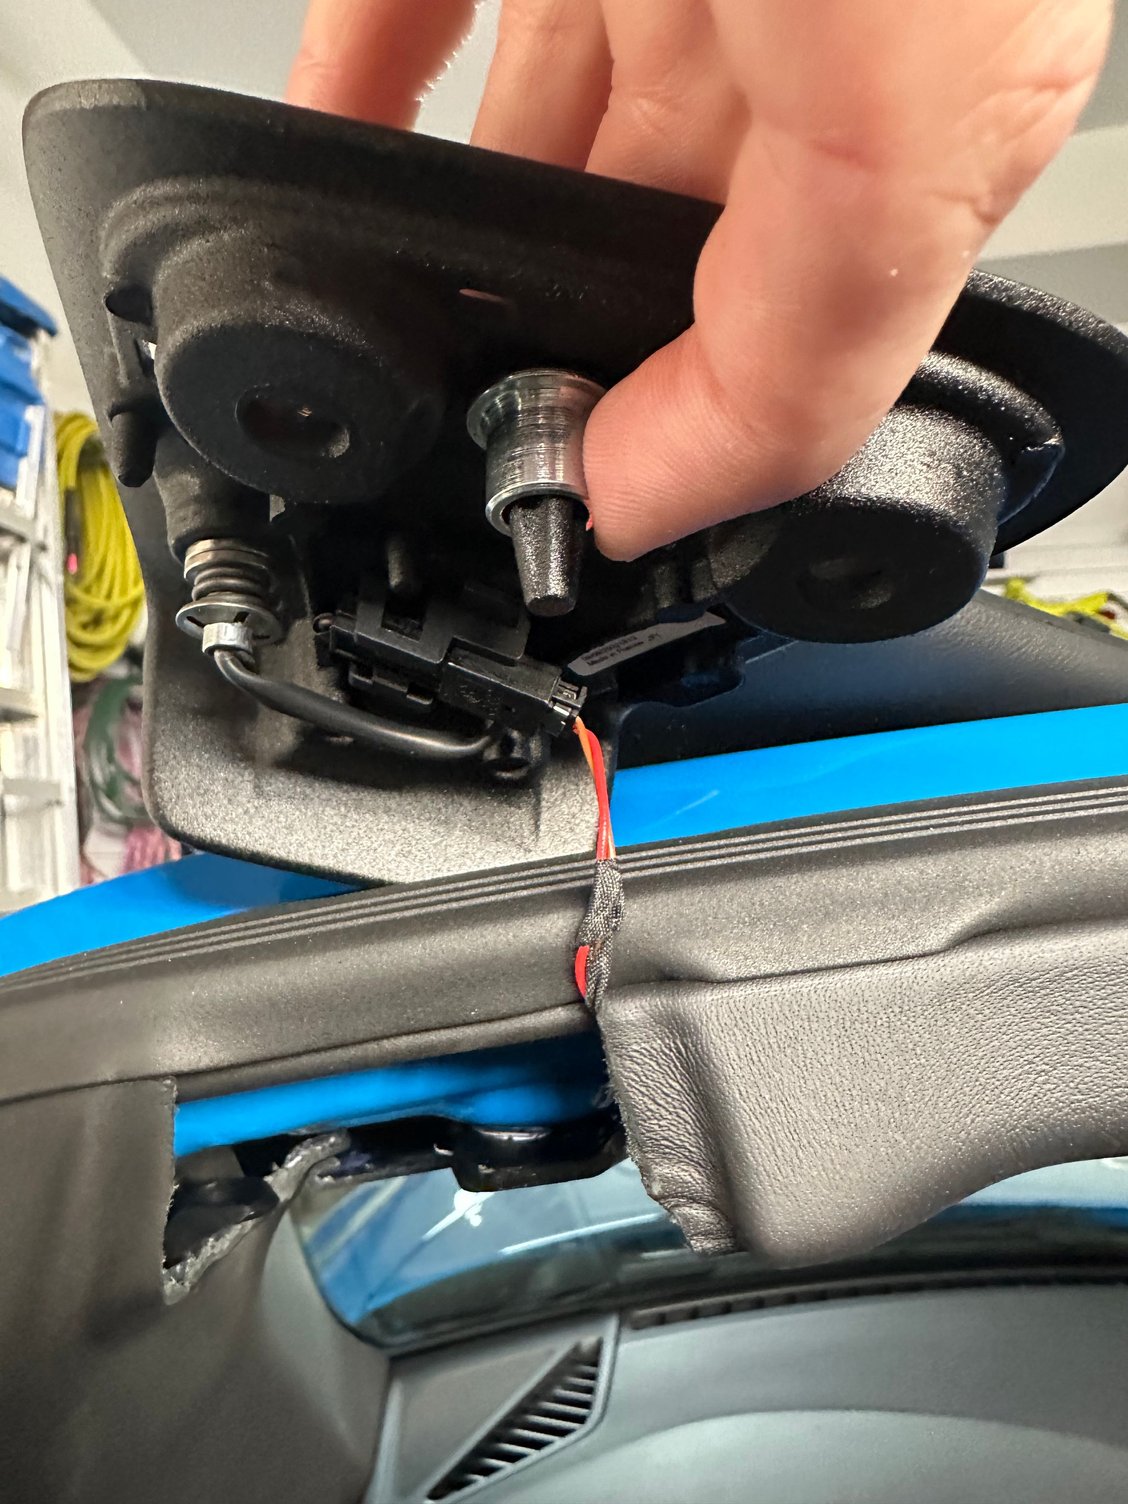
As mentioned in the group buy thread, I tackled the Stage 1 part of the install DIY this morning. Overall very smooth, about 25 minutes per side. I have a convertible, so a few minor differences on the A pillar. You’ll need to open the roof to do the install. You have to remove the sunshade, as that roof bracket holds onto the top of the trim piece. There is an east to remove fascia piece, covering two T-27 screws that do the real work. After removing those the sunshade will come out with a little maneuvering. Be careful as it had a power connector. Also it has a loose silver grommet. Make sure to keep track of it and reinstall.
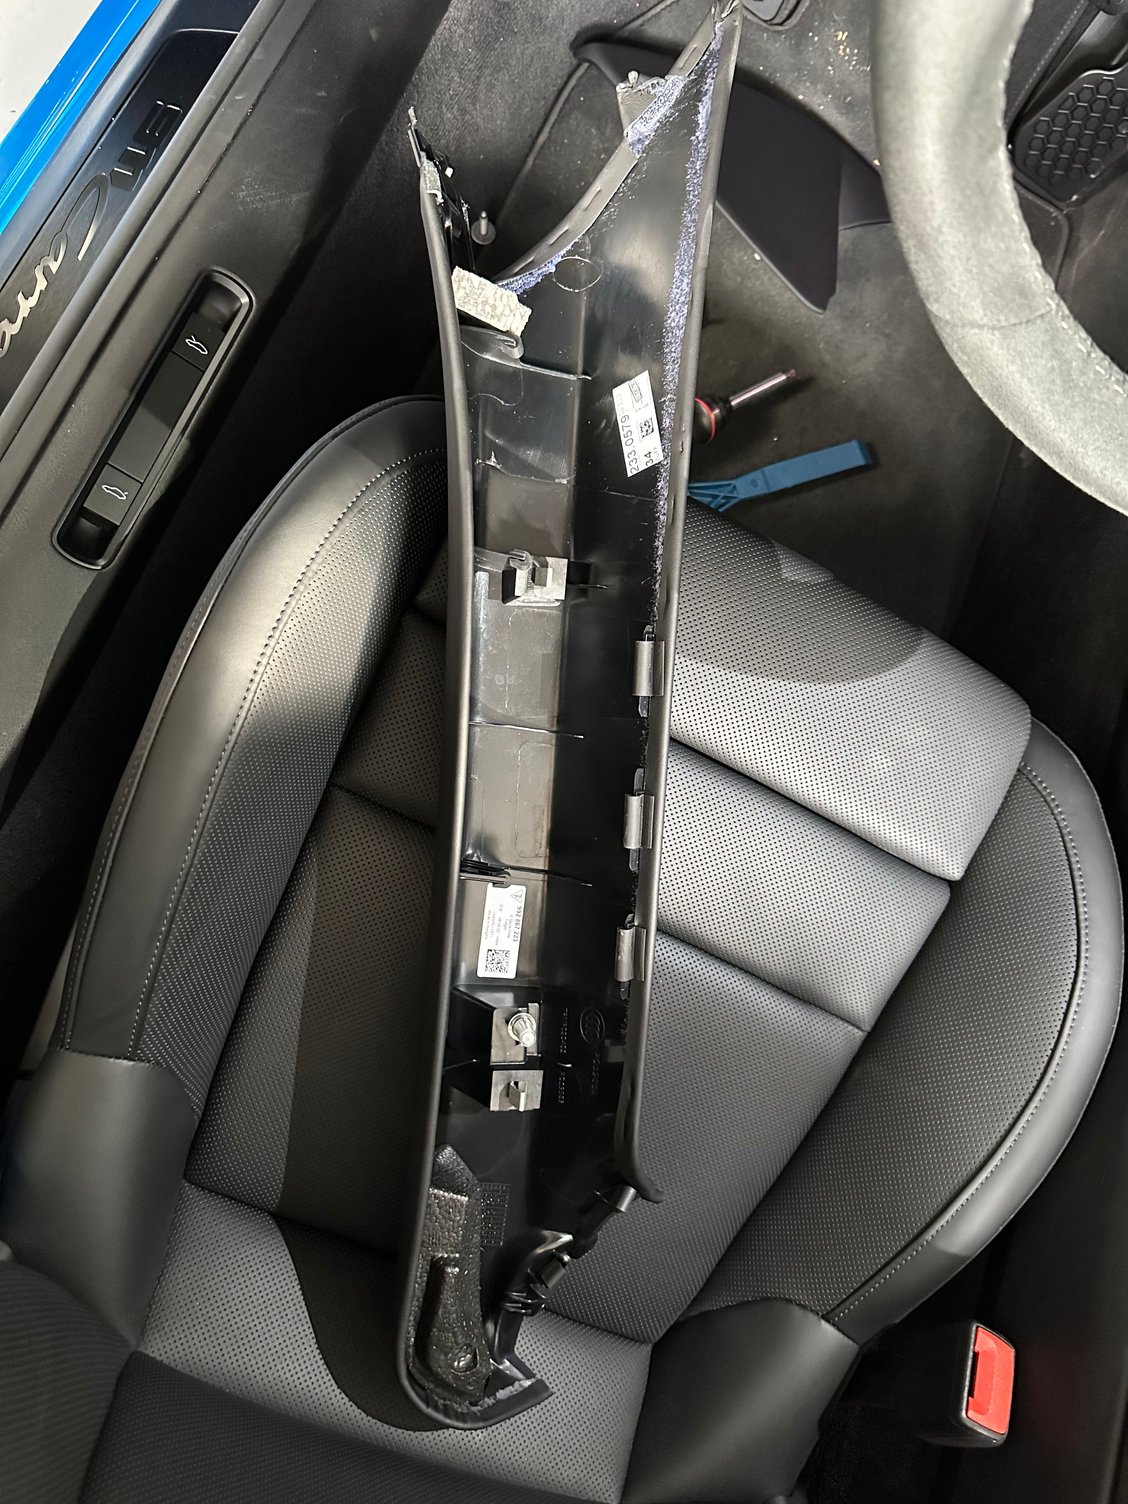
After that, the A-pillar removal is actually quite easy. The convertible just uses conventional clips and doesn’t have that extra strap. Snaps out and in without any fuss. You do need to loosen the center trim piece a little as it overlaps and holds the A-pillar in as well.
Here’s some quick shots for reference. Fascia piece Two T-27 screws. Loose silver grommet and wire. Also see the overlap of the center trim piece with the A-pillar trim. A-pillar, all conventional clips.
Well I completed the Stage 1 & Stage 1 plus upgrades today.
The tweeters were no problem (although I could have done with smaller cutters) however the door panels were my nemesis. The left hand side (my passenger door) came off and went back on relatively easy however the right hand side (drivers) refused to lift off. The clips at the top of the door frame by the rubber seal did not want to release and eventually these started lifting off the door panel rather than staying in the door panel and releasing the door card, as a result the rubber seal started lifting. I eventually managed to prise the door panel out but getting the rubber seal back behind the door frame and getting the 2 clips, which had come off, back on was a complete pain.
Many 4 letter words later and the seal and clips were back on and after the dampening had been installed it was a much harder job getting the door card back on than the other door. I think the problem was again the metal clips by the door seal and pushing the card into them was very tight. Engaging the little clip in the triangular plastic panel by the wing mirror (with the alarm LED) also proved challenging. I think all 4 clips re-engaged but I didn't have a chance to take it out to listen to it or check for rattles. For my own piece of mind I might take it off again and recheck the rubber seal is correctly re-seated just to be sure!
Its very normal that the window rubber seal lifts with the clips underneath as they tend to stay more on the door panel than the door itself...just lift it off. Once off, its fairly simple to lift the rubber seal further to position and slide in the metal clips underneath and then press the rubber seal back in before attaching the door panel. I have done it more times than I care to tell but some of the clips always come off the door and pull the rubber window seal with it. No big deal. To my surprise my door panels went on easy despite the additional sound dampening...or I just did it too many times that it becomes routine.
Well I completed the Stage 1 & Stage 1 plus upgrades today.
The tweeters were no problem (although I could have done with smaller cutters) however the door panels were my nemesis. The left hand side (my passenger door) came off and went back on relatively easy however the right hand side (drivers) refused to lift off. The clips at the top of the door frame by the rubber seal did not want to release and eventually these started lifting off the door panel rather than staying in the door panel and releasing the door card, as a result the rubber seal started lifting. I eventually managed to prise the door panel out but getting the rubber seal back behind the door frame and getting the 2 clips, which had come off, back on was a complete pain.
Many 4 letter words later and the seal and clips were back on and after the dampening had been installed it was a much harder job getting the door card back on than the other door. I think the problem was again the metal clips by the door seal and pushing the card into them was very tight. Engaging the little clip in the triangular plastic panel by the wing mirror (with the alarm LED) also proved challenging. I think all 4 clips re-engaged but I didn't have a chance to take it out to listen to it or check for rattles. For my own piece of mind I might take it off again and recheck the rubber seal is correctly re-seated just to be sure!
Check out the tips in my thread here. My issue w/ the door panels was due to me not getting the longer rear bottom bracket high enough to sit into the door. Once I figured that out, the door panels come on and off easily. I also used a wooden roller to push on the soundshield very tightly so that probably made it easier to slip the door panel back on. I didn't struggle with it at all, though I did have to pull down a bit on the grab bar to get the panel low enough to reinstall the screw going into where the door handle is.

 01-19-2023, 10:19 PM