When you click on links to various merchants on this site and make a purchase, this can result in this site earning a commission. Affiliate programs and affiliations include, but are not limited to, the eBay Partner Network.
I'm trying to install a CTEK battery tender on my 992 (w/ AGM battery) and could use some advice. It seems like there are multiple ways to skin this cat, and I'm planning on following the instructions above since they seem pretty clear.
Electricity is not something I really have an understanding of, so I wanted to confirm my understanding of the steps required to implement this. Here are the steps below as I understand it (steps 1-6). What I'm a bit confused about is whether I need to remove the bolt for the negative at all (step 1 in my image below), since I'm not using this bolt for the battery tender. I'm assuming the answer is still yes. I've read elsewhere (see here) that this bolt doesn't come off, so if the answer is yes, I'm not quite sure how to proceed...
Could anyone help me verify my understanding?
Also, I assume that when I go to remove the positive and negative terminal, I should lift the entire clamp off to disconnect it. Is that right?
Apologies in advance for what I'm sure is a pretty low level question. Should've paid more attention in high school. Appreciate any advice!
Don’t remove the nuts from the battery clamp. Those are not meant to be backed out all the way and if you do, the nut will not go back into the bolt.
Instead, remove the hex nut (10mm I think) from the positive terminal and attach the positive charger lead. Attach the negative to the grounding terminal on the firewall body. It’s the giant nut on the body with the black cable attached to it, right behind your battery.
Thanks for the advice!
So I don't need to disconnect the negative first before disconnecting the positive? I assumed I had to first disconnect the negative before I could disconnect the positive.
I'm also a bit confused because you said to not remove the nut, but then said to remove the hex nut. Can you help clarify which nut I'm not supposed to remove, and which I should remove?
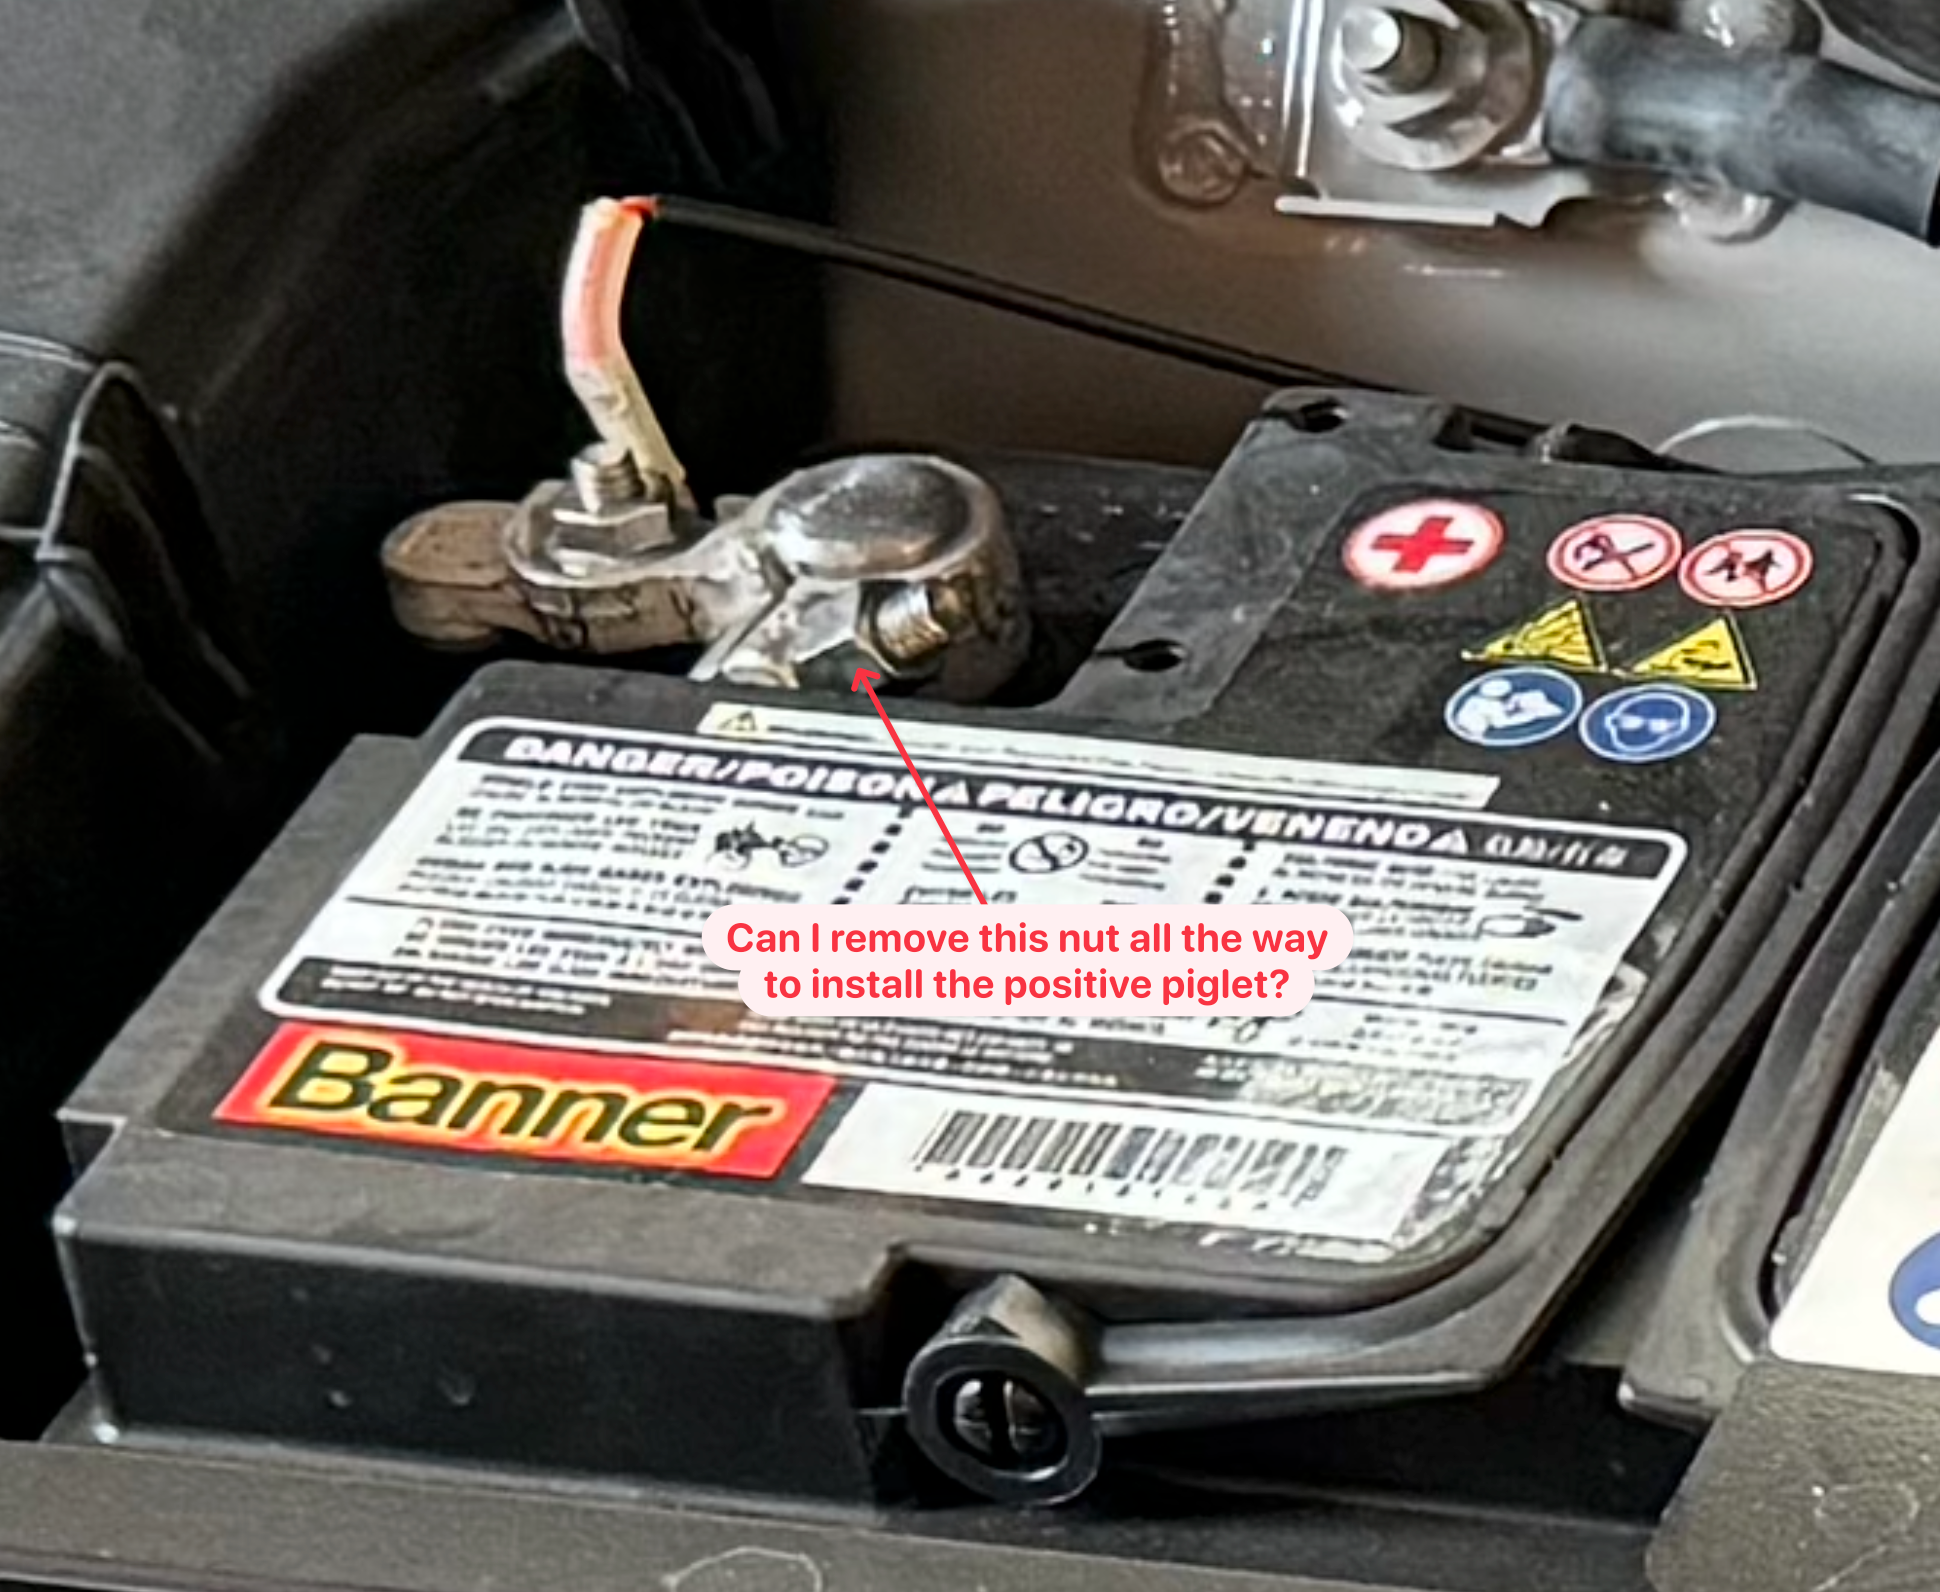
Here's a picture below on the nut I thought I was supposed to fully remove on the positive in order to install the positive piglet behind it.
Do not take it all the way off. Just unscrew it about 2mm. Use clippers and cut a slot in the circle of the connector and slide it on, screw back down.
So I don't need to disconnect the negative first before disconnecting the positive? I assumed I had to first disconnect the negative before I could disconnect the positive.
I'm also a bit confused because you said to not remove the nut, but then said to remove the hex nut. Can you help clarify which nut I'm not supposed to remove, and which I should remove?
Here's a picture below on the nut I thought I was supposed to fully remove on the positive in order to install the positive piglet behind it.
see the other hex nut facing vertical with the small black wire connected? Remove that nut.
Do not take it all the way off. Just unscrew it about 2mm. Use clippers and cut a slot in the circle of the connector and slide it on, screw back down.
lol good brief, my brain is really fried after a weekend with family!
Thank you guys. So it sounds like I don't need to remove the nut on the negative before removing the nut on the positive? I was under the impression that I had to disconnect the black first before touching the red.
Is the procedure to disconnect the negative connector from the battery and fully remove power from the car before taking a wrench to the positive connector of the battery? Does the interruption in power cause other problems with the 992 super computer?
Extreme caution must be exercised if the car ground (negative) lead is attached to the negative terminal of the battery when wrenching on the connected positive lead of the battery.
Just to be clear: A wrench or other tool that is used to change the positive lead of the battery could come in contact with the chassis and make some sparks if the negative battery lead is connected to the car.
This Is why most people attach the black wire (negative) to a chassis ground point and not to the battery. Scroll up and there are multiple posts showing the chassis ground points that were used.
This Is why most people attach the black wire (negative) to a chassis ground point and not to the battery. Scroll up and there are multiple posts showing the chassis ground points that were used.
I agree with that process of connecting the ground wire to the chassis. This is the recommended procedure.
The procedure I was emphasizing was to prevent a short to ground from the positive connection of battery to the chassis when making the charger connection to the positive terminal of the battery. I always disconnect the negative terminal firsts and attach it last. This effectively breaks the circuit. If you short the positive lead on the battery to the chassis the return path to the negative terminal is broken with the negative connection disconneced.
This worked for me. Attached the ground with an additional nut on the factory chassis grounding post. Then pretty much what everyone else does for the positive side.
What is nut size for factory grounding post? Will 6mm eyelet fit over post without modification?
if I’m not mistaken, it’s an M6 so the eyelet should fit over it with no issue. It’s got a lot of thread on it before you put the nut so you can do a trial without touching anything. If you end up having the correct nut and the eyelet fits. I recommend using a wire brush to remove some of the paint on the chassis stud threads before you thread the additional bolt on so you get better conductivity.
I ended up replacing the eyelid for the one on the positive battery post since the post was so small.
Last edited by Porsche 505; 12-26-2023 at 03:53 PM.


 12-25-2023, 09:16 PM


 Appreciate any advice!