When you click on links to various merchants on this site and make a purchase, this can result in this site earning a commission. Affiliate programs and affiliations include, but are not limited to, the eBay Partner Network.
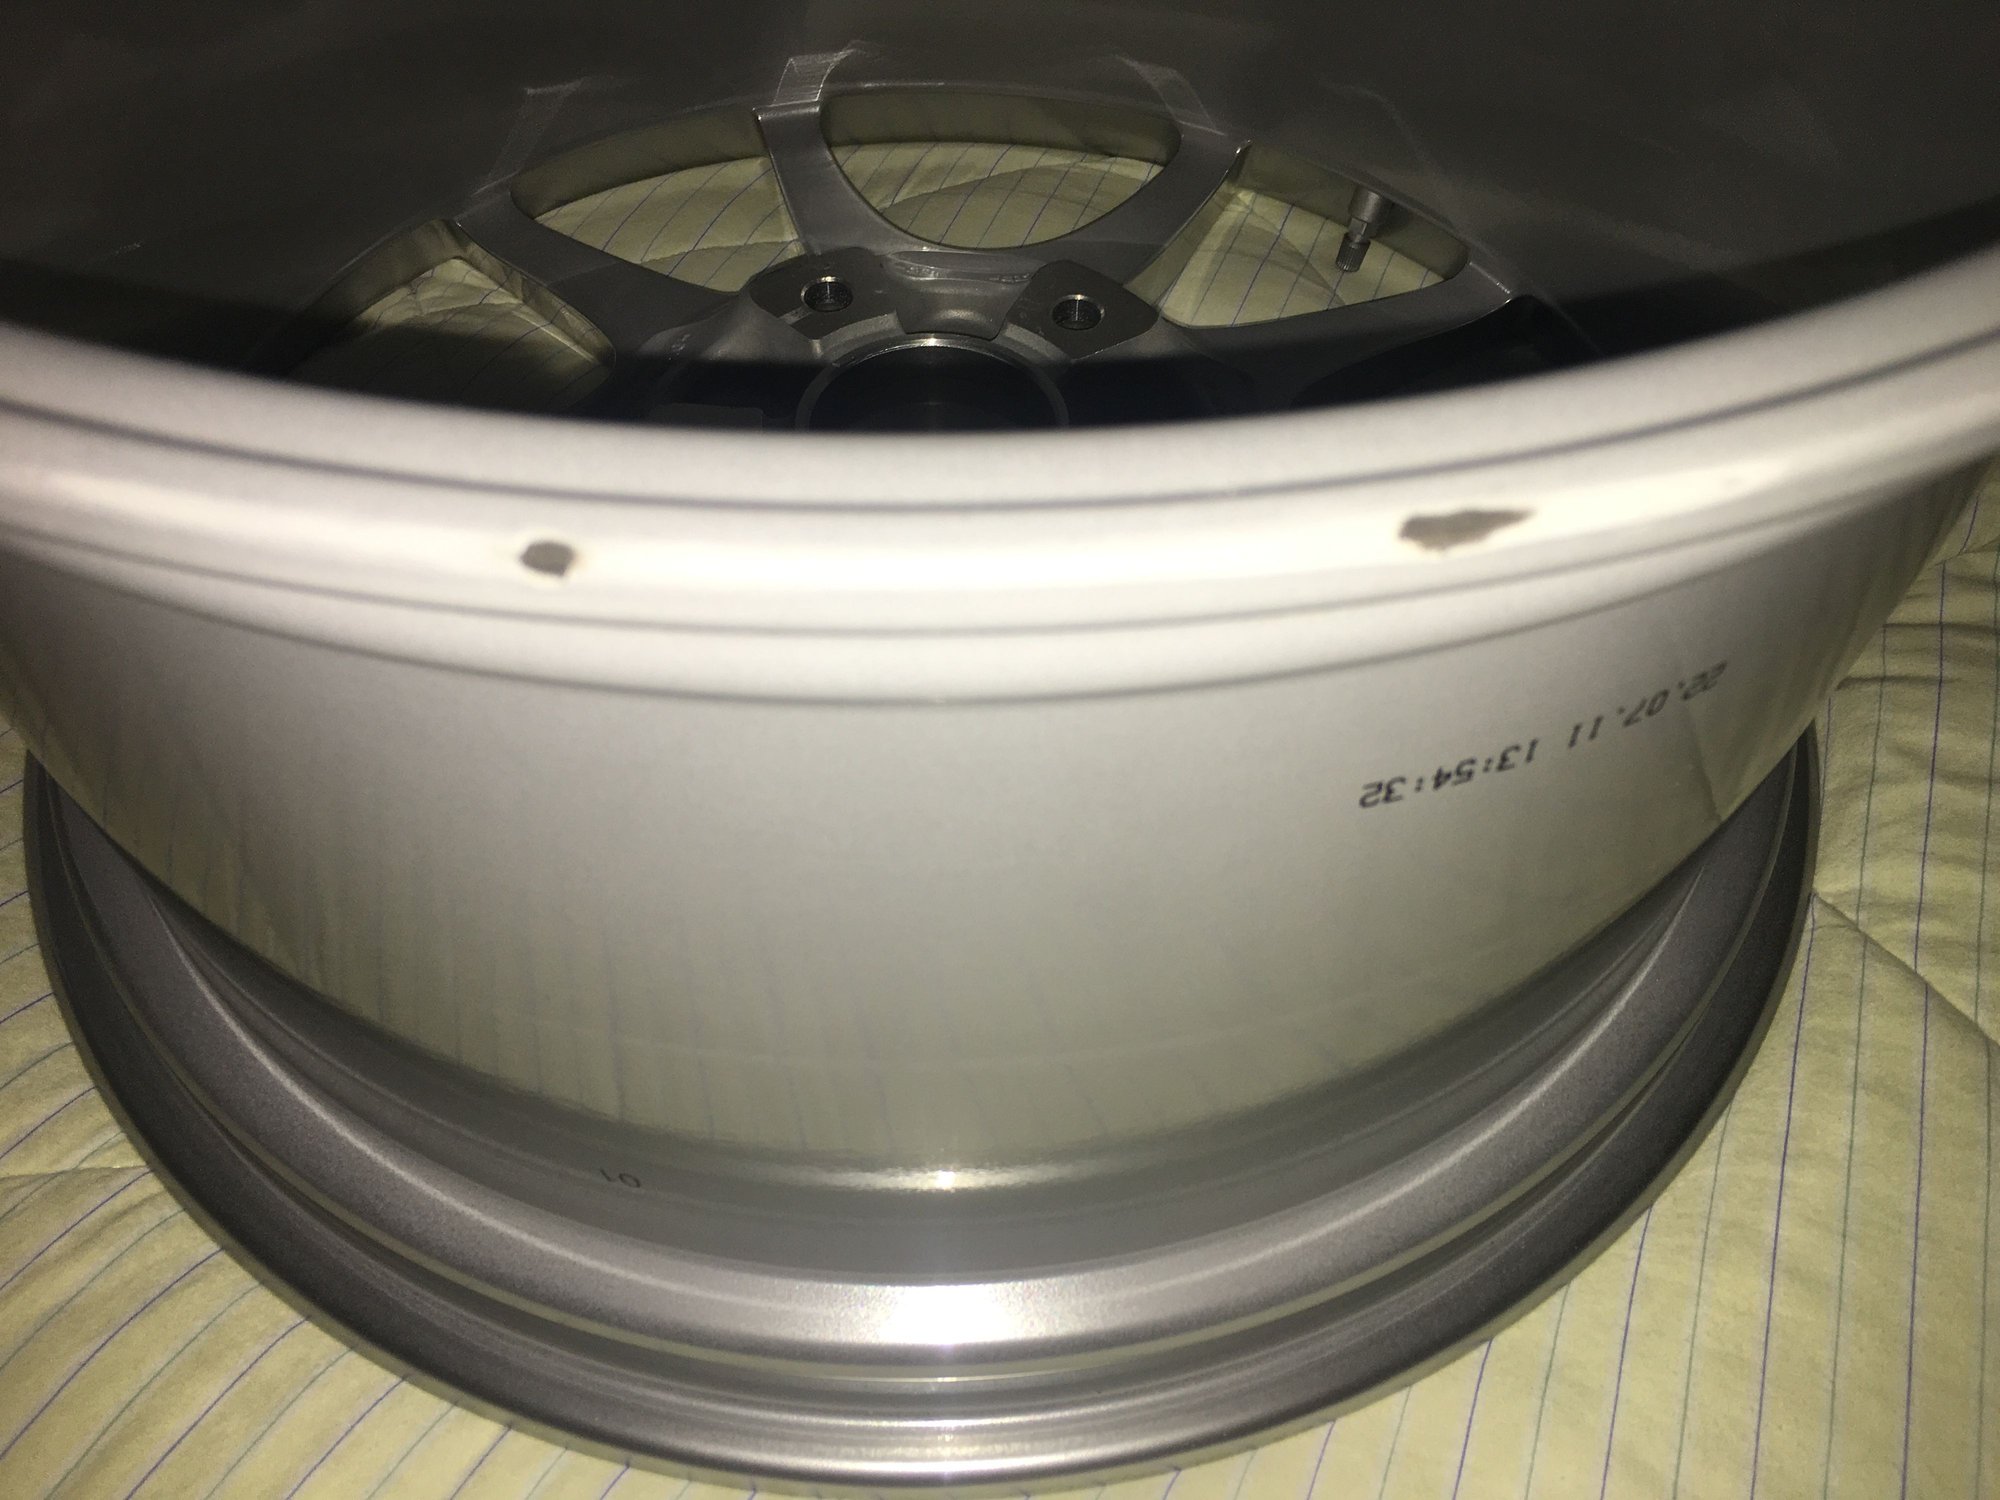
This is a great thread. Have one wheel that was repaired by an indy, and was painted so thick that it wouldn't fit on my hub! Had to sand the inside hub area of wheel to get it to fit. Now the outside has started to cloud (poor prep before the clear perhaps), so I will likely re-spray the whole wheel. The sad part is they were a brand new second set of wheels from Suncoast and were damaged in a small area while the tires were being mounted. I only wanted the small area (1" gouge) repaired, but the dealer had the indy do the whole wheel.
This is a great thread. Have one wheel that was repaired by an indy, and was painted so thick that it wouldn't fit on my hub! Had to sand the inside hub area of wheel to get it to fit. Now the outside has started to cloud (poor prep before the clear perhaps), so I will likely re-spray the whole wheel. The sad part is they were a brand new second set of wheels from Suncoast and were damaged in a small area while the tires were being mounted. I only wanted the small area (1" gouge) repaired, but the dealer had the indy do the whole wheel.
Every time my car is in for service, or somewhere for a relatively simple task like changing out tires I'm always nervous because I know whoever is doing the work won't be nearly as careful as I would be, and a disaster can be hiding in the bushes. There was no reason for a small gouge to turn out like it did on your wheel, but unfortunately stuff like that is fairly common.
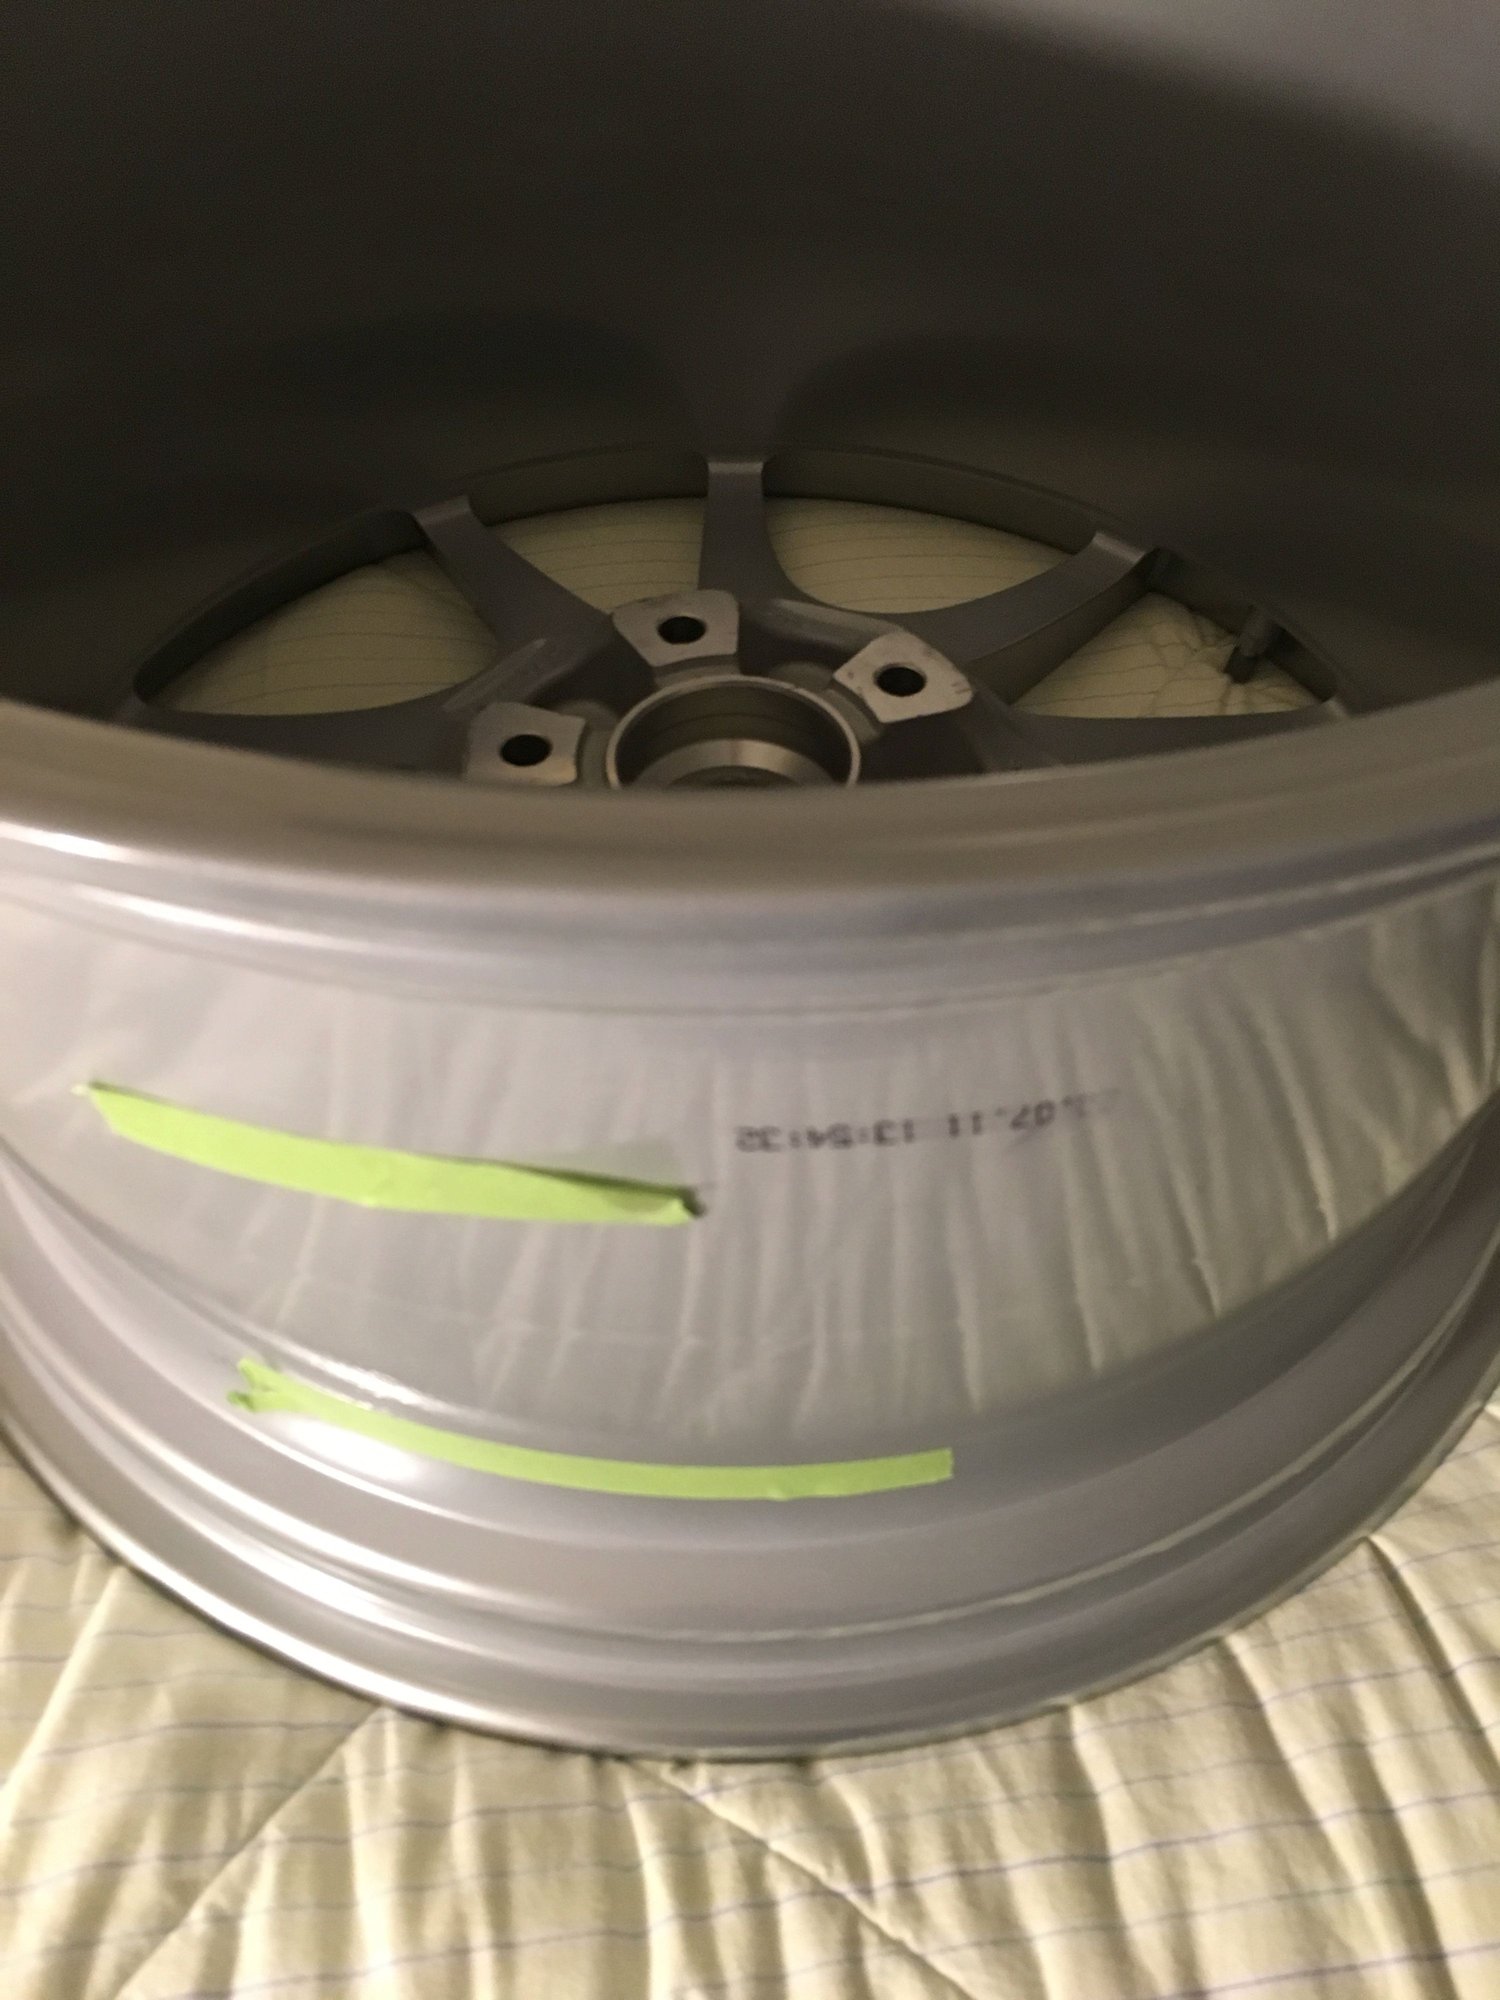
Today I used a very fine file to knock down the ridges left around the gouges. I also used a file to clean out smashed paint in the gouge, and to leave a rough texture in the gouge which will help with filler adhesion. Then I used an epoxy filler to fill in the gouge. As the epoxy was starting to harden, I used a razor blade to carefully slice away excess epoxy. After it set up I used a fine file to blend the areas in with the surrounding areas, followed by a 400 grit wet sand. When I rub my finger around the rim I cannot feel the filled areas, so far so good. Next steps will be the application of primer, basecoat, and then clearcoat.
This is a great thread. Have one wheel that was repaired by an indy, and was painted so thick that it wouldn't fit on my hub! Had to sand the inside hub area of wheel to get it to fit. Now the outside has started to cloud (poor prep before the clear perhaps), so I will likely re-spray the whole wheel. The sad part is they were a brand new second set of wheels from Suncoast and were damaged in a small area while the tires were being mounted. I only wanted the small area (1" gouge) repaired, but the dealer had the indy do the whole wheel.
ps....nice wheels! I have a set of those on my C2S Cab....need to update my pic. I really like the Sport Technos. Actually, I like all sorts of wheels, which is why I bought the set of Carrera S wheels.
Thanks, Flickroll. I looked long and hard to find a C2S that had the Sport Technos on it with the other equip I wanted. Like you, I love wheels too, which is why I bought the second new set from Suncoast they had on a smoking sale. Now I just need to get the one bum wheel re-sprayed to my liking. Thanks for the additional info on your gouge repair. This is very helpful info.
Do you have a pic of your espresso-cognac two tone interior? Beautiful car.
Do you have a pic of your espresso-cognac two tone interior? Beautiful car.
Thanks for the compliment. I've attached the only interior shot that I have. It's not very good and it was copied from the dealer's website when I bought the car. Got an absolutely incredible deal on the car including great trade for the Boxster S, too good to pass up so I bit. I need to take some quality photos of the car as I have done a few things to it since I picked it up. Some things you can't tell just by looking at the car such as PSE and a Smarttop module, plus a few cosmetic things like clear LED side markers, new SPASM front lip spoiler, and a paddle shift kit for the steering wheel which is really awesome as I now have paddles on the multifunction wheel.
I am not a big fan of Carrera Classic wheels, so I started a wheel search not long after I got the car. Took a long time but in the end the Sport Technos are what popped for me so I ordered a wheel set from my local dealer who matched Suncoast's price. I also like the Carrera S wheel in shiny silver, had them on my Boxster S, so when I saw Suncoast was offering a set of takeoffs for $1895 I bought those....I'll swap wheels every now and then. I have to say Suncoast stepped up to the plate with the damaged wheel and offered a number of options for me to pick from, including wheel replacement. In the end I took a credit as I have all of the materials to fix the wheel except the base coat (and the rash is on the inside lip of the wheel), and I can buy a 1/2 pint of that for about $40.
Looks to me like the inside rim lip and the barrel of the wheel are painted a different color than the face of the rim. Perhaps it's the light but I'm pretty sure it is different, looks more gray. Any idea if two paints are used on the rim, and if so what the inside color is? Thx
I dont know what wheel you have. I know the black back shaded ones are 2 tone. I would guess the inner is just more flat than the face
That's what I think too. I decided to spray the small repair areas in Arctic Silver. Since the areas are so small and I'm using an airbrush which gives very fine material control, it won't be noticeable unless one looks very close. Plus it's on the inside of the rim so you won't see it anyway.
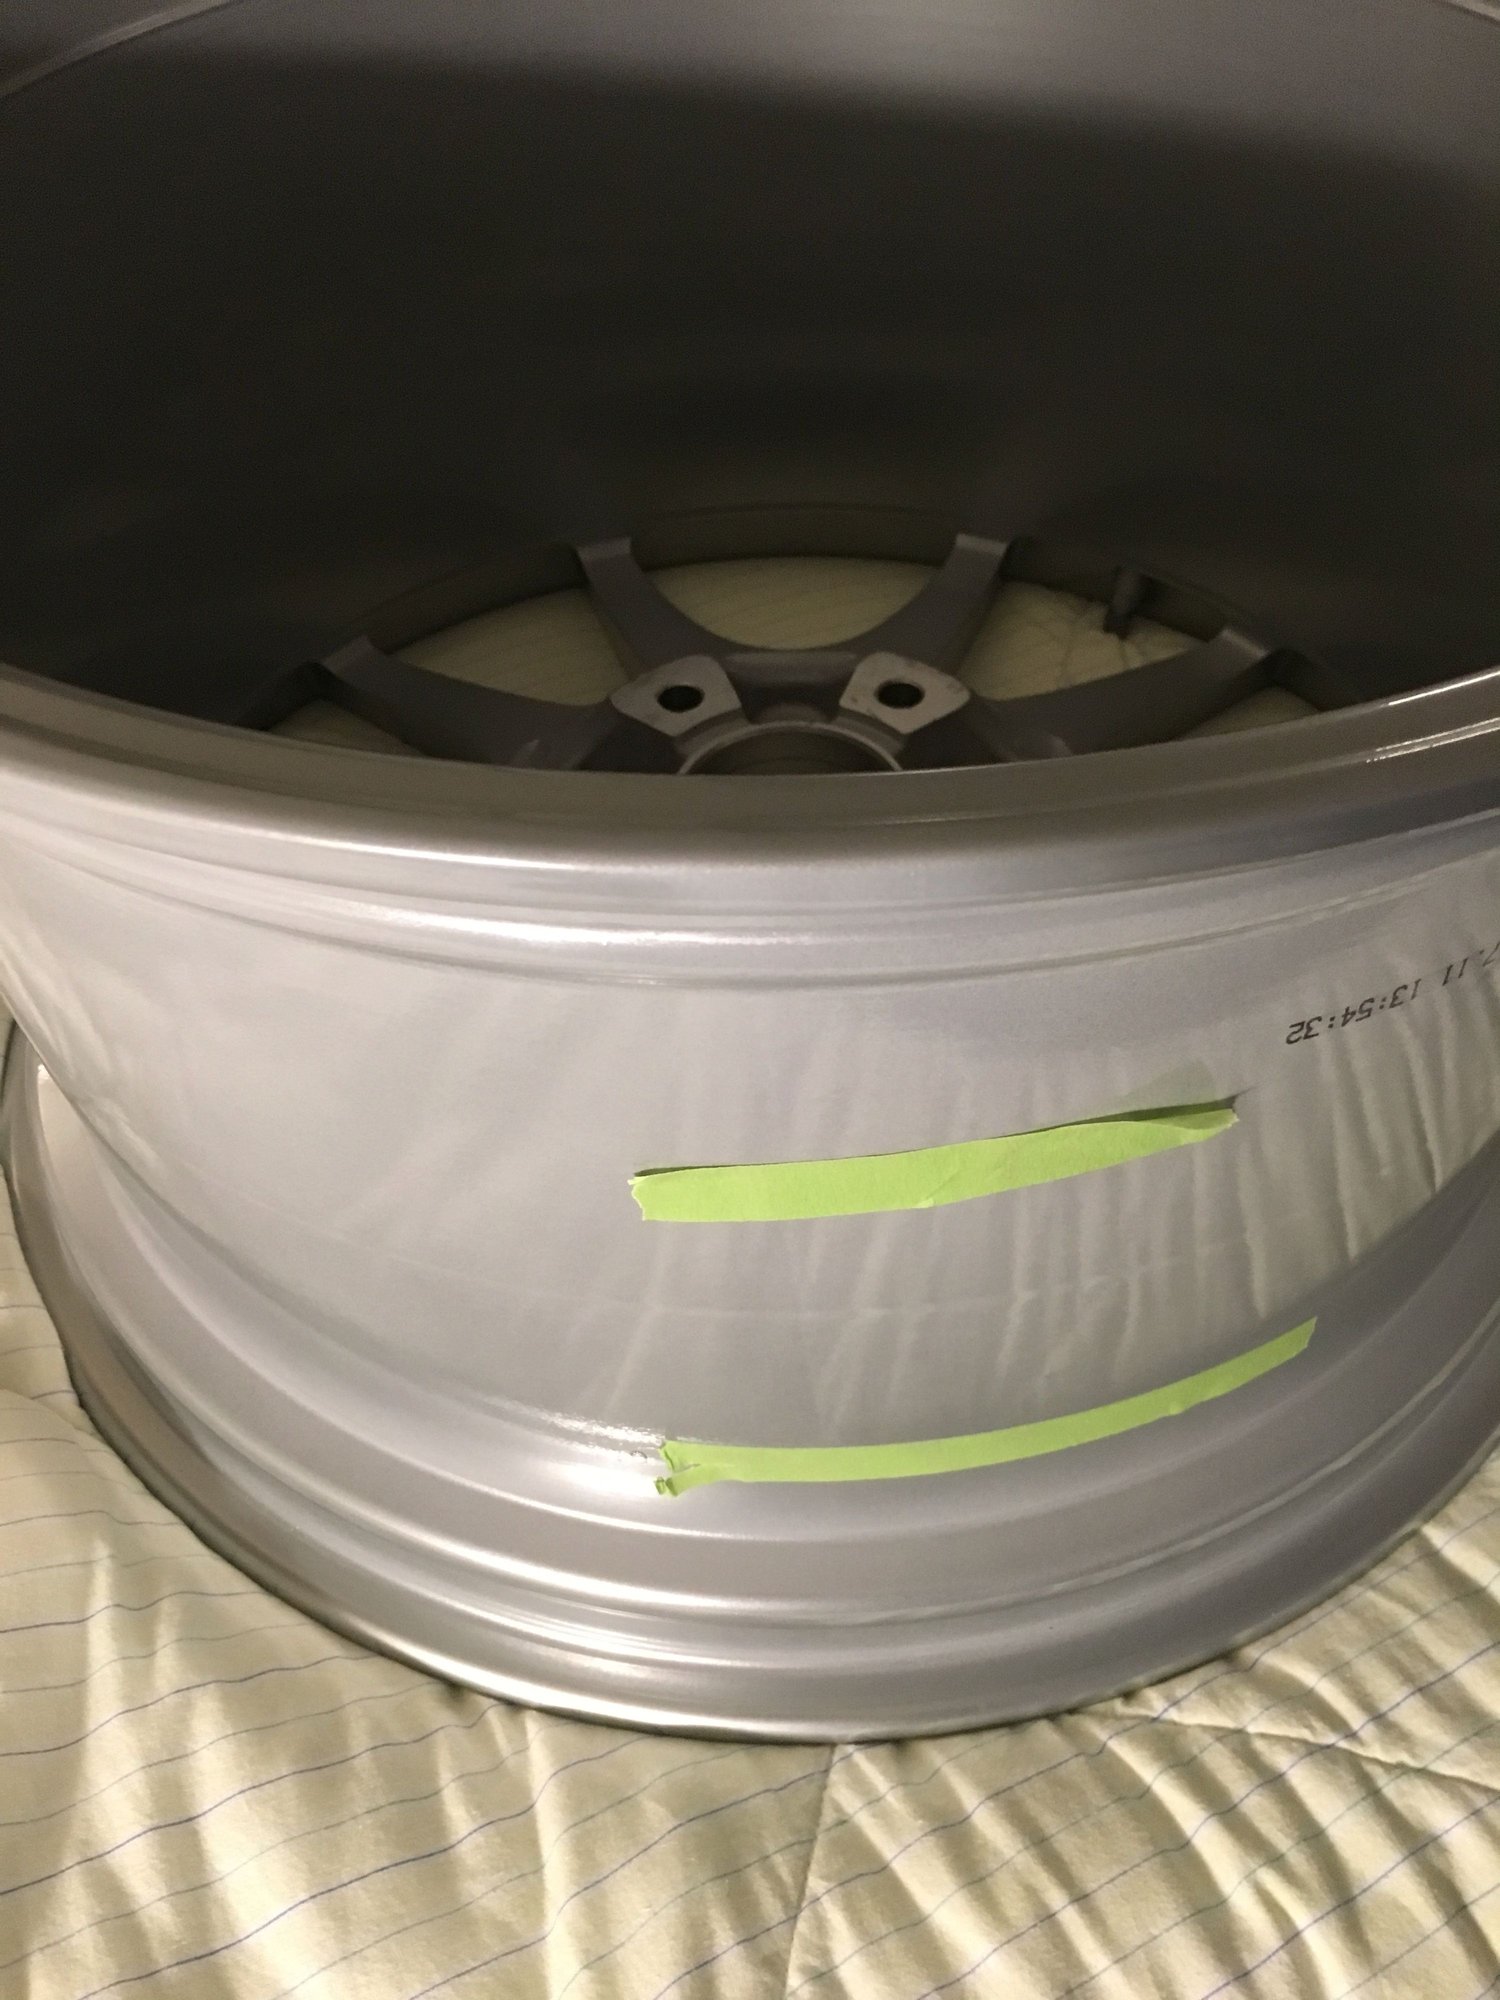
I finished the wheel repair today. I have attached pictures to show the gouges filed with epoxy filler, and the finished product. The project was fairly straight forward except the paint match. As I mentioned earlier in the thread, the barrel is a different color than the face of the wheel which made it tricky to make it look right. I tried 2 or 3 different iterations until I got a good match. What worked is using PPG'S K36 catalyzed primer, Arctic Silver basecoat, and PPG Concept clearcoat. The successful process for a really good color match was to use the K36 primer, which is a light gray, as the final base color to work from, and then fog the primer with Arctic Silver basecoat. Too much basecoat and it turned bright silver like the face of the wheel and did not match the barrel. All of which was topped off with the clearcoat. I am very happy with the way it turned out, and the repair area is about impossible to detect. The green tape on the wheels is to show the areas that were repaired (above the tape, on the rim). The spray gun was a Paasche VL airbrush coupled to a Porter Cable air compressor.
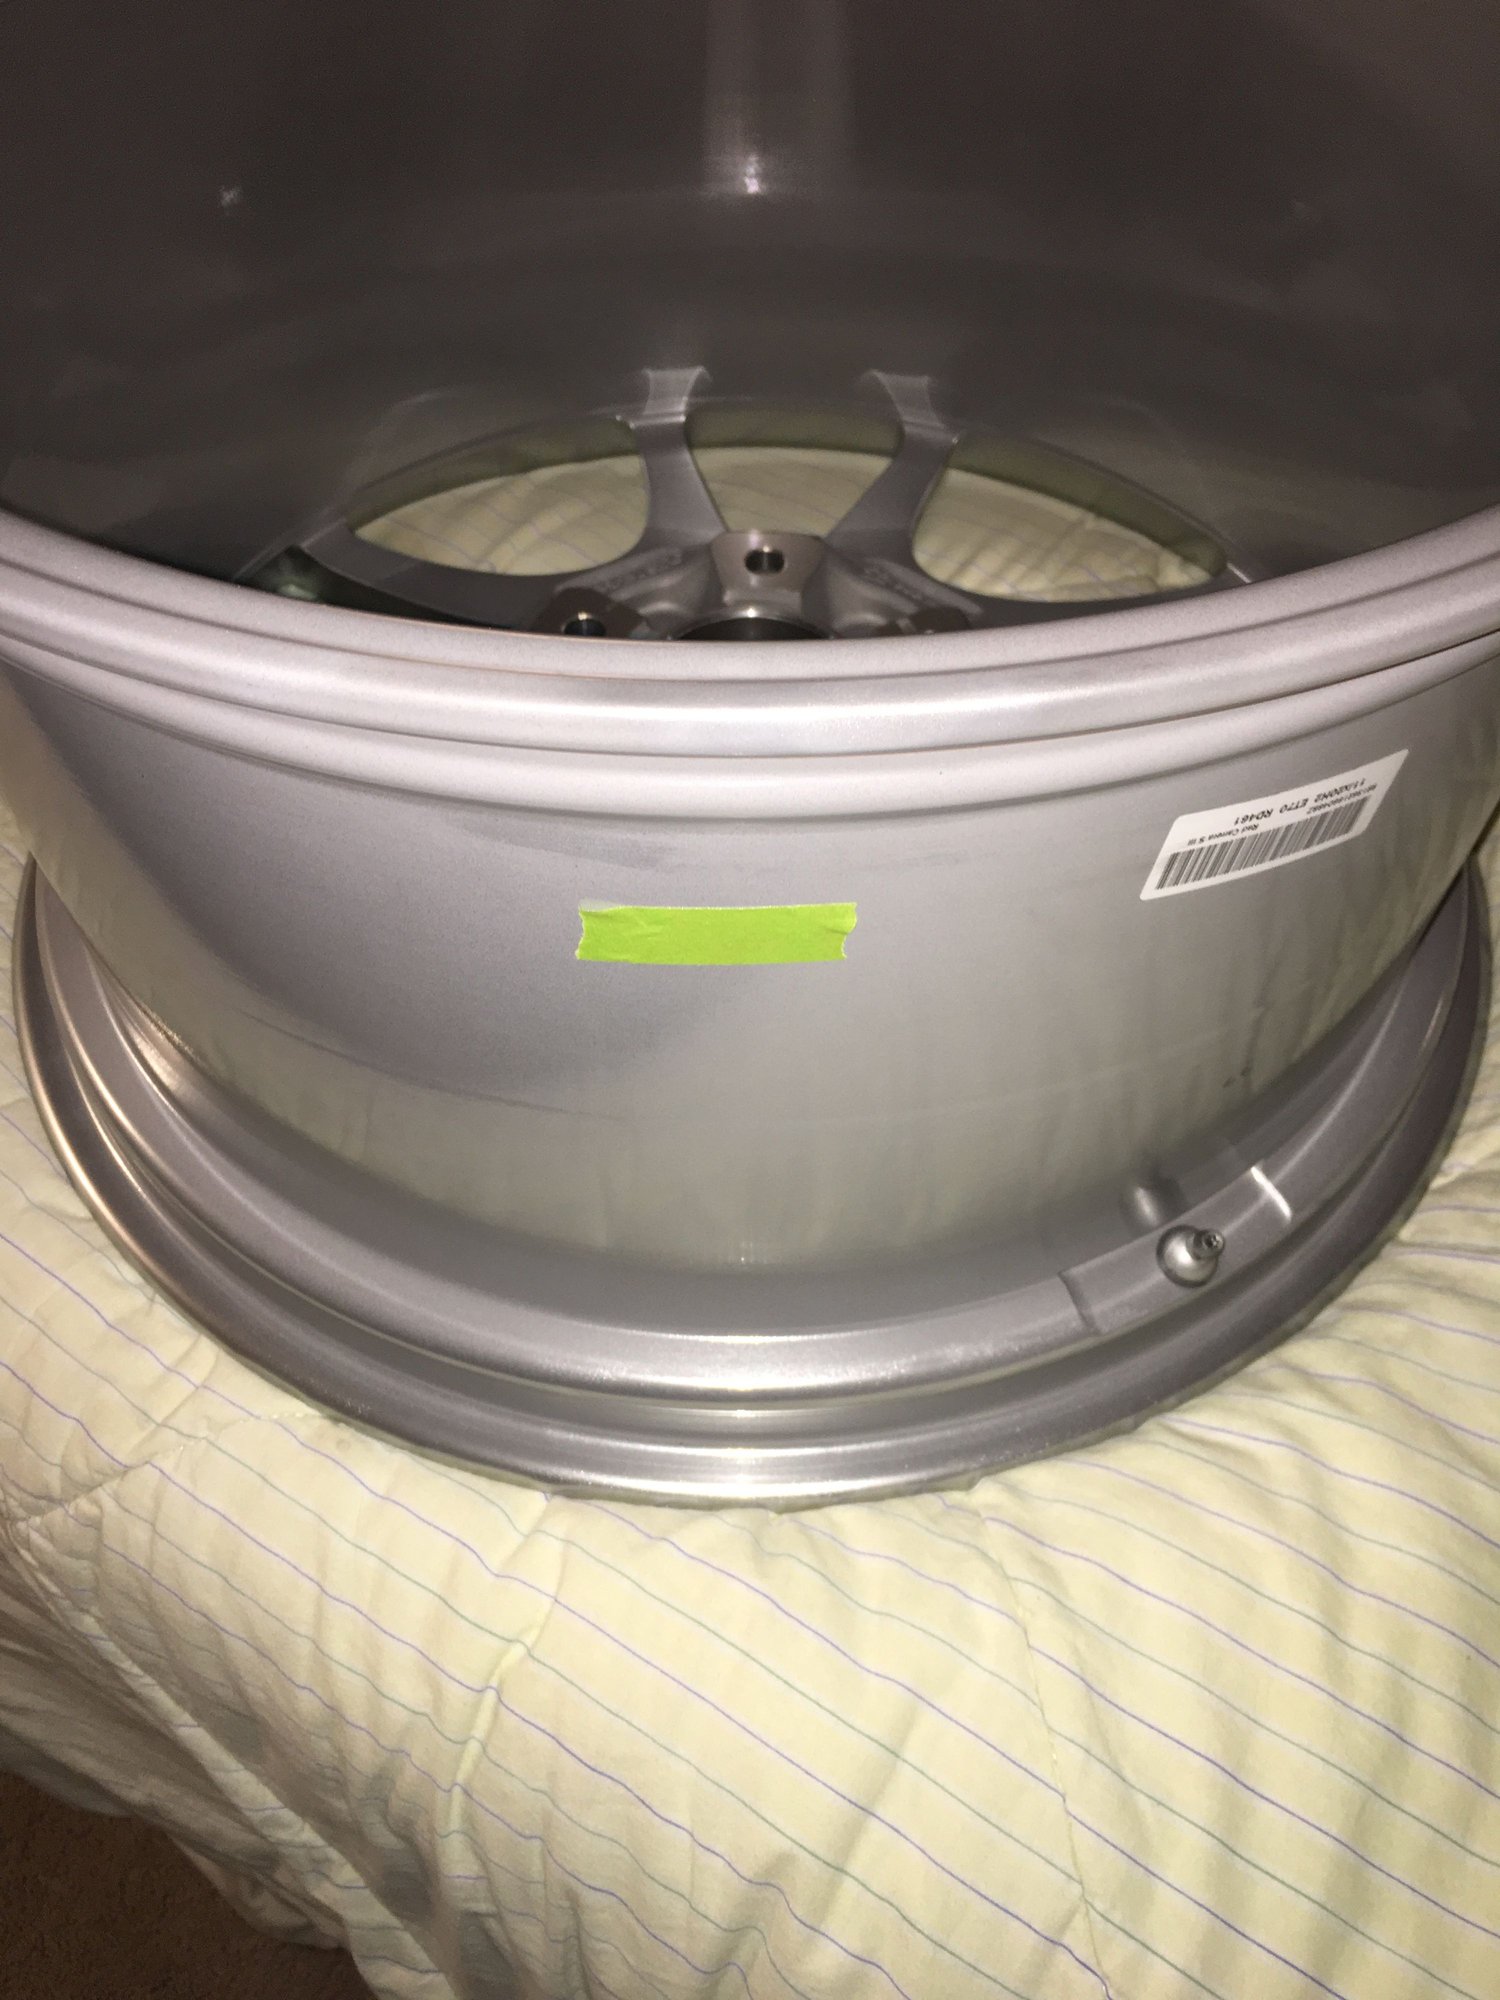
I just bought a set of Carrera S wheels for my 991 that are basically perfect except for a small defect on the outside edge that likes like it was due to removing the tire. I’m worried that repairing the wheel would be worse than the defect. However, I would like to touch it up prior to mounting the tires. Just wondering if the Arctic silver or wurth silver is better?
I just bought a set of Carrera S wheels for my 991 that are basically perfect except for a small defect on the outside edge that likes like it was due to removing the tire. I�m worried that repairing the wheel would be worse than the defect. However, I would like to touch it up prior to mounting the tires. Just wondering if the Arctic silver or wurth silver is better?
Some options to consider: 1) Ask your local Porsche dealer who does their wheel repairs and check with them. They�ll probably even be able to do it well for a reasonable price. 2) Buy both paints and try them on cardboard or a metal scrap and see what provides the closest match. 3) if it�s just a chip, consider using a more modest approach with Dr Colorchip or similar. A nice thing with Dr Colorchip is if it isn�t looking right you can remove it with their mild cleaner fluid and try again. Several applications may be needed if the spot is deep with a drying time between each.
With spray, one of the biggest challenges is feathering out the edges of the sprayed area. And don�t forget to clear coat over the metal flake (especially on the Wurth where it left a rough surface otherwise).
It�s certainly not for the faint of heart and you have to be willing to deal with a bigger fix if it goes wrong.

 01-07-2017, 07:10 PM