

Replacing the P-O-R-S-C-H-E emblem.


 04-21-2014, 08:53 PM
#48
Unless you can find a template, you should be able to make one pretty much like the factory one in the video. First raise your spoiler and cut a piece of cardboard to fit the flat area it was covering. Trace from below and cut your edge matching the fender curve. This piece has to fit the space perfectly. Cut a strip of cardboard wide and long enough to cover the badge, hold it flush in place and tape it to the top piece. Reinforce with some ribs so it'll hold its shape. Now find another 991 and transfer the lettering onto your template. If you got the right cardboard (kinda soft) you might get the letters to imprint. If not, put some wax or polish, anything that'll transfer onto the cardboard. Extra credit, cut the outlines and have a jig just like in the video. Faster/easier, run a strip of double-sided tape across the middle and align your letters on that. Forgot to mention photography, but that goes without saying I suppose...
04-21-2014, 09:12 PM
#49
Newbies Hospitality Director
Lifetime Rennlist
Member
Lifetime Rennlist
Member
Join Date: Apr 2005
Location: Winston-Salem, NC
Posts: 18,084
Likes: 0
Received 34 Likes
on
33 Posts
Unless you can find a template, you should be able to make one pretty much like the factory one in the video. First raise your spoiler and cut a piece of cardboard to fit the flat area it was covering. Trace from below and cut your edge matching the fender curve. This piece has to fit the space perfectly. Cut a strip of cardboard wide and long enough to cover the badge, hold it flush in place and tape it to the top piece. Reinforce with some ribs so it'll hold its shape. Now find another 991 and transfer the lettering onto your template. If you got the right cardboard (kinda soft) you might get the letters to imprint. If not, put some wax or polish, anything that'll transfer onto the cardboard. Extra credit, cut the outlines and have a jig just like in the video. Faster/easier, run a strip of double-sided tape across the middle and align your letters on that. Forgot to mention photography, but that goes without saying I suppose...

 04-22-2014, 10:31 AM
#50

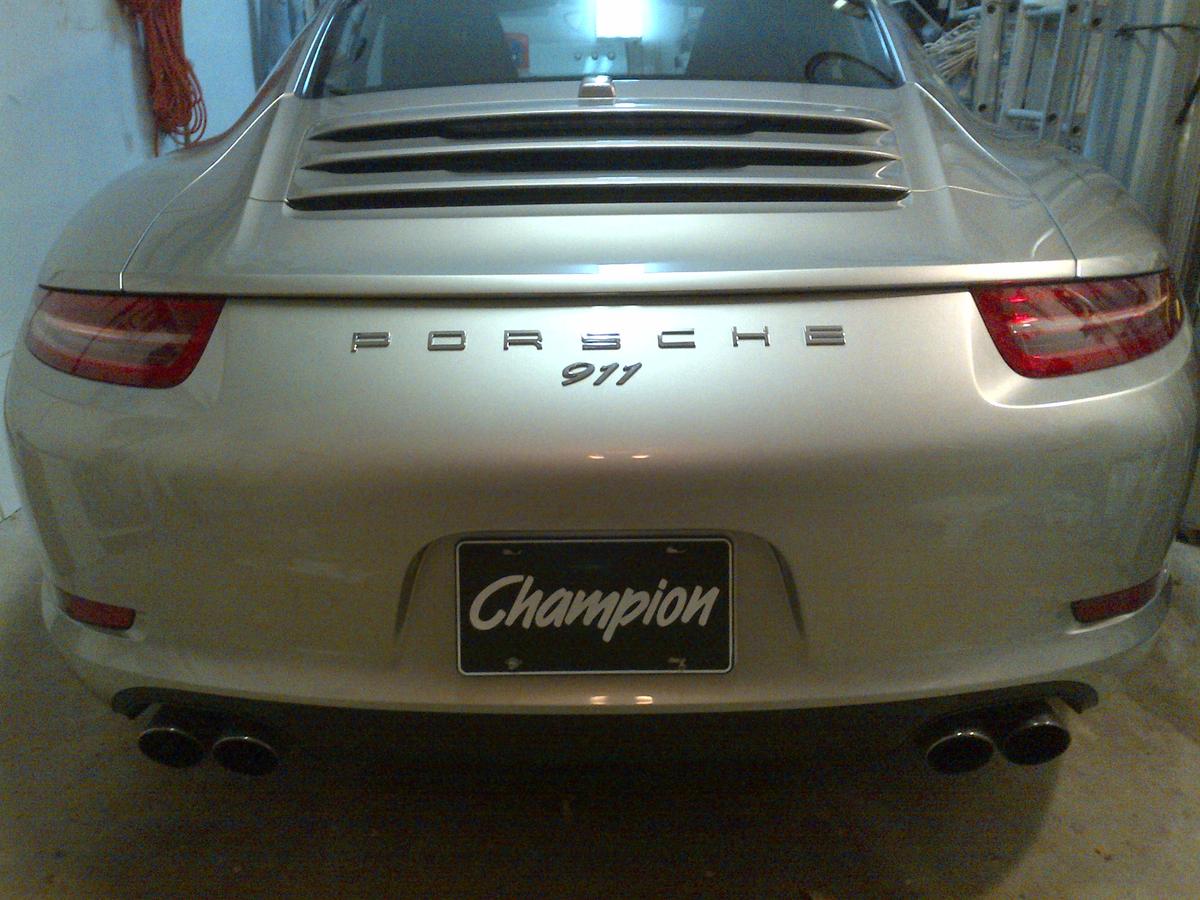
The reason it looks strange is because you didn't follow the upper contours of the vehicle (where the spoiler rests).
As stated in my earlier post, the P and E are slightly higher than the S, and the O R C H are in line with the S.
This is why you have the illusion of the letters drooping..
As stated in my earlier post, the P and E are slightly higher than the S, and the O R C H are in line with the S.
This is why you have the illusion of the letters drooping..
04-22-2014, 09:27 PM
#53
Rennlist Member
Thread Starter
I called my dealer today. They don't have a template. They said they have done it by taping off and measuring one of the cars on the lot. I'm guessing they aren't going to do too much better than I did without the actual template.
04-22-2014, 09:39 PM
#54
Burning Brakes
But if they measure down from the top, they could. You just need a template or measurements that are referenced from the top of the bumper - where the spoiler sits down on it. Open the spoiler and measure down from there to the top of each letter.
04-22-2014, 09:53 PM
#55
Three Wheelin'
I would be happy to make you an etching of mine, but since I have the TechArt spoiler, I couldn't base it on that. If you're interested, let me know and I'll see what I can come up with!
04-22-2014, 09:54 PM
#56
RL Community Team
Rennlist Member
Rennlist Member
Just order a new white 911, with the P-O-R-S-C-H-E lettering in black.
There you go. Perfect spacing. Problem solved.
04-22-2014, 10:57 PM
#57
The P and S should be higher than the S.
His letters are clearly not off set as he went for a straight line approach, which gives the illusion of droopy letters..
My letters are all the exact same distance from the top crease (when measured along lines perpendicular from that crease).
If you look closely, you'll notice that the R and C are a TINY bit higher than the S and so on...
 04-23-2014, 08:28 AM
#58
Banned

Join Date: Jan 2013
Location: Chicagoland Area
Posts: 26,141
Likes: 0
Received 5,413 Likes
on
2,516 Posts
04-23-2014, 10:35 AM
#60
RL Community Team
Rennlist Member
Rennlist Member