When you click on links to various merchants on this site and make a purchase, this can result in this site earning a commission. Affiliate programs and affiliations include, but are not limited to, the eBay Partner Network.
Rear Spoiler Panel Fitment - Another Method of Adjustment
Since I bought my base 991.1, there's been a panel gap issue with my rear spoiler that drives me nuts every time I see it. I'd read just about every thread on the topic, and basically came to the conclusion that I had a broken spring, or I needed to find a PIWIS to do the recalibration procedure. A quick examination of the spoiler mechanism revealed no broken spring, and I found myself saying "there has to be an adjustment here somewhere. There's no way a computer is the solution to this problem."
I finally figured out where the mechanical adjustment that I needed was, and from there, about 30 minutes of trial and error got the thing lined up perfectly. I haven't seen another thread talking about this particular method of adjusting the spoiler position, so I thought I'd do a quick writeup in the hopes it helps someone else. Here we go...
Time Required:
1-5 Beers, depending on your eye for detail.
Tools Needed:
-1/4" Drive Ratchet
-T20 Bit
-10mm Socket
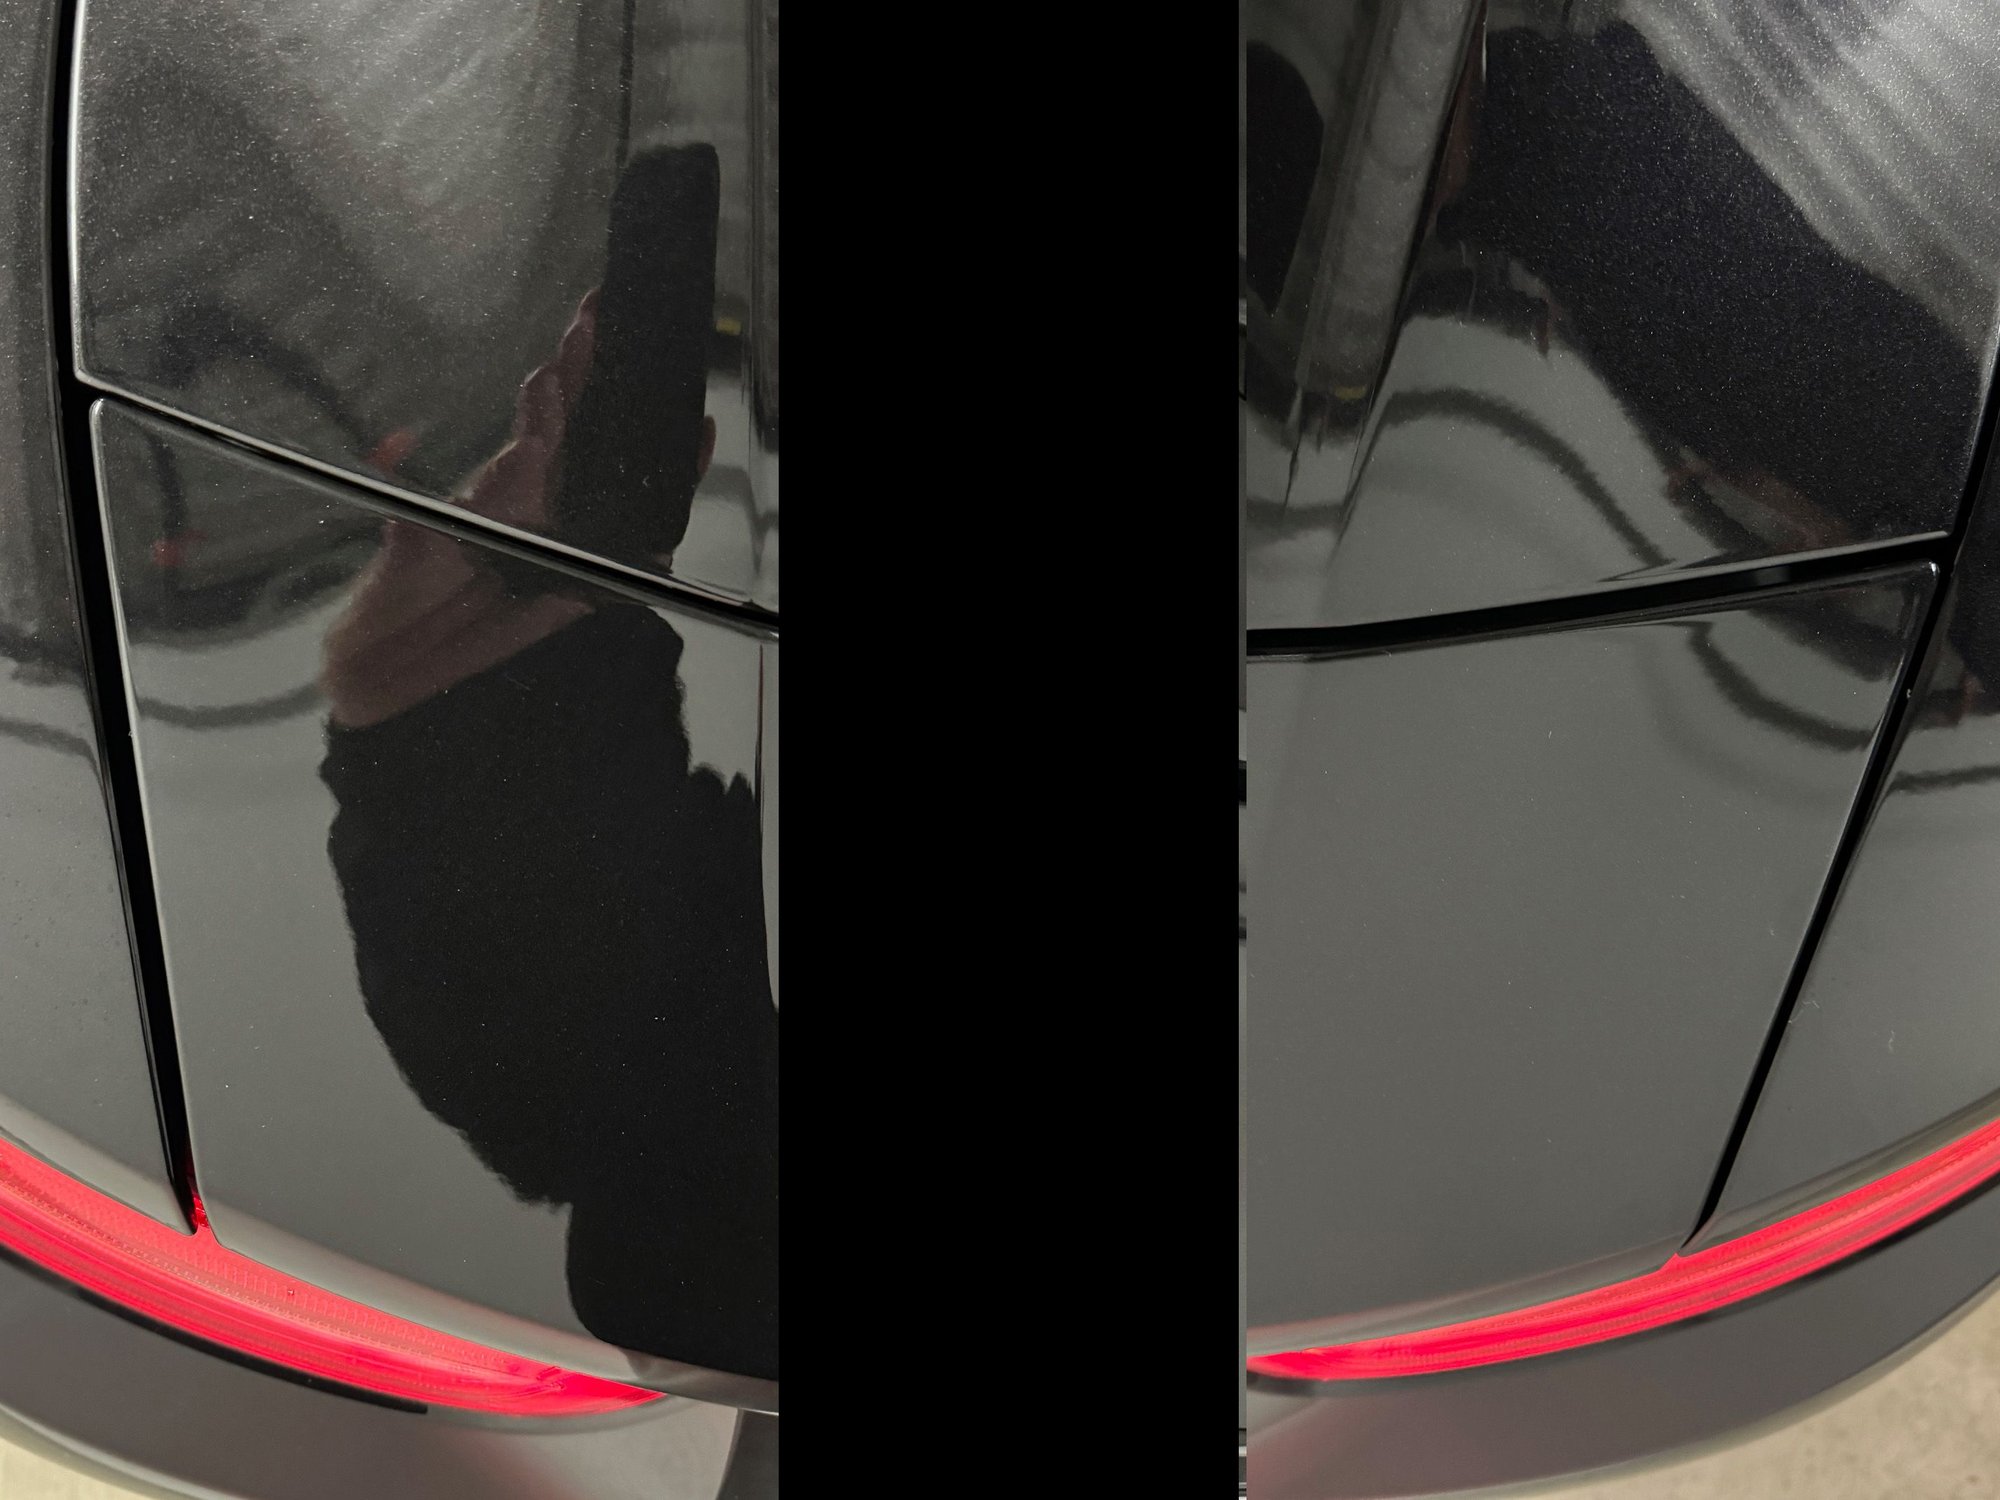
Here you can see the problem. The gaps at each end of the spoiler don't match. We need to move the entire panel slightly to the left, and bring the left side of the panel down a bit.
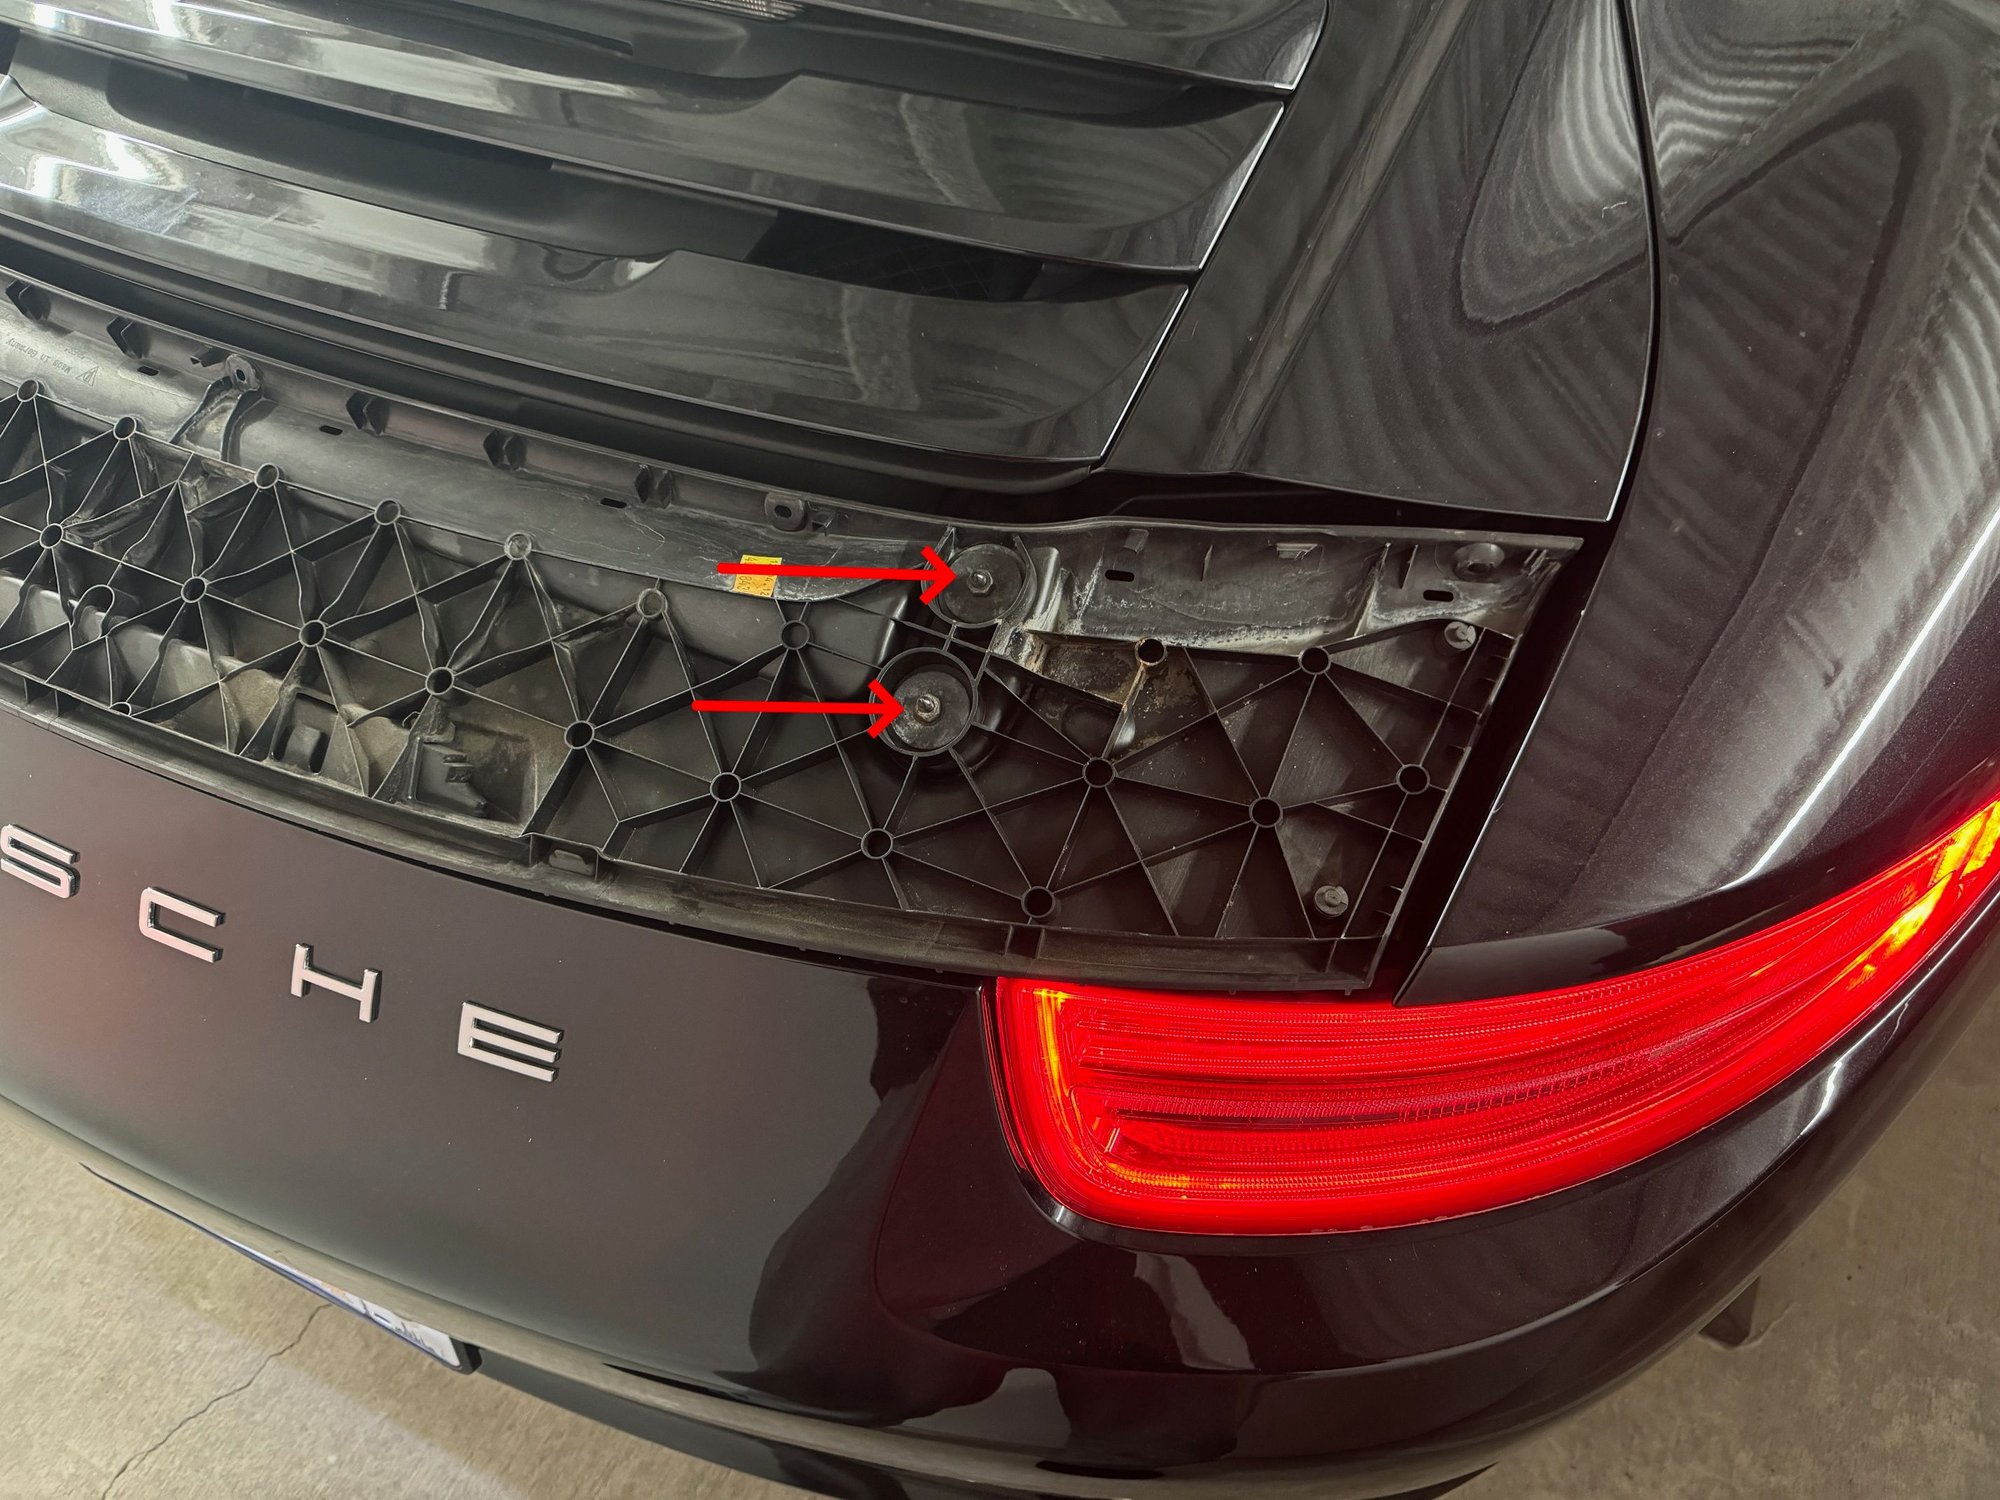
The first thing we need to do is remove the painted spoiler panel from the spoiler drive mechanism. This is accomplished by first raising the spoiler and opening the engine compartment, then removing five T20 fasteners. On the 991.1, there are five exposed fasteners. On a 991.2, there are six, and they're hidden under plastic covers you'll need to remove using a small flathead screwdriver.
Once these fasteners are removed, gently move the spoiler panel towards the front of the car, and lift up. You may have to work it a bit, but it will detach from the drive mechanism with little fuss. Keep in mind that that there are five (or six, for the .2) nutplates on the panel that the attachment hardware mates to. Make sure you don't lose them!
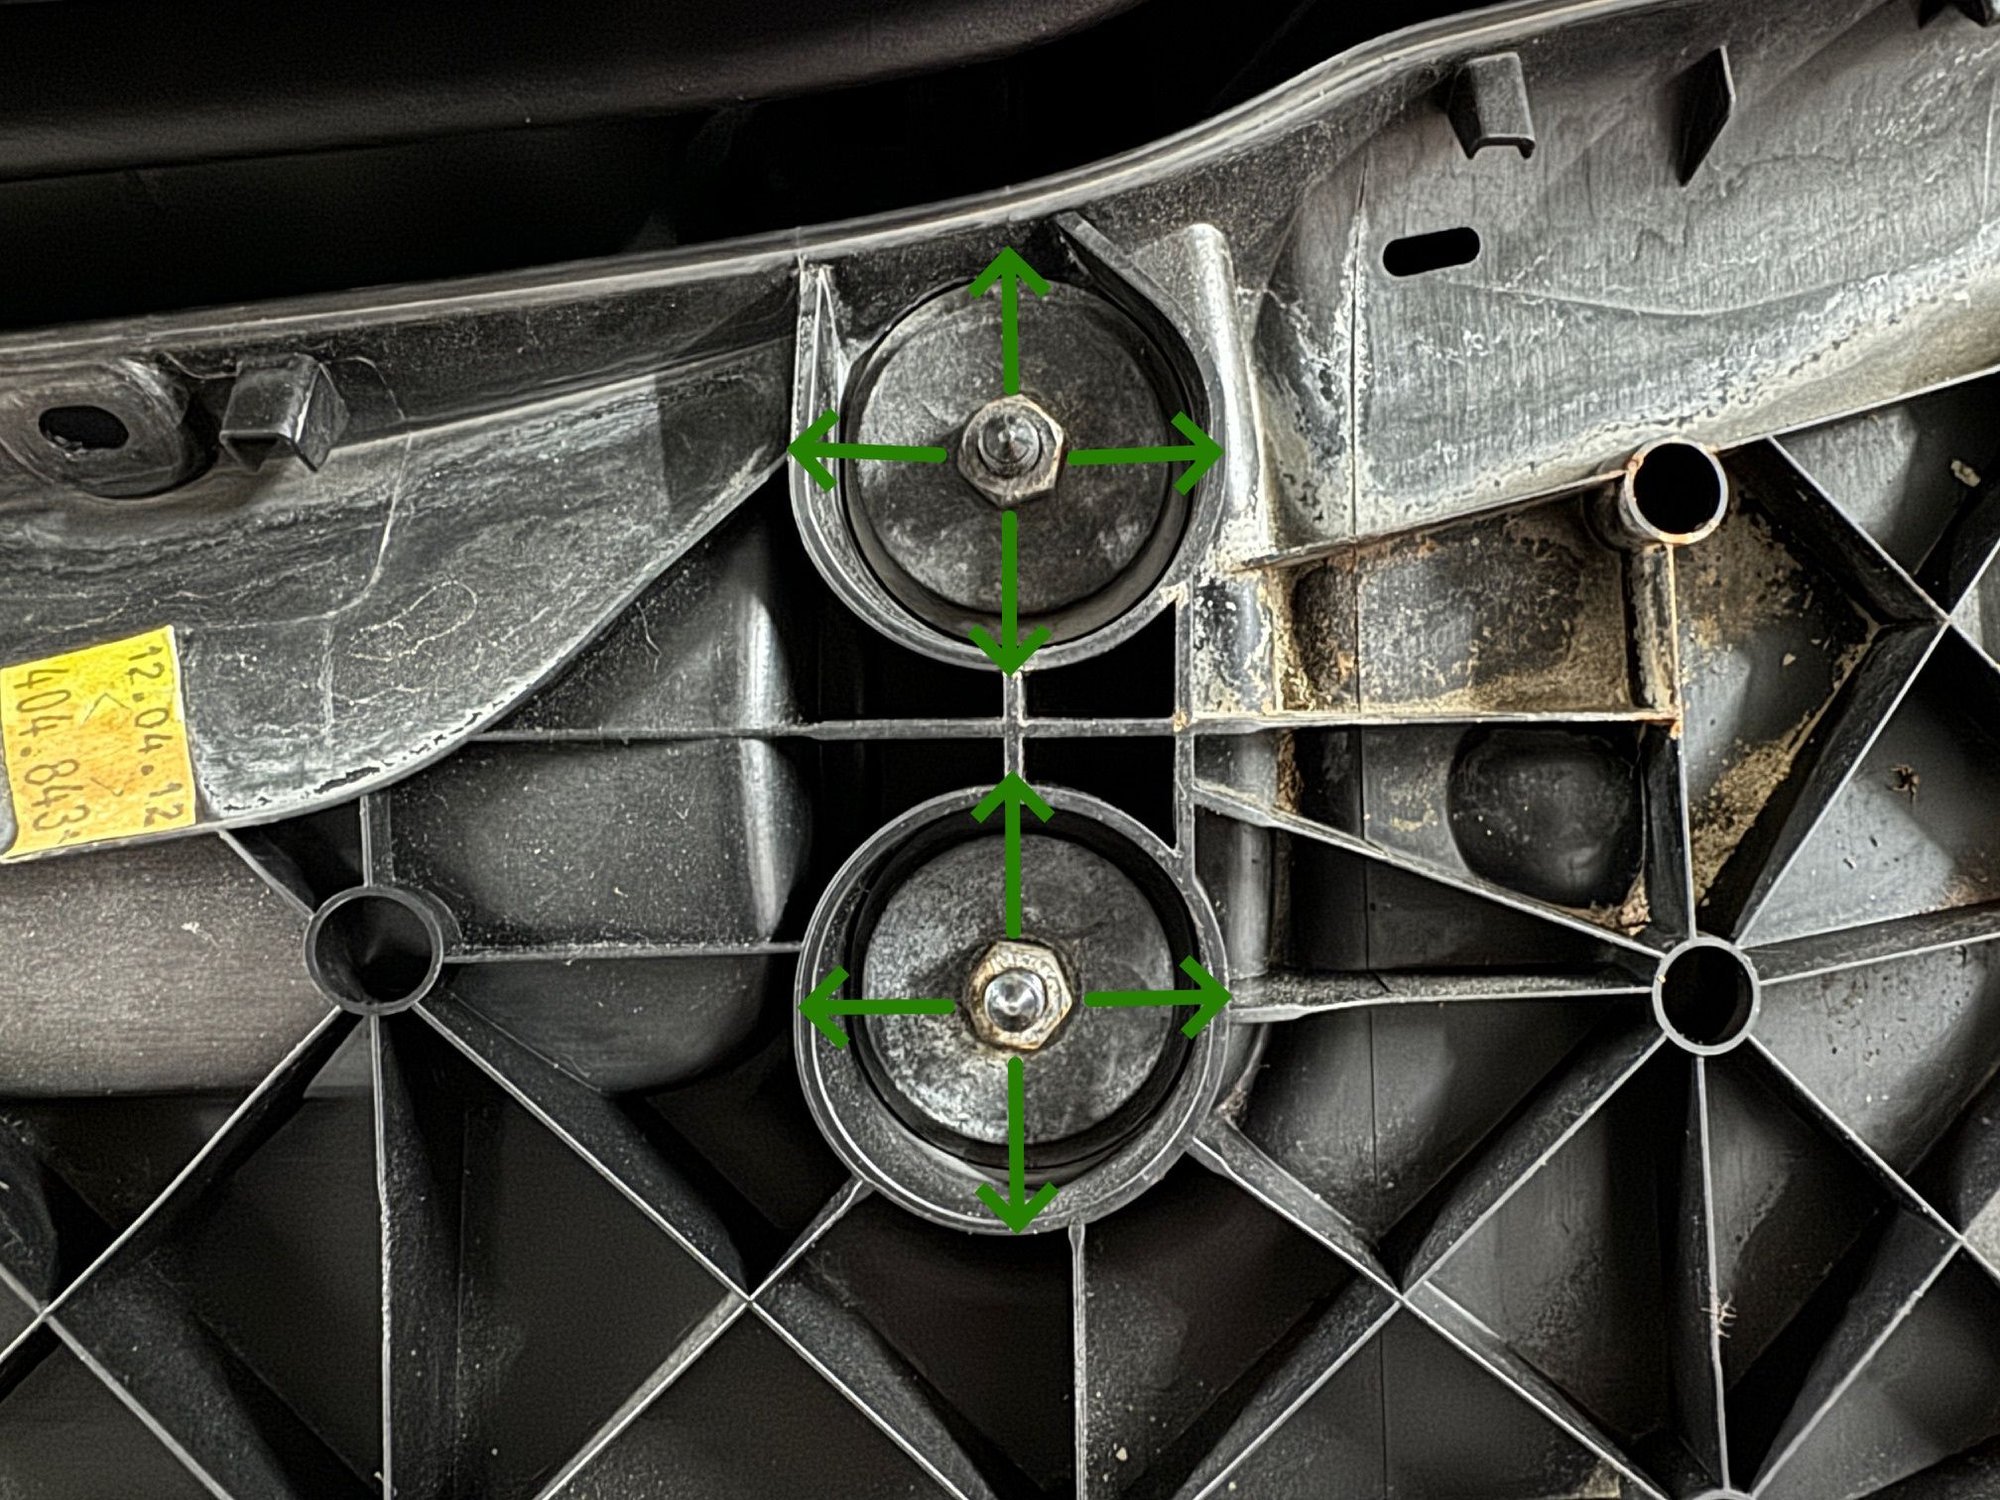
Now we can see the hardware we need to loosen to adjust the position of the spoiler. What we're doing here is moving the entire sub-panel on the ends of the actuator arms. At this point, I found it best to retract the spoiler. This way, once you've made a position adjustment, you can briefly slide the painted panel back on and test the fitment. As you can no doubt tell, a LOT of crap gets caked up under the painted panel, now is a great opportunity to clean things up a bit under here. Despite my car never seeing salt, one of the attachment nuts is pretty badly corroded. Replacement on order. Using a 10mm socket, loosen the nuts. This will give you nearly unlimited adjustment of the panel position on the ends of the actuator arms. I recommend doing this one side at a time, otherwise it becomes nearly impossible to manage given how small the adjustments need to be. When you think you've got it right, just carefully place the painted panel back onto the sub-panel, and check the fitment. If you're happy, you're done. If not, take the painted panel back off and keep going until you are.
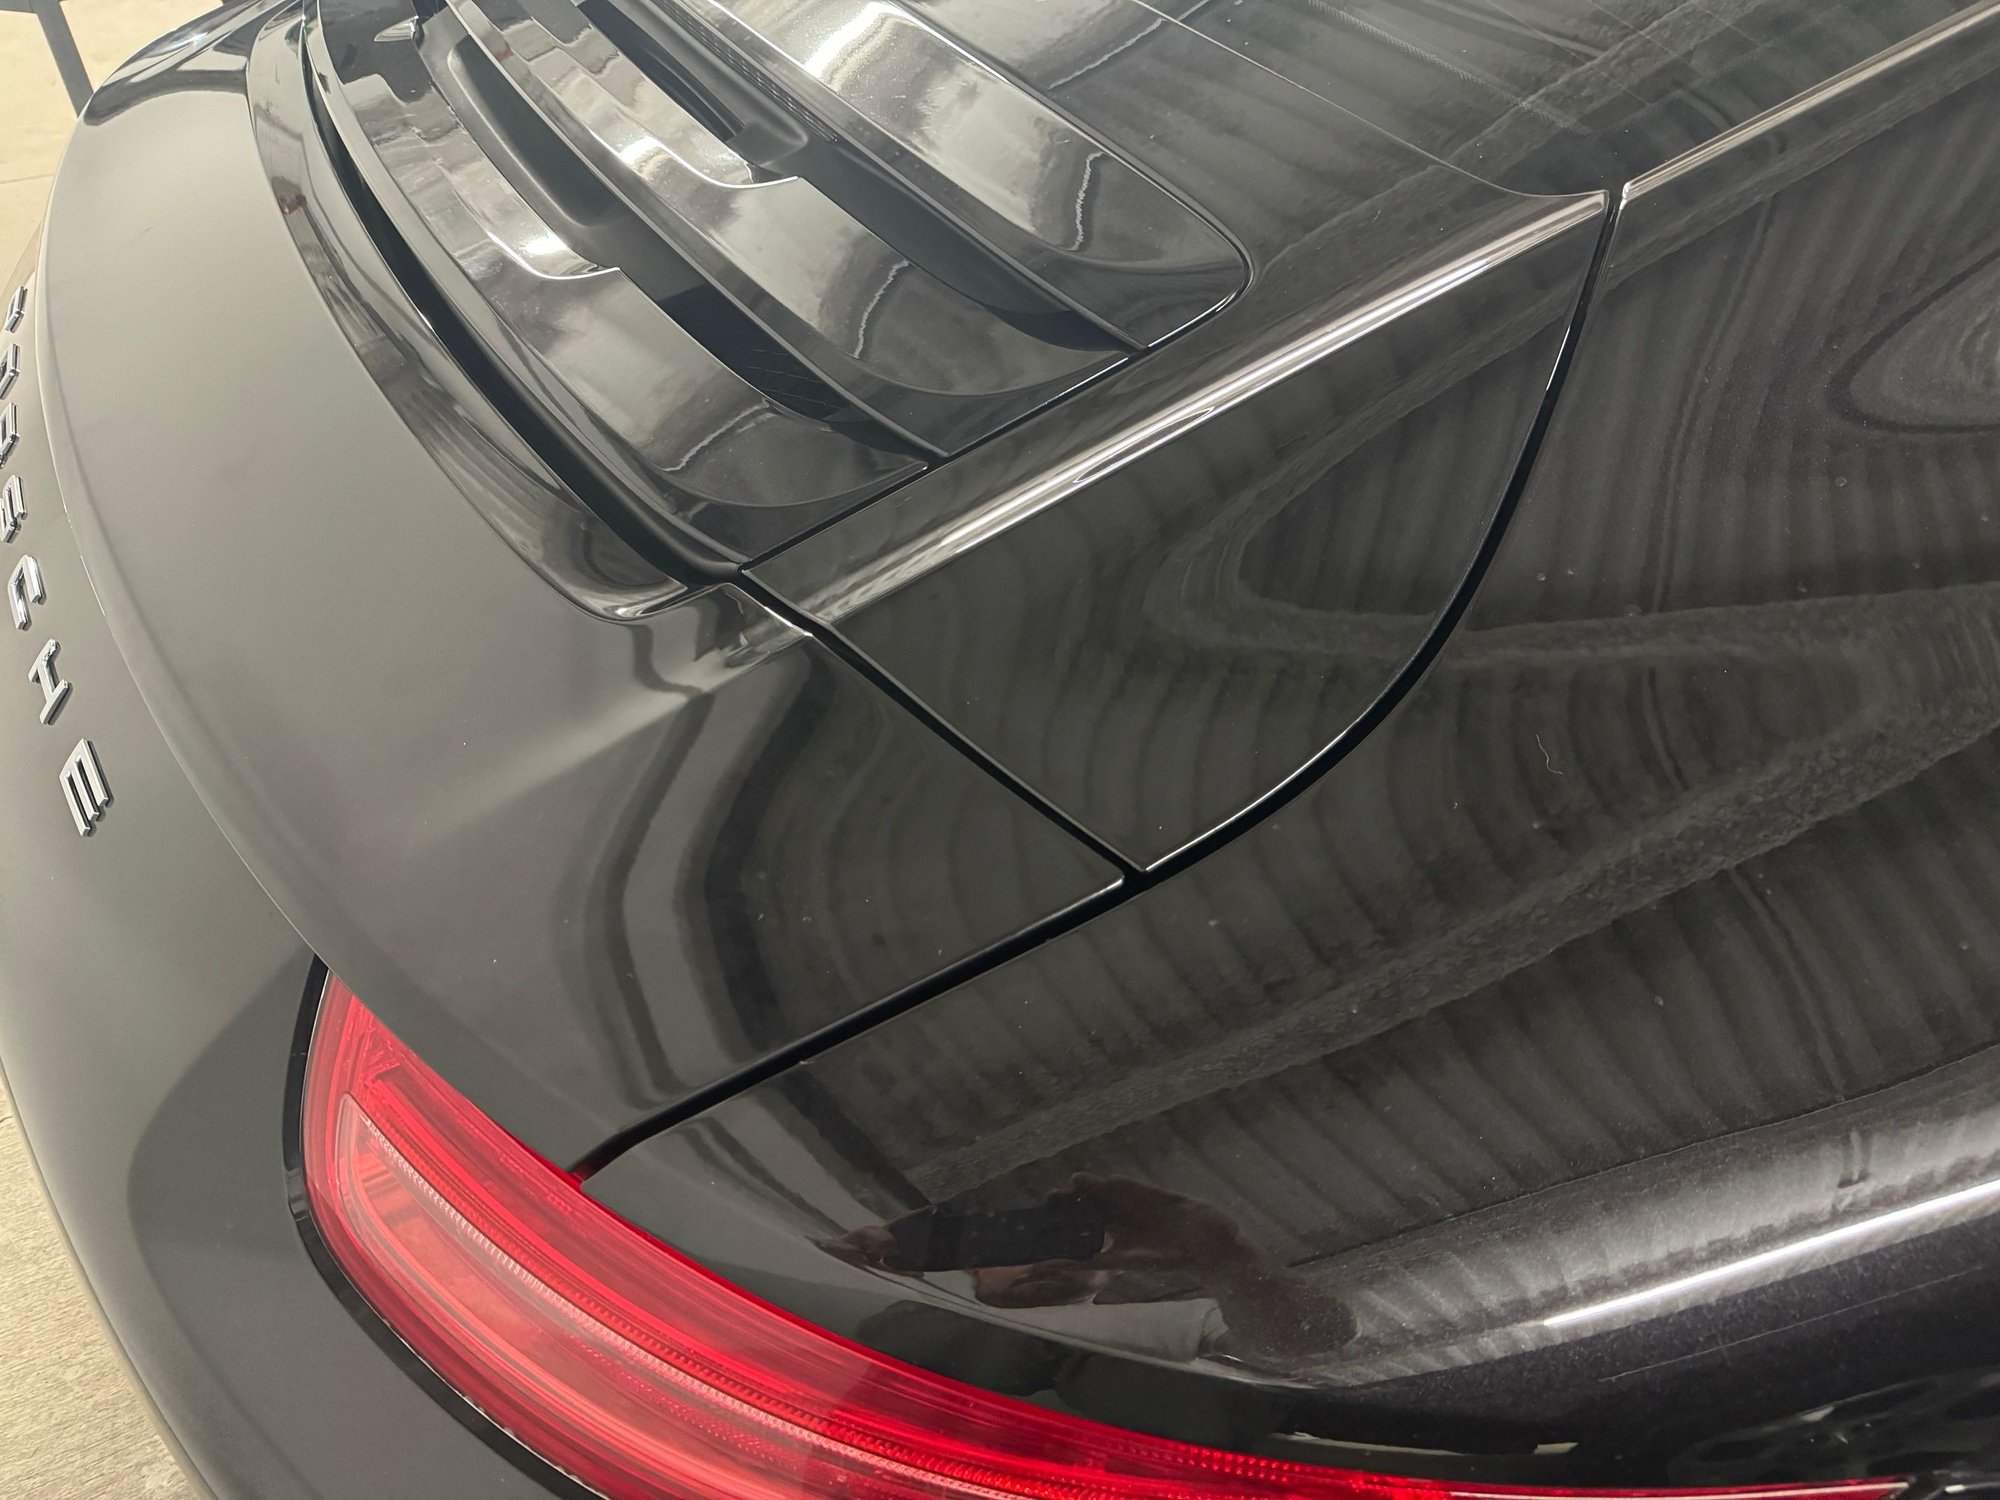
Hope this was helpful. Anyways, I'm off to wash the car. Black is a beautiful, but never ending occupation.
Great write up. If only there was an equally simple way to make vertical adjustments. My spoiler is ever so slightly elevated on the front left corner so that the panel doesn't sit perfectly flush with the surrounding panels. It's not very noticeable to most people, but of course I see it all the time.
Great write up. If only there was an equally simple way to make vertical adjustments. My spoiler is ever so slightly elevated on the front left corner so that the panel doesn't sit perfectly flush with the surrounding panels. It's not very noticeable to most people, but of course I see it all the time.
I don�t need to make a vertical adjustment to mine, but as soon as I finished this job I had the same thought you did. There has to be a similar adjustment somewhere that can tweak the height. Planning on investigating that the next time I have things apart back there.


 04-19-2024, 04:31 AM