When you click on links to various merchants on this site and make a purchase, this can result in this site earning a commission. Affiliate programs and affiliations include, but are not limited to, the eBay Partner Network.
Watching this thread with quite a bit of interest, as both a fan of the Carrera T and a big believer in brakes that inspire 100% confidence.
Curious about the info above, as that's new to me. Makes sense, but I think PCCB rotors were "similarly" sized to cast-iron counterparts on many 996, 997, and 987 models? I'm also not sure 981/991 PCCB are so much larger than their cast-iron counterparts. I mean, yes they're bigger and typically require 20s, but I have always had the sense that 981/991/982 PCCB were bigger mainly because Porsche went to a "one-size fits all" mentality to utilize one PCCB disc on all sports cars, from the 918 Spyder on which they debuted on down to my mere Carrera optioned with PCCB. The smallest PCCB rotor, IIRC, was for the 987 rear and the (very rarely optioned) neither front nor rear were particularly impressive in terms of OD.
Now I am sort of curious as to the smallest diameter CCB out there?
Yea, that is a good point as 997 GT3 iron and PCCB discs were the same size, for example. The cars have gotten bigger and faster though, so a larger disc was likely implemented to accommodate (i.e. 992 Turbo S). Iron discs have also gotten bigger, as we are now seeing 408mm discs used on the GT/S cars and Turbos, so it's not just carbon ceramics.
I've never tracked my car but would like to some day. So let's just say my car is primarily street and leave it at that. Is there any disadvantage to going with AP Racing brakes (rotors & pads only) over OEM for a street use only vehicle? I have a 991.2 C2S with standard red brakes.
Watching this thread with quite a bit of interest, as both a fan of the Carrera T and a big believer in brakes that inspire 100% confidence.
Curious about the info above, as that's new to me. Makes sense, but I think PCCB rotors were "similarly" sized to cast-iron counterparts on many 996, 997, and 987 models? I'm also not sure 981/991 PCCB are so much larger than their cast-iron counterparts. I mean, yes they're bigger and typically require 20s, but I have always had the sense that 981/991/982 PCCB were bigger mainly because Porsche went to a "one-size fits all" mentality to utilize one PCCB disc on all sports cars, from the 918 Spyder on which they debuted on down to my mere Carrera optioned with PCCB. The smallest PCCB rotor, IIRC, was for the 987 rear and the (very rarely optioned) neither front nor rear were particularly impressive in terms of OD.
Now I am sort of curious as to the smallest diameter CCB out there?
stout,
With carbon ceramic discs, it's not just about the overall diameter of the disc. It's about the height of the disc face and the pad that mates to it, which I've referred to as radial depth. That dimension is from the OD of the disc to the ID...how tall the disc face actually is. You can have two discs that are an identical 380mm in overall diameter, but one may have a disc face with a height of 80mm, whereas the other only has a height of 54mm. So when looking at comparing the iron disc from a given model to the carbon disc for that model, you'll typically see a much taller disc face and corresponding pad for the carbon ceramic discs. Carbon ceramic discs heat up more quickly and don't have an internal vane structure that is as intricate as an iron disc. They therefore typically use a very tall pad and disc face to allow for increased heat radiation. Iron discs use a complex internal vane structure to draw heat out of the disc since they can flow more air. It's two different ways of getting rid of heat.
That said, you are also correct about consolidation. Producing carbon ceramic discs is labor intensive and time-consuming. Manufacturers try to limit the number of sizes offered and fit them on a variety of different vehicles if applicable.
__________________
'09 Carrera 2S, '08 Boxster LE (orange), '91 Acura NSX, Tesla Model 3 Performance, Fiesta ST
Jeff Ritter
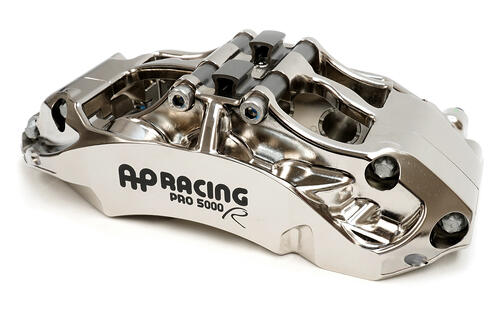
Mgr. High Performance Division, Essex Parts Services Essex Designed AP Racing Radi-CAL Competition Brake Kits & 2-piece J Hook Discs Ferodo Racing Brake Pads Spiegler Stainless Steel Brake Lines
704-824-6030 jeff.ritter@essexparts.com
I've never tracked my car but would like to some day. So let's just say my car is primarily street and leave it at that. Is there any disadvantage to going with AP Racing brakes (rotors & pads only) over OEM for a street use only vehicle? I have a 991.2 C2S with standard red brakes.
There is absolutely no downside to going with our AP Racing J Hook discs and upgraded pads for street driving vs. OEM. Our discs have anti-rattle clips installed, which have enough tension to prevent rattling, yet still allow the disc to float if it ever does get heated to high temps.
I've never tracked my car but would like to some day. So let's just say my car is primarily street and leave it at that. Is there any disadvantage to going with AP Racing brakes (rotors & pads only) over OEM for a street use only vehicle? I have a 991.2 C2S with standard red brakes.
I know you like to do your own DIY stuff, but if you want to move forward I'd love to work together with you on this. We can get her up on the lift in the shop, work together on car, shoot some joint content for our respective social media sites, etc. Shoot me a PM with your contact info if that sounds interesting to you ....
18907931[/url]]I know you like to do your own DIY stuff, but if you want to move forward I'd love to work together with you on this. We can get her up on the lift in the shop, work together on car, shoot some joint content for our respective social media sites, etc. Shoot me a PM with your contact info if that sounds interesting to you ....
I know you like to do your own DIY stuff, but if you want to move forward I'd love to work together with you on this. We can get her up on the lift in the shop, work together on car, shoot some joint content for our respective social media sites, etc. Shoot me a PM with your contact info if that sounds interesting to you ....
After so many years piloting fully caged, purpose built race cars I am now trying to learn to adjust to the compromises and challenges that a dual purpose car presents. Not having a cage, or even a roll bar is new. As is a 3-point belt and lack of a head and neck device. With the Carrera T being built to be primarily a road car I did not want to install a half cage/roll bar. However basal skull fractures really suck, so I did want to come up with a solution that would allow me to add that protection back into the mix.
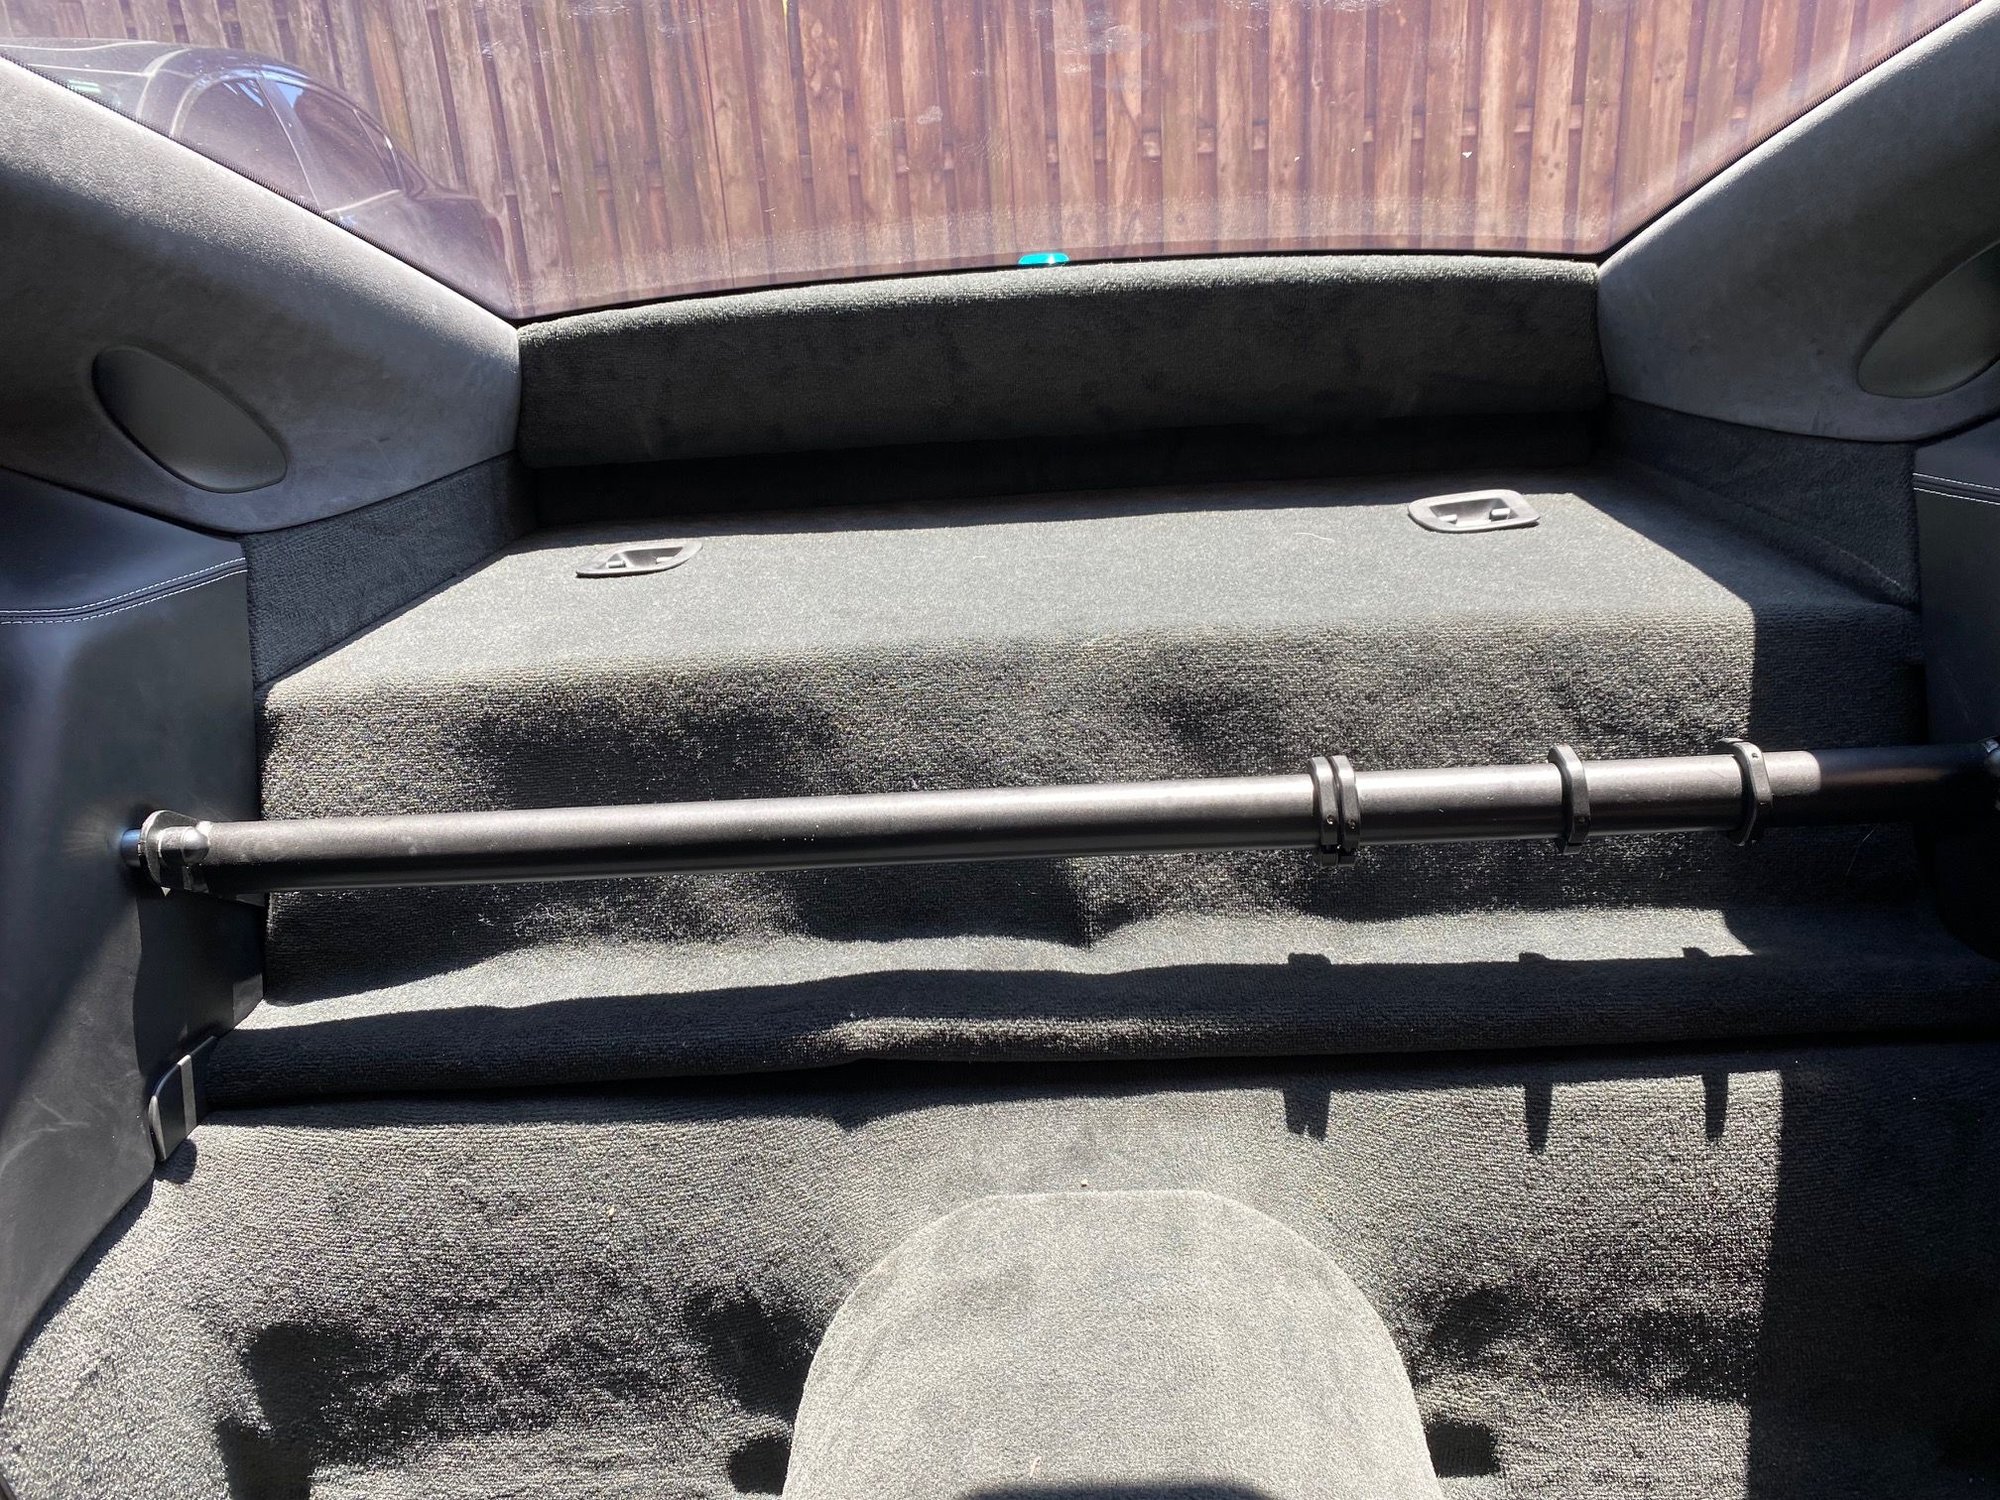
After considering multiple options, I settled on the FVD harness bar (https://www.fvd.net/us-en/FVD5809910...tandalone.html) and the Schroth 4 pt belt designed for the Porsche LWB seats (https://www.schrothracing.com/item/p...ning-Harnesses). The bar is very sleek in a you hardly know it�s there kind of way, and likewise, the 4-point belt installation will also nearly disappear when not in use since there won�t be a sub strap coming up through the seat.
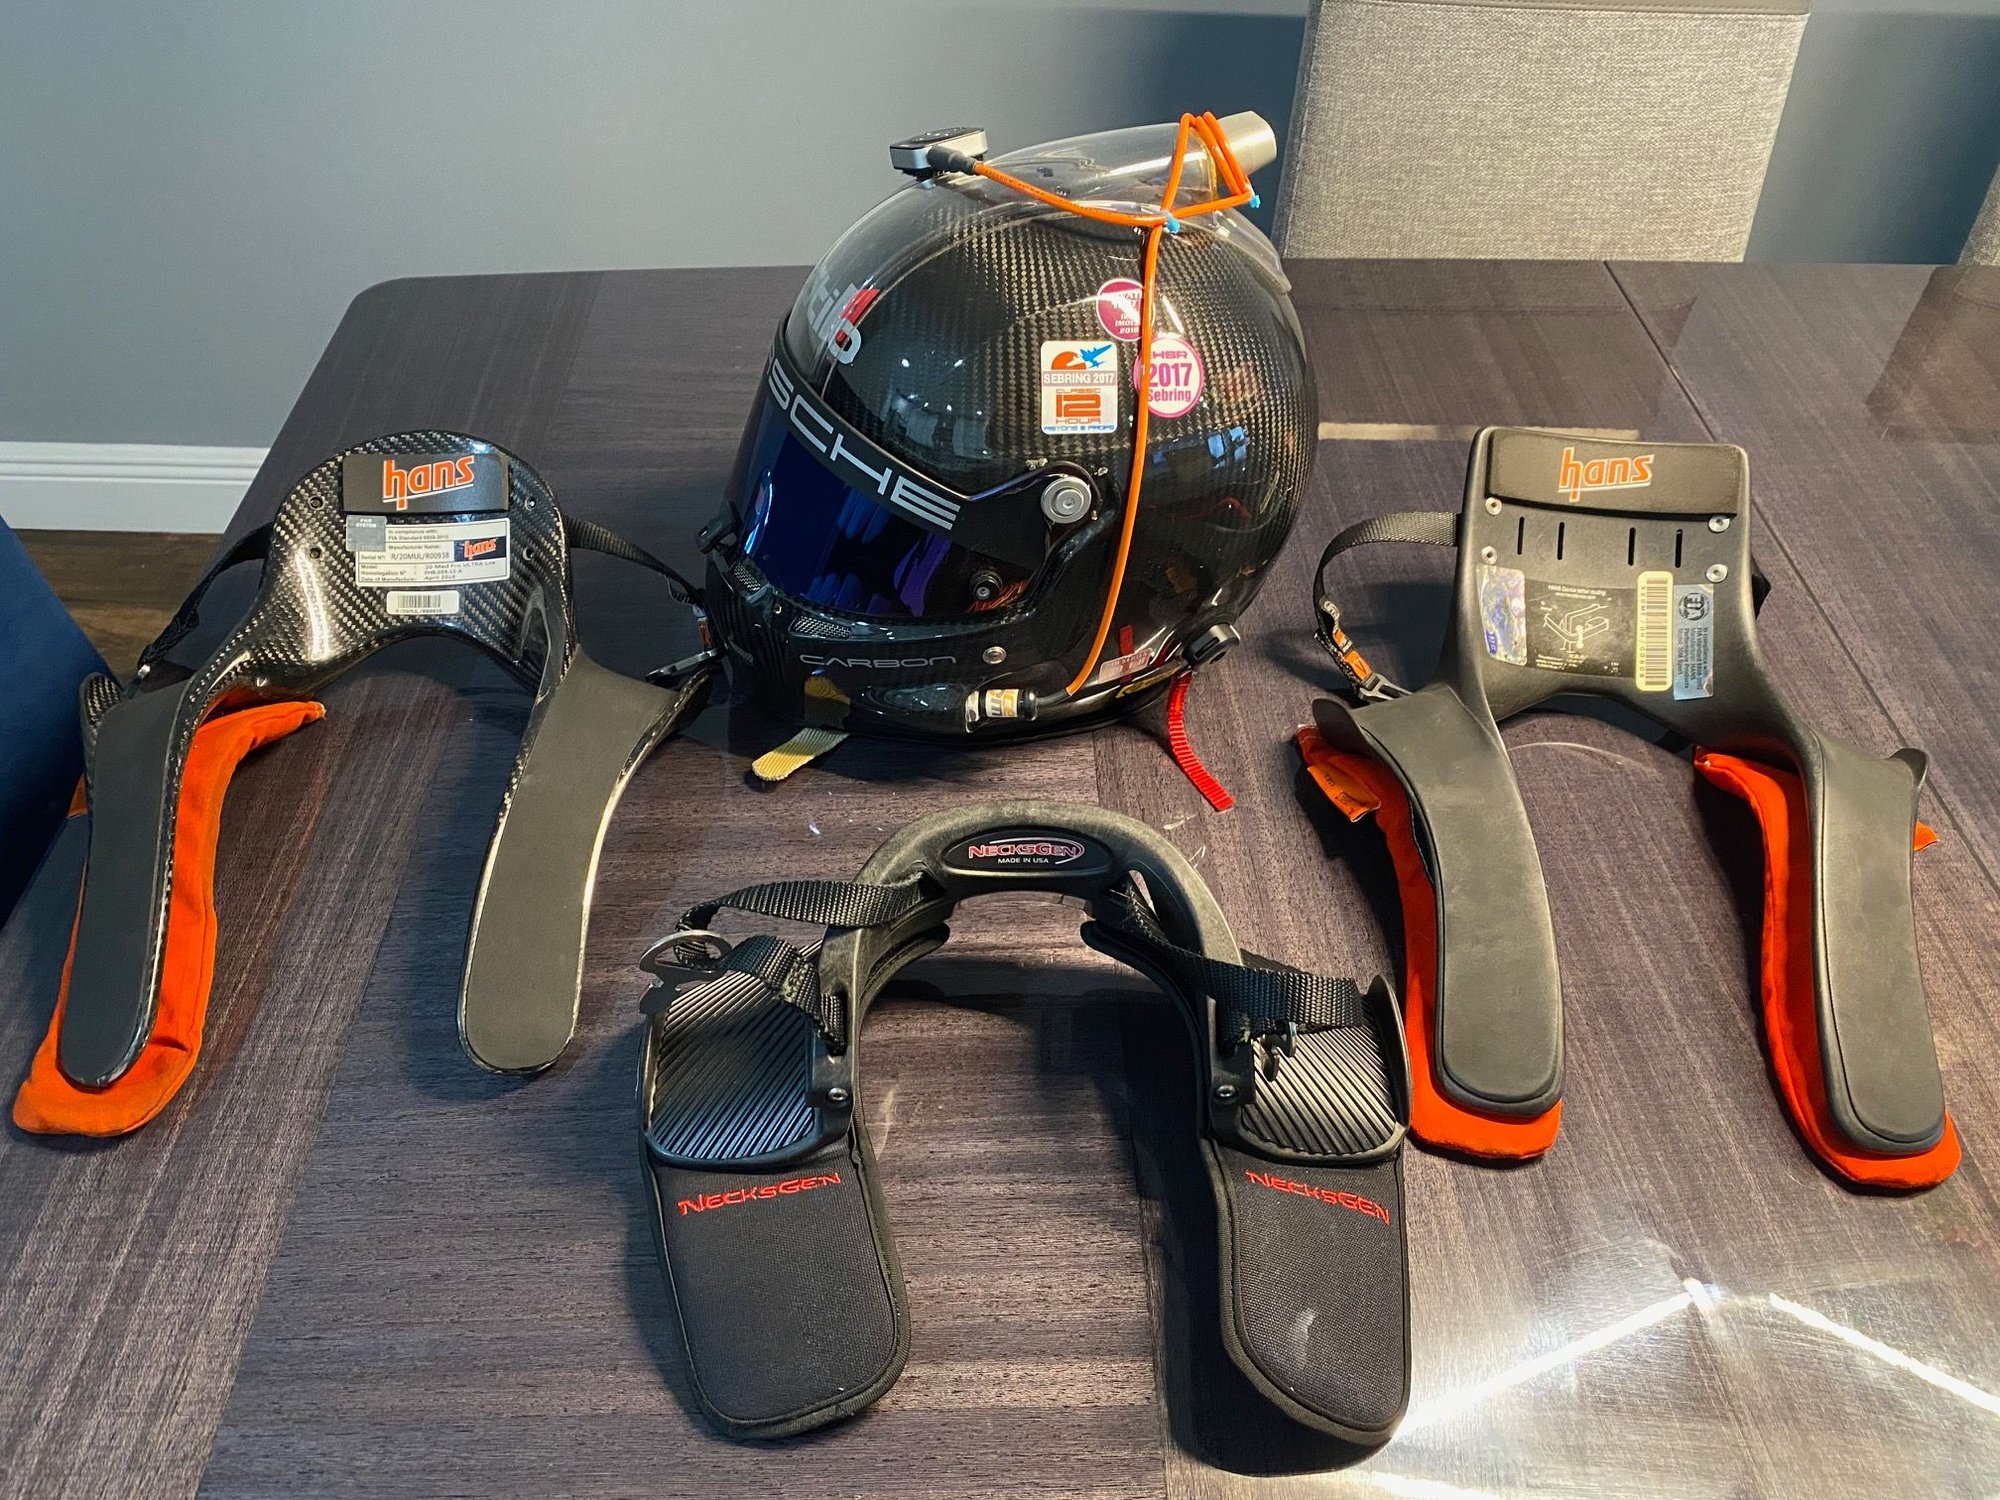
The harness will also allow me to use existing head and neck restraints I have on hand. While I preferred the Hans in the race cars, I found that the back it too large to be used with a Porsche LWB seat. It hits the headrest and forces your helmet forward. The solution is the Necksgen Rev 2 Lite, which I previously used in my GT4 dual purpose car. The picture shows the size differences. My first Hans is on the right, the upgraded carbon fiber version on the left, and the Rev2 Lite in the middle.
If you are no more than medium sized, fit and limber, this job can be done with the both LWB seats in place. And if you install the harnesses as I did (more on the later), there is no need to remove them for that either. So I made the decision to leave the seats in place and did the job crawling in and out of the back seat as needed. And thankfully I can confirm that no humans were injured during this process.
Step 1: Remove the rear most carpeted section immediately under the glass. It pulls straight out. Then pop the trim pieces off the rear luggage shelf and fold the big carpeted piece in the middle and remove that as well. A tip from another Rennlister advised that the side interior panels could be left in place, so that�s it for interior removal!
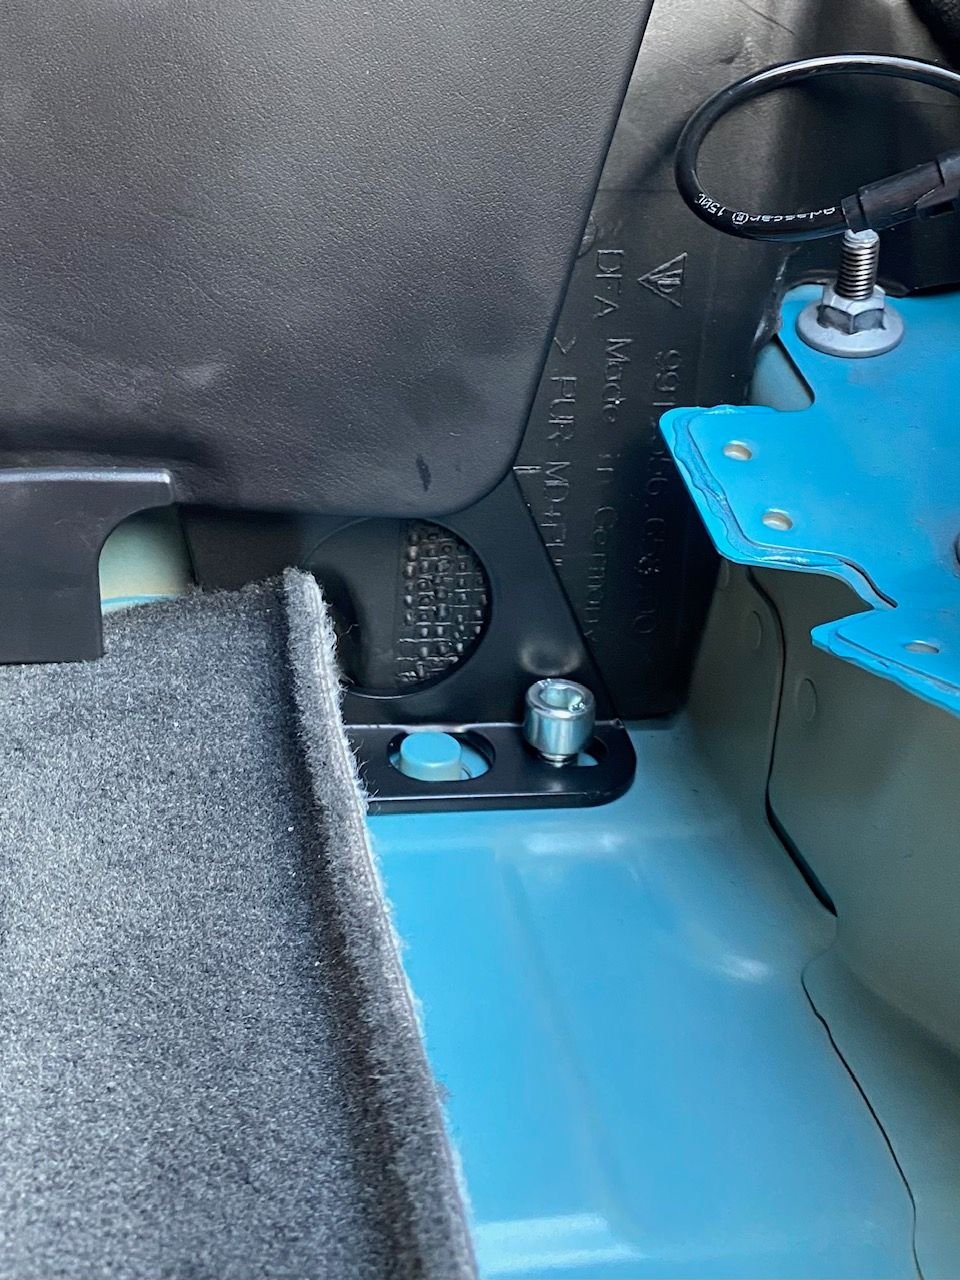
Step 2: Install the vertical brackets over the threaded bosses in the floor. You do this by slipping the brace behind the interior panel on the side and the bottom falls naturally into place. Hand tighten the provide bolts to hold it in place.
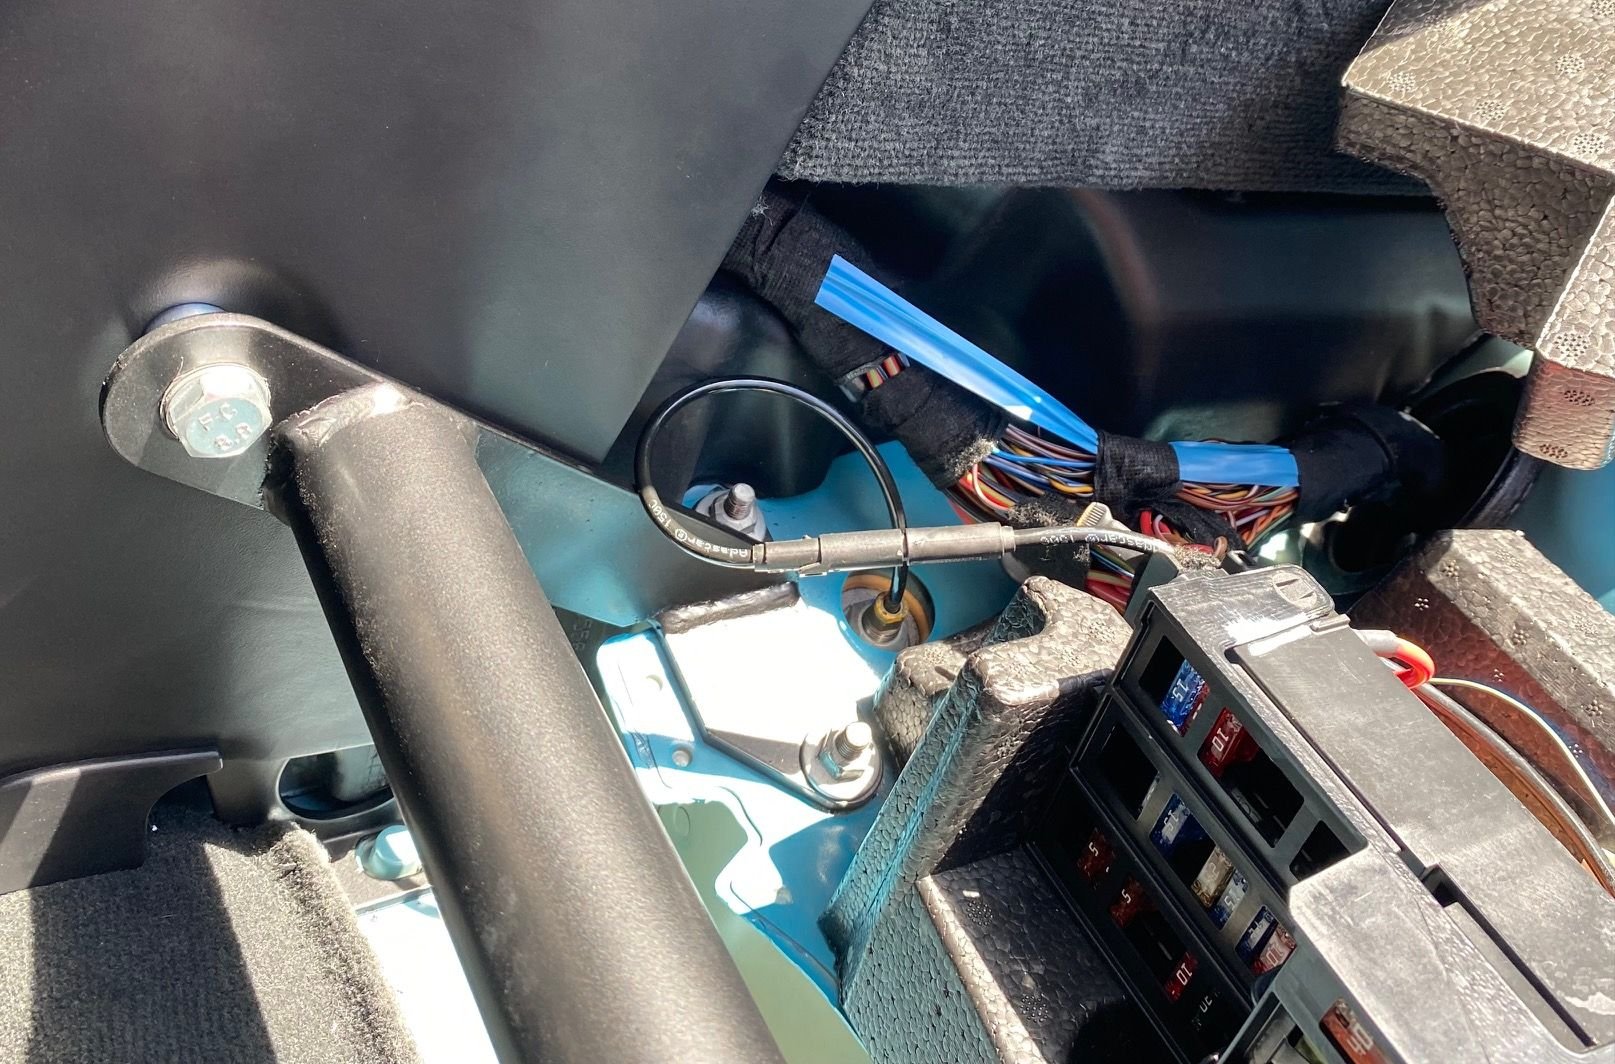
Step 3: The top of that brace with the threaded hole should now be directly behind the interior panel where there is an indented circle marking the location. You can feel where the bolt hole is behind the panel and how it lines up with the circle. It is nearly dead center and provides a great template. This is the only permanent modification � you have to drill a hole through the circle for the bolt to go through. I used about 5 different bits, very high quality bits, slowly increasing in size until the bolt would pass through. Happy to say that my full leather interior panels did not fray in the process!
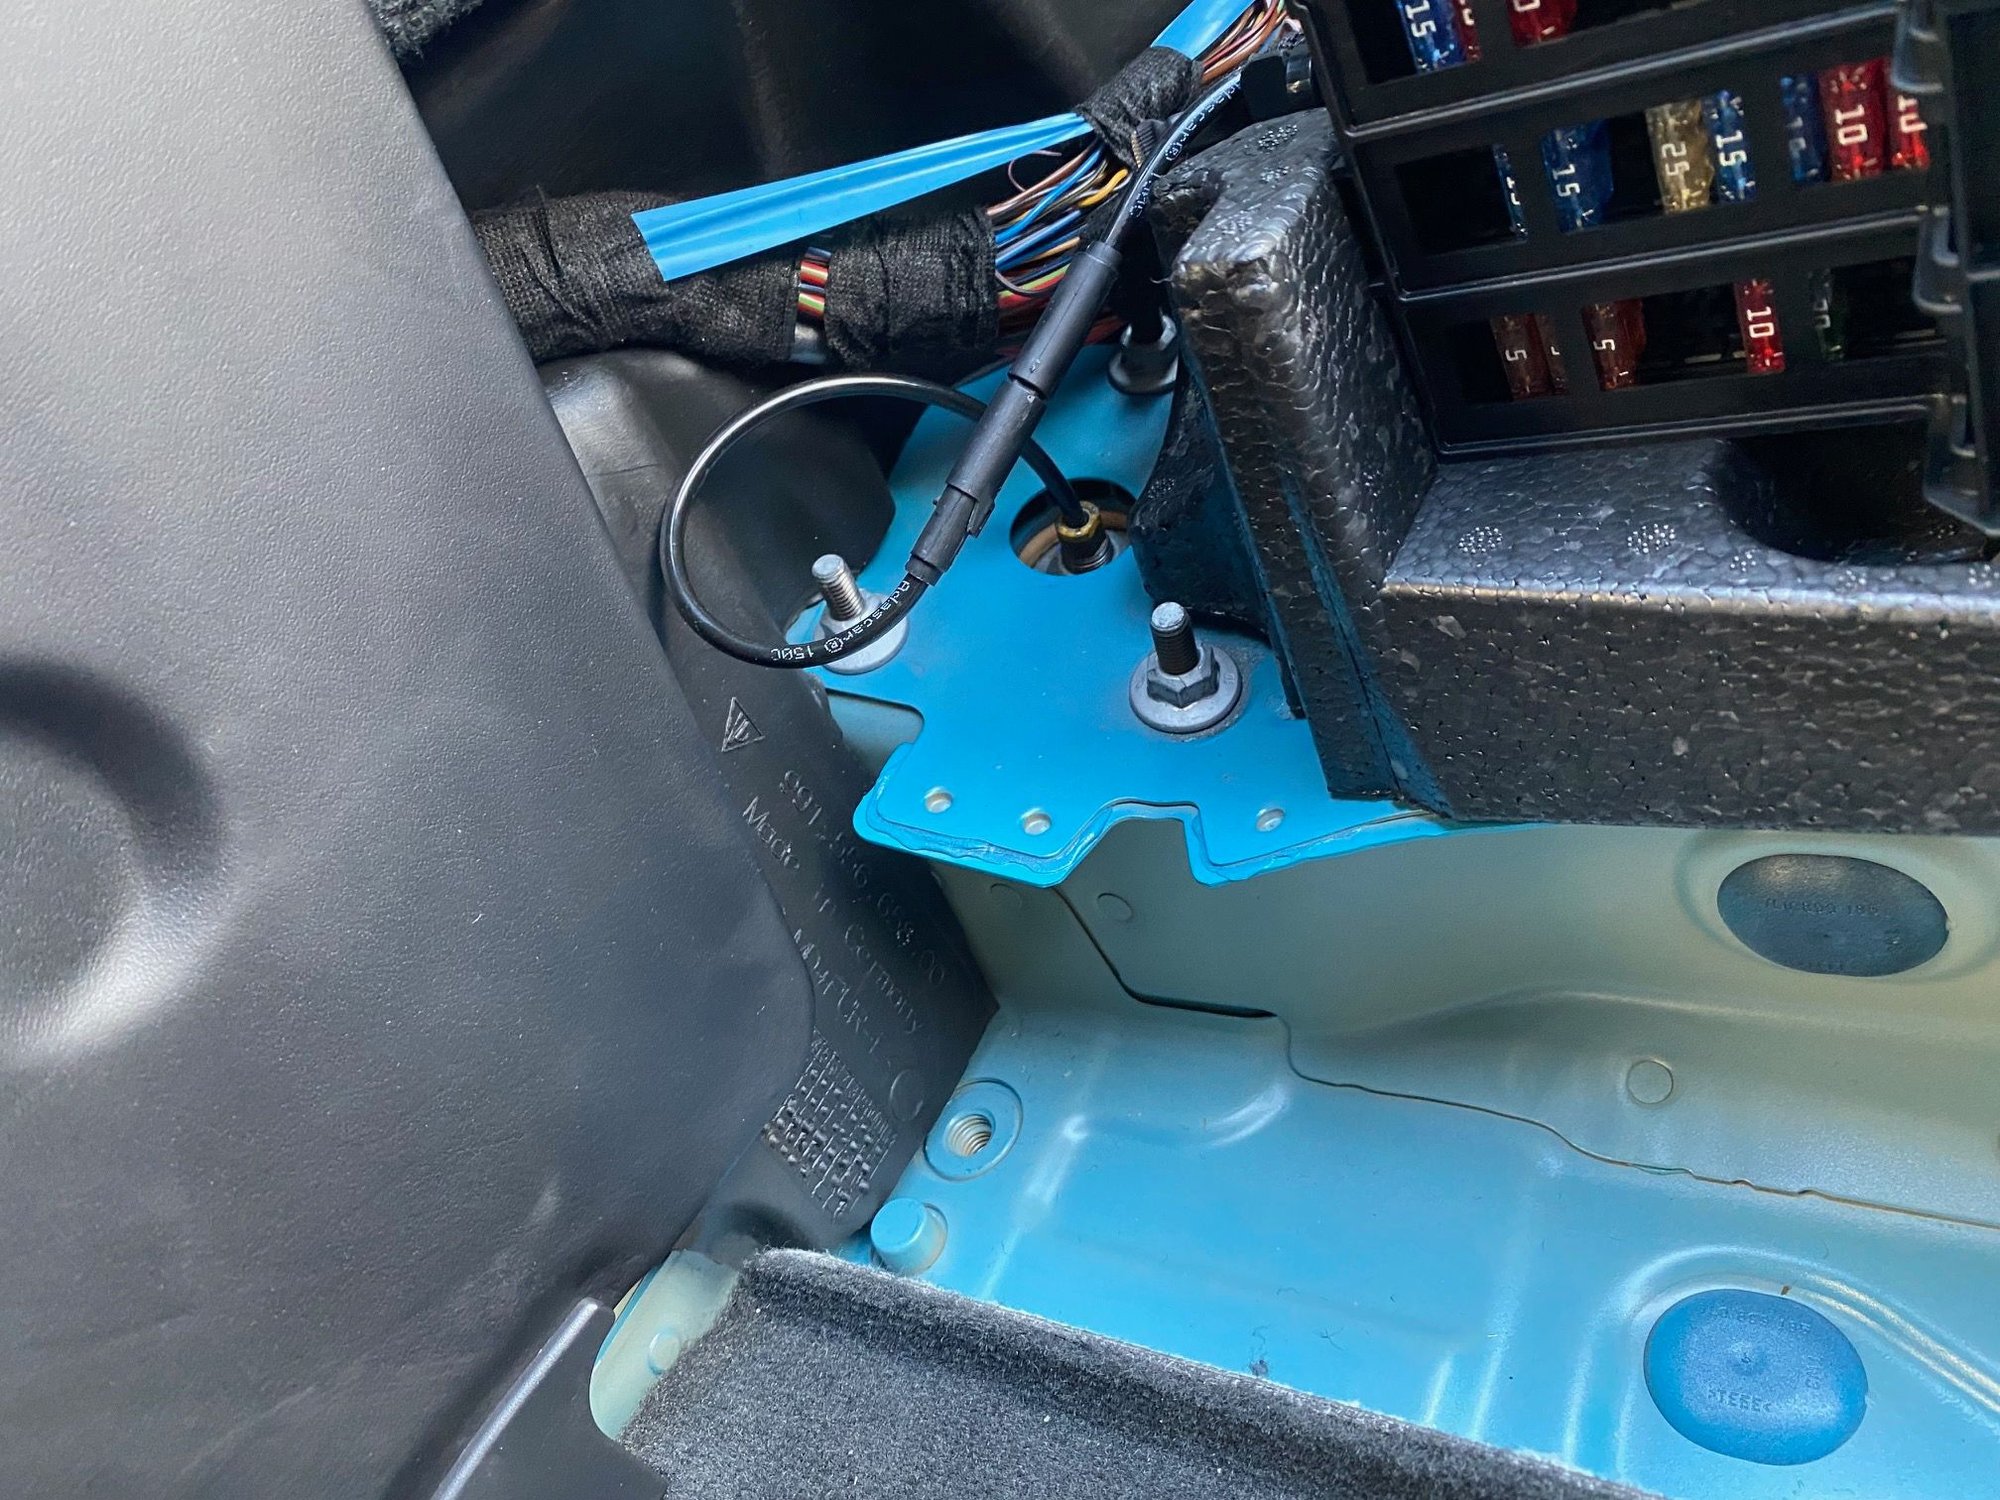
Step 4: This turned out to be more difficult than anticipated! You now slip the harness bar over the rear strut tower bolts and position so that the top lines up with the holes you just drilled. The surprise was that the tolerance is so tight on the base plate that it didn�t want to just slip over the studs. It was a wrestling match. I eventually ever so slightly drilled one hole a little larger and then tapped it down with a small hammer. Then once over the studs you can tighten the bolts over the studs to push the base plate all the way down. BUT � doing so changes the location of the top bolt hole. This then become an iterative process of moving each side up and down until everything lines up at the top of the harness bar. You�ll want an electric or air powered tool for this with a 13mm socket, not a rachet. There is a lot of back and forth to get it right. Here are the strut tower studs. You use the 2 studs closest to the front of the car. You can also see the circle that I referenced earlier in this photo.
Step 5: Wedge the included spacer between the bar and the interior panel and then slide the included bolt through the bar, spacer, and interior panel so that it can be bolted to the brace hidden behind the panel. I used a skinny punch to line everything up and you can slide your hand behind the panel to feel the punch going through the bolt hole. For me, one this was done the bolt still struggled to make it through. Everything was lined up so I surmised that the hole in the panel was off just a hair or slightly too small, so I drilled again with everything all lined up and this cleared the path. Bolt then went in like butter.


 07-13-2023, 02:06 PM