When you click on links to various merchants on this site and make a purchase, this can result in this site earning a commission. Affiliate programs and affiliations include, but are not limited to, the eBay Partner Network.
Can you share any pictures or experience in the swap? Just ordered mine for 991.2 and concerned with lining up the needles. I ordered in yellow and will most likely only change the Tach
Did you get the 911 added in extra or does it come like that?
Looks slick.
I'm thinking about getting some white ones to pair with my exterior color.
Not sure if the white tacs are going to conflict with the brushed aluminum trim in the interior however.
Looks like you have white + aluminum combo, what are your thoughts?
'911' was additional no-cost option - I love that it lights up. They look great with the aluminum trim, especially with the aluminum gauge rings. I'm VERY pleased.
'911' was additional no-cost option - I love that it lights up. They look great with the aluminum trim, especially with the aluminum gauge rings. I'm VERY pleased.
The "911" just convinced me to order a set. Thanks!
how did you get the gauge face back over the tubes that the needles passed through?
Or conversely, how did you remove those tubes?
I�m doing a Cayman and twisting them on is not an option.
If you're just referring to the gauge needles, make a mental note of exactly how they sit in their off/zero position, then just firmly pull them. They're just press fit onto the stepper motors. They require a bit more force than you think, but shouldn't take a ton.
If you're just referring to the gauge needles, make a mental note of exactly how they sit in their off/zero position, then just firmly pull them. They're just press fit onto the stepper motors. They require a bit more force than you think, but shouldn't take a ton.
This!
Also, for making a mental note, take a pic with your phone, specifically the zero position in relation to the last line... usually goes past it by a little. I took individual pics of each gauge straight and head on. When reinstalling, I put the needle back in the middle of the sweep and then slowly moved it back to the zero position. The stepper motor will stop at the zero position and you'll get a little resistance. Using the stepper motor stop, you can then "fine tune" the needle position to get it exactly where you want it. I did it with all the needles.
If you're just referring to the gauge needles, make a mental note of exactly how they sit in their off/zero position, then just firmly pull them. They're just press fit onto the stepper motors. They require a bit more force than you think, but shouldn't take a ton.
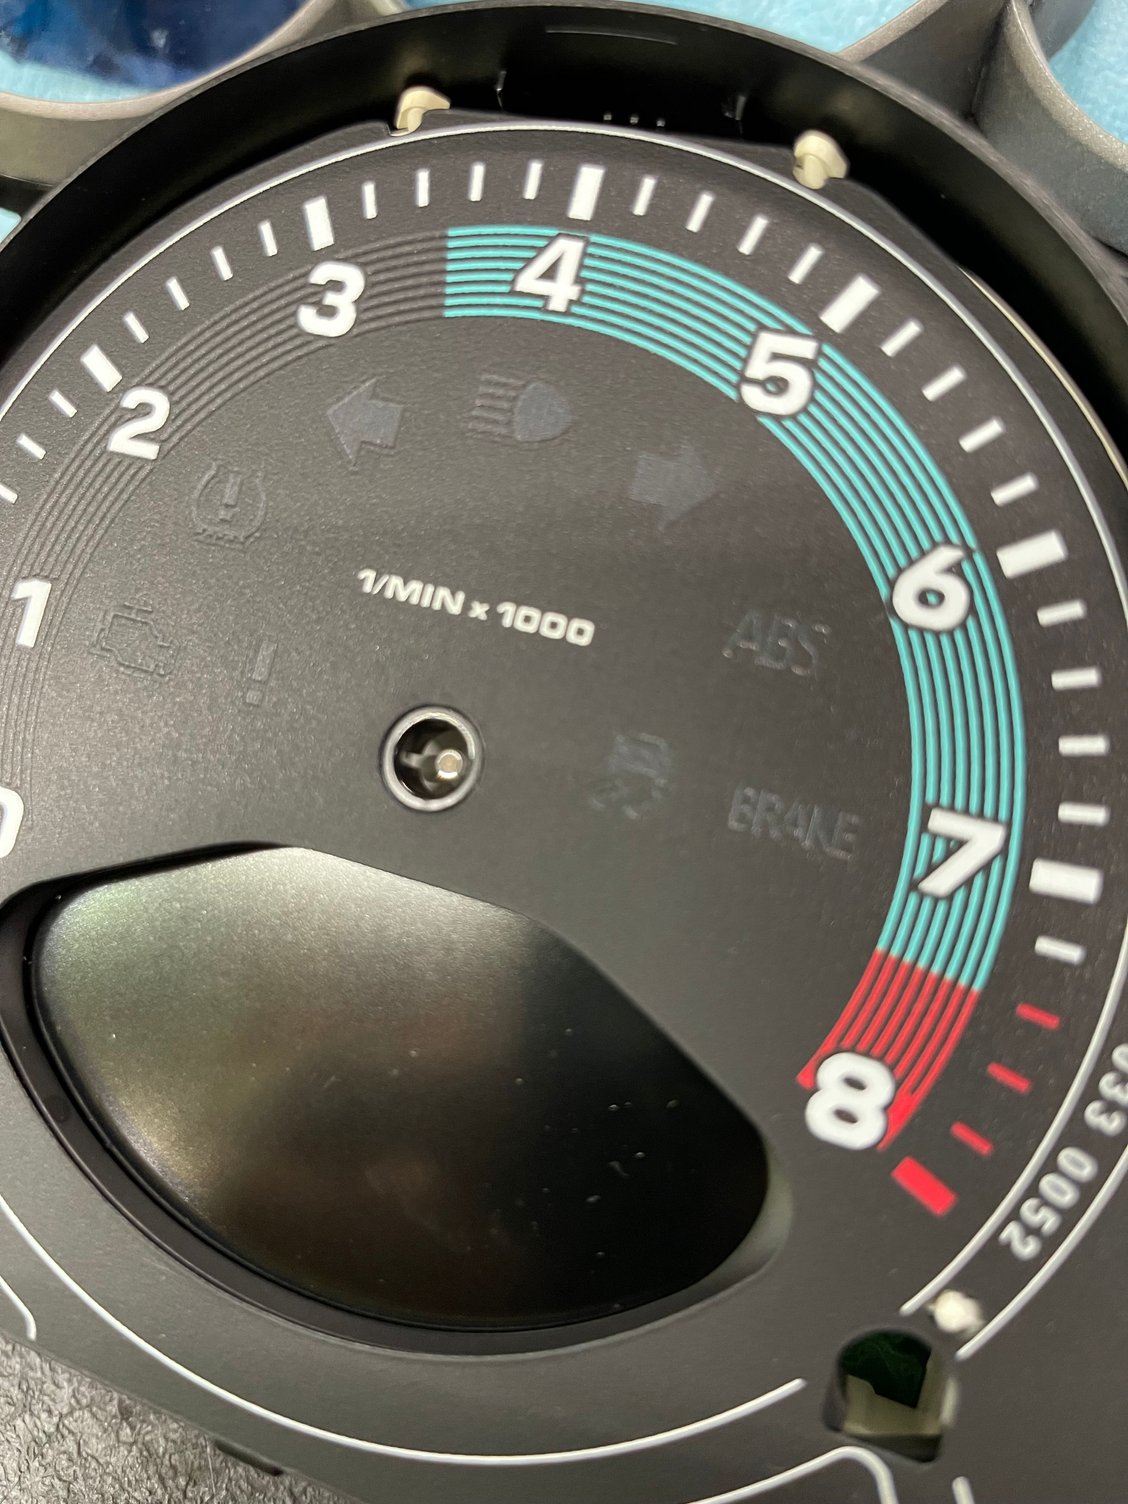
Got the needles off. There are sleeves that hold that gauge face down around the needles.
Sort of a big rivet.
They don't seem to want to move and I'm hesitant to force it.
The more I look at it I feel like they are glued in.
The old gauge face slips out over the rivets but the new fave sits on top of them. And I don't think you can work them back under the lip of the rivet.
Also, for making a mental note, take a pic with your phone, specifically the zero position in relation to the last line... usually goes past it by a little. I took individual pics of each gauge straight and head on. When reinstalling, I put the needle back in the middle of the sweep and then slowly moved it back to the zero position. The stepper motor will stop at the zero position and you'll get a little resistance. Using the stepper motor stop, you can then "fine tune" the needle position to get it exactly where you want it. I did it with all the needles.
I've got photos and video of dash with key on and key off and will replicate those positions key on before I seal up the cluster.
Got the needles off. There are sleeves that hold that gauge face down around the needles.
Sort of a big rivet.
They don't seem to want to move and I'm hesitant to force it.
The more I look at it I feel like they are glued in.
The old gauge face slips out over the rivets but the new fave sits on top of them. And I don't think you can work them back under the lip of the rivet.
I'll take more pics later.
Thanks!
This doesn't sound right. The needle is a 2 piece design and I'm wondering if you just removed the top piece (needle) and left the cylindrical body on the motor.
Forward to 14:20 and you can see how the needles are removed and what they look like. You'll also see how the gauge looks like after the face is removed.
Needles are completely out. I redo mechanical watches for fun so this is easy.
You can see at 15:14 he is working the center of the gauge under the "rivet" by rotating it and pressing down. It also was evident the gauge center was under something when he pulled the face off.
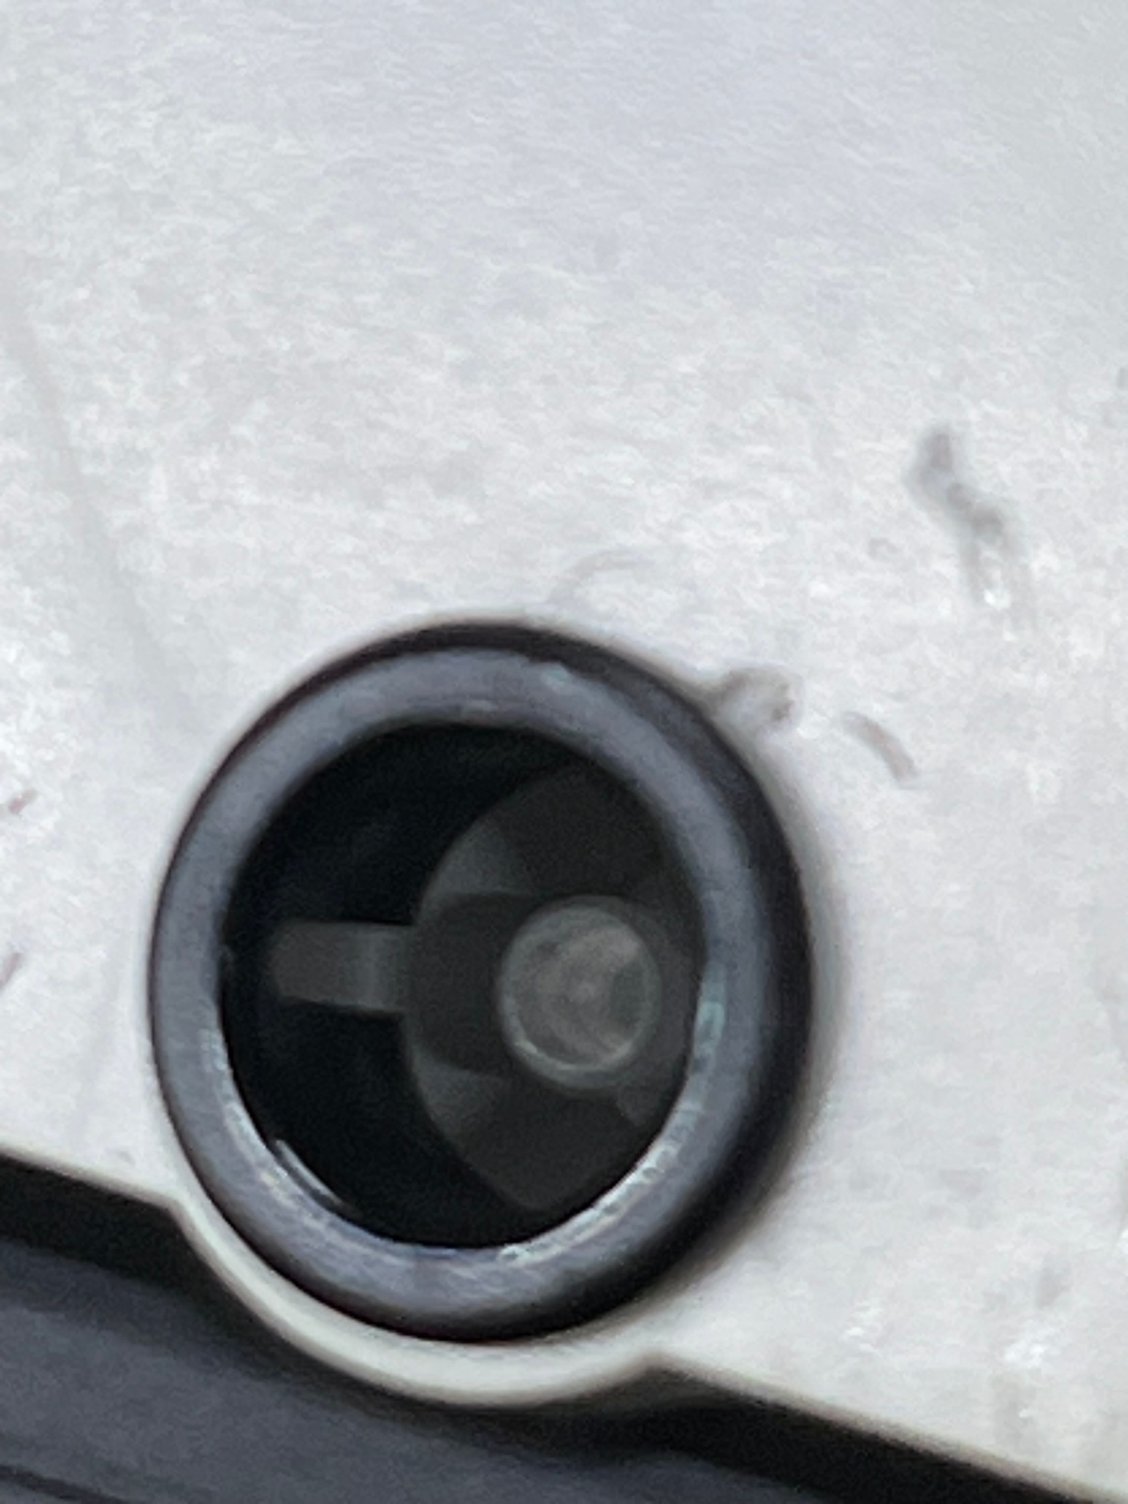
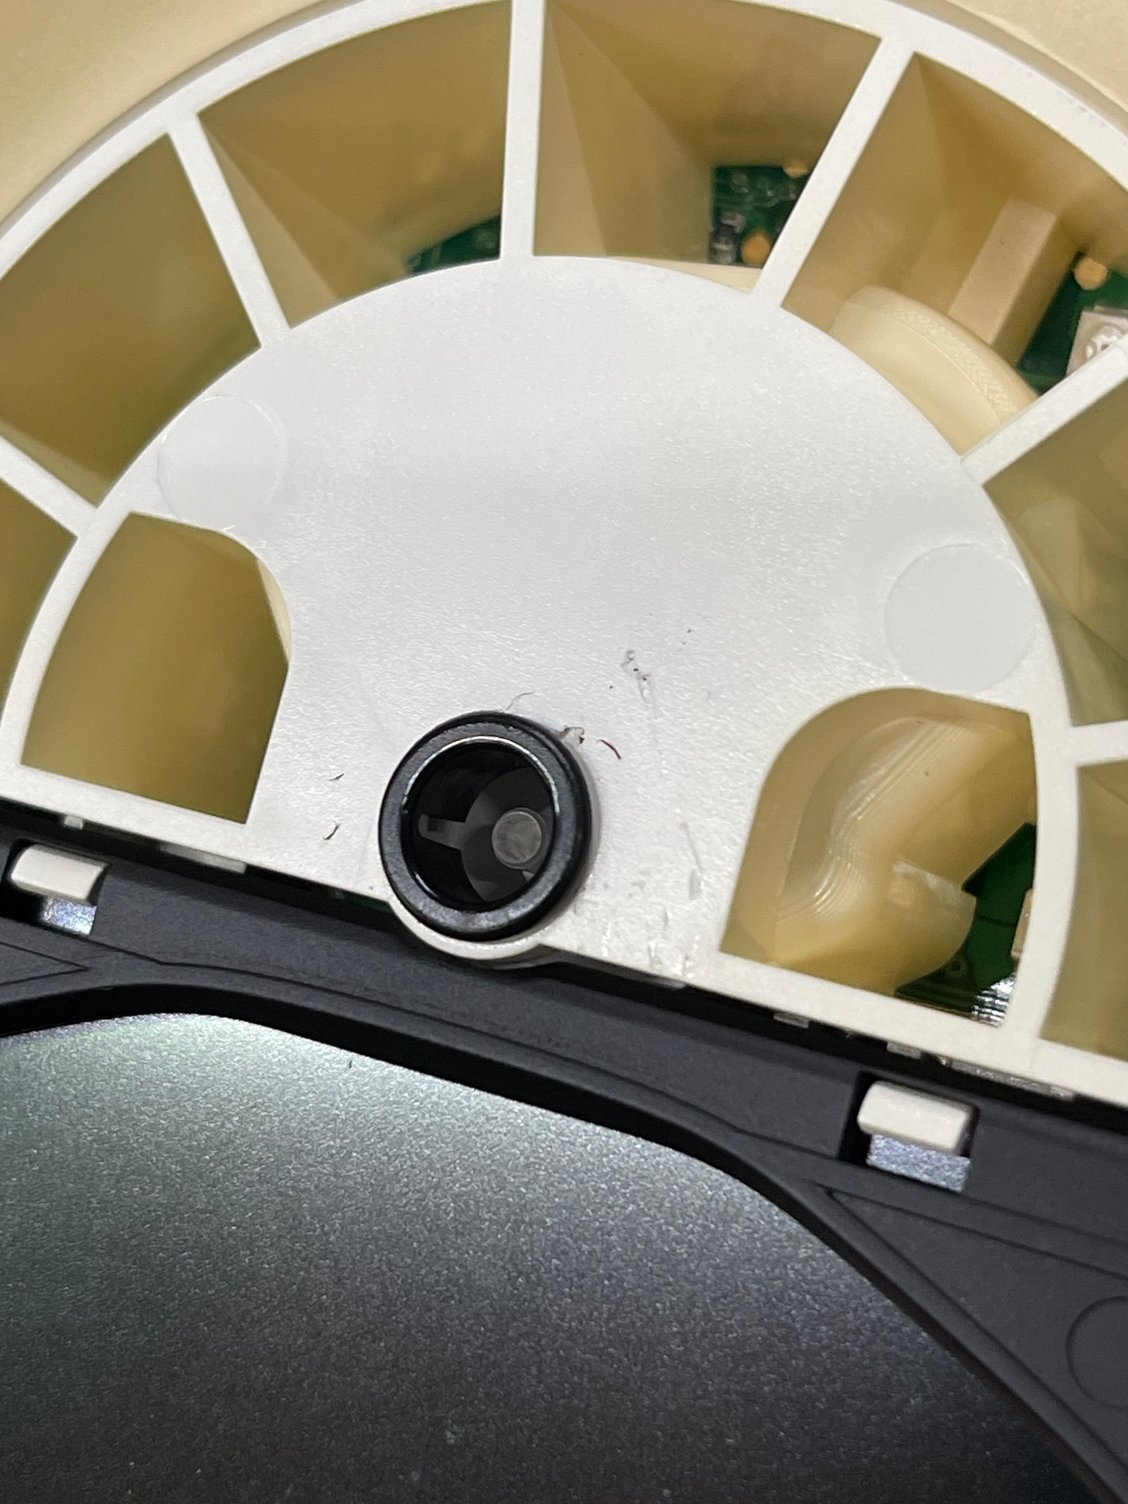
The cayman gauges have four spots to line up all at once. You can't rotate them to try to slip them under. Pics The tach hole. Note the old gauge face was under the black lip. I can't get the black part (what I am calling the rivet) to move to reinstall on top of the new gauge. Same part over view. You can see the black circle in the center hole underneath the gauge face.
Last edited by Ric In RVA; 06-27-2024 at 06:27 PM.


 02-06-2024, 03:23 PM