When you click on links to various merchants on this site and make a purchase, this can result in this site earning a commission. Affiliate programs and affiliations include, but are not limited to, the eBay Partner Network.
2015 Porsche 911 Carrera 4 GTS. Purchased from the original owner in 2018 (3y 1m after initial delivery) with 98 miles. Coolant pipe started to leak intermittently in May 2020. It was an intermittent and a slow leak. I never had to add any coolant to the coolant reservoir. Then during my first two drives in 2021, the coolant pipe leaked each time. Although I am still under CPO warranty and if anything I trust my local dealer far more than the independents, I chose to fix this myself.
I found plenty of coolant leak complaints on various forums, but it seems 991 owners had them fixed under warranty. I did come across a Rennlister in the UK who clarified some of the questions I had.
The typical coolant leak in the 991.1 and 991.2 models. Some owners have had issues with leaking coolant pumps. Luckily I haven't...yet.
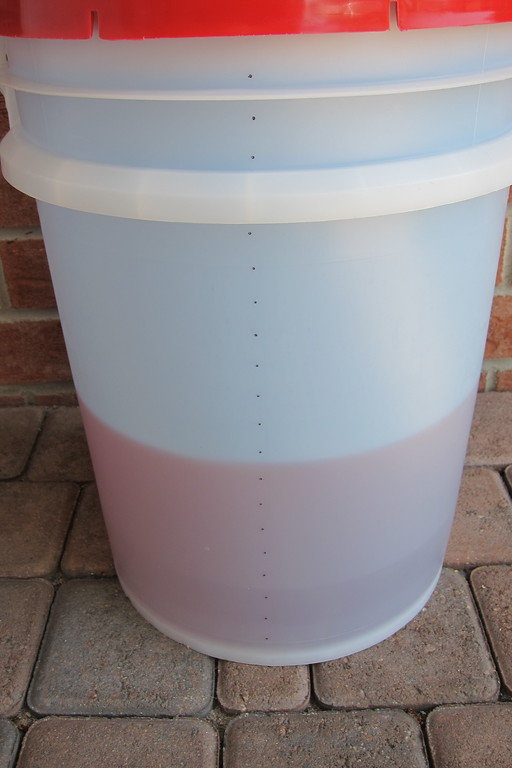
I didn�t want to drain the whole coolant system, so I parked my 991 in my sloped driveway with the nose down. By the time I set both back wheels on car ramps, the engine was far above the rest of the coolant system. I drained 8.5 liters of factory coolant. Upon filling, it took just over 8 liters and will get topped up after the next few short drives. I have a vacuum filler, but it was not necessary or used. I used a 1000 ml graduated cylinder and marked off each liter with an automatic punch and later filled in each punch hole with a permanent marker.
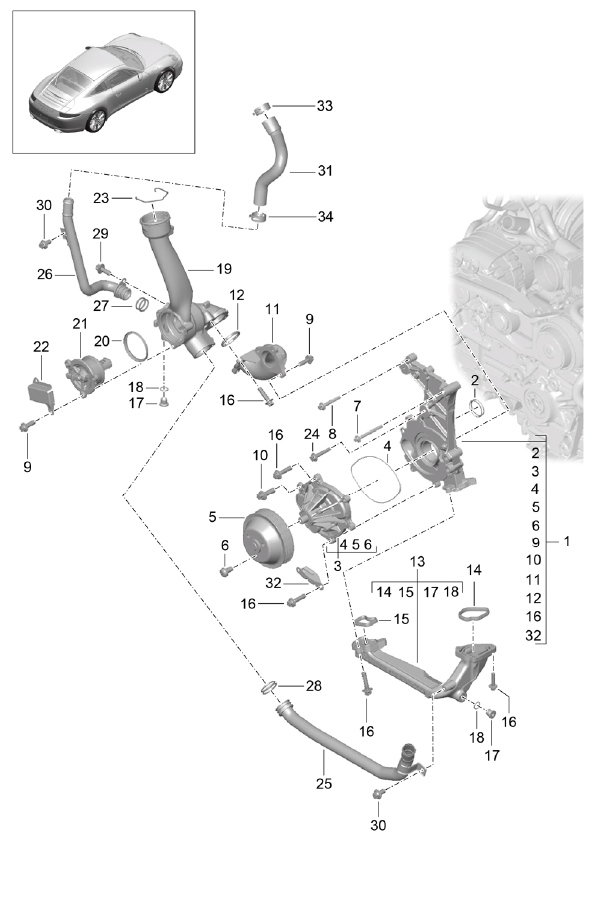
Text within brackets eg. (#25) refer to the parts in this diagram.
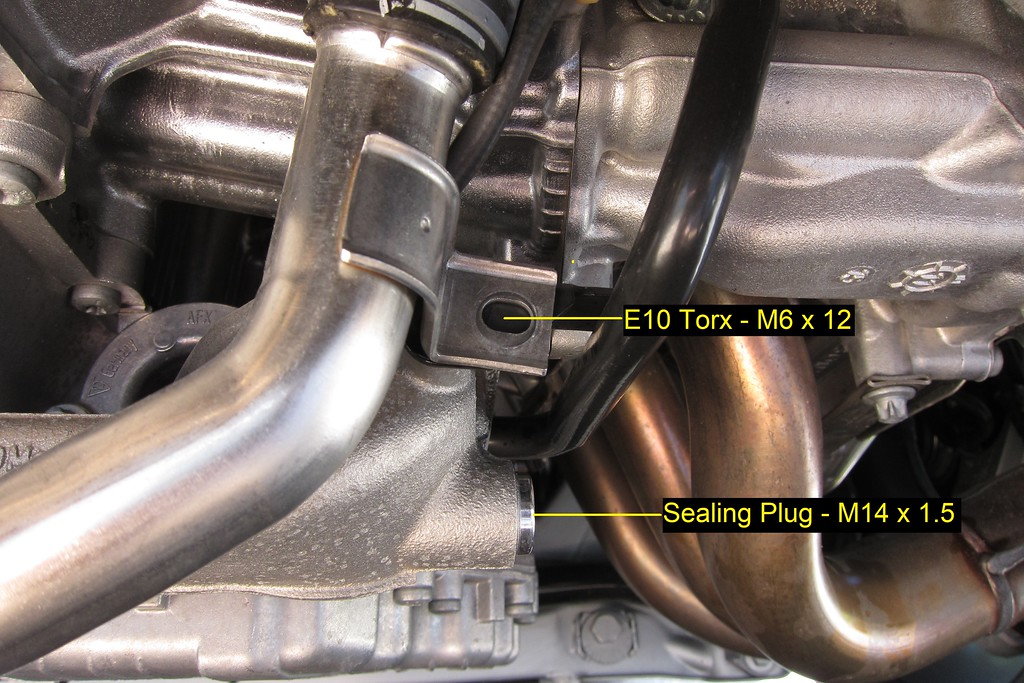
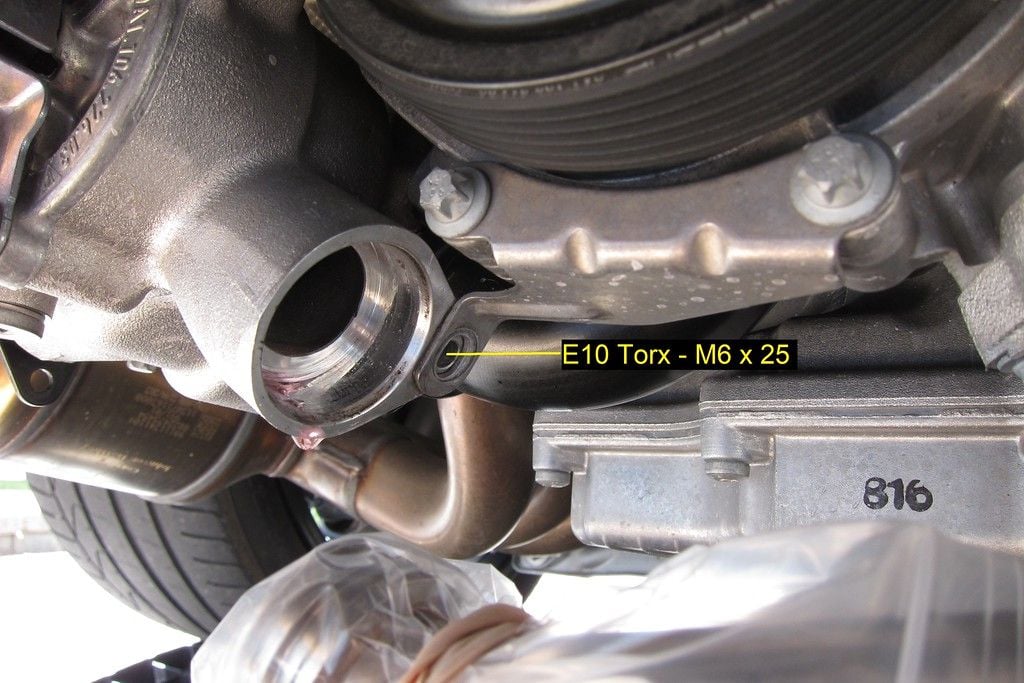
I removed the E10 Torx bolt - M6 x 12 (#30) that fastens the silver coolant pipe (#25) to the engine block. After removal of that fastener, that pipe can now be pulled out of the thermostat housing (#19).
I removed the E10 Torx bolt - M6 x 12 (#30) that fastens the black coolant pipe (#26) to the cover of the high pressure pump. Without removing that bolt, you won�t be able to remove the black coolant pipe from the thermostat housing (#19).
I removed the E10 Torx bolt � M6 x 16 (#29) that fastens the black coolant pipe (1) to the thermostat housing (#19). That black coolant pipe can now be removed from the thermostat housing.
Coolant pipe 1 is #26 in the Coolant Parts Diagram.
Coolant pipe 2 is #25 in the Coolant Parts Diagram.
Coolant pipe 3 is not shown in the Coolant Parts Diagram.
Shown is the coolant pipe retainer after the E10 Torx bolt � M6 x 16 (#29) that fastens the black coolant pipe to the thermostat housing (#19) is removed.
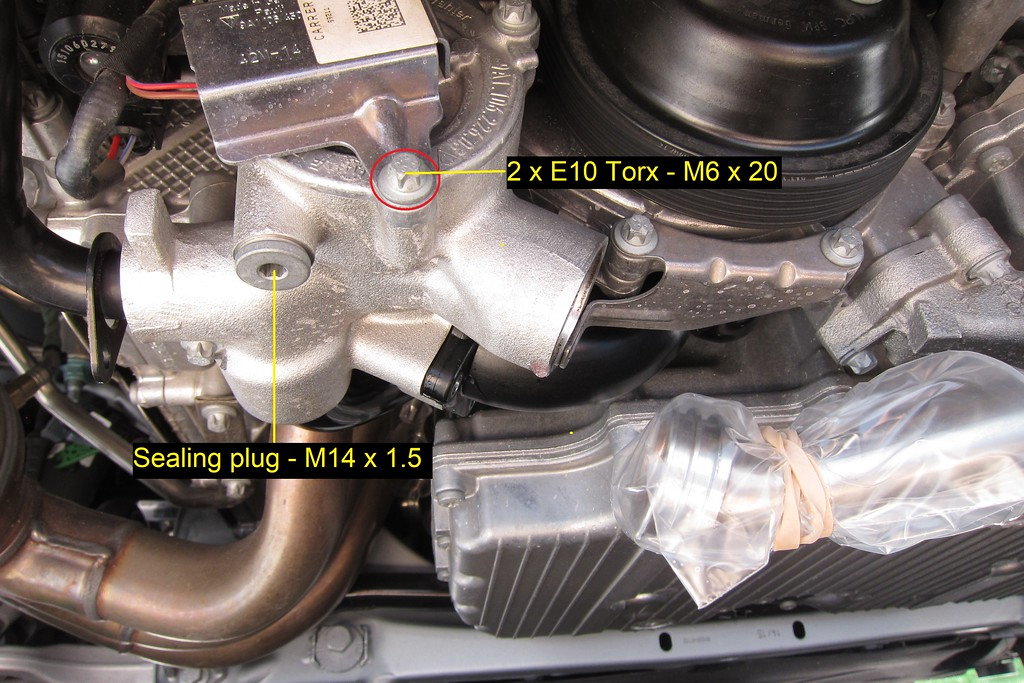
I removed the two E10 Torx bolts � M6 x 20 (#9) that fasten the guard plate (#22) in place. Then I removed the electrical connector that the guard plate covered.
I removed the two E10 Torx bolts that fasten the thermostat housing (#19) to the engine.
I removed the two E10 Torx bolts that fasten the thermostat housing (#19) to the engine. This bolt (removed) attaches the bracket (#32) on the coolant pump to the thermostat housing.
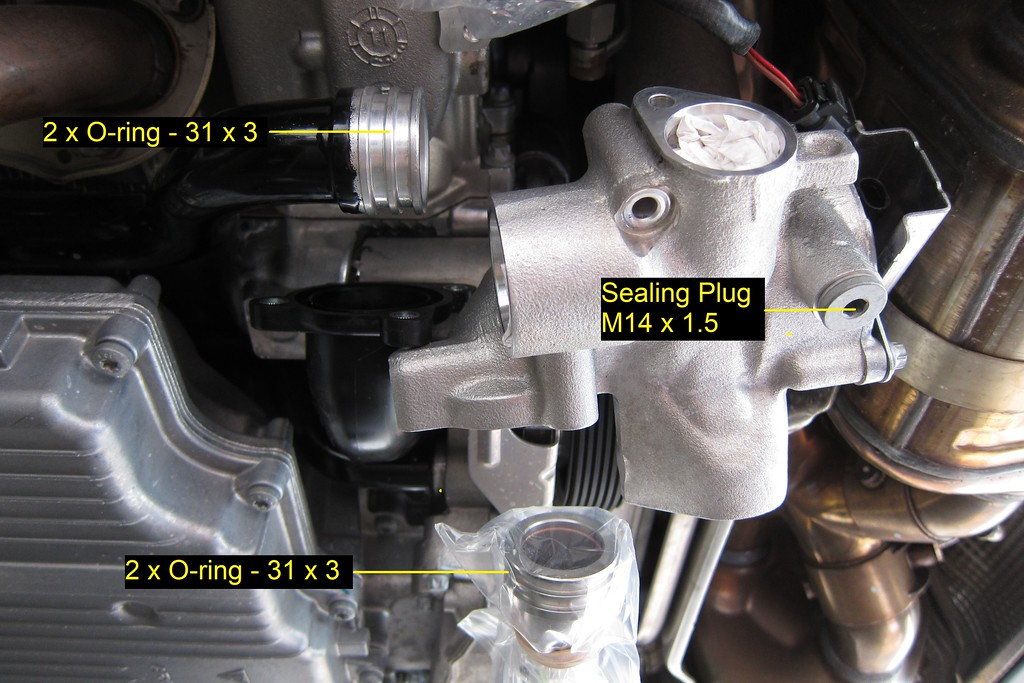
I removed the two E10 Torx bolts that fasten the thermostat housing (#19) to the engine. The thermostat housing can now be moved to the rear allowing access to the O-ring (#12) and mating surface of the plastic coolant pipe (#11).
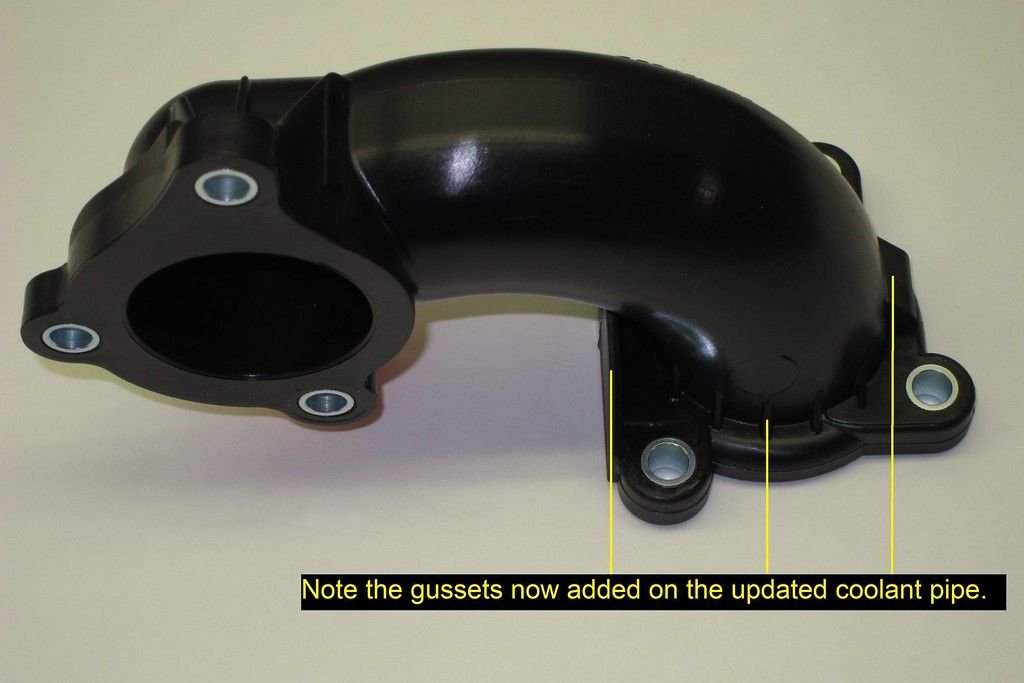
O-ring (#12) has been removed and the mating surface as well as the groove for the O-ring has been thoroughly cleaned. The plastic coolant pipe (#11) has been updated but in order to replace it, the coolant pump and other parts would have to be removed. This can be done at a later date or when this joint leaks again. The updated part is shown near the end of this photo series.
After a long drive, no more leaks.
Note: although the points where the fasteners are, are flush, there is a 0.019� gap between the plastic coolant pipe and the thermostat housing between the fastener points. It could be why Porsche updated the plastic coolant pipe and added gussets. I�ll get around to installing the updated coolant pipe if I have further issues down the road, but that involves taking off the coolant pump and other parts. At the moment, I want to drive!
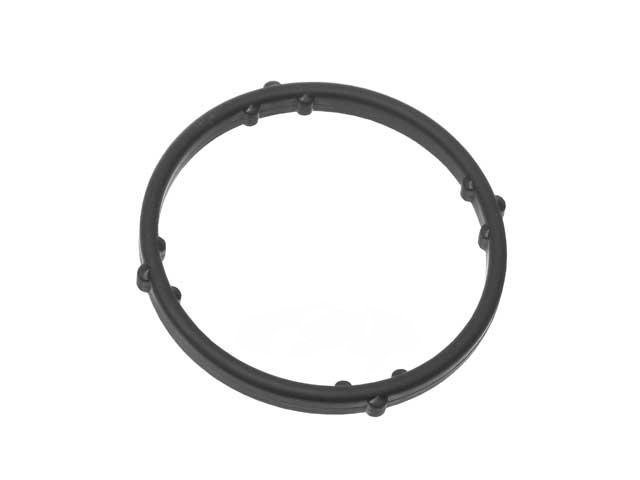
Those nubs are there to keep the water pipe seal (#12) in place while it sits in the groove of the water pipe (#11). The issue is the groove is wider than the width of the seal allowing it to squish and flatten more easily. Maybe that is why this joint leaks after a period of time.
Same thought I had - especially while the car is under warranty. Isn�t that what it�s for?
DaveGee
If it was a big ticket item, sure, but this was for a $15 O-ring. I can handle that.
Besides, I like working on my vehicles (cars & motorcycles) and when I was a flight instructor, on the aircraft I used to fly. I have the practical skills and on a scale of 10, this was a 1 if that. Plus I know it is done right.
Thanks for sharing in detail the repair for the coolant pipe leak, I feel confident now for my repair. Unfortunately, I was the cause of my leak when I backed into a parking spot and lightly bumped the thermostat housing against a parking curb. Totally my fault but it really surprised me that just the slightest bump caused a leak. After my repair I will design and install a protective skid plate for that area.
Looks like the same design used on an early gen MINI i used to have. That rubber gasket would get old and the recess was deep enough that it wouldn't keep good pressure on the seal. After replacing that plastic piece a few times, I ended up putting it on a belt grinder and shaving about a millimeter off of it so that the groove wasn't so deep and it put more pressure on the o-ring. Never leaked again...
Awesome�I�d love to see more DIY stuff on 991�s. Suppose we got at least another 5 yrs or so before these type of threads will start replacing the �CPO/Warranty� threads.
That rubber gasket would get old and the recess was deep enough that it wouldn't keep good pressure on the seal.
In the case of the 991, the square section groove is too wide, but I guess they make it that way to accept the extra nubs that hold the seal "in place" on the rectangular section seal.
Maybe a square or larger rectangular section seal like those used on an some oil filters might do the trick. The other issue is the rigidity of the flange area. In my case so far so good, but then it has only been just over a year since replacement of that seal.
I am 99.999999999% sure those are triple square fasteners NOT TORX!!!! Look the same until you strip them out. Get the write "sockets".
Which fasteners are you referring to? Are you on the right thread? Other than the two "sealing plugs", all fasteners are an E-Torx in my DIY.
Now I did see a YouTuber using a 10mm socket on an E-Torx head. Maybe it works as long as it is not seized but I prefer to use the correct socket/tool. I don't cut corners.
I learned something. Male sockets are three square females sockets can be Torx or 12 point. For example the fastener on the oil pan would be 3 square, even though a Torx would fit, it doesn't engage the depth and can strip.... Thanks for clarifying for me!!!!


 06-27-2021 | 04:34 PM