When you click on links to various merchants on this site and make a purchase, this can result in this site earning a commission. Affiliate programs and affiliations include, but are not limited to, the eBay Partner Network.
I’m stuck
Replaced the seal, and it’s still dripping albeit very slowly now.
I tried refilling the coolant, managed to get about 6L in after draining about 9L.
Car is overheating and I can’t figure out a way to get the air out. Any help on getting the air out?
I have done 2 drain and fills and used a vacuum fill tool so I’m not a lot of help with you air bleeding issues but I recall a valve on top of the coolant reservoir tank that can be flipped up in an open position to help bleed air from the radiators and the system. It bleeds air to the top of the sealed reservoir tank and not externally so I think it would probably take multiple heating and cool down cycles??? Porsche and most of the DIYers recommend the vacuum bleeding tools as there are multiple heat exchangers and valves in the system that can trap air and make a complete fill very difficult without the vacuum tool.
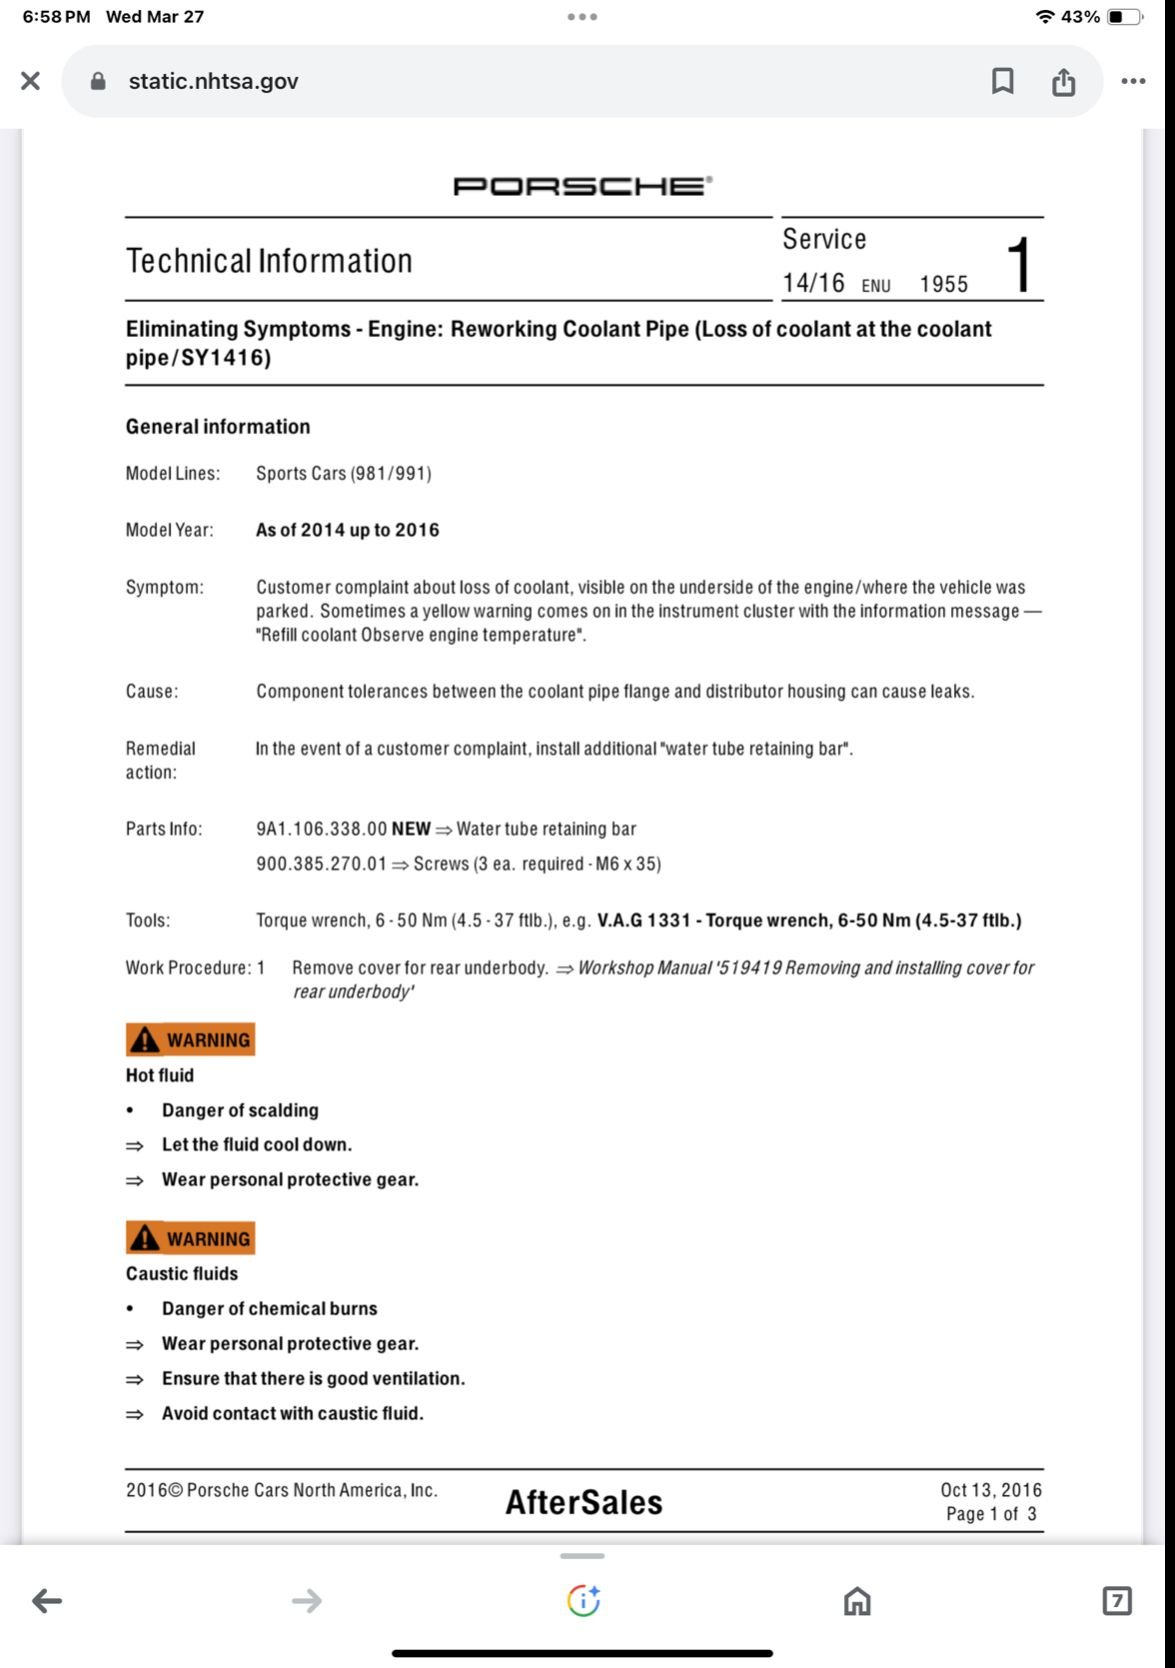
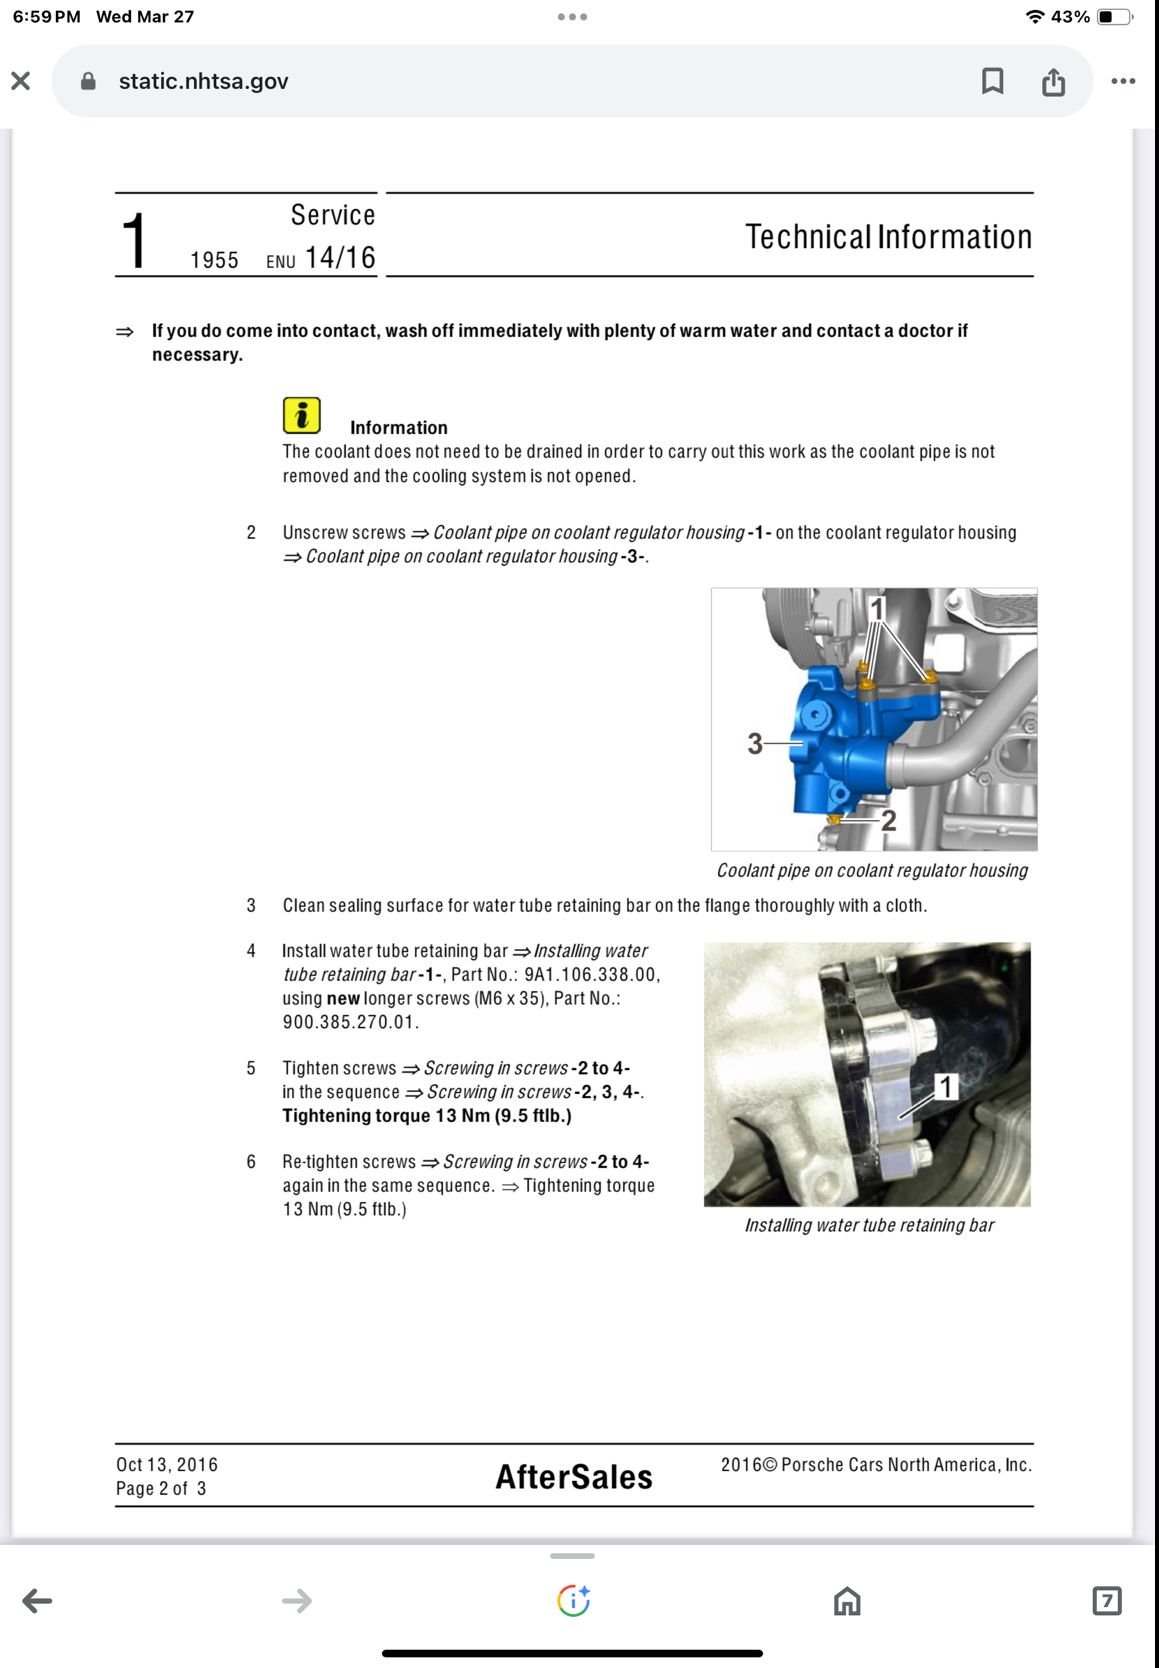
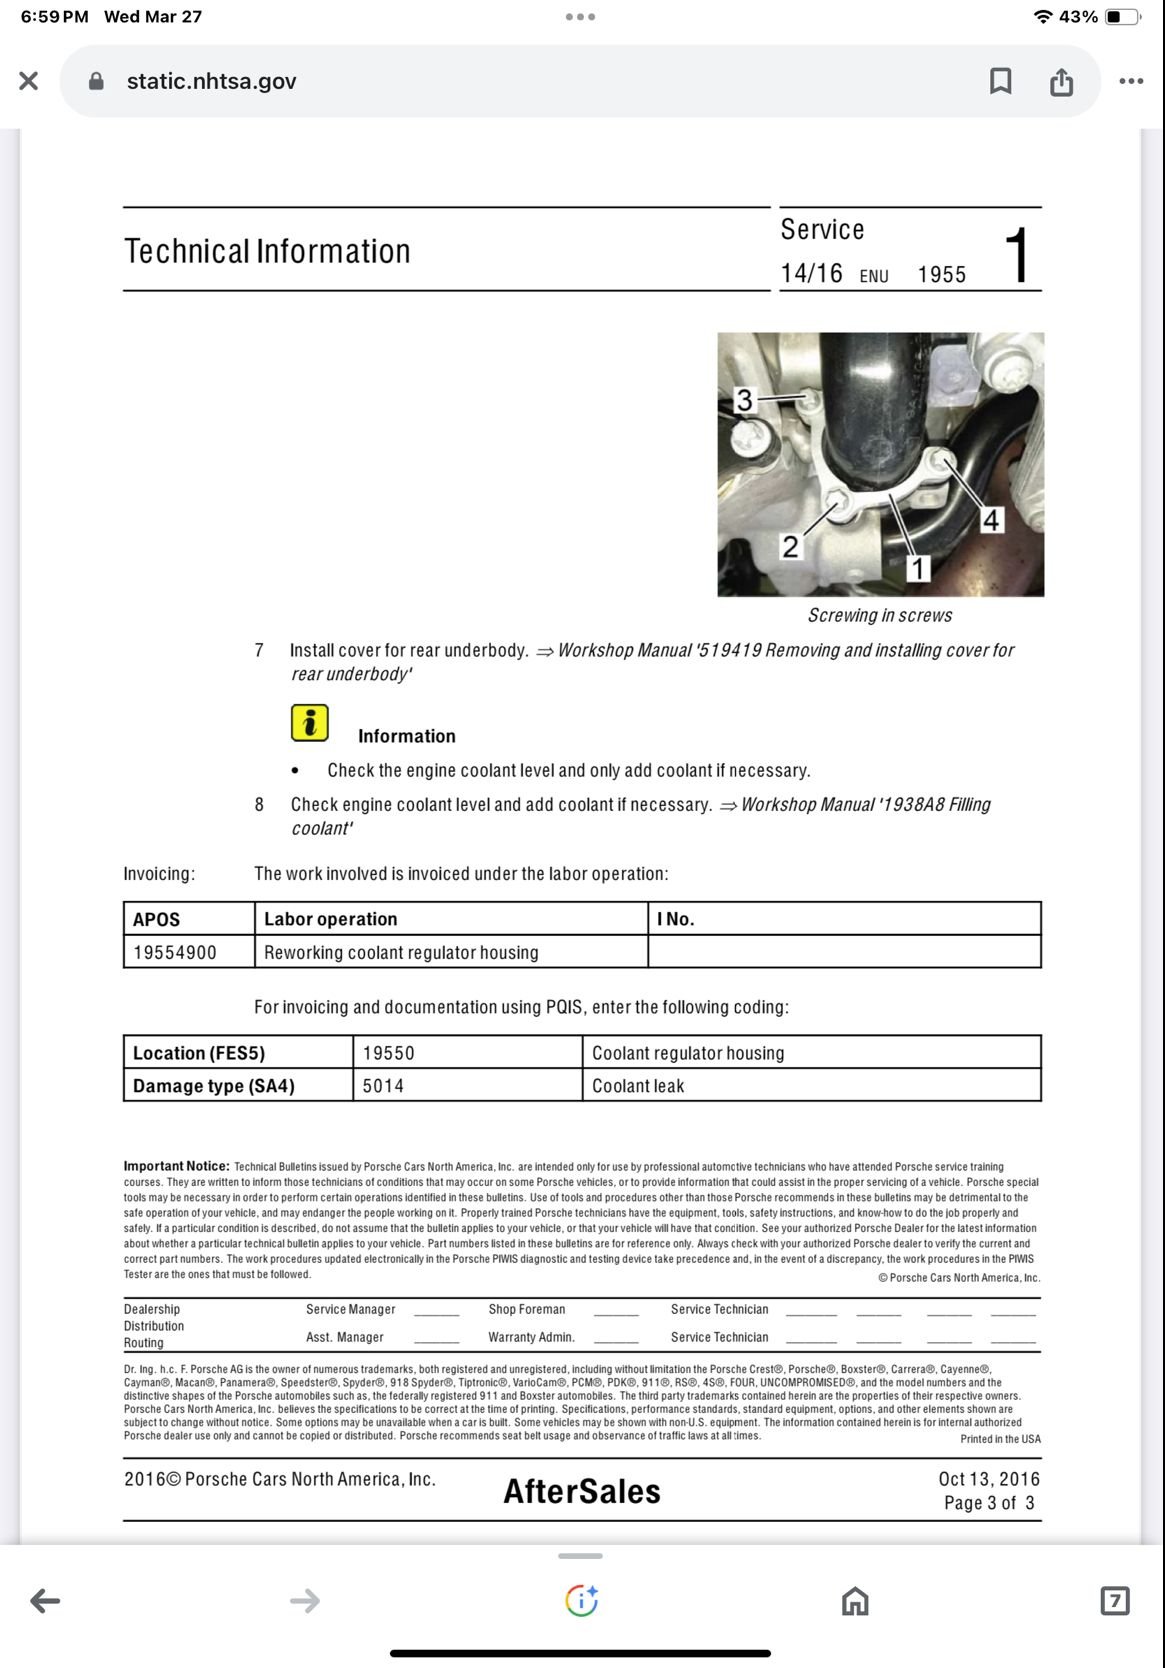
Porsche issued a service bulletin on “Reworking Coolant Pipe” with a kit that has a water tube retaining bar and bolts that puts more uniform clamping force on the coolant pipe that is installed without removing the existing pipe. There are 2 other recent threads on this repair and I posted the below repair and added to some previously posted installation tips. The parts were about $40 and I installed them as a preventative measure to avoid a leak in the future. This repair does not require draining the coolant but a small amount will come out when the bottom bolt is replaced so you need to work fast.
Jim
I have done 2 drain and fills and used a vacuum fill tool so I�m not a lot of help with you air bleeding issues but I recall a valve on top of the coolant reservoir tank that can be flipped up in an open position to help bleed air from the radiators and the system. It bleeds air to the top of the sealed reservoir tank and not externally so I think it would probably take multiple heating and cool down cycles??? Porsche and most of the DIYers recommend the vacuum bleeding tools as there are multiple heat exchangers and valves in the system that can trap air and make a complete fill very difficult without the vacuum tool.
Porsche issued a service bulletin on �Reworking Coolant Pipe� with a kit that has a water tube retaining bar and bolts that puts more uniform clamping force on the coolant pipe that is installed without removing the existing pipe. There are 2 other recent threads on this repair and I posted the below repair and added to some previously posted installation tips. The parts were about $40 and I installed them as a preventative measure to avoid a leak in the future. This repair does not require draining the coolant but a small amount will come out when the bottom bolt is replaced so you need to work fast.
Jim
Thank you, I�ve ordered the new retaining bar and screws to try solve that leak once and for all.
I�m still struggling to find more details on that valve on top of the coolant reservoir to help bleed the system, what does it look like?
Ive tried so much and coolant ends up leaking when I undo the coolant cap each time
Thank you, I’ve ordered the new retaining bar and screws to try solve that leak once and for all.
I’m still struggling to find more details on that valve on top of the coolant reservoir to help bleed the system, what does it look like?
Ive tried so much and coolant ends up leaking when I undo the coolant cap each time
it’s a wire loop that flips to an upright position next to the reservoir tank close to coolant cap. It’s called the comfort valve on the diagram below.
I�ve ordered the new retaining bar and screws to try solve that leak once and for all.
So have I as a "back-up" now that I found out about it in the last month. Some years ago, I saw that coolant pipe retaining bar on a few pics, but nobody seemed to know anything about it. Mind you, I also did not ask the dealer.
As for the leak, mine has been 100% leak-free since I replaced it with a new seal in June of 2021...three years ago.
I�ve found the bleed valve by the reservoir, and flipped it to the up position. I heard some air come through.
Then I turned it on, put heater on max temp, left the coolant cap open and bleed valve open. As the car got to 90c, it threw some fluid out and then I turned the car off.
What is the right process here to help bleed it out? When to open the coolant cap and when to open the bleed valve?
I’ve found the bleed valve by the reservoir, and flipped it to the up position. I heard some air come through.
Then I turned it on, put heater on max temp, left the coolant cap open and bleed valve open. As the car got to 90c, it threw some fluid out and then I turned the car off.
What is the right process here to help bleed it out? When to open the coolant cap and when to open the bleed valve?
As I mentioned in both posts 32 and 34 above it is very difficult to bleed the system without the vacuum bleeding tool but I think multiple heating and cool down cycles with the bleed valve (comfort valve) flipped up to the open position and the cap loose would give the best results. And of course the heating cycles will need to be relatively short and monitored to avoid overheating. When I added the center radiator I used the vacuum bleeder which gave a good initial results. I left the top engine cover loose for a few drives over the course of a week and I left the comfort valve flipped up for the whole week. I removed the cap after each cool cool down and had to only add a total of a few ounces. When I was convinced I had all air out, I then flipped the bleed valve to the closed (automatic) position before reinstalling the engine cover.
Below is a screenshot of the comfort valve description that goes along with the screenshot in post #34 of the complete cooling system.
Jim
I’m glad to see that you are getting a vacuum kit and am sure you will also find many uses for the compressor. I have the Airlft 550000 vacuum kit which appears to be similar to the one you picked. I have a large 60 gallon 2 piston stationary mounted compressor that has a lot of air flow and is able to pull the recommended 25 inches of vacuum for a complete coolant fill. You should be able to pull the 25 inches of vacuum with your smaller compressor but you will probably need to do it in multiple steps by pausing the process as the compressor runs low on air pressure and letting it pump up to full pressure then pulling more vacuum then repeating until you get the full 25 inches of vacuum. You will also need a clean 5 gallon bucket positioned at the height of the reservoir tank when you start the filling stage.
Jim
I�m glad to see that you are getting a vacuum kit and am sure you will also find many uses for the compressor. I have the Airlft 550000 vacuum kit which appears to be similar to the one you picked. I have a large 60 gallon 2 piston stationary mounted compressor that has a lot of air flow and is able to pull the recommended 25 inches of vacuum for a complete coolant fill. You should be able to pull the 25 inches of vacuum with your smaller compressor but you will probably need to do it in multiple steps by pausing the process as the compressor runs low on air pressure and letting it pump up to full pressure then pulling more vacuum then repeating until you get the full 25 inches of vacuum. You will also need a clean 5 gallon bucket positioned at the height of the reservoir tank when you start the filling stage.
Jim
Thank you for all the tips.
Will pulling the vacuum remove all the existing fluid too? Or will it just pull the air and I can fill using the coolant I have left over from doing the original drain to replace the seal?
Thank you for all the tips.
Will pulling the vacuum remove all the existing fluid too? Or will it just pull the air and I can fill using the coolant I have left over from doing the original drain to replace the seal?
According to the instructions, the more complete the drain, the better the fill as you will be sucking a lot of coolant when you are pulling vacuum. Both of my vacuum fills were with fairly complete drains so I got only a small ammount of coolant out when pulling the vacuum. Sorry but no personal experience with a less complete drain or more of a top off like yours. I would be interested in your results.
Jim
Will pulling the vacuum remove all the existing fluid too? Or will it just pull the air and I can fill using the coolant I have left over from doing the original drain to replace the seal?
According to the Pelican Parts video, it does although I have to wonder how well it does that. I'd sooner buy new seals, pull the elbows and drain as much as possible.
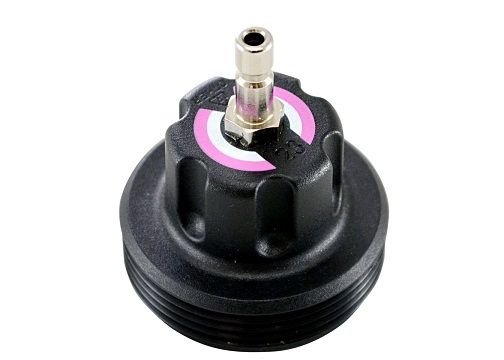
I also use a proper fill cap instead of depending on a rubber cone to hold a vacuum.
The 911 is probably the most difficult vehicle to fill with coolant.
System needs to be pretty much fully drained in order to pull a full vacuum. So many nooks and crannies, pockets of coolant get trapped.
Done this many times, mostly unsuccessfully. Too much coolant and your vacuum tool will start sucking coolant and misting it out the tool�s exhaust. You�ll also have a pocket of air hopelessly trapped behind a slug of coolant. Then the hoses start to pinch off further isolating parts of your coolant system.
I once attempted to try to pull a vacuum slowly on a partially drained system. Over the course of 10 hrs I would periodically hit the air on the vac tool to rebuild vacuum and let it gurgle away. Maybe this would have eventually worked but after that time it seemed like the vac gauge was holding. So I let it start sucking in coolant and it drew half the bucket and the suction peter�s out. Extremely frustrating.
Wonder if the secret is to have the back of the car elevated, like just the rear wheels on ramps. People that do that seem to have a much better time.
Oh no.. just as I was hyping myself to get it done. Sounds like this is going to be a nightmare
I will jack the rear up again, let it settle, maybe run the car a bit. But it�s almost full of coolant, if anything, when I drain from the rear, only a 8-9L will come out, and then air could be anywhere I guess.
I think my local garage might not even be able to do this, and towing to my Indy is pretty far.

 05-04-2024, 05:30 PM