When you click on links to various merchants on this site and make a purchase, this can result in this site earning a commission. Affiliate programs and affiliations include, but are not limited to, the eBay Partner Network.
I could not find a detailed explanation on how to install the warning triangle on a 991.2, so I figure this might help someone...
Here are the part numbers I bought:
Holder ($9.81): 991-551-801-01-1E0
Holder ($9.81): 991-551-802-01-1E0
Warning Triangle ($41.66): 8K0-860-251
Fastening Screw x 2 (2 x $0.34): 999-507-294-40
The installation should not take more than 30 minutes.
Here we go:
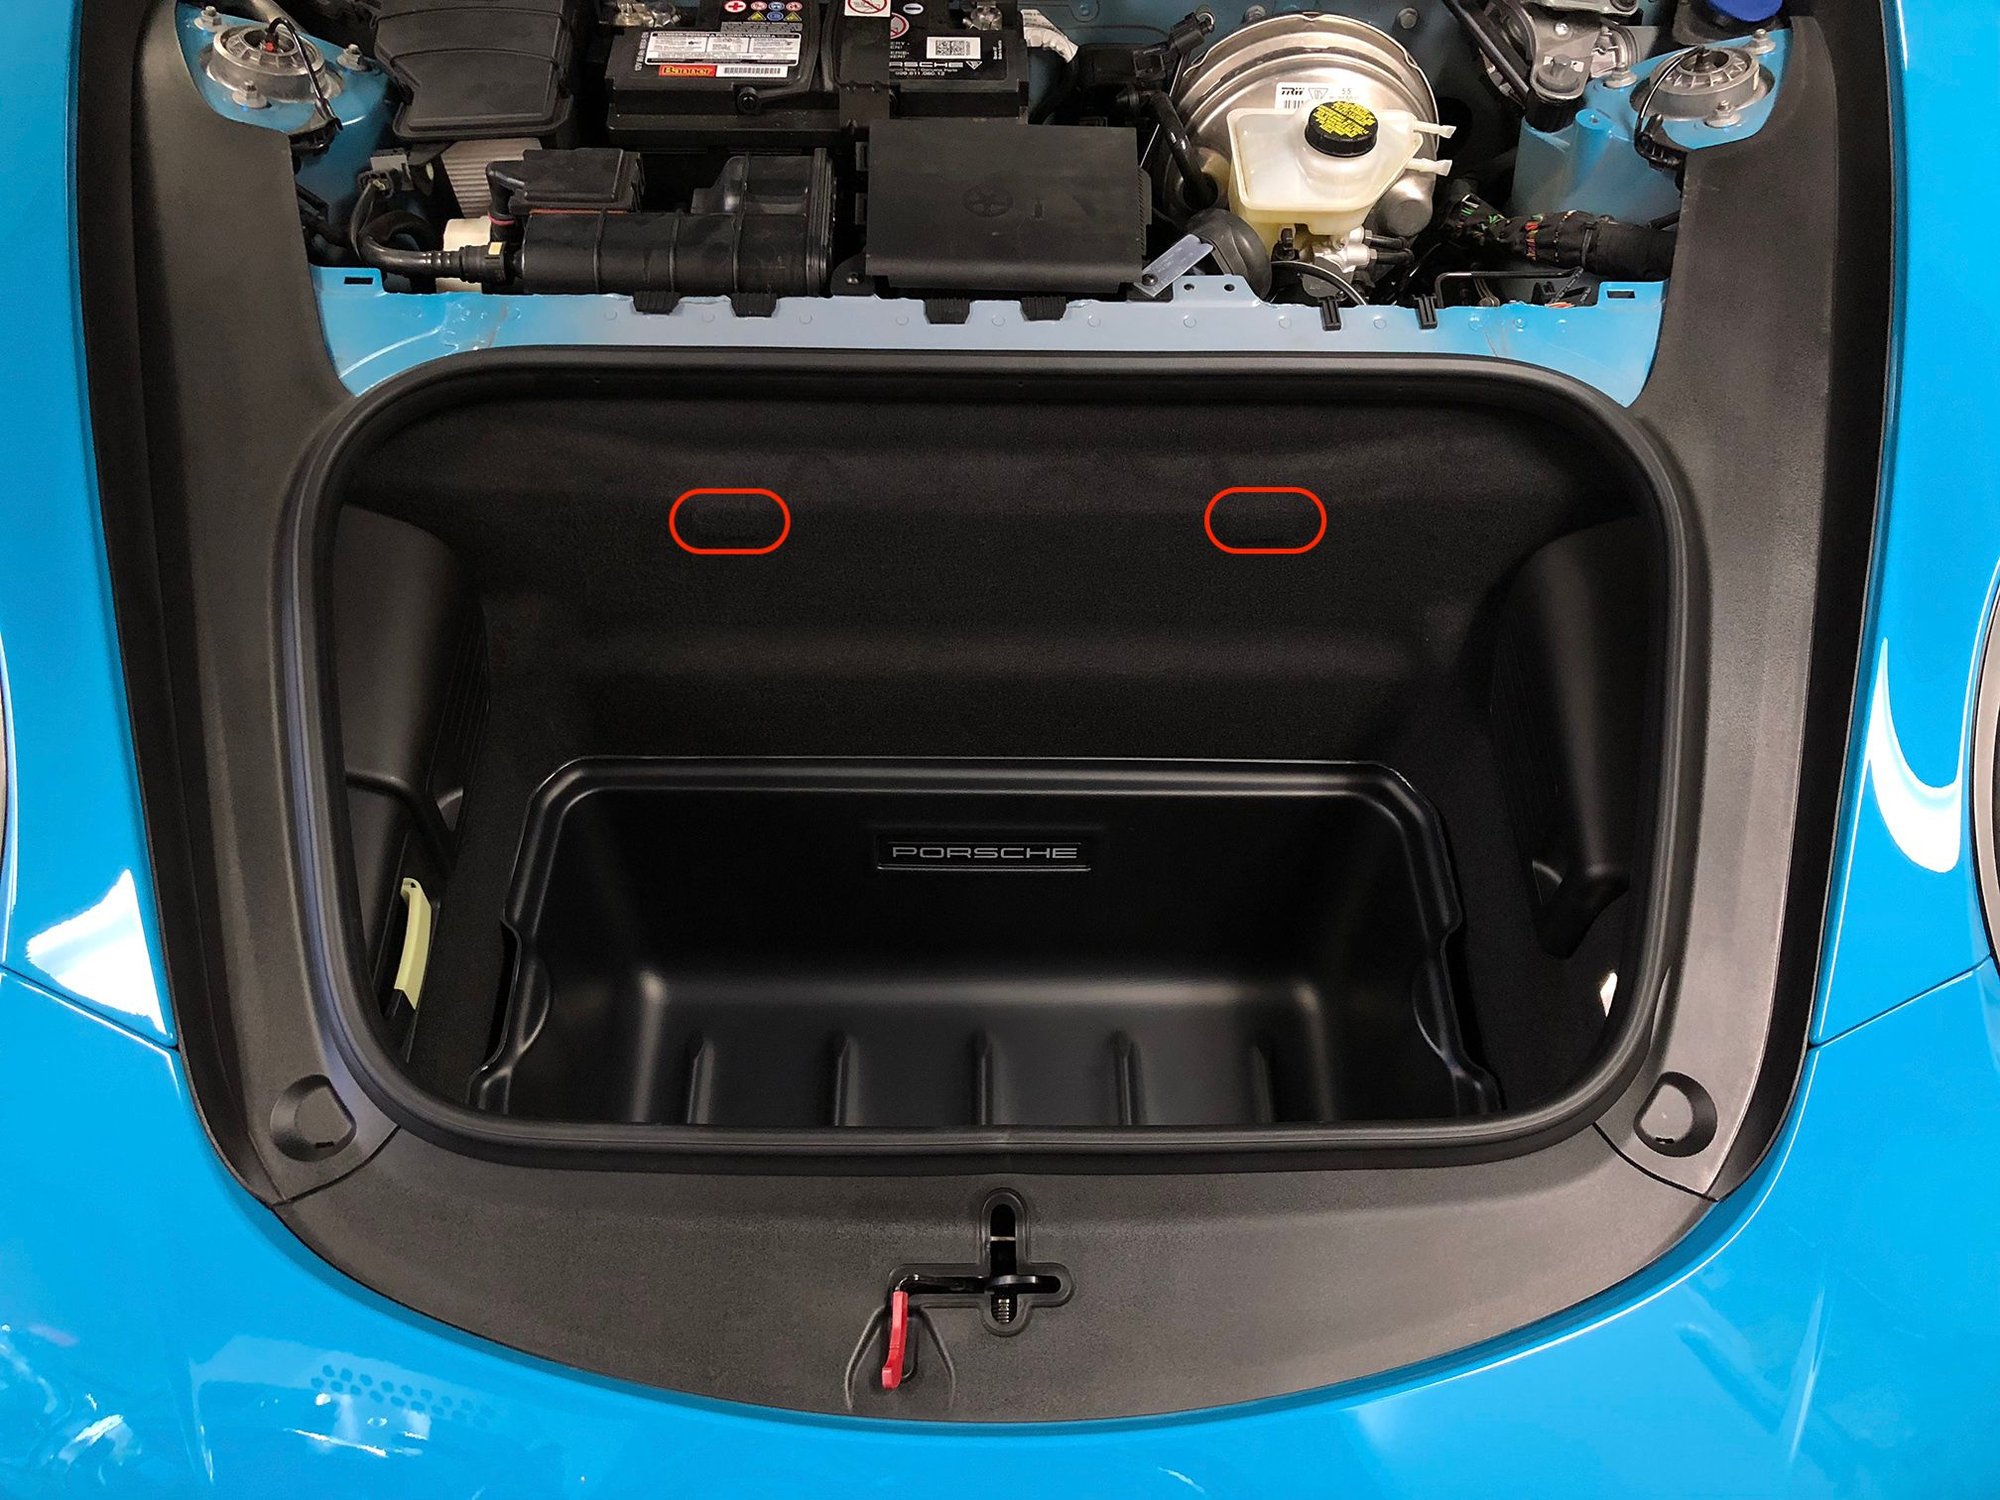
1 - Remove the trunk cover (by pulling the handles on each side).
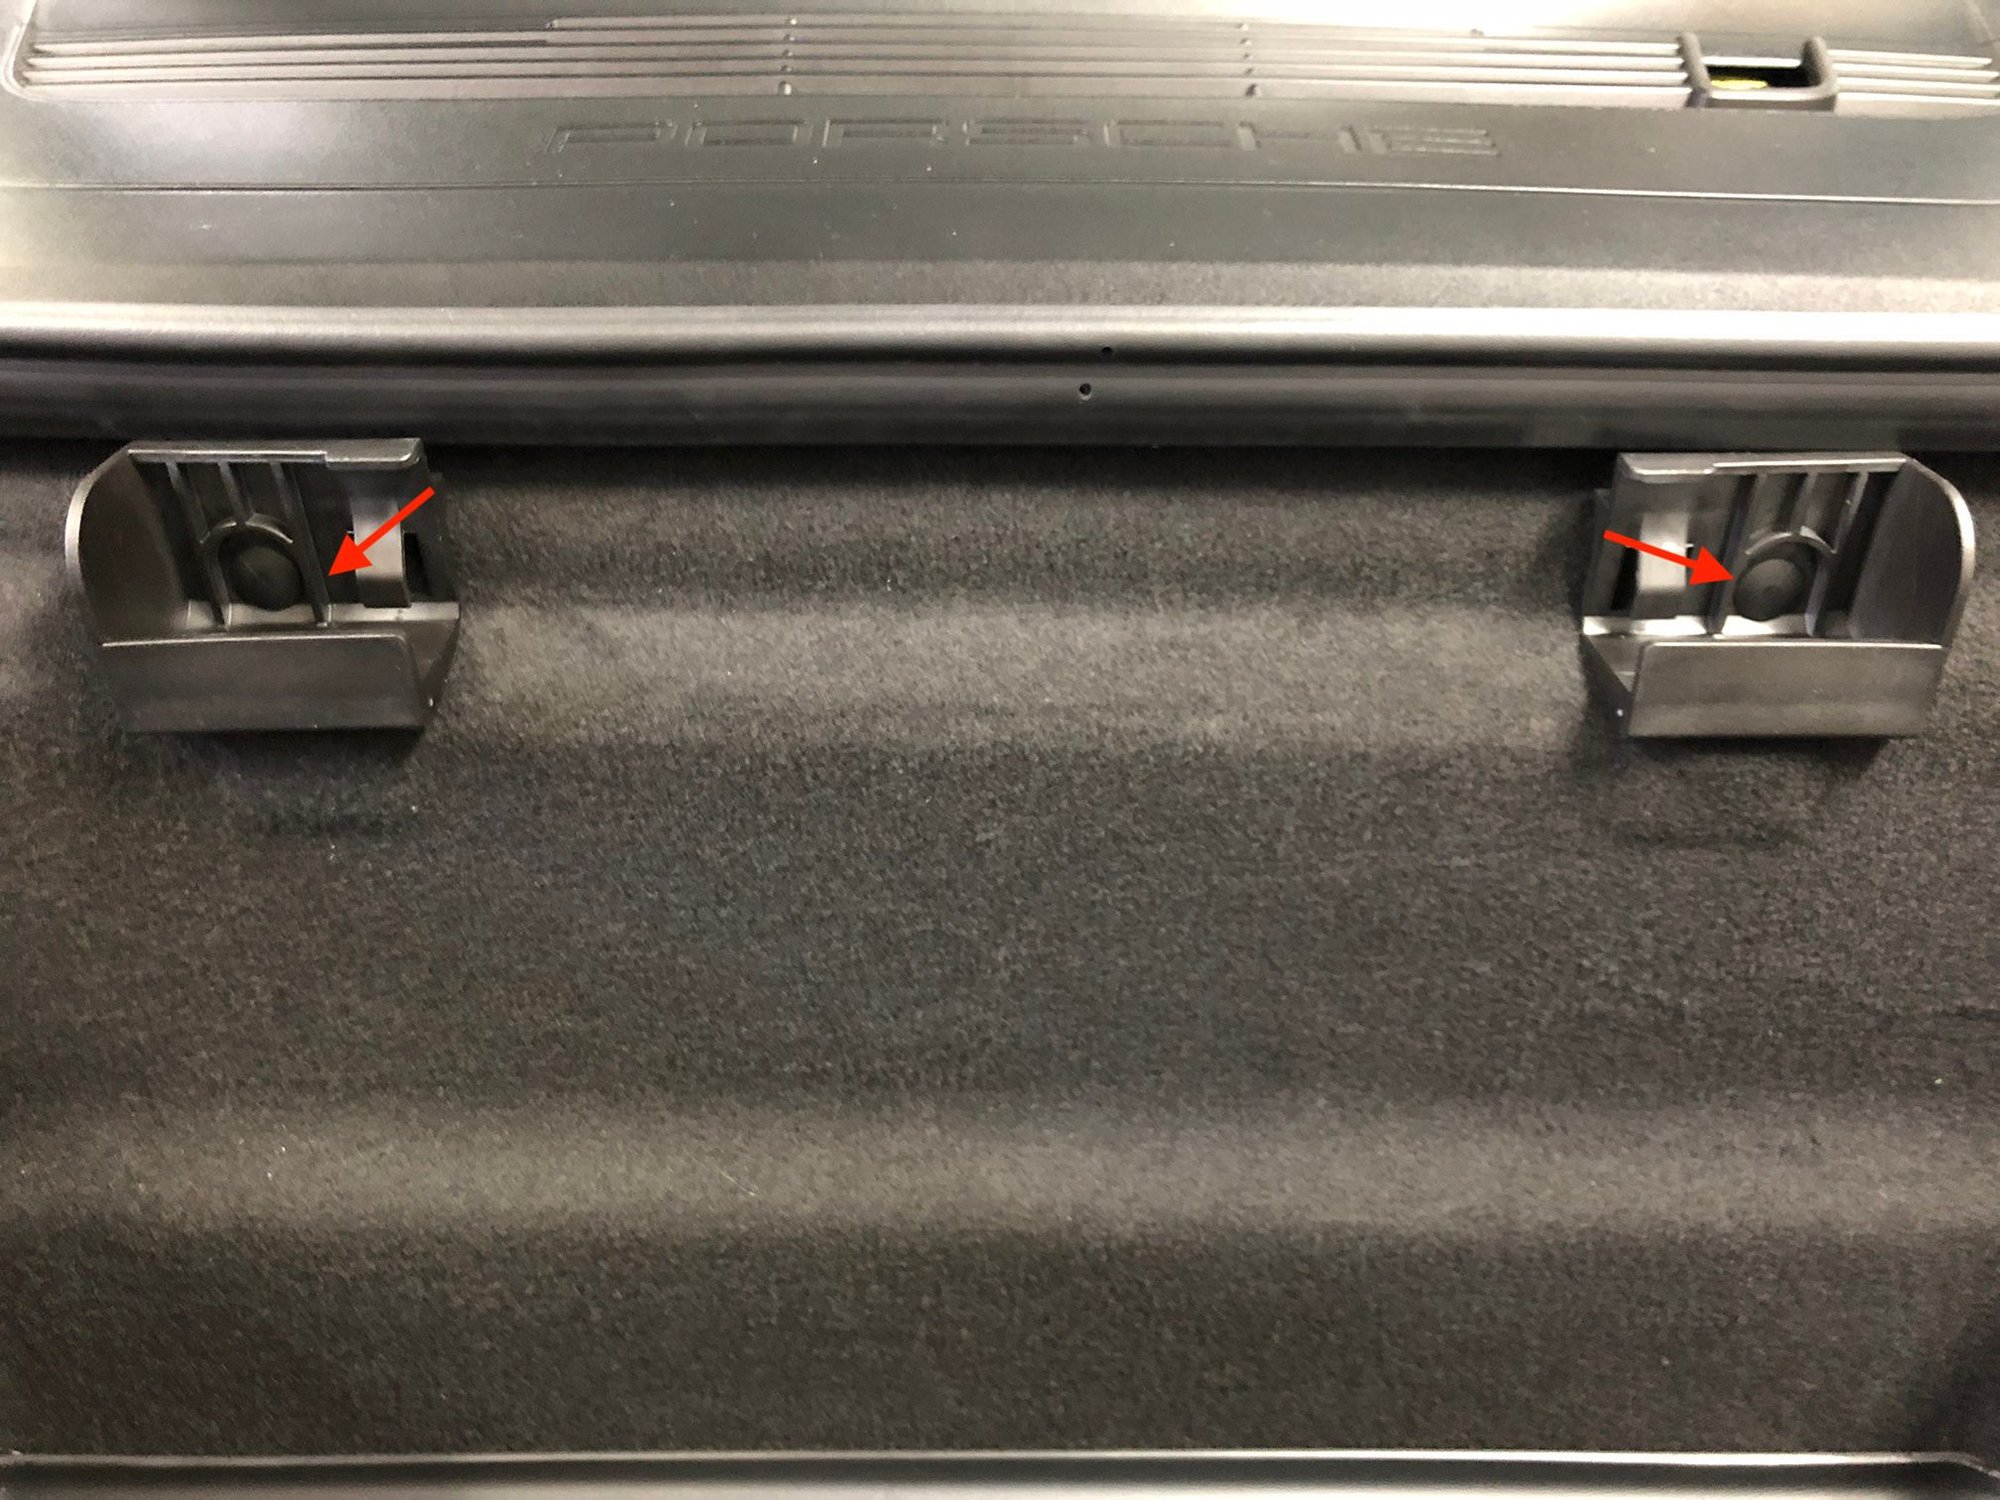
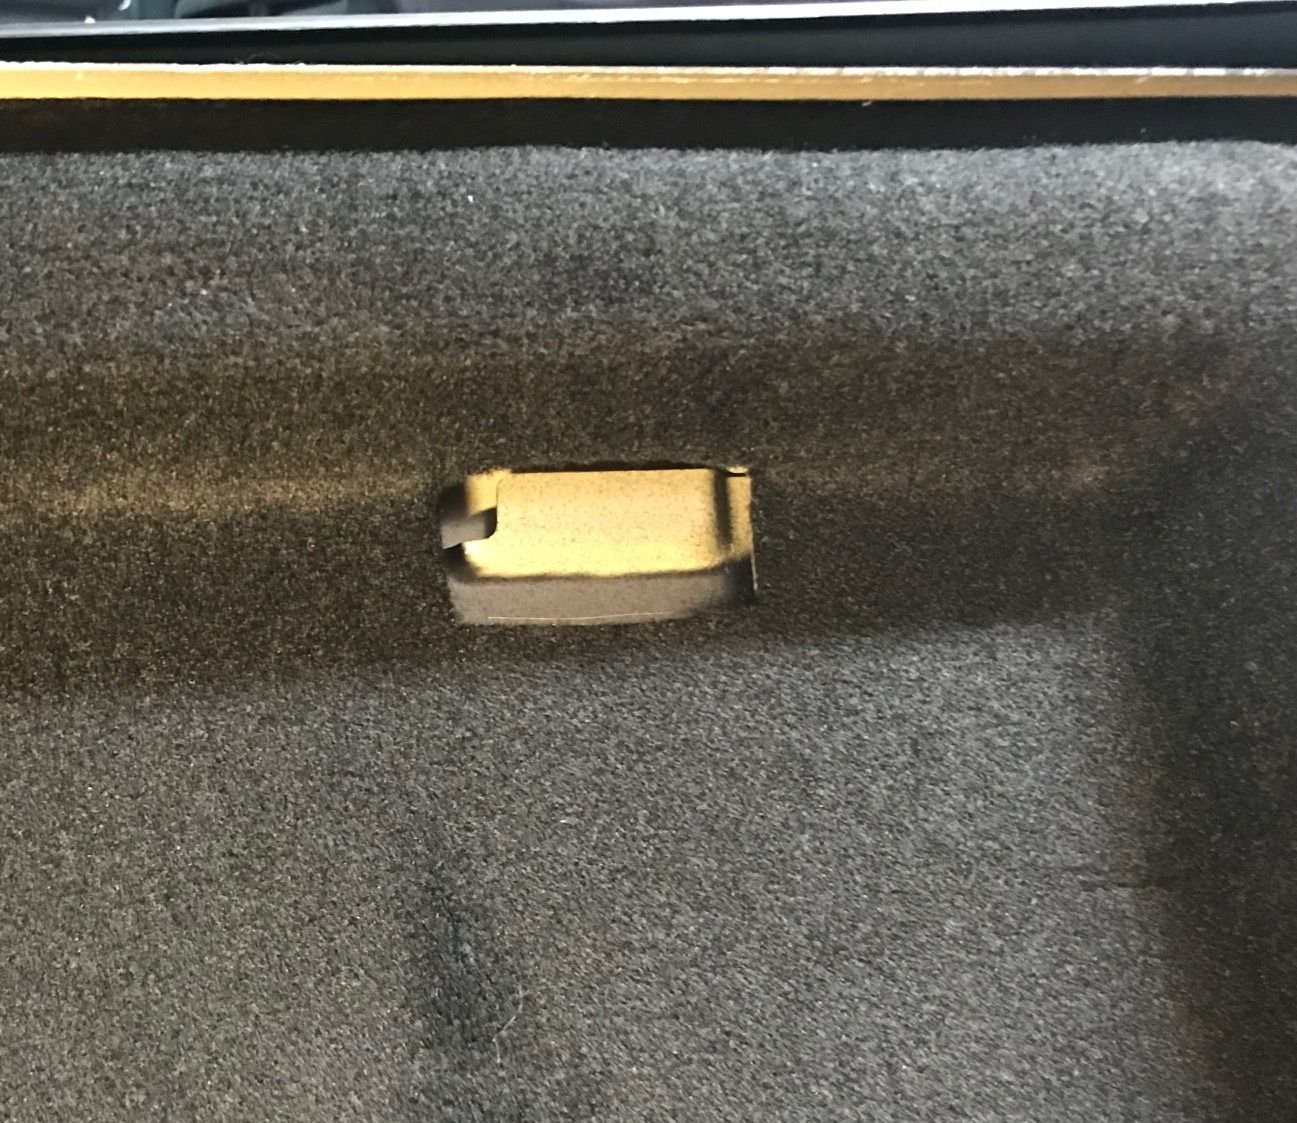
2 - The two tiny bumps circled below show where the holders will slide in.
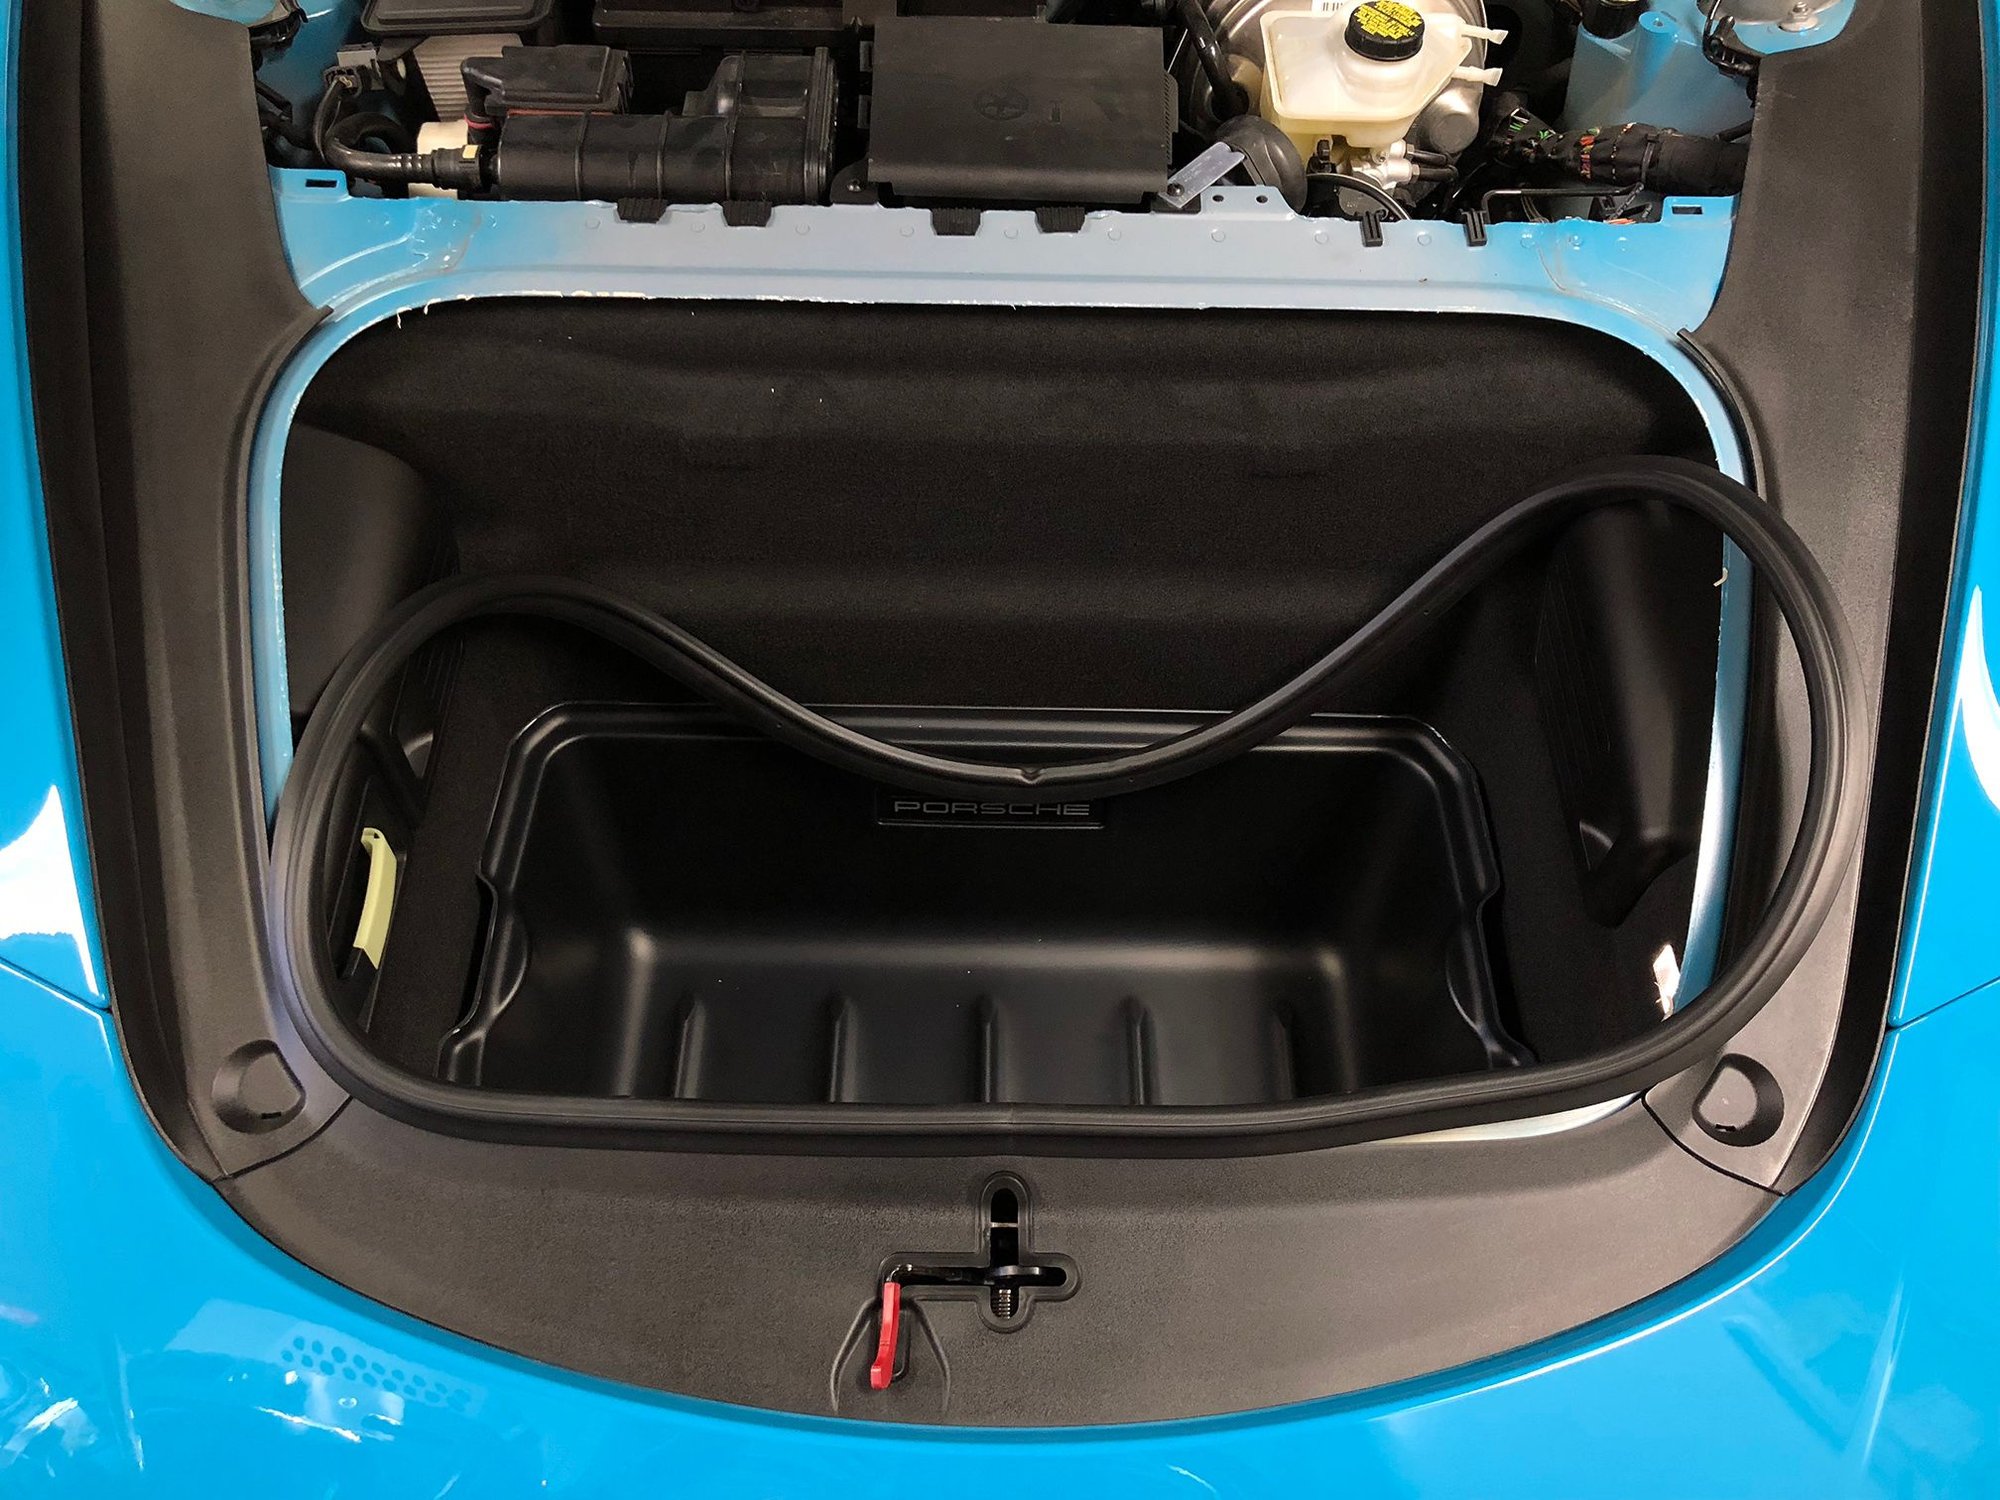
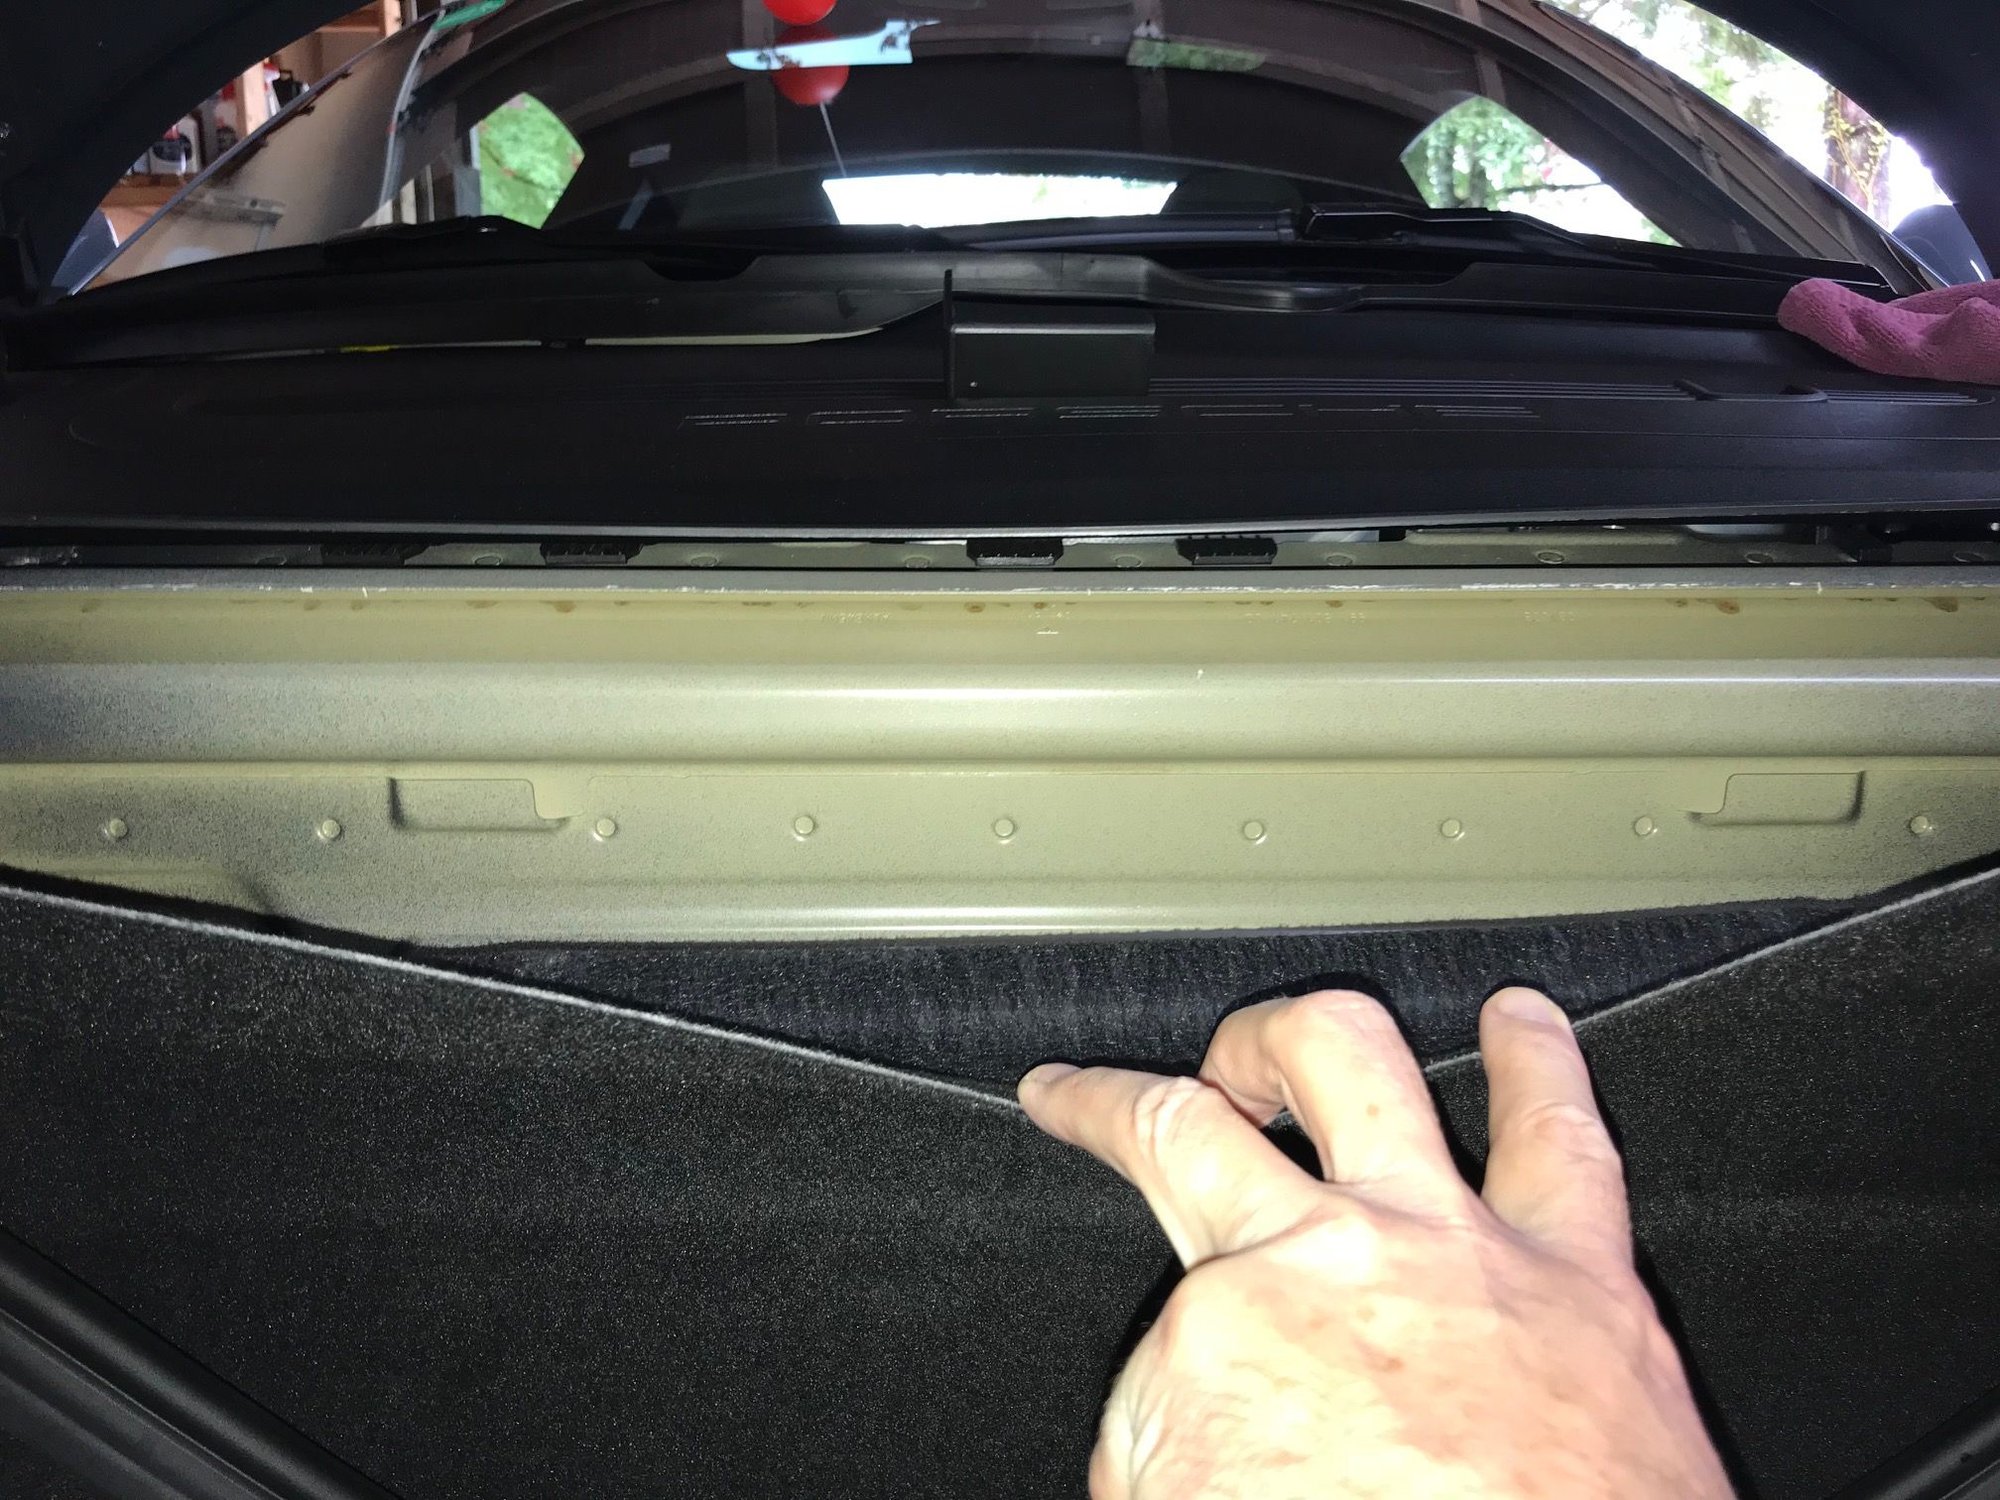
3. Remove the top part of the rubber seal to get access to the fiberboard.
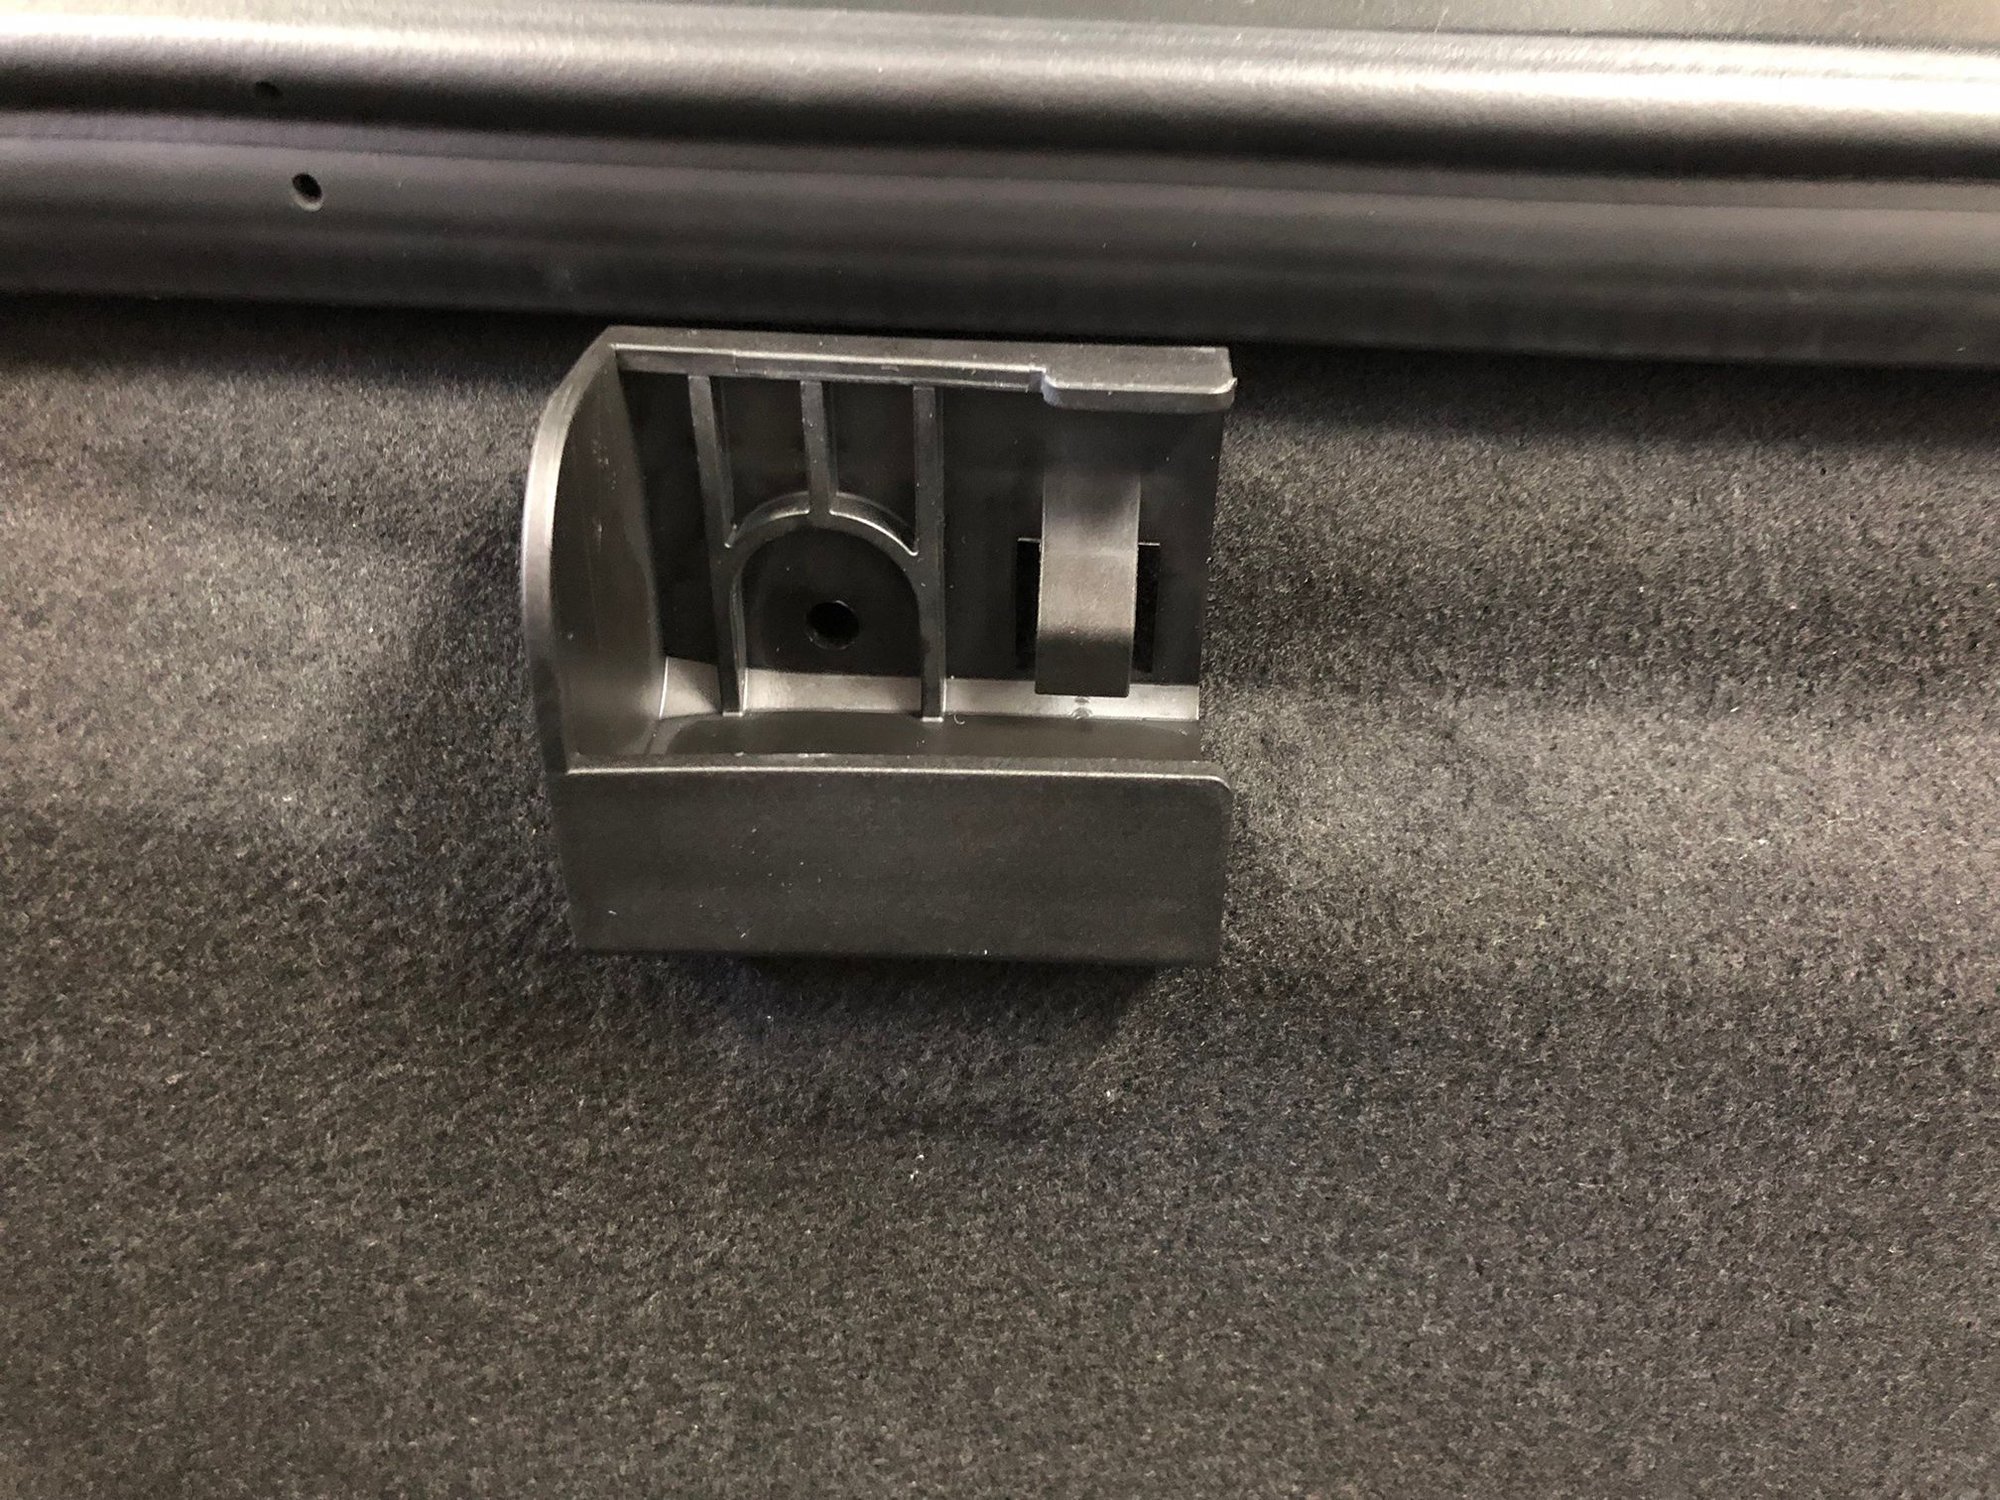
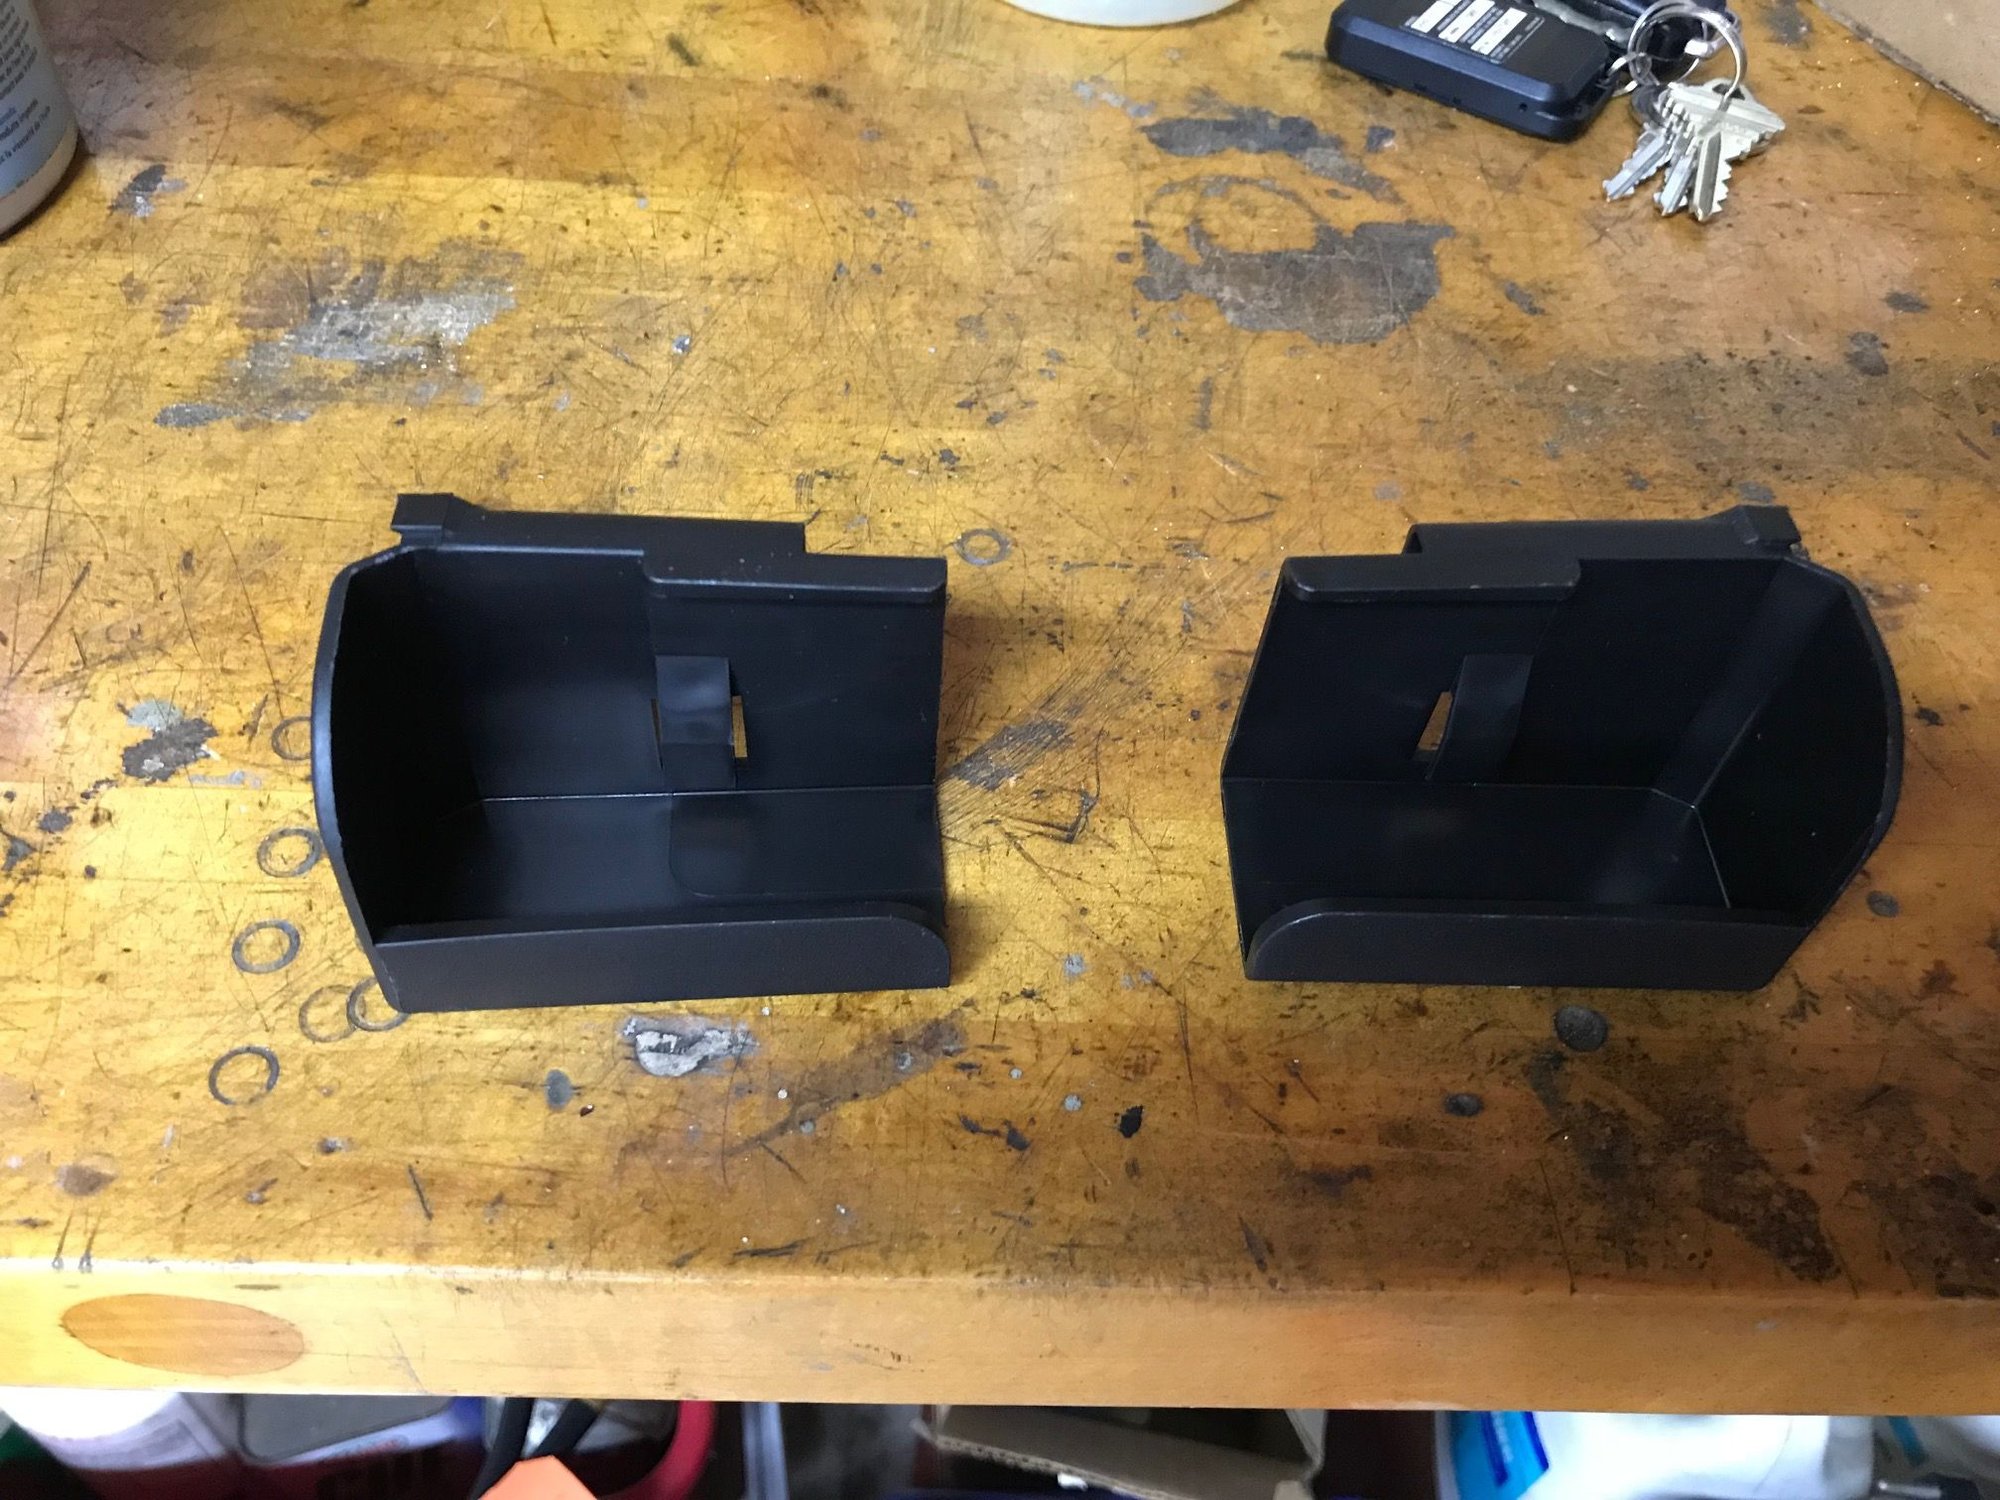
4. Here's the left holder. The top arrow show where the fastener goes, the bottom arrow is the part that slides in the small metal holder (see step 5).
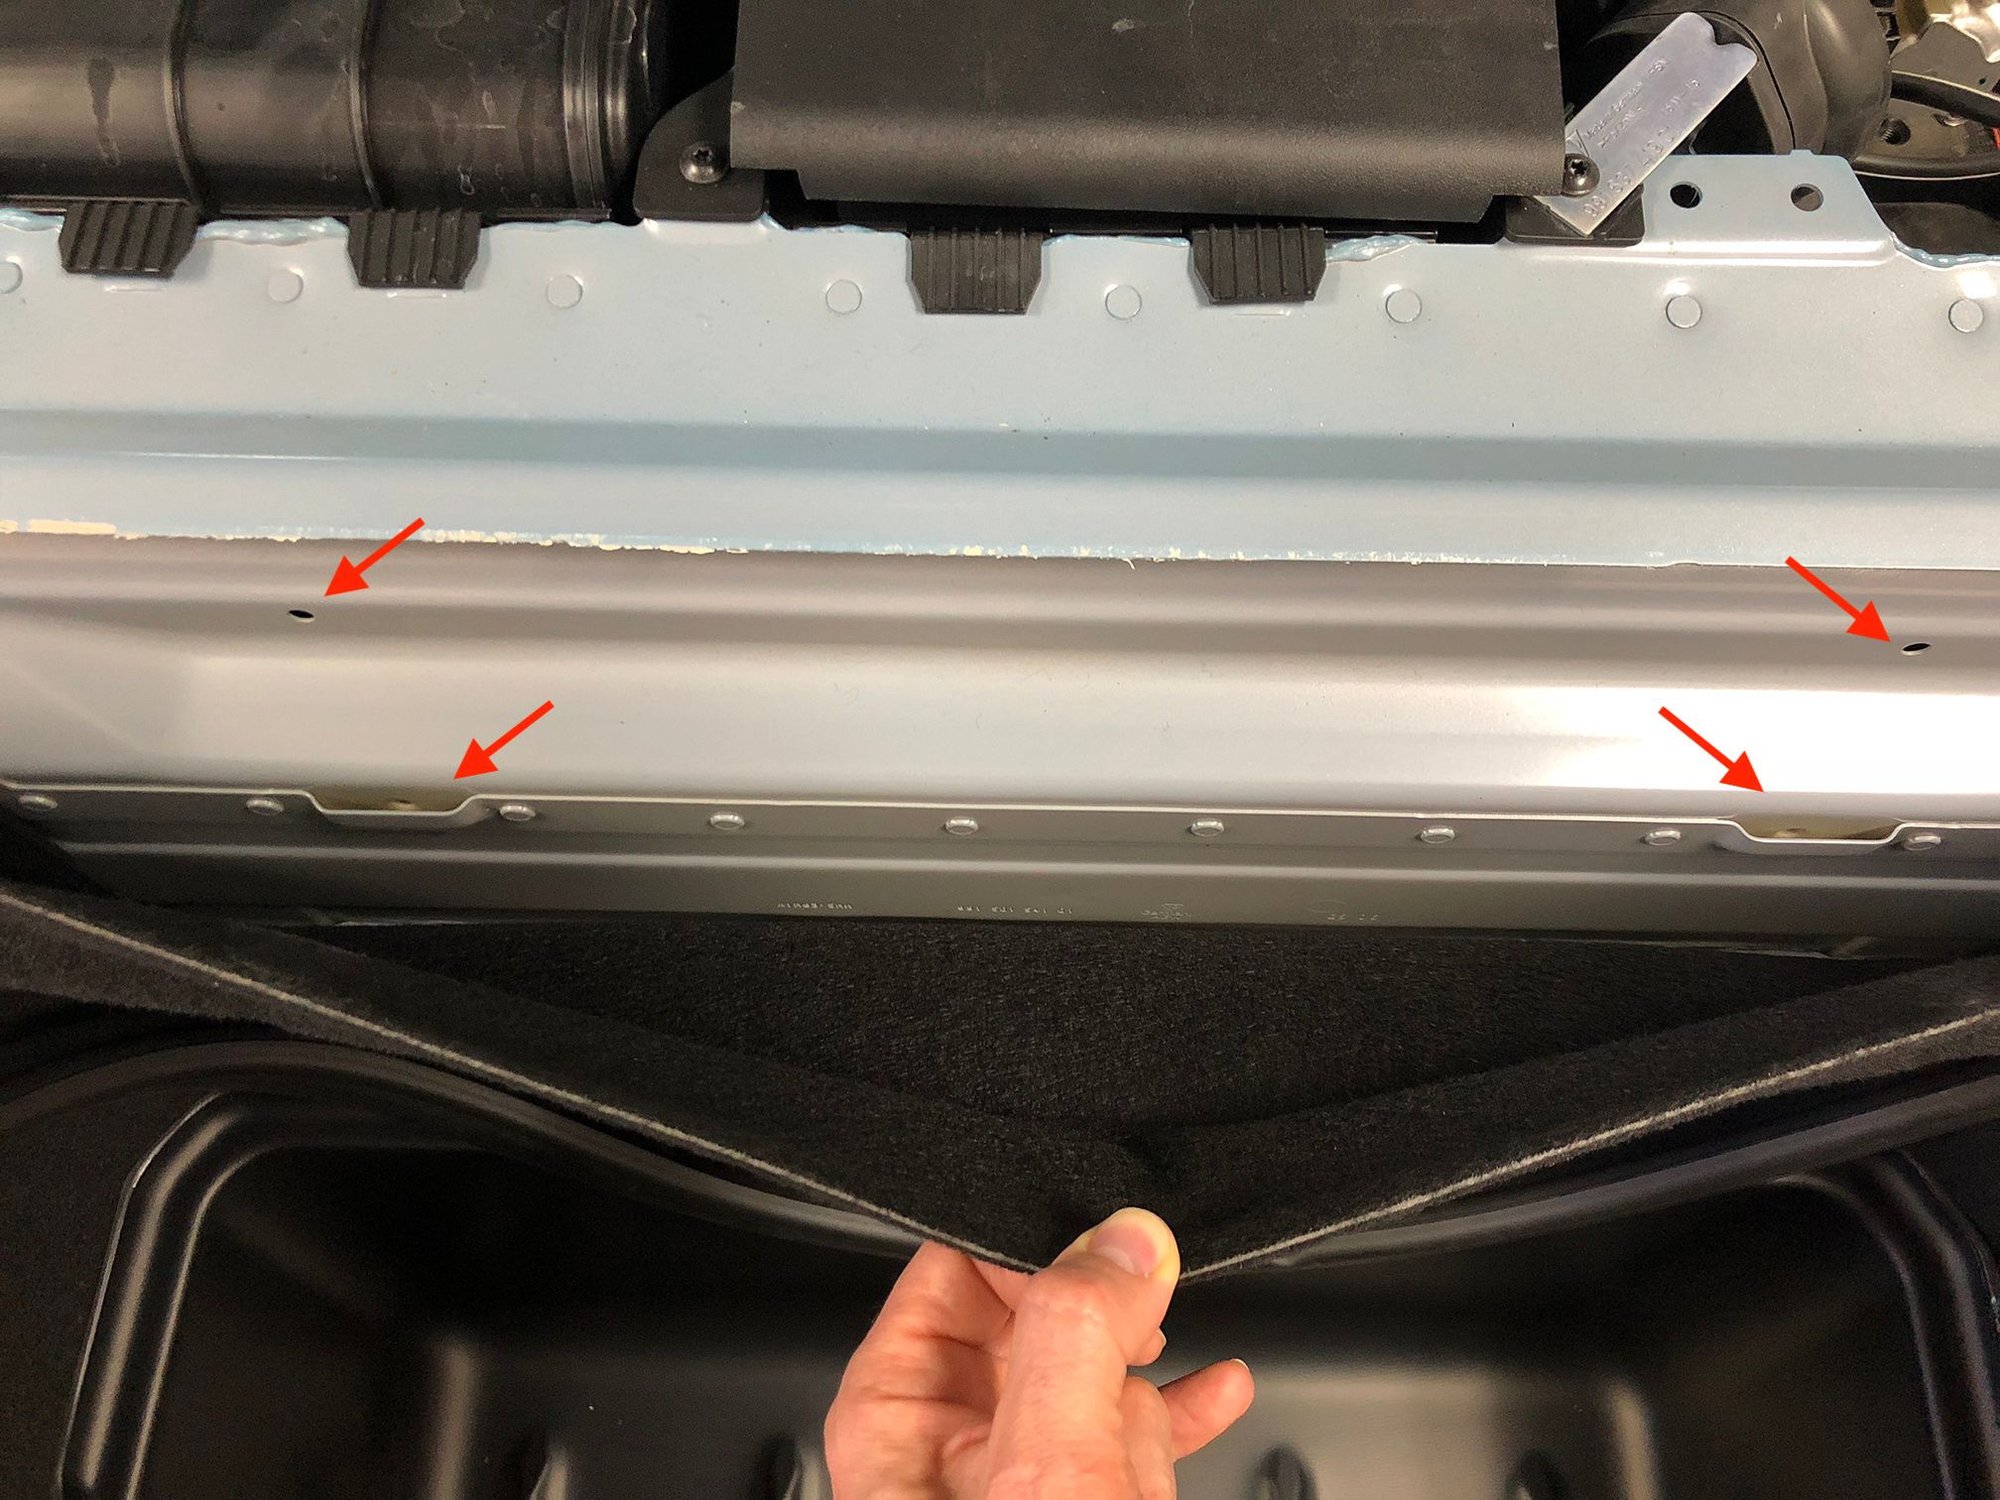
5. The top arrows show where the fastener will go, the bottom arrows show where the holders slide in. Note that the holes in the metal holders are not used.
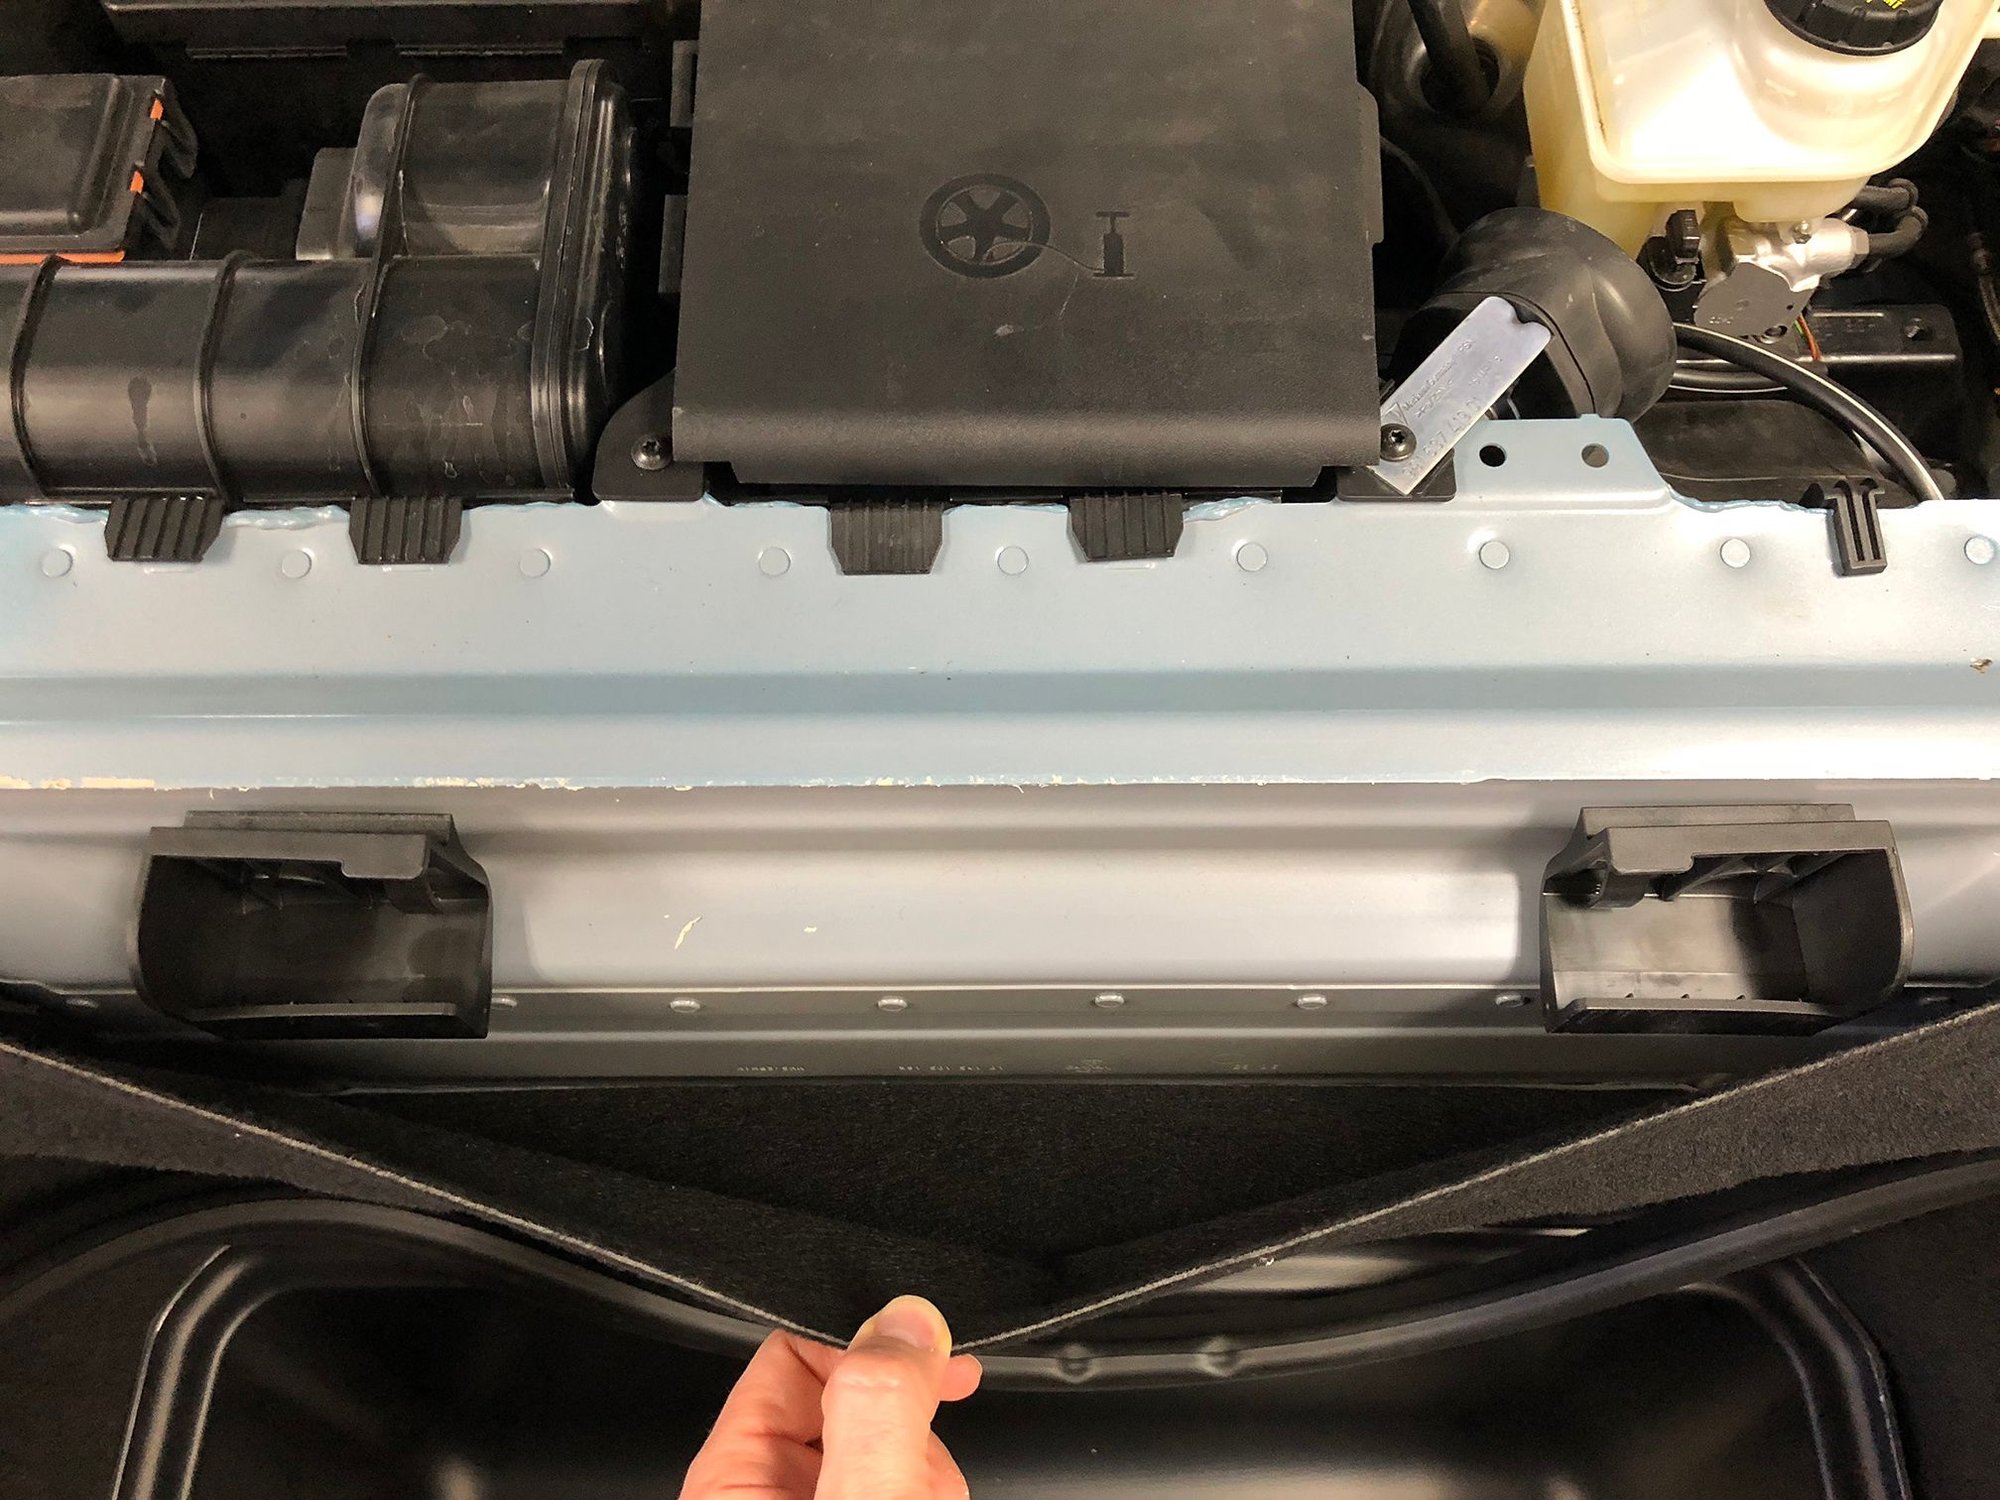
6. Showing how the holders should be installed.
7. The cutting part is fairly easy. The photo below shows the end-result.
For the bottom part (where the plastic holder slides in), push the fiberboard so that it touches the metal holder underneath, and just slice the fiberboard with an X-acto knife.
This step is fairly easy, just make sure to slice the entire length of the metal holder.
For the top hole, see the next photo.
Once you're done with the slicing of the bottom, insert the plastic holder, and locate the hole that is behind by poking with a small screw driver (you have to apply a bit of pressure to go through the fiberboard).
Once you've located the hole, remove the plastic holder and enlarge the hole with a bigger screw driver.
8. Here's what you should see once you've done both sides.
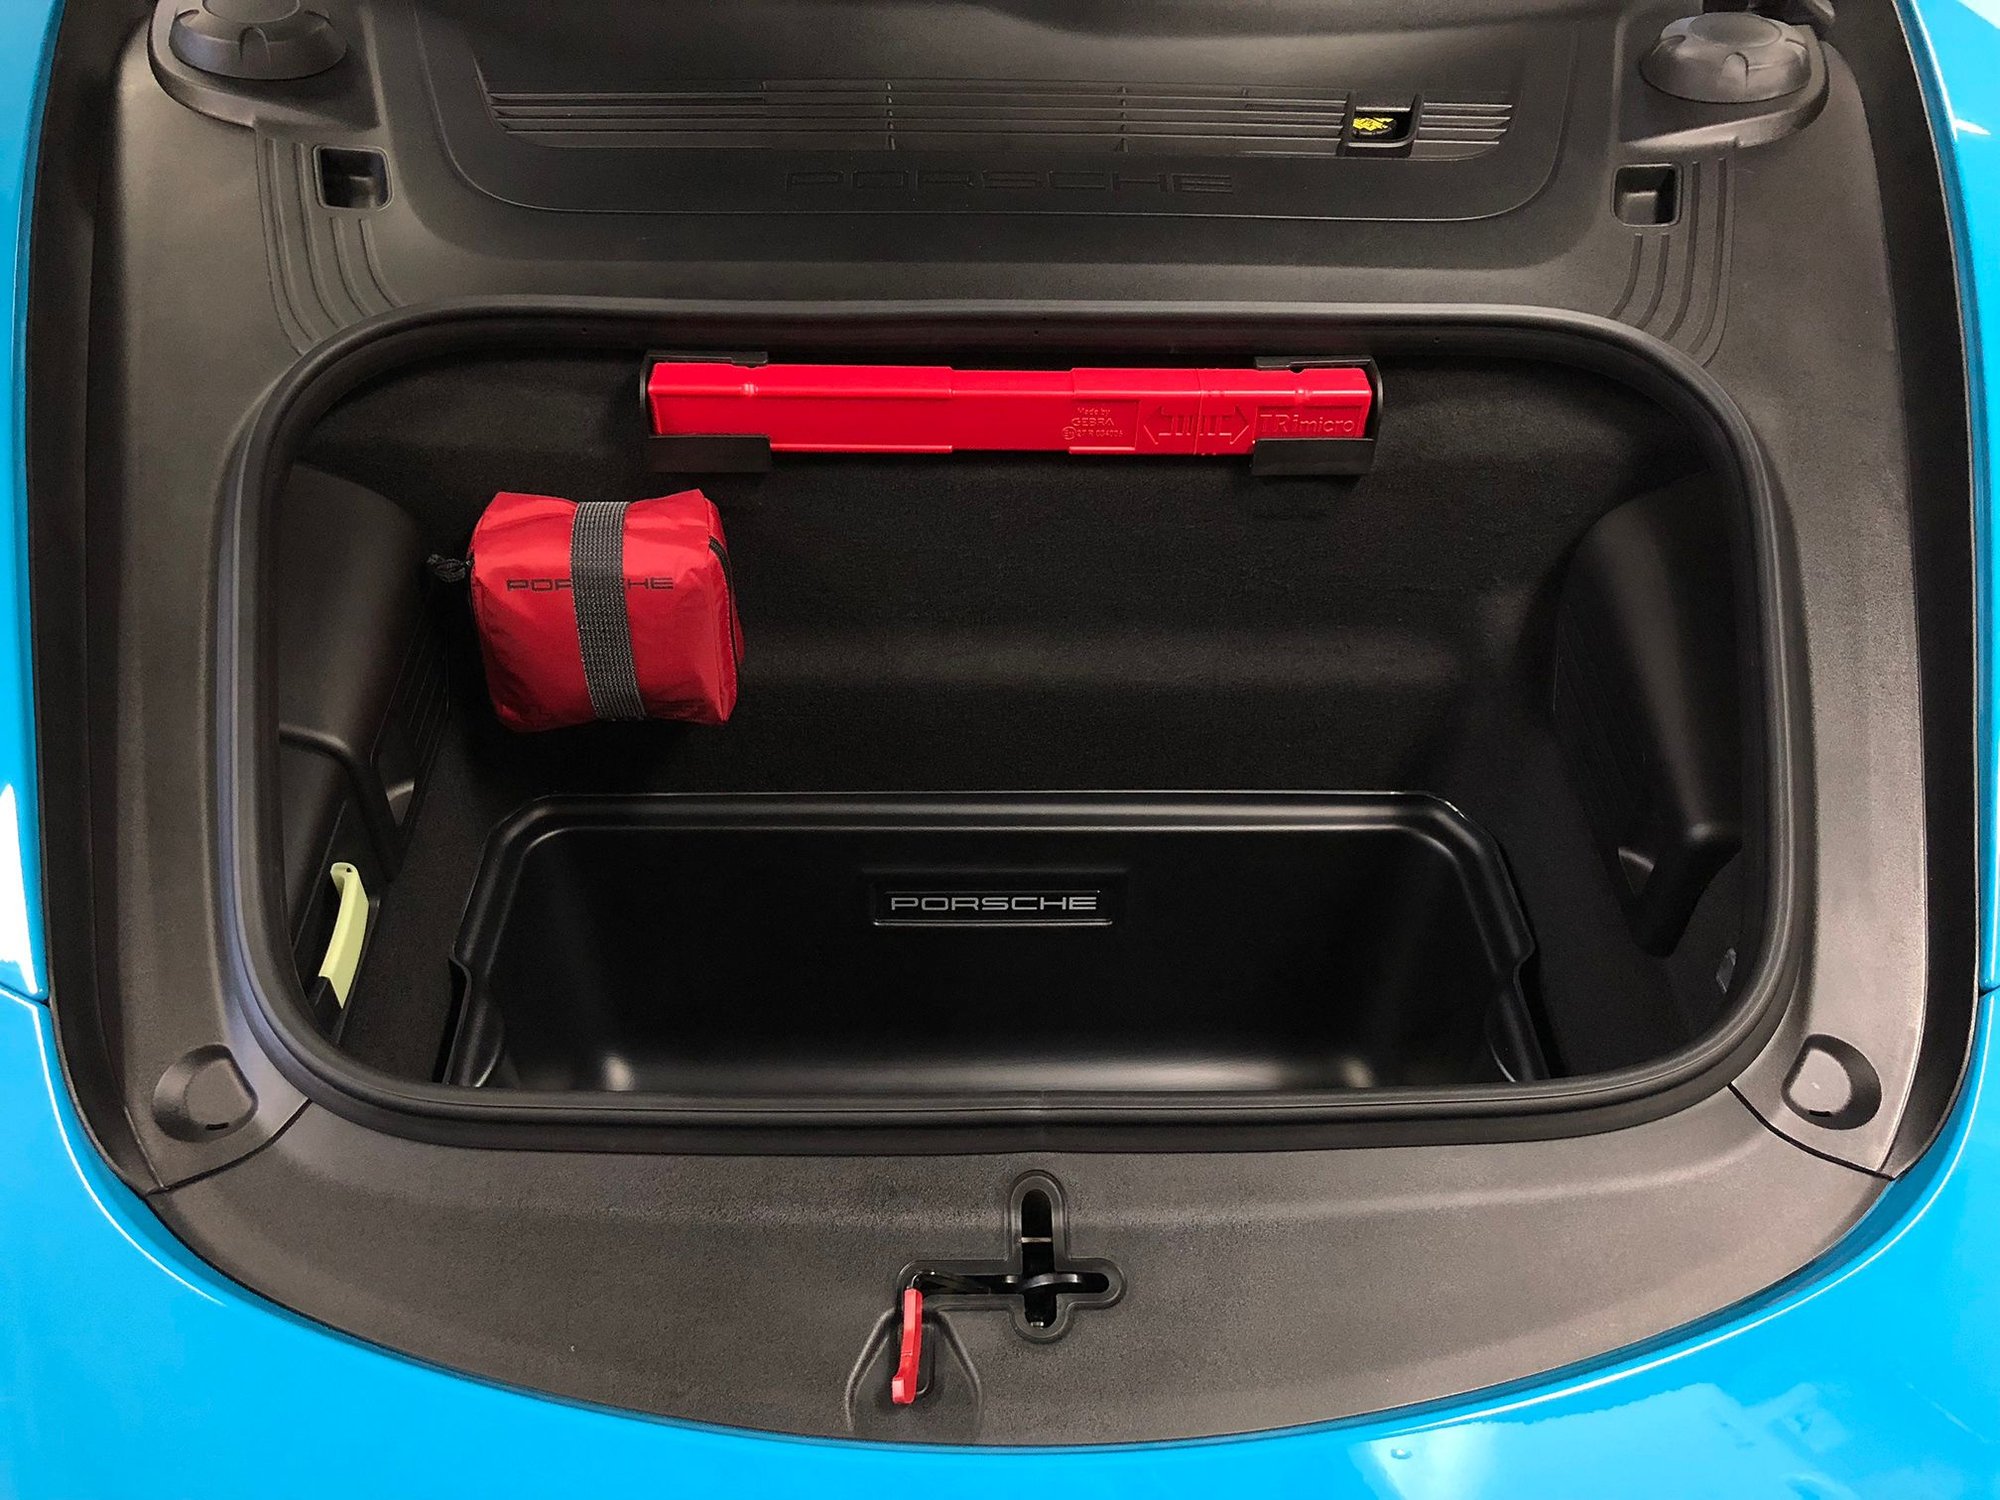
9. Insert the plastic holders, and push the plastic fasteners all the way through.
Its the same procedure as above, but only the slot is needed to be cut, there is no hole for the fastening screw.
Bracket holders behind lining Left and right brackets The location of the required cut is actually embossed in the lining Installing the brackets takes a little finesse and effort to slide in Done!
Its the same procedure as above, but only the slot is needed to be cut, there is no hole for the fastening screw.
Bracket holders behind lining
Left and right brackets
The location of the required cut is actually embossed in the lining
Installing the brackets takes a little finesse and effort to slide in
Done!
Thanks for this late model installation update. It threw me off when I received parts that slide on rather than slip in to groove and secure with a screw. Your post here helped me from returning them thinking I got the wrong order or something. Suncoast sent me just what my car needed, good job guys! I did however receive two big push-in plastic fasteners with the warning triangle kit that I'm not sure were needed or not.
I believe the first aid kit is #000 722 o41 01 and the strap is #997 551 741 00. Should verify with your local Porsche dealer. I could not get the first aid kit from a US Porsche dealer. had to get it when I was in the UK. May be different now. This was 3 years ago.


 09-20-2018 | 11:19 PM