
DIY - Rennline Adjustable Pedal Install
 07-04-2018, 03:42 PM
#1
RL Community Team
Rennlist Member
Rennlist Member
Thread Starter
So I finally got around to purchasing the Rennline 4 piece adjustable pedal kit for the 991's. Main purpose was to gain the adjusaibility to improve my heel - toe action. I learned to heel - toe on this car, and while I can do it, it's not always as smooth as I'd like, particularly the 3 - 2 downshift. Most of that is down to my size 13 shoes and also my feet naturally splay outwards, which is the opposite of what you want when you heel - toe. Ideally you want your foot more straight up and down or with the toes rotated in. When I heel - toe, I use the width of my foot and roll my foot outward at the ankle, so it's more of a toe-toe action. I figured that the adjustable height of this pedal set plus the pedal extensions would help.
This install is not difficult. But it is a pain, because you are reaching into the footwell while laying over the door sill. I completed it over two days (more on this later) and after the first day, my chest was sore from laying on the door sill. I padded that with a towel on the second day and that improved things a lot. If I had a lift and could be working with the car at chest level, it would be a lot less of a pain.
The other pain is that for me, as a tall guy, trying to reach around the back of the pedals to get the nuts engaged on the screw when installing the brake and clutch pedals. It's blind, and very awkward to be able to reach in and hold the nut. The screws are not overly long, which doesn't help.
I only ran into one problem with the kit, which I'll get into below. The pedals are very nice. The pedal pads look aluminum, but they are not. The only aluminum is the dead pedal. The other pads are a very high density nylon type material. Still, they look good and feel good and I don't regret buying them in the least. The pedal assembly is all aluminum. Rennline should burr the edges better on their CNC machine or by hand. I cut my hands up pretty good installing the throttle pedal base plate.
Tools you'll need are a drill, 3/16" metal bit. 1/8 or 1/16 standard bit, phillips screwdriver and a few hex wrenches. I'm sorry I don't know the sizes on those as I have a complete set and just grabbed what fit. Rennline does not tell you what size they are. The Rennline kit is very good, and quite complete. The directions are "sufficient" to do the install, but they are not overly verbose. I hope that this thread will help those doing the install. There is ONE BIG FLAW with the kit which I worked around but caused me a lot of time and consternation and a trip to the hardware store. The fix is not difficult or expensive. I'll be emailing Rennline about it, so hopefully they fix it moving forward. Will elaborate below.
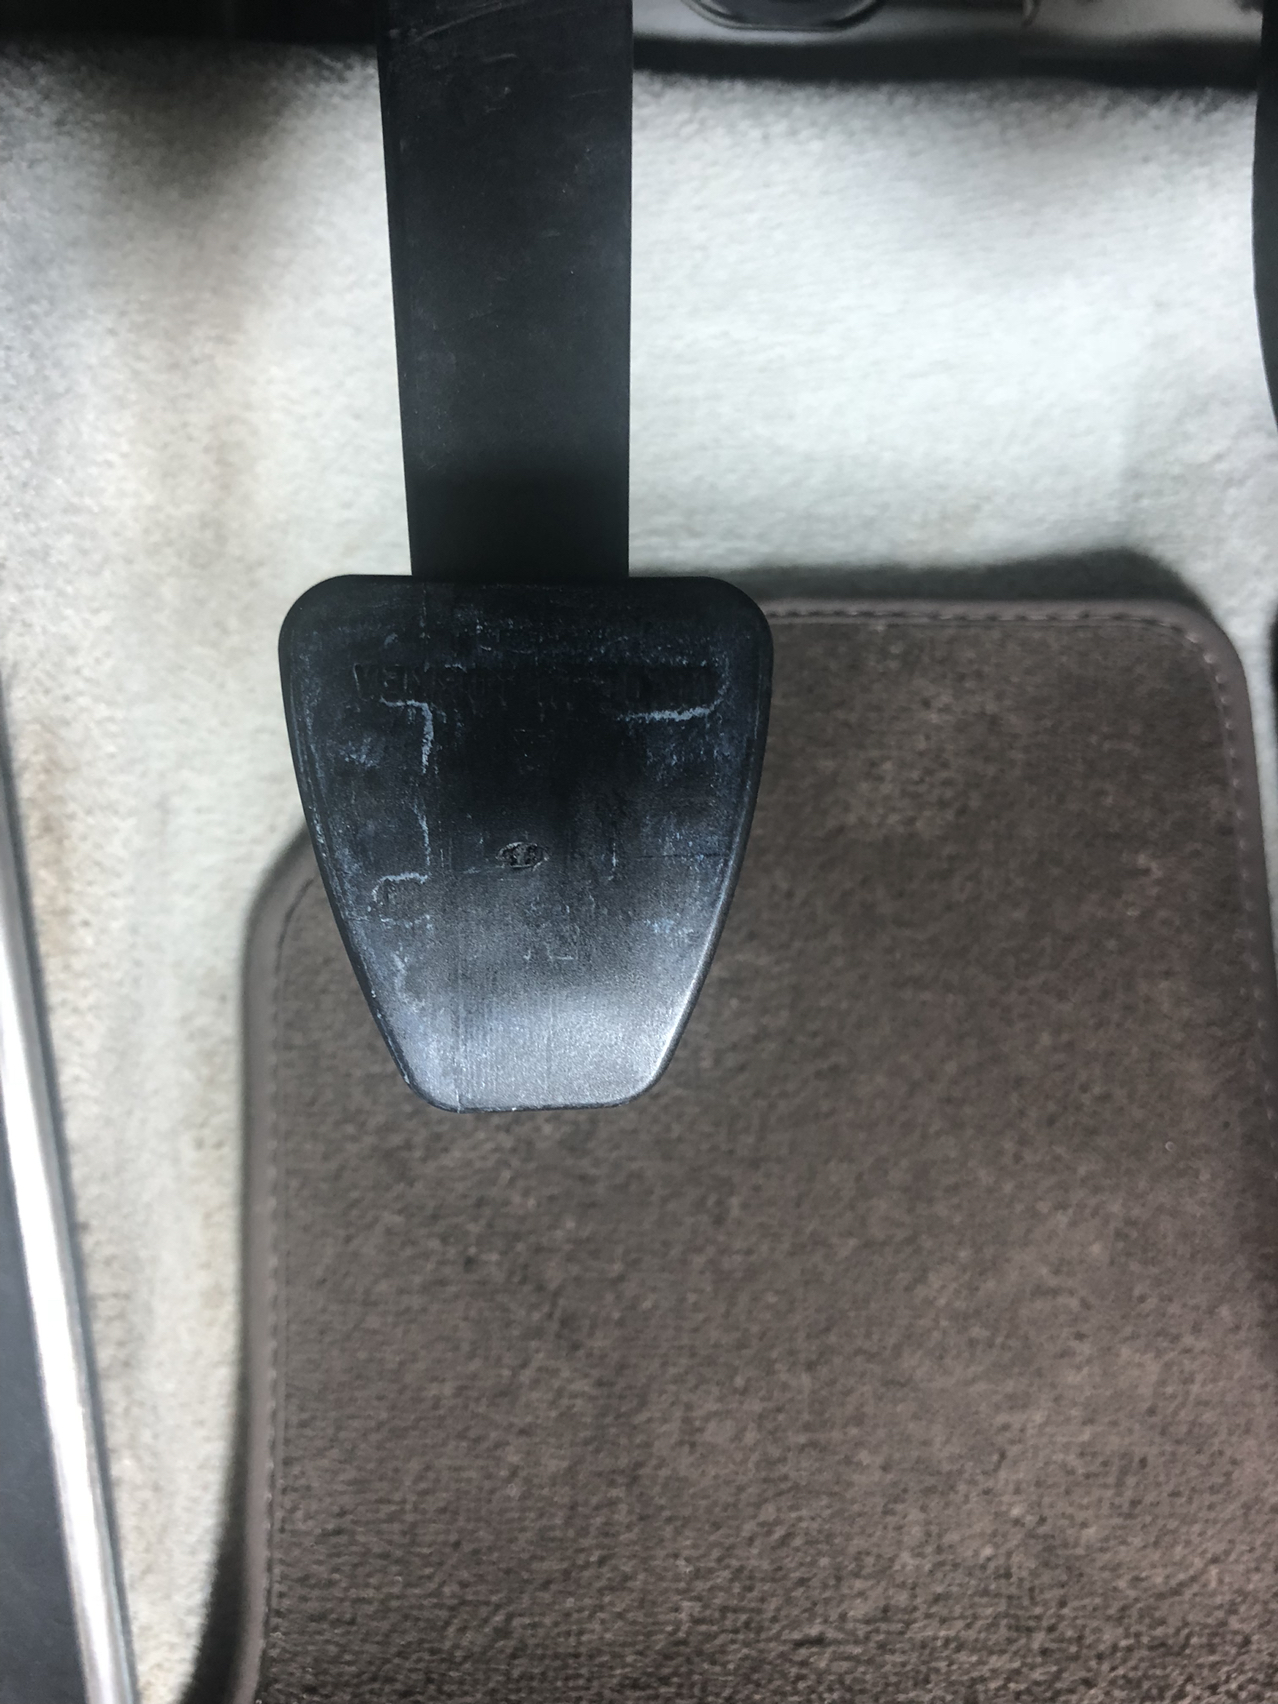
The first step is to undo the bolt at the top of the accelerator pedal assembly. The pedal assembly is held on at the top by one bolt, and at the bottom, the body of the assembly has a large "tab" that fits into a t-shaped slot in the floorpan. Once the bolt is out, you grab the assembly and slide it up to move the tab to the wider part of the slot and then pull it out. It's an awkward motion, as the pedal assembly is quite tightly slotted in and you're using an upward pulling force. Wiggling the top back and forth helps. Once the assembly is out, disconnect the control wire from the top. Simply press on the latch on the front of the connector and pull it off.
Follow the Rennline instructions. You'll be removing the factory pedal pad" from the pedal base / potentiometer and re-using the base. That was very simple. The next step is where I ran into the snag.
Rennline has you mount the pedal base plate, mark the hole on the bottom, drill the hole in the floorpan bracket that holds the pedal, remove the base plate, slip a j-nut over the hole and re-mount the base pedal. A J nut is a nut attached to a clip, which allows you to hold the nut into place blindly on the back of the hole while you screw in from above. The reason you need this is that the base plate, to which the Rennline pedal assembly mounts to, needs a second mounting point. Remember I said above that the accelerator assembly has one screw hole at the top and a tab at the bottom that goes into a hole in the floorpan bracket? Well, you'll re-mount it that way, but you've got no bottom attachment point for the plate. So the first step is creating one. Seemed simple enough, but the trouble started when I went to re-mount the accelerator assembly to the new Rennline bracket. The tab simply would not slide into the slot and down. I removed everything and test fit it out of the car. No problems. Then I noticed that the J-nut was not lining up perfectly with the hole I drilled. I thought that was causing the base plate to rotate so that it didn't line up with the factory bracket hole. So I enlarged the hole with the drill. No dice, didn't help.
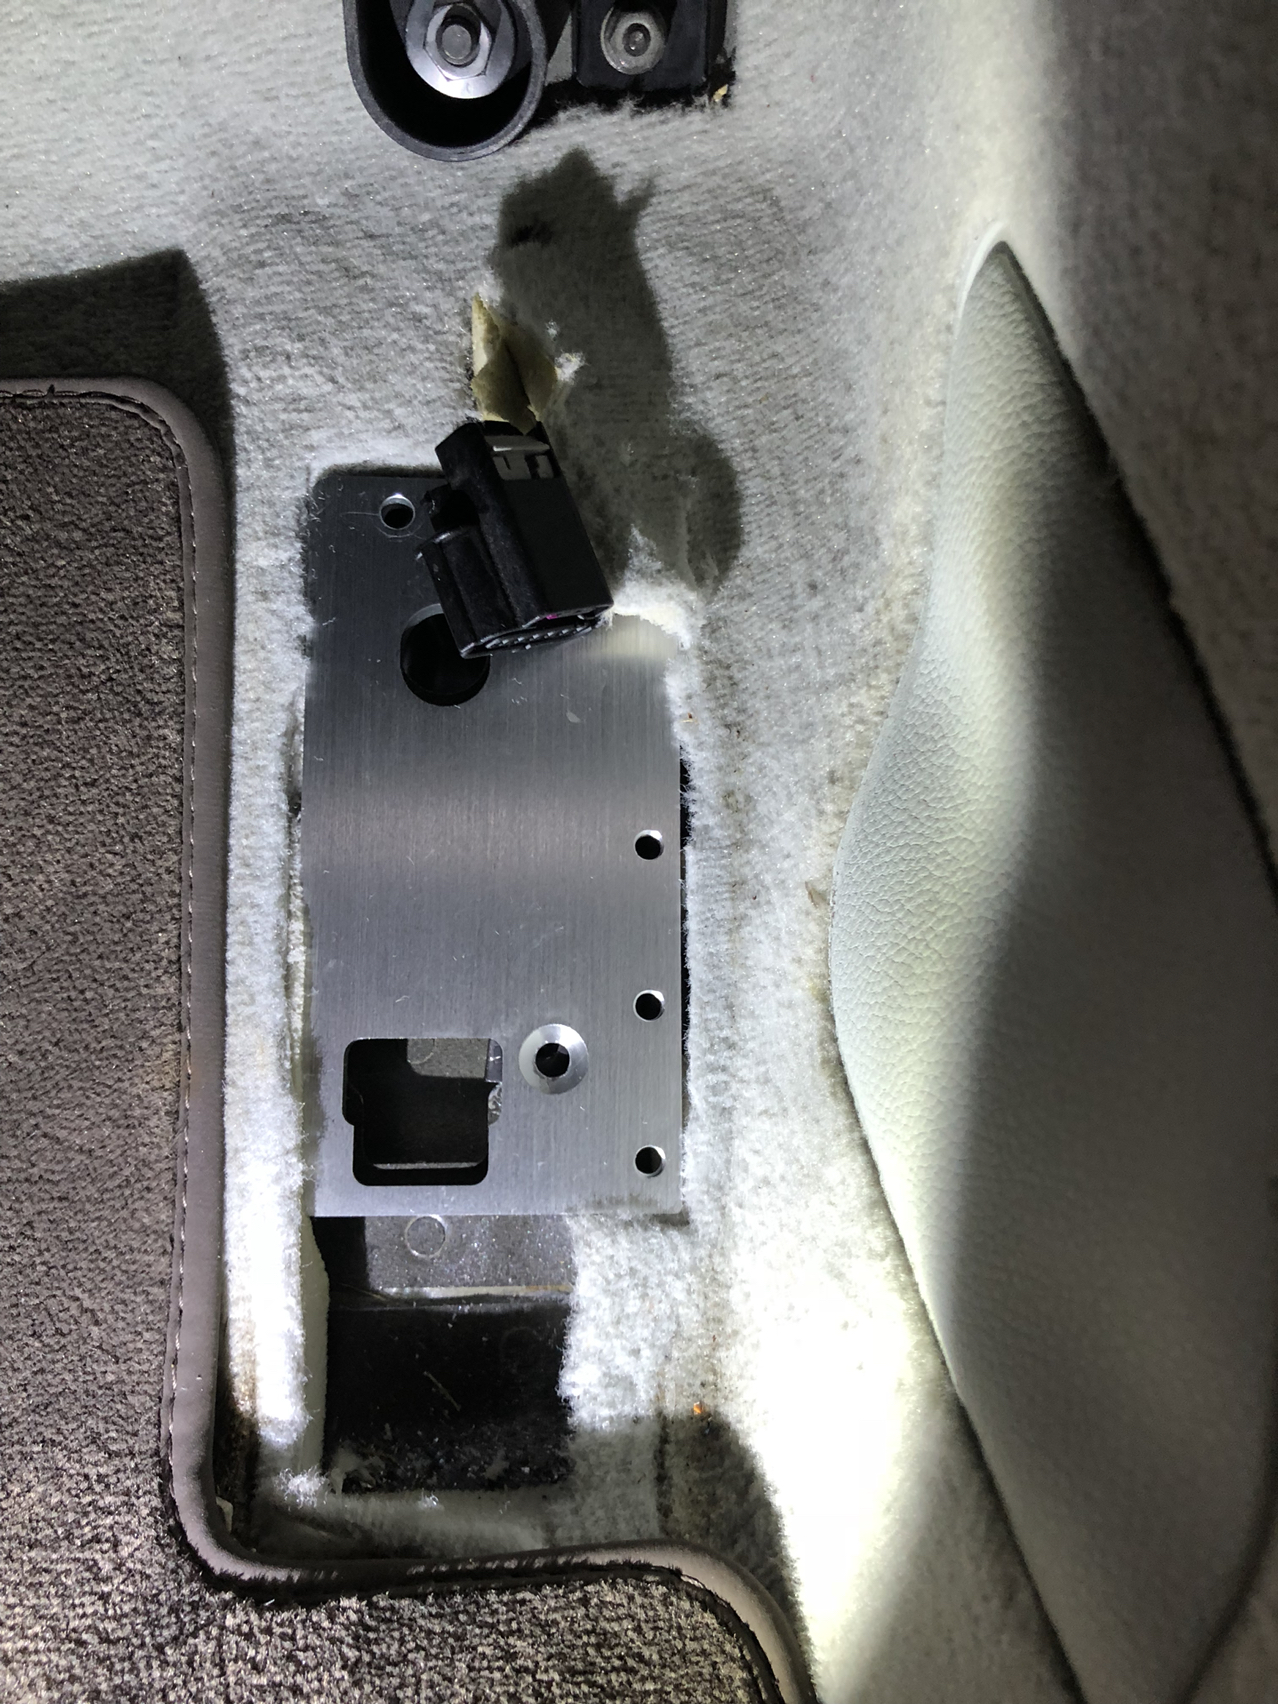
The first day I did the install, it was hot. I had a fan going in the garage but I was sweating like a maniac and also getting very frustrated. Not ideal. So I took a break and looked at what I had done and compared to the Rennline Instructions. Immediately I noticed that the J-nut they supplied is too large! You can see that in the pictures below, the "body" of the j-nut protrudes quite a bit into the hole on the floorpan bracket. I disassembled everything out of the car and again test fit and found that the tab on the accelerator assembly needs all that space to get in.

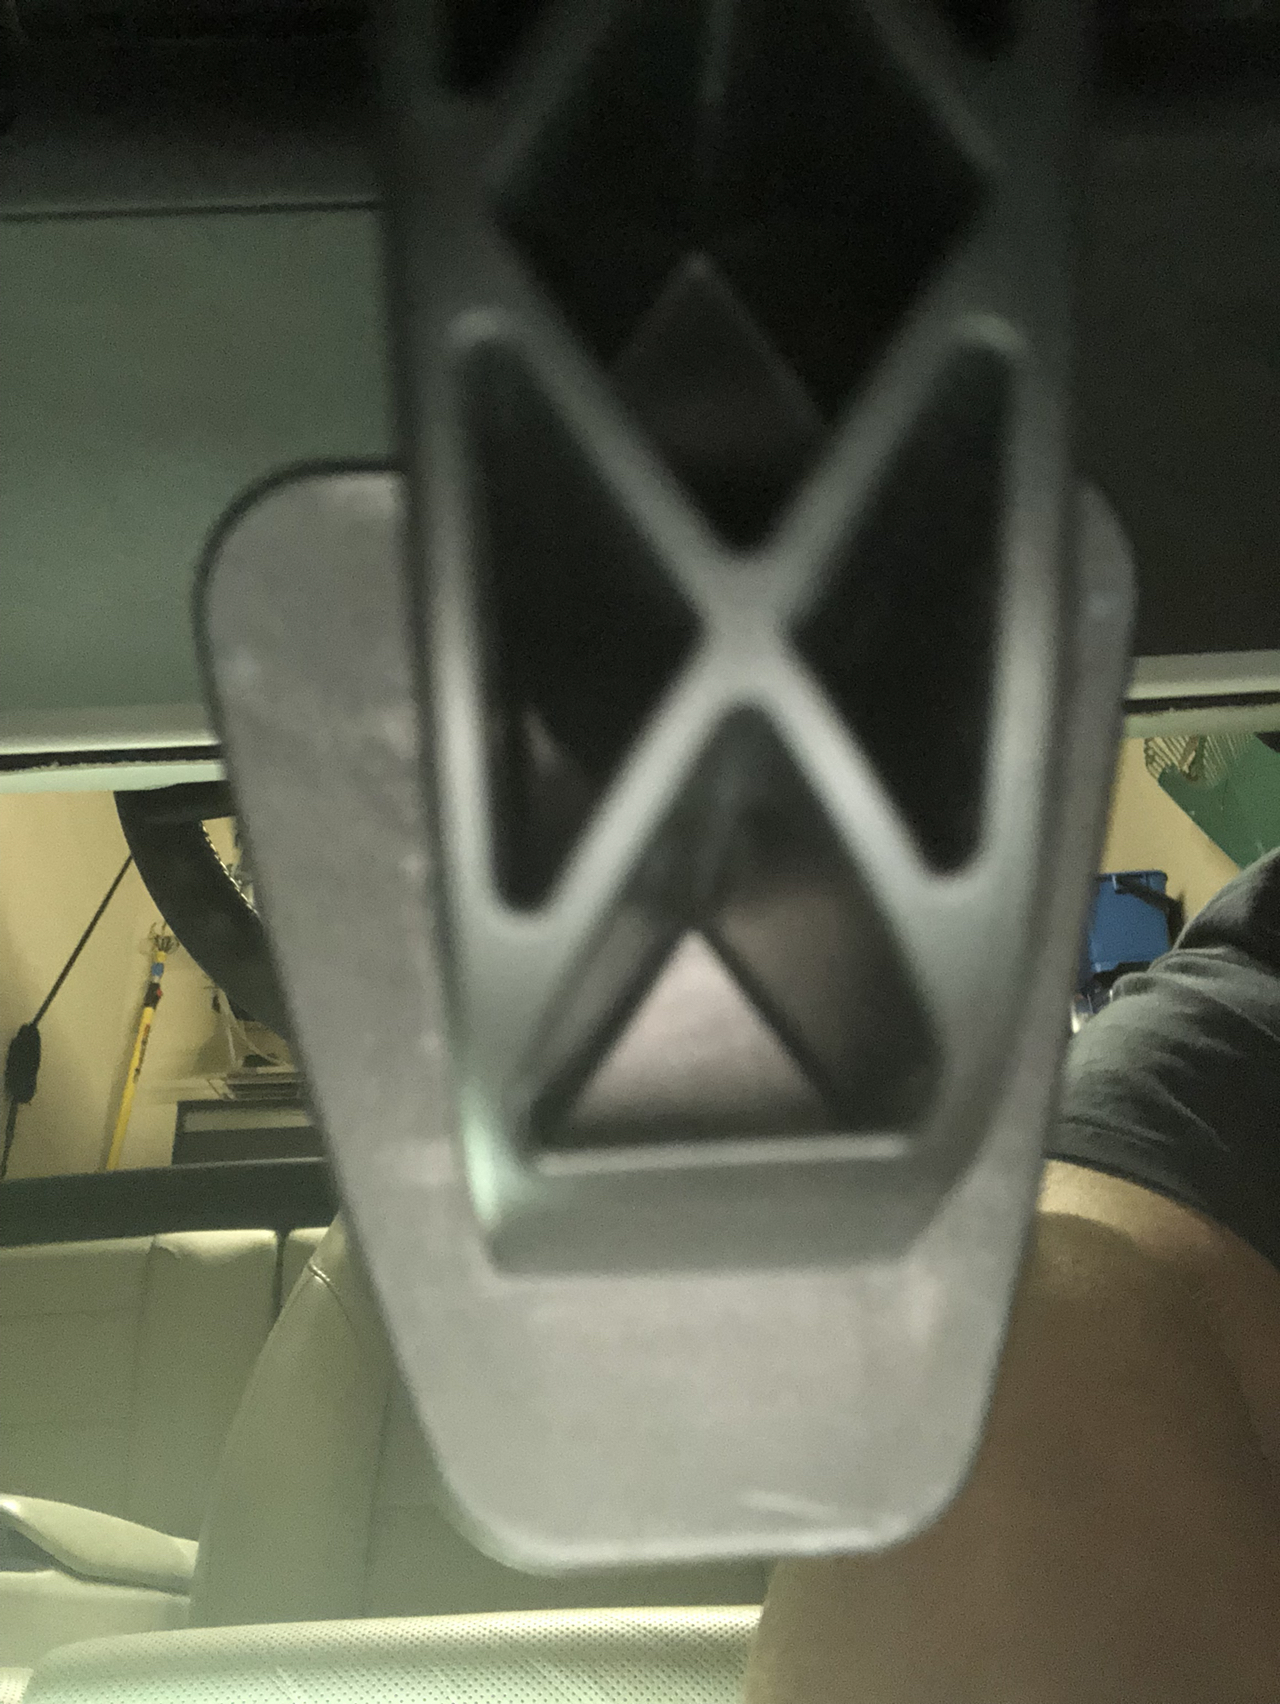
You can see looking through the base plate, that the j-nut is intruding into the hole that the tab needs to slide into.
I went off to my local Ace and grabbed a smaller J-nut (smaller body, same sized nut). I also got just a plain nut as I figured I'd be able to hold the nut inside the bracket with my finger. That did the trick. It wasn't all that hard to hold the nut against the backside of the bracket and screw through into it. I was able to mount the bracket and then mount the remainder of the accelerator assembly onto the car. Whew!
Factory floorpan with integrated bracket. J-nut is on the right. Notice how it interrupts the t-shaped slot. This is what the pedal assembly clips into.
Rennline base plate mounted. Notice that the j-nut is intruding into the space.
Accelerator assembly re-installed on top of Rennline base plate, and the new pedal base has been installed on the right. After this, it got a lot easier.
Pedal body installed. The pedal assembly must latch into the factory potentiometer switch so that it can work like normal. It simply clips into a hole on the right of the pedal body.
Adjustable brackets installed. These can be loosened and moved toward or away from the driver to permit the adjustment for perfect heel - toeing.
Pads and pad extensions mounted to the pedals.
Now it was time to tackle the brake and clutch pedals. Interestingly, the brake pedal and arm are made from steel. The clutch pedal and arm are made from nylon. As such, you cannot mount the pedals the same. Rennline gives you hardware for four attachment points on each pedal, but says 2-3 is most common. With the clutch, you cannot put any fasteners in the middle as the arm has reinforcements inside it. The brake pedal arm is u-shaped so you can.
Clutch pedal
Back of clutch pedal
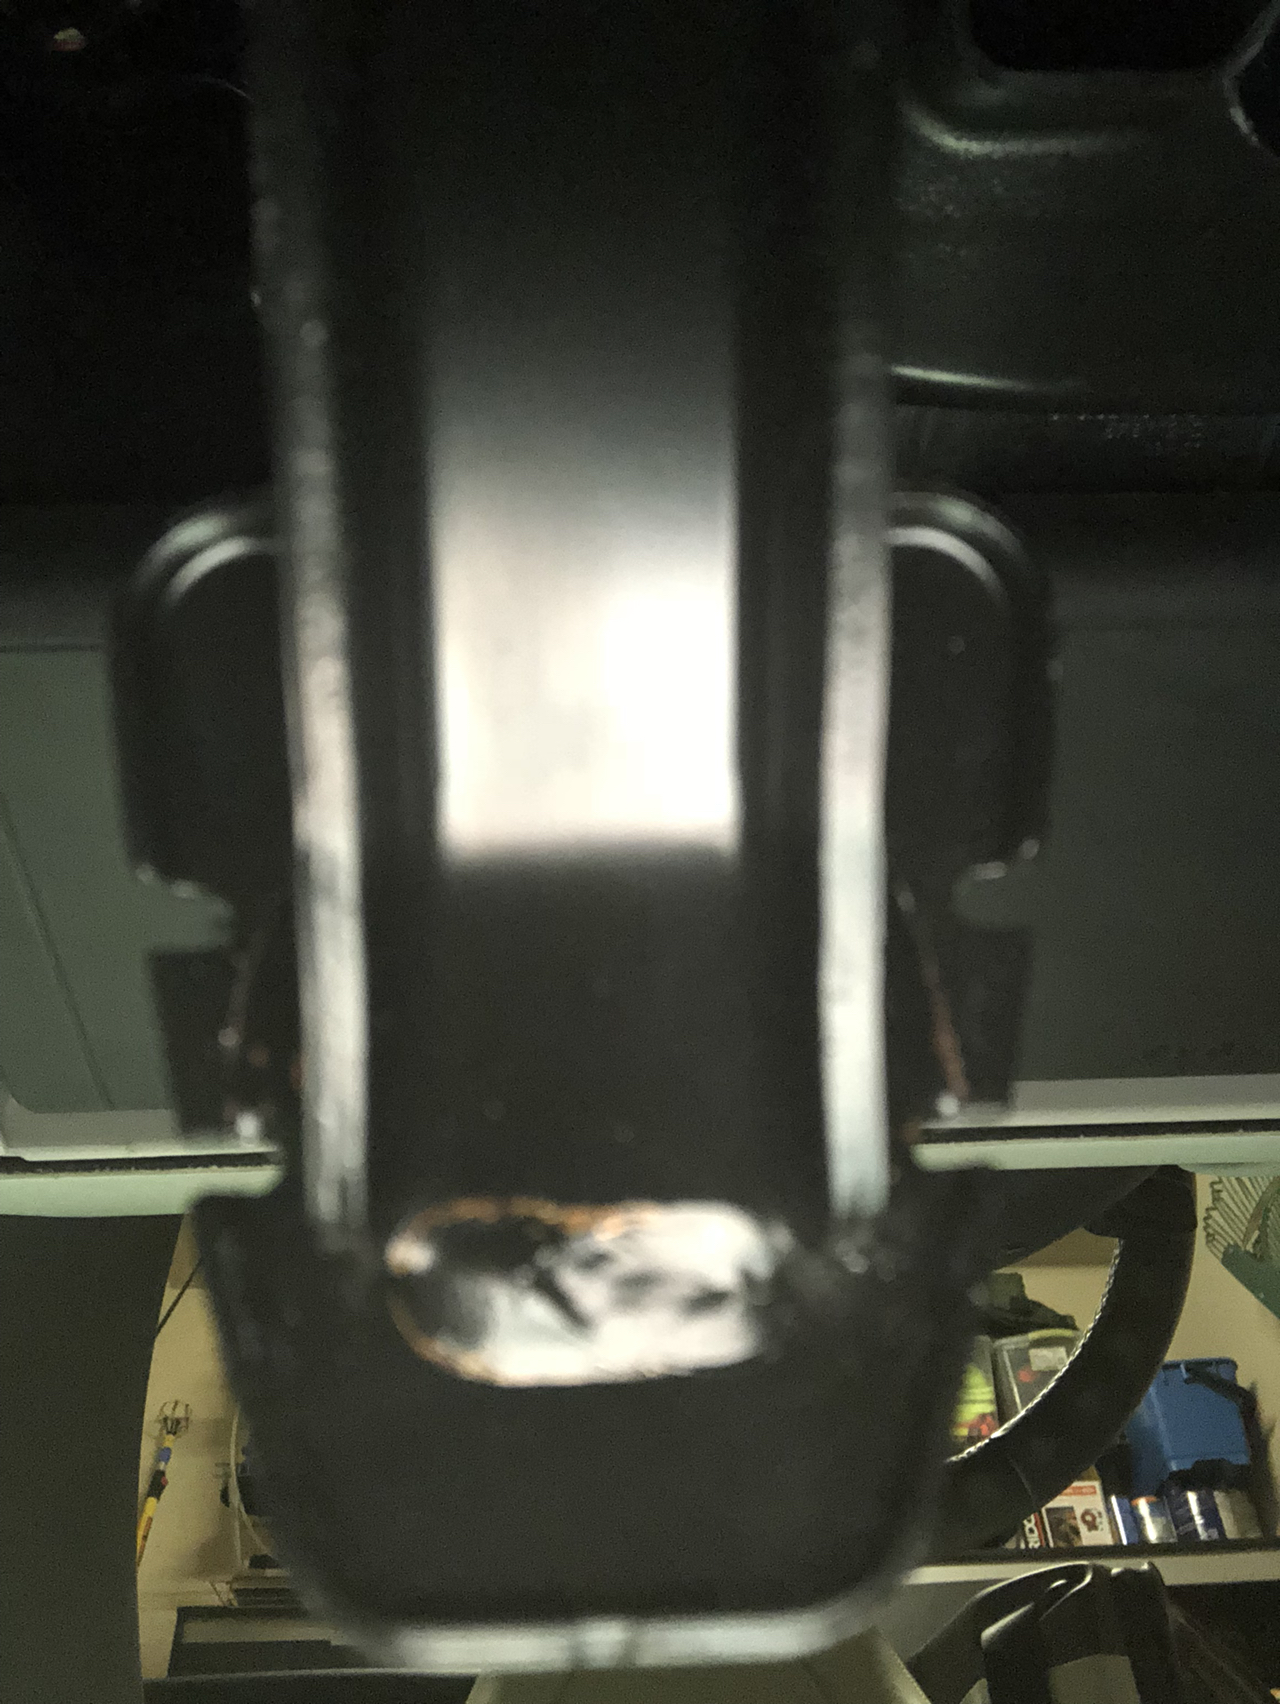
Back of brake pedal. Sorry about pic quality.
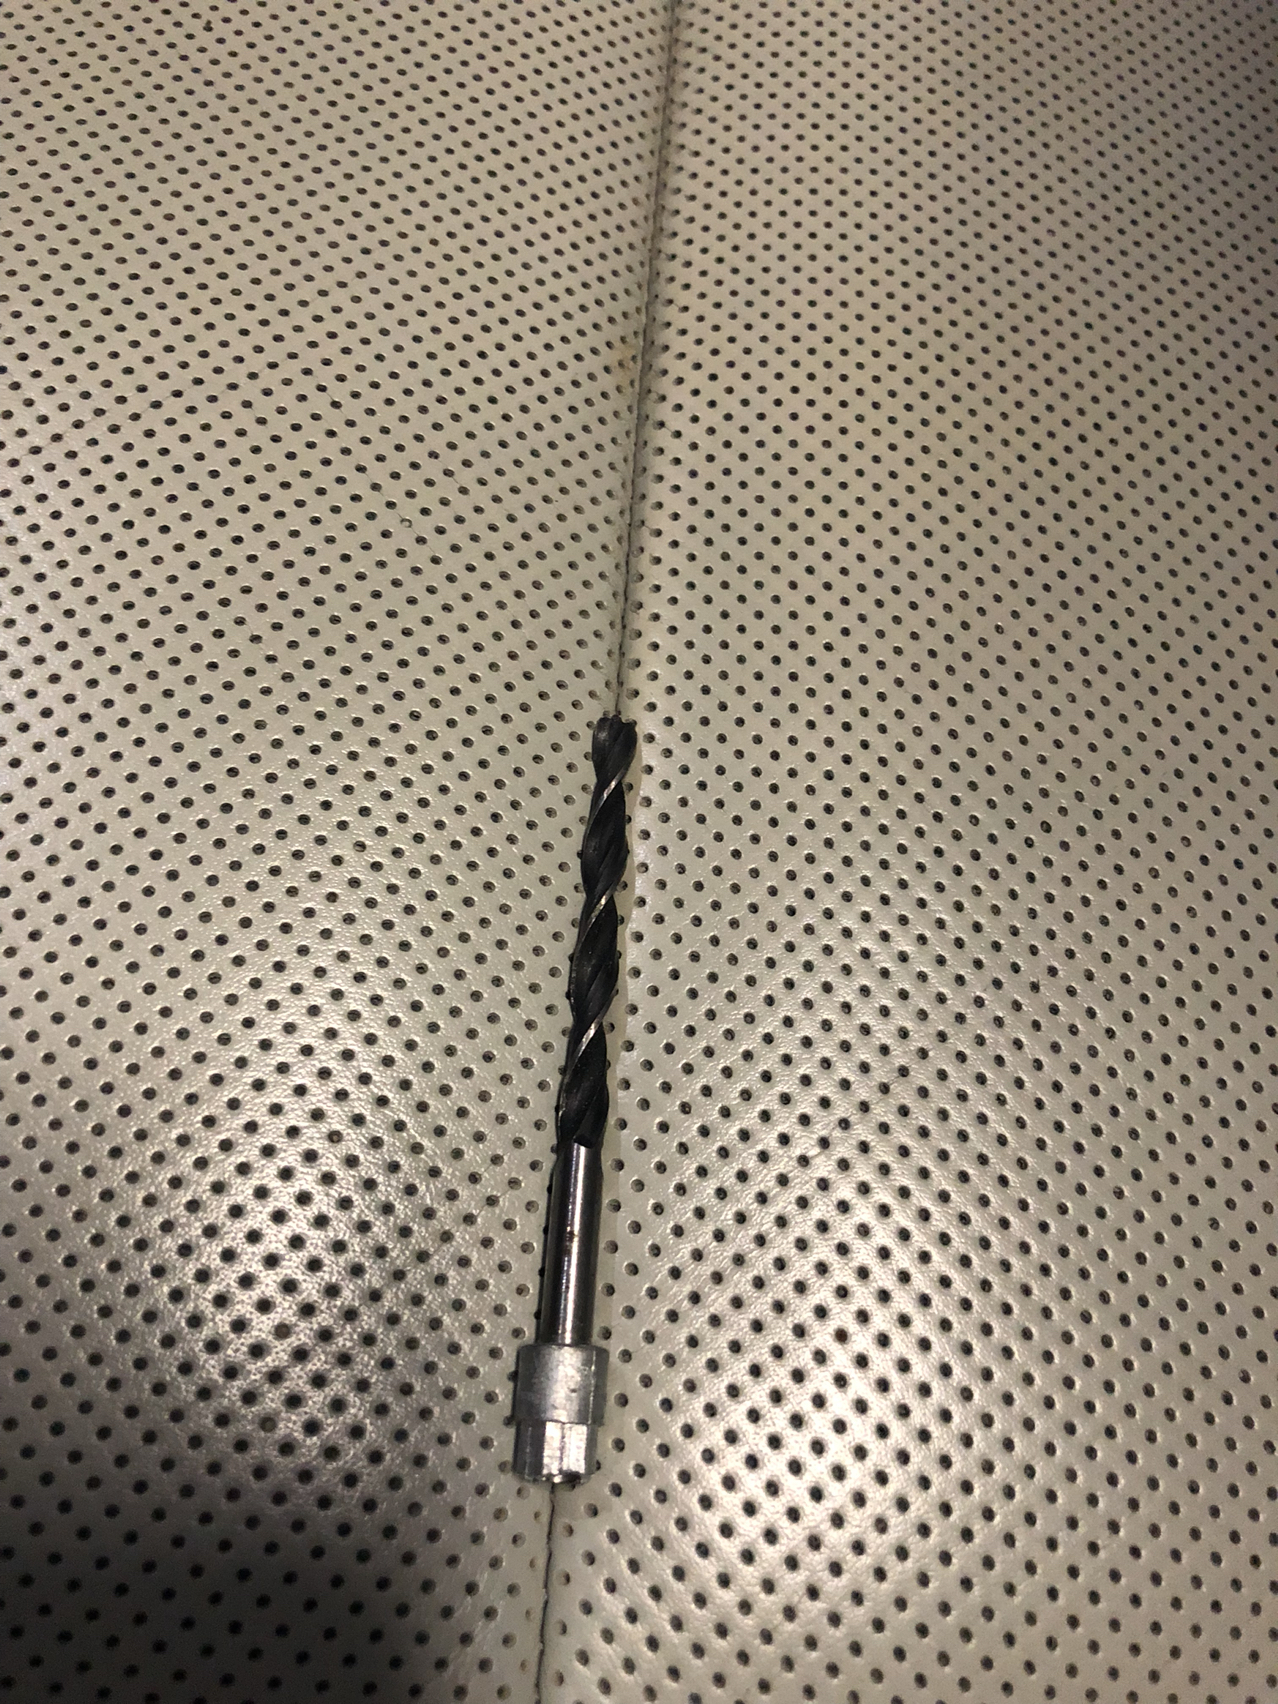
The brake pedal steel is quite strong. Don't use a Kobalt "metal" bit. It takes too much force and eventually broke on me. I got a Milwaukee dedicated bit and that lanced right through nicely.
At first, I was planning on using a vertically arranged two bolt setup for the brake. But once I got the pedal on, I realized that the top hole has a double flange behind it. So the bolts that are included in the kit are two short. If you would like to use this configuration, get a longer bolt (1/2") and you will be fine. The included bolts are JUST too short where I drilled the top hole. Having already made two trips to the hardware store, I wasn't about to go again. So I drilled two holes on the top and used these to mount the brake pedal pad.
The clutch, well, the only I option I found was to use two holes. You can see below that I marked the clutch pedal with a horizontal line where the bottom of the arm comes in. Well, if you were to drill a hole lower than that, wide enough for a nut to secure behind, the pedal pad would be really low. It would not allow you to line up the holes on the top (they'd be off the edge of the pedal) and also the top of the pedal would be visible behind the pad. So the clutch got installed with two bolts. It seems very secure.
The dead pedal installs with two self-tapping screws, although they recommend drilling pilot holes with a 1/8" bit, which I did.
Sorry about the pics getting out of order and my inability to edit. Having issues editing the post. Hope this was informative. Enjoy!

This install is not difficult. But it is a pain, because you are reaching into the footwell while laying over the door sill. I completed it over two days (more on this later) and after the first day, my chest was sore from laying on the door sill. I padded that with a towel on the second day and that improved things a lot. If I had a lift and could be working with the car at chest level, it would be a lot less of a pain.
The other pain is that for me, as a tall guy, trying to reach around the back of the pedals to get the nuts engaged on the screw when installing the brake and clutch pedals. It's blind, and very awkward to be able to reach in and hold the nut. The screws are not overly long, which doesn't help.
I only ran into one problem with the kit, which I'll get into below. The pedals are very nice. The pedal pads look aluminum, but they are not. The only aluminum is the dead pedal. The other pads are a very high density nylon type material. Still, they look good and feel good and I don't regret buying them in the least. The pedal assembly is all aluminum. Rennline should burr the edges better on their CNC machine or by hand. I cut my hands up pretty good installing the throttle pedal base plate.
Tools you'll need are a drill, 3/16" metal bit. 1/8 or 1/16 standard bit, phillips screwdriver and a few hex wrenches. I'm sorry I don't know the sizes on those as I have a complete set and just grabbed what fit. Rennline does not tell you what size they are. The Rennline kit is very good, and quite complete. The directions are "sufficient" to do the install, but they are not overly verbose. I hope that this thread will help those doing the install. There is ONE BIG FLAW with the kit which I worked around but caused me a lot of time and consternation and a trip to the hardware store. The fix is not difficult or expensive. I'll be emailing Rennline about it, so hopefully they fix it moving forward. Will elaborate below.
The first step is to undo the bolt at the top of the accelerator pedal assembly. The pedal assembly is held on at the top by one bolt, and at the bottom, the body of the assembly has a large "tab" that fits into a t-shaped slot in the floorpan. Once the bolt is out, you grab the assembly and slide it up to move the tab to the wider part of the slot and then pull it out. It's an awkward motion, as the pedal assembly is quite tightly slotted in and you're using an upward pulling force. Wiggling the top back and forth helps. Once the assembly is out, disconnect the control wire from the top. Simply press on the latch on the front of the connector and pull it off.
Follow the Rennline instructions. You'll be removing the factory pedal pad" from the pedal base / potentiometer and re-using the base. That was very simple. The next step is where I ran into the snag.
Rennline has you mount the pedal base plate, mark the hole on the bottom, drill the hole in the floorpan bracket that holds the pedal, remove the base plate, slip a j-nut over the hole and re-mount the base pedal. A J nut is a nut attached to a clip, which allows you to hold the nut into place blindly on the back of the hole while you screw in from above. The reason you need this is that the base plate, to which the Rennline pedal assembly mounts to, needs a second mounting point. Remember I said above that the accelerator assembly has one screw hole at the top and a tab at the bottom that goes into a hole in the floorpan bracket? Well, you'll re-mount it that way, but you've got no bottom attachment point for the plate. So the first step is creating one. Seemed simple enough, but the trouble started when I went to re-mount the accelerator assembly to the new Rennline bracket. The tab simply would not slide into the slot and down. I removed everything and test fit it out of the car. No problems. Then I noticed that the J-nut was not lining up perfectly with the hole I drilled. I thought that was causing the base plate to rotate so that it didn't line up with the factory bracket hole. So I enlarged the hole with the drill. No dice, didn't help.
The first day I did the install, it was hot. I had a fan going in the garage but I was sweating like a maniac and also getting very frustrated. Not ideal. So I took a break and looked at what I had done and compared to the Rennline Instructions. Immediately I noticed that the J-nut they supplied is too large! You can see that in the pictures below, the "body" of the j-nut protrudes quite a bit into the hole on the floorpan bracket. I disassembled everything out of the car and again test fit and found that the tab on the accelerator assembly needs all that space to get in.
You can see looking through the base plate, that the j-nut is intruding into the hole that the tab needs to slide into.
I went off to my local Ace and grabbed a smaller J-nut (smaller body, same sized nut). I also got just a plain nut as I figured I'd be able to hold the nut inside the bracket with my finger. That did the trick. It wasn't all that hard to hold the nut against the backside of the bracket and screw through into it. I was able to mount the bracket and then mount the remainder of the accelerator assembly onto the car. Whew!
Factory floorpan with integrated bracket. J-nut is on the right. Notice how it interrupts the t-shaped slot. This is what the pedal assembly clips into.
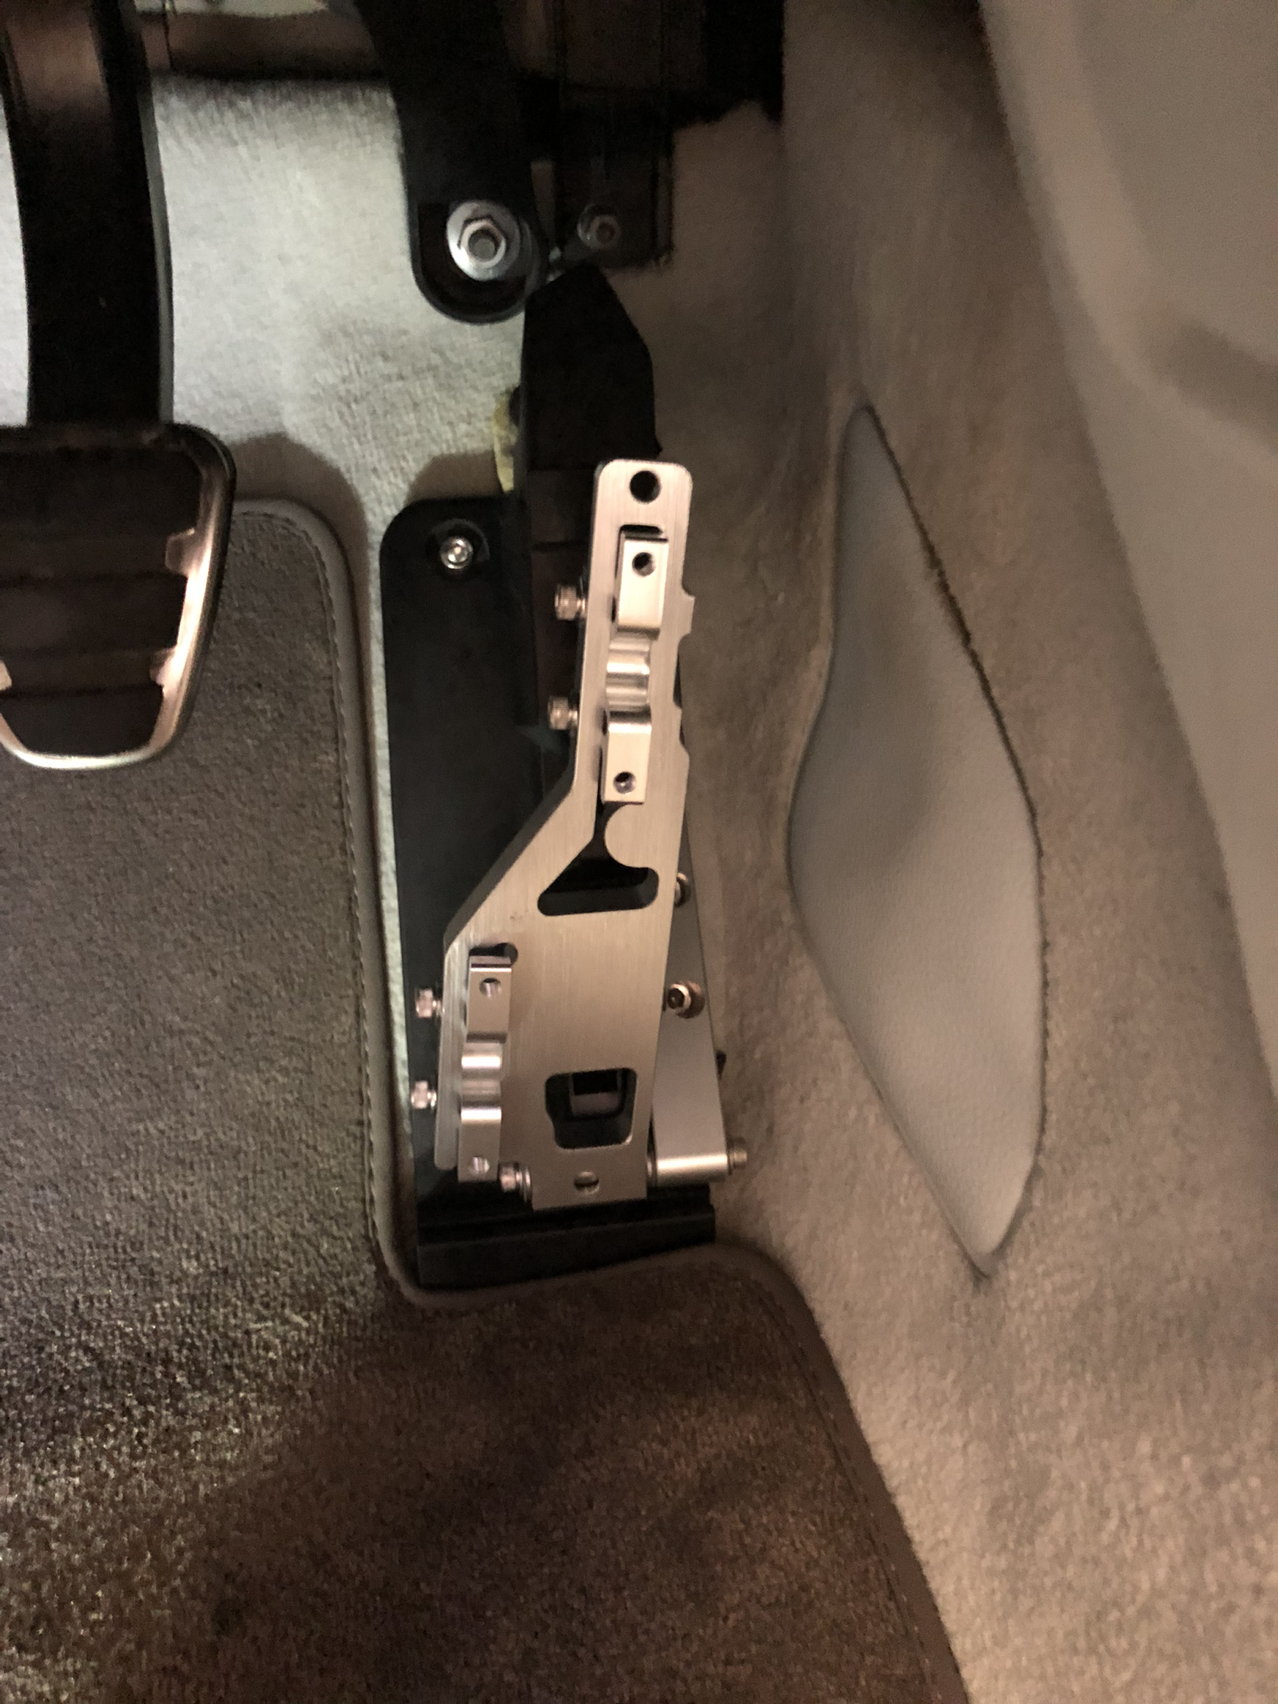
Rennline base plate mounted. Notice that the j-nut is intruding into the space.
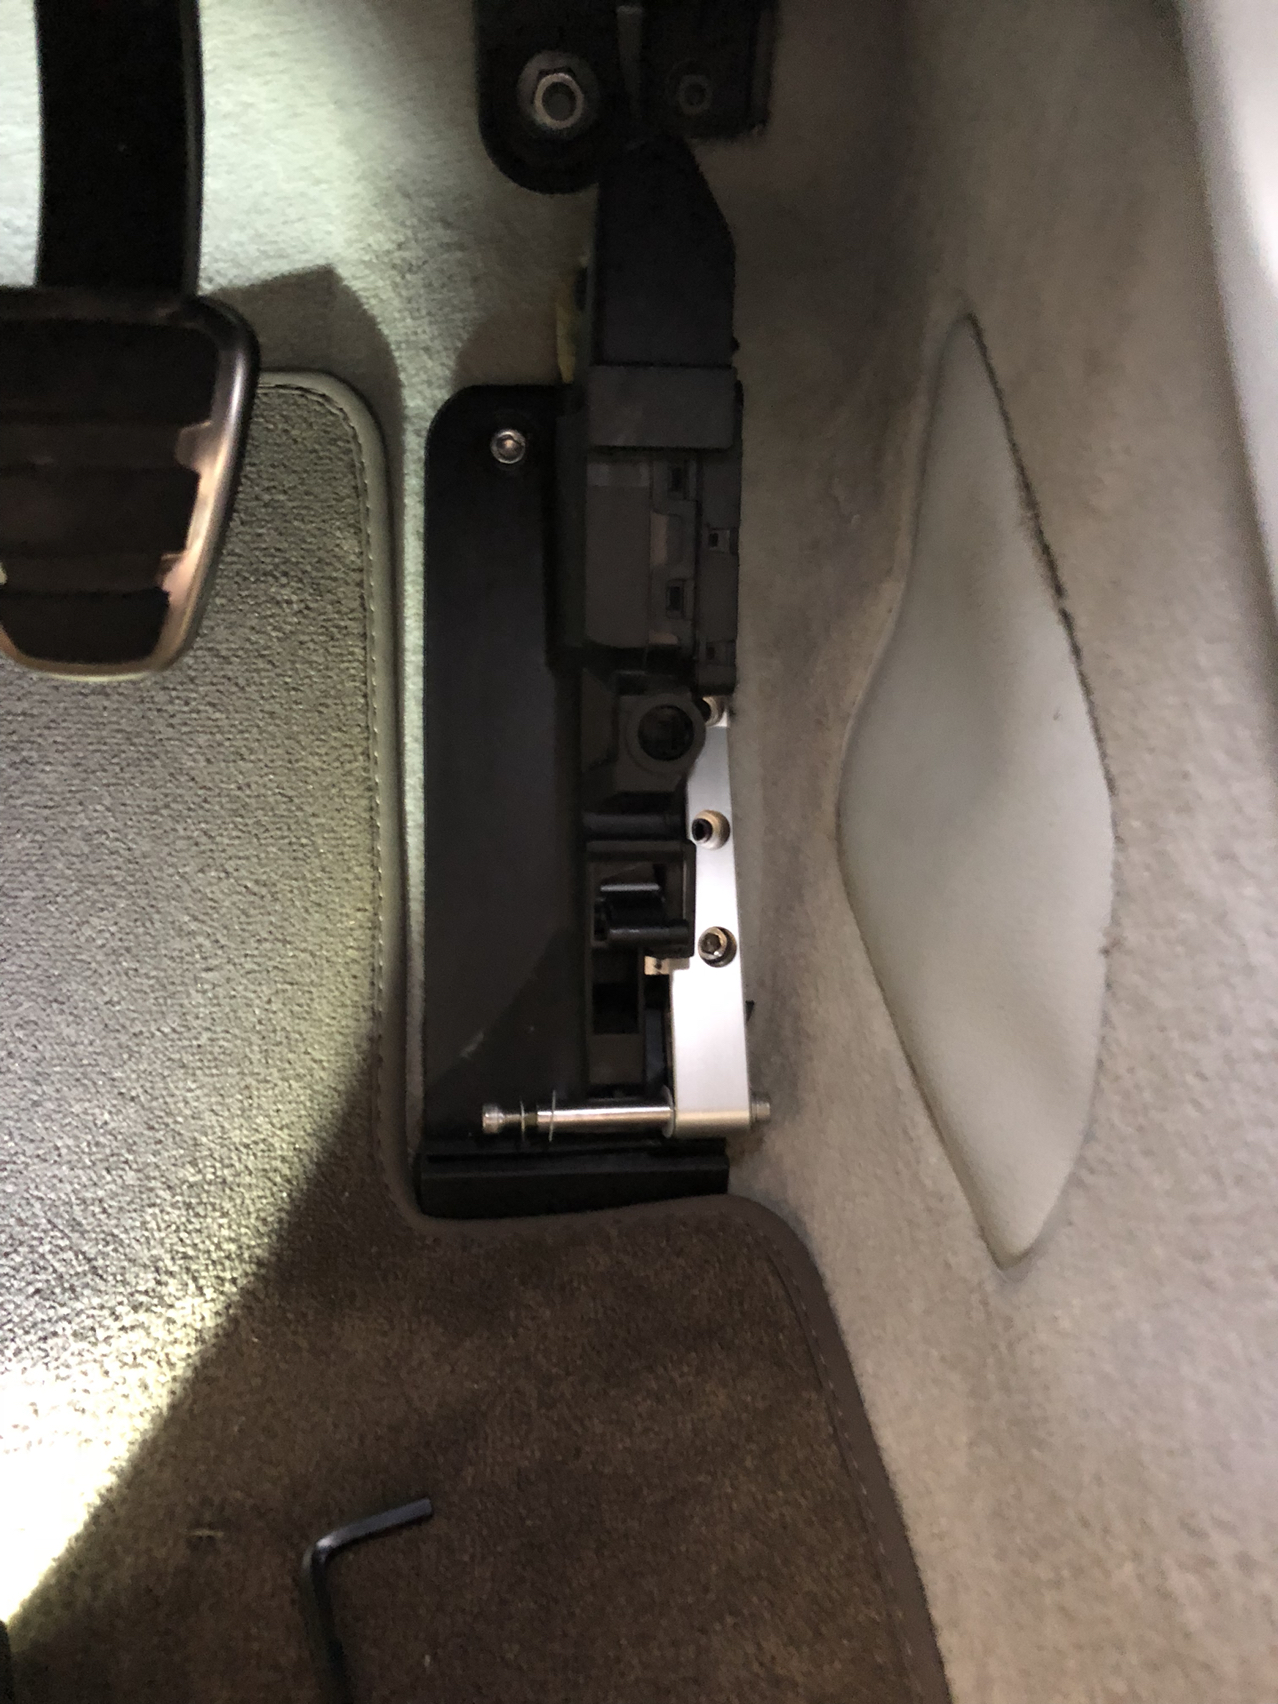
Accelerator assembly re-installed on top of Rennline base plate, and the new pedal base has been installed on the right. After this, it got a lot easier.
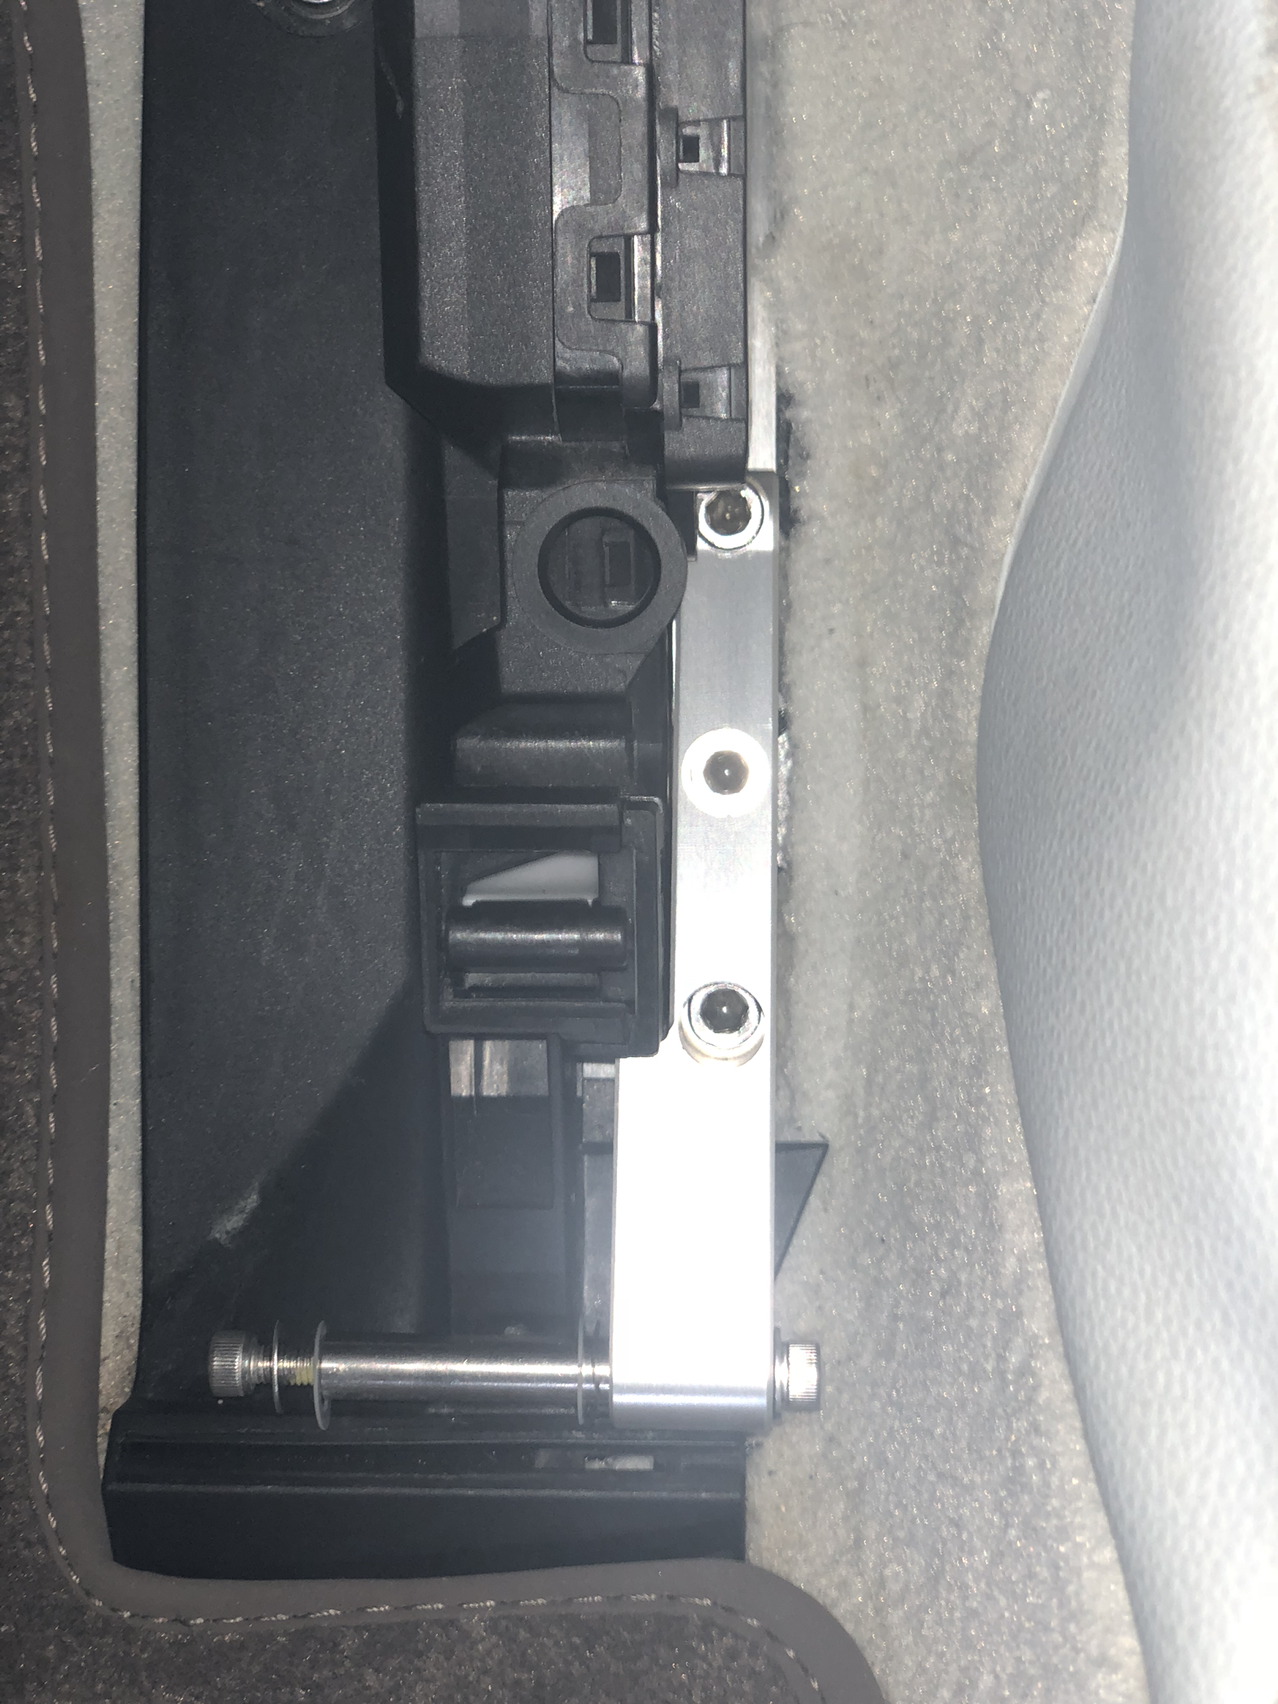
Pedal body installed. The pedal assembly must latch into the factory potentiometer switch so that it can work like normal. It simply clips into a hole on the right of the pedal body.
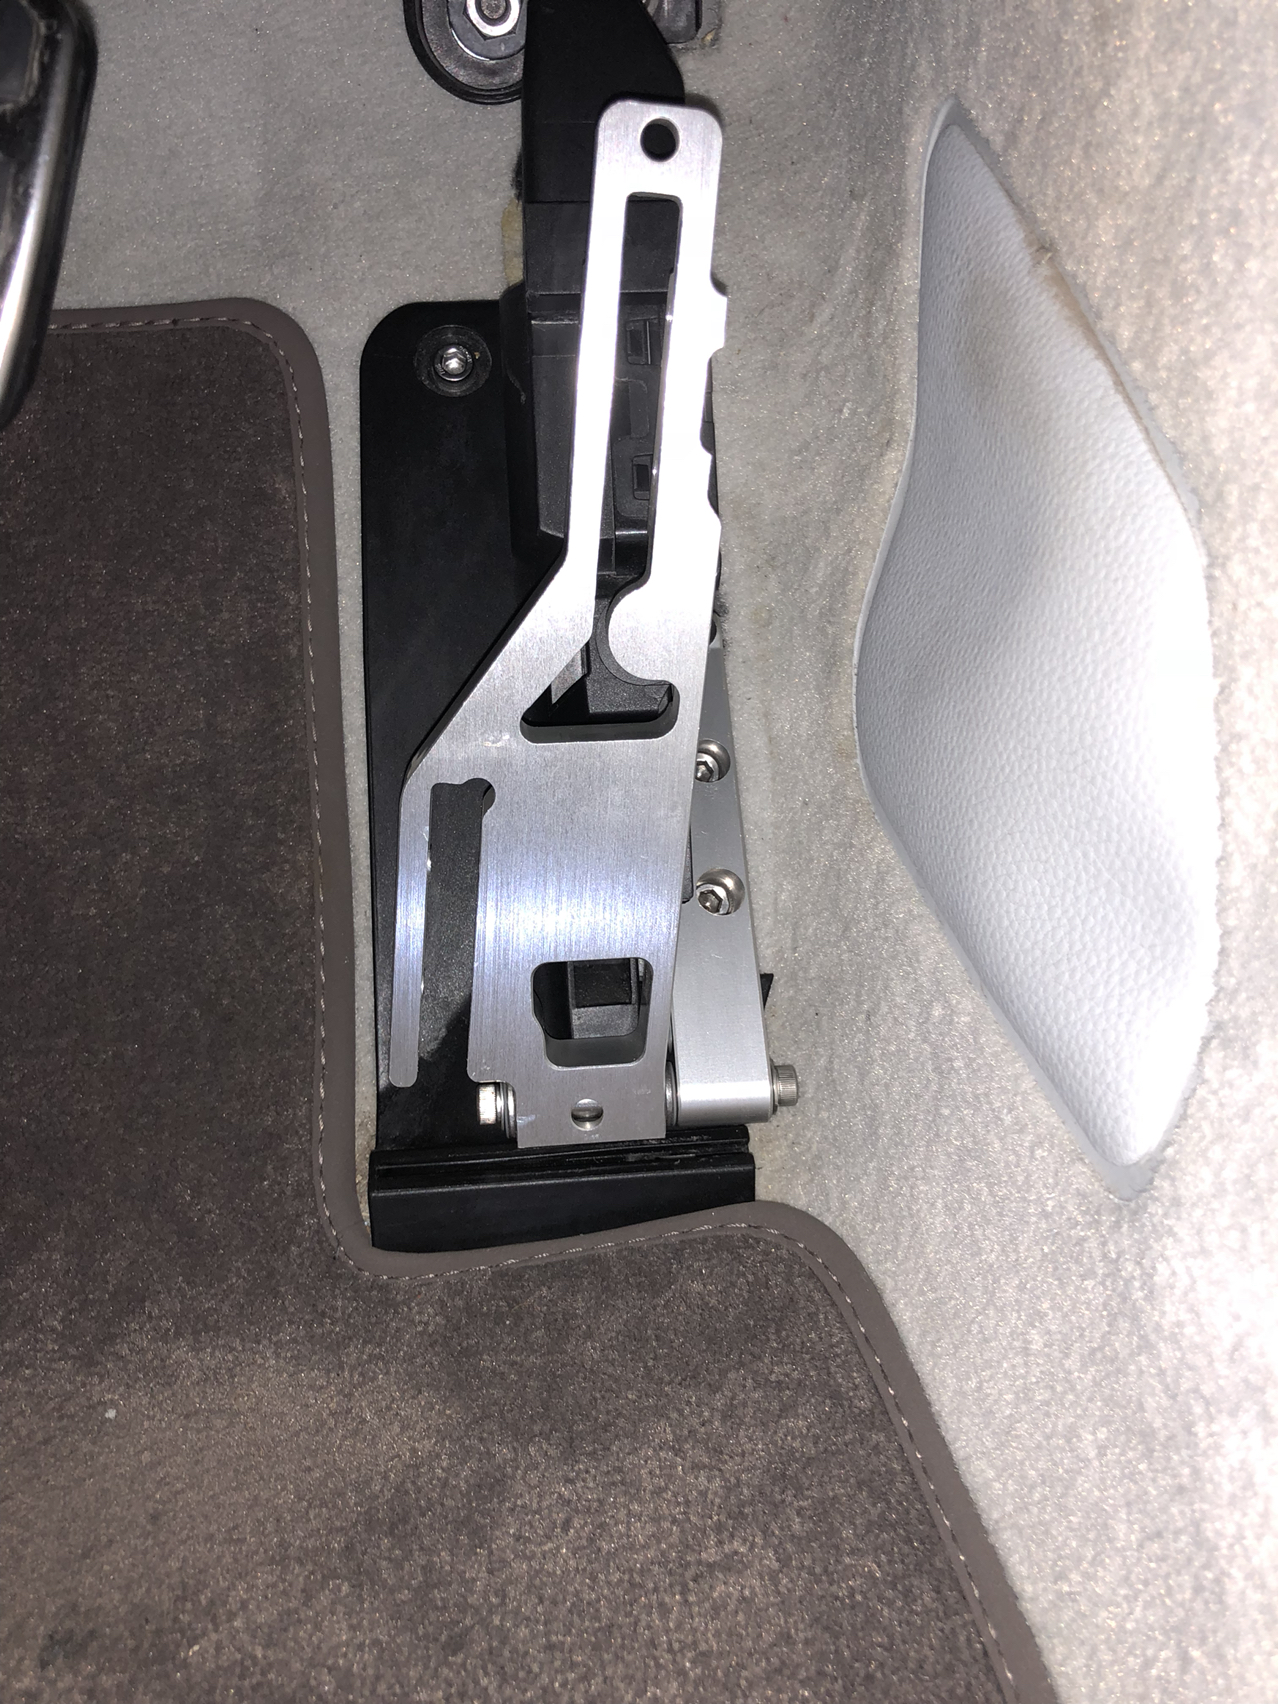
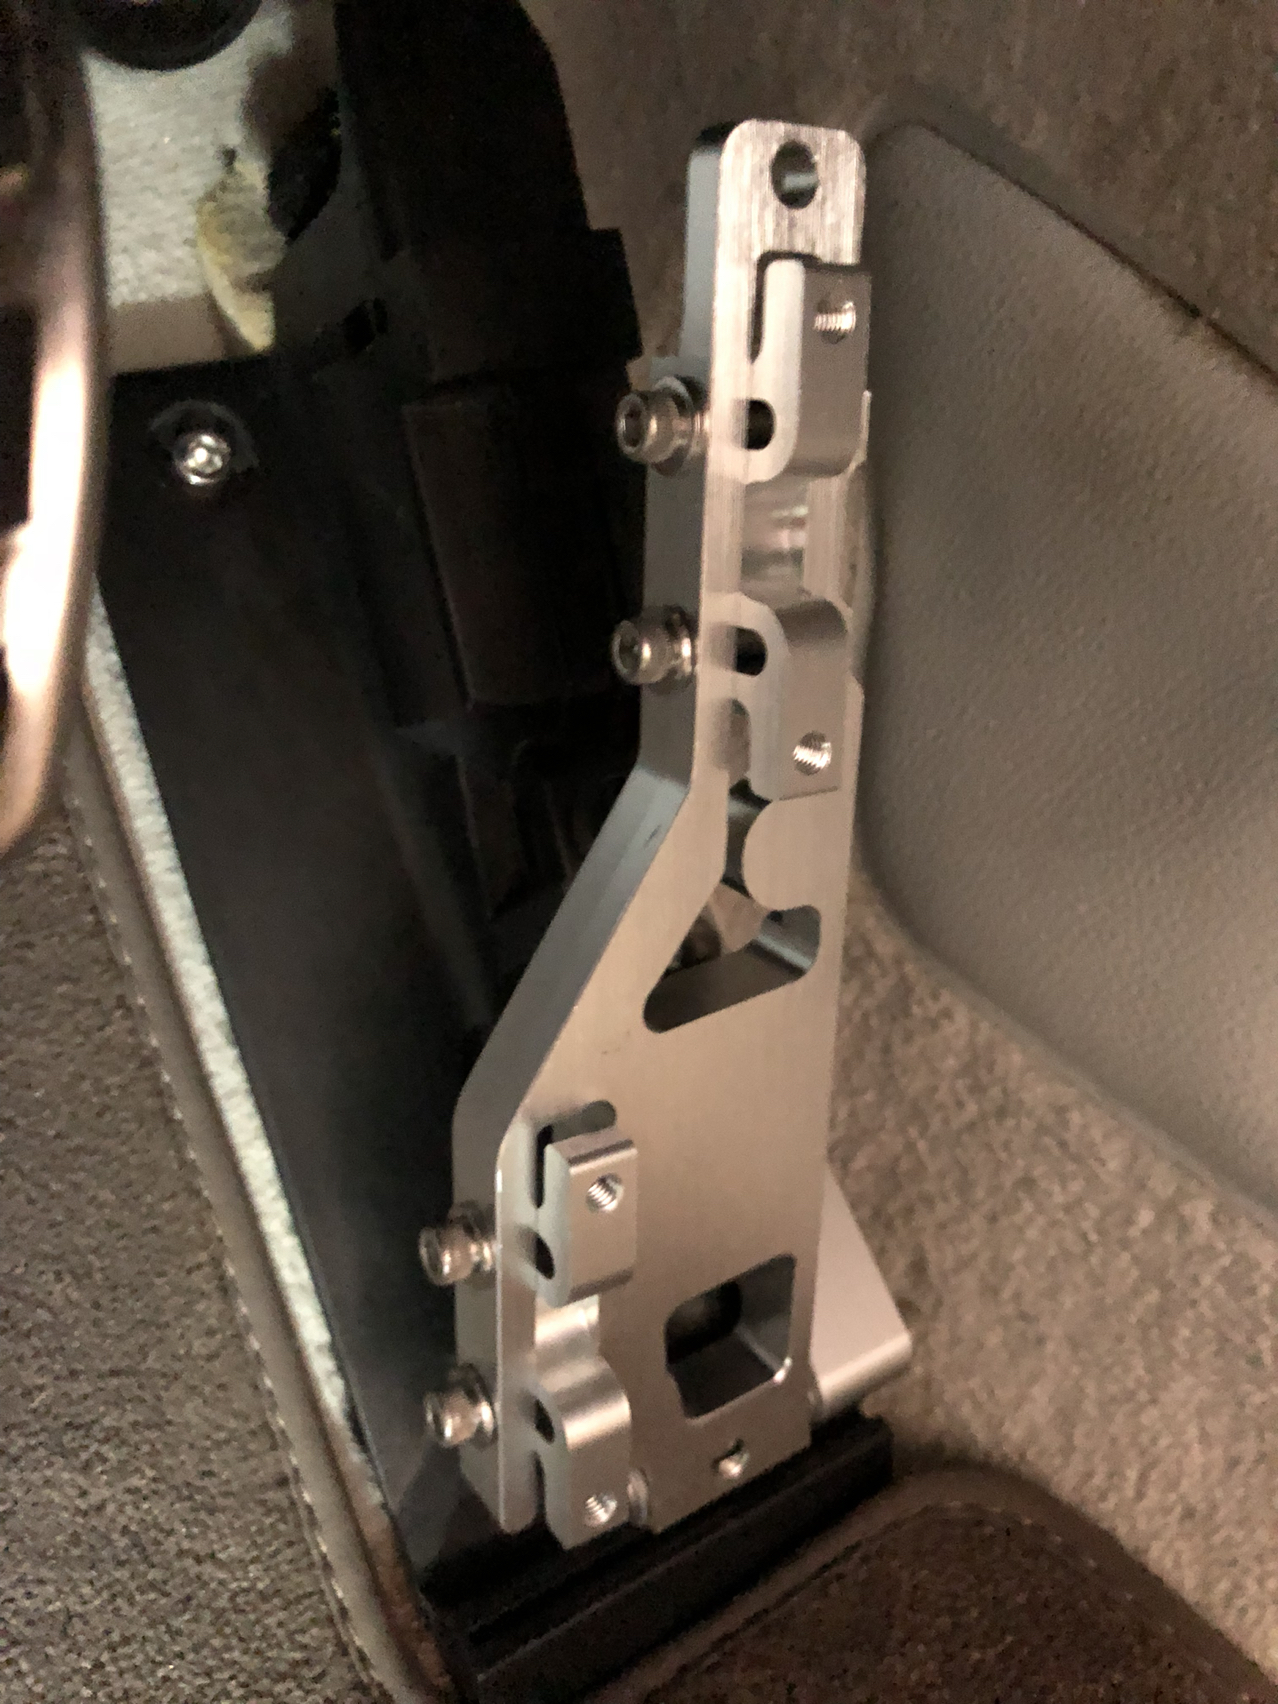
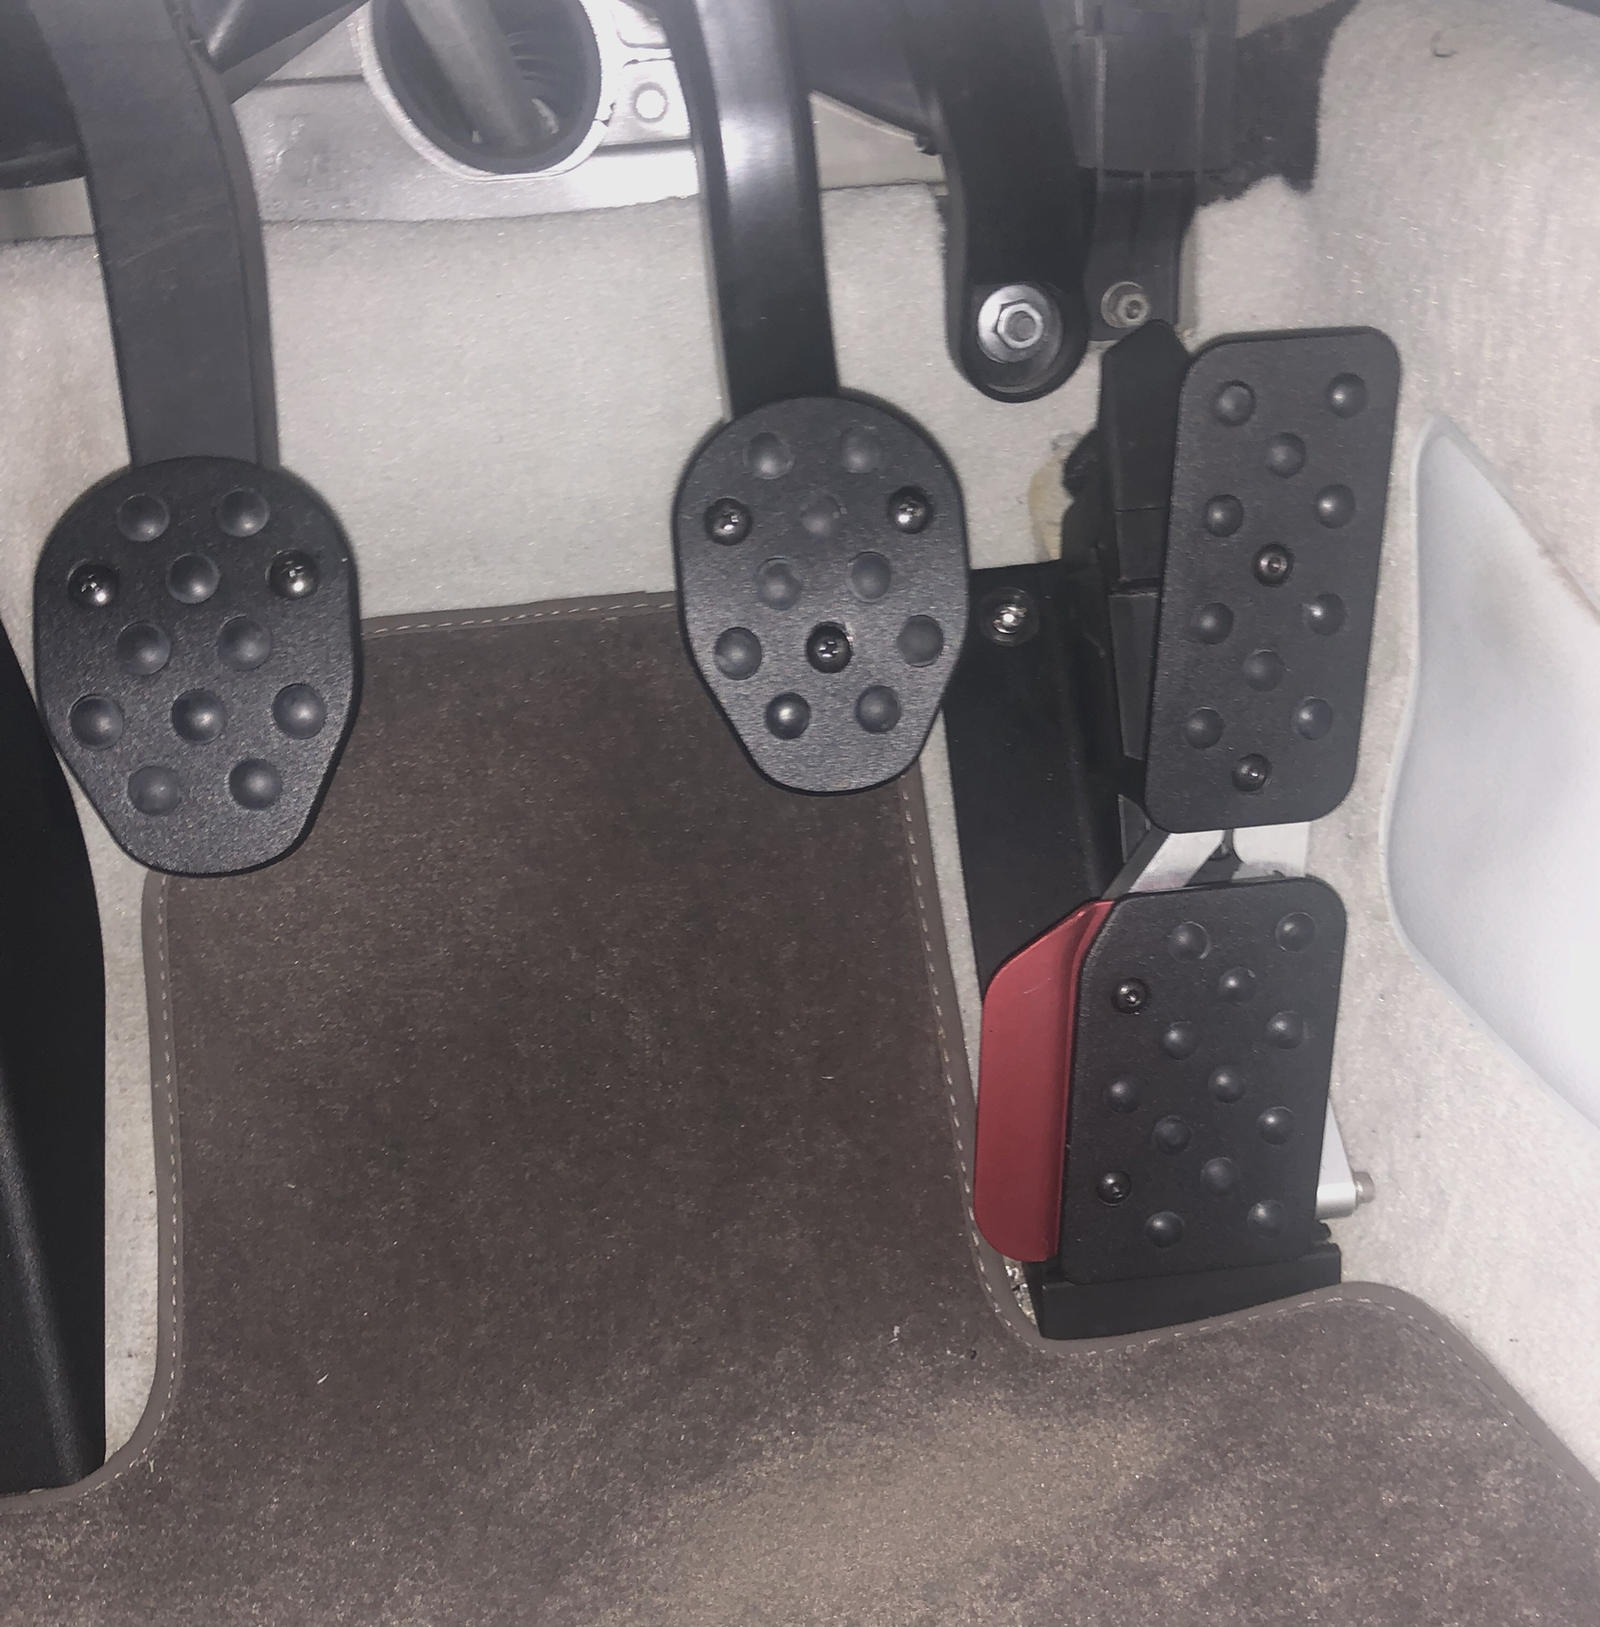
Adjustable brackets installed. These can be loosened and moved toward or away from the driver to permit the adjustment for perfect heel - toeing.
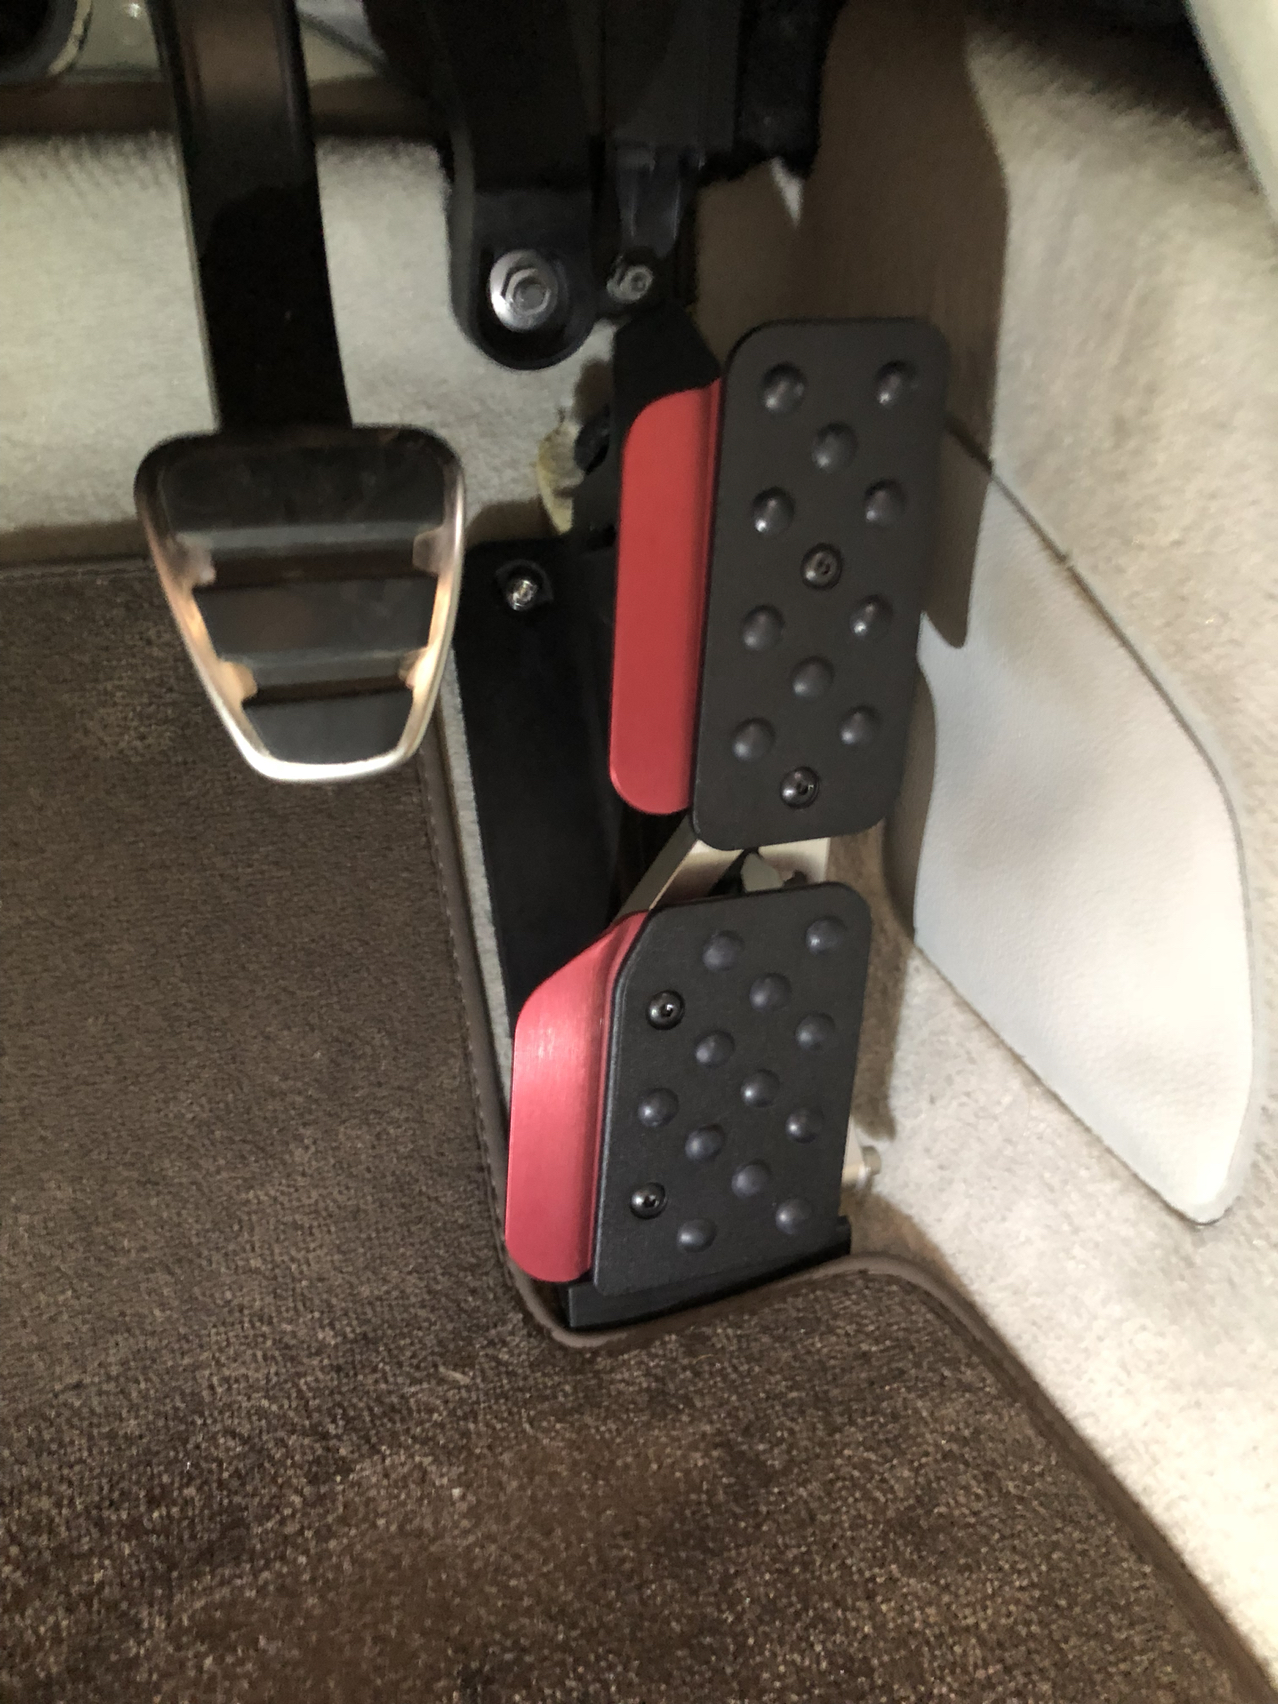
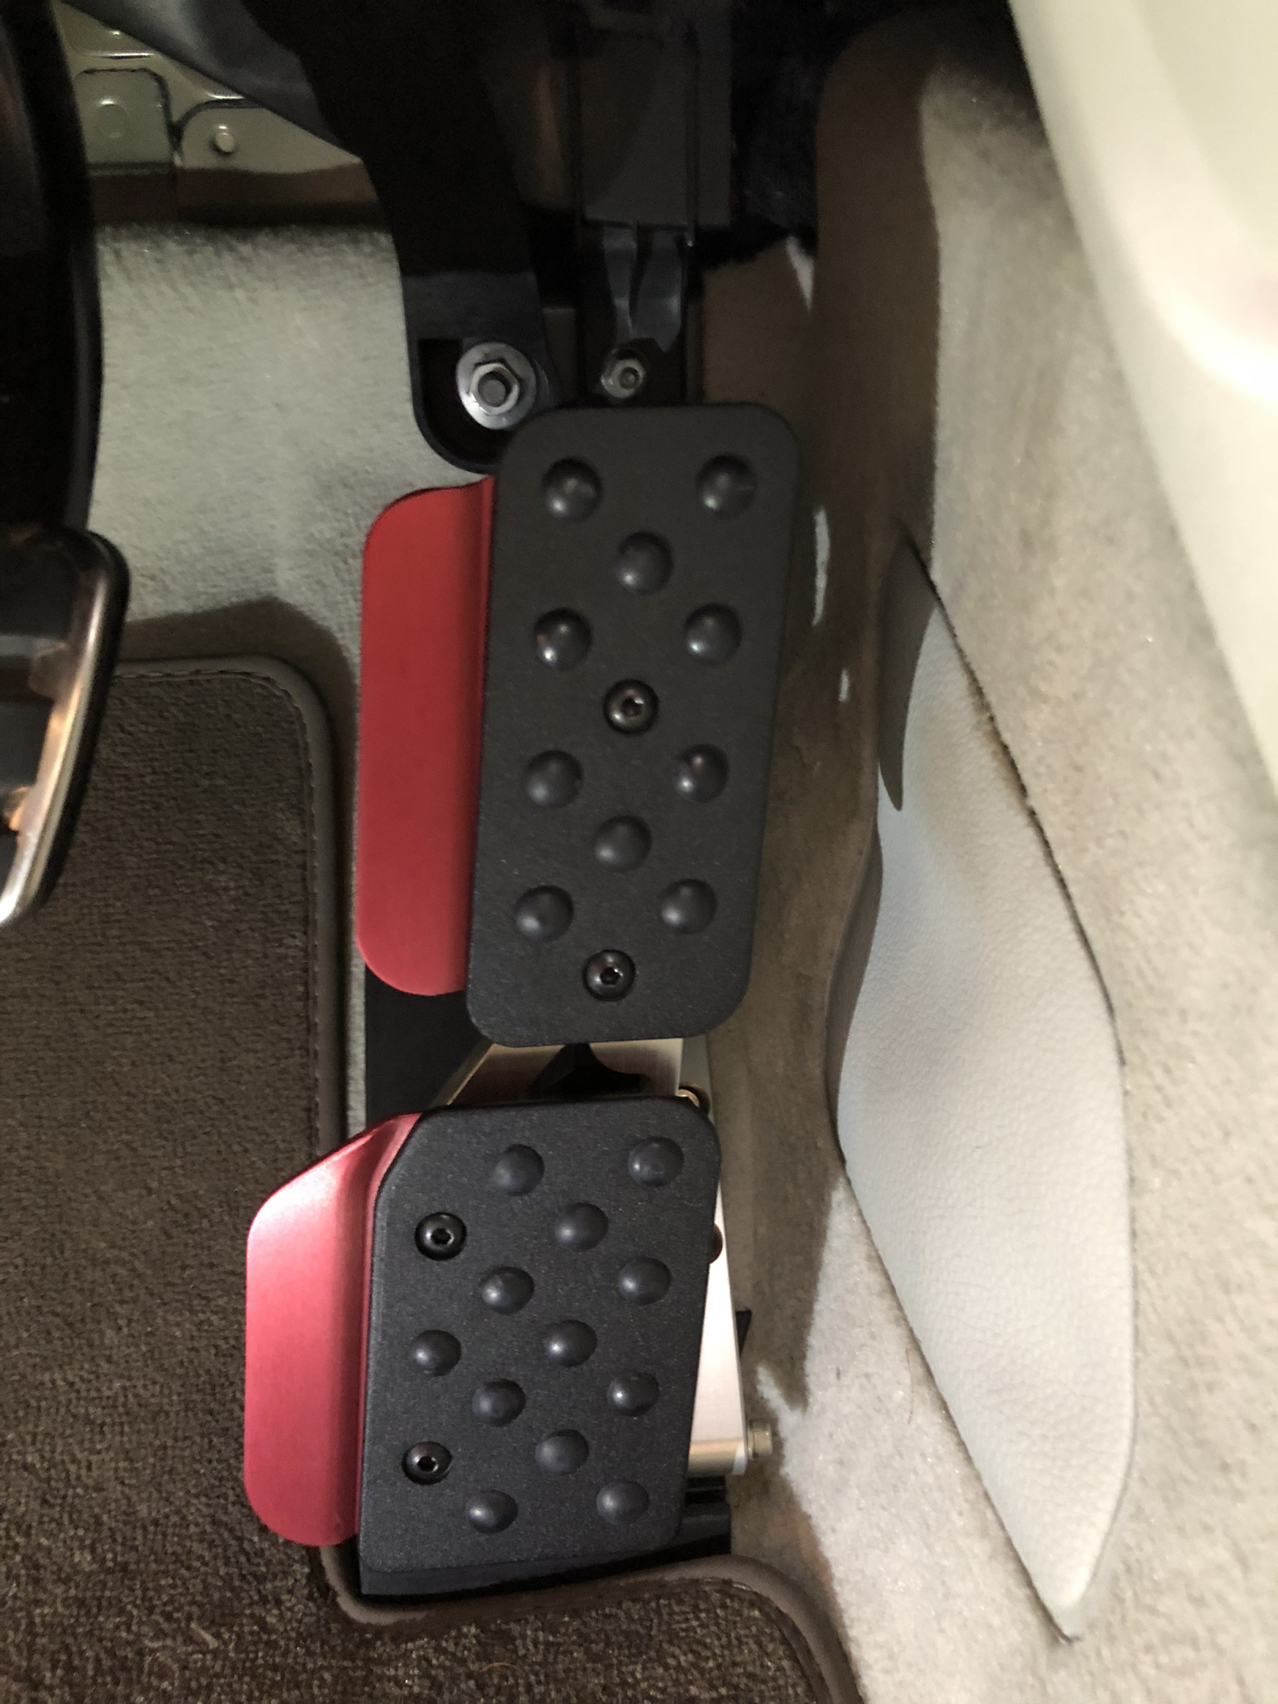
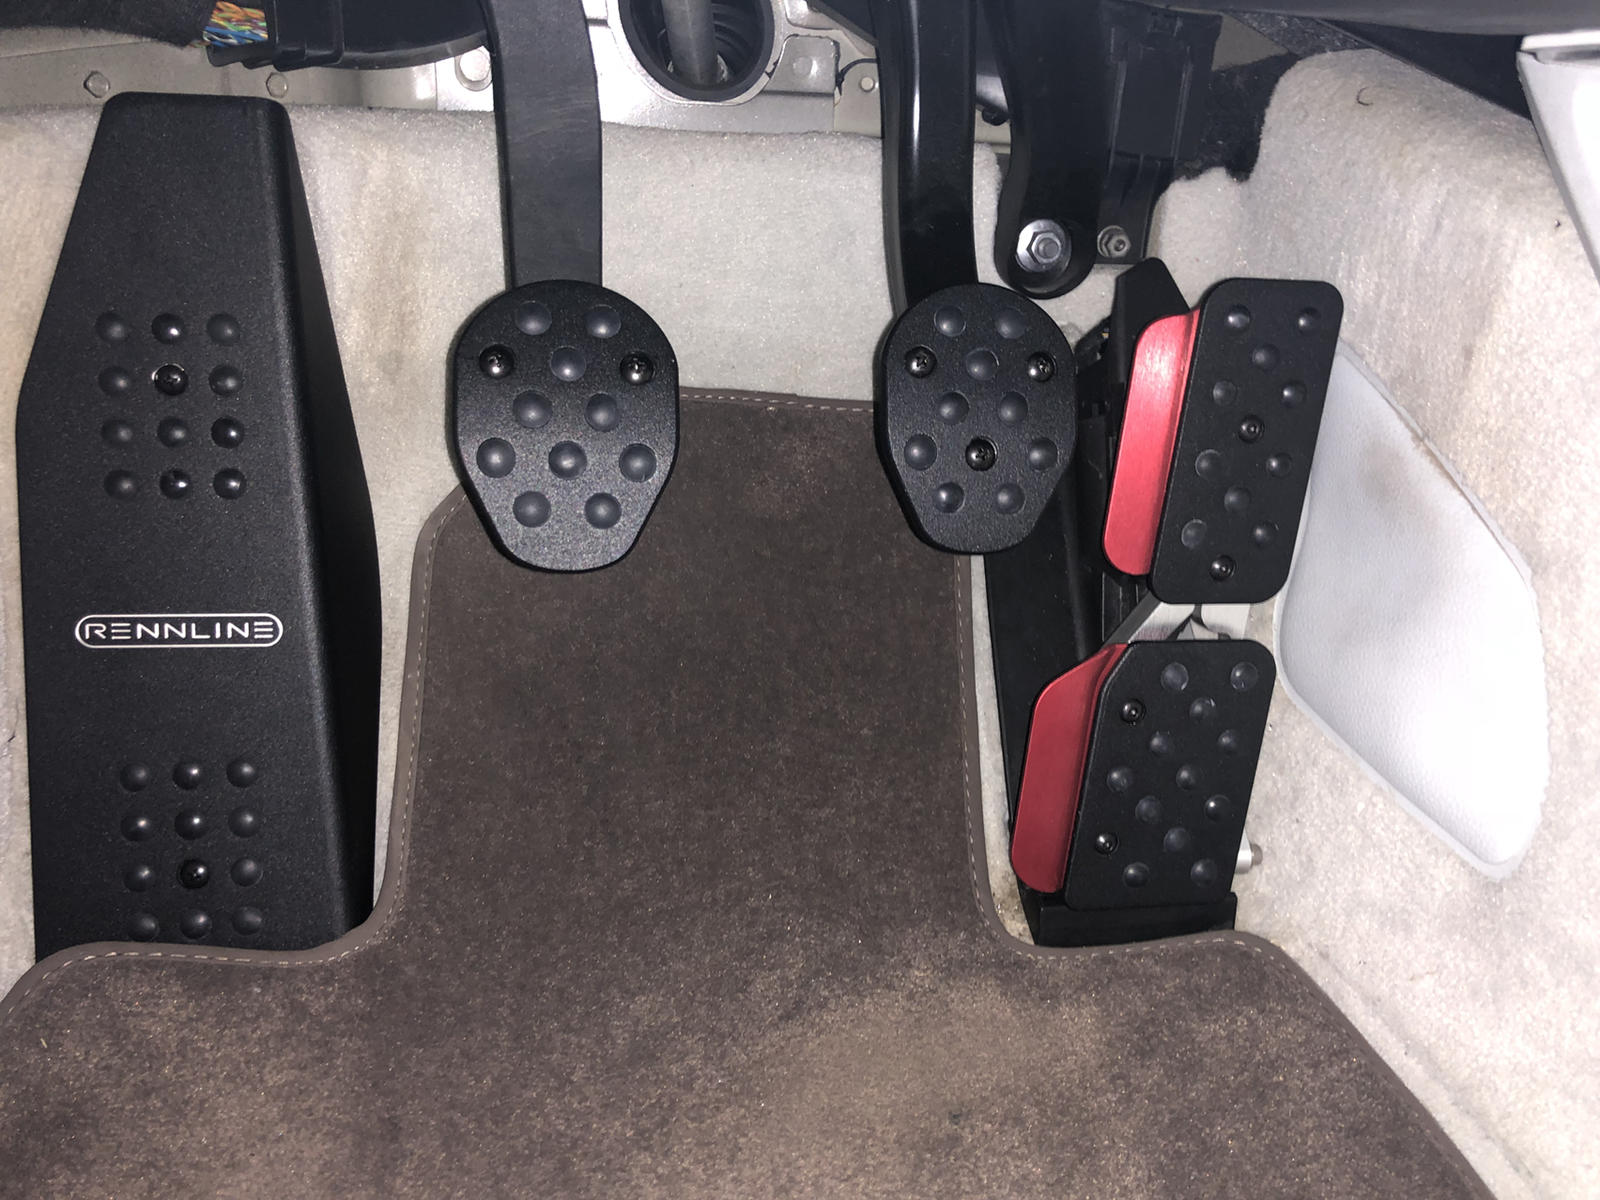
Pads and pad extensions mounted to the pedals.
Now it was time to tackle the brake and clutch pedals. Interestingly, the brake pedal and arm are made from steel. The clutch pedal and arm are made from nylon. As such, you cannot mount the pedals the same. Rennline gives you hardware for four attachment points on each pedal, but says 2-3 is most common. With the clutch, you cannot put any fasteners in the middle as the arm has reinforcements inside it. The brake pedal arm is u-shaped so you can.
Clutch pedal
Back of clutch pedal
Back of brake pedal. Sorry about pic quality.
The brake pedal steel is quite strong. Don't use a Kobalt "metal" bit. It takes too much force and eventually broke on me. I got a Milwaukee dedicated bit and that lanced right through nicely.
At first, I was planning on using a vertically arranged two bolt setup for the brake. But once I got the pedal on, I realized that the top hole has a double flange behind it. So the bolts that are included in the kit are two short. If you would like to use this configuration, get a longer bolt (1/2") and you will be fine. The included bolts are JUST too short where I drilled the top hole. Having already made two trips to the hardware store, I wasn't about to go again. So I drilled two holes on the top and used these to mount the brake pedal pad.
The clutch, well, the only I option I found was to use two holes. You can see below that I marked the clutch pedal with a horizontal line where the bottom of the arm comes in. Well, if you were to drill a hole lower than that, wide enough for a nut to secure behind, the pedal pad would be really low. It would not allow you to line up the holes on the top (they'd be off the edge of the pedal) and also the top of the pedal would be visible behind the pad. So the clutch got installed with two bolts. It seems very secure.
The dead pedal installs with two self-tapping screws, although they recommend drilling pilot holes with a 1/8" bit, which I did.
Sorry about the pics getting out of order and my inability to edit. Having issues editing the post. Hope this was informative. Enjoy!
Last edited by Needsdecaf; 07-04-2018 at 04:29 PM.
 07-04-2018, 08:46 PM
#2
RL Community Team
Rennlist Member
Rennlist Member
Thread Starter
Took it out for a ride and man, what a difference. A lot easier to heel toe. Even in comfort, the blip on 3-2 doesn't require me to contort my foot like a Yogi. Love it. Bonus, I have the lower portion of the pedal out further than the upper and find it's easier to modulate when starting off.
I am finding a very slight application of throttle while under full braking at a stop. May need to adjust further back.
I am finding a very slight application of throttle while under full braking at a stop. May need to adjust further back.
Last edited by Needsdecaf; 07-04-2018 at 09:58 PM.
07-05-2018, 03:10 PM
#4
Advanced
Great write up. Have installed the Rennline pedal set for my PDK C2S and am very pleased with the results. Agree with you that it is a pain to get into the footwell to do the work. My biggest problem was with the electrical connector but eventually got it disconnected and the rest of the install was smooth.
07-06-2018, 09:23 AM
#5
RL Community Team
Rennlist Member
Rennlist Member
Thread Starter
Great write up. Have installed the Rennline pedal set for my PDK C2S and am very pleased with the results. Agree with you that it is a pain to get into the footwell to do the work. My biggest problem was with the electrical connector but eventually got it disconnected and the rest of the install was smooth.
07-06-2018, 12:06 PM
#6
Advanced
No issues with the j clip,...just the damn electrical connector. Was difficult to contort my body enough to get access and leverage but finally got it done. Just wanted to make sure I did not brake the connector.
07-06-2018, 09:20 PM
#7
RL Community Team
Rennlist Member
Rennlist Member
Thread Starter
Originally Posted by whoddoo
No issues with the j clip,...just the damn electrical connector. Was difficult to contort my body enough to get access and leverage but finally got it done. Just wanted to make sure I did not brake the connector.
Trending Topics
07-14-2018, 02:44 PM
#8
RL Community Team
Rennlist Member
Rennlist Member
Thread Starter
So after driving with it for a bit, I had the following impressions:
Initially I set it up with the top pad almost all the way back, and the lower pad further out. This worked fantastic for two reasons. 1, heel and toe was a breeze. 2, the lower pad being out further made it far easier for me to roll into the throttle more progressively. Made it much easier for me to be able to apply that small throttle opening needed to start off in first much more precisely. It's not something I would have really thought about but once I have it, I don't want to go back.
There were two problems with this setup. I had "overlap" on the brake and throttle while holding the car at a stop. Second, while the lower pad was great for progressive throttle application, while cruising at steady state throttle, it came out a little too much, and was feeling weird pushing on my arch. So I adjusted the upper pad to max forward and snuck the lower pad in a bit. Solved the problem with the lower pad, however while that reduced the overlap while braking at a stop, it didn't cure it completely.
Finally got it set up right by removing the upper extension. The pedal is at the perfect height and heel and toe is a breeze, but there is no issue with sitting at a light and revving the engine accidentally.
In all, this is a great product. Everyone's physiology is different, and their preferences are different as well. This way, the car adapts to you, you don't adapt to the car. I find it much more comfortable to shift now. Would definitely recommend all MT owners to buy!
10-16-2020, 12:56 PM
#9
RL Community Team
Rennlist Member
Rennlist Member
Thread Starter
Hello 991 owners! Just had the opportunity to re-visit this thread for another reason else and wanted to bump it for those of you who might not have seen it. This plus the GT4 shifter completely transformed the way I drove my 991 7MT. Would highly recommend both of these mods, they are totally DIY-able. This mod really made a difference in not only shifting, but how I was able to feather the gas from a standstill. When I sold my 991 and went back to stock pedals, it was a remarkable difference.
Something to put on your Holiday shopping list! I've no affiliation with Rennline, but can't recommend this product enough.
Something to put on your Holiday shopping list! I've no affiliation with Rennline, but can't recommend this product enough.
10-17-2020, 11:22 AM
#10
Three Wheelin'

Have you seen the new Numeric petal set? Turns this rather involved (nicely documented!) install into a 10 minute job with no drilling at all. Checkout the thread on this forum.
10-17-2020, 11:13 PM
#11
RL Community Team
Rennlist Member
Rennlist Member
Thread Starter
I do like the way the brake and clutch pedals attach. Nice design there.
Last edited by Needsdecaf; 10-17-2020 at 11:17 PM.