When you click on links to various merchants on this site and make a purchase, this can result in this site earning a commission. Affiliate programs and affiliations include, but are not limited to, the eBay Partner Network.
Does anyone know how to remove the lower console trim? The pieces to the left and right of the split line in the photo, as well as the ‘perforated’ piece above them. Thanks.
Does anyone know how to remove the lower console trim? The pieces to the left and right of the split line in the photos, as well as the �perforated� piece above them. Thanks.
It's very similar to the top centre-console side "blades you already removed.
Just pry out 1 end then kinda pul/slide and pop out the other end.
Once you figure out which side pops, which side slides and where the pop and slide happen simultaneously it's a matter of seconds.
It's very similar to the top centre-console side "blades you already removed.
Just pry out 1 end then kinda pul/slide and pop out the other end.
Once you figure out which side pops, which side slides and where the pop and slide happen simultaneously it's a matter of seconds.
Hope that was of some help.
Thanks for the reply. It is somewhat helpful but as you likely know if you pull when you should be sliding, or vice versa, something is going to break I wish there was an exploded parts view available somewhere.
Thanks, but the Rennline video shows the removal of the upper trim which is already off my console. I need help with the lower trim which is closest to the carpet.
Success. Hope this helps someone in the future. There is a screw up near the footwell lighting panel. Remove the screw and the the front piece slides forward. I was only trying to remove the front piece.
Success. Hope this helps someone in the future. There is a screw up near the footwell lighting panel. Remove the screw and the the front piece slides forward. I was only trying to remove the front piece.
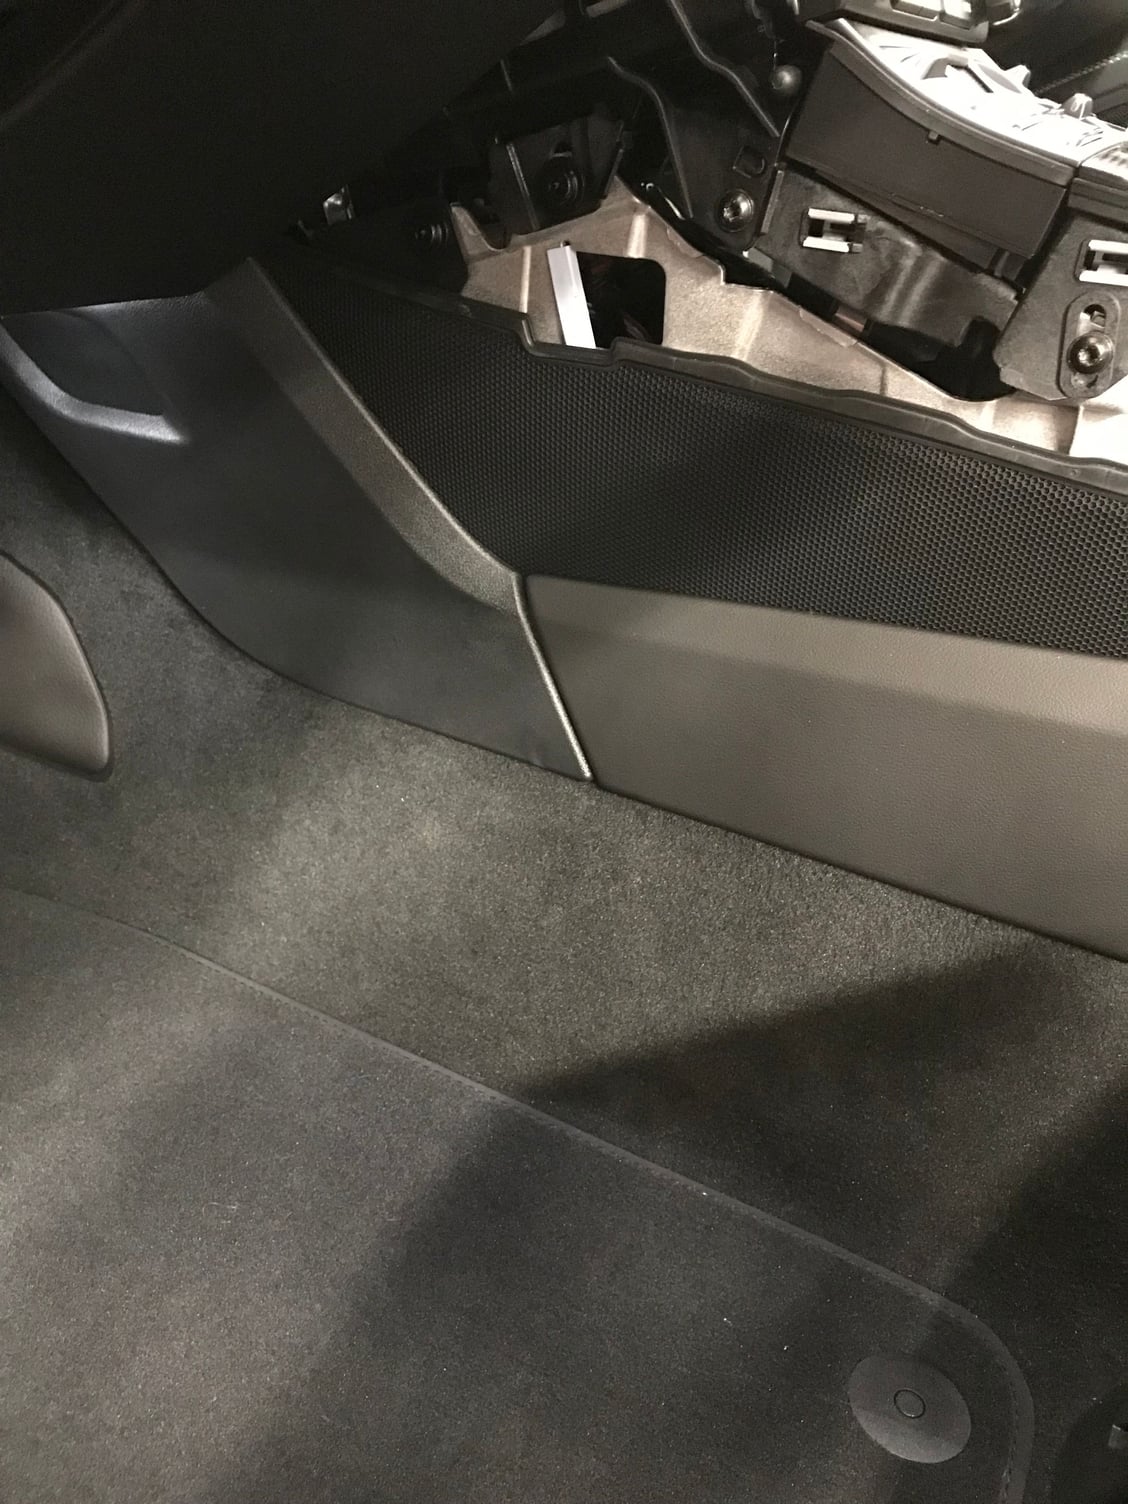
Reviving this old-ish post. Looking to remove this lower center console trim, marked with a Red X
Picture of the back shows clips and hooks. Almost looks like the piece needs to be pulled up and the hooks seem similar to the hooks on the door panel. Wondering if there are screws in there too. Anyone know for sure? Thanks.
I successfully removed these panels yesterday, and I see a couple people on this older thread who didn't get answers, so I thought I'd revive this with the steps:
1) The center console side trim top piece, which runs alongside the center/PCM can be removed by pulling the sides outwards (starting from the armrest) and working your way just past the shifter. Once those clips are out, then pull the panel towards the engine.
2) To remove the center console trim bottom pieces, we need to divide this into two parts: the front portion (near the throttle pedal) and the rear portion (running alongside the center tunnel). The front portion requires removing a T25 bolt as shown here. Then slide the piece towards the frunk.
3) Next, before trying to remove the rear portion, you need to remove the middle mesh plastic piece that resides between #1 and #2 above. Start from the front (closest to frunk) and pull outwards (towards the doors). You can remove all of the clips except for the final two (the two closest to the center armrest) by pulling outward. The remaining two are rubber nubs that need to be pivoted out; no swift/abrupt pulling required, just some finesse to get them out.
4) Finally, the rear portion (from #2 above) can be removed. It is easiest to do this with the seats out of the car as the panels are long and require some force. Removing the seats simply requires removing 4 E12 bolts per seat. Before attempting to remove the rear portion of the lower trim, you will want to pull up on the rear tunnel, as that is clipped into the rear portion of the center trim. In my GT3, I needed to pull up the little rubber trim on the rear seat delete and then use a 13mm hex socket to unbolt the rear seat delete/tunnel, then simply pull up. Now that the rear tunnel is unclipped from the rear center trim, you simply need to pull up on this piece. I started at the front and worked my way back. It requires a lot of force, unfortunately, which is why the seat removal helps. Pull straight up, not outward.


 02-08-2018 | 11:47 PM