When you click on links to various merchants on this site and make a purchase, this can result in this site earning a commission. Affiliate programs and affiliations include, but are not limited to, the eBay Partner Network.
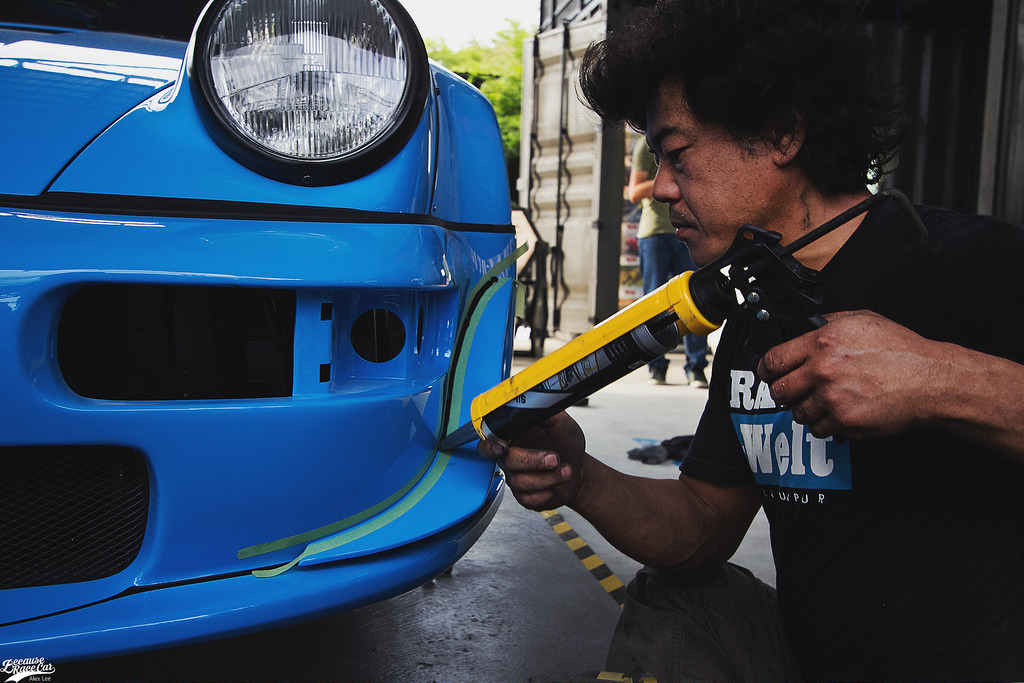
Looks great from the pictures. The tape could be a bit cleaner but it's not like you are a body fabricator for a living.
It would look great to everyone but me (and maybe some other obsessed type individuals). Since it is my own car, obviously I notice every little detail. I am only a fan of modifications when I can make it just as clean as if it were to come from the factory that way. At this point, I dont feel I've completed the job to that level... so its either remove them or improve them. I am considering black silicone.
What about just putting the tape a little lower so you can't see the edge of it?
The inner lip is so small that it can not go any lower, unfortunately. I had taken that into account when I did it initially. Its probably 1/8 inch or less.
The inner lip is so small that it can not go any lower, unfortunately. I had taken that into account when I did it initially. Its probably 1/8 inch or less.
So I couldn't resist and picked up a driver's side side sill just for the hell of it.
I do see the issue you are referring to when it comes to taping the edge to the chassis. I'm going to play with it a bit this week and see what I come up with.
Even if you just used black double sided tape it would blend.
I feel the same way as gbree. If it's not perfect, it's coming off 🙂
Even with black tape, you will still notice some gaps due to the small ledge at the top of the sill that is meant to go under the chassis on widebody cars. My OCD won't allow this lol.
After studying the piece a bit more this afternoon, I believe the only way to get it to be seamless would be to sand the small ledge completely flat and use a heat gun to mold it to the chassis allowing the tape to be placed lower.
^ My concern with this is that the pressure the piece would be under may cause the tape to pull away over time but we shall see.
gbree, if you have it, could you upload a pic of the back of the inside of the sill before you installed it? That would be very helpful.
when you order the skirt, does it come with that piece pointed in below picture, or that is an existing part on 991.1?
Phow, how long did it take you to install the skirts?
The piece in the image you are pointing to is an existing part of the 991.1. Basically you remove this piece and use those holes to mount the bottom of the skirt to the chassis.
I'm still in the cutting and trimming phase of the installation. I did a test fit of the skirt last night and I'm not 100% happy with how the top of skirt lines up to the body of the car.
I think I'm going to risk ruining the skirt and trim it back even further to make the line more seamless.
On the widebody cars, the skirt actually mounts underneath the chassis. Obviously you can't do this with the narrowbody cars so the skirt basically sits on top of the chassis. The more ridge/ledge (which would normally be hidden on the widebody cars) you have at the top of the skirt, the more it protrudes out from the side of the vehicle.
Either way, it's a fun evening project to play around with in the garage. I will see if I get any further along tonight and post pics if I stumble upon any progress worth mentioning.
After studying the piece a bit more this afternoon, I believe the only way to get it to be seamless would be to sand the small ledge completely flat and use a heat gun to mold it to the chassis allowing the tape to be placed lower.
^ My concern with this is that the pressure the piece would be under may cause the tape to pull away over time but we shall see.
.
That is exactly what I did and that is exactly what is happening. You only see the tape because the panel wants to pull away a bit. I have made it much better. More pics coming this evening.
That is exactly what I did and that is exactly what is happening. You only see the tape because the panel wants to pull away a bit. I have made it much better. More pics coming this evening.
Sweet! I will probably wait to do any more sanding and cutting until I see what you have

 10-03-2017, 02:58 PM