When you click on links to various merchants on this site and make a purchase, this can result in this site earning a commission. Affiliate programs and affiliations include, but are not limited to, the eBay Partner Network.
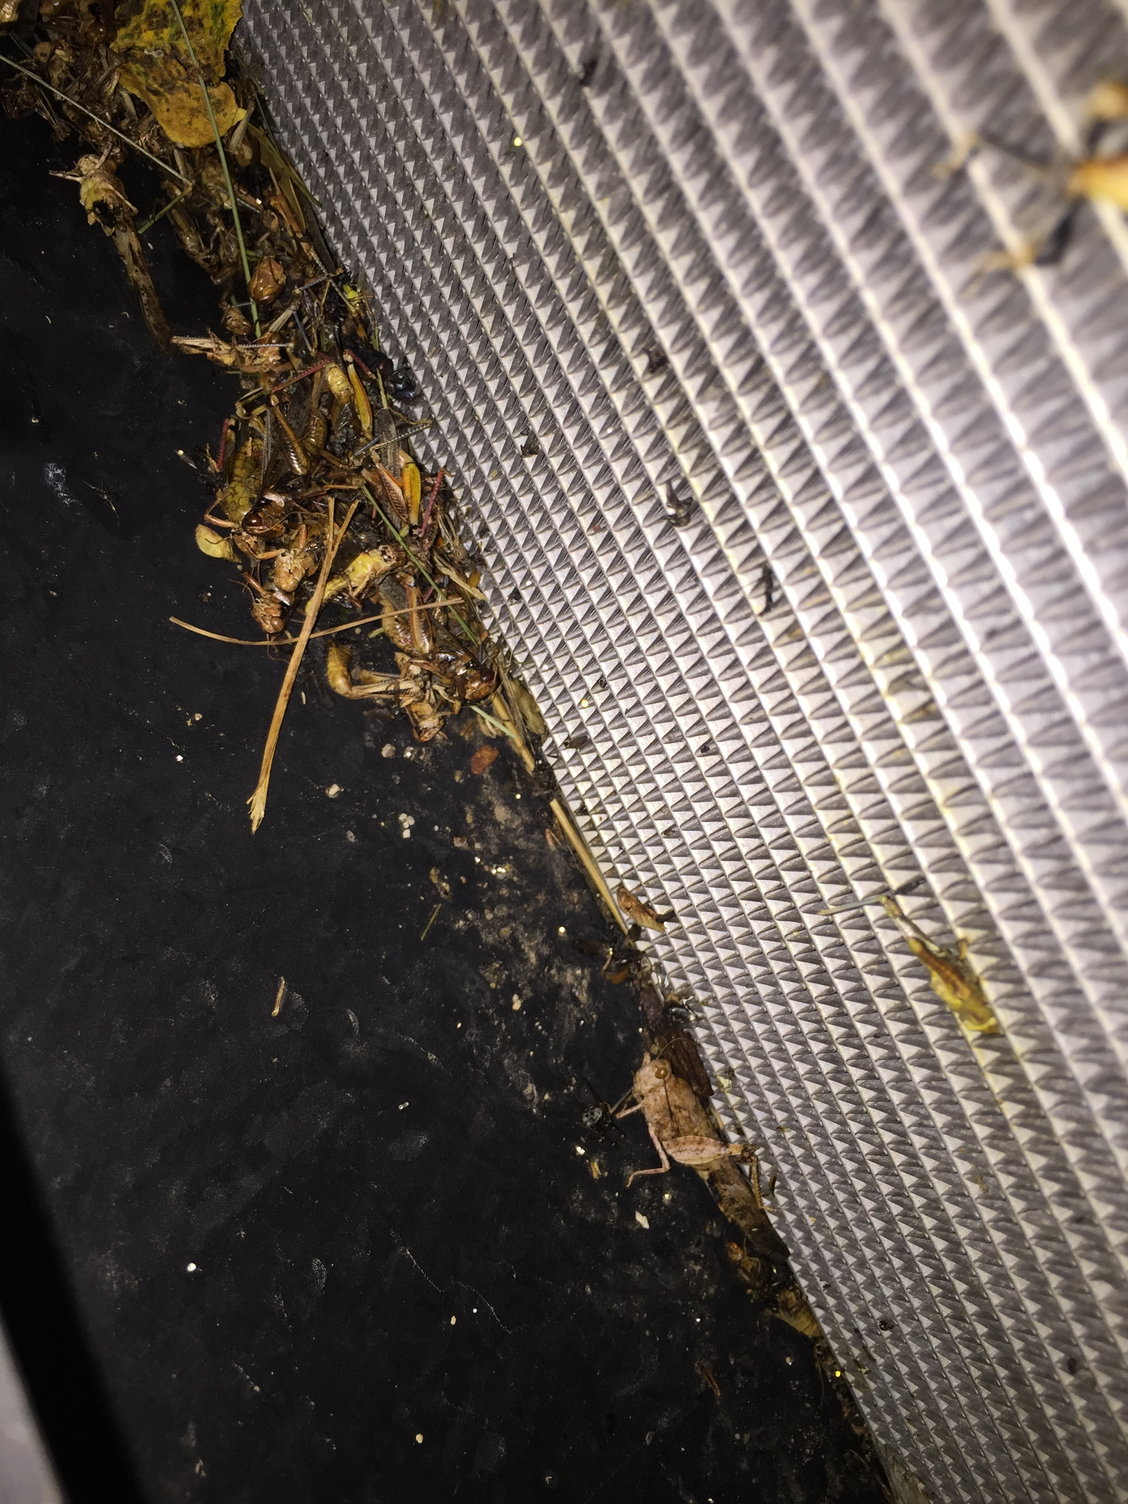
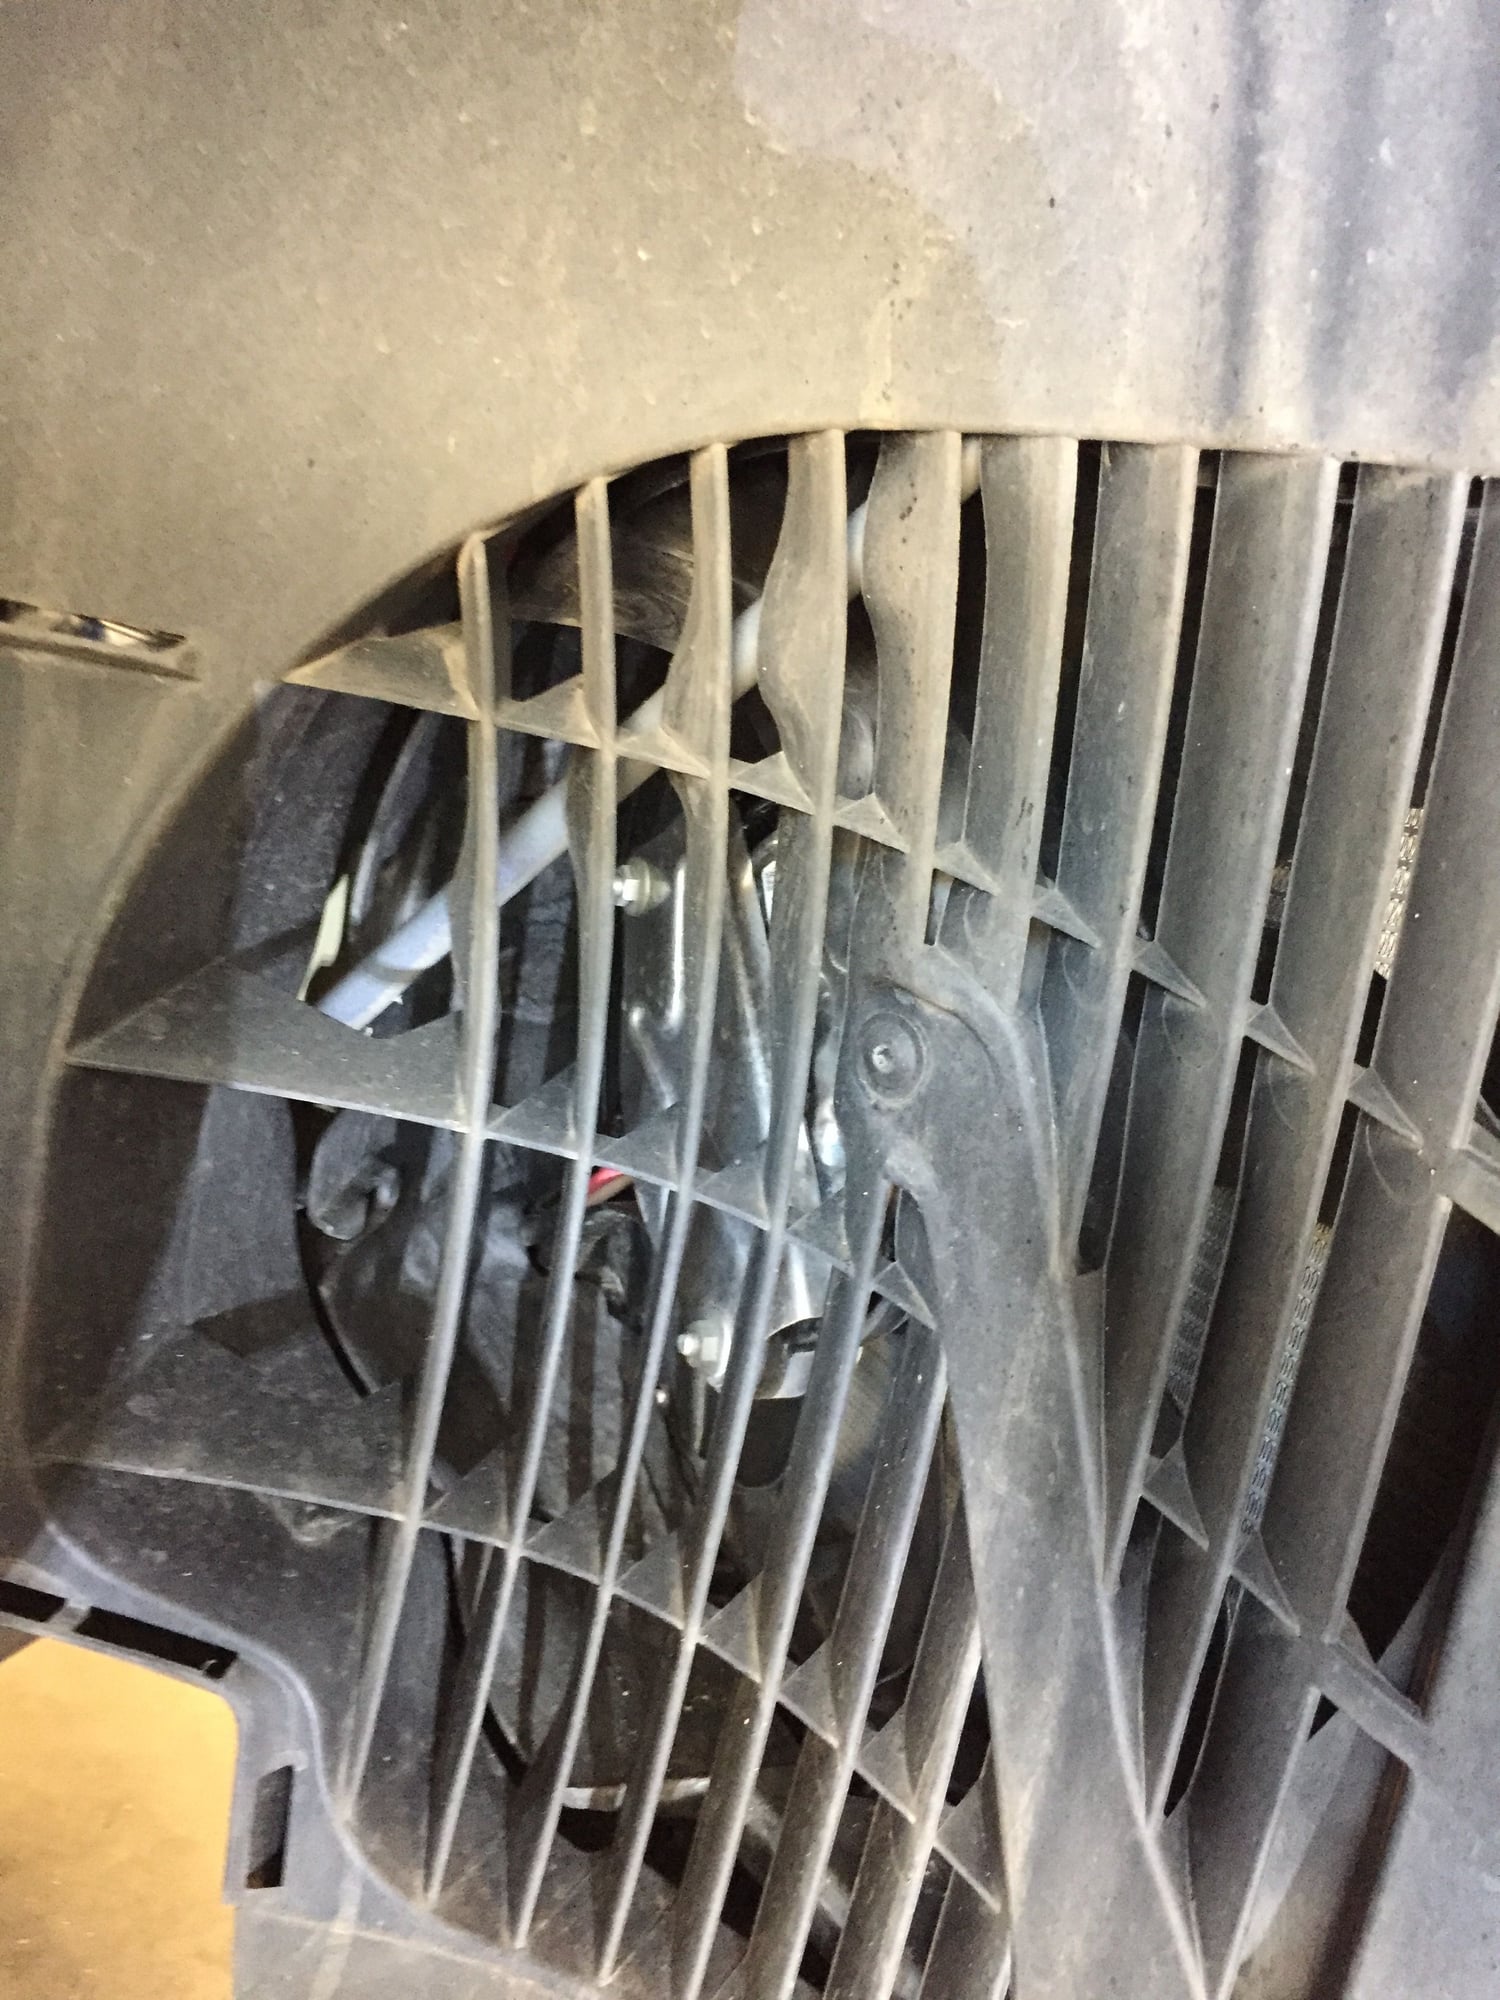
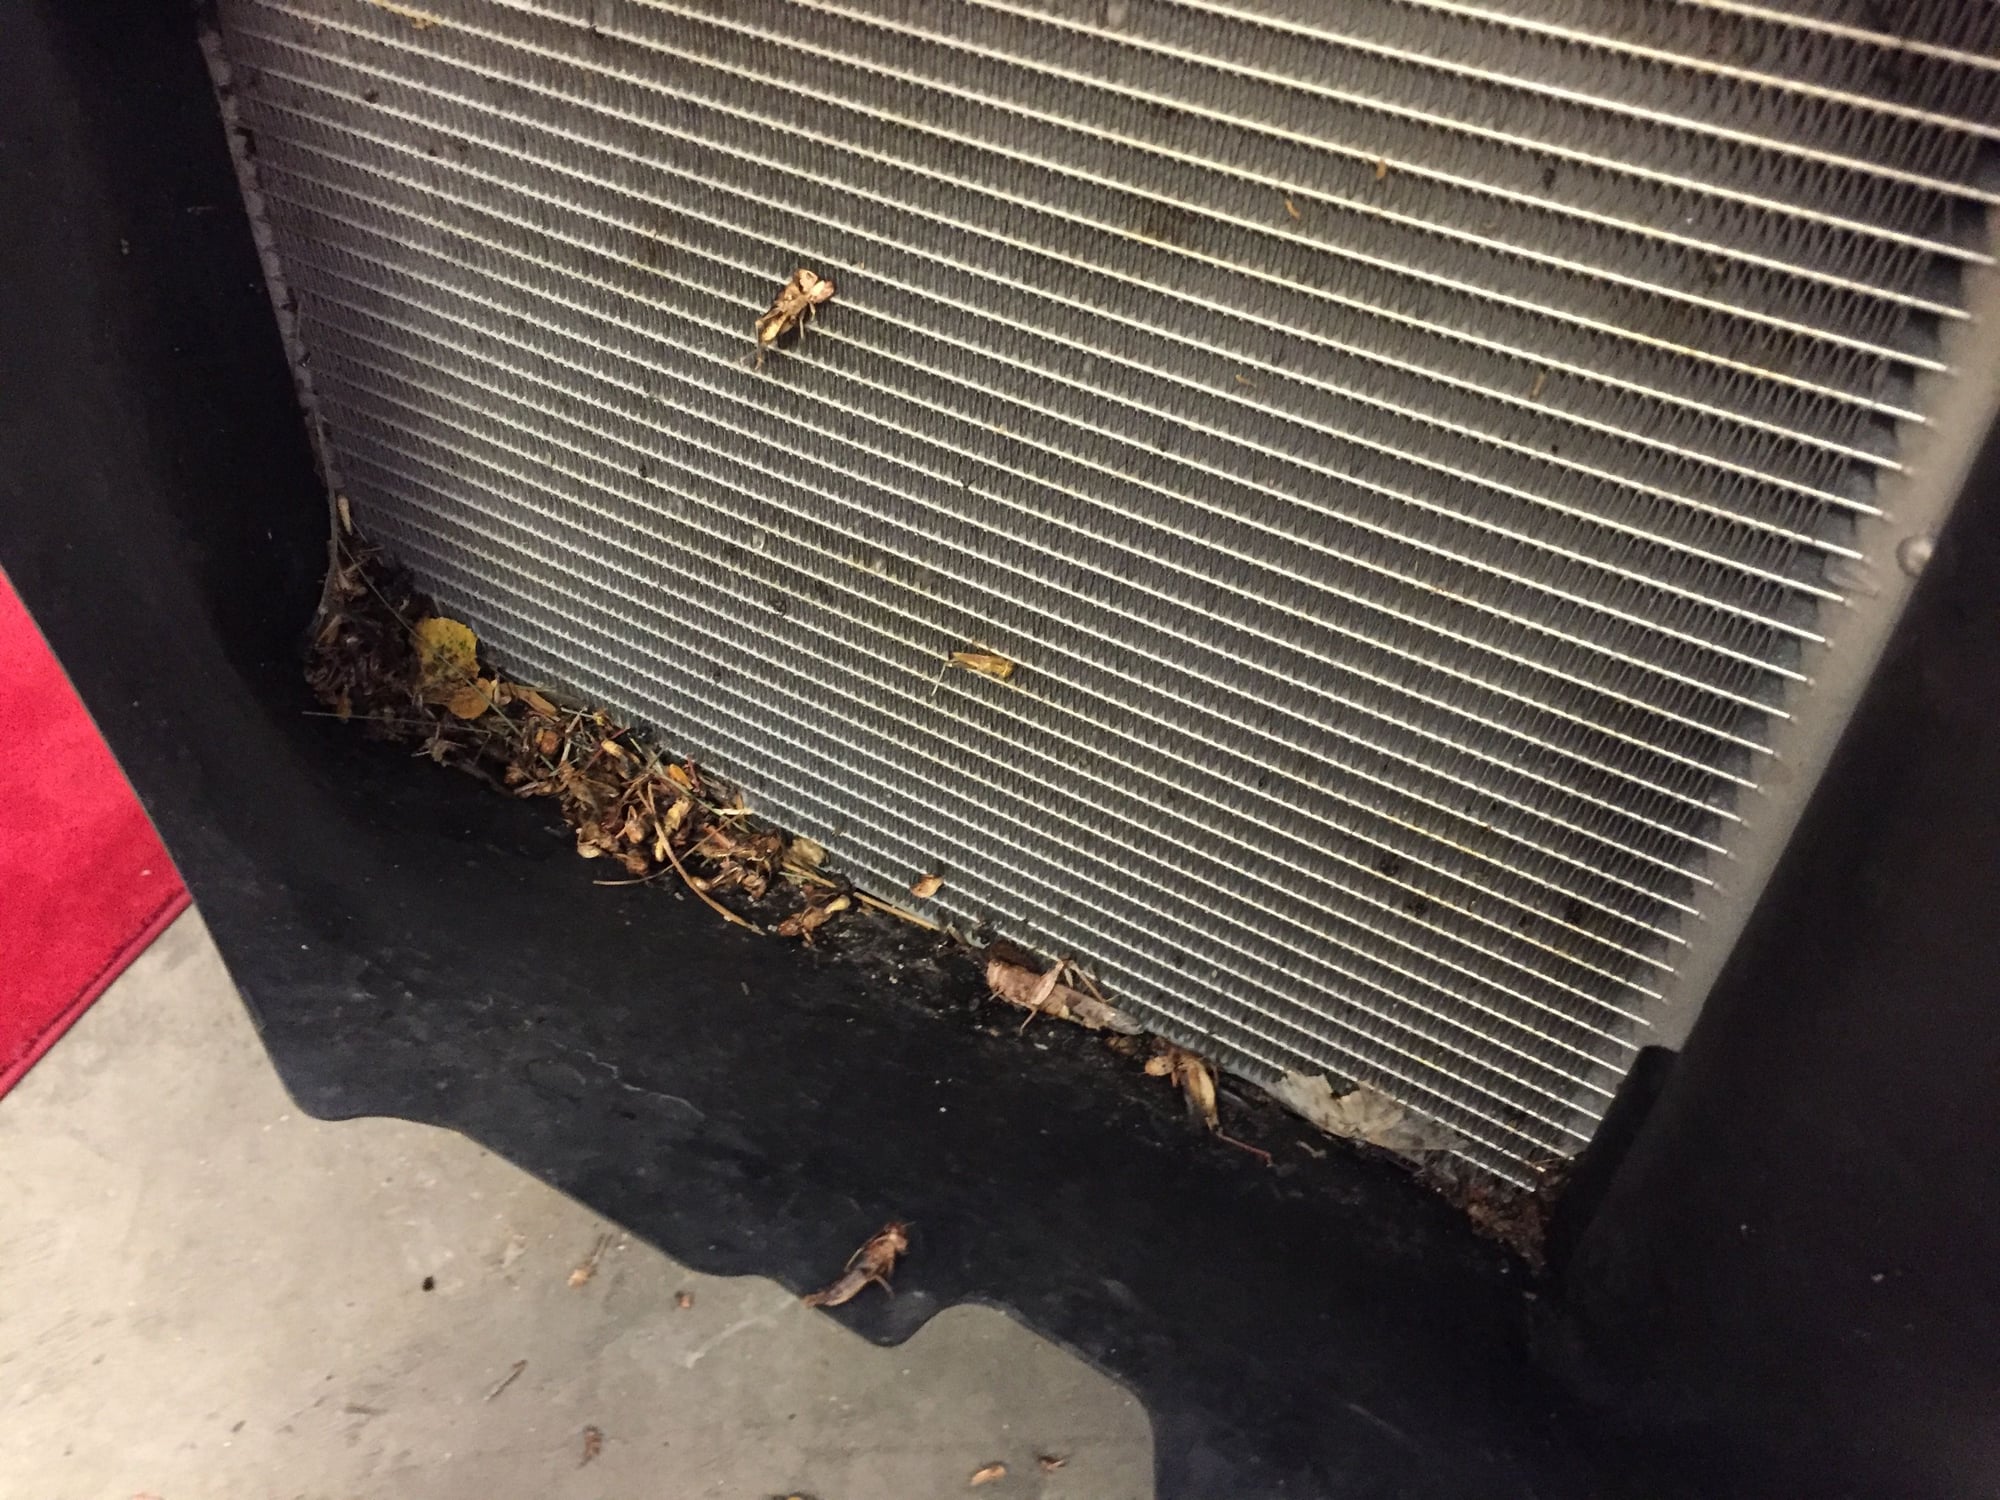
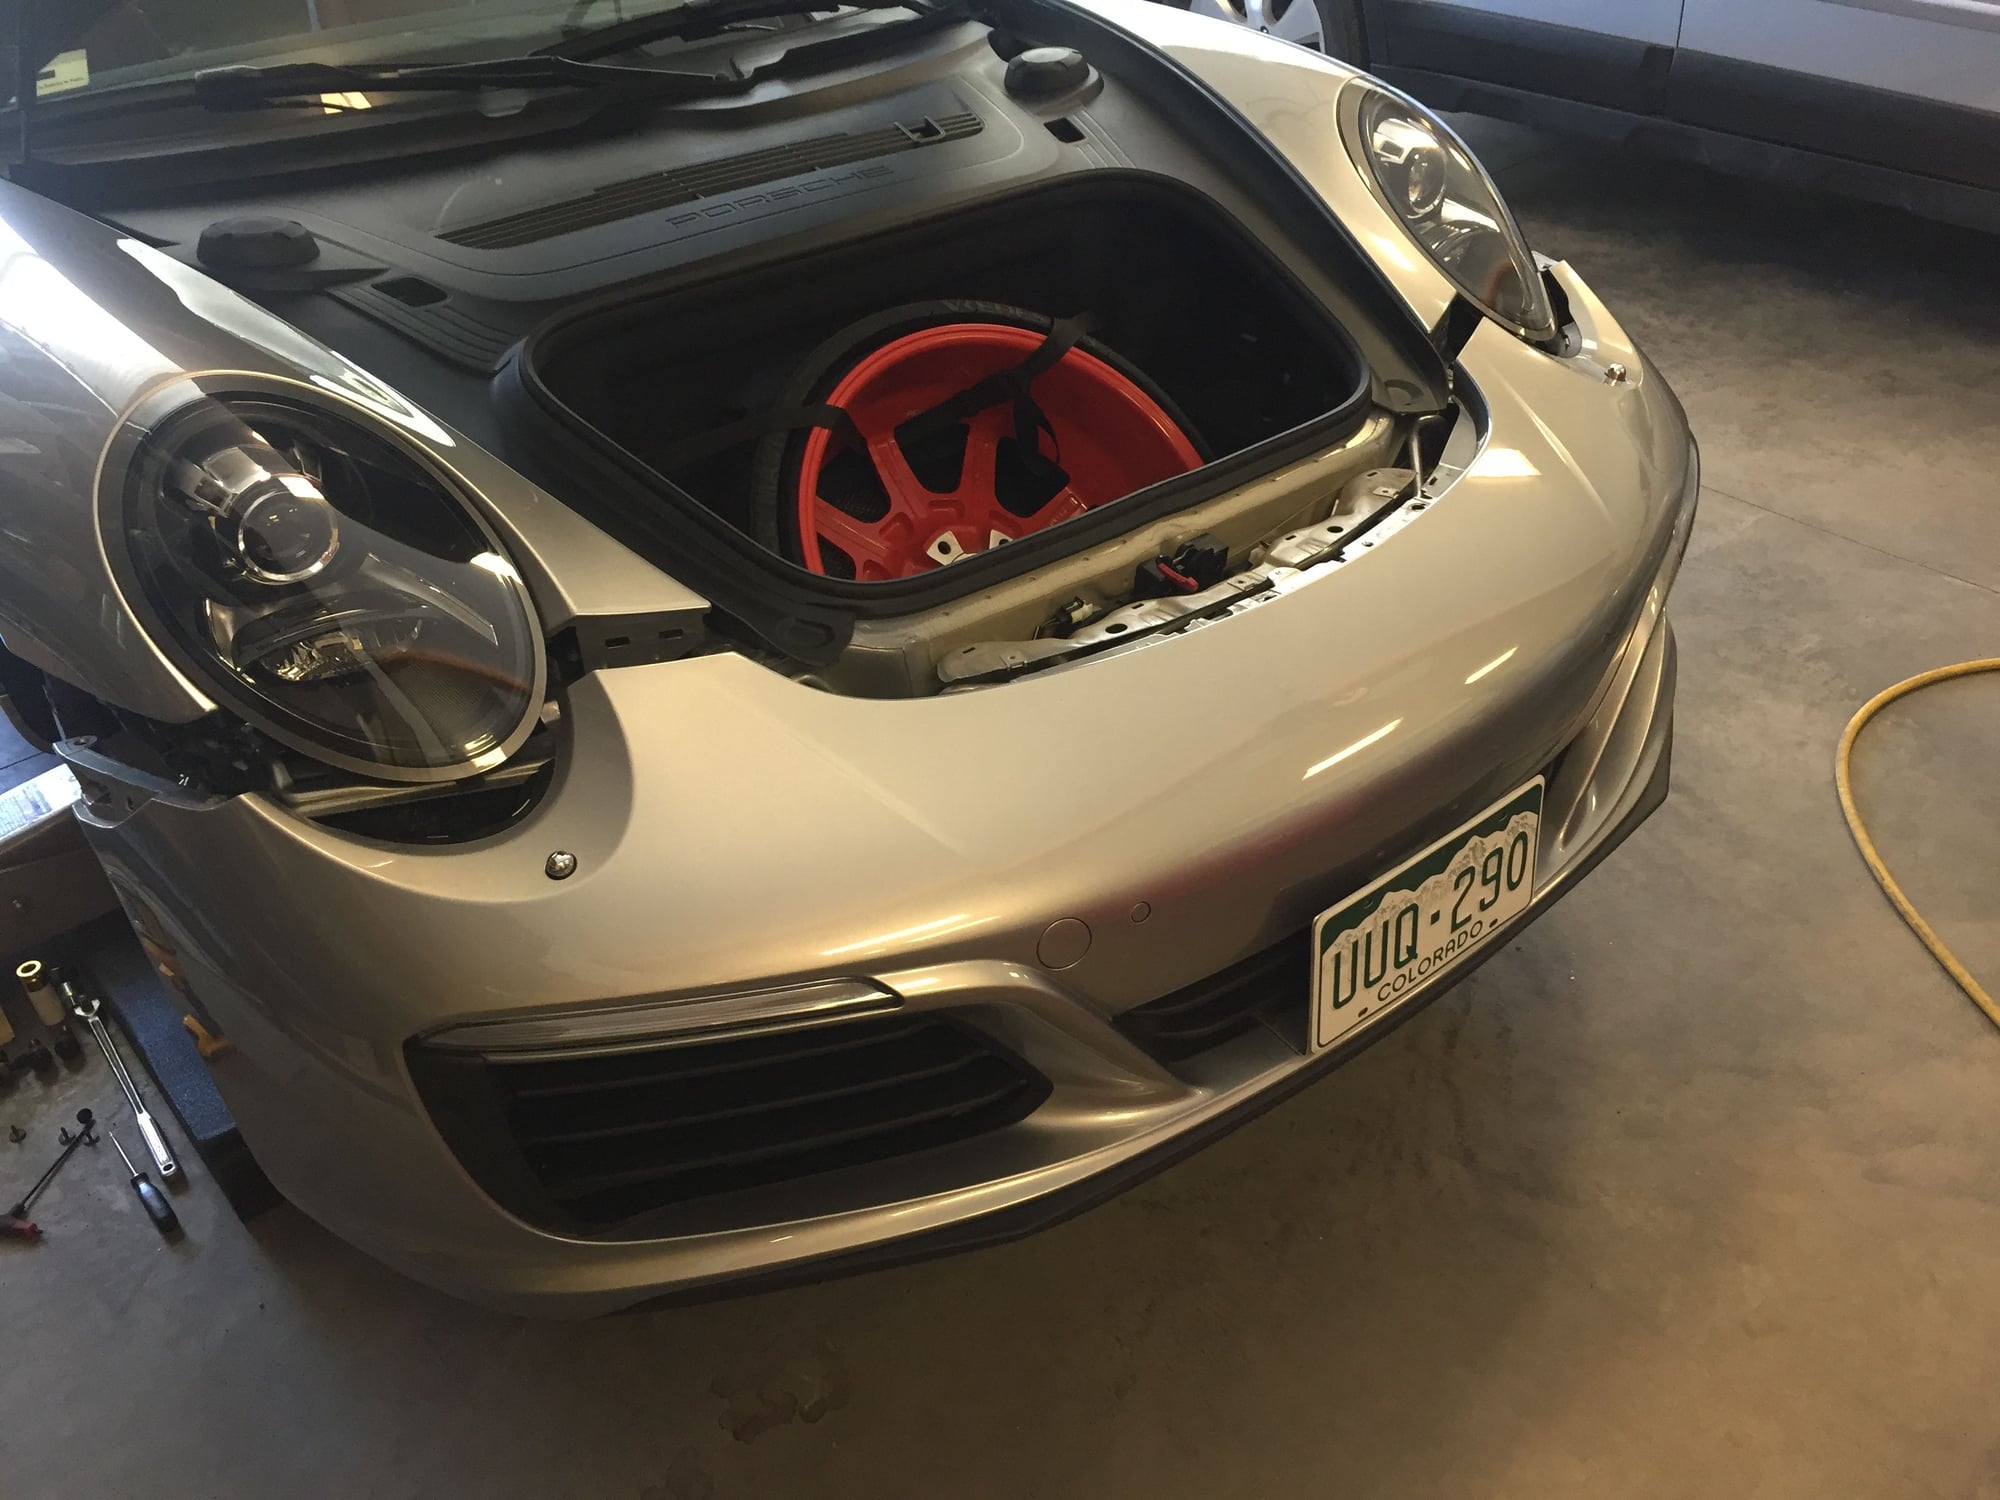
OK, here comes another long overly-detailed DIY with lots of photos. This started when I started to clean my 2017 C2 for a local car show. When I tried to flush out the radiator intakes I got a return flow of dead grasshoppers. Looking inside the grill I saw this:
I tried more flushing and then vacuuming, but still had lots of dead bugs. Coupled with curiosity about the process, I decided to try removing the bumper cover.
Before I describe the process, here are the main points, some of which differ from the 991.1:
- The front wheels must come off, since...
- The front fender liners must come out, since...
- All the electrical and headlight washer connections are only accessible below and behind the headlight brackets.
- The headlights do not come out (in fact, it seems difficult to remove the headlights without removing the bumper cover first.
Note that I learned this process by exploration, and the order I recommend is not exactly what I did. I also started with the wheels in place, on ramps, and later removed the wheels. So some photos are not perfectly in sync with this narrative.
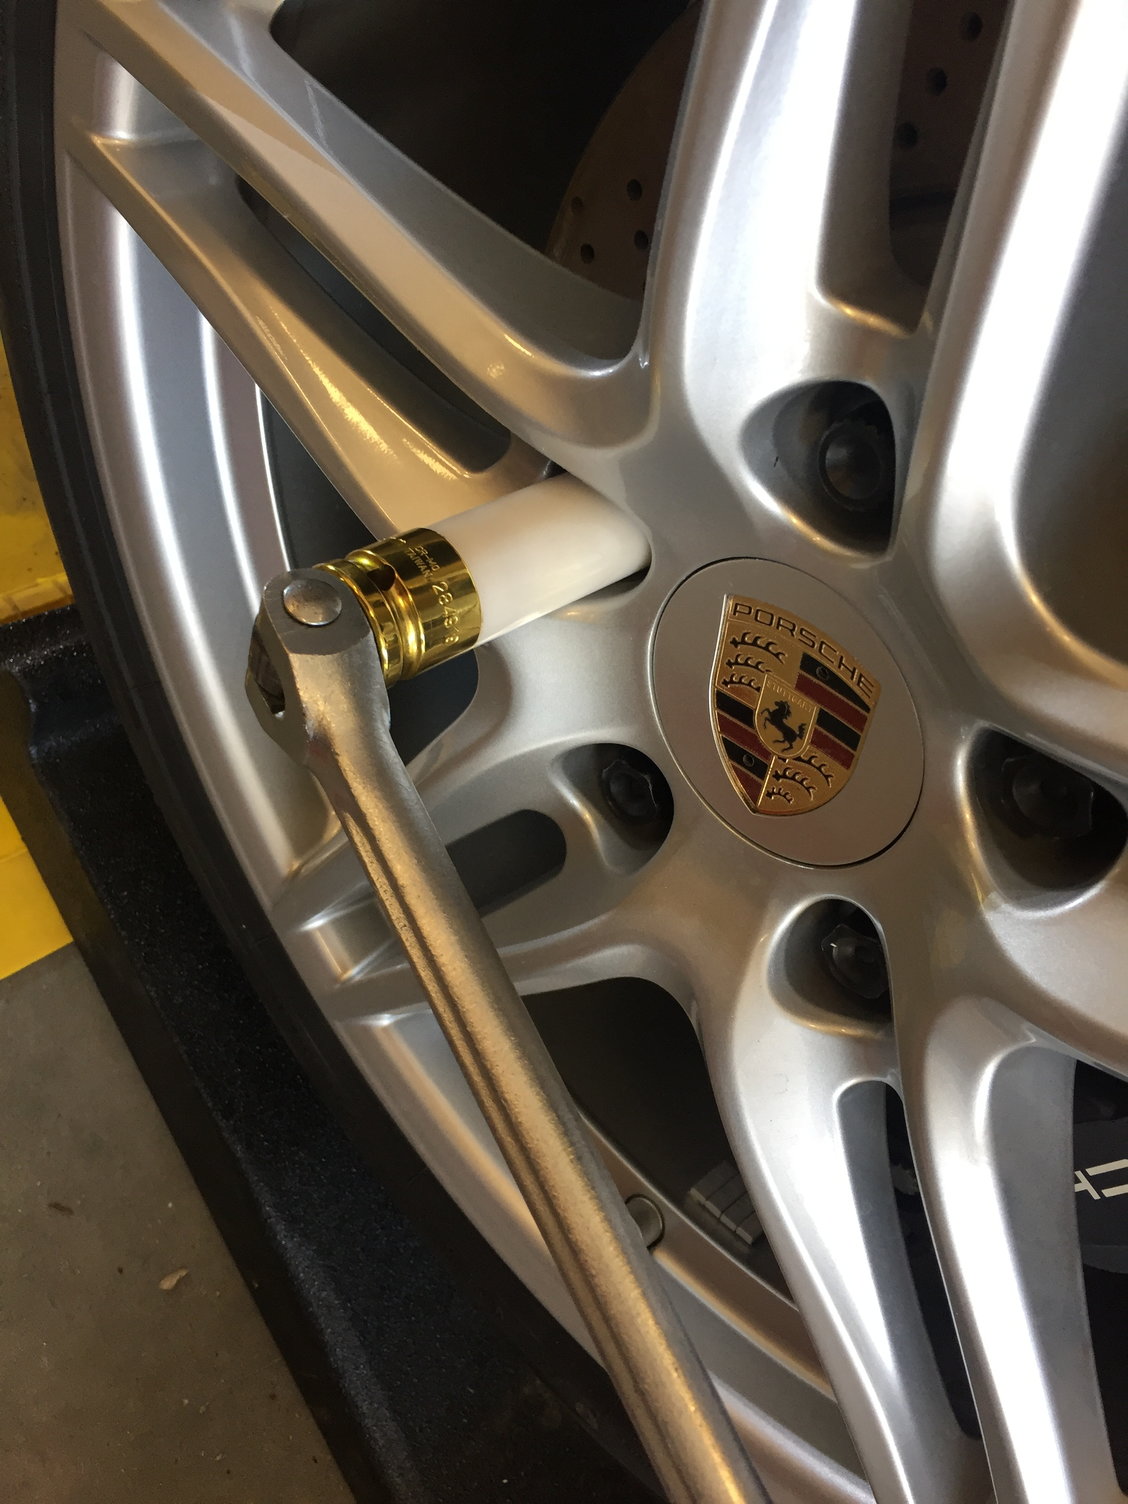
Start by jacking up the front of the car and removing both wheels. Everyone has a "soft socket", right?
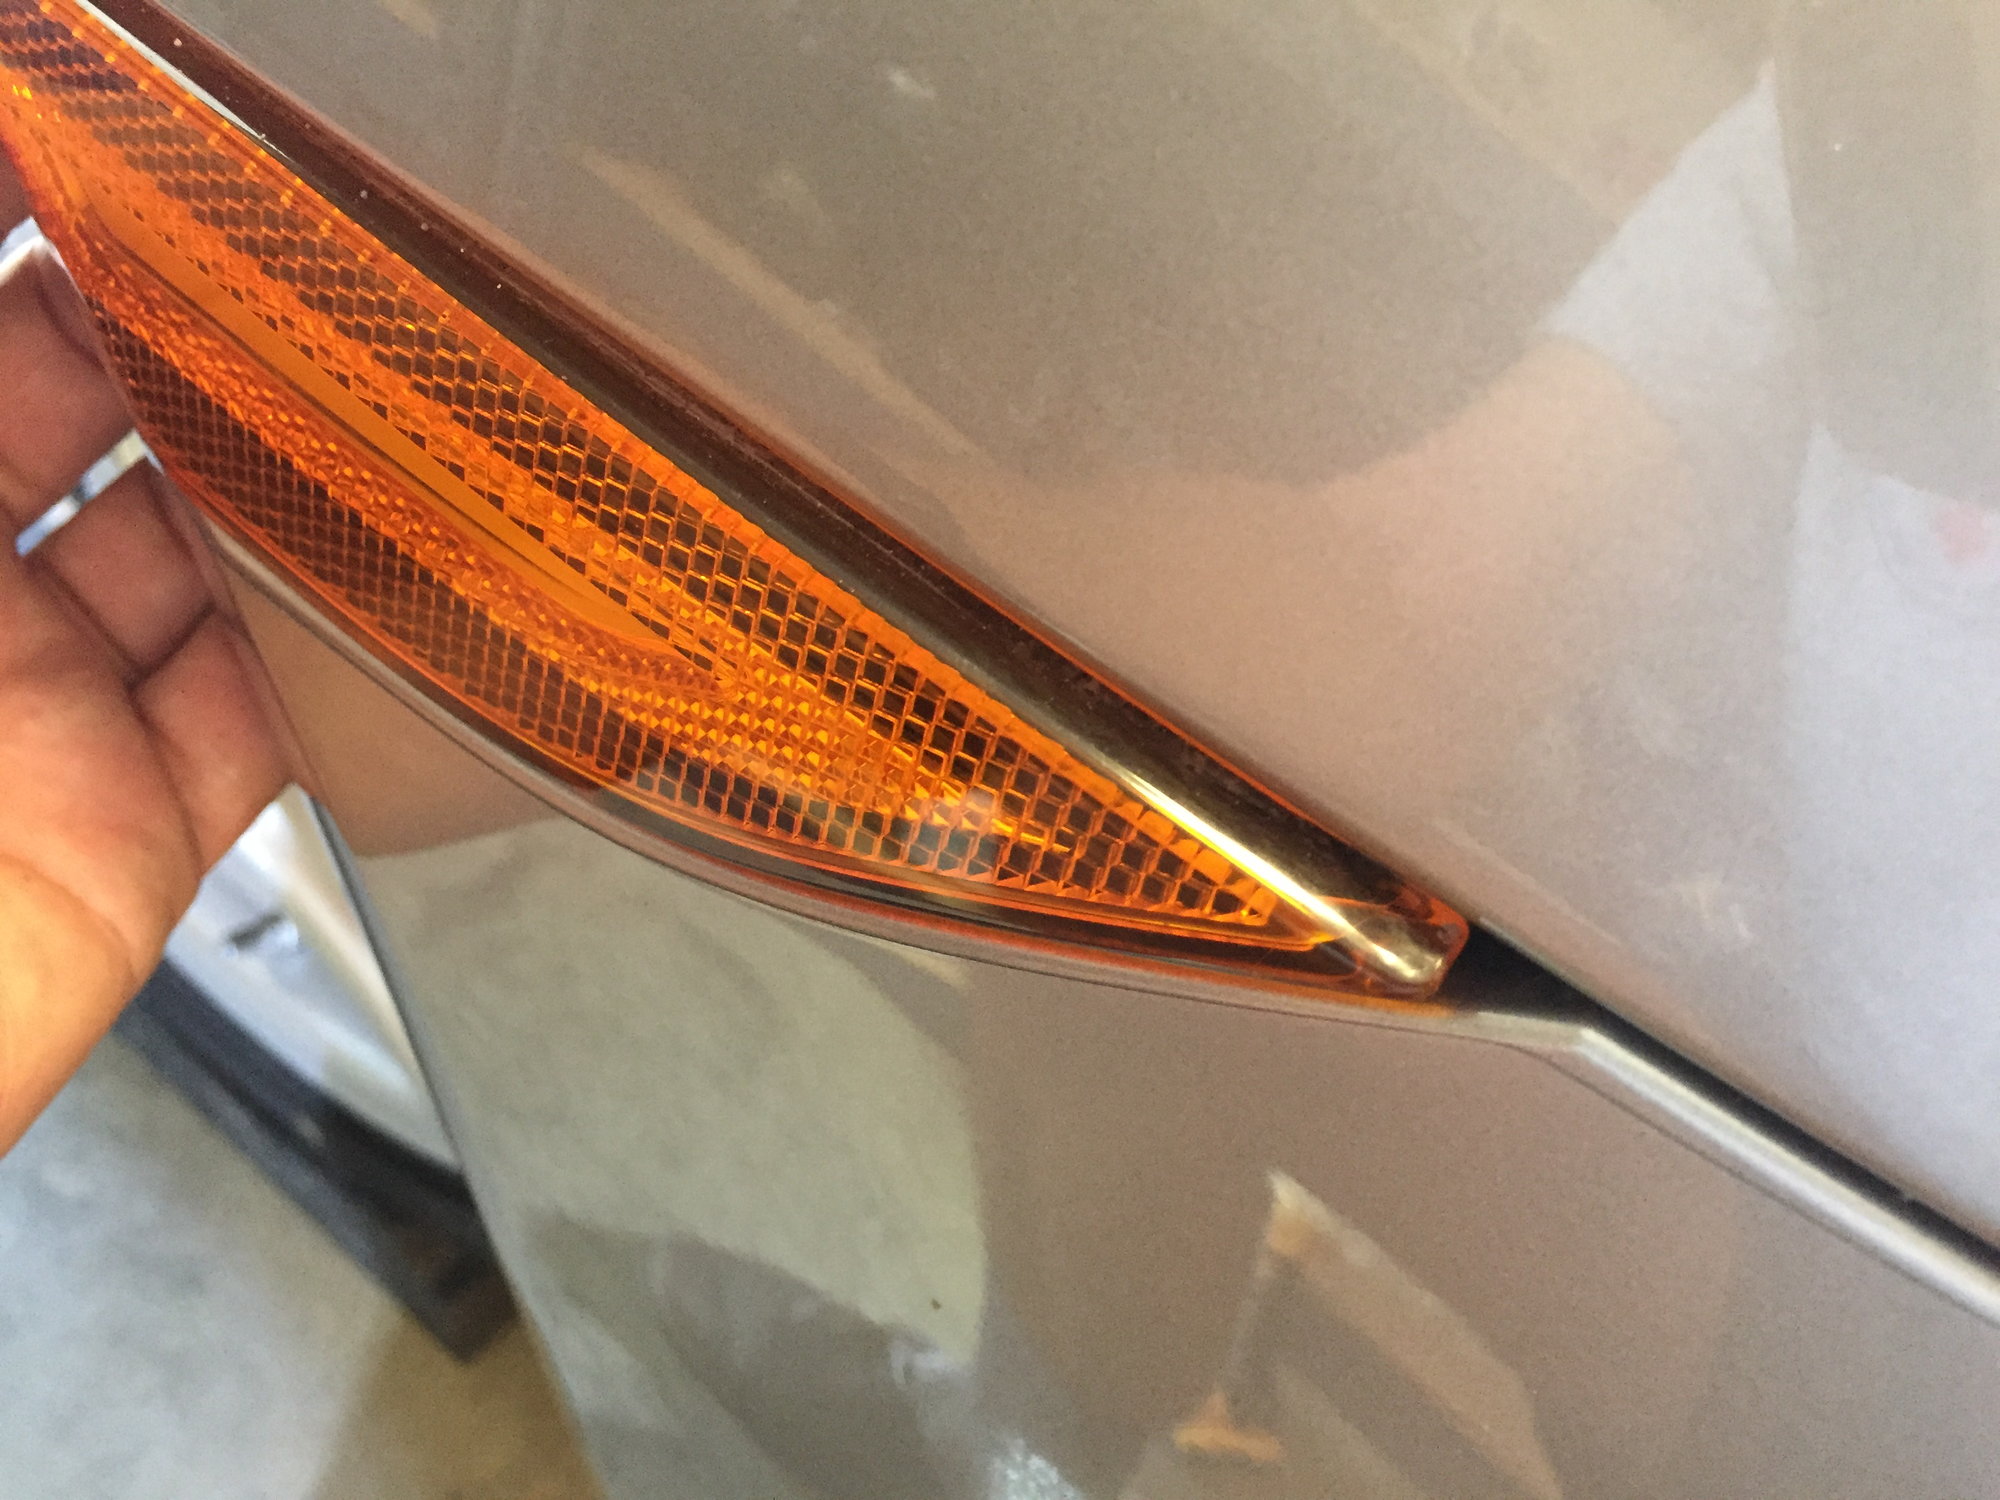
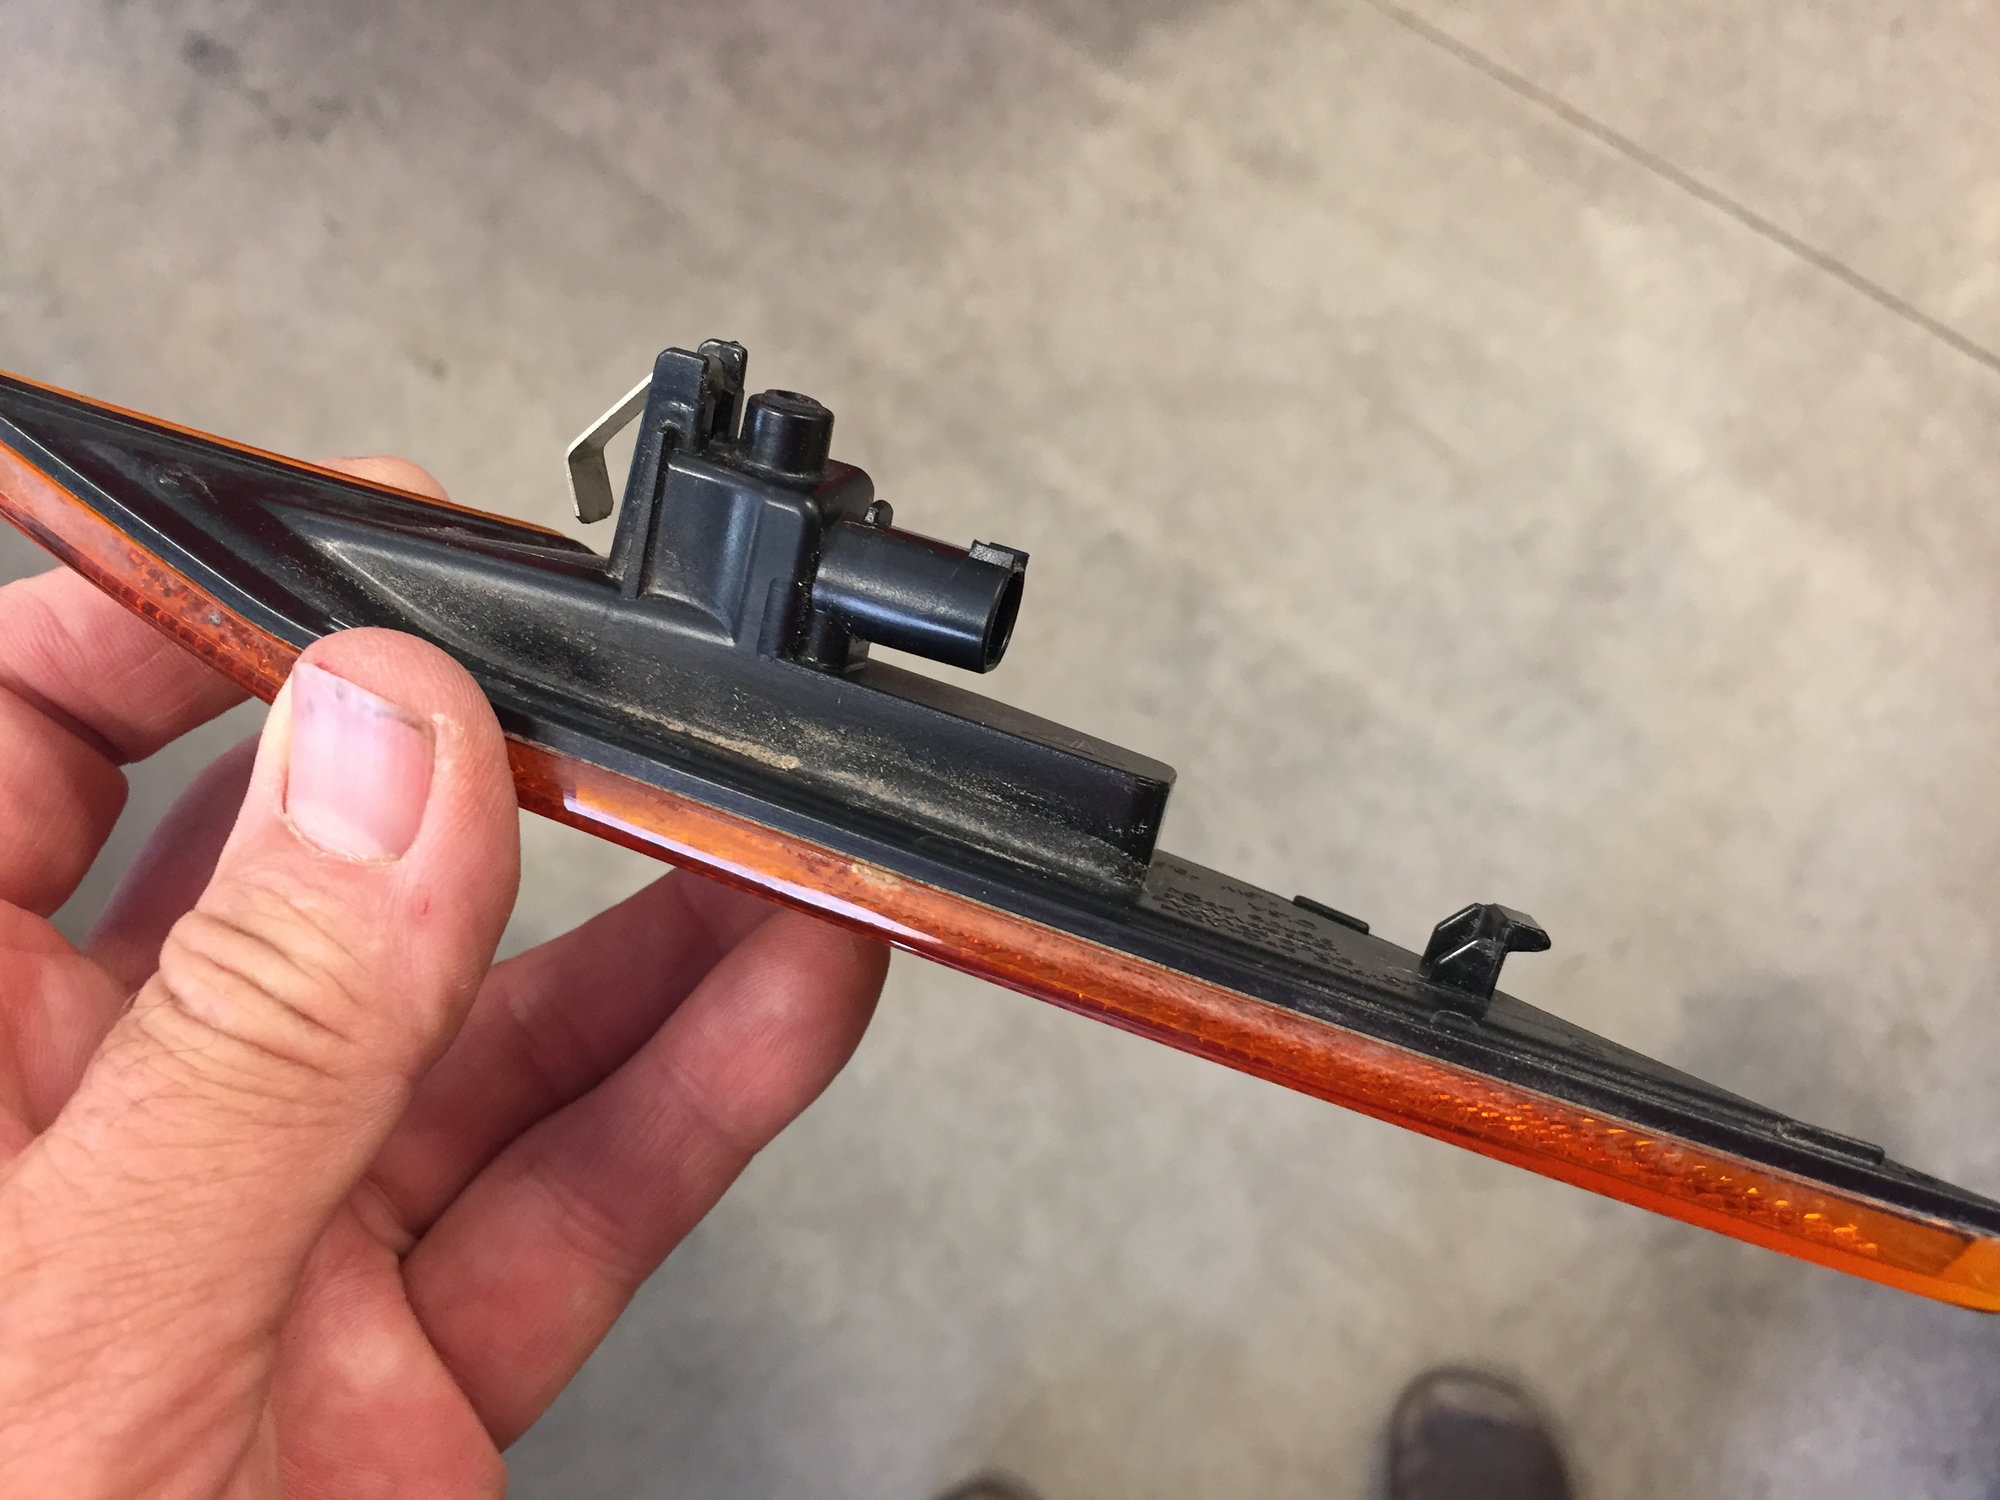
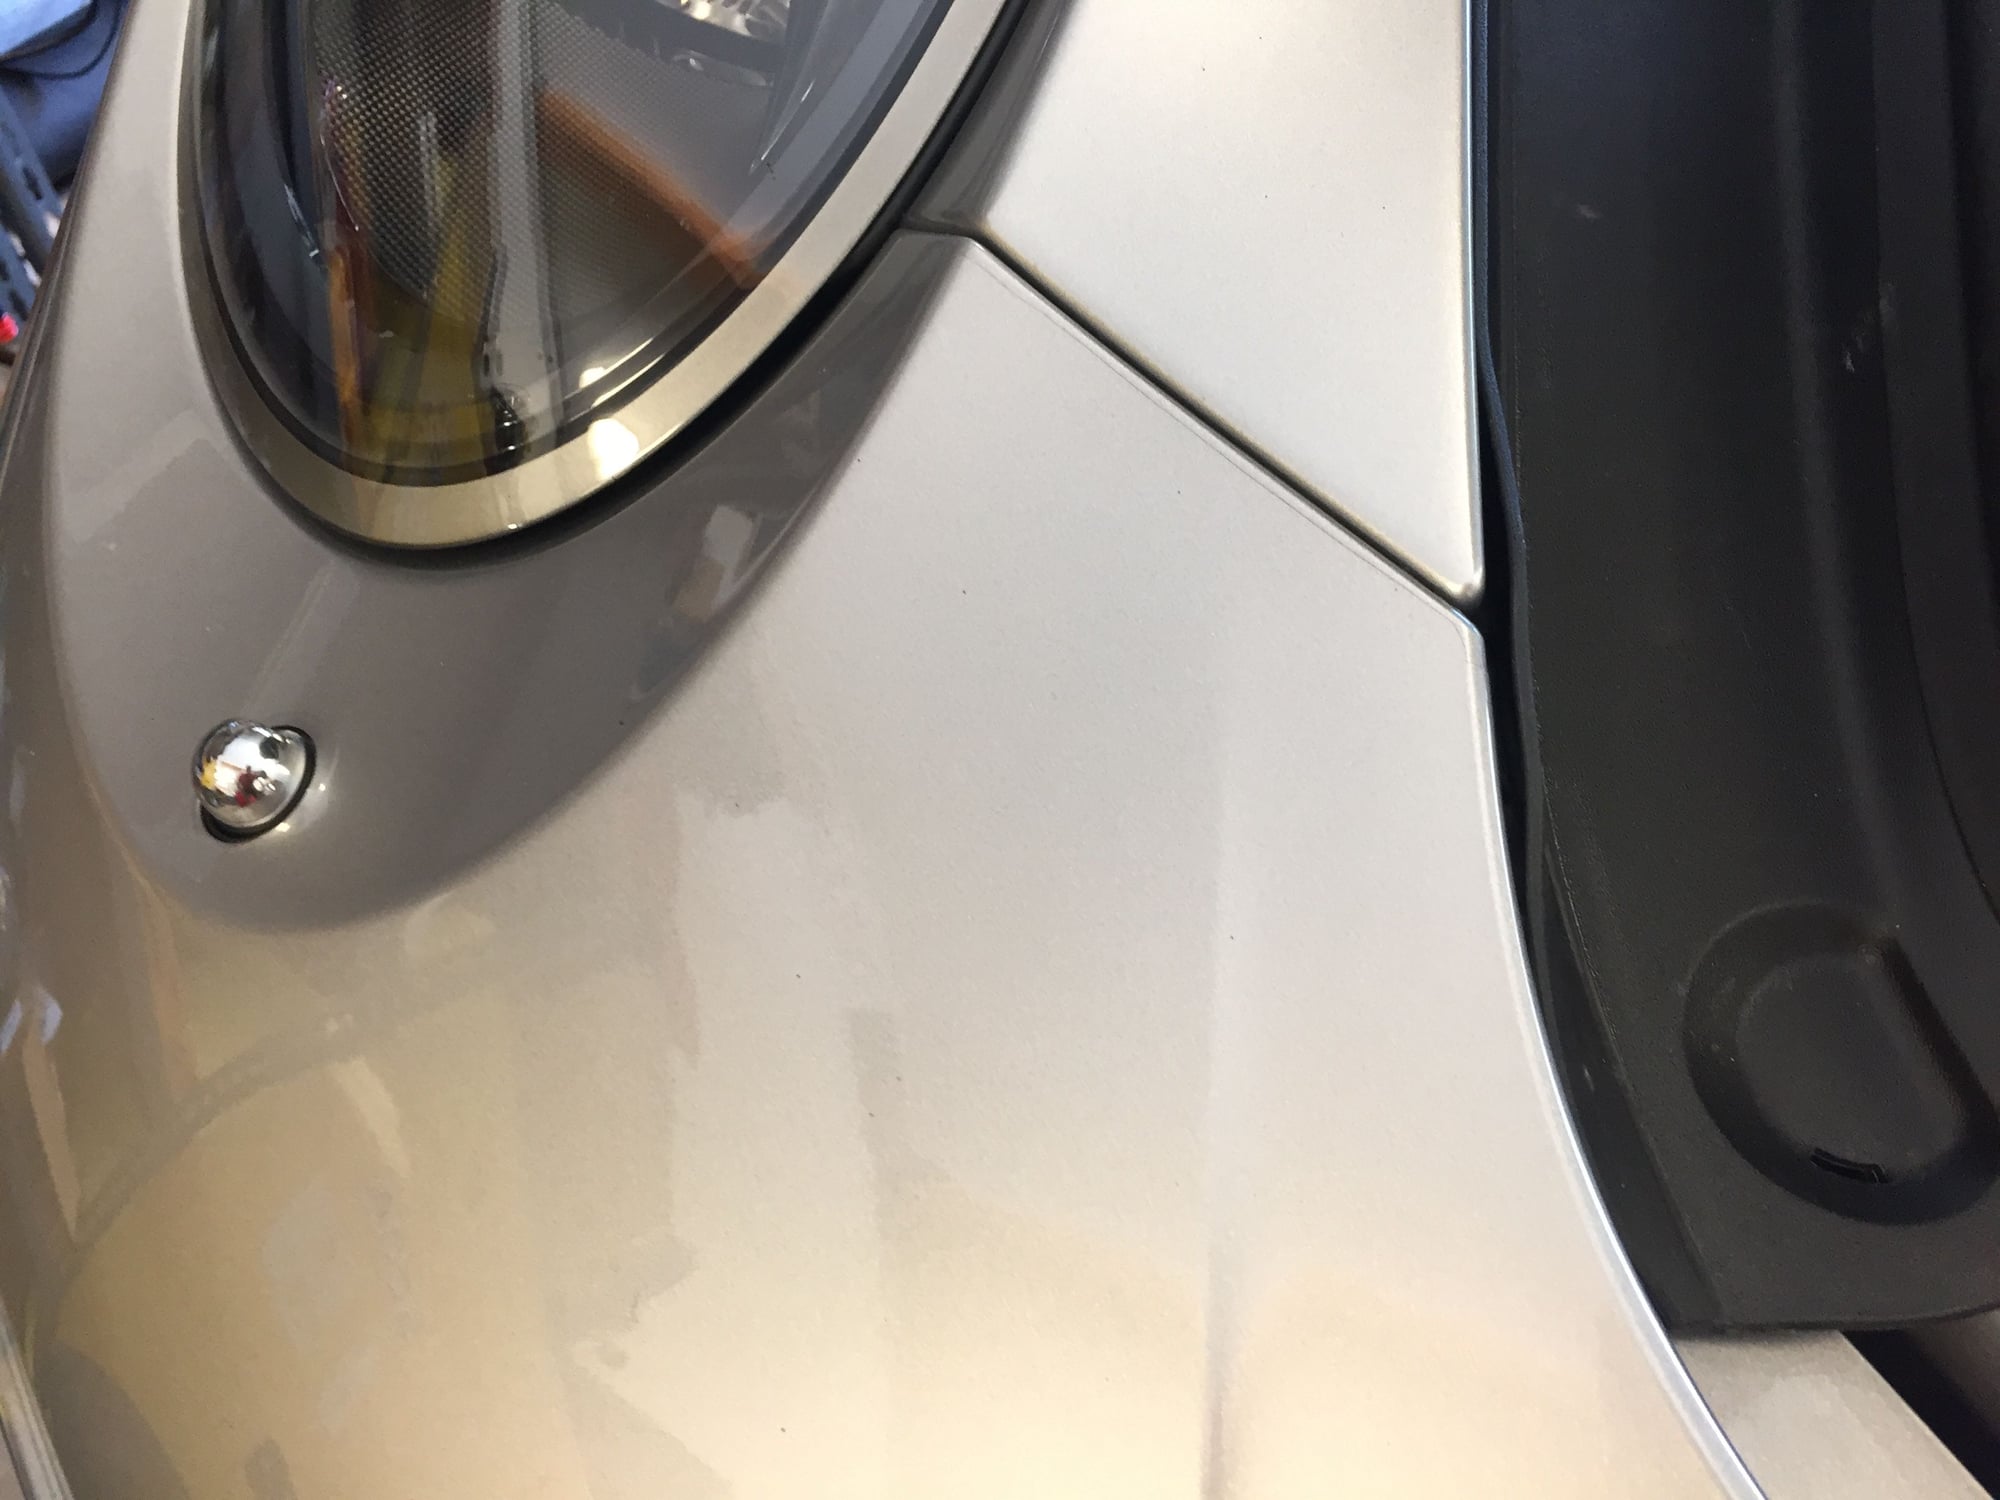
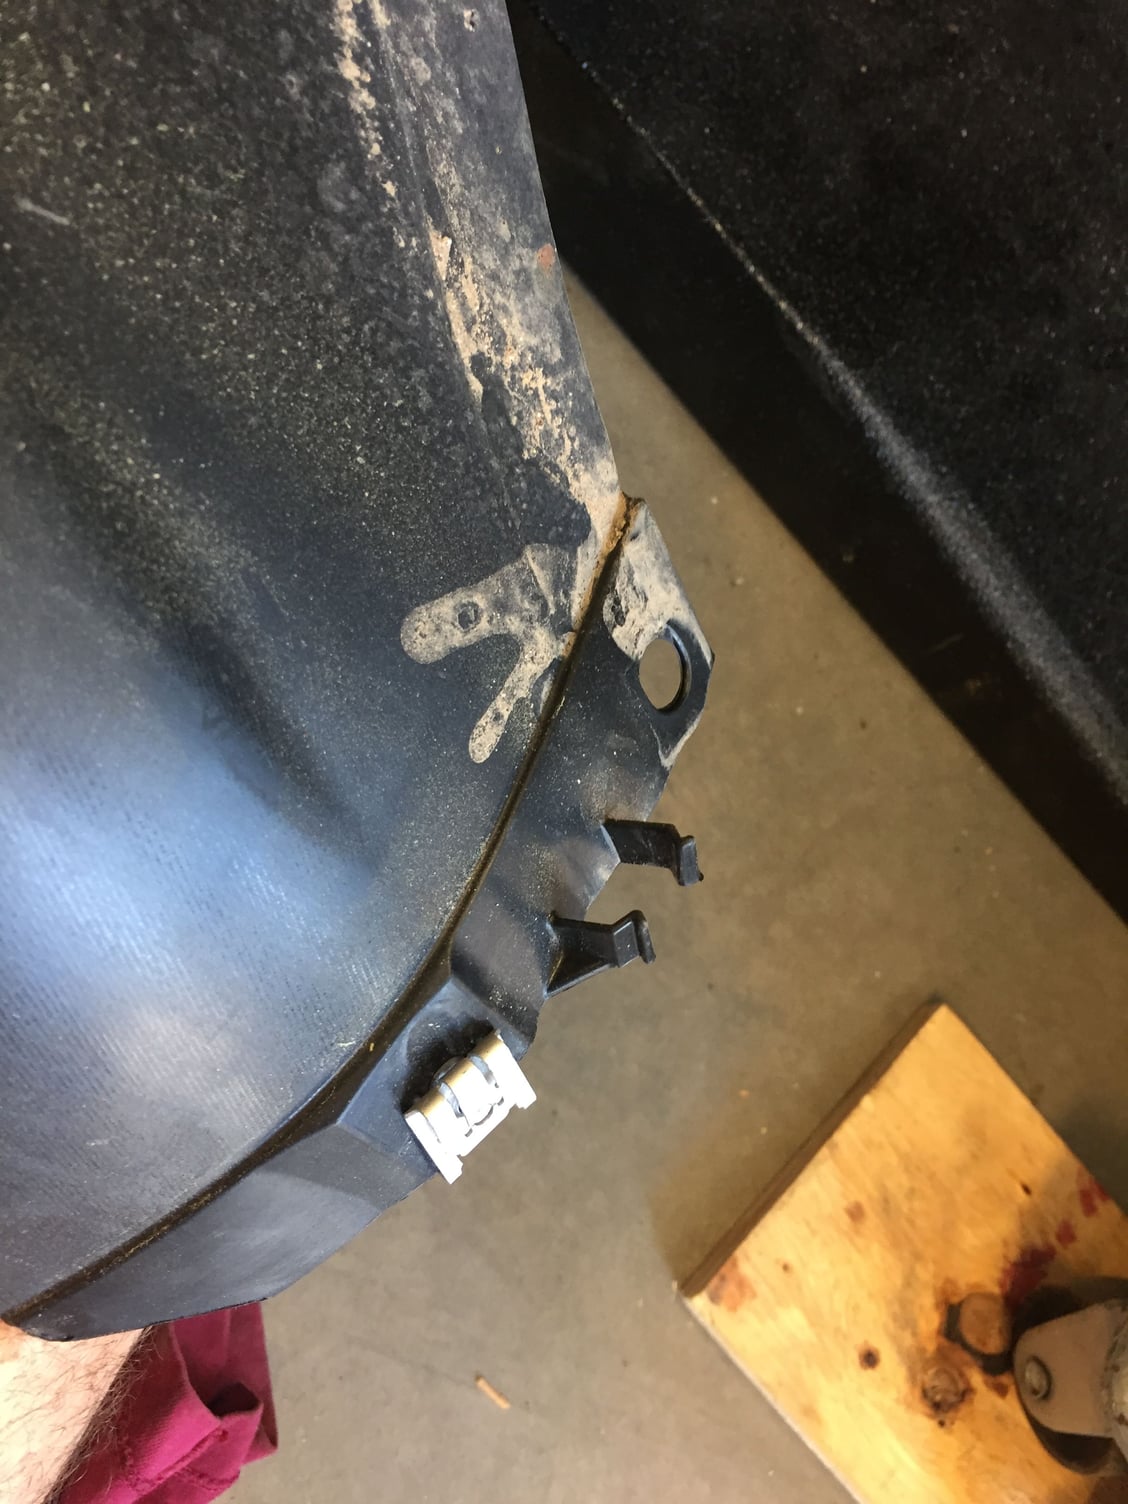
Remove the side marker lights. Many people have suggested how to do this. I was able to remove these without tools. Push the light firmly towards the rear of the car, and then tease the front outward:
If it resists, then shift it front and rearward a few times. It should come out easily:
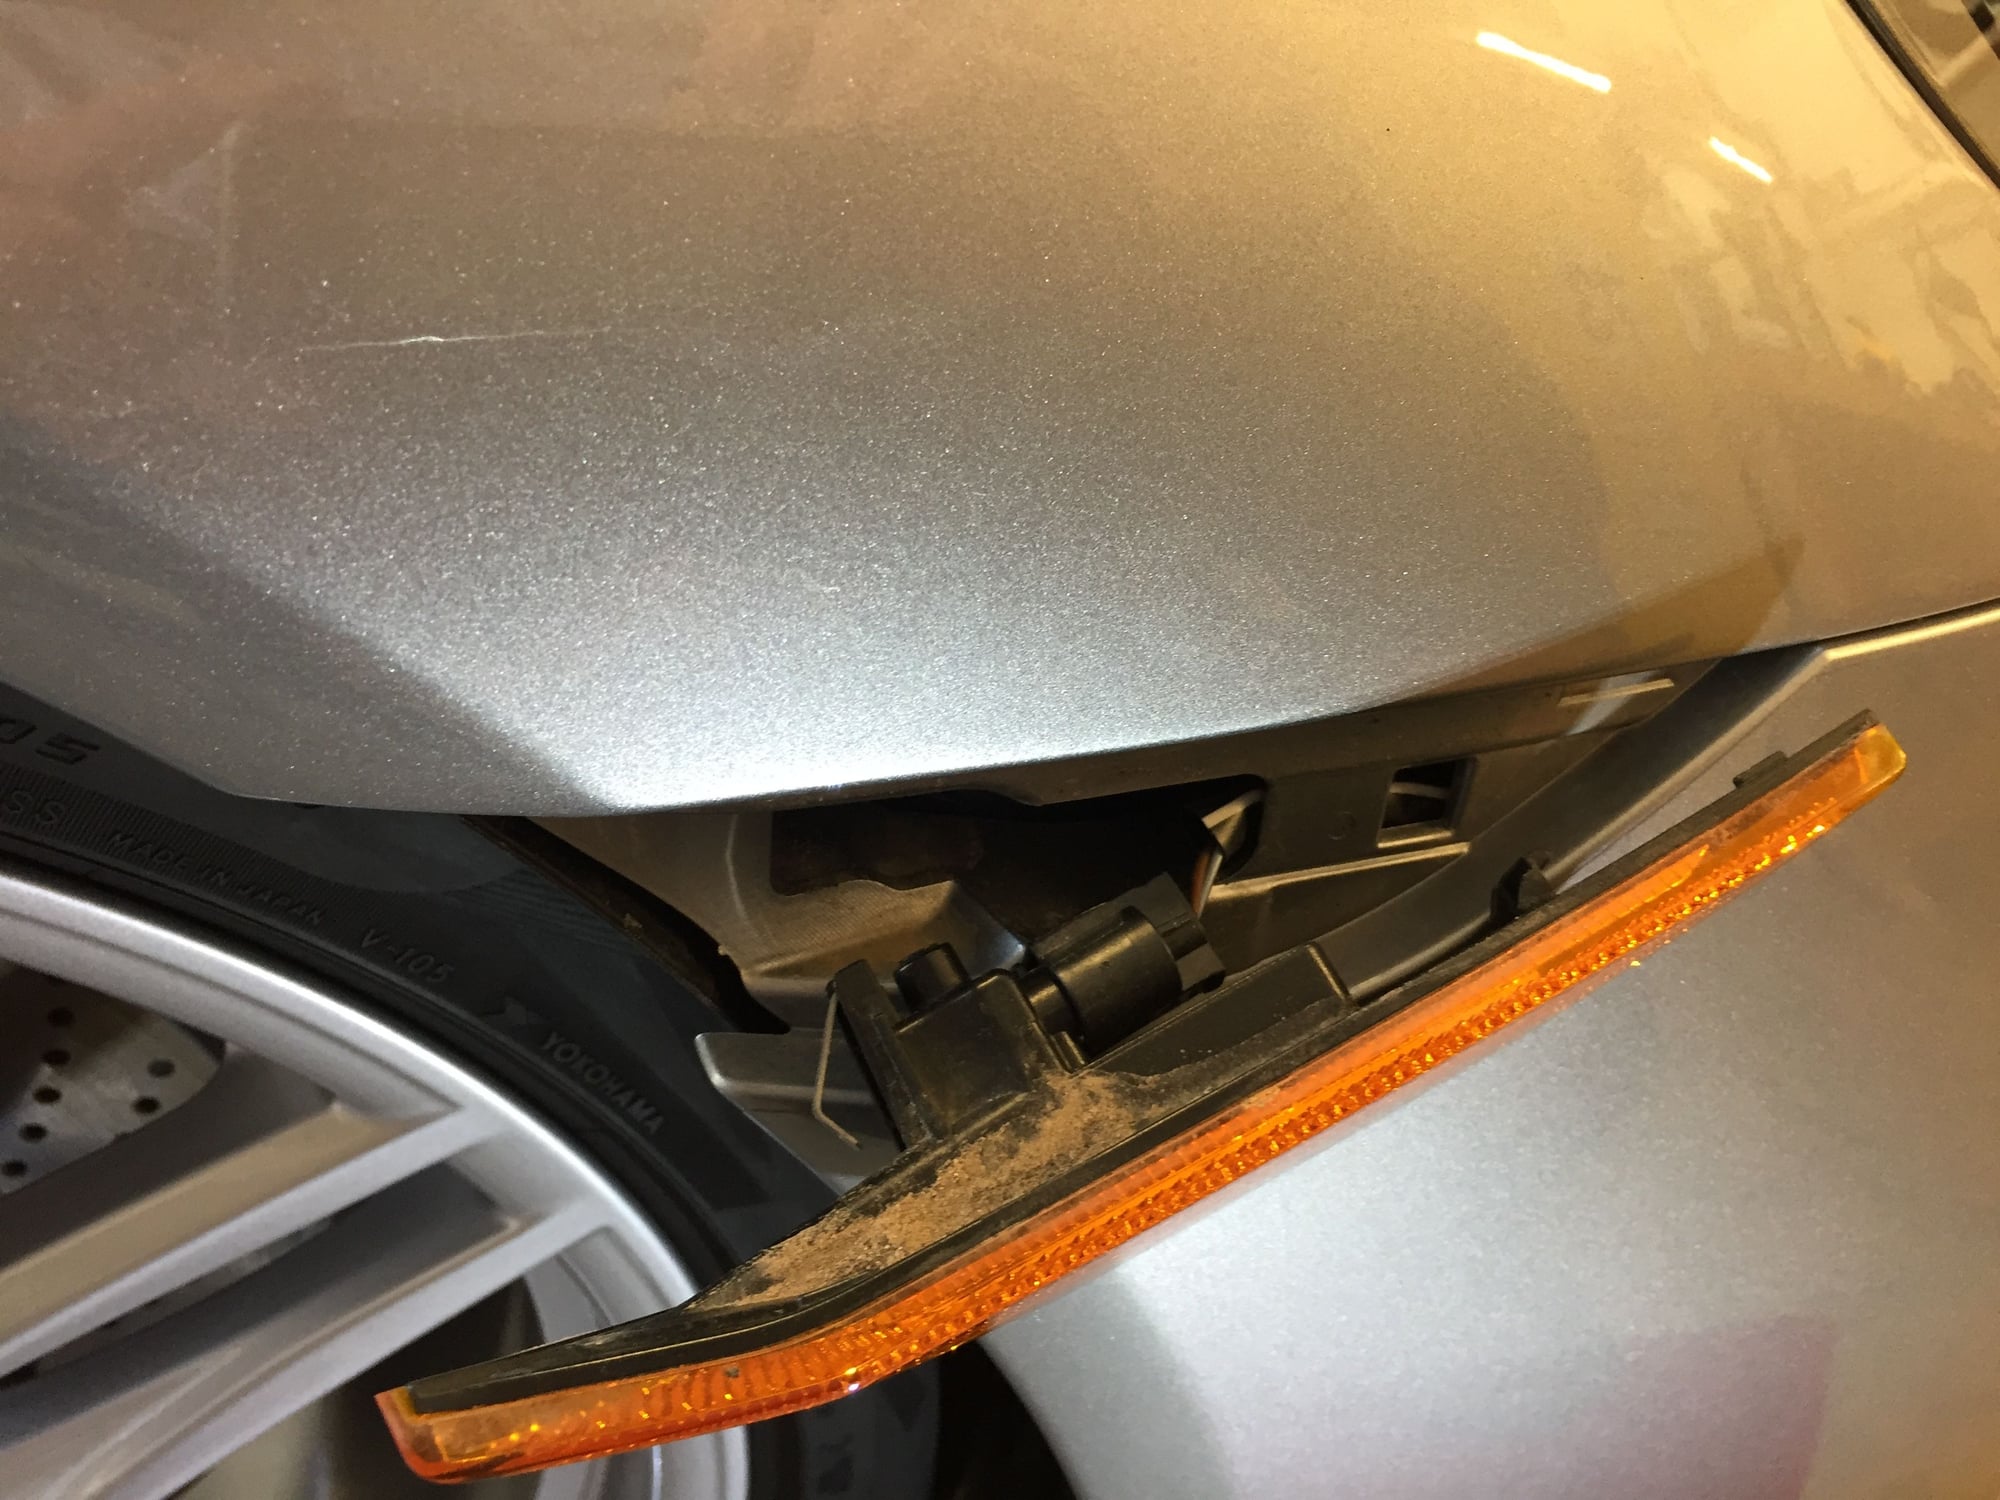
Note the retaining method for the side marker, a spring clip to the rear and a small hook towards the front:
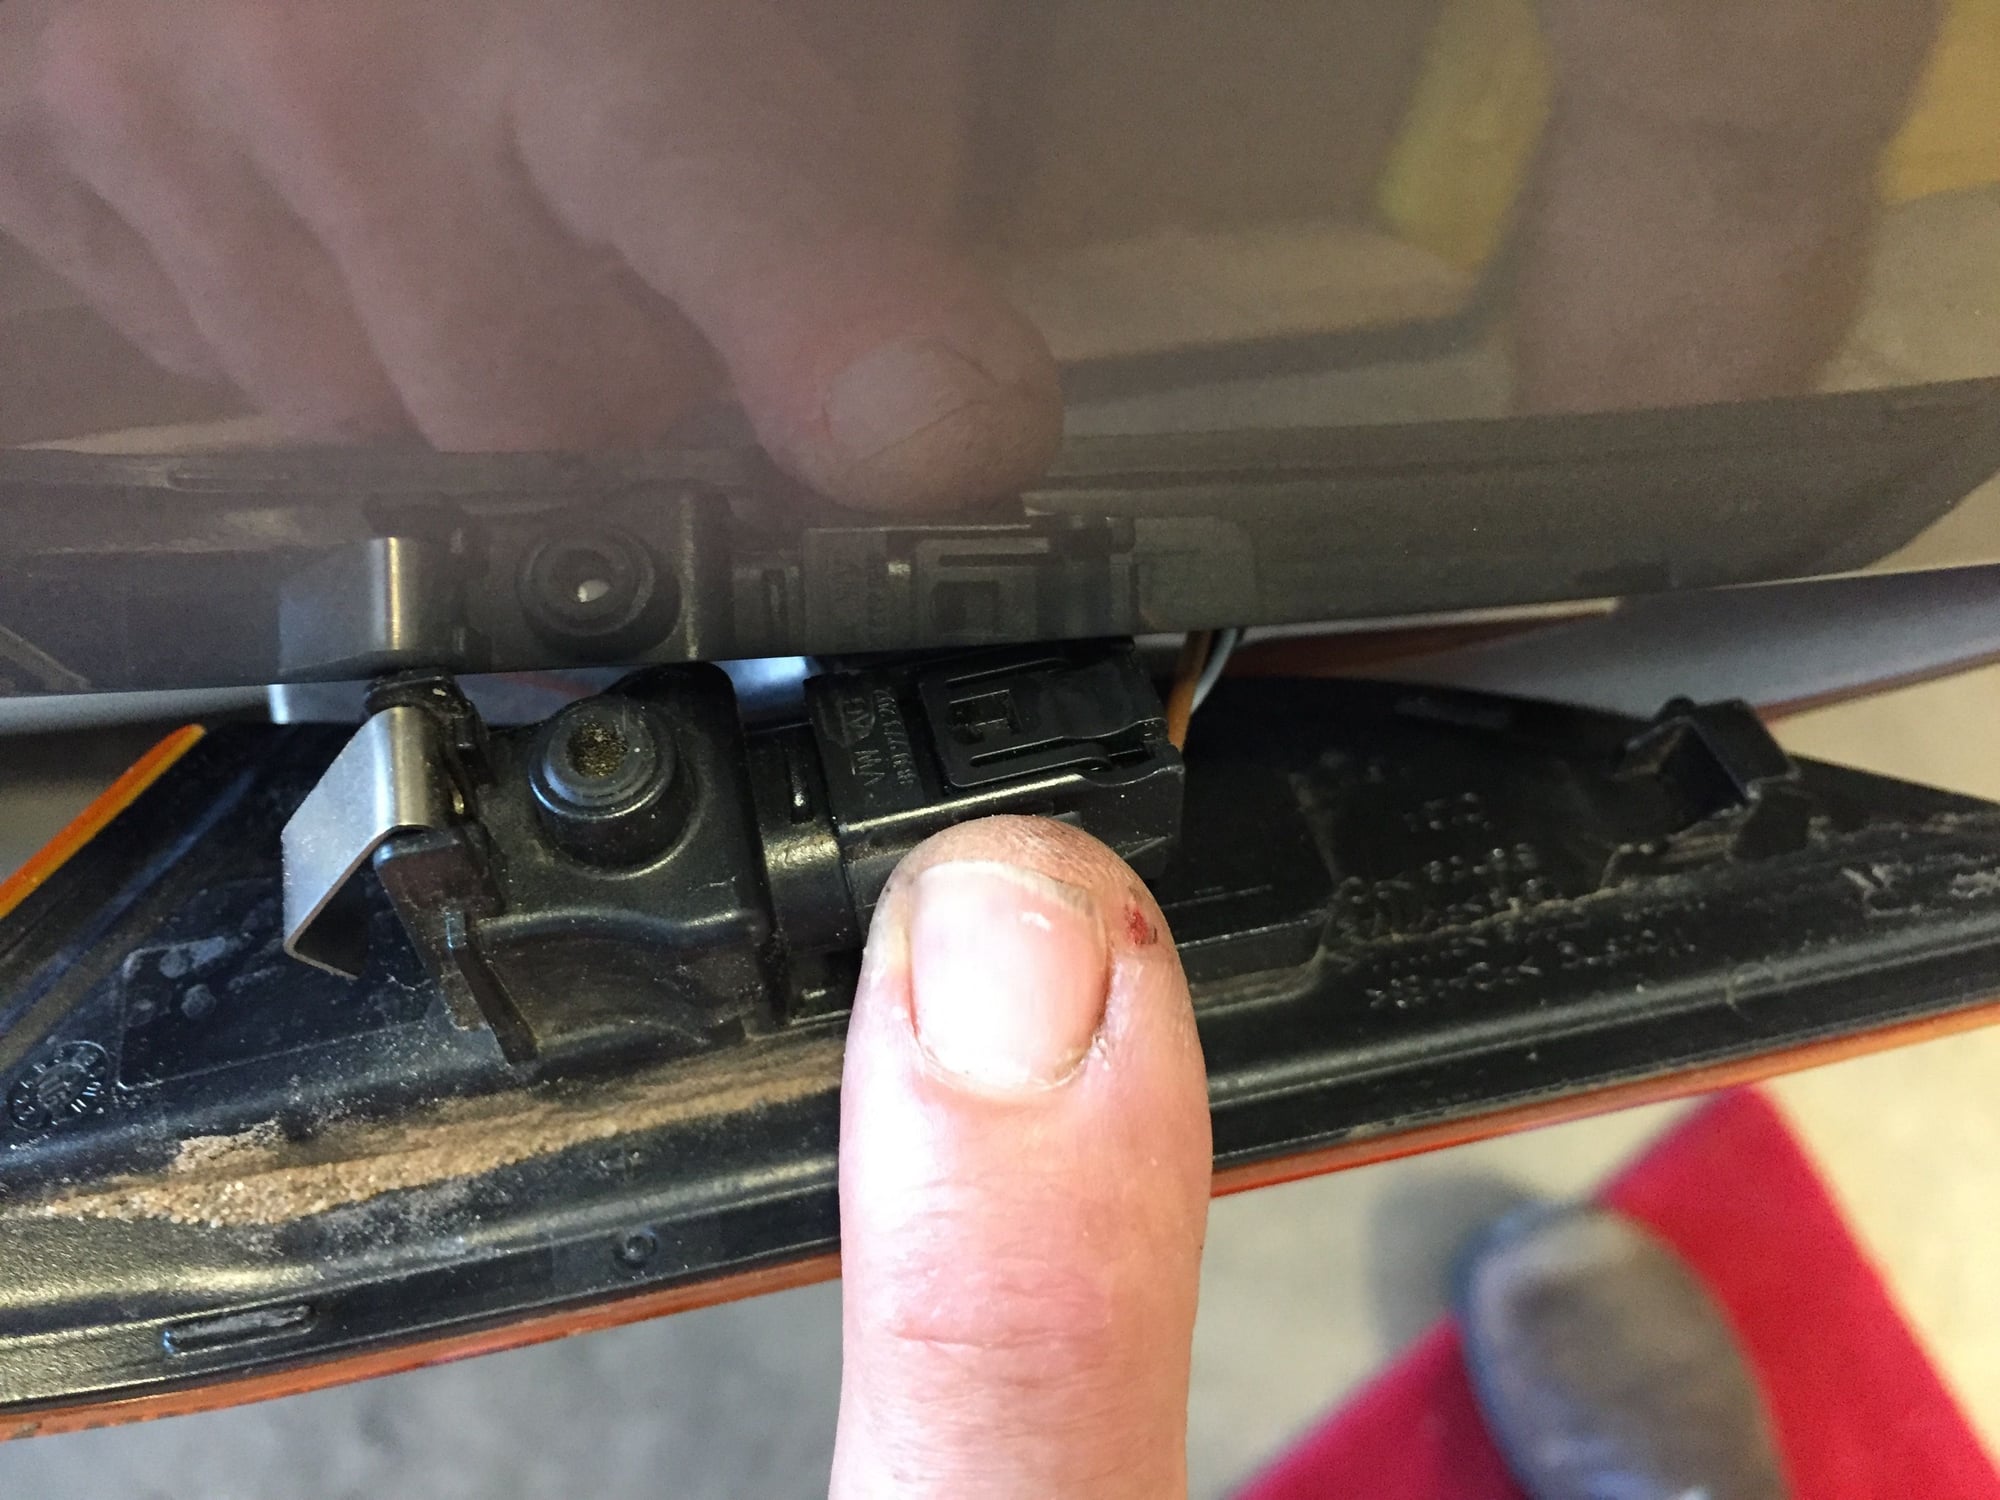
When the marker light is loose, undo the electrical connector by pressing on the release tab:
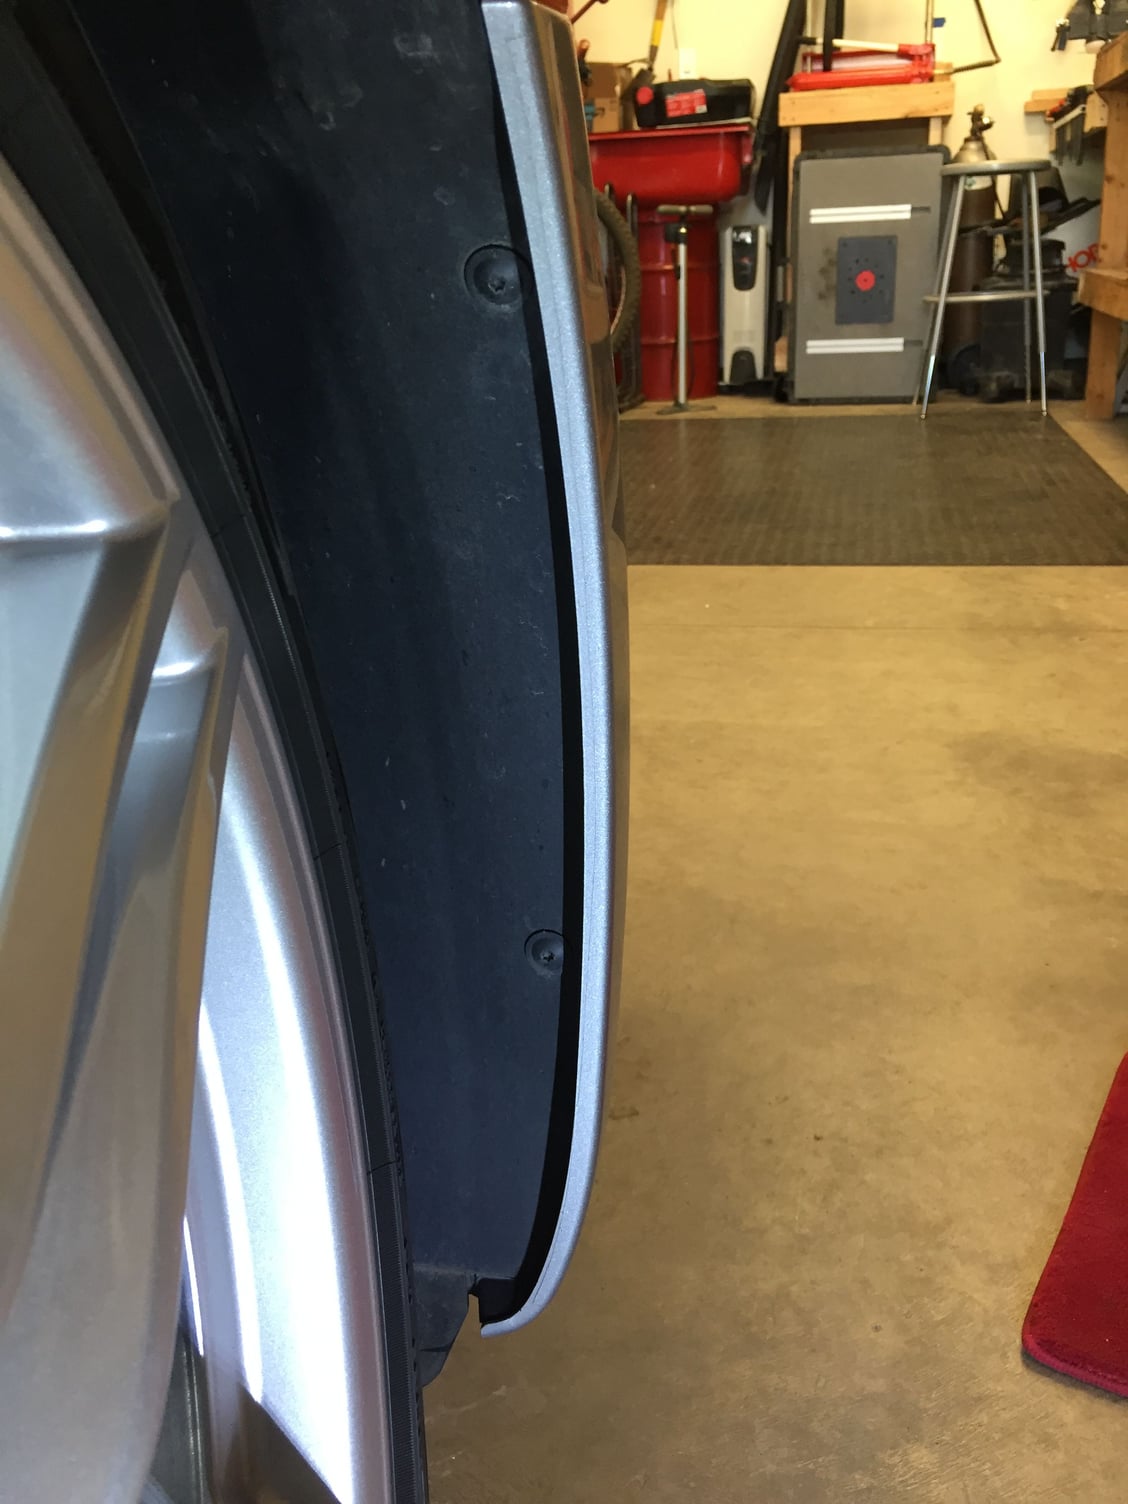
Remove the fender liners from the front half of the left and right wheel wells. These are retained with T25 screws inside the well and below the bumper, and the pattern is the same left and right. 2 screws are just inside the fender edge (note wheel should be removed by now):
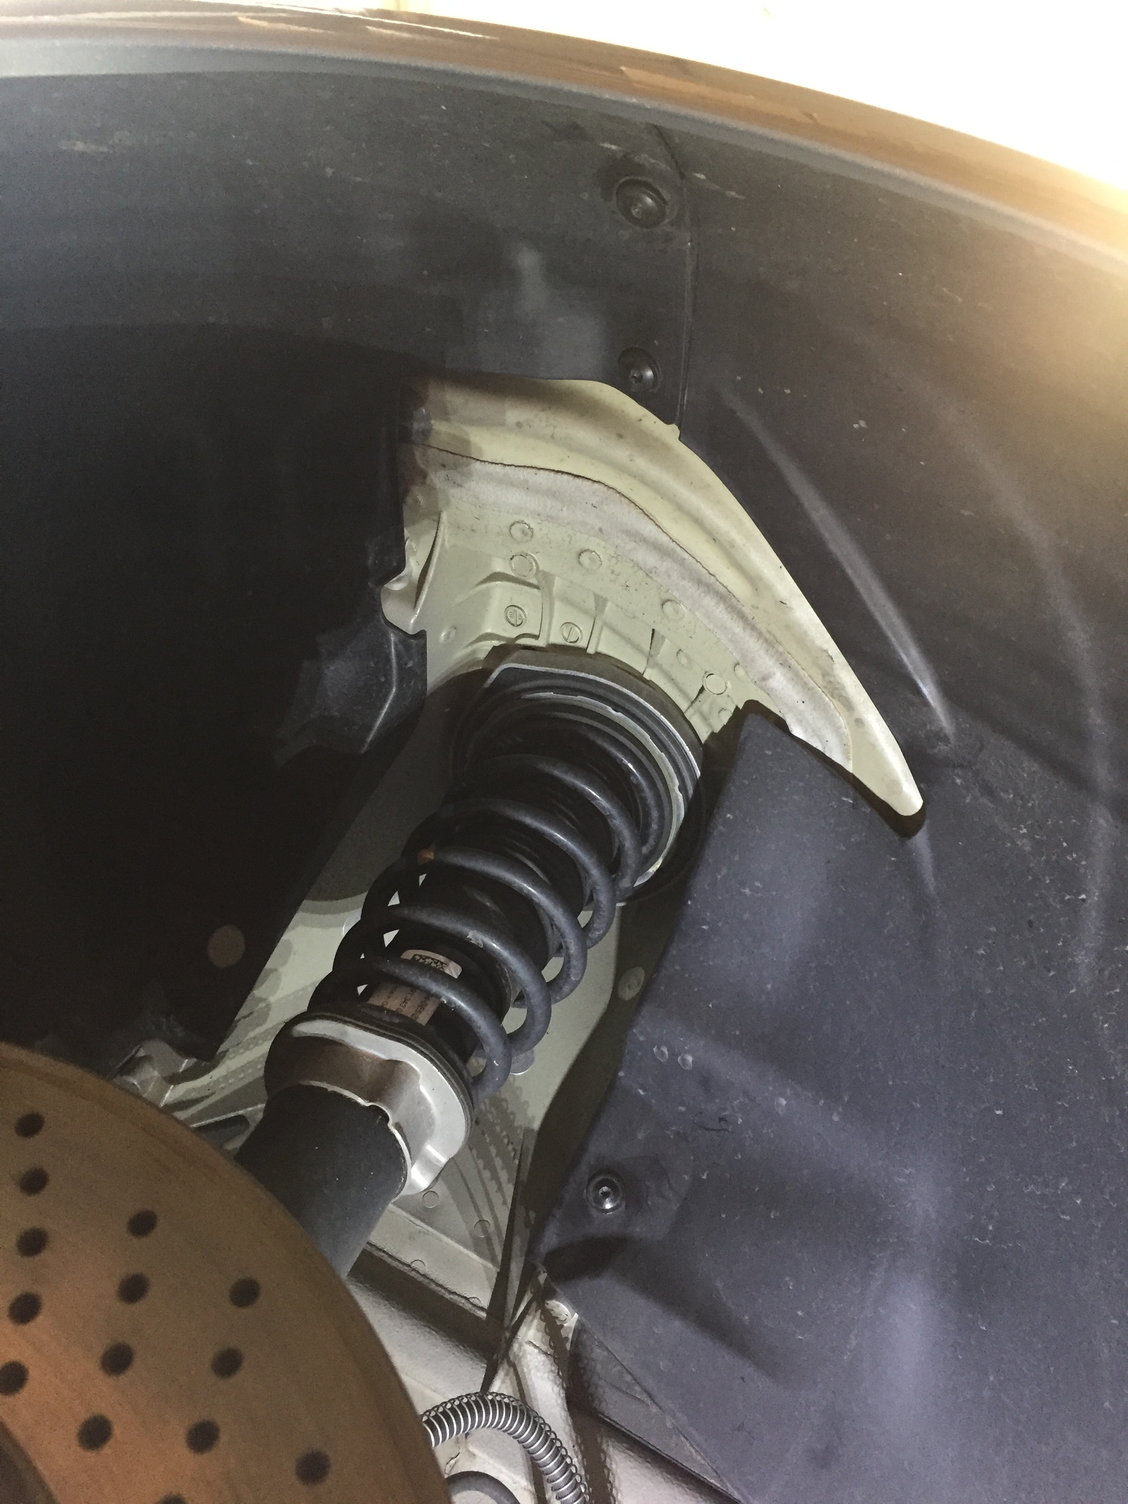
2 more screws are at the top and 1 on the inside behind the strut:
1 screw is in the middle of the leading surface of the liner, in the middle of the radiator vent grill:
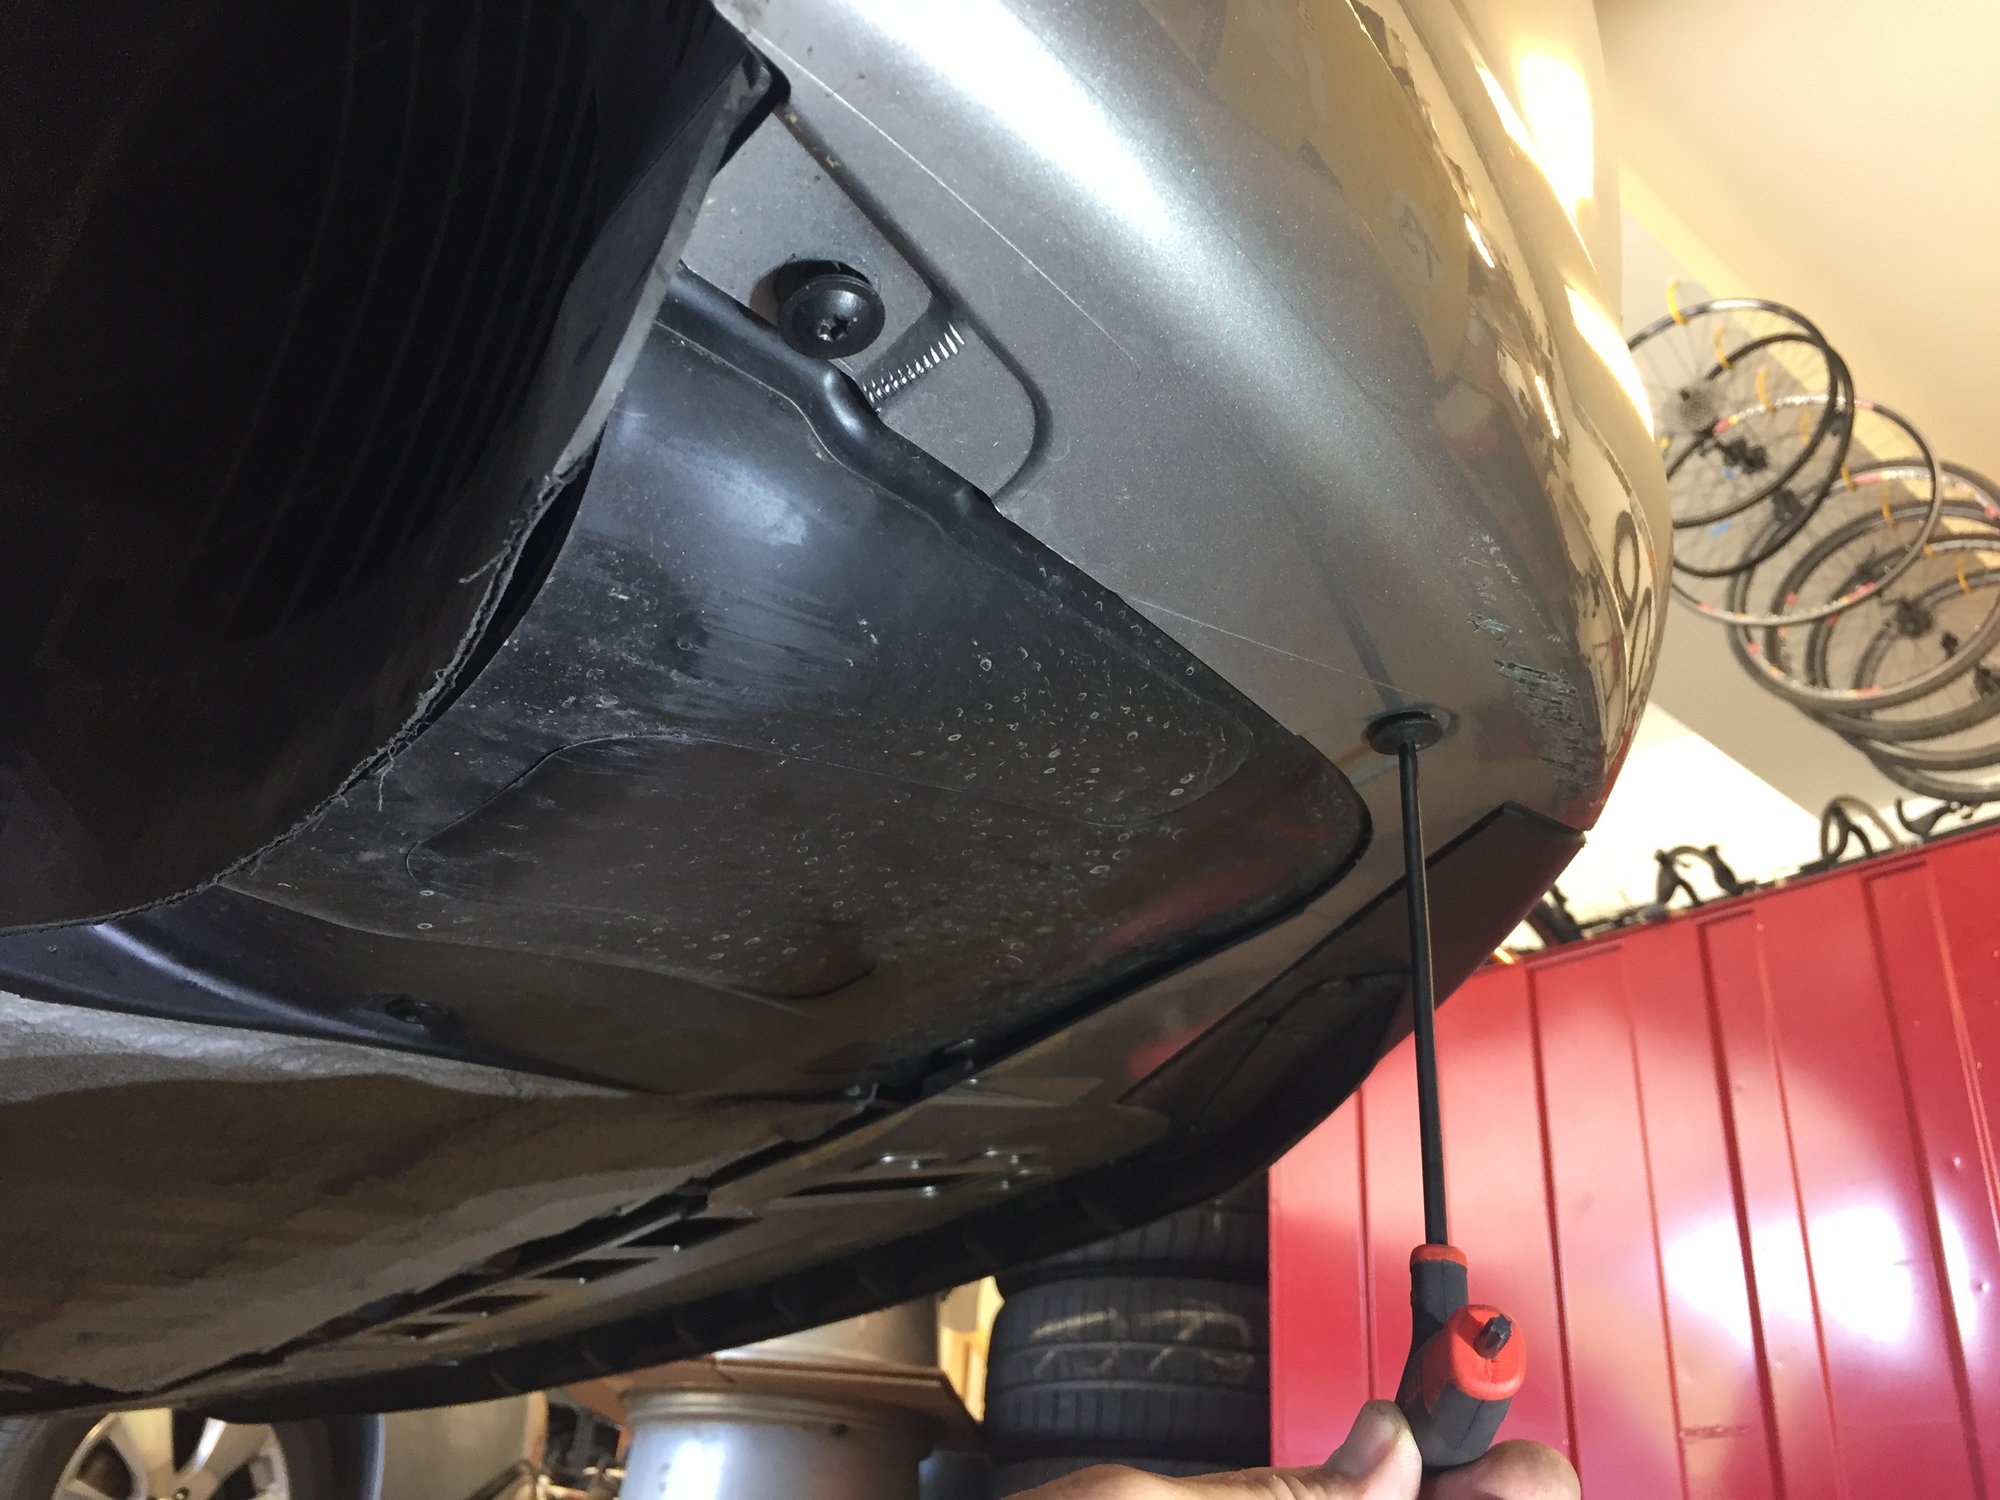
The remaining screws are under the leading edge of the car. Some of these screw through the bumper cover as well as the liner, others directly into the chassis (and yes, I have some scars from driving into a nasty dip):
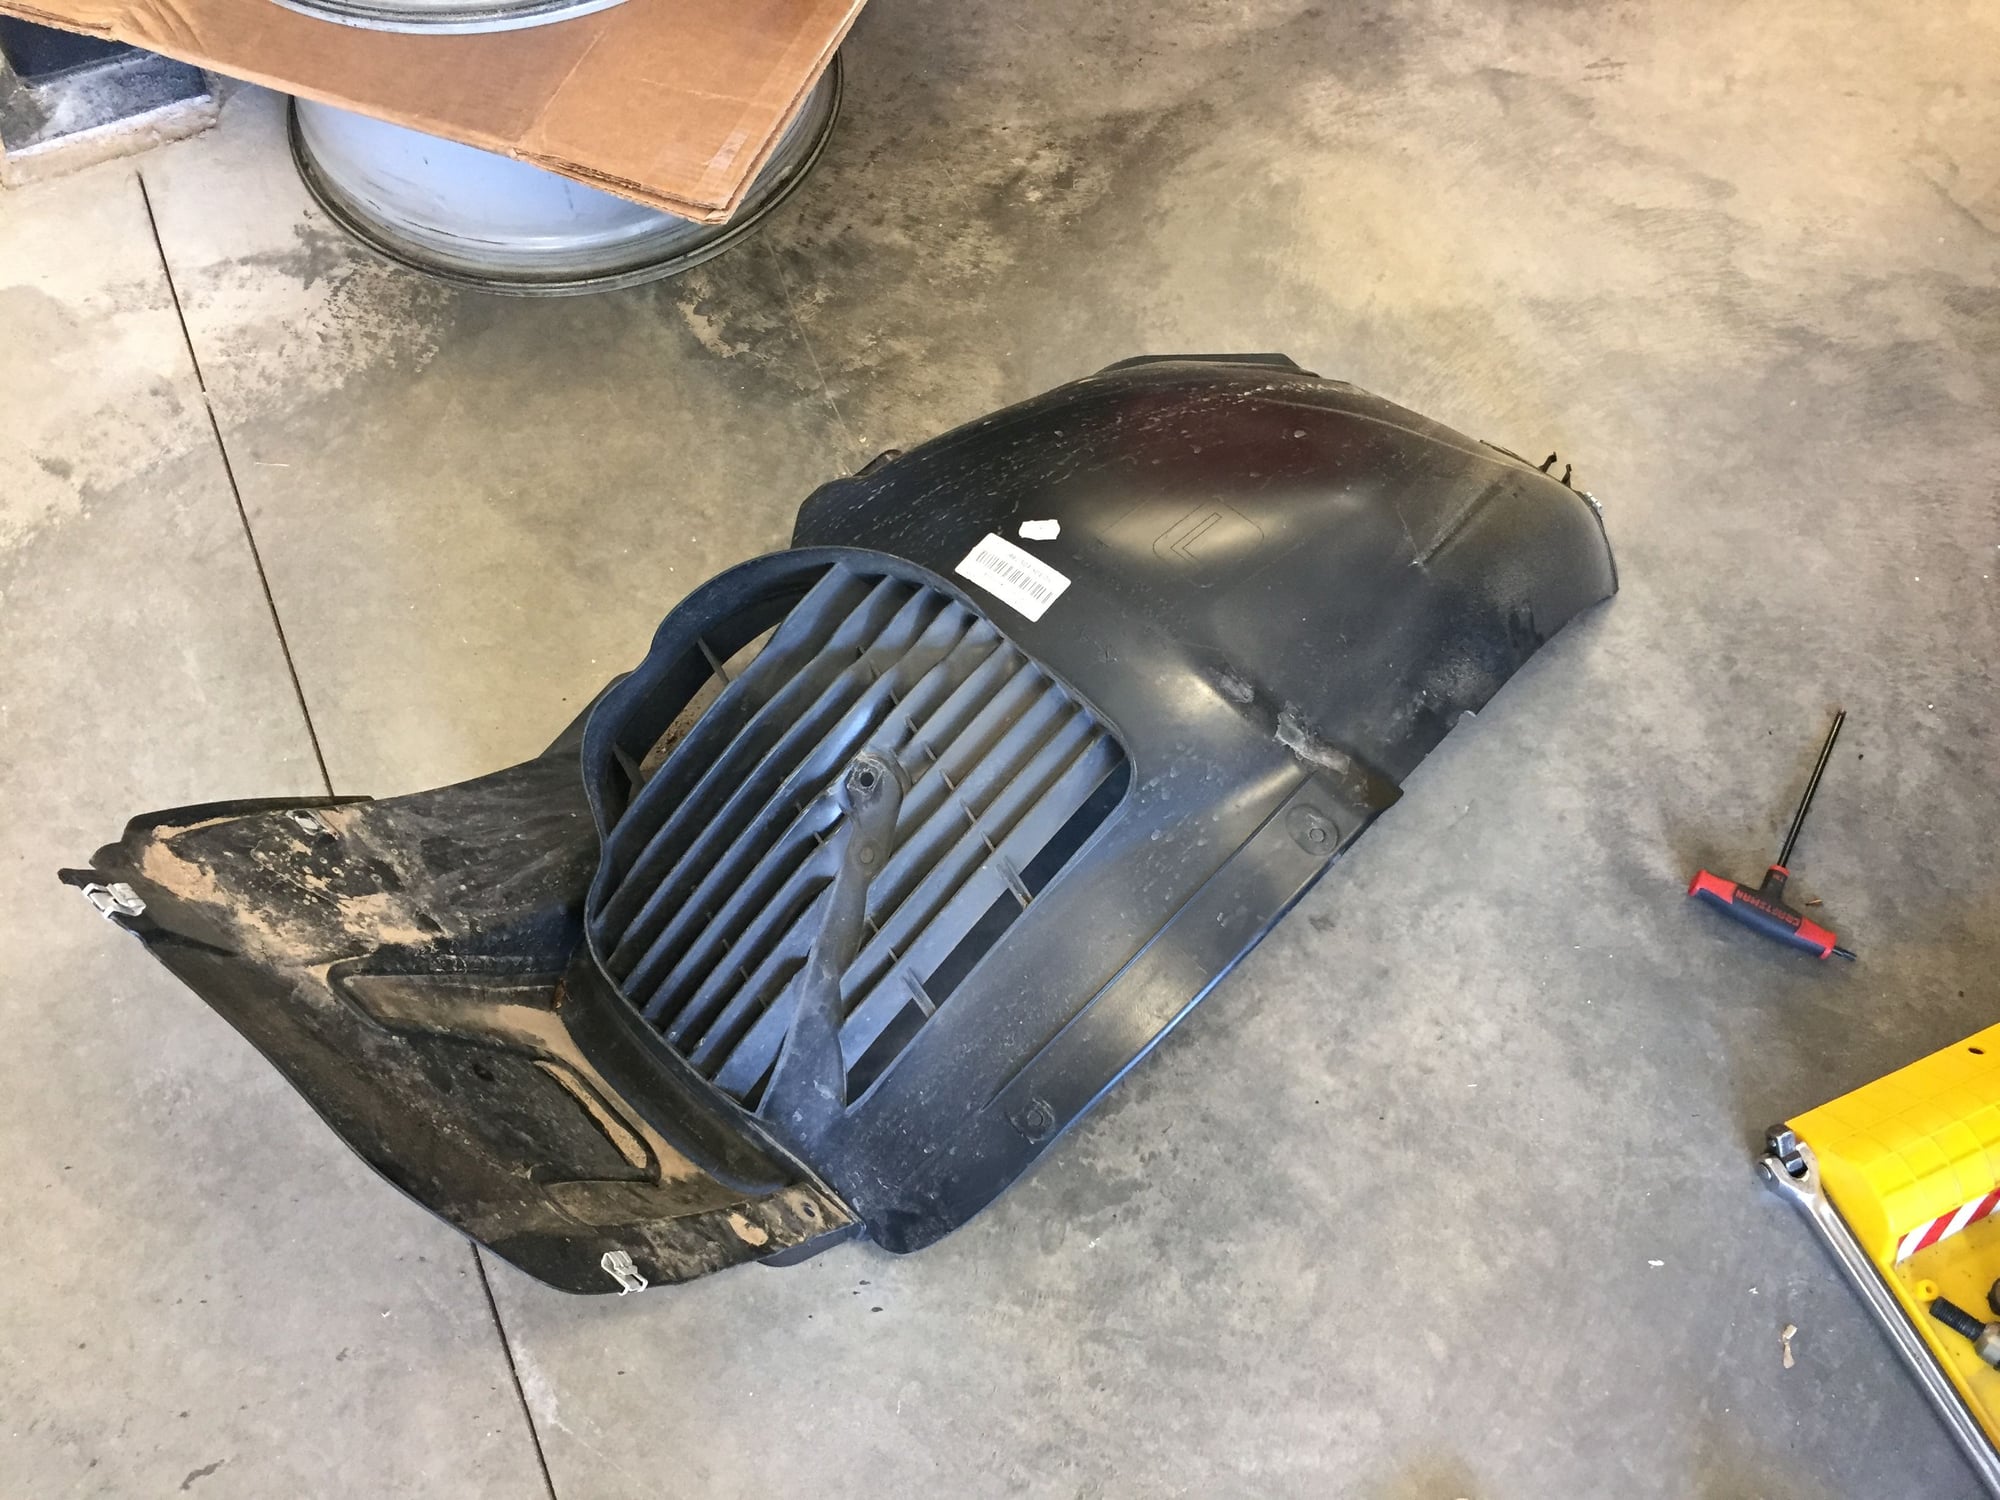
With all the screws removed, gently flex the fender liners and remove them:
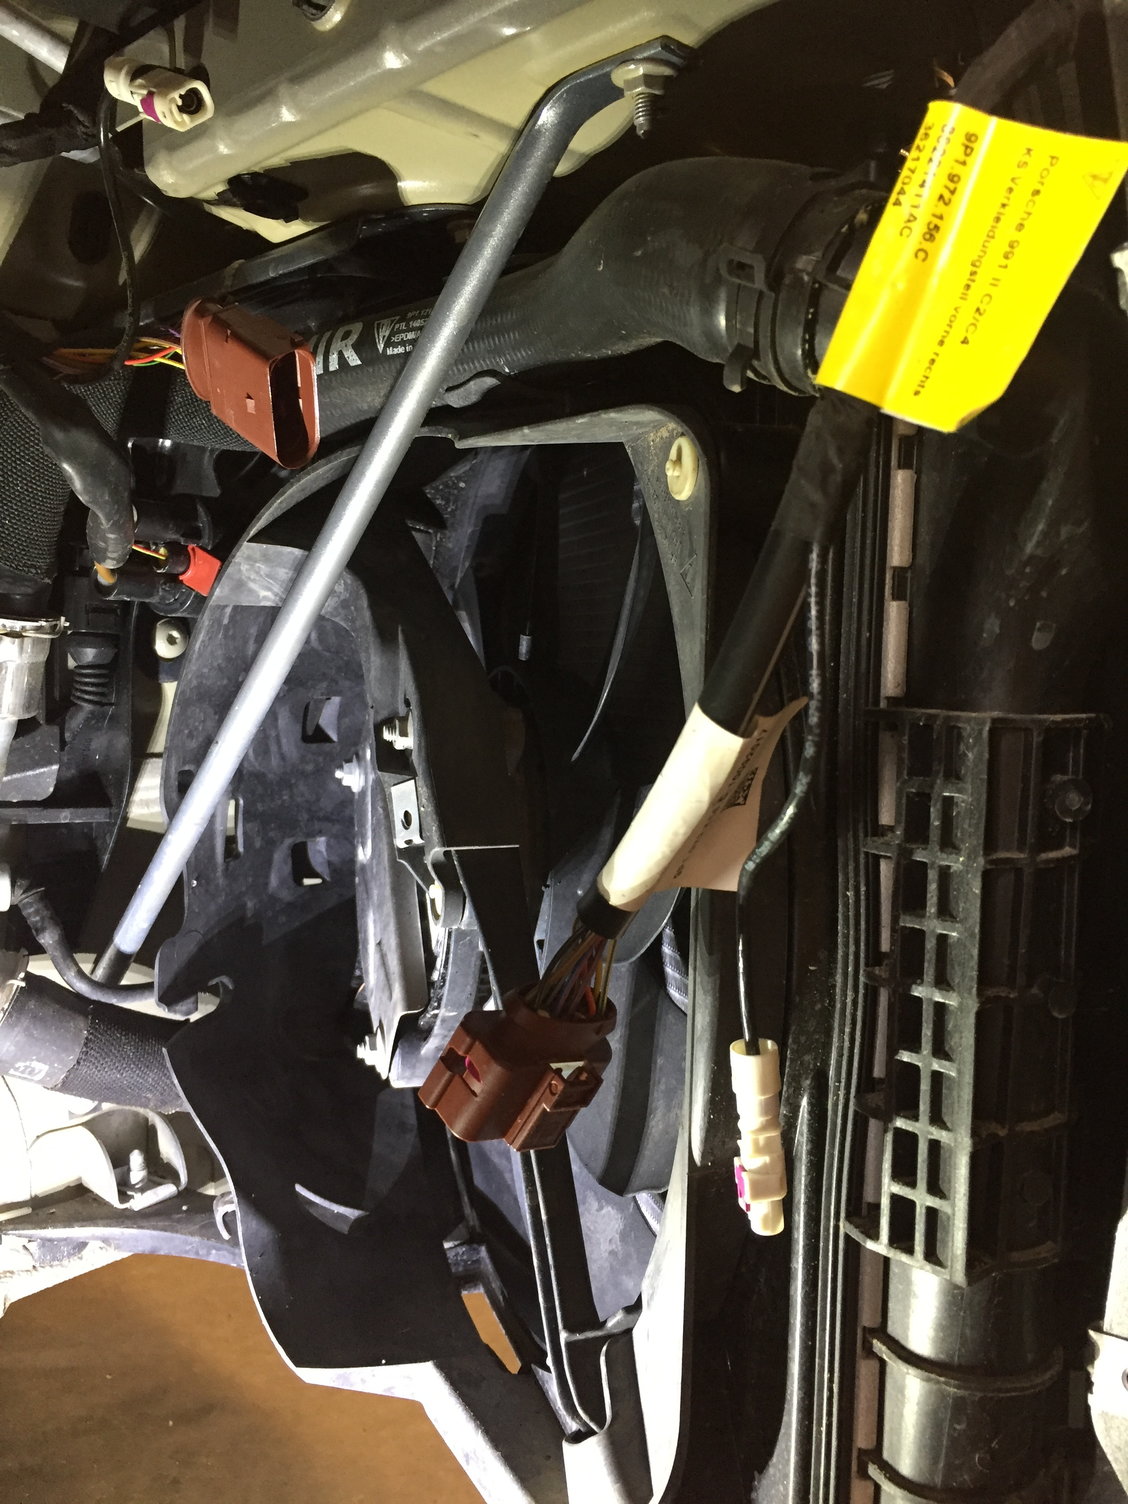
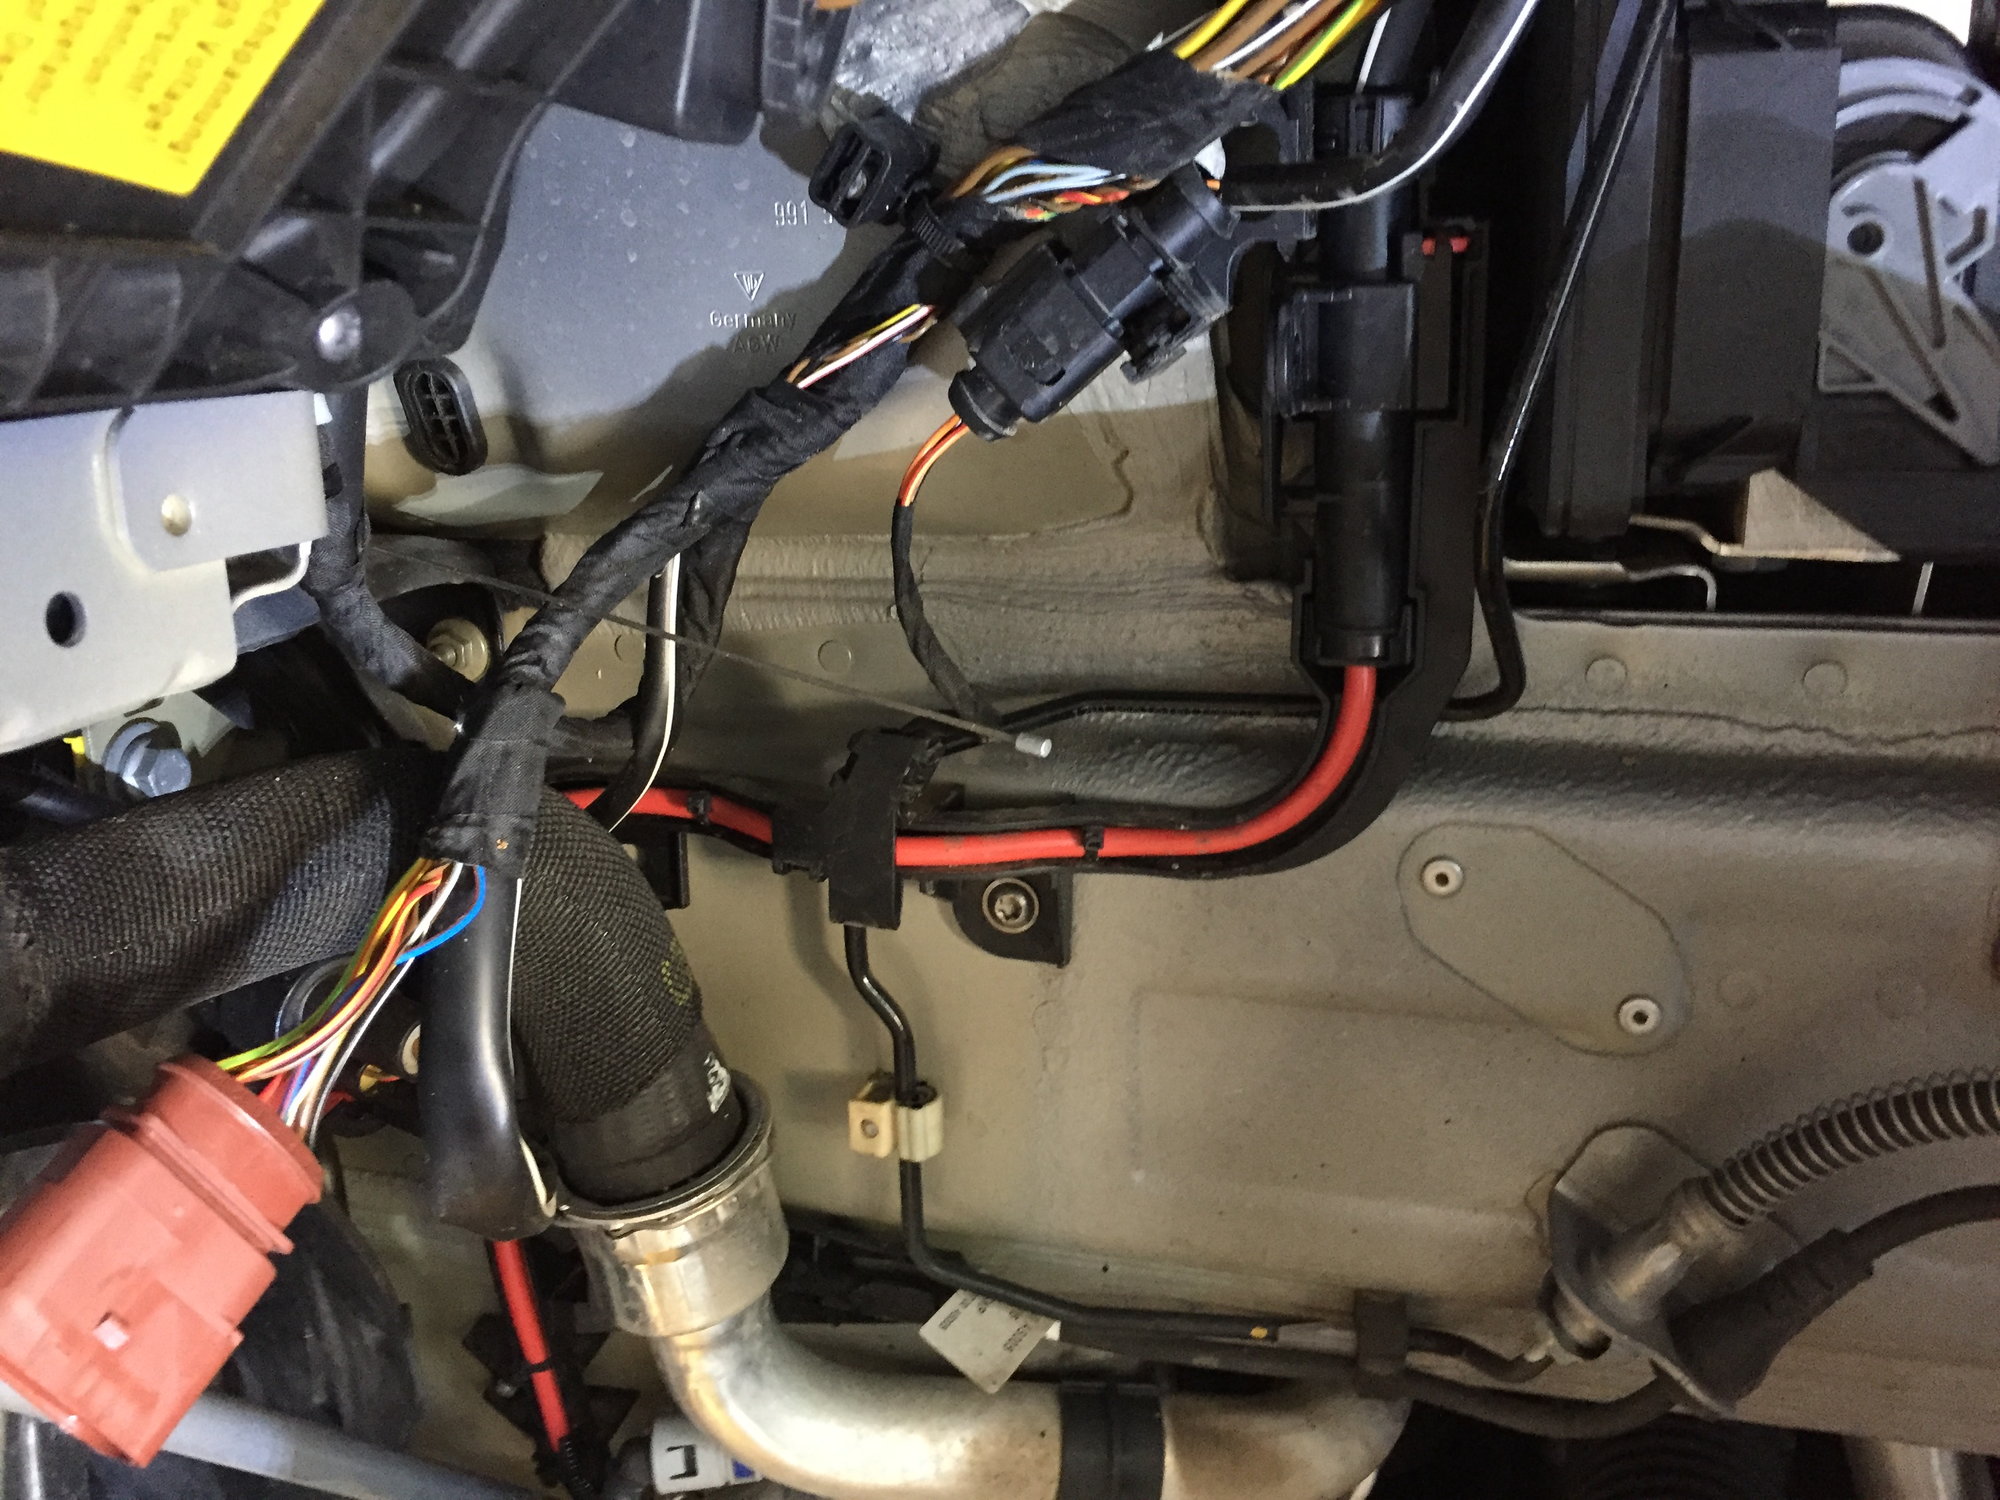
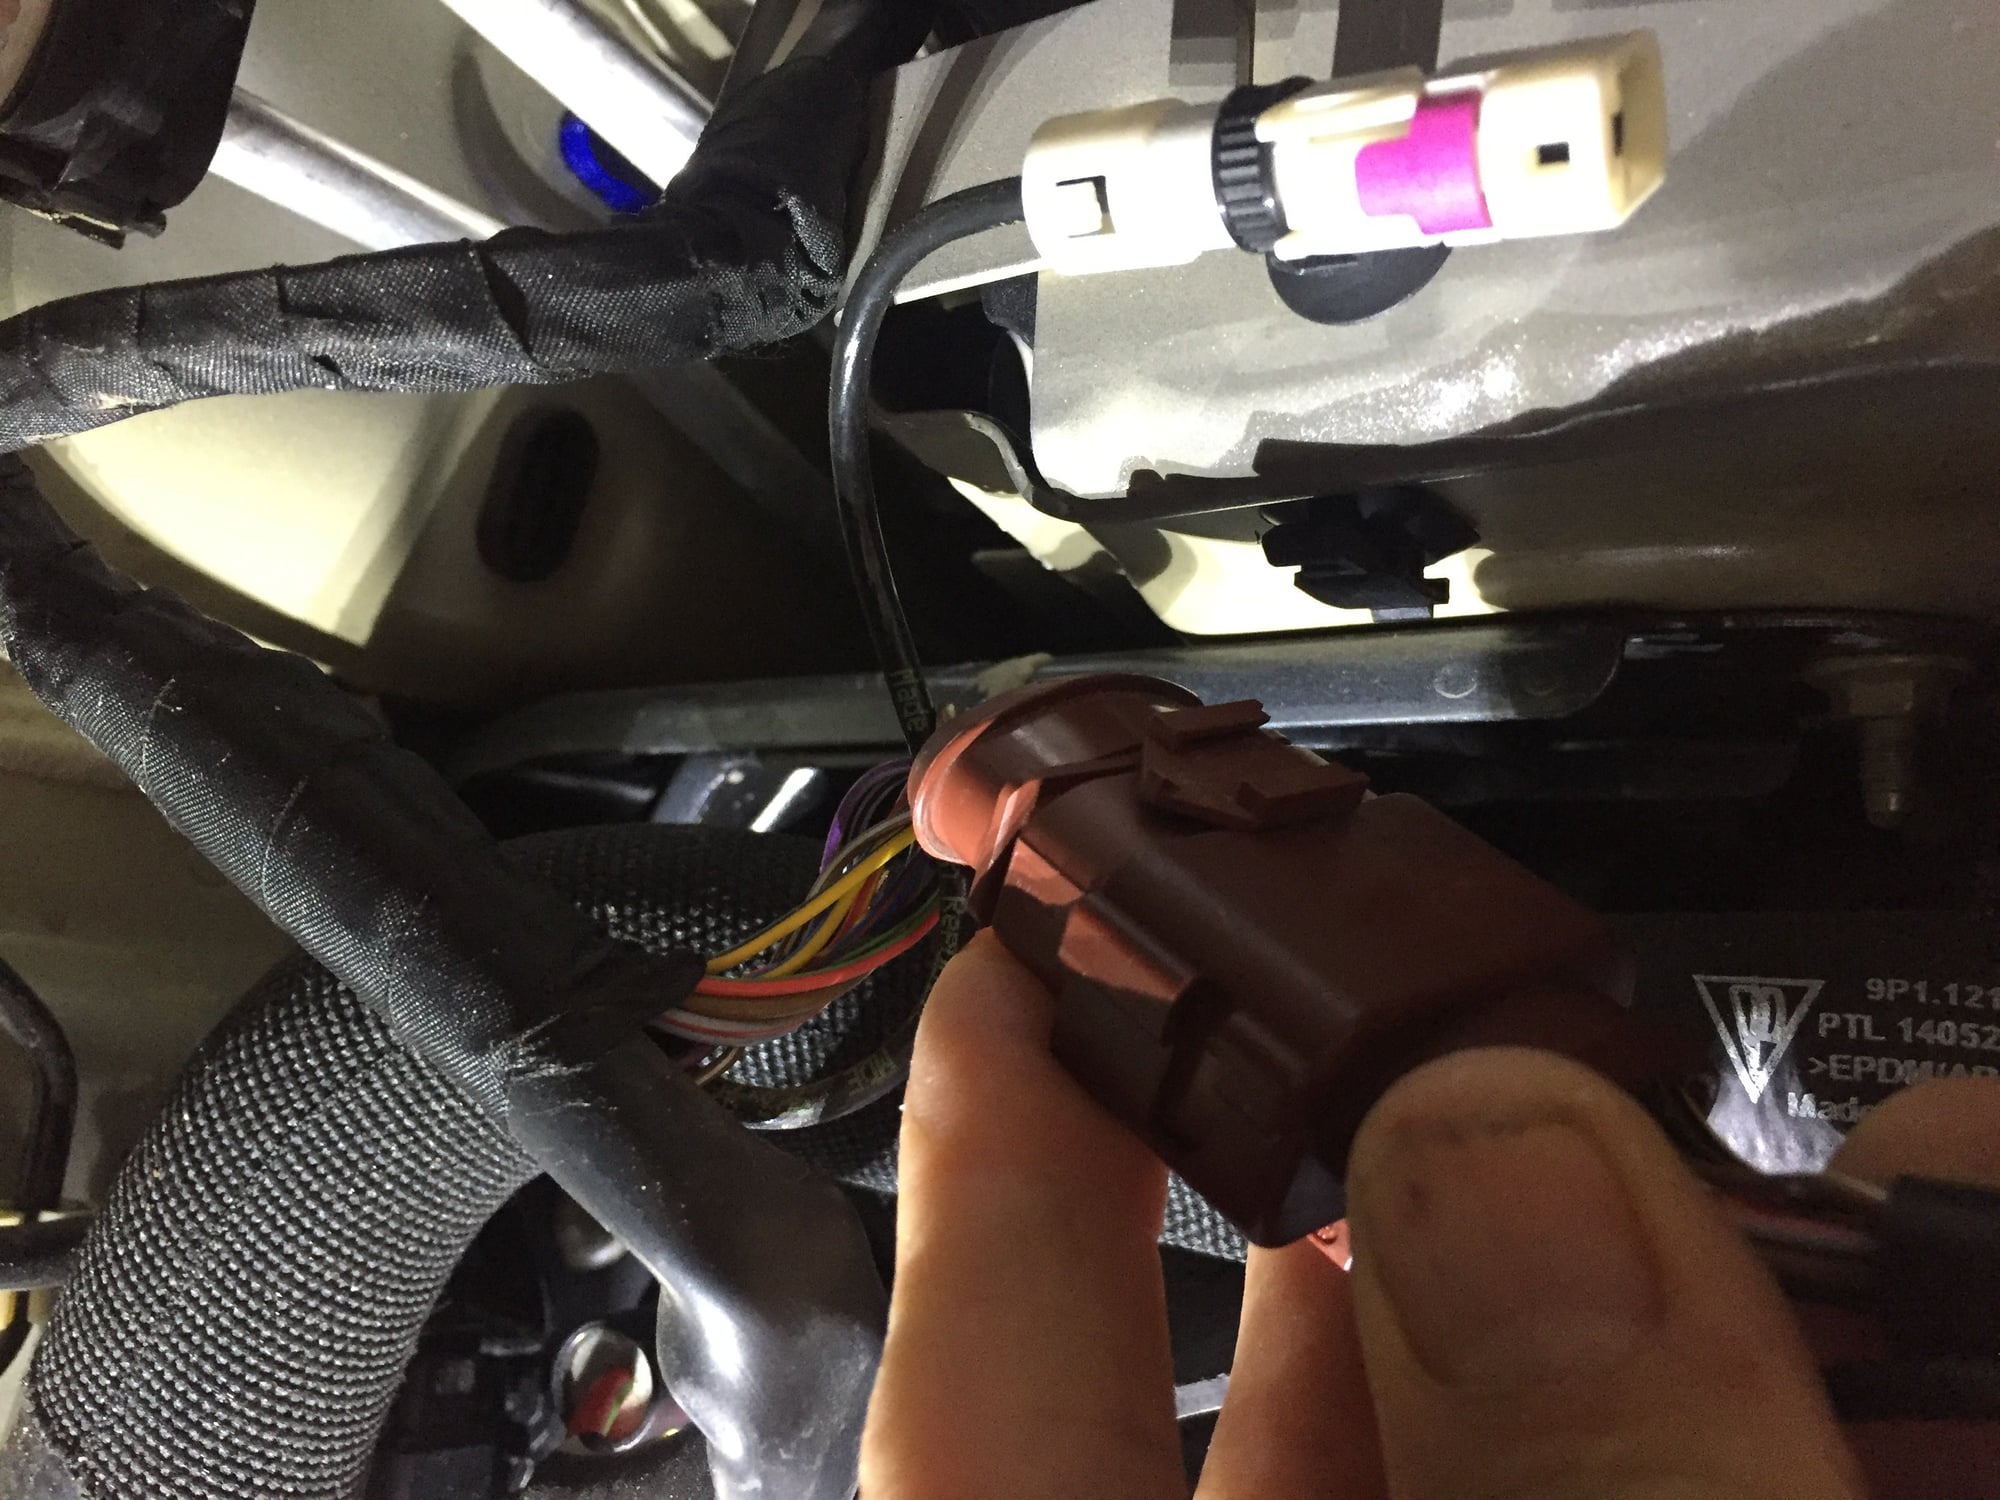
Starting inside the right fender locate the electrical connectors (big brown connector and small white connector):
The white connector releases easily when pushing on the pink tab. The brown connector can first detach from the black mounting clip (press the mounting tab and slide the connector rearward), and then release the connector by pushing on the tab and pulling apart. Push the cables out of the way:
Inside the left fender is the same brown electrical connector. In fact, Porsche used the same connector and mounting tab so the release is "backwards", and has to move towards the front of the car--not much room:
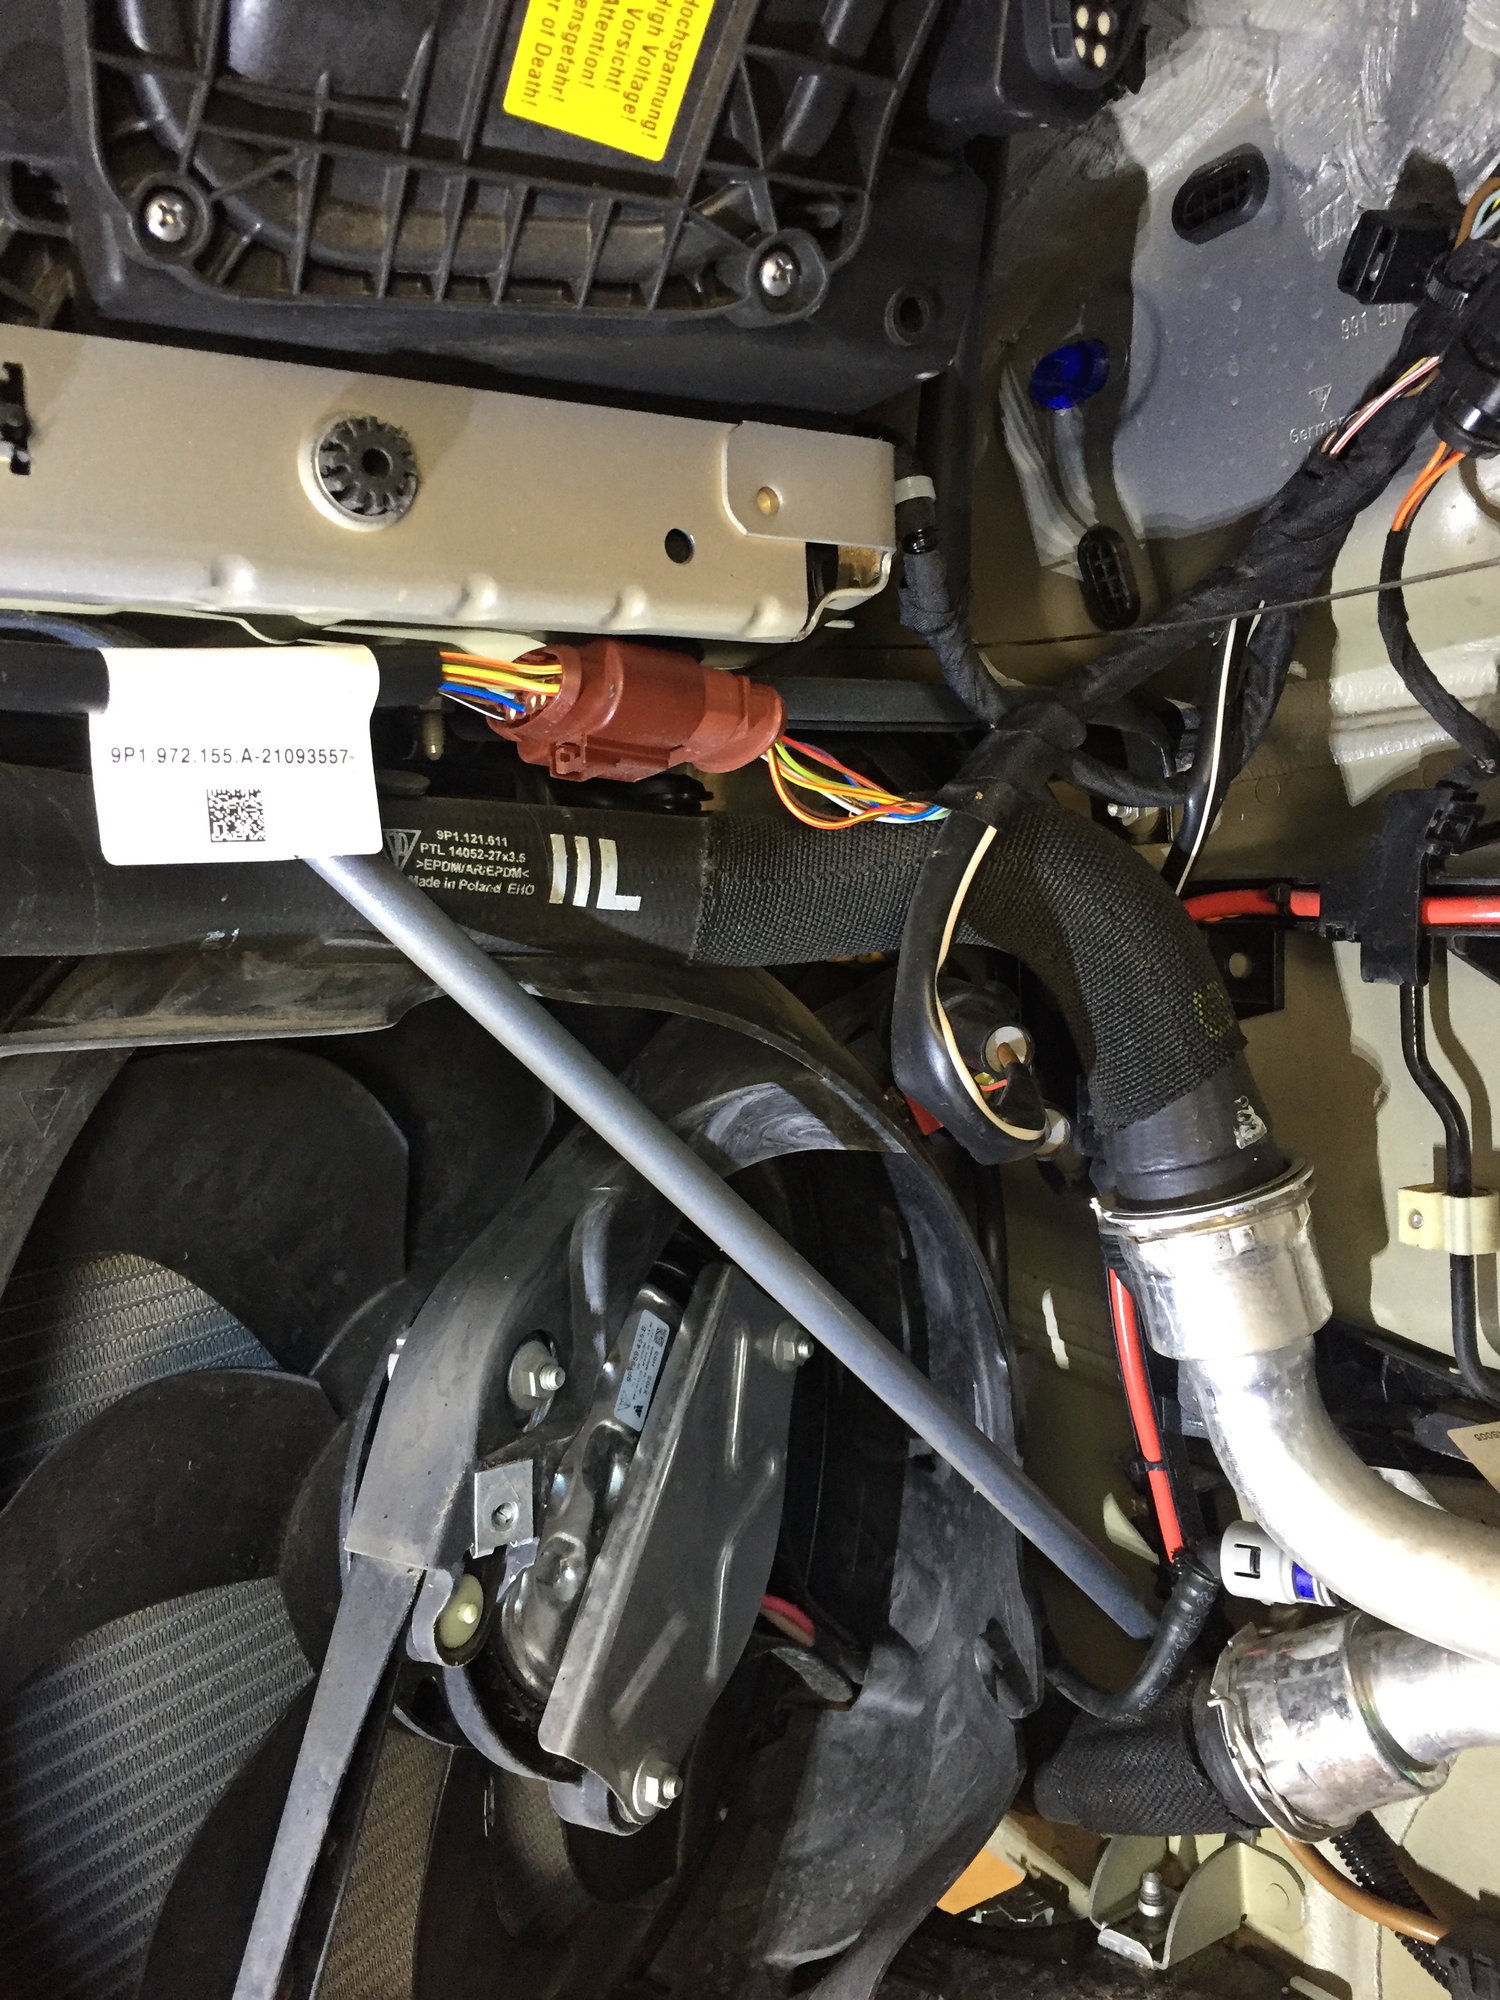
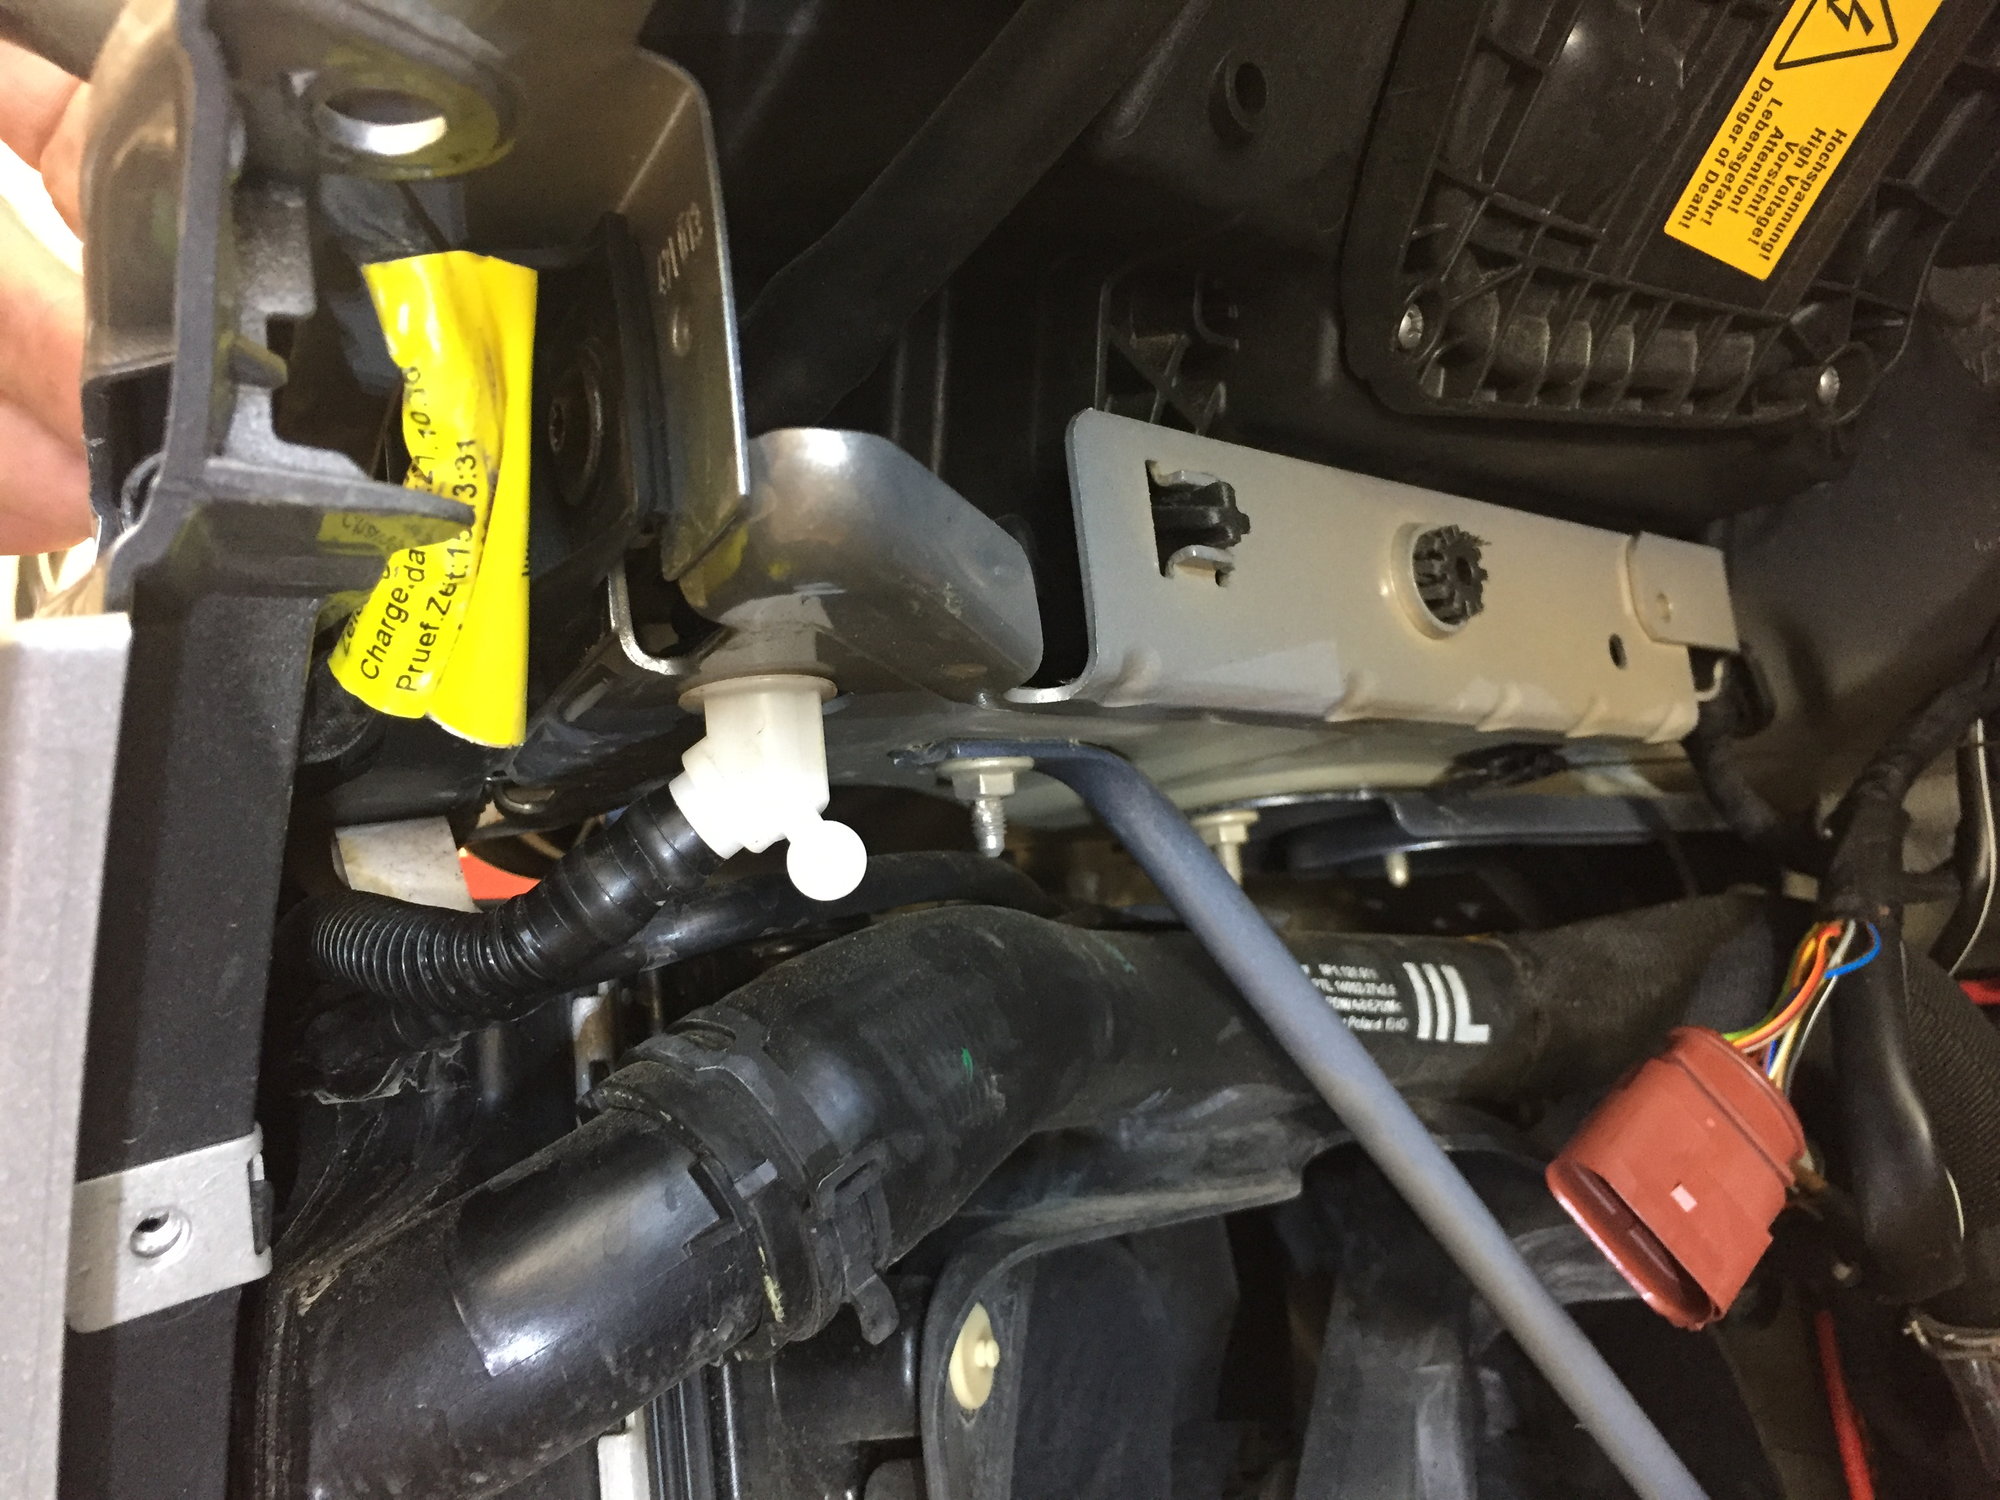
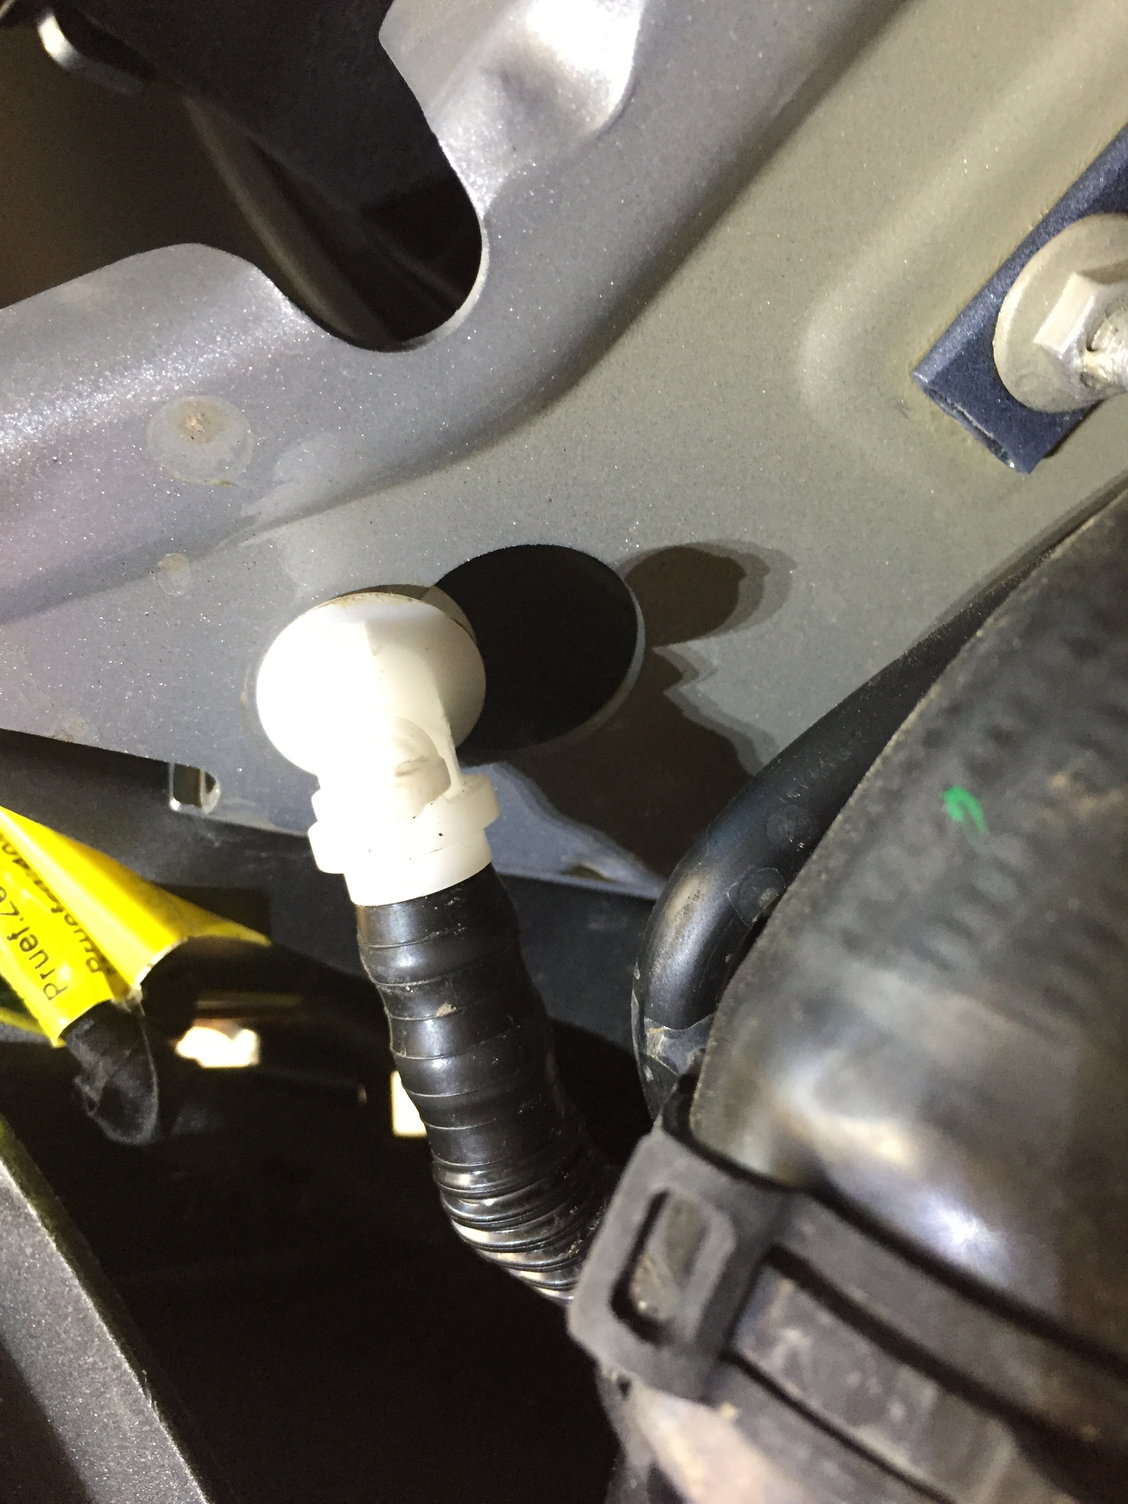
Also inside the left fender is the feeder hose and connector for the headlight washers. This is a pretty clever and easy device (look for the white plastic elbow with the little ball handle):
The feeder hose mounts to the top of the elbow, held on by a small plastic clip. The clip slides out with finger pressure:
Then the feeder hose comes off:
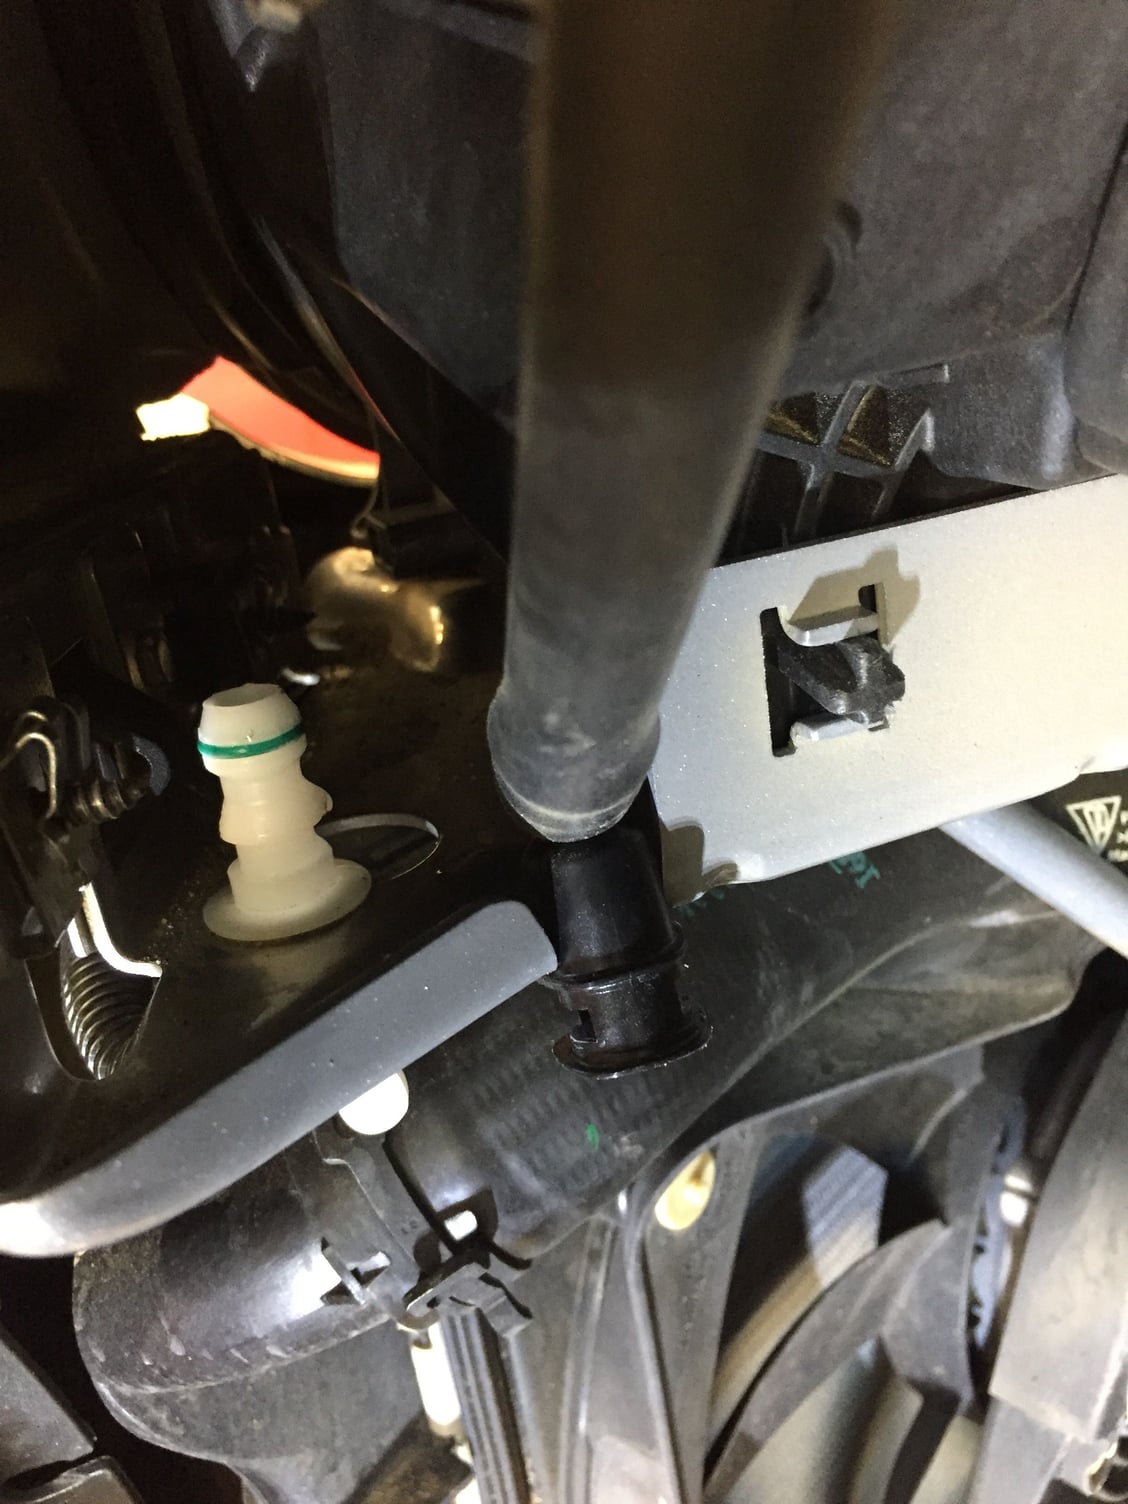
To release the elbow (attached to the hose that connects to the headlight washers) the elbow slides sideways into the larger hole. Push firmly or tap with something softish:
Now to remove the bumper cover itself. Undo the remaining T25 screws below the car:
Also remove the screws that lie behind the side marker lights:
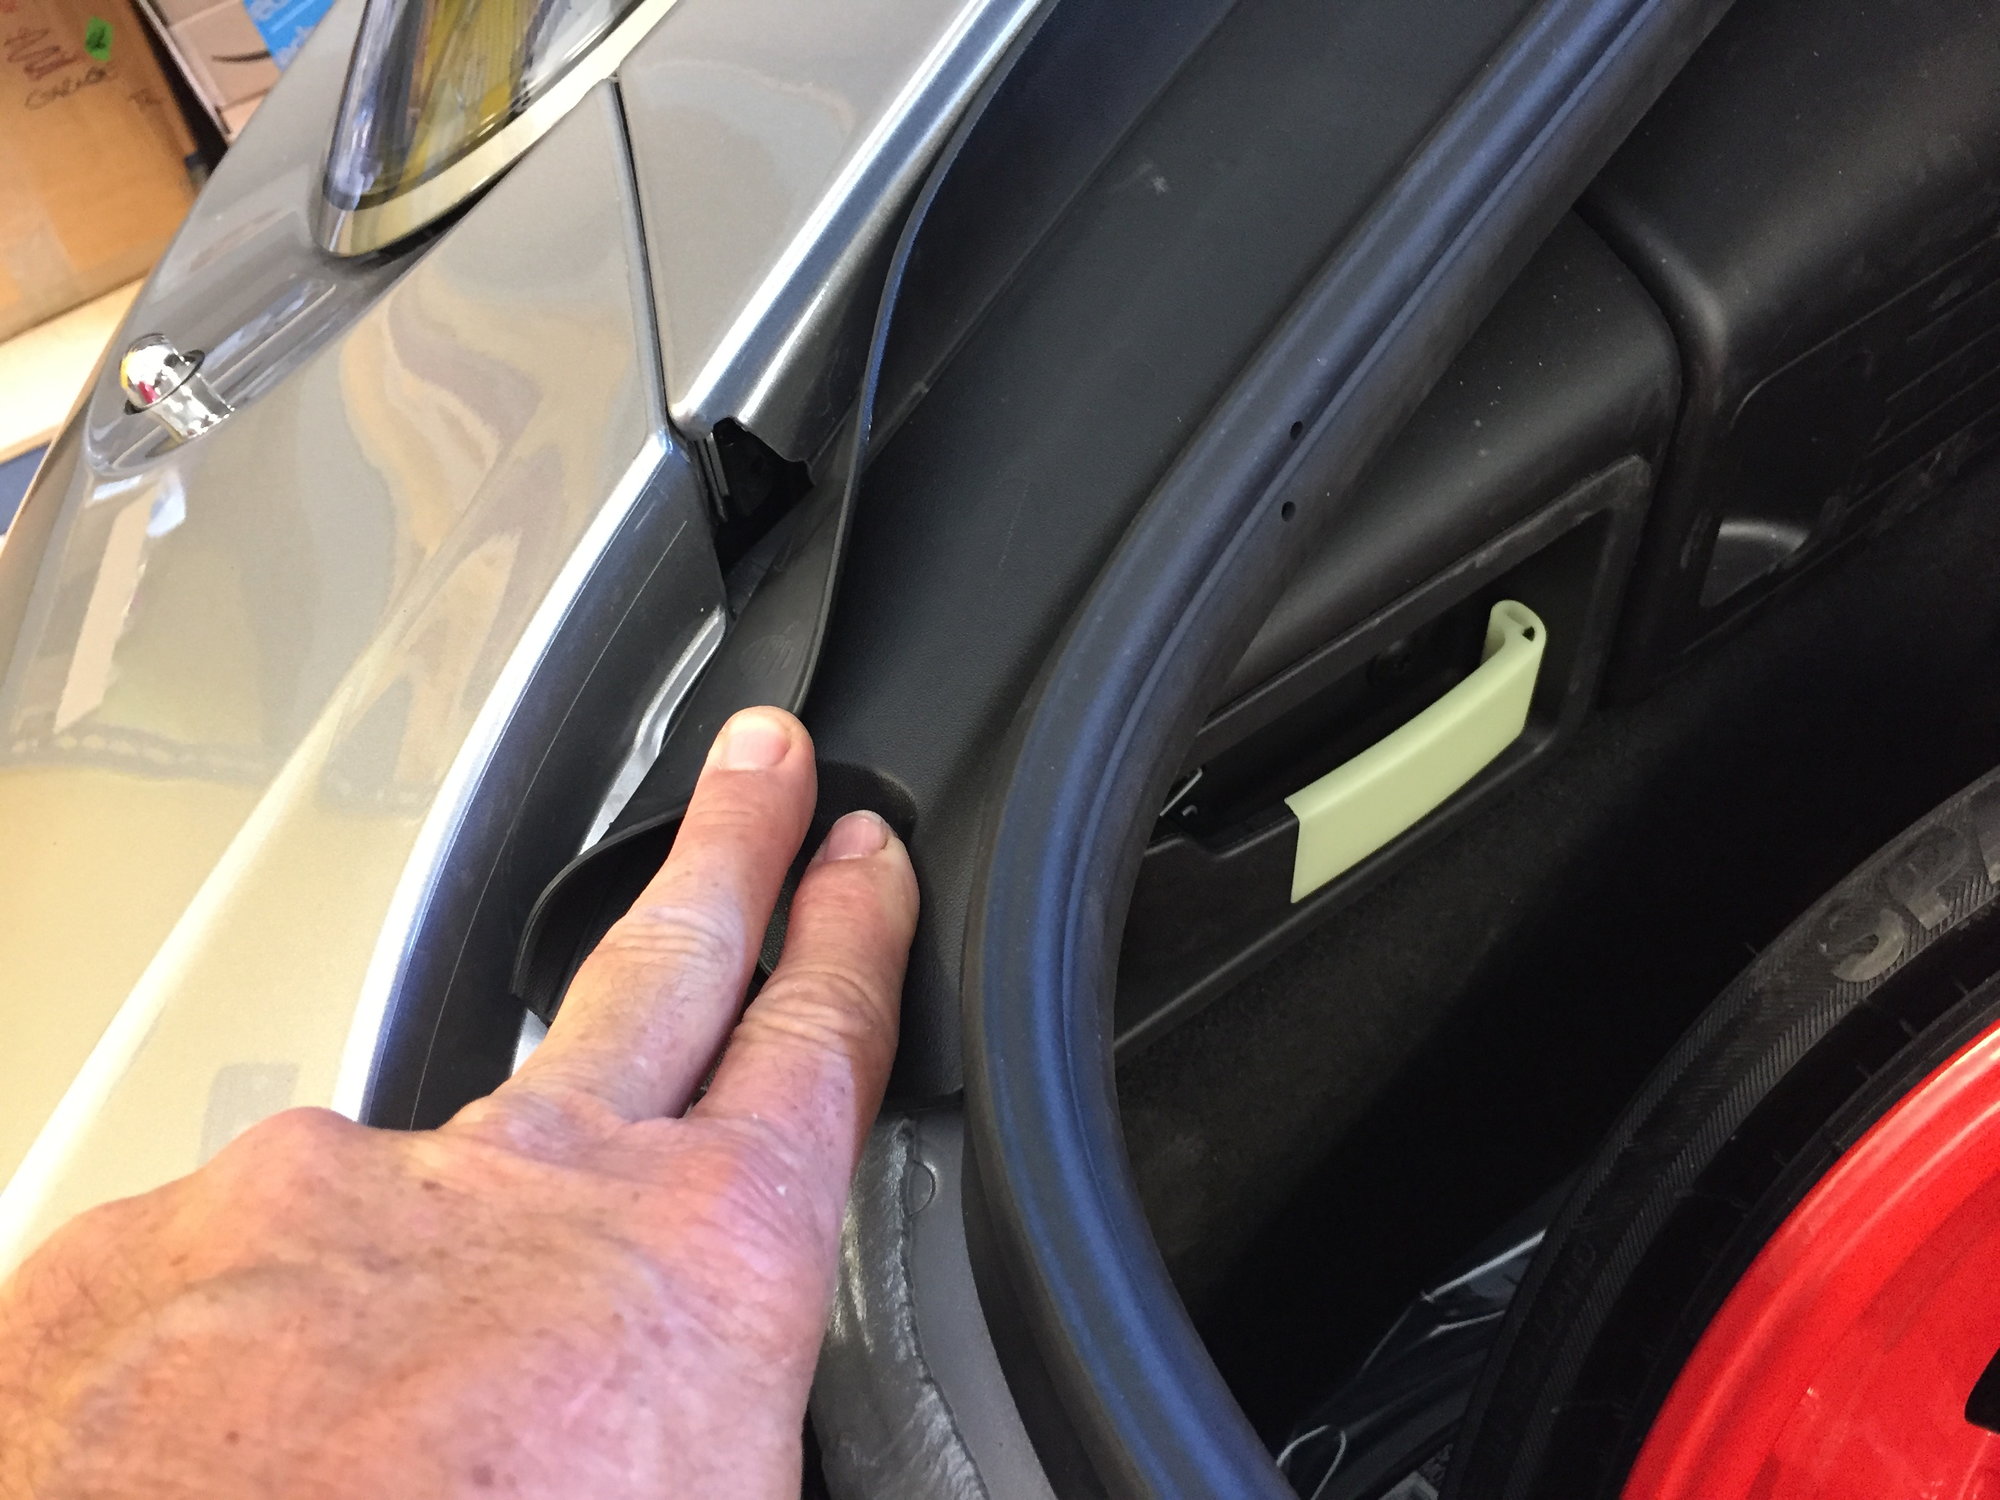
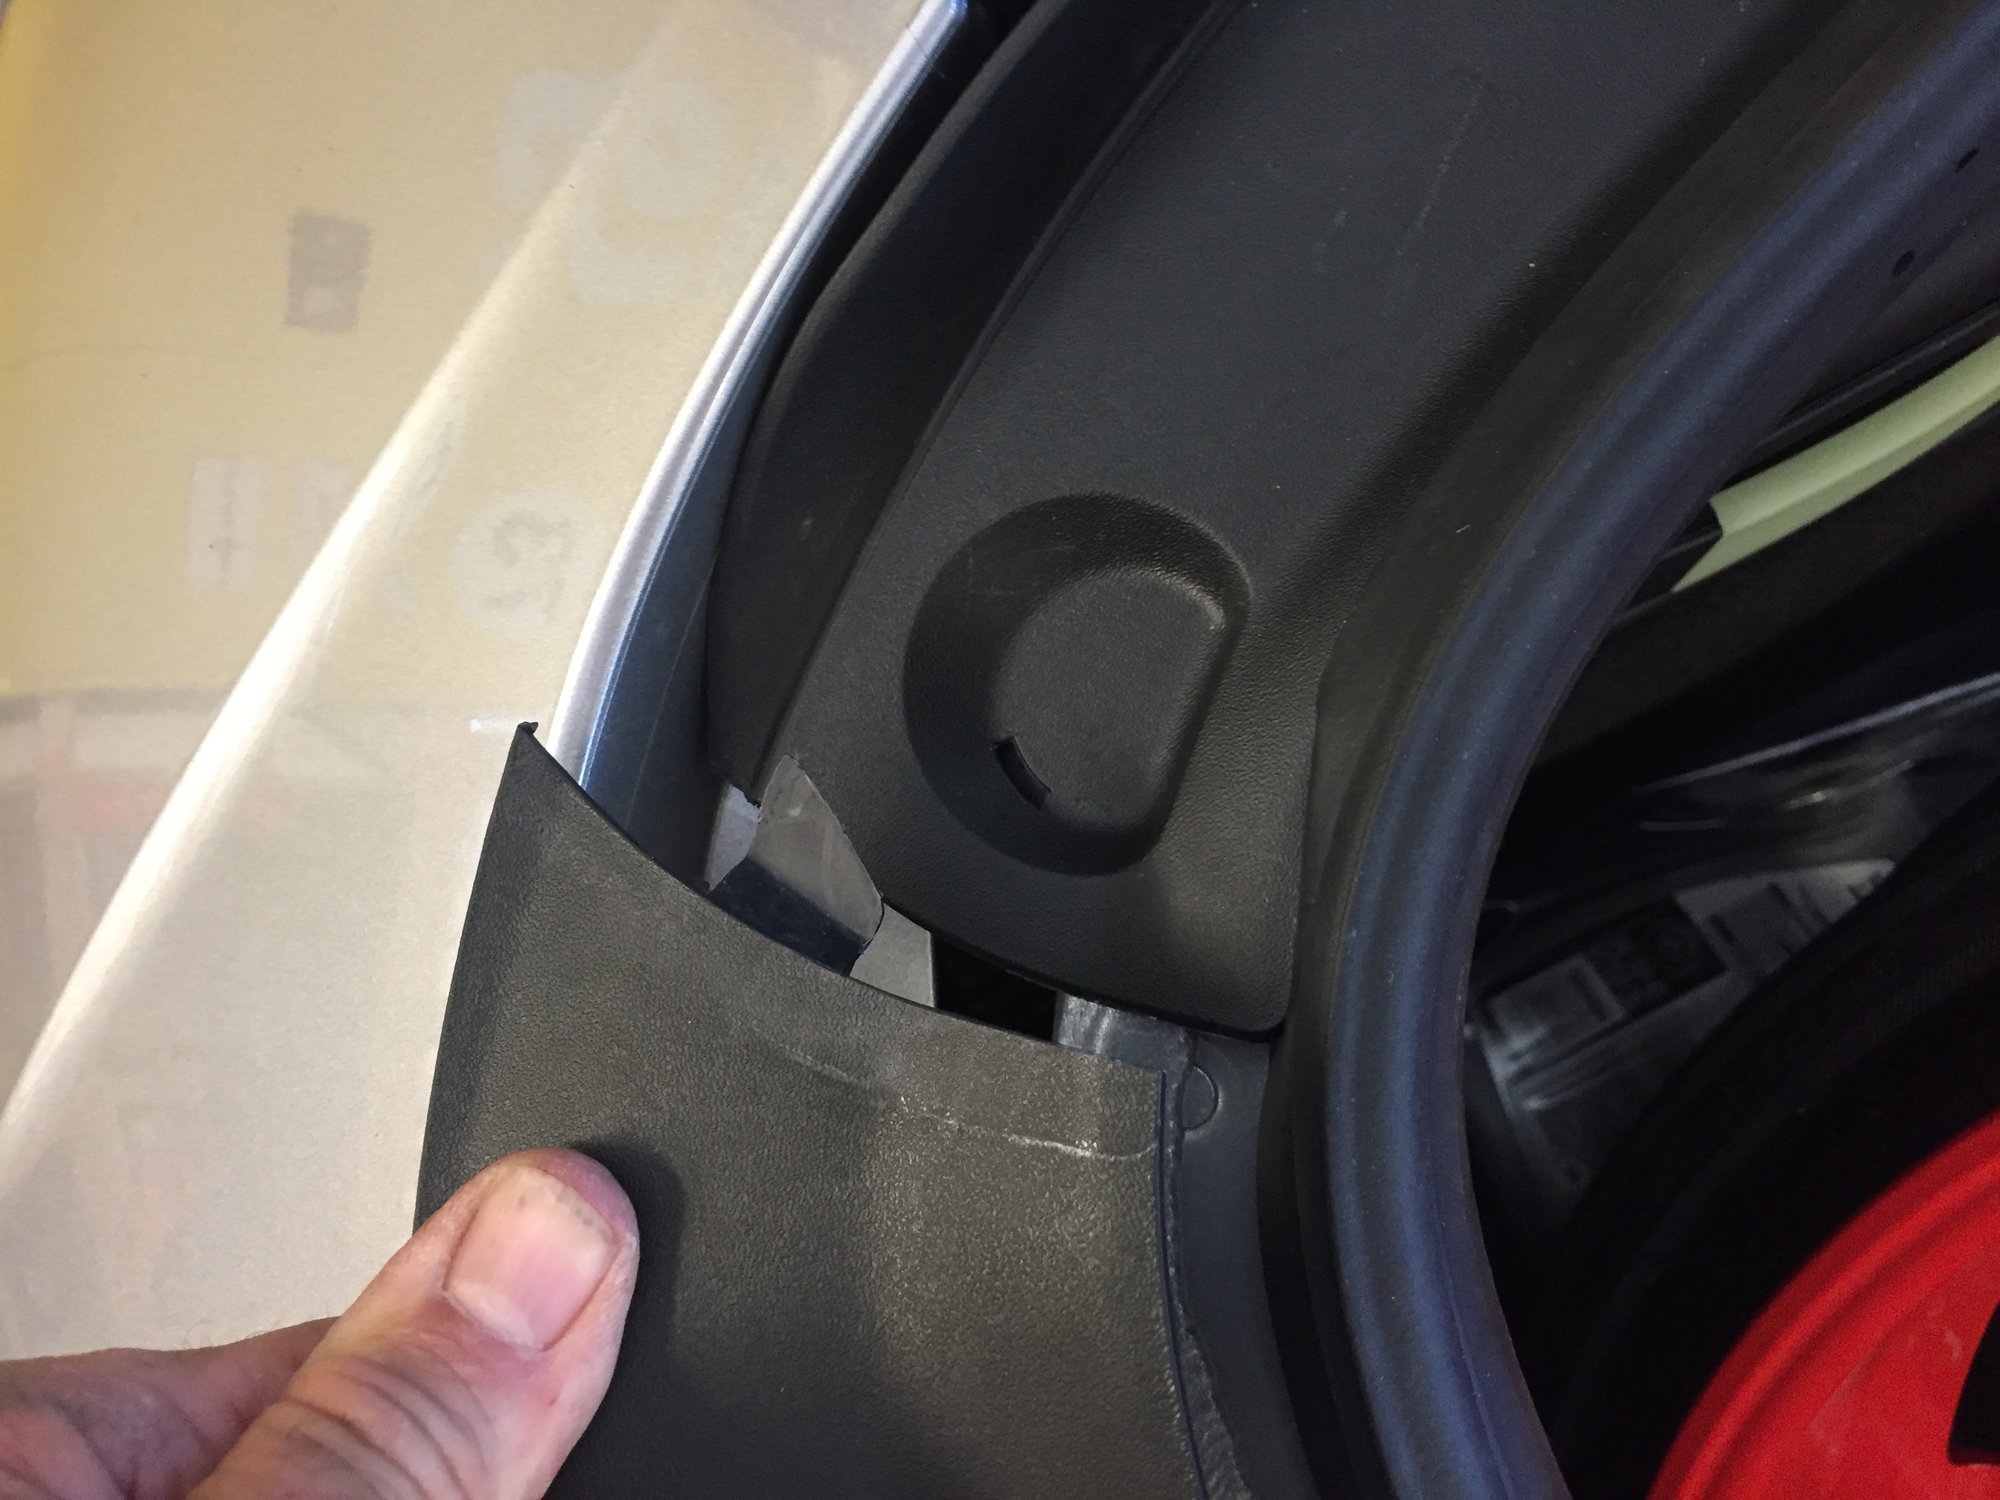
If not already open, pop the frunk. Remove the flat trim piece around the release by pulling up at the center. This is a robust and flexible plastic so be firm:
Here is the under-side of the trim piece, showing the 4 retaining clips:
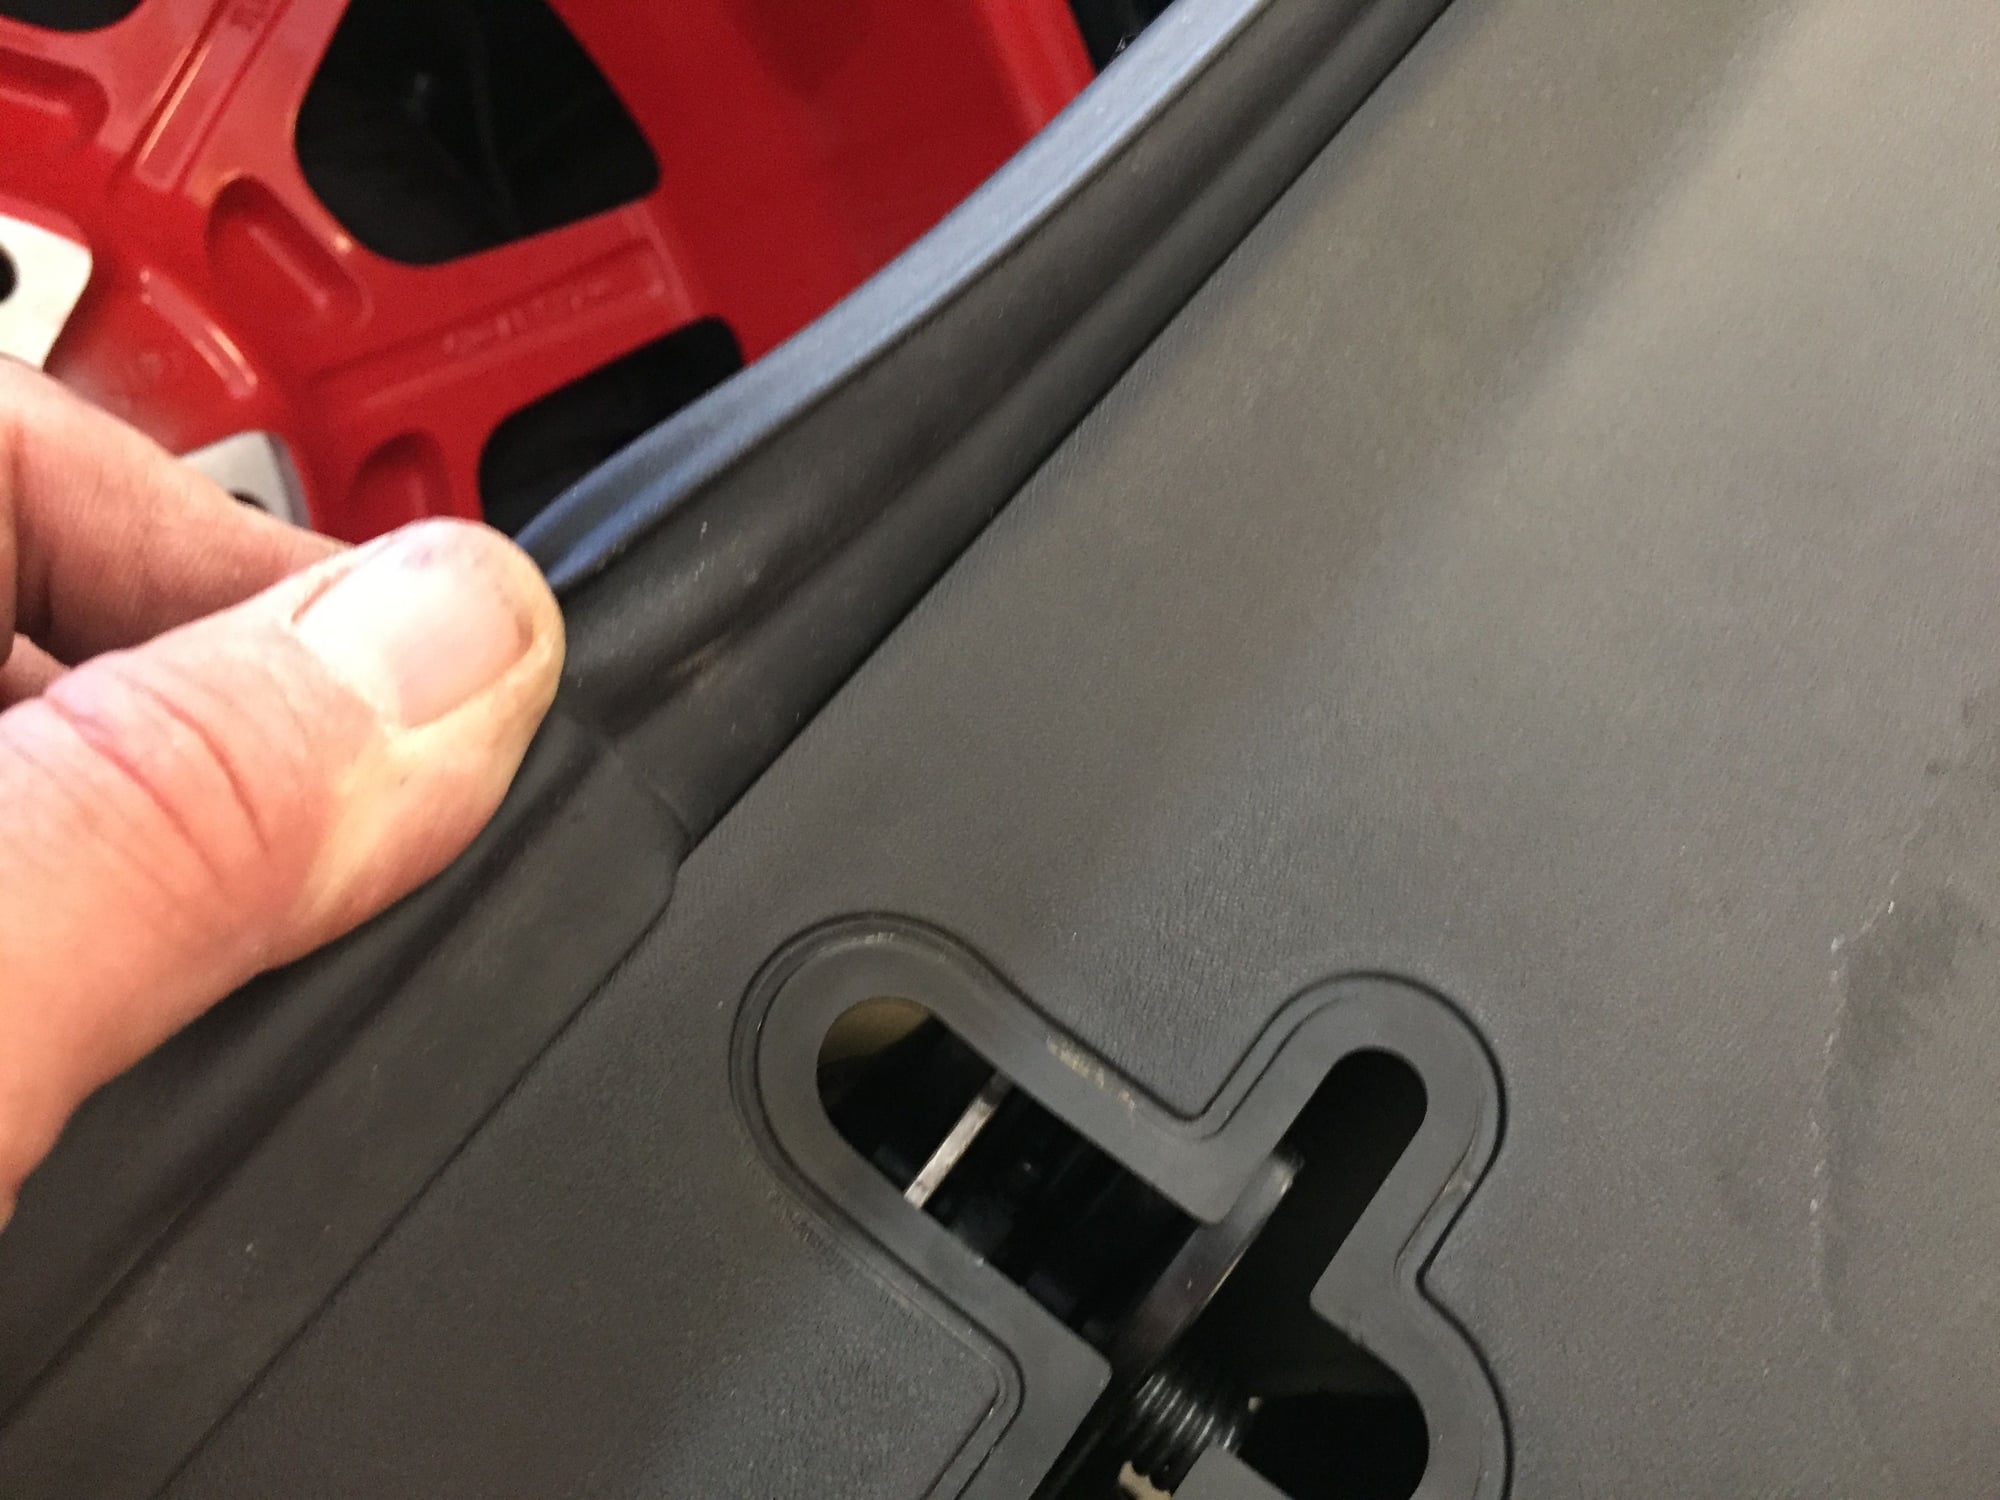
Remove the 3 screws along the bumper cover edge:
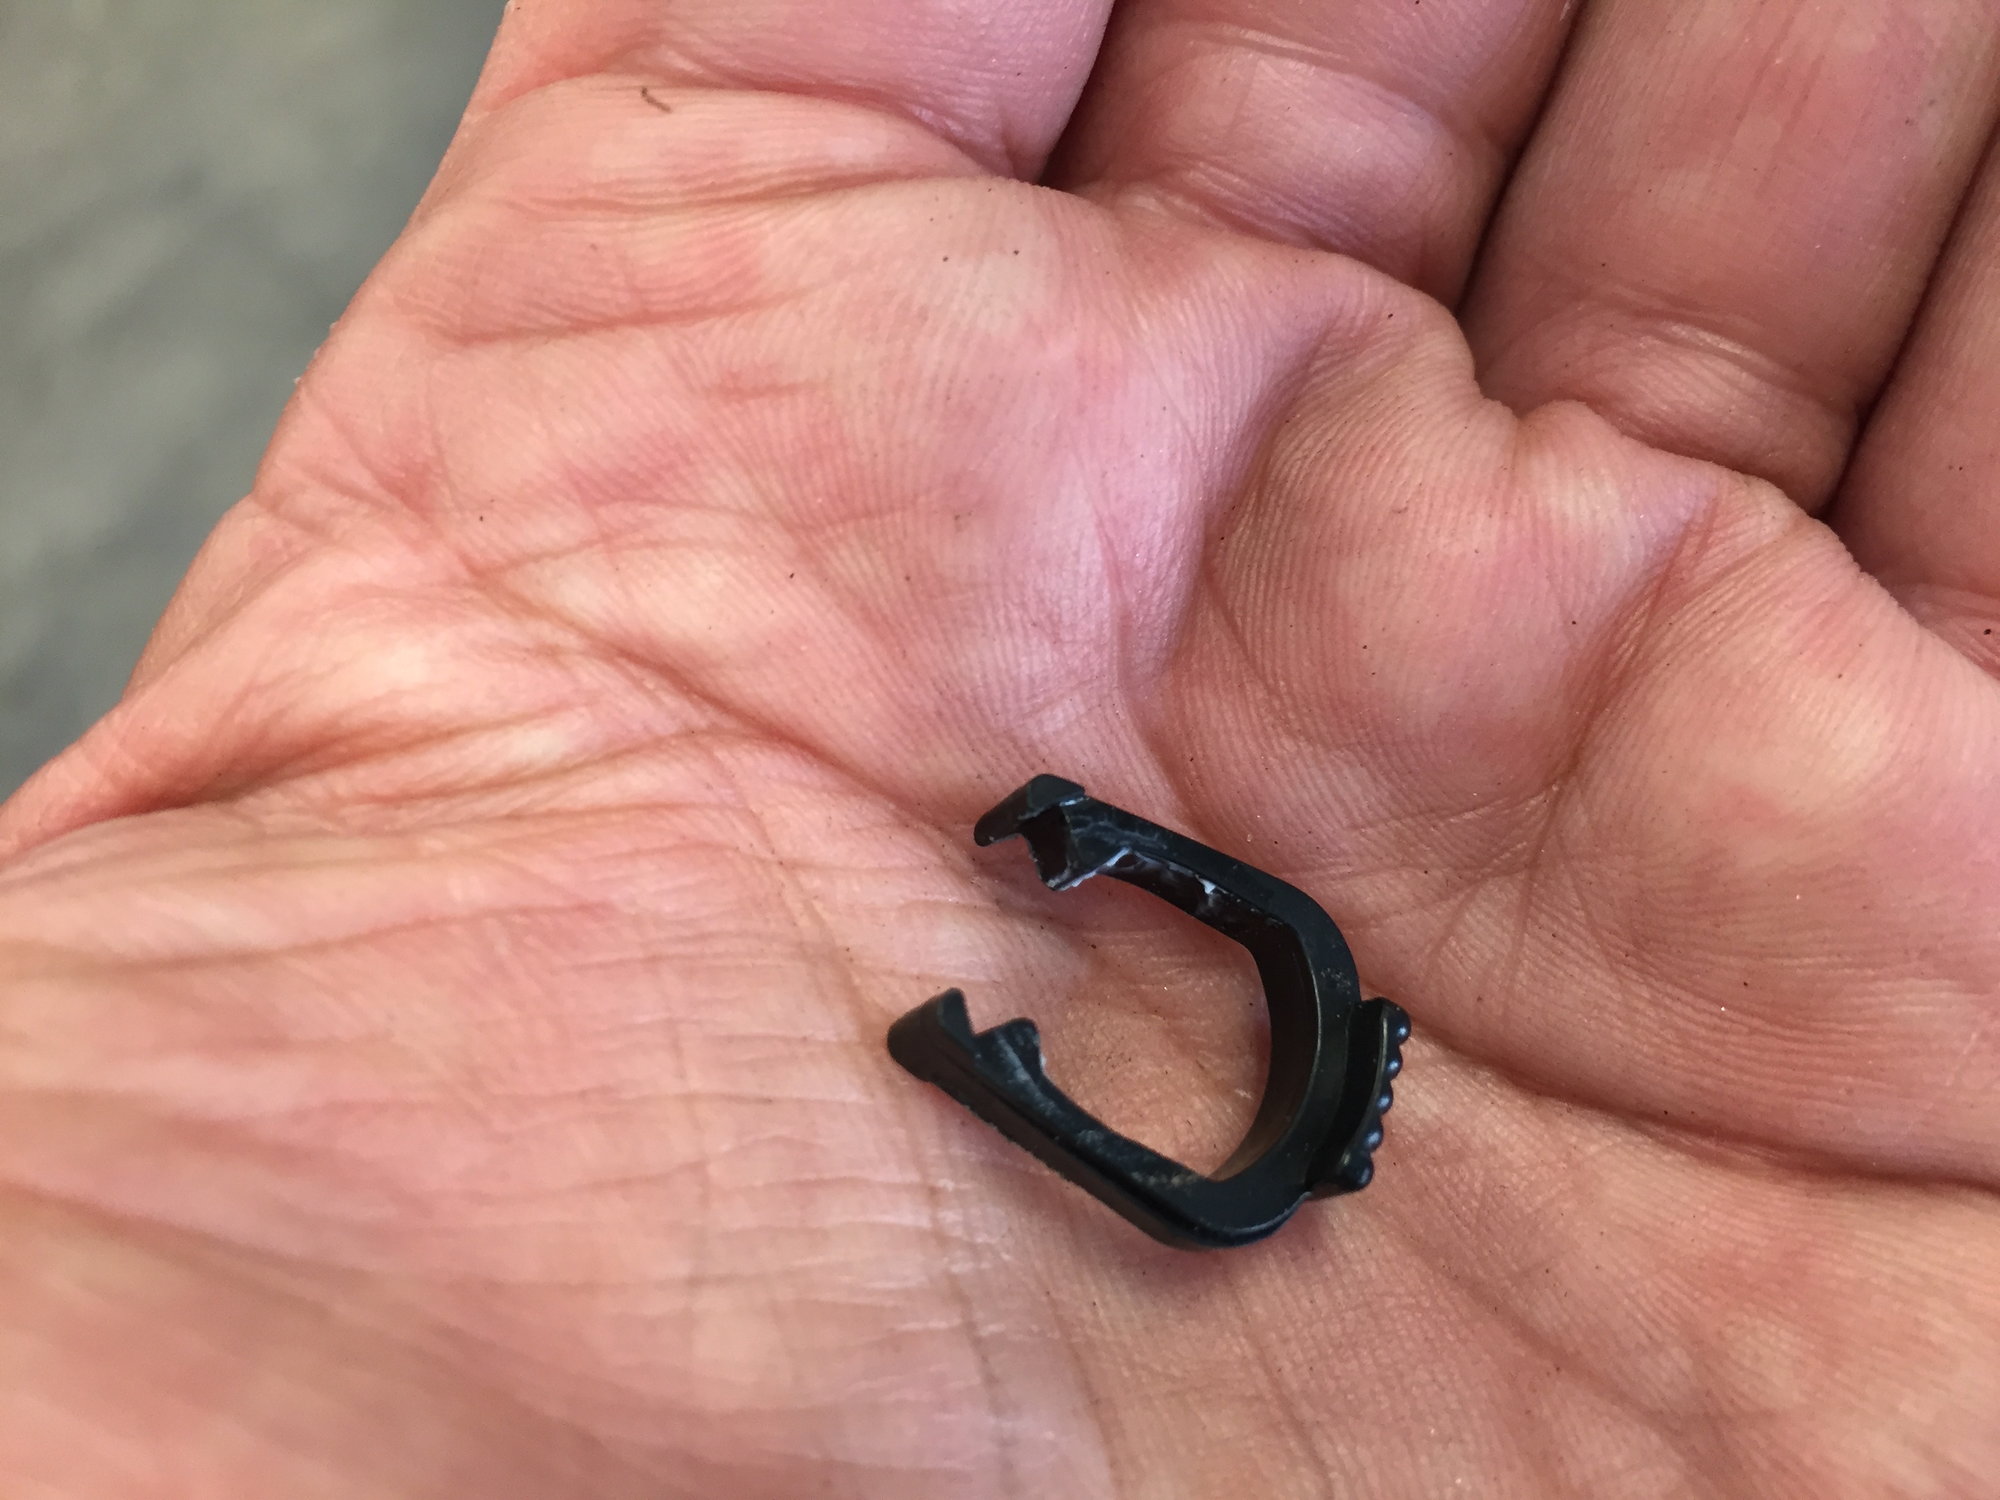
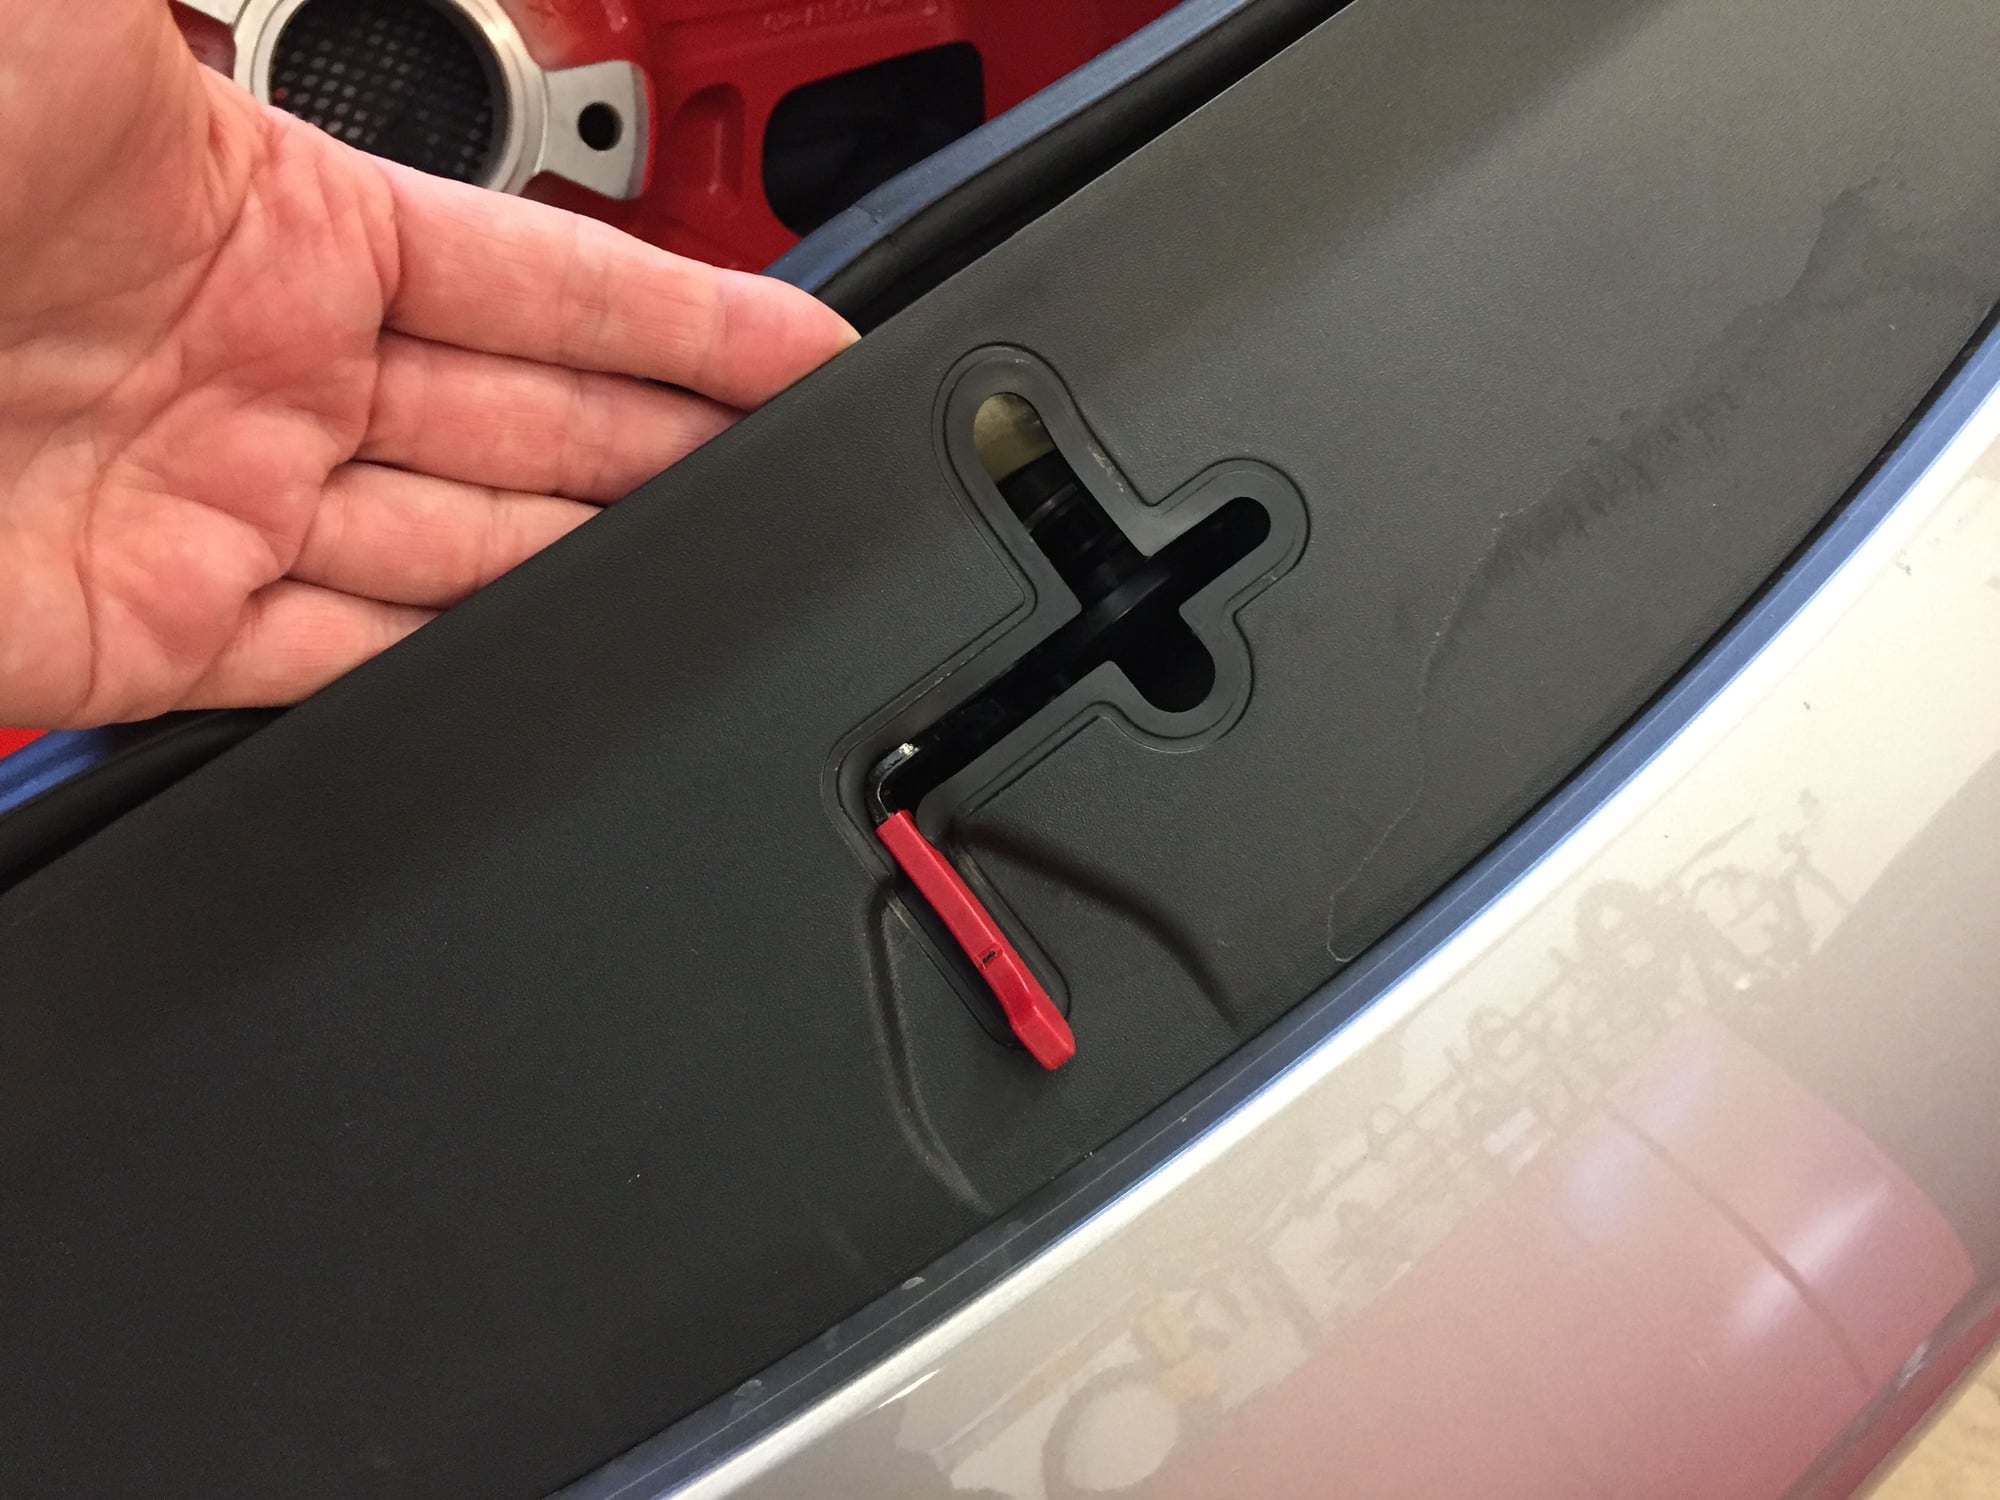
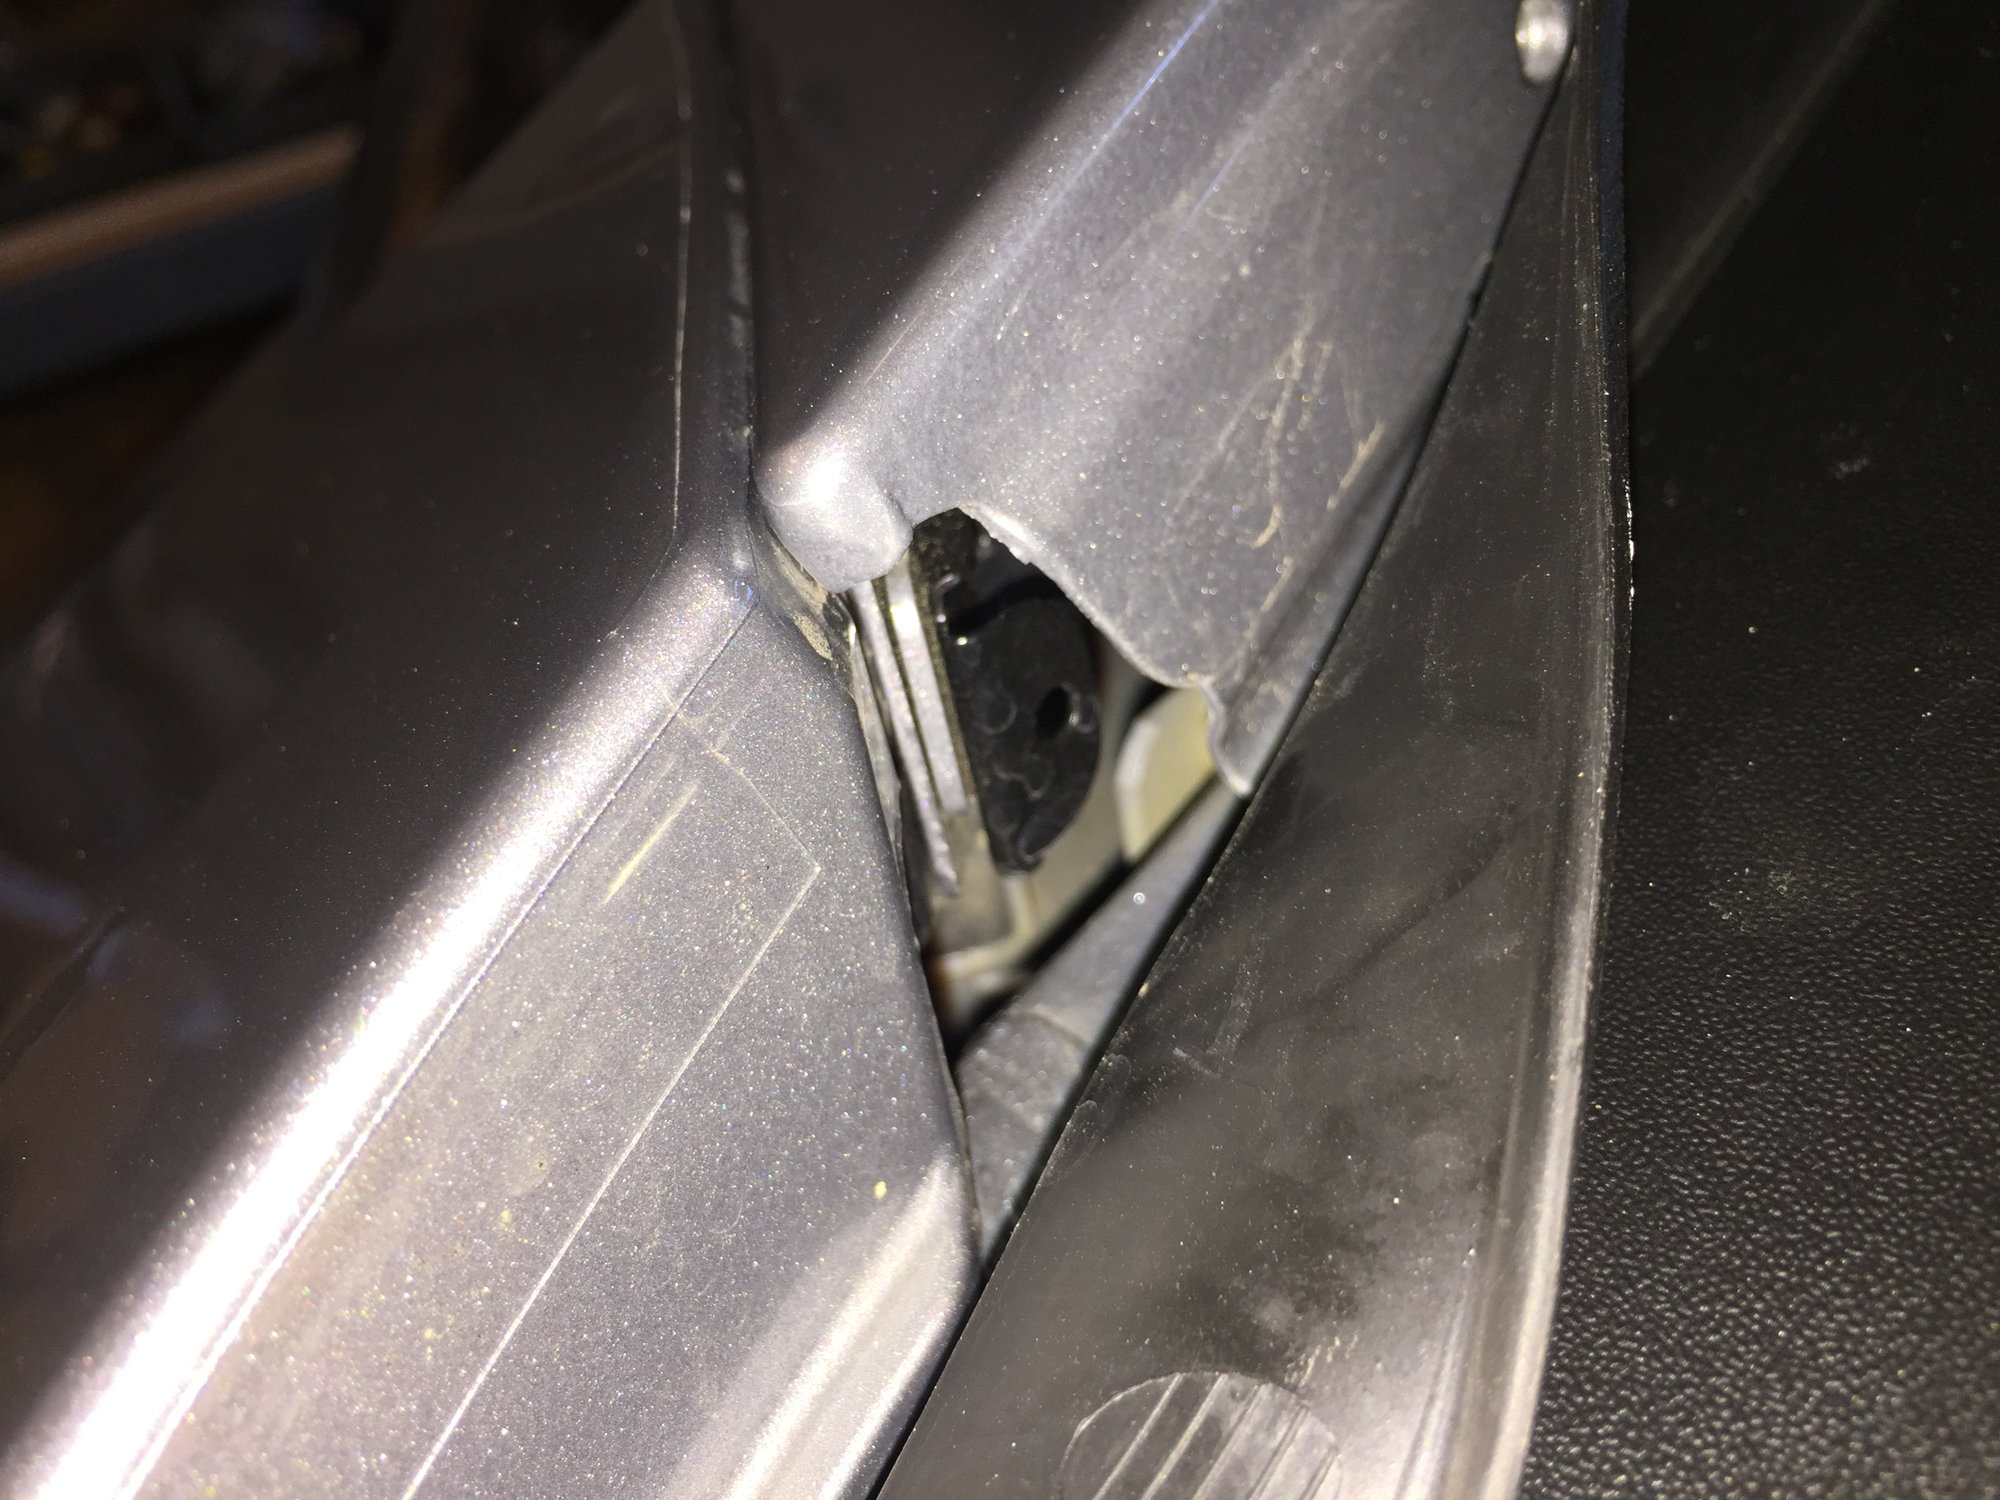
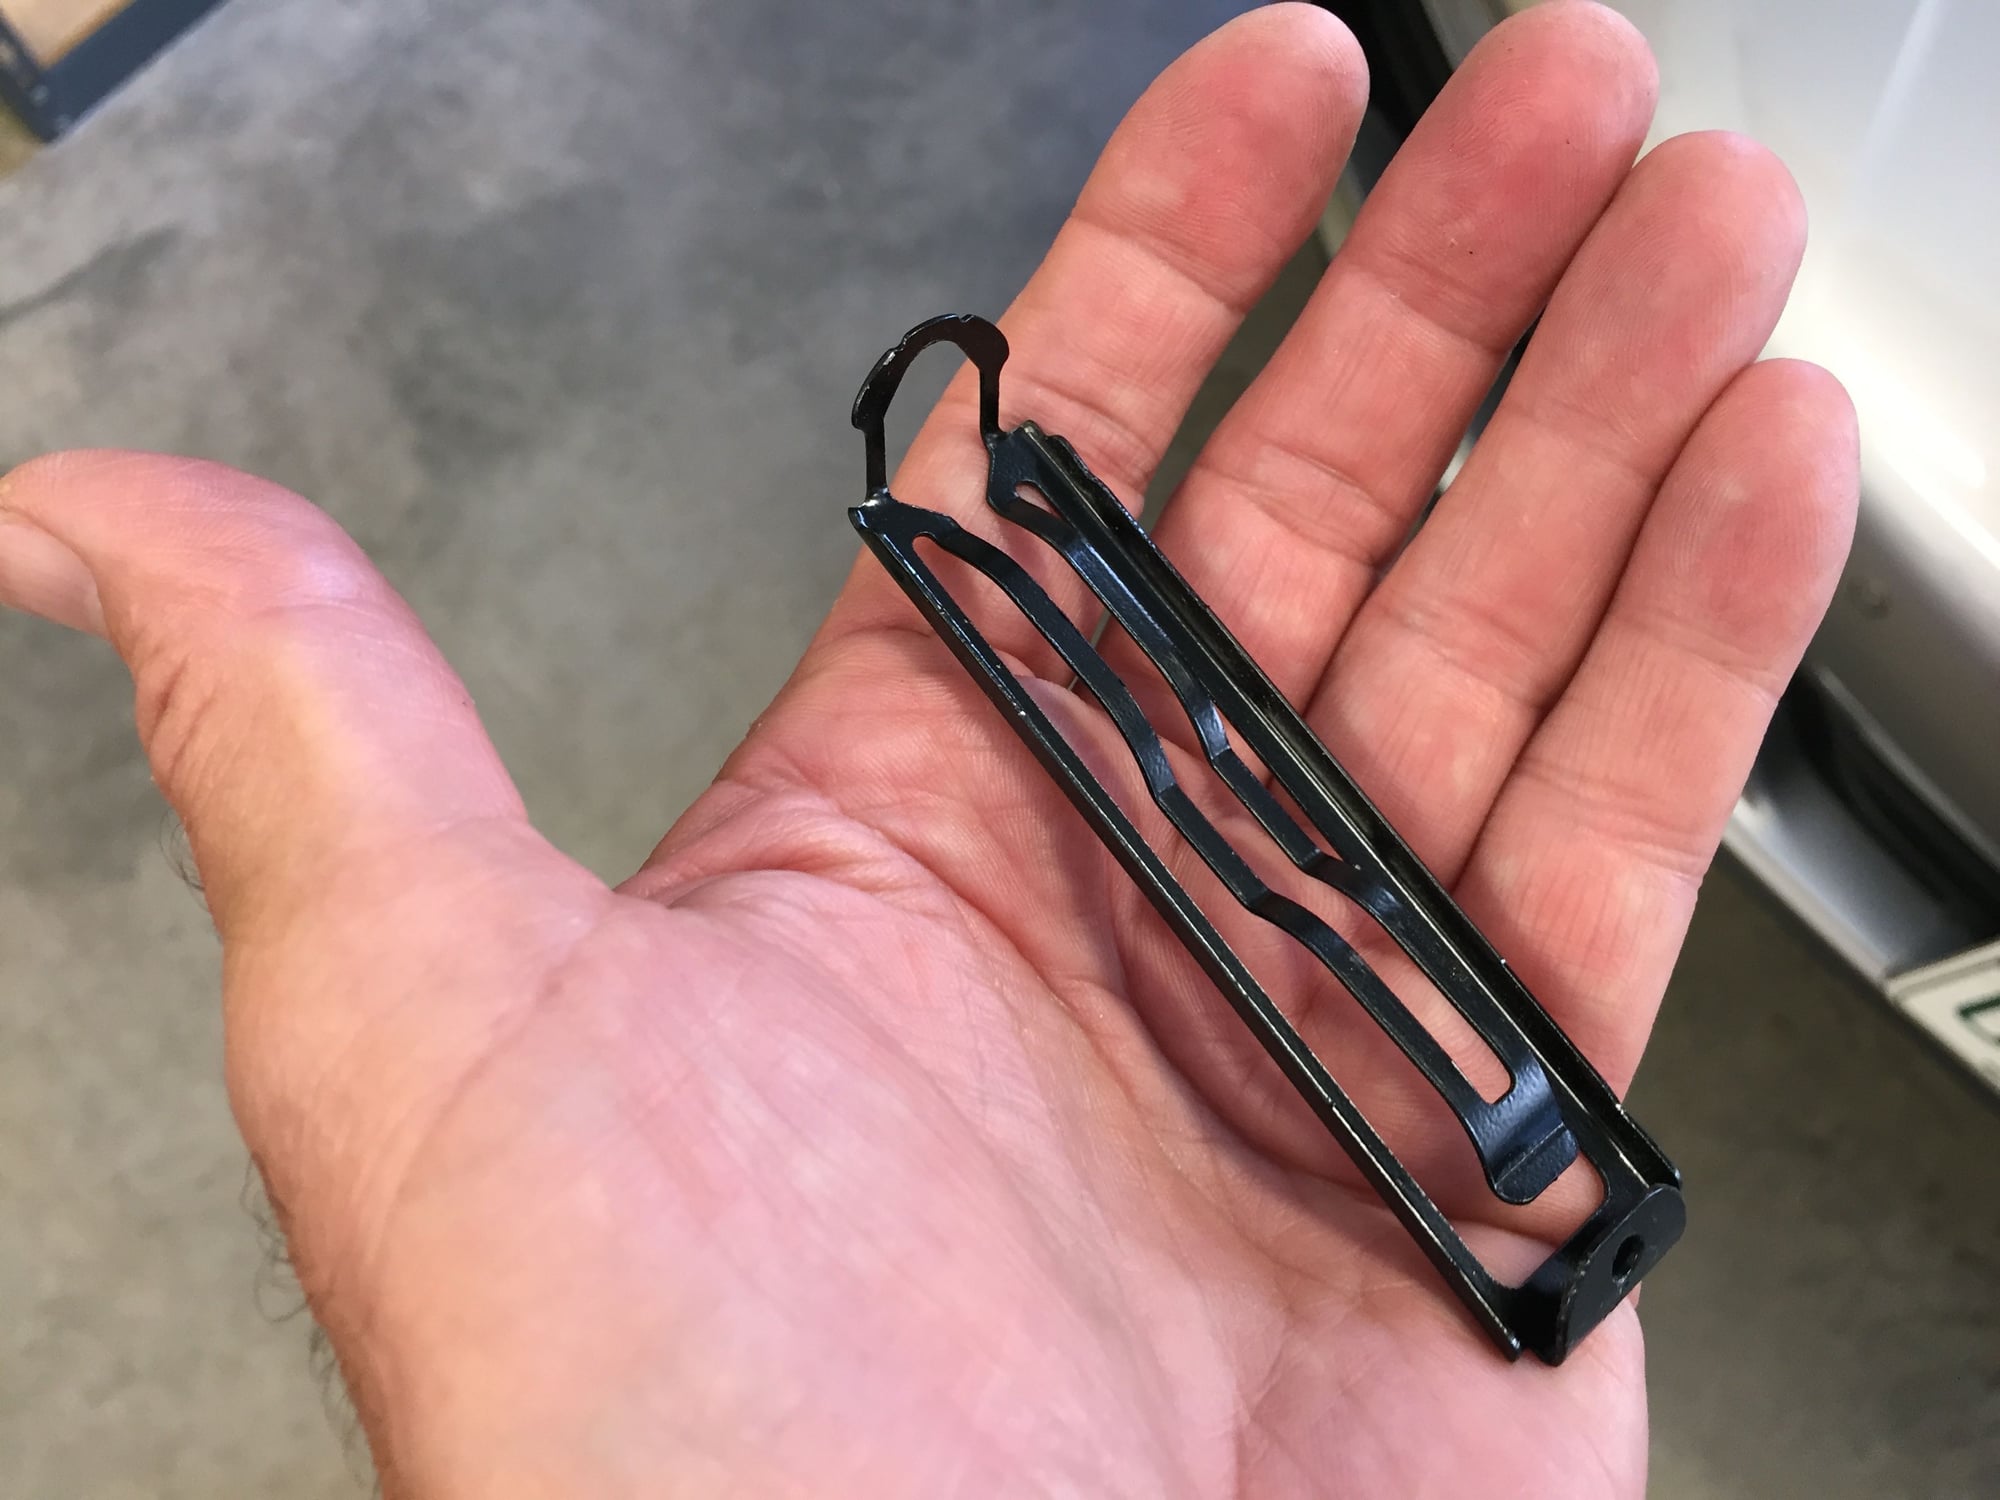
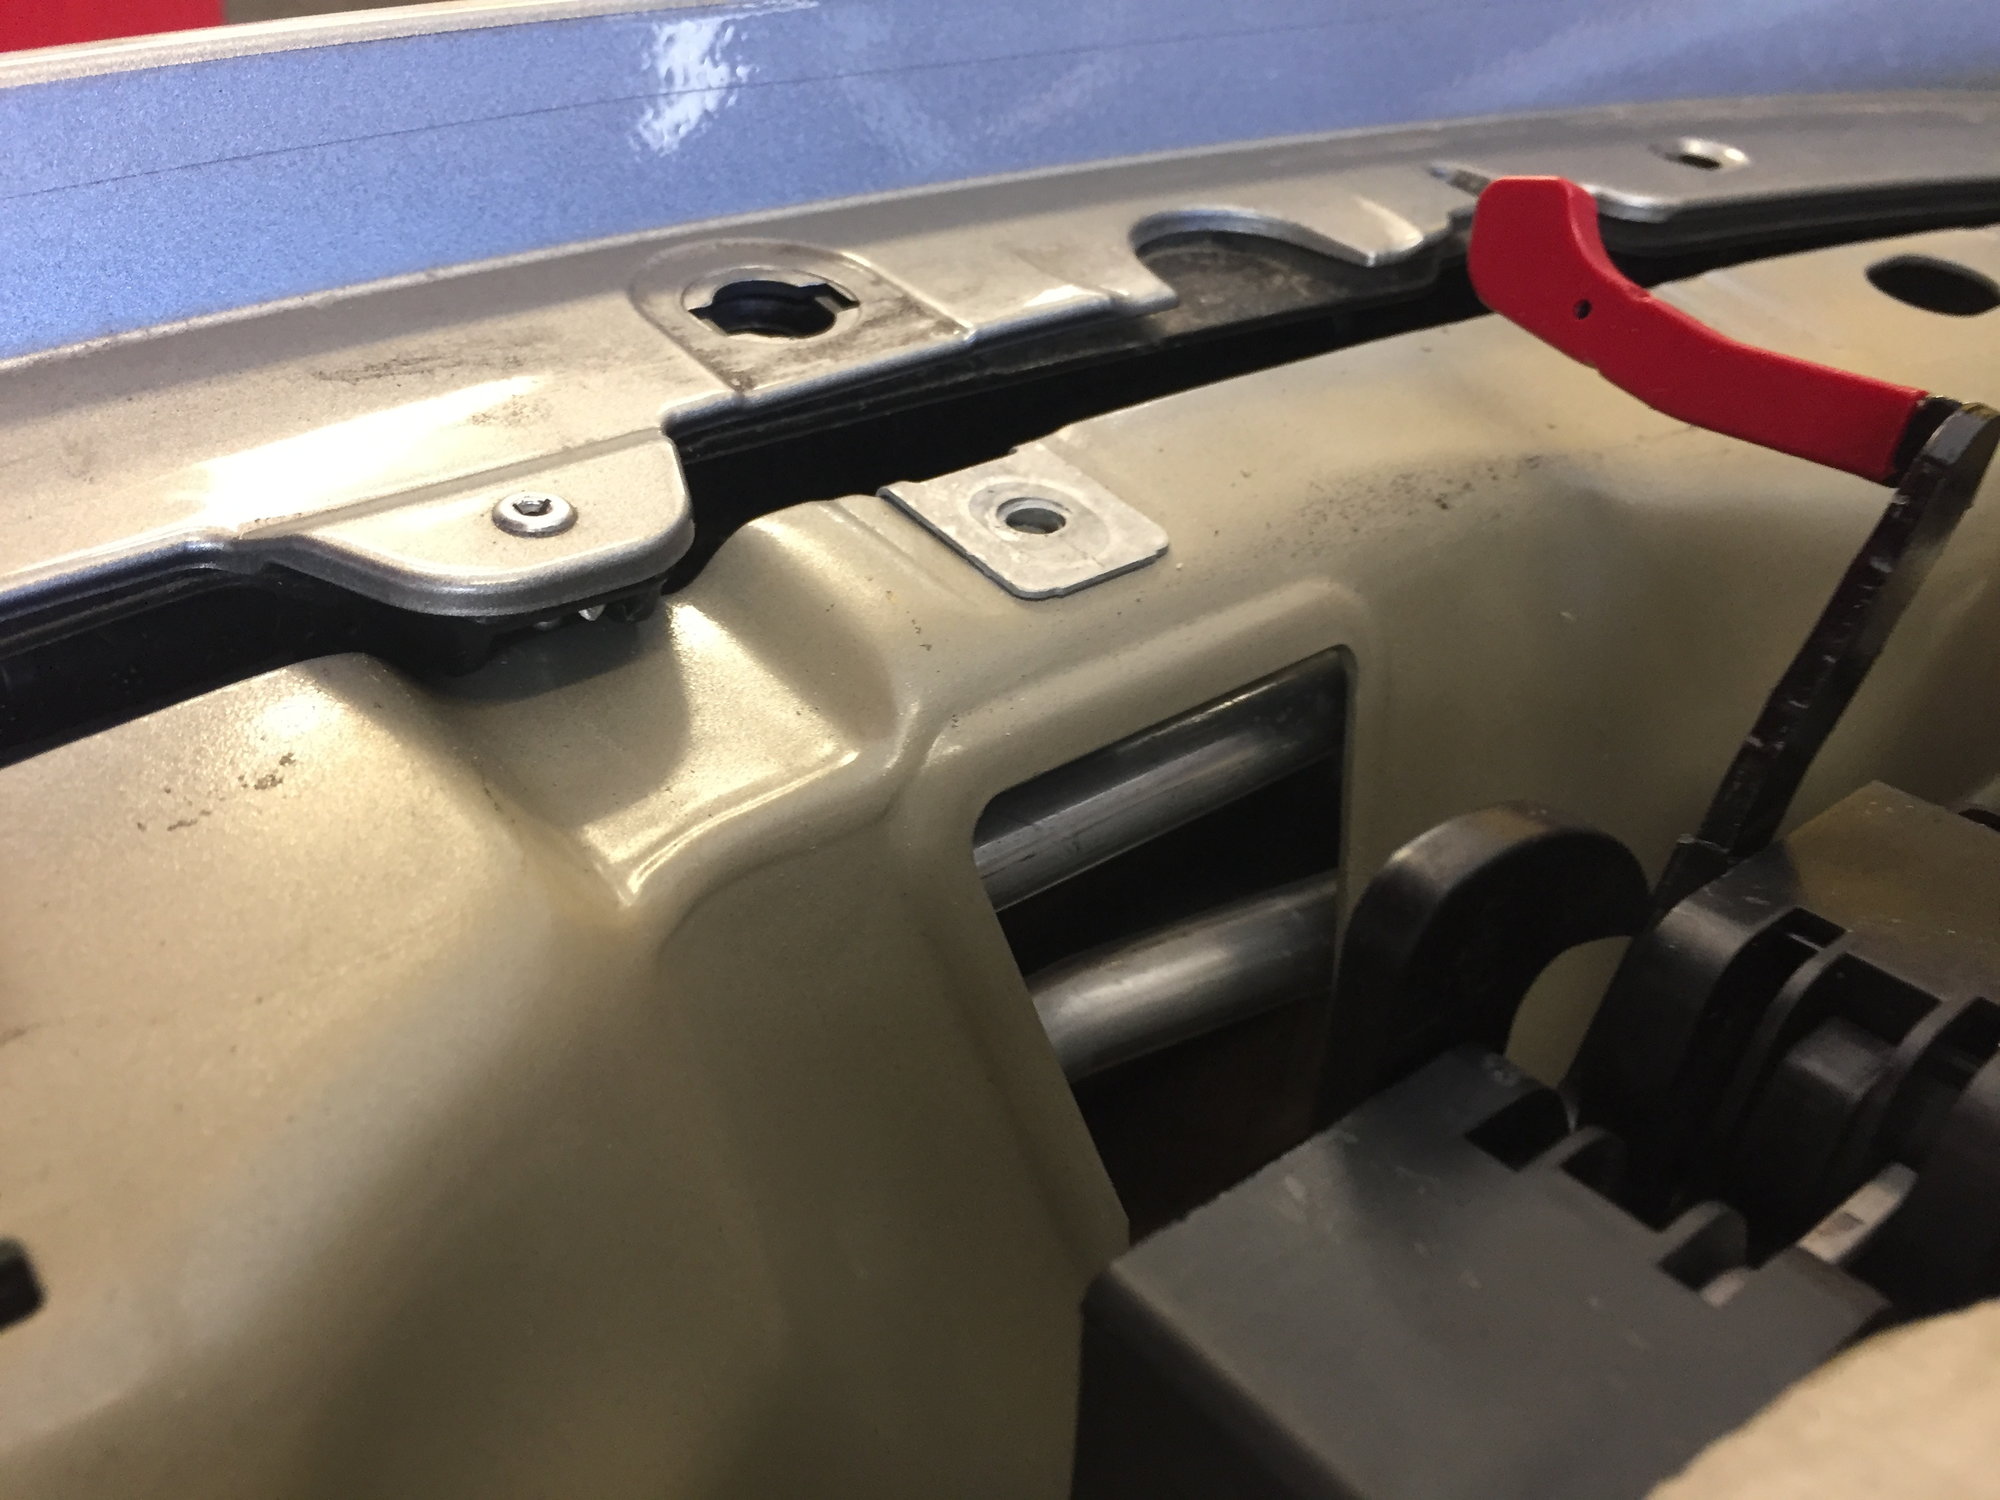
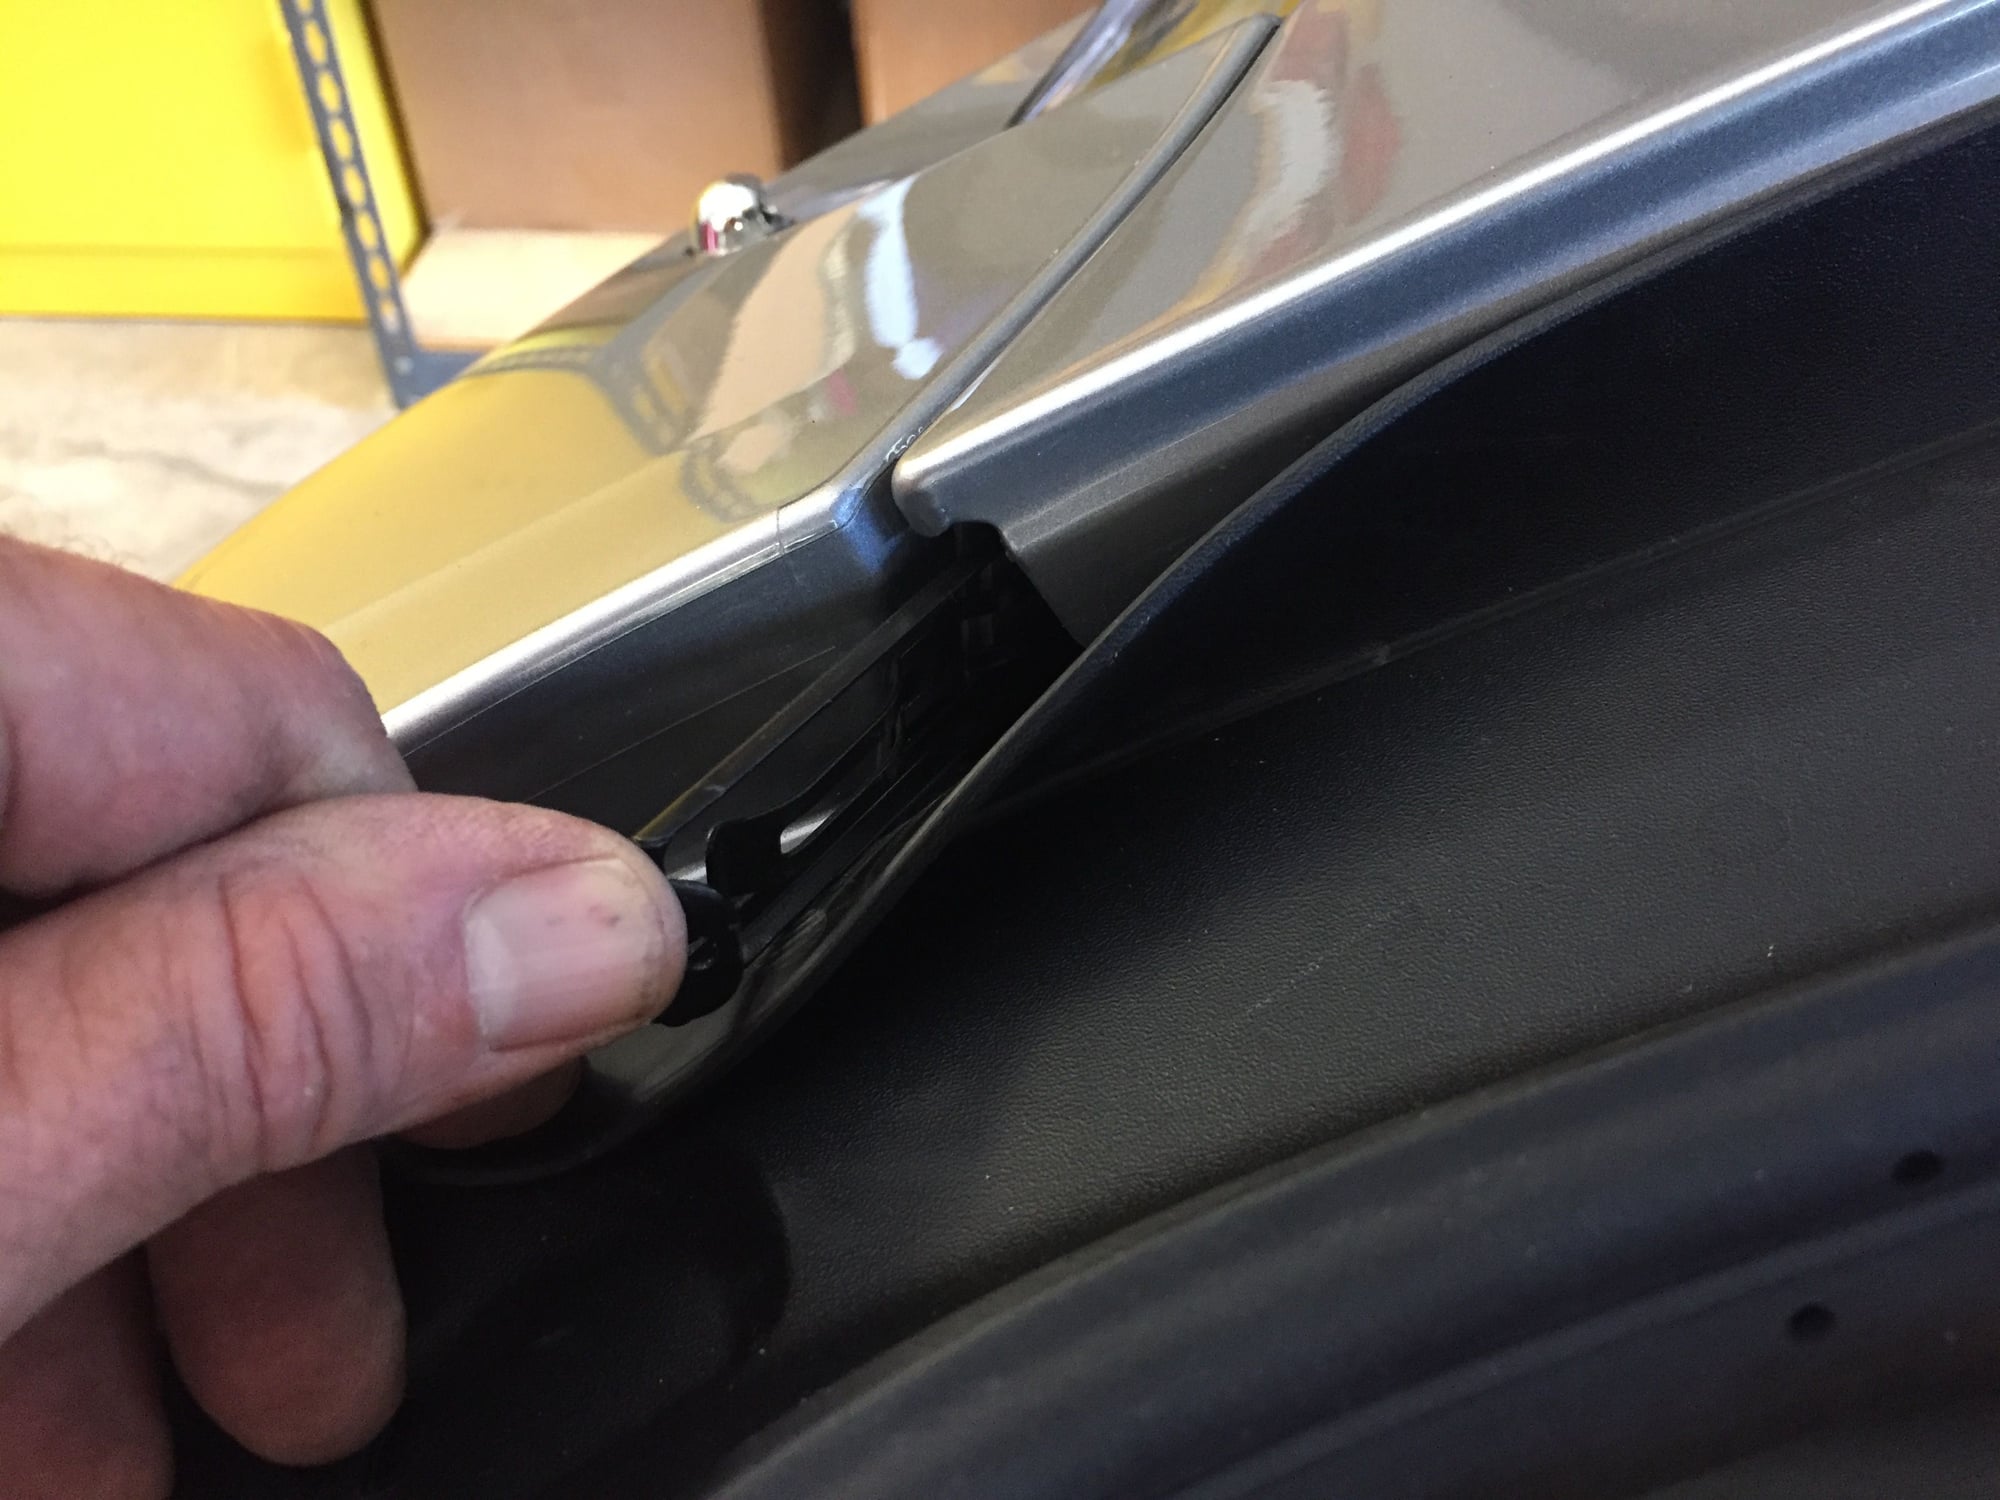
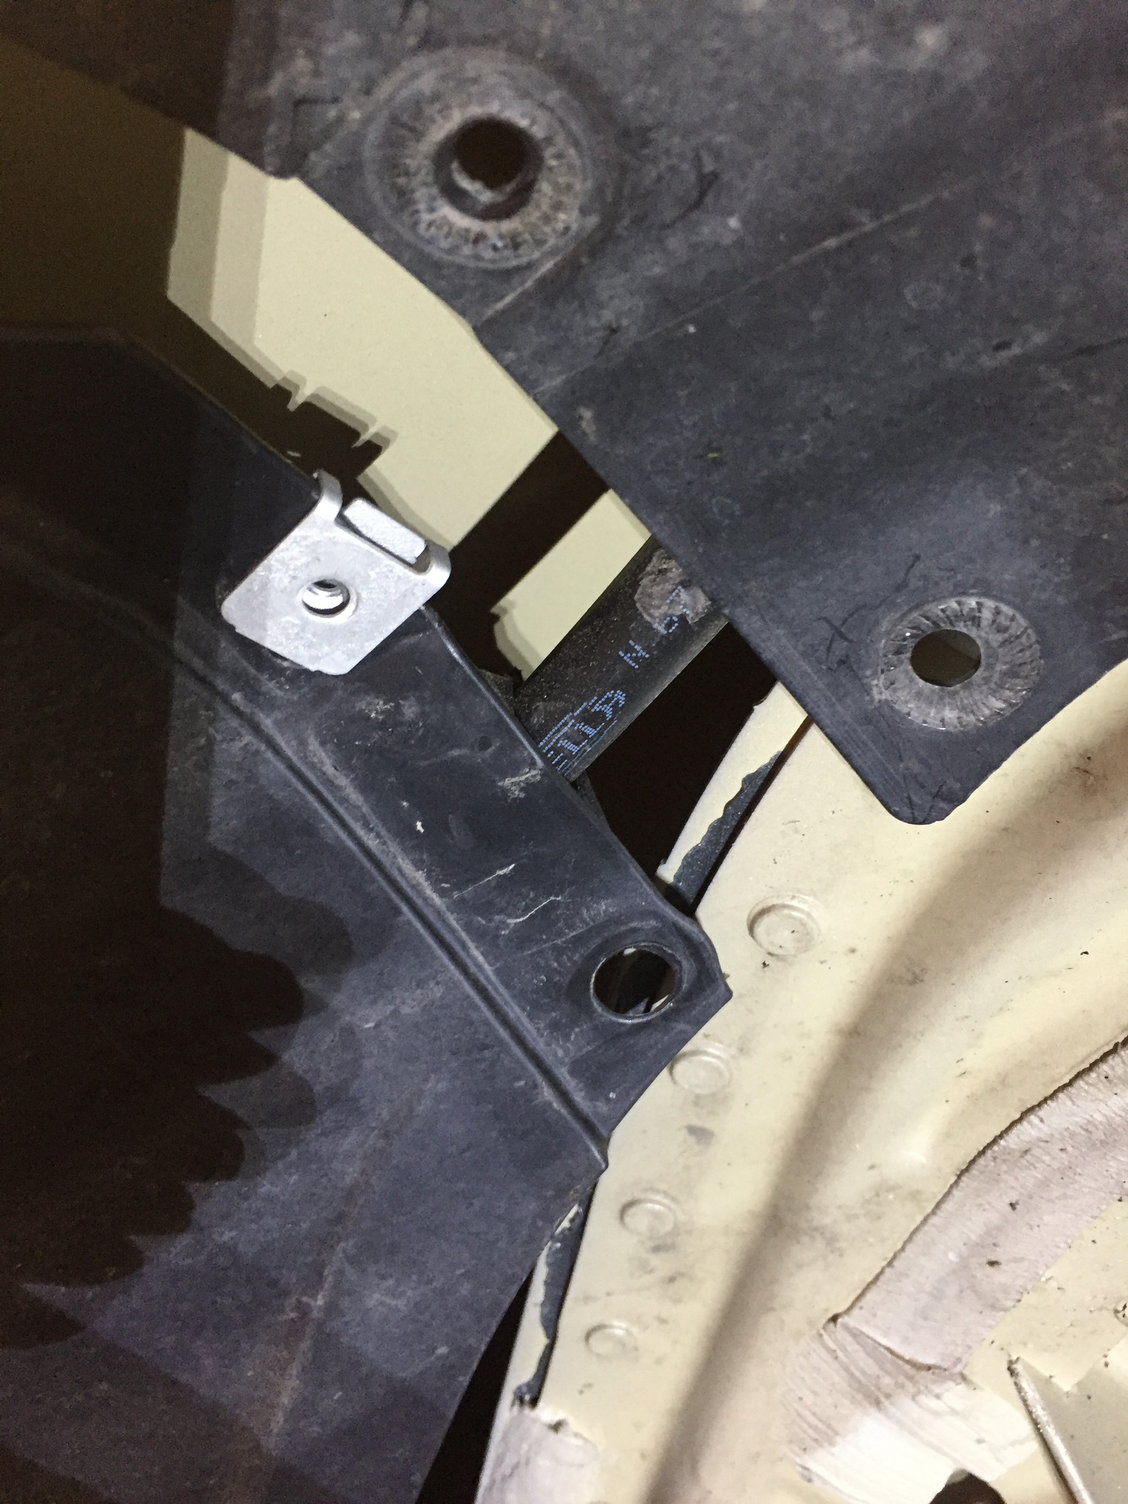
Last of all, remove the sliding retaining clips that hide next the the headlamps:
I was able to grab the end of the clip with needle-nose pliers (one prong in the hole in the end of the clip). Give a good pull towards the center of the car:
Here is the clip removed:
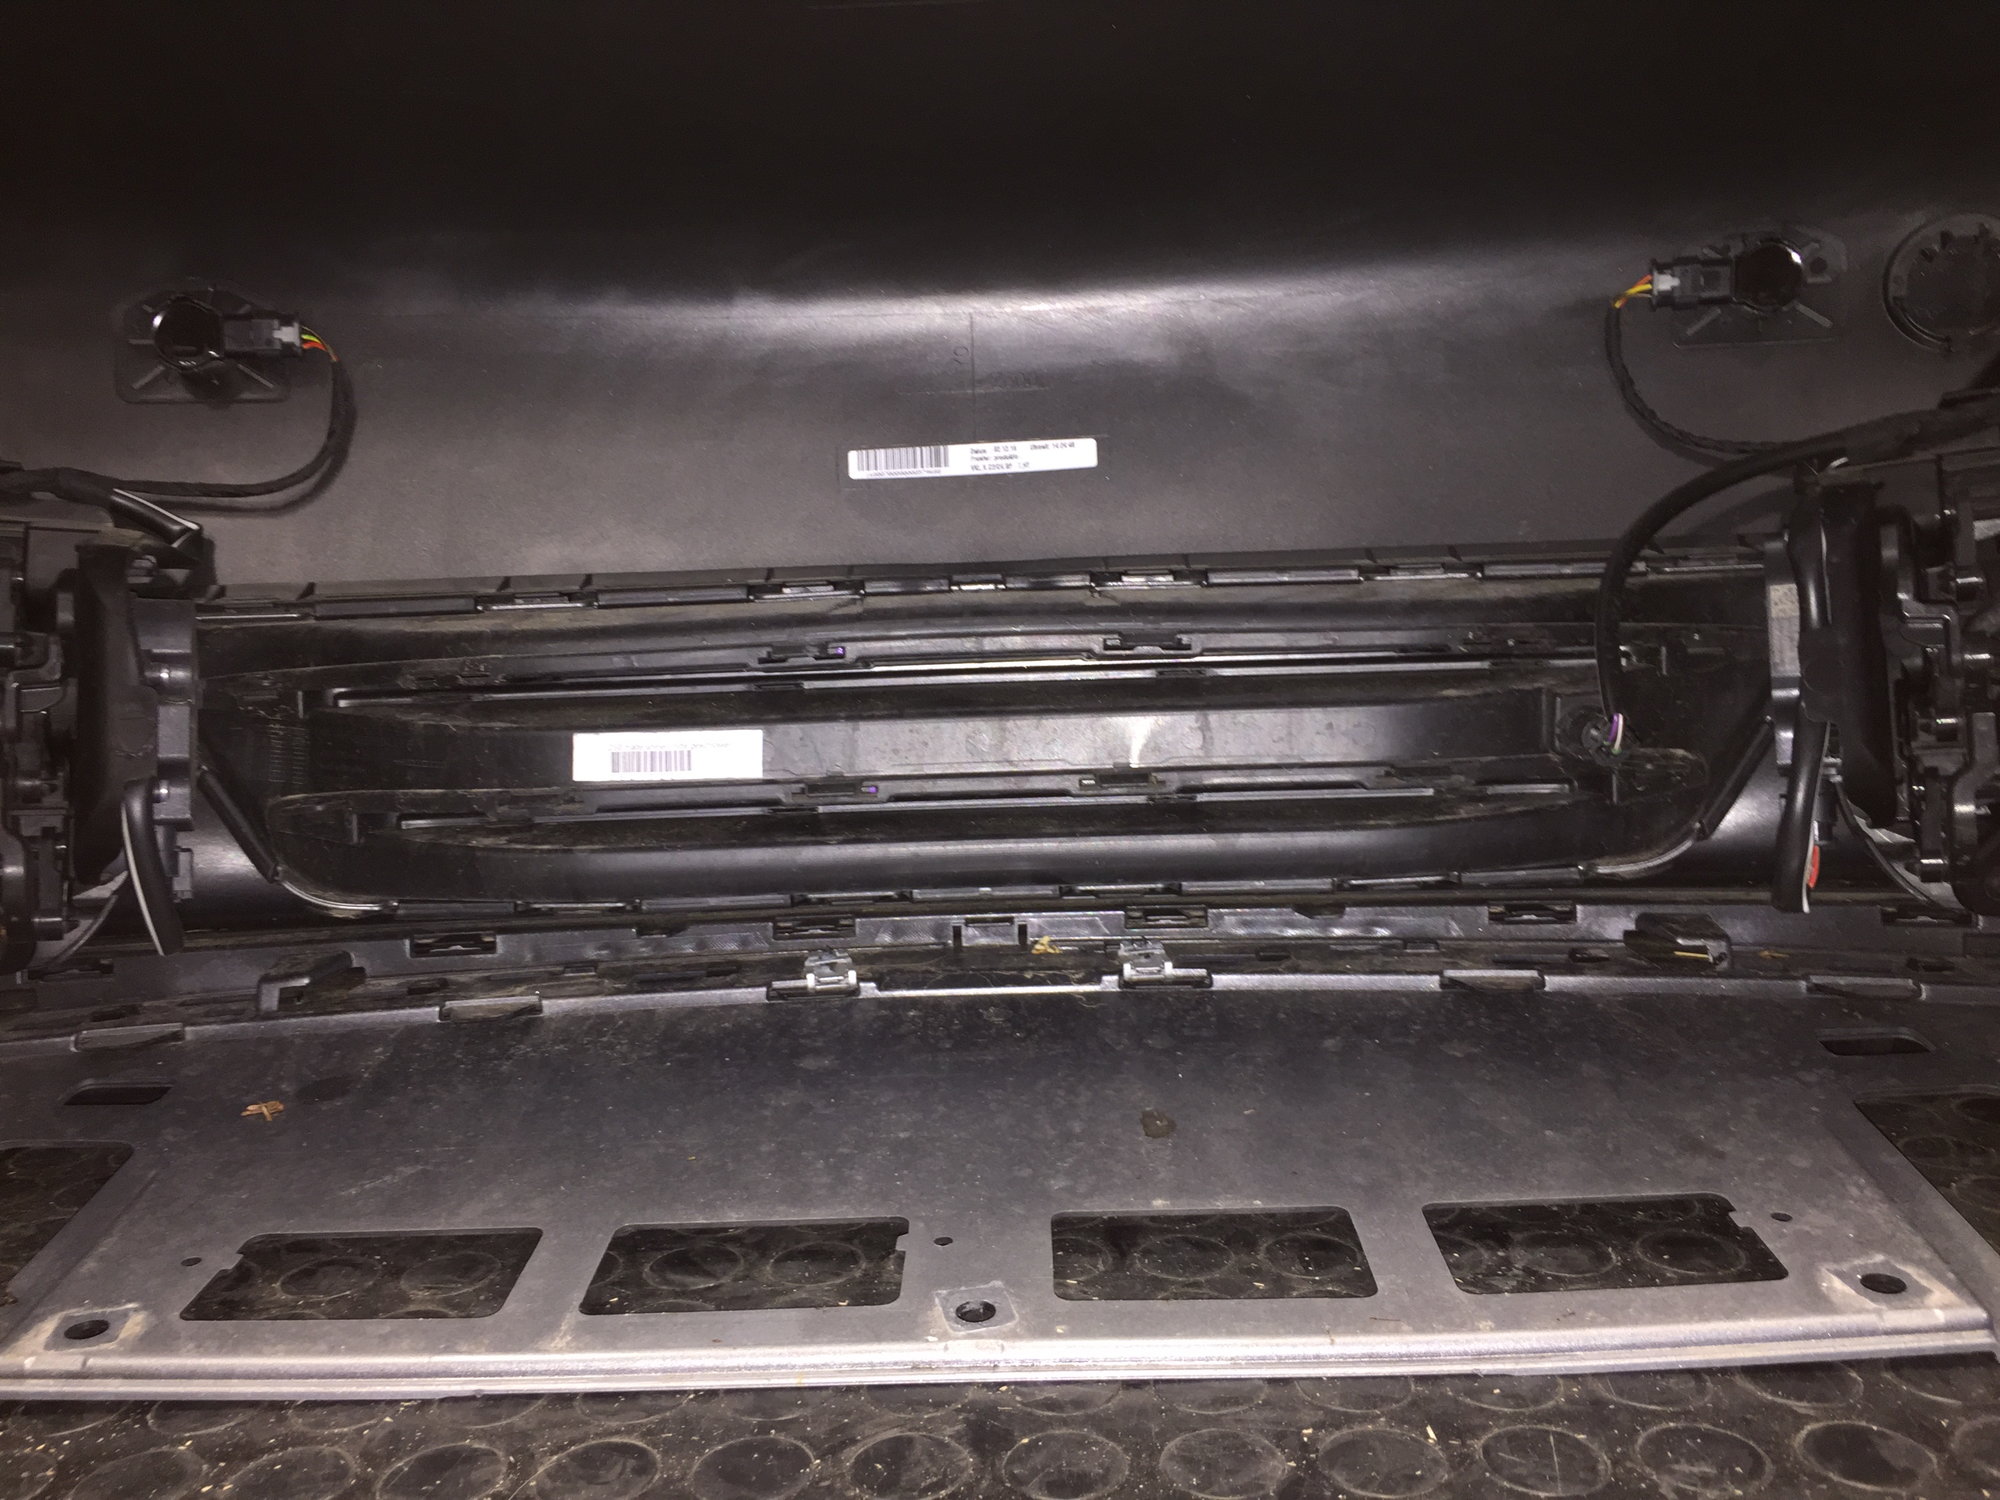
At this point, the bumper cover should slide forward easily. If not, check for any remaining screws under the car. Stop when the cover has moved forward about an inch, and then check that all cables are free (tuck the side marker light connectors through the holes on each side):
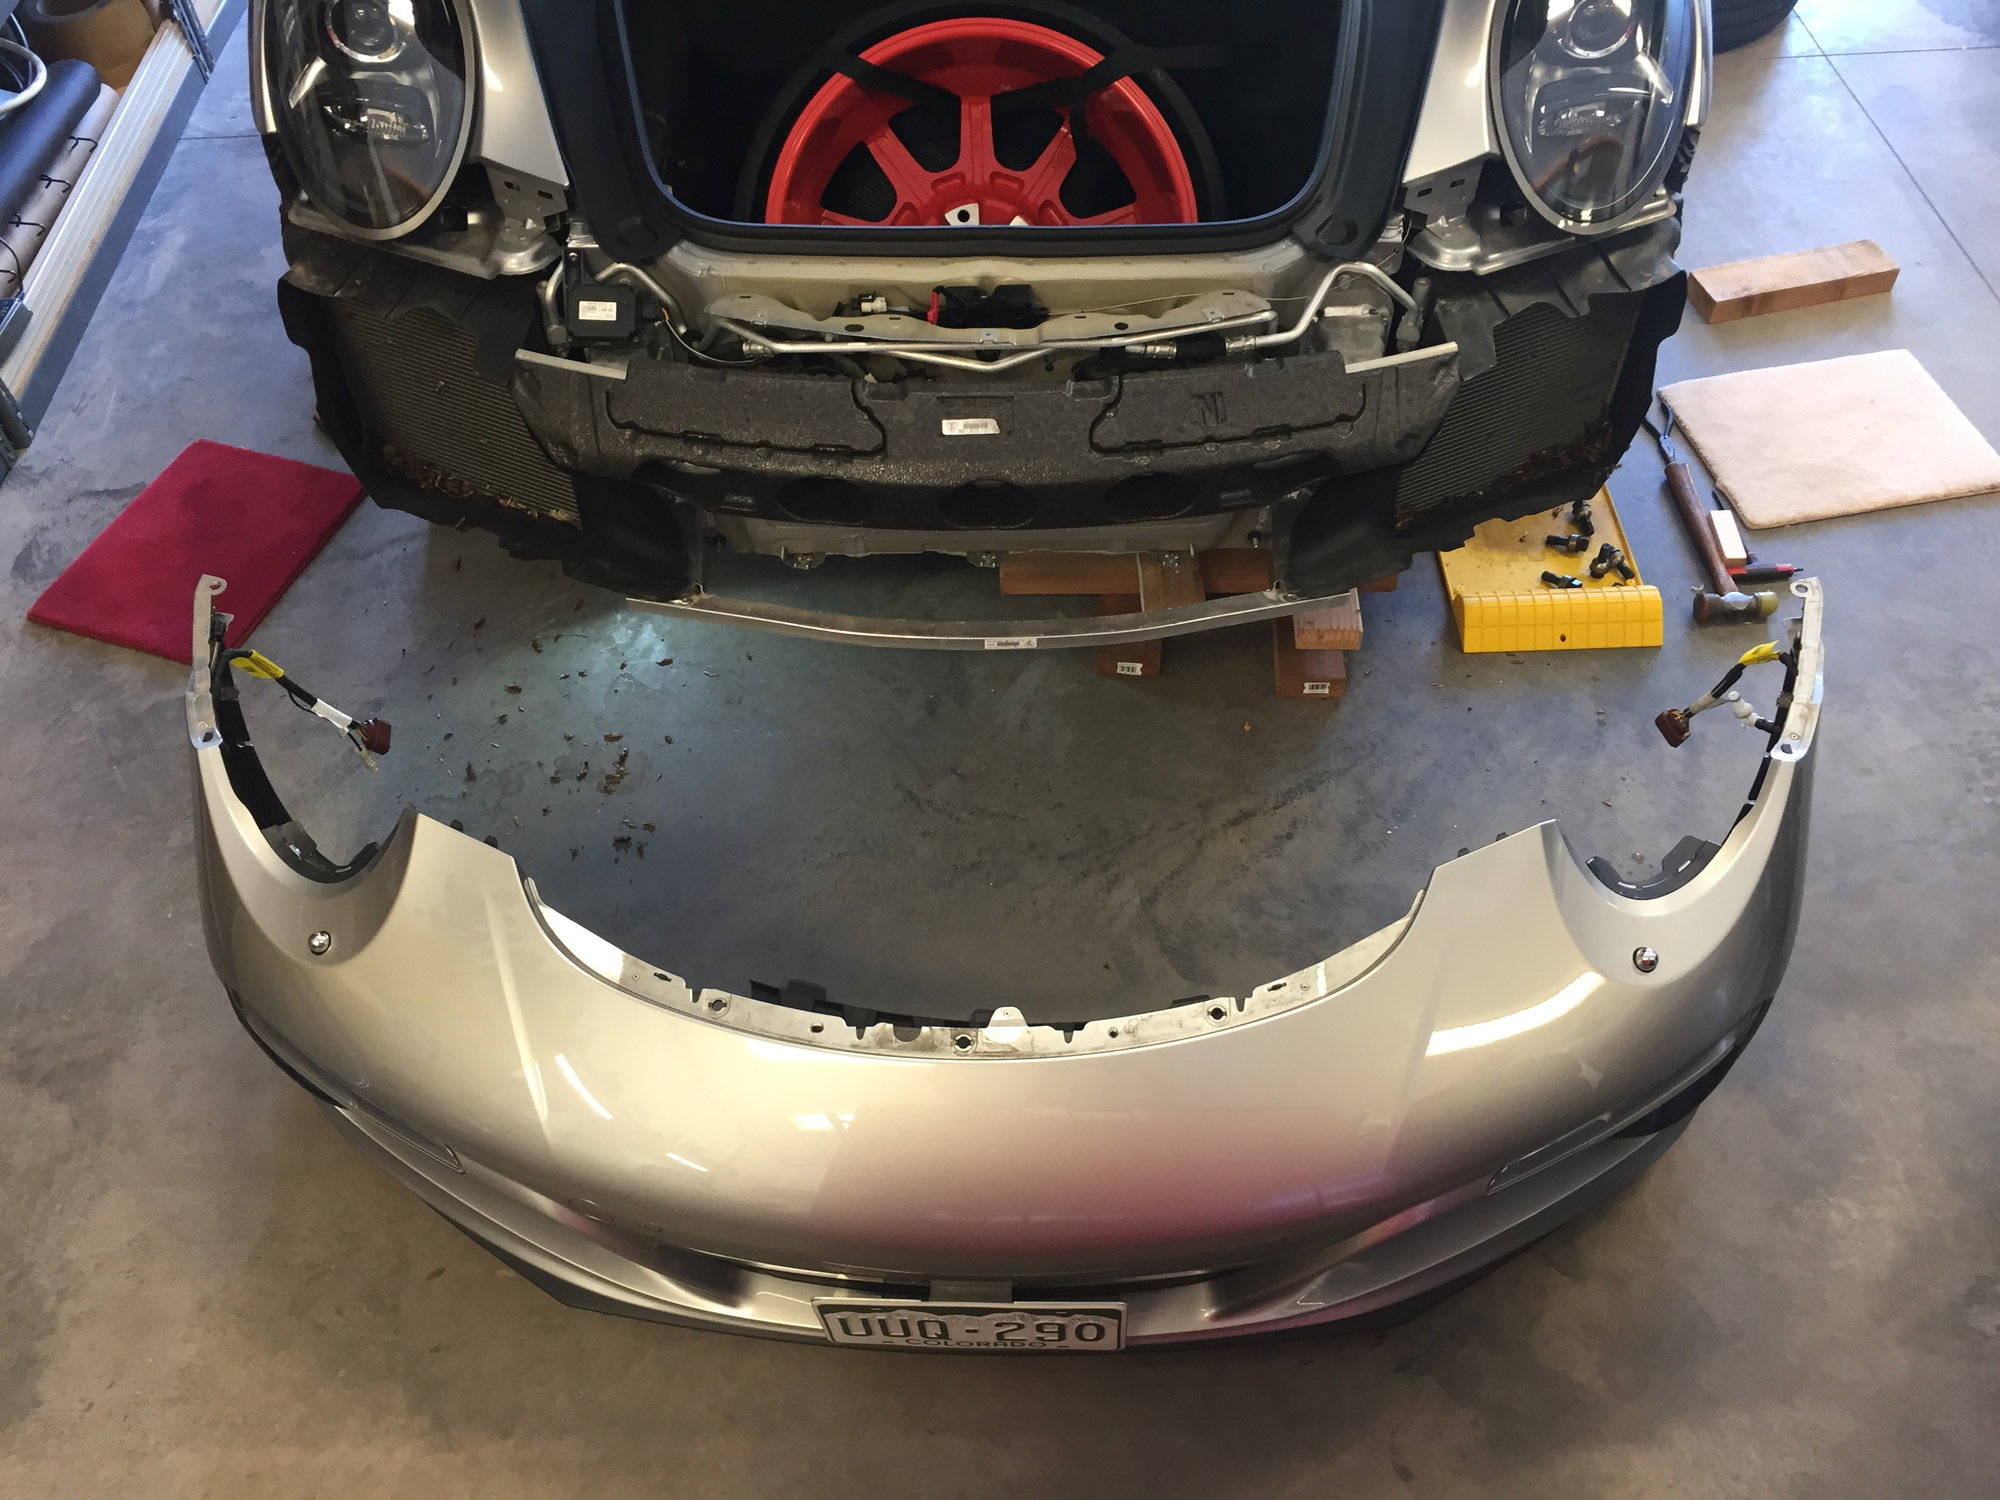
Carefully complete the forward release of the bumper cover and place on the floor. This is a fairly light and stiff piece, and can be handled by one person. Note more grasshopper bits:
And even more grasshoppers:
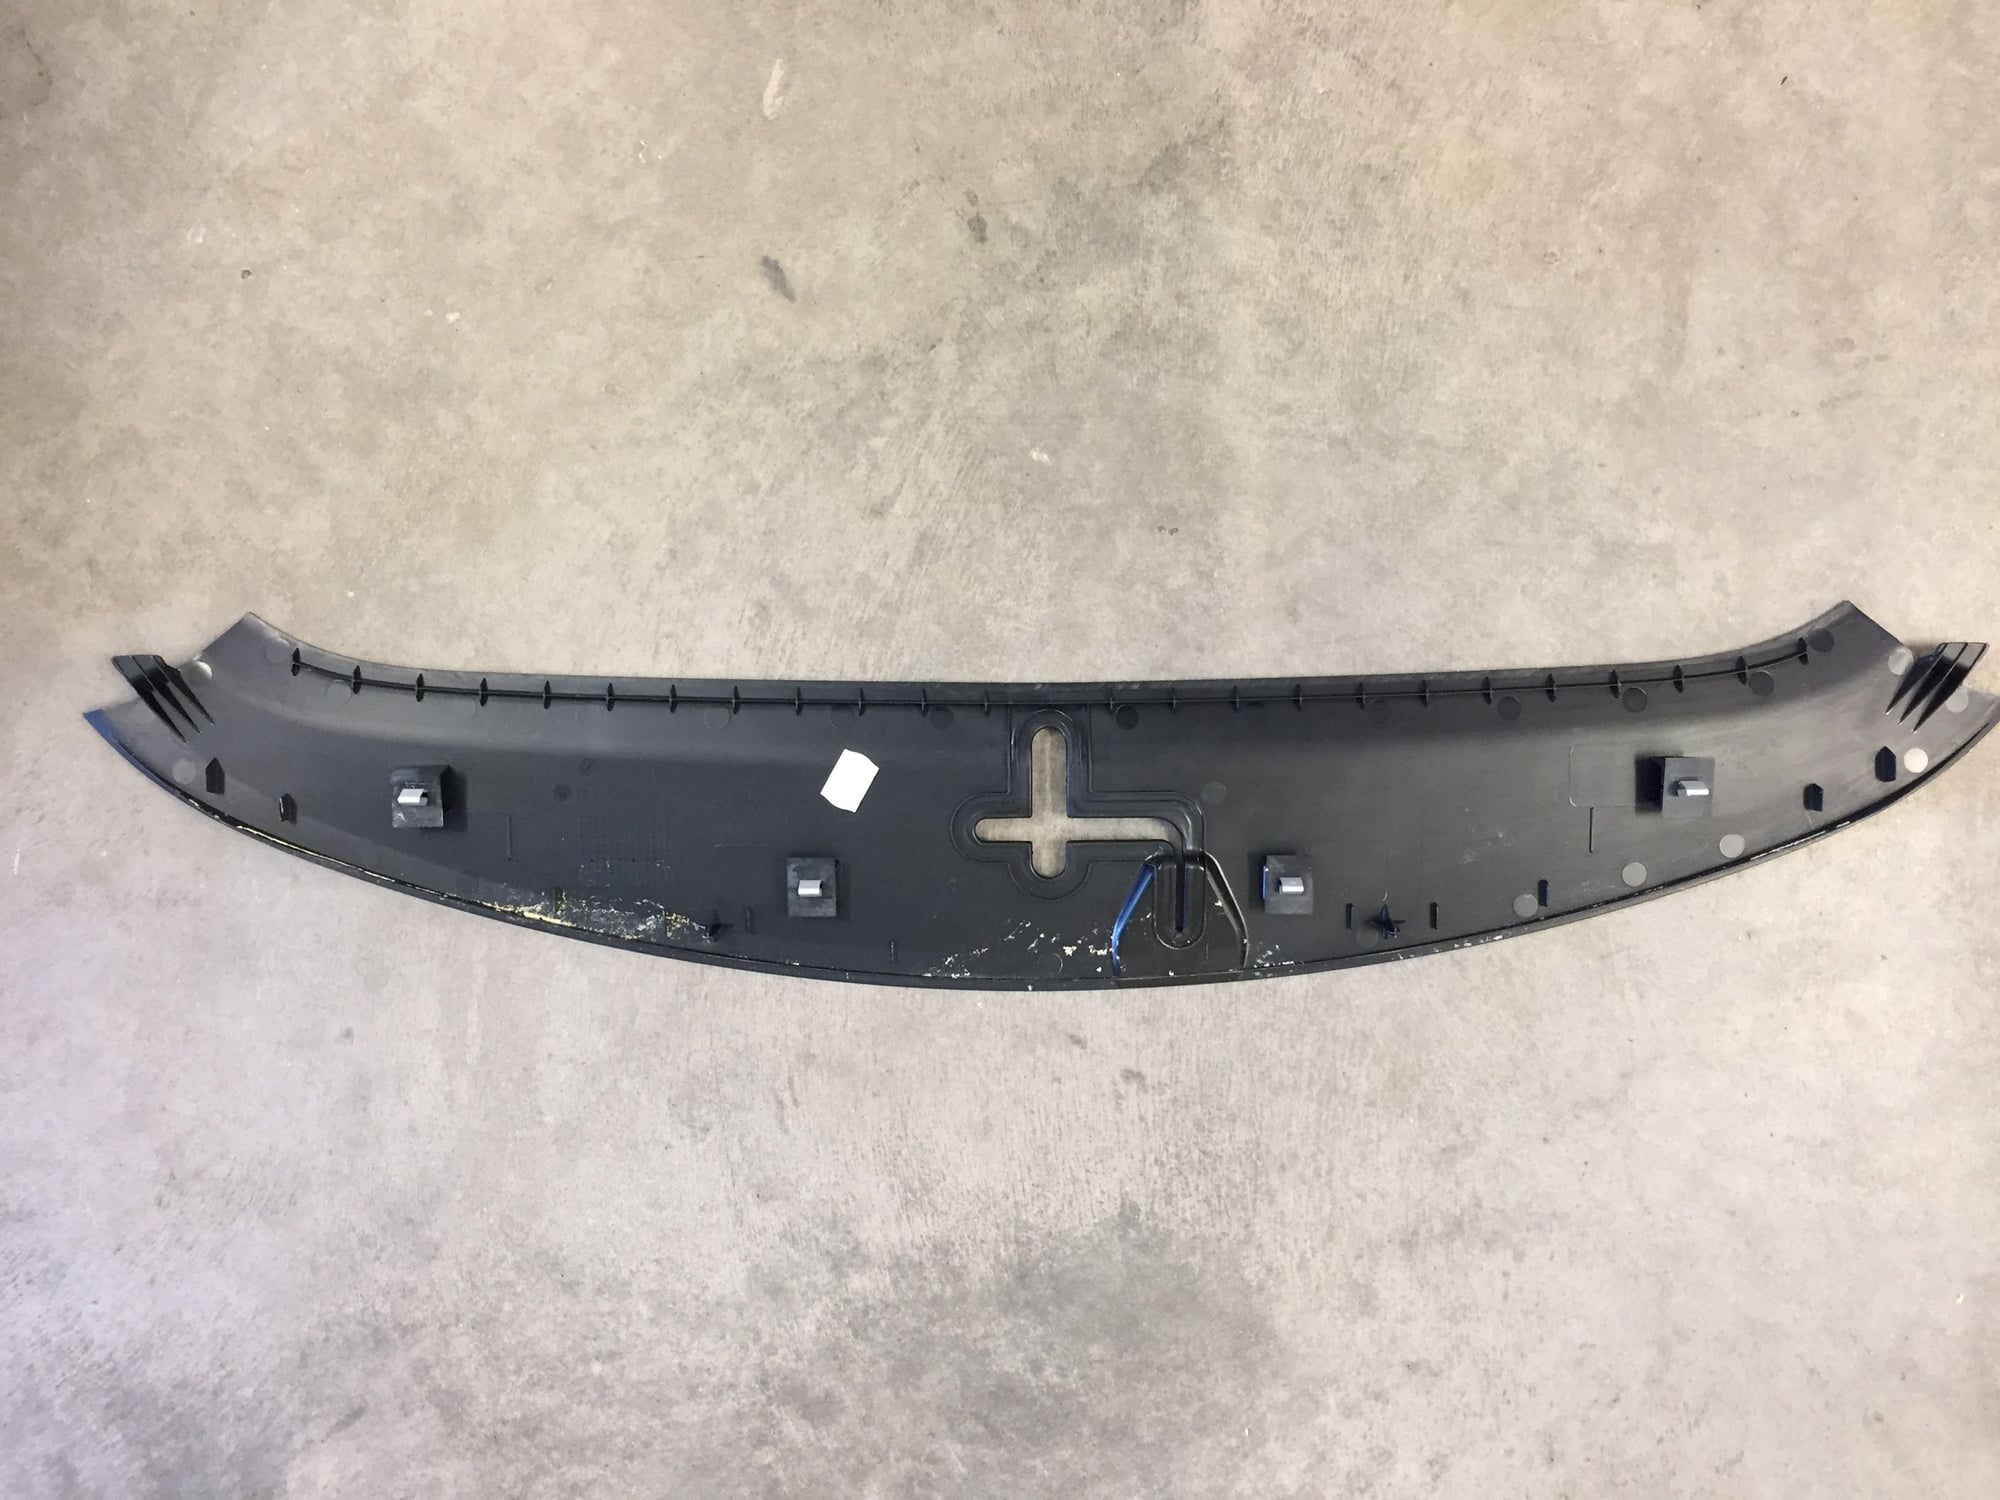
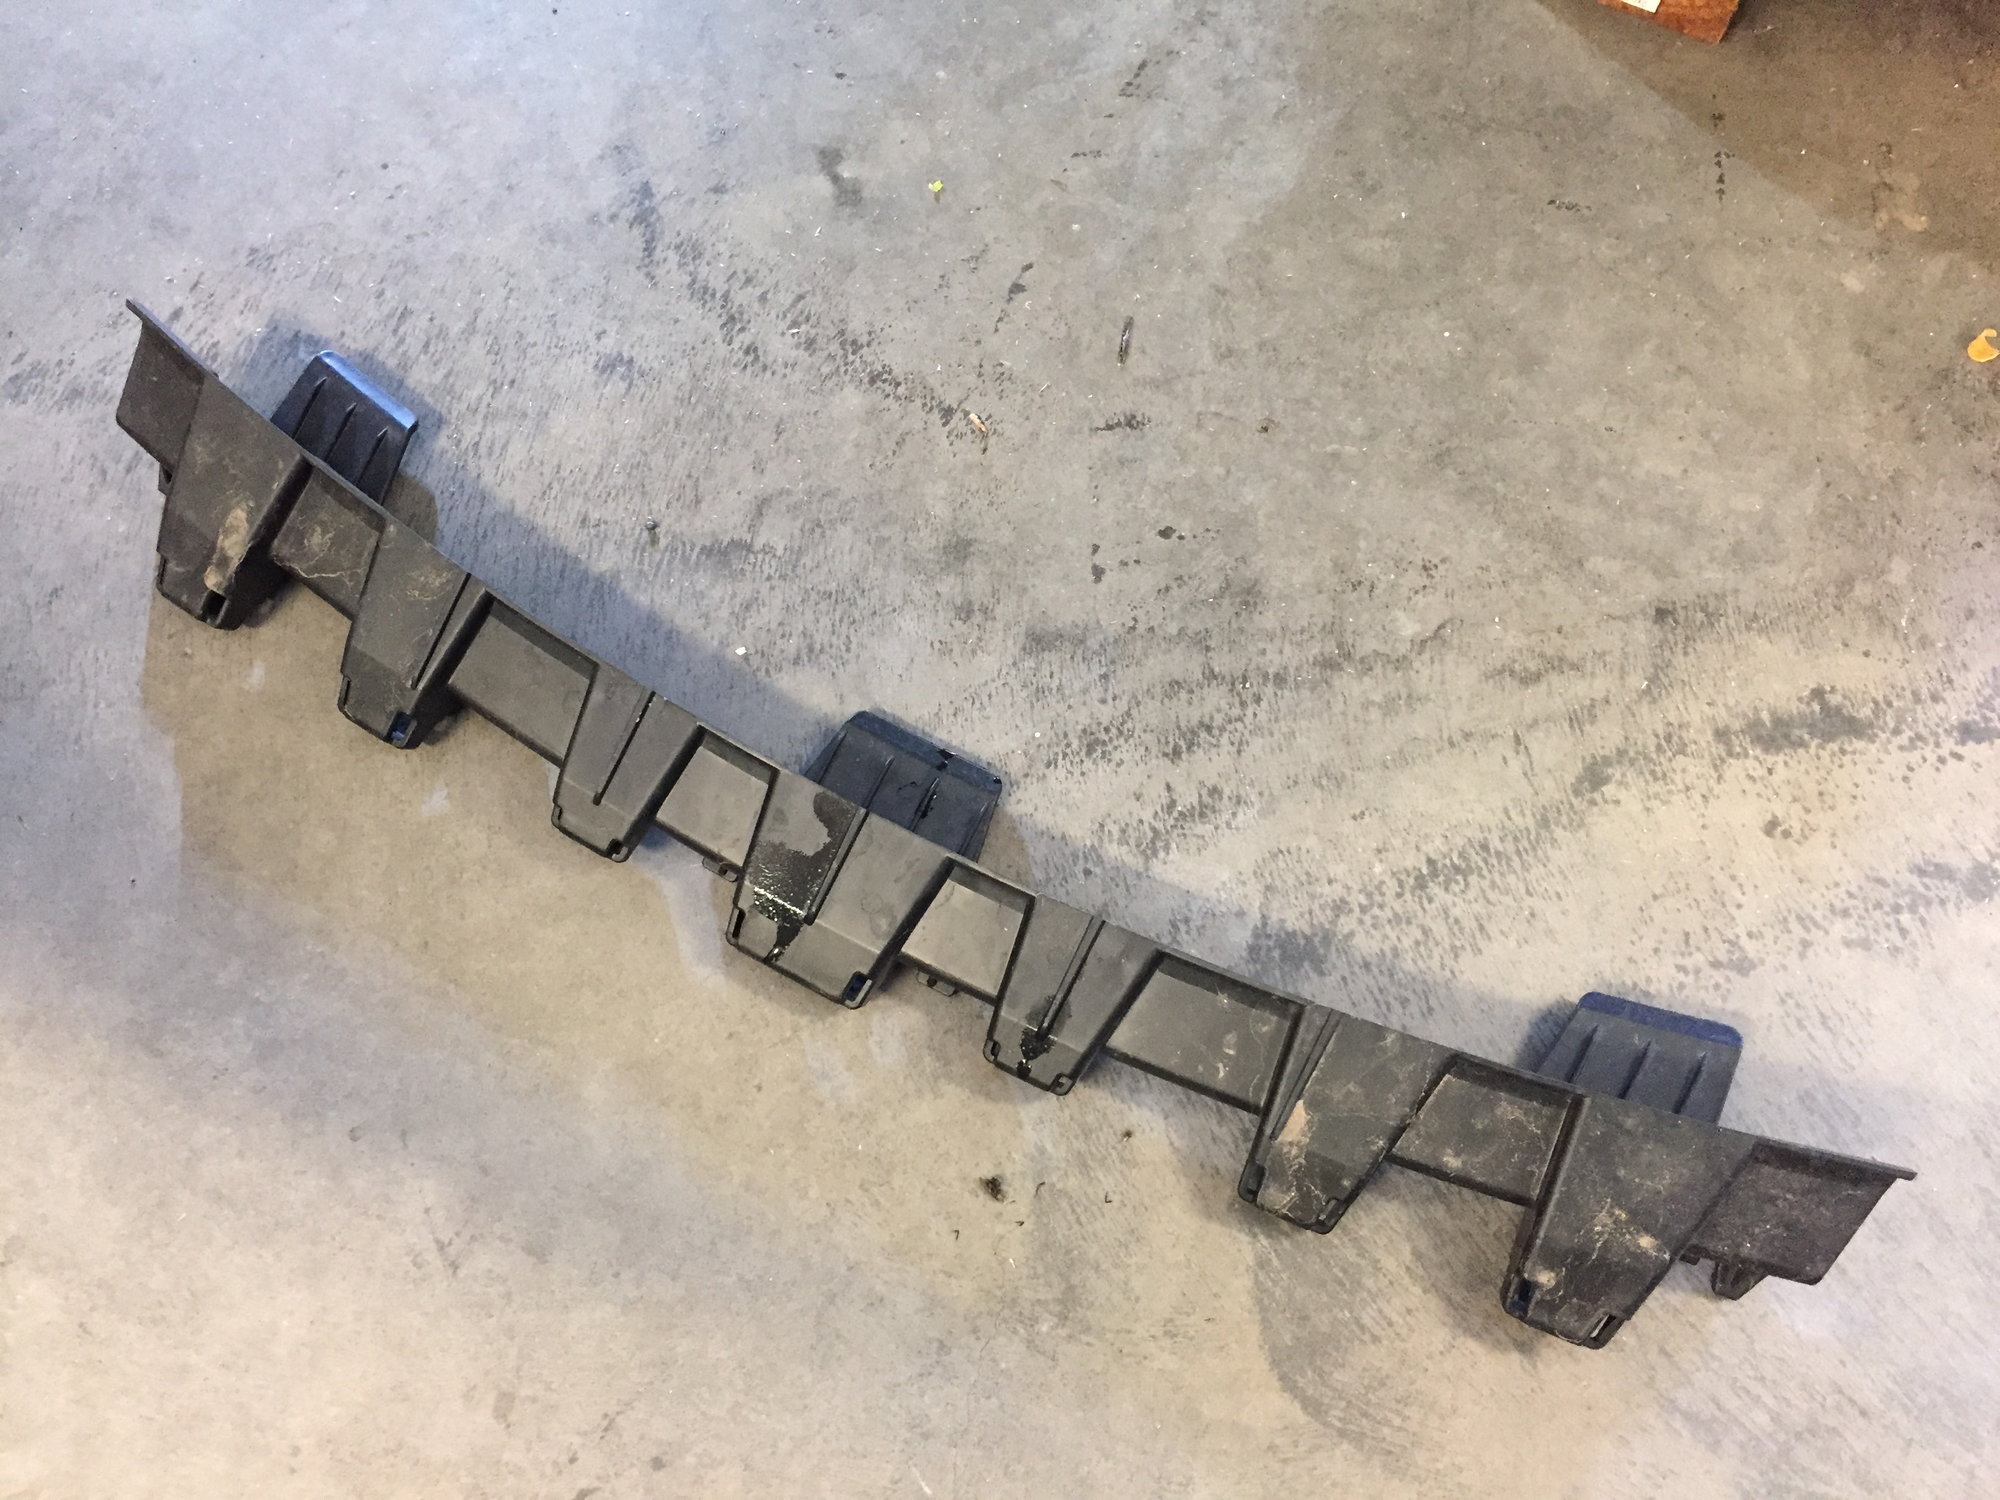
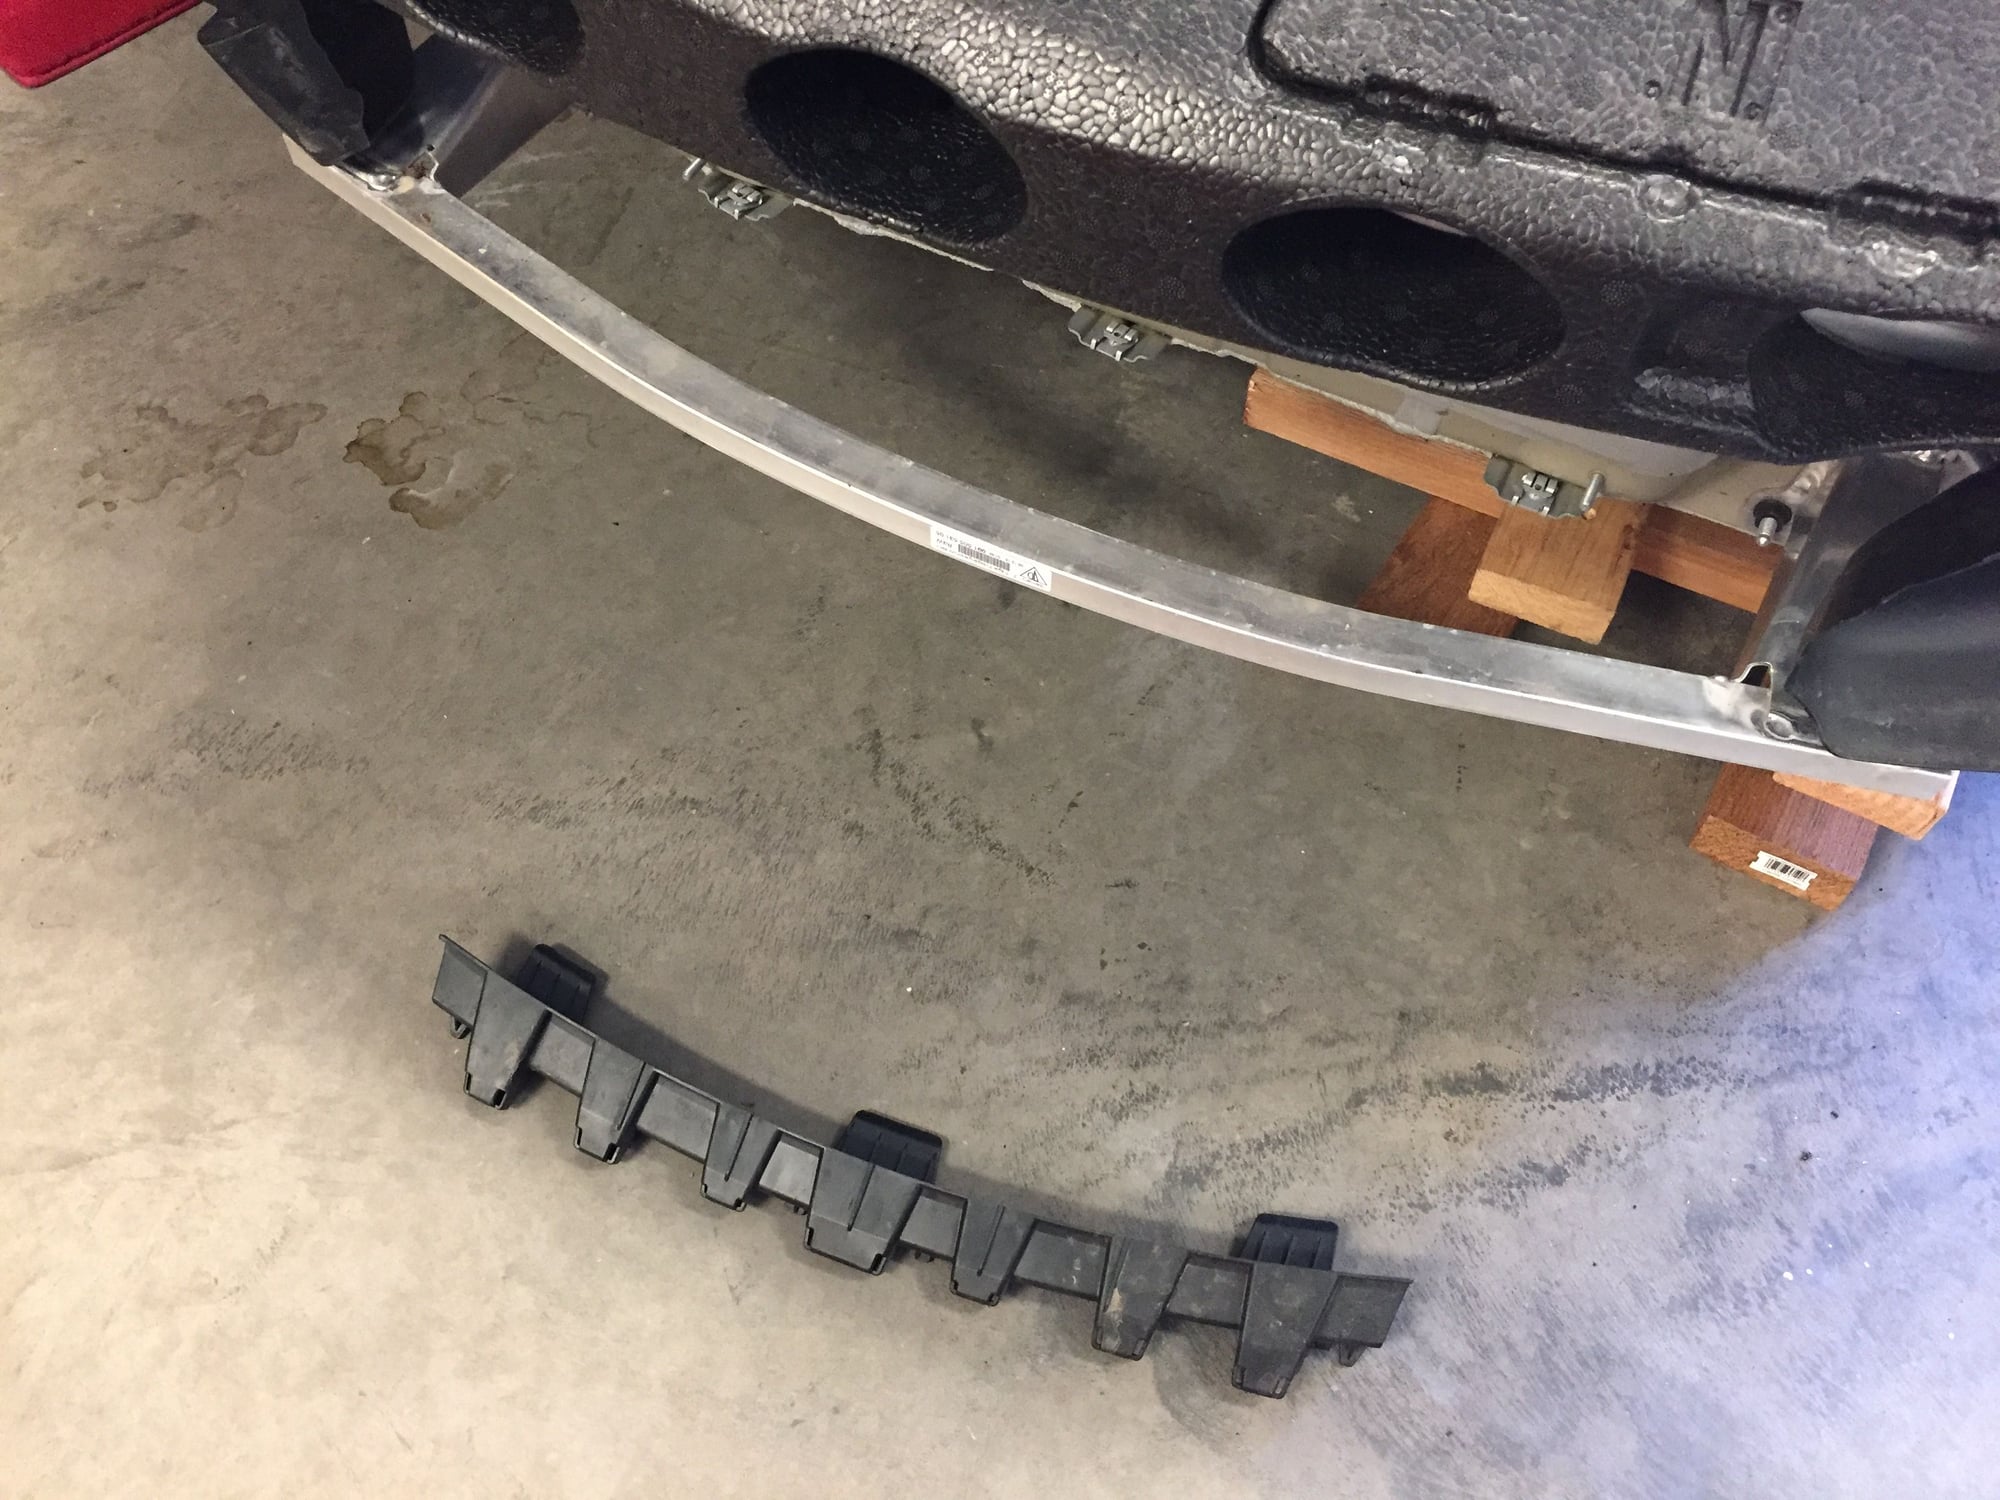
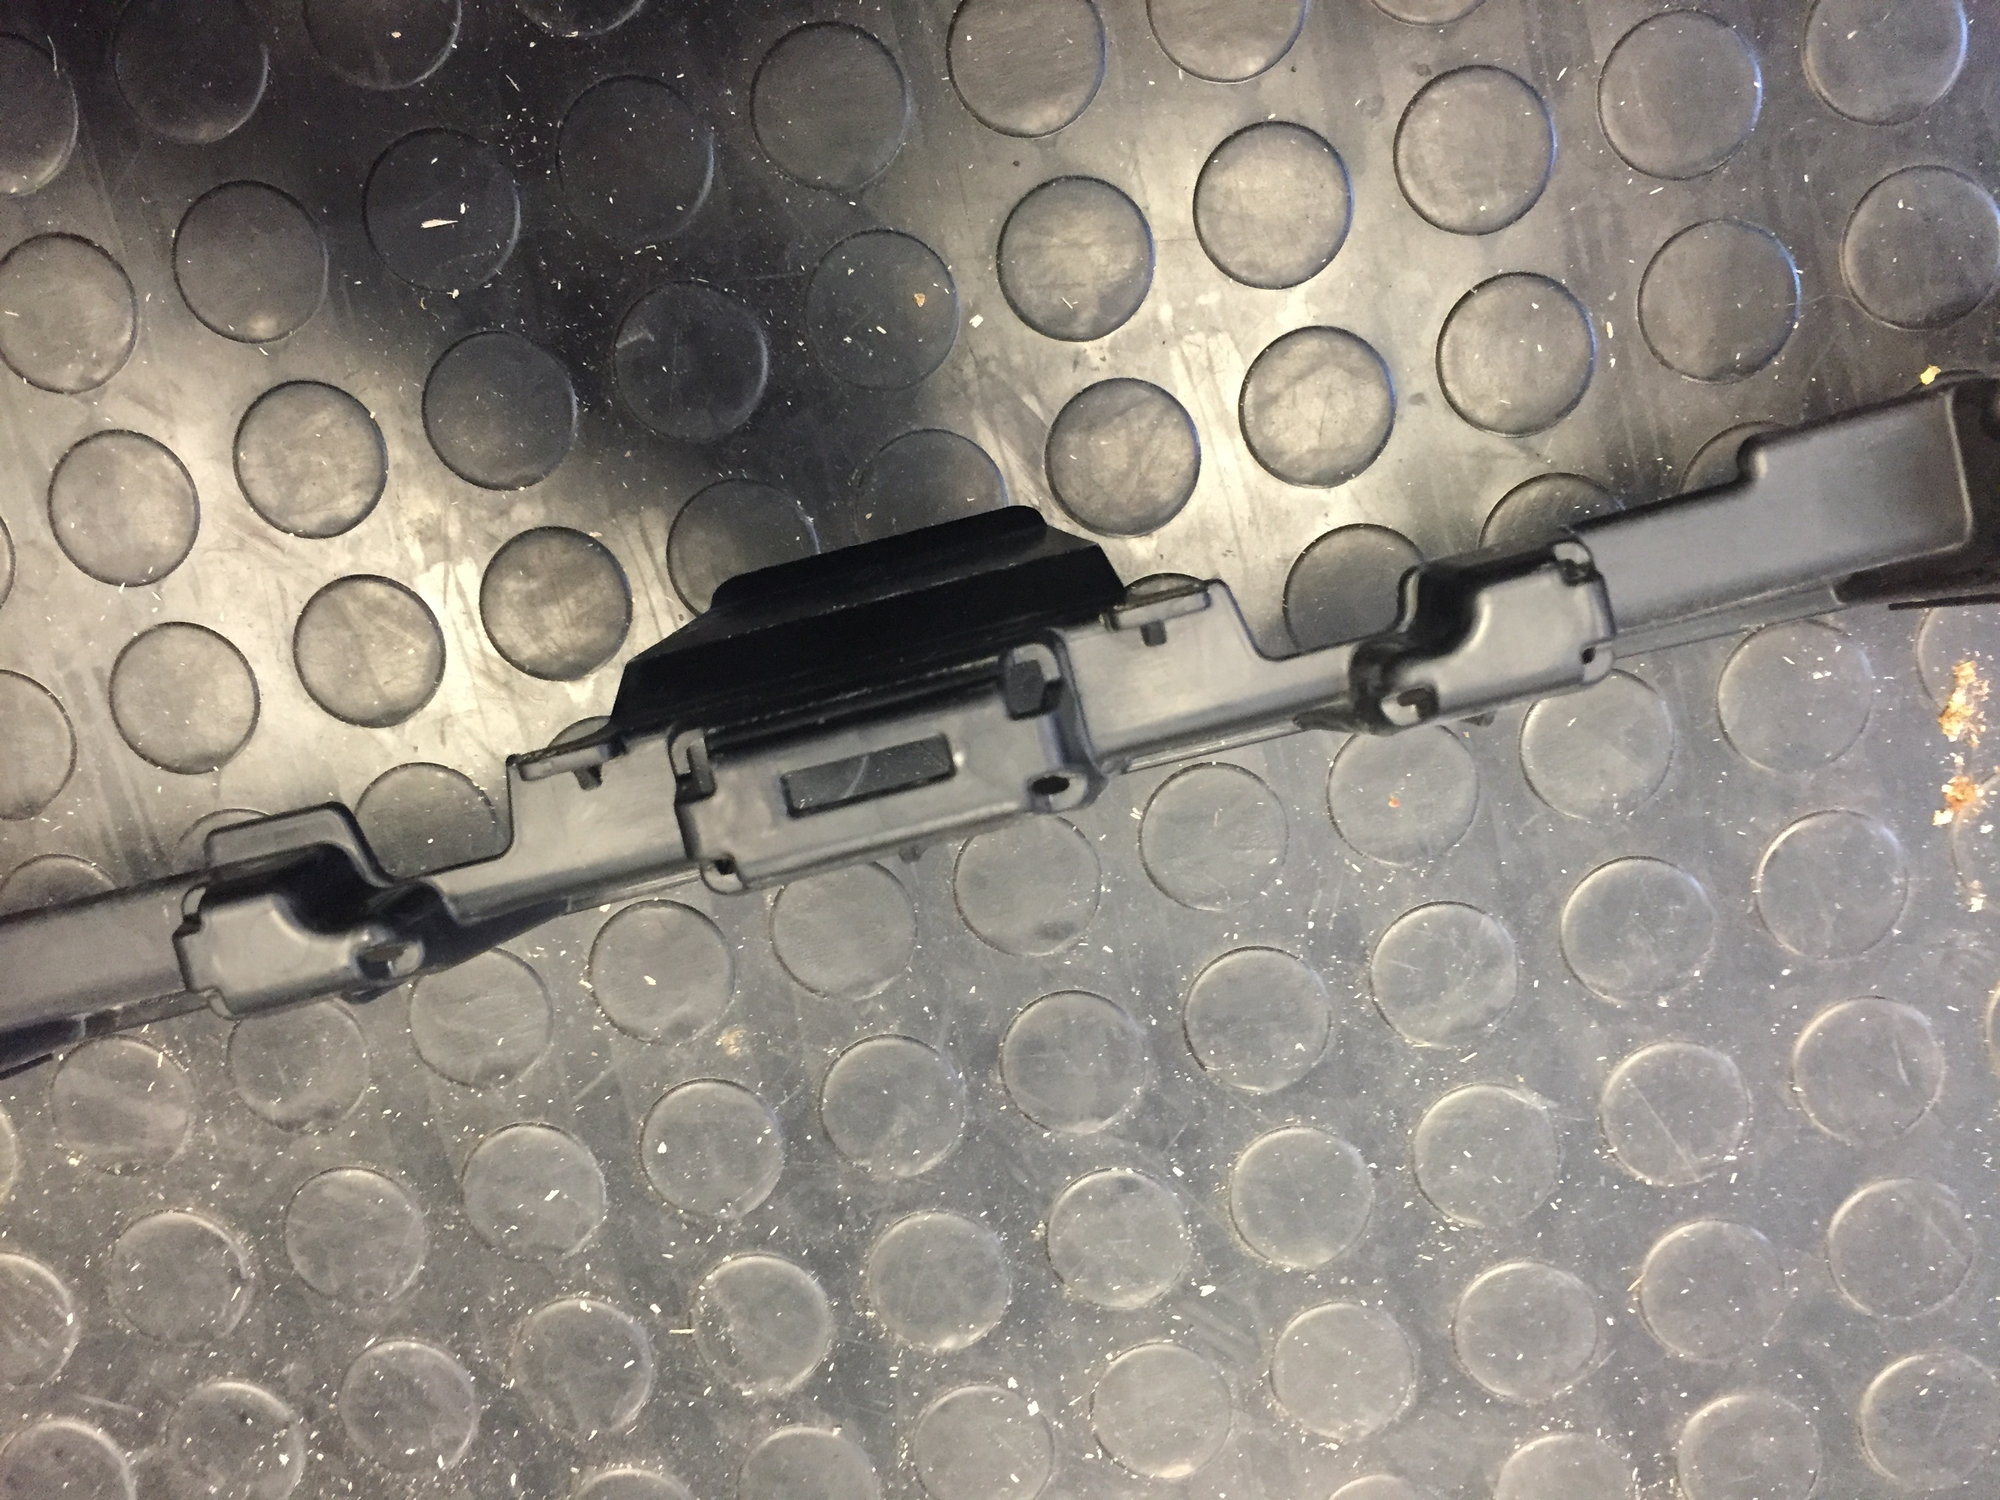
This piece may drop loose. This is the "pedestrian protector". Don't worry, we will deal with this during installation:
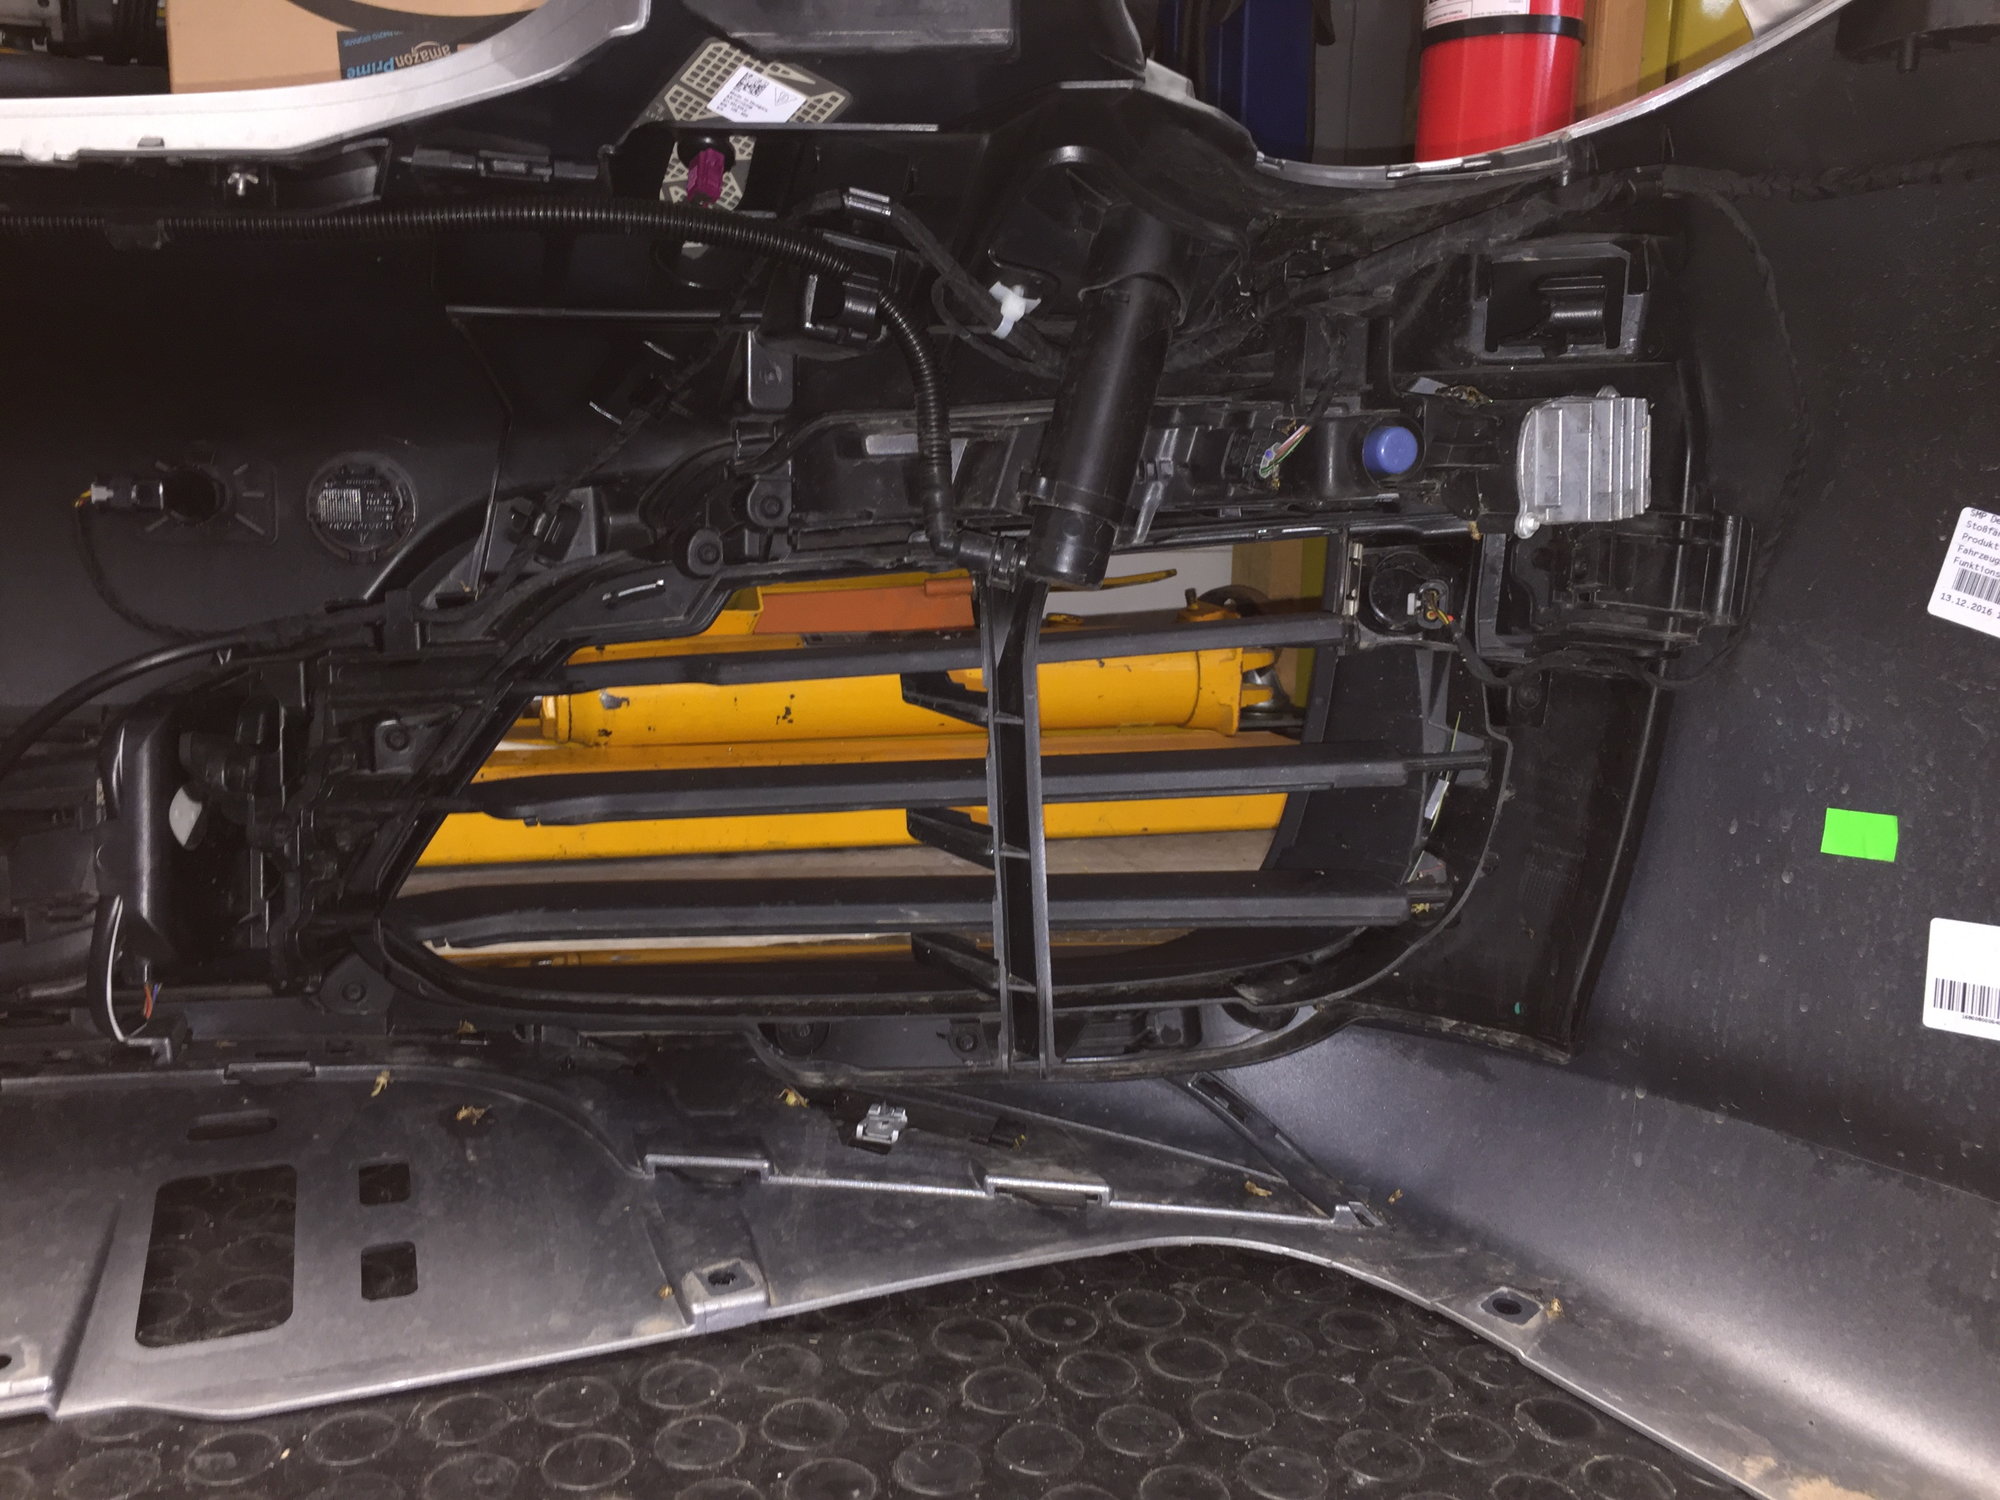
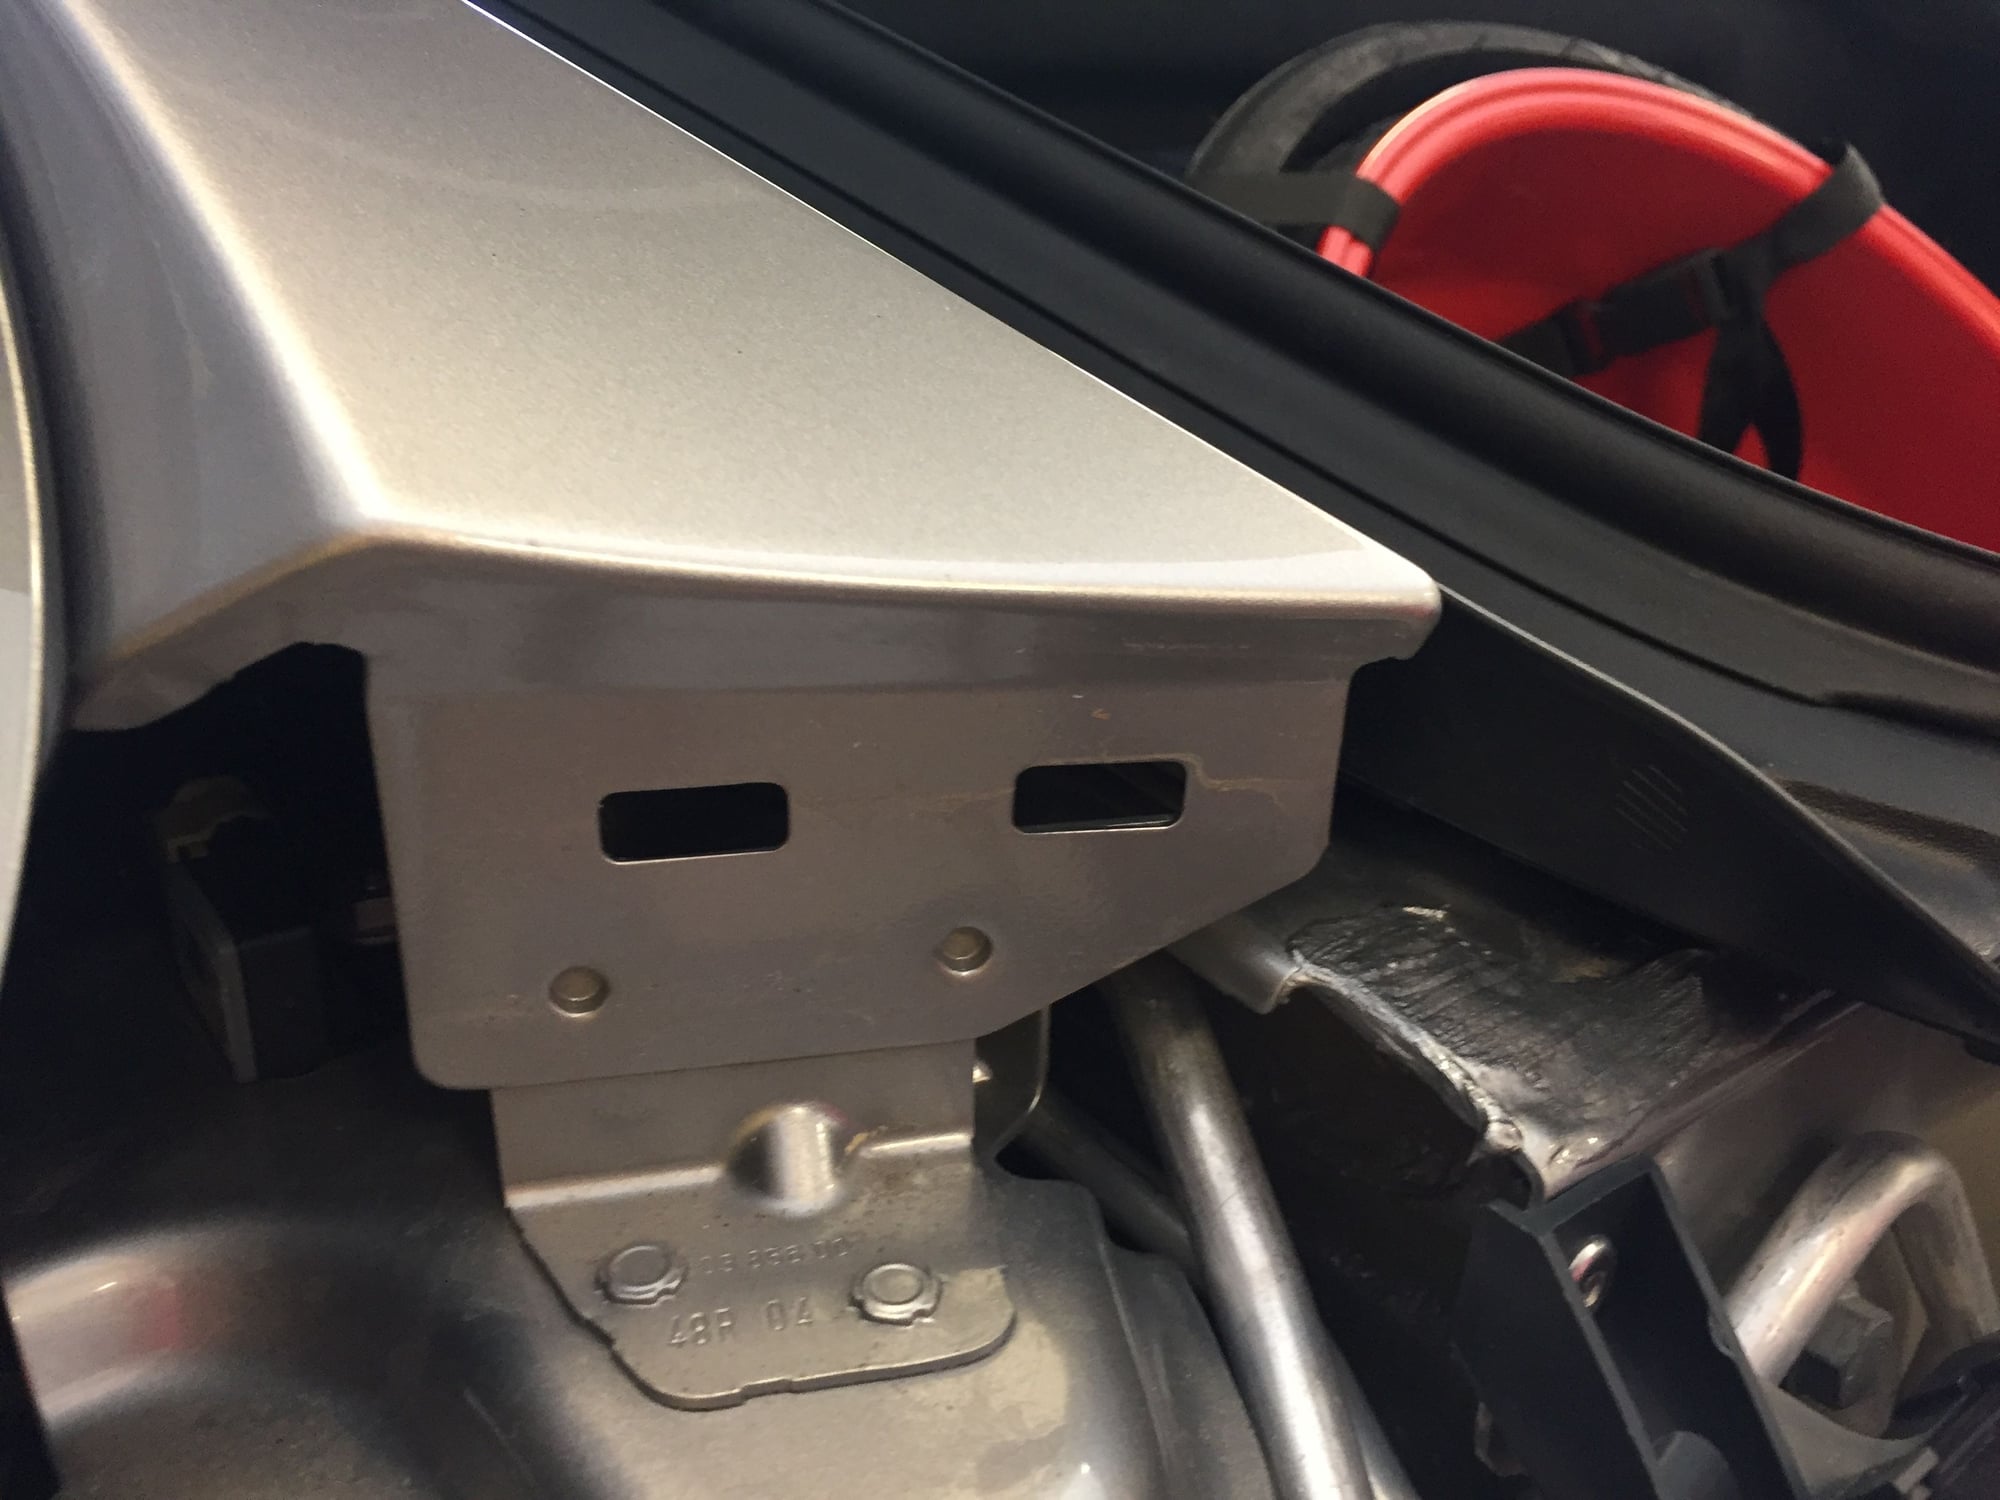
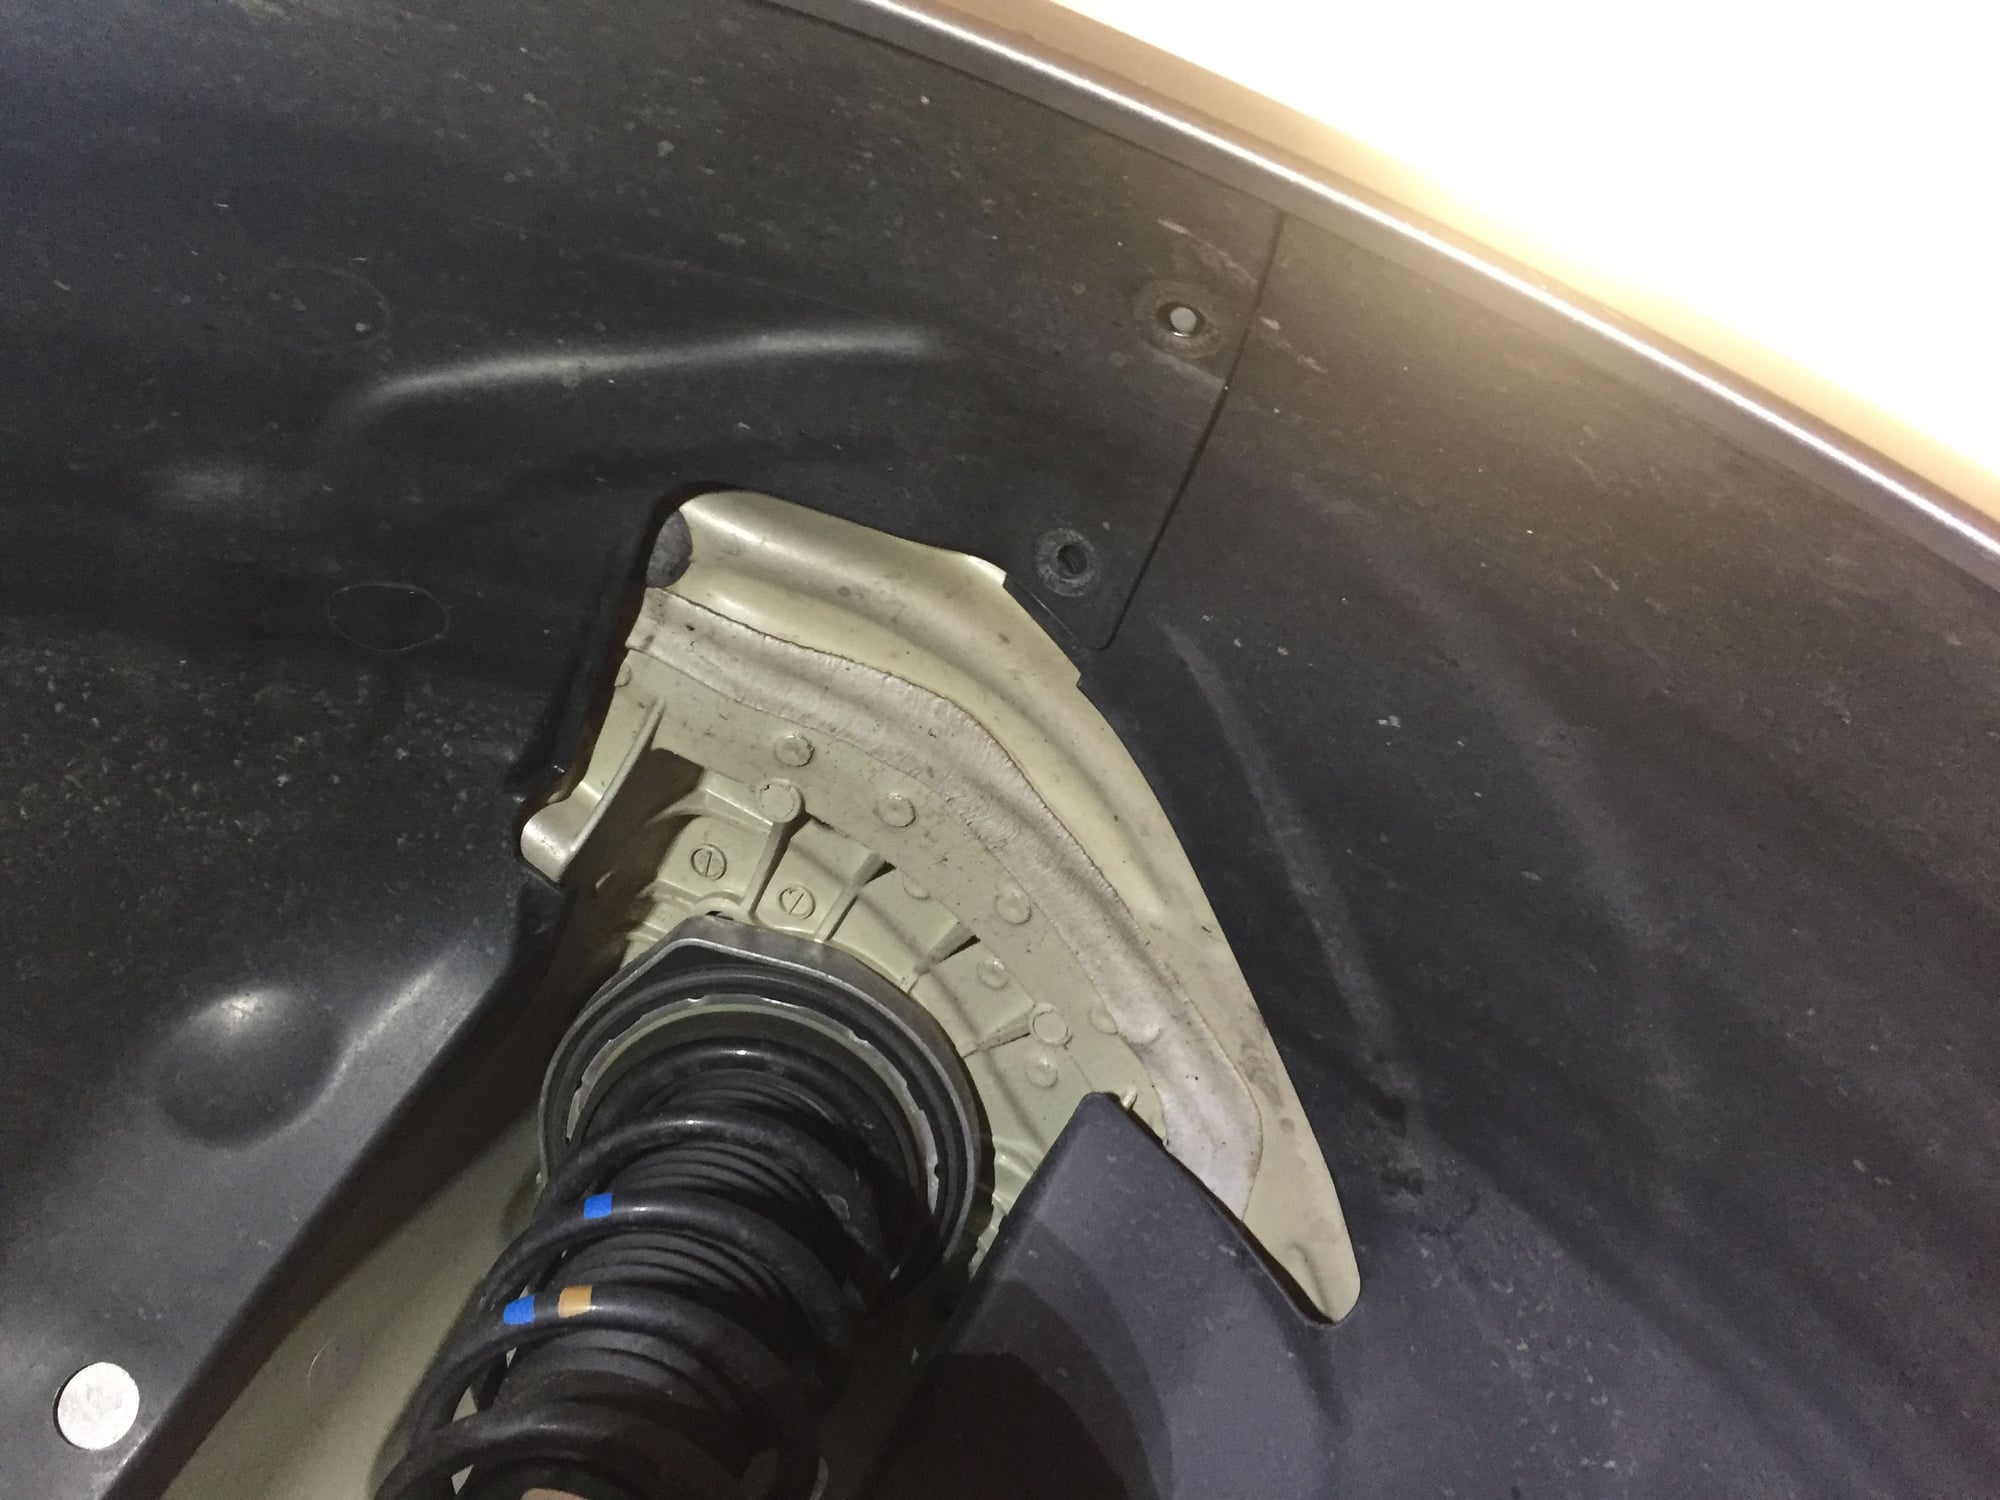
Time for some exploration with the bumper cover removed. First, here is the "pedestrian protector bracket". This is made from extremely thin aluminum:
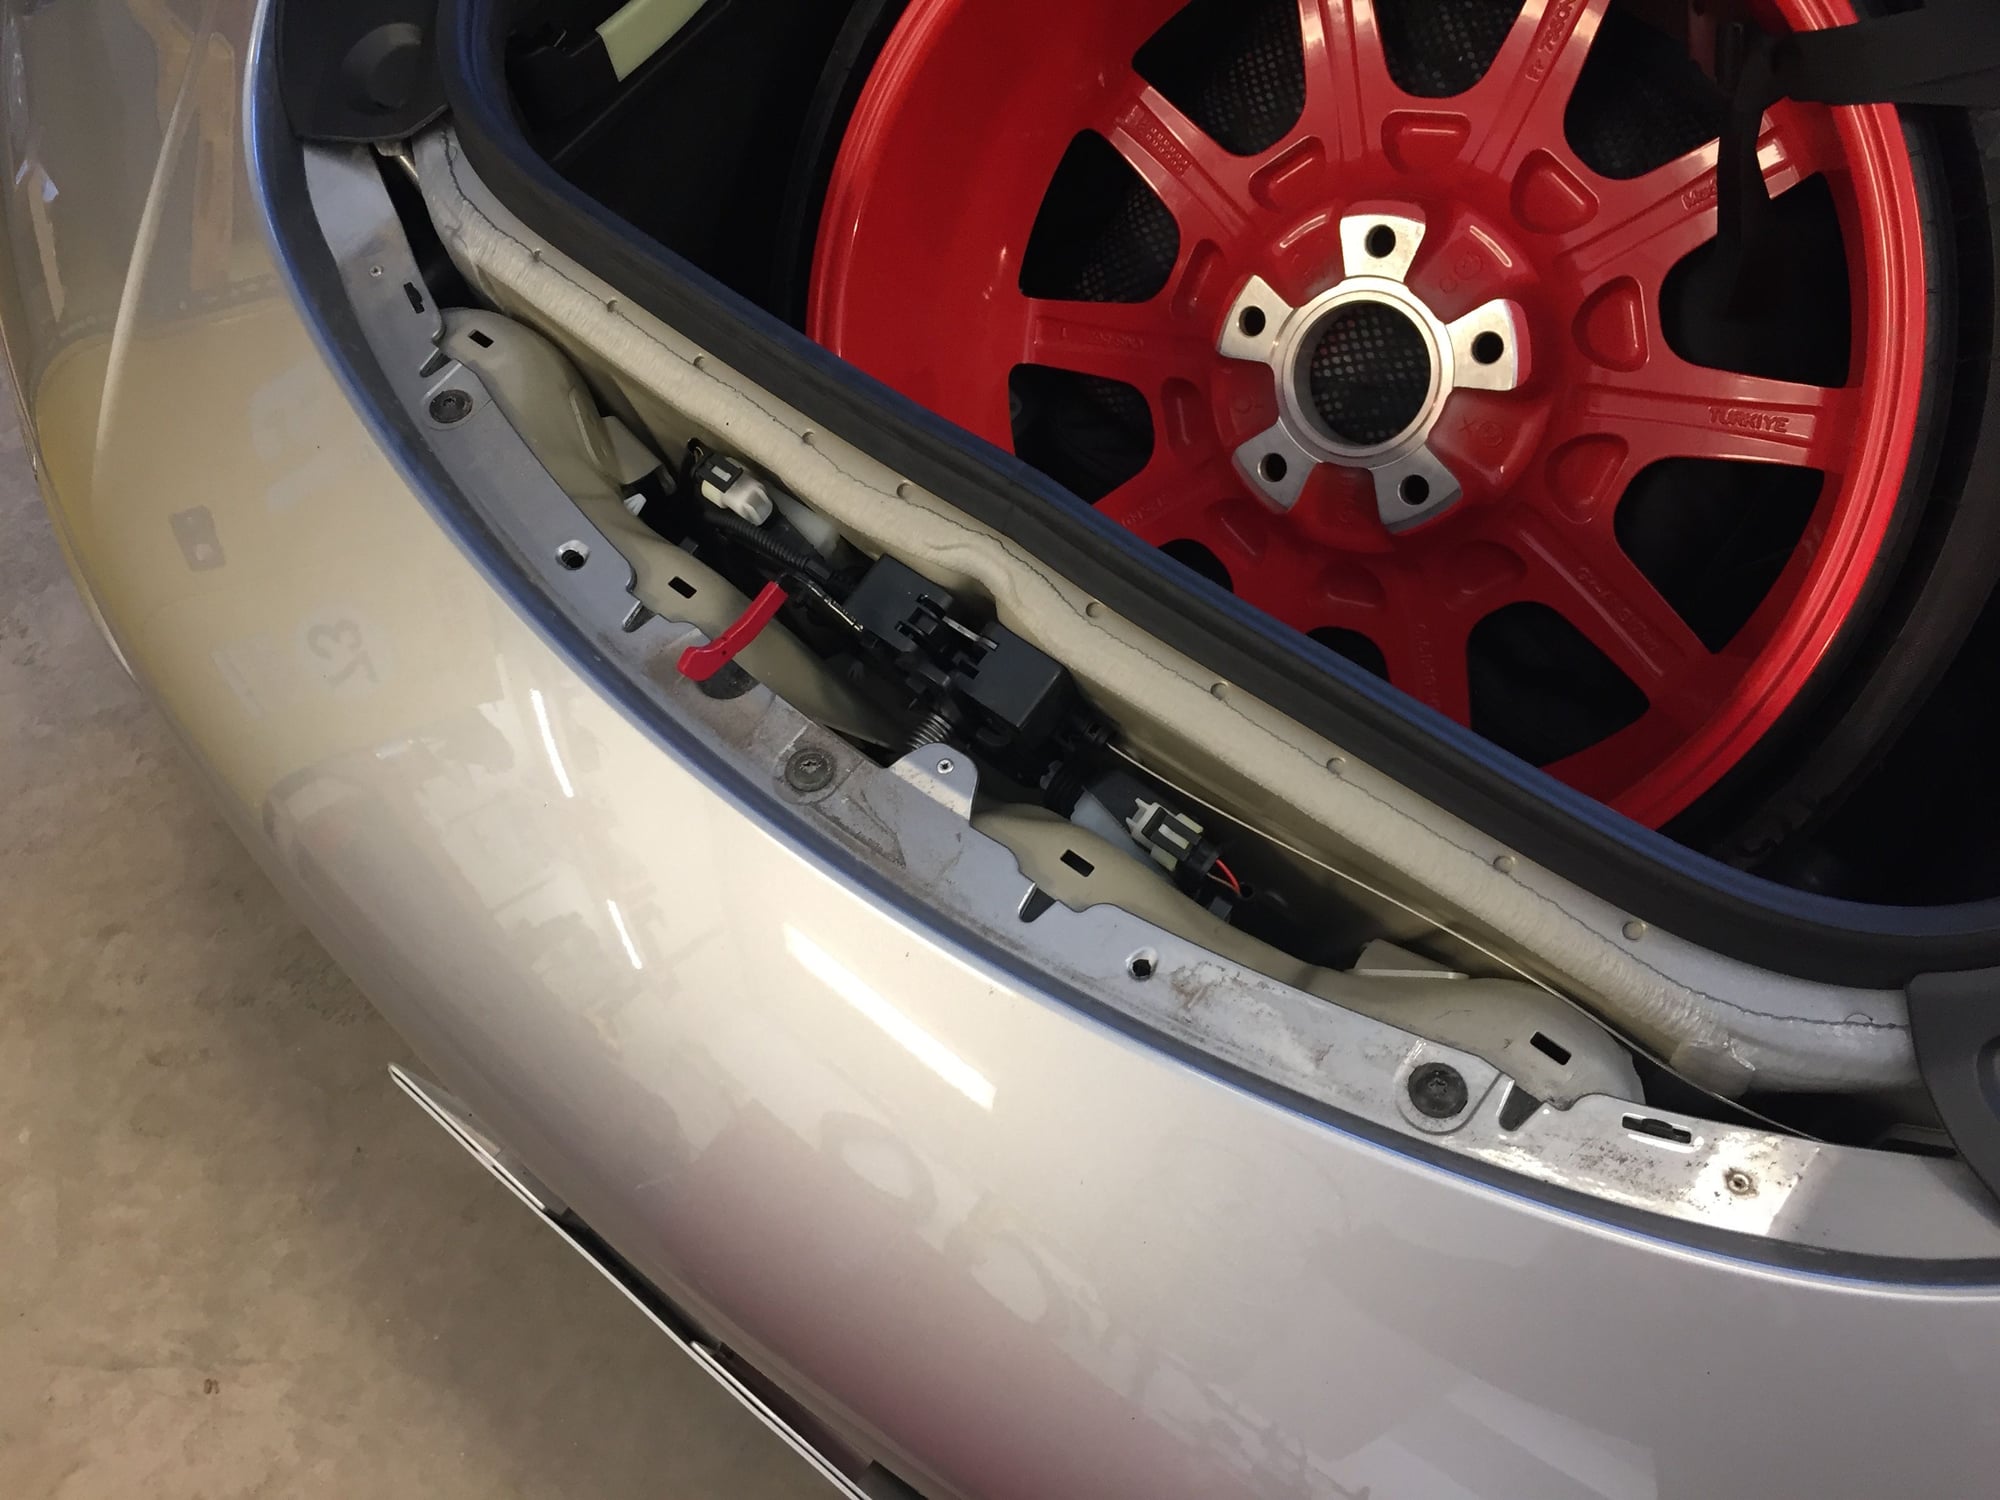
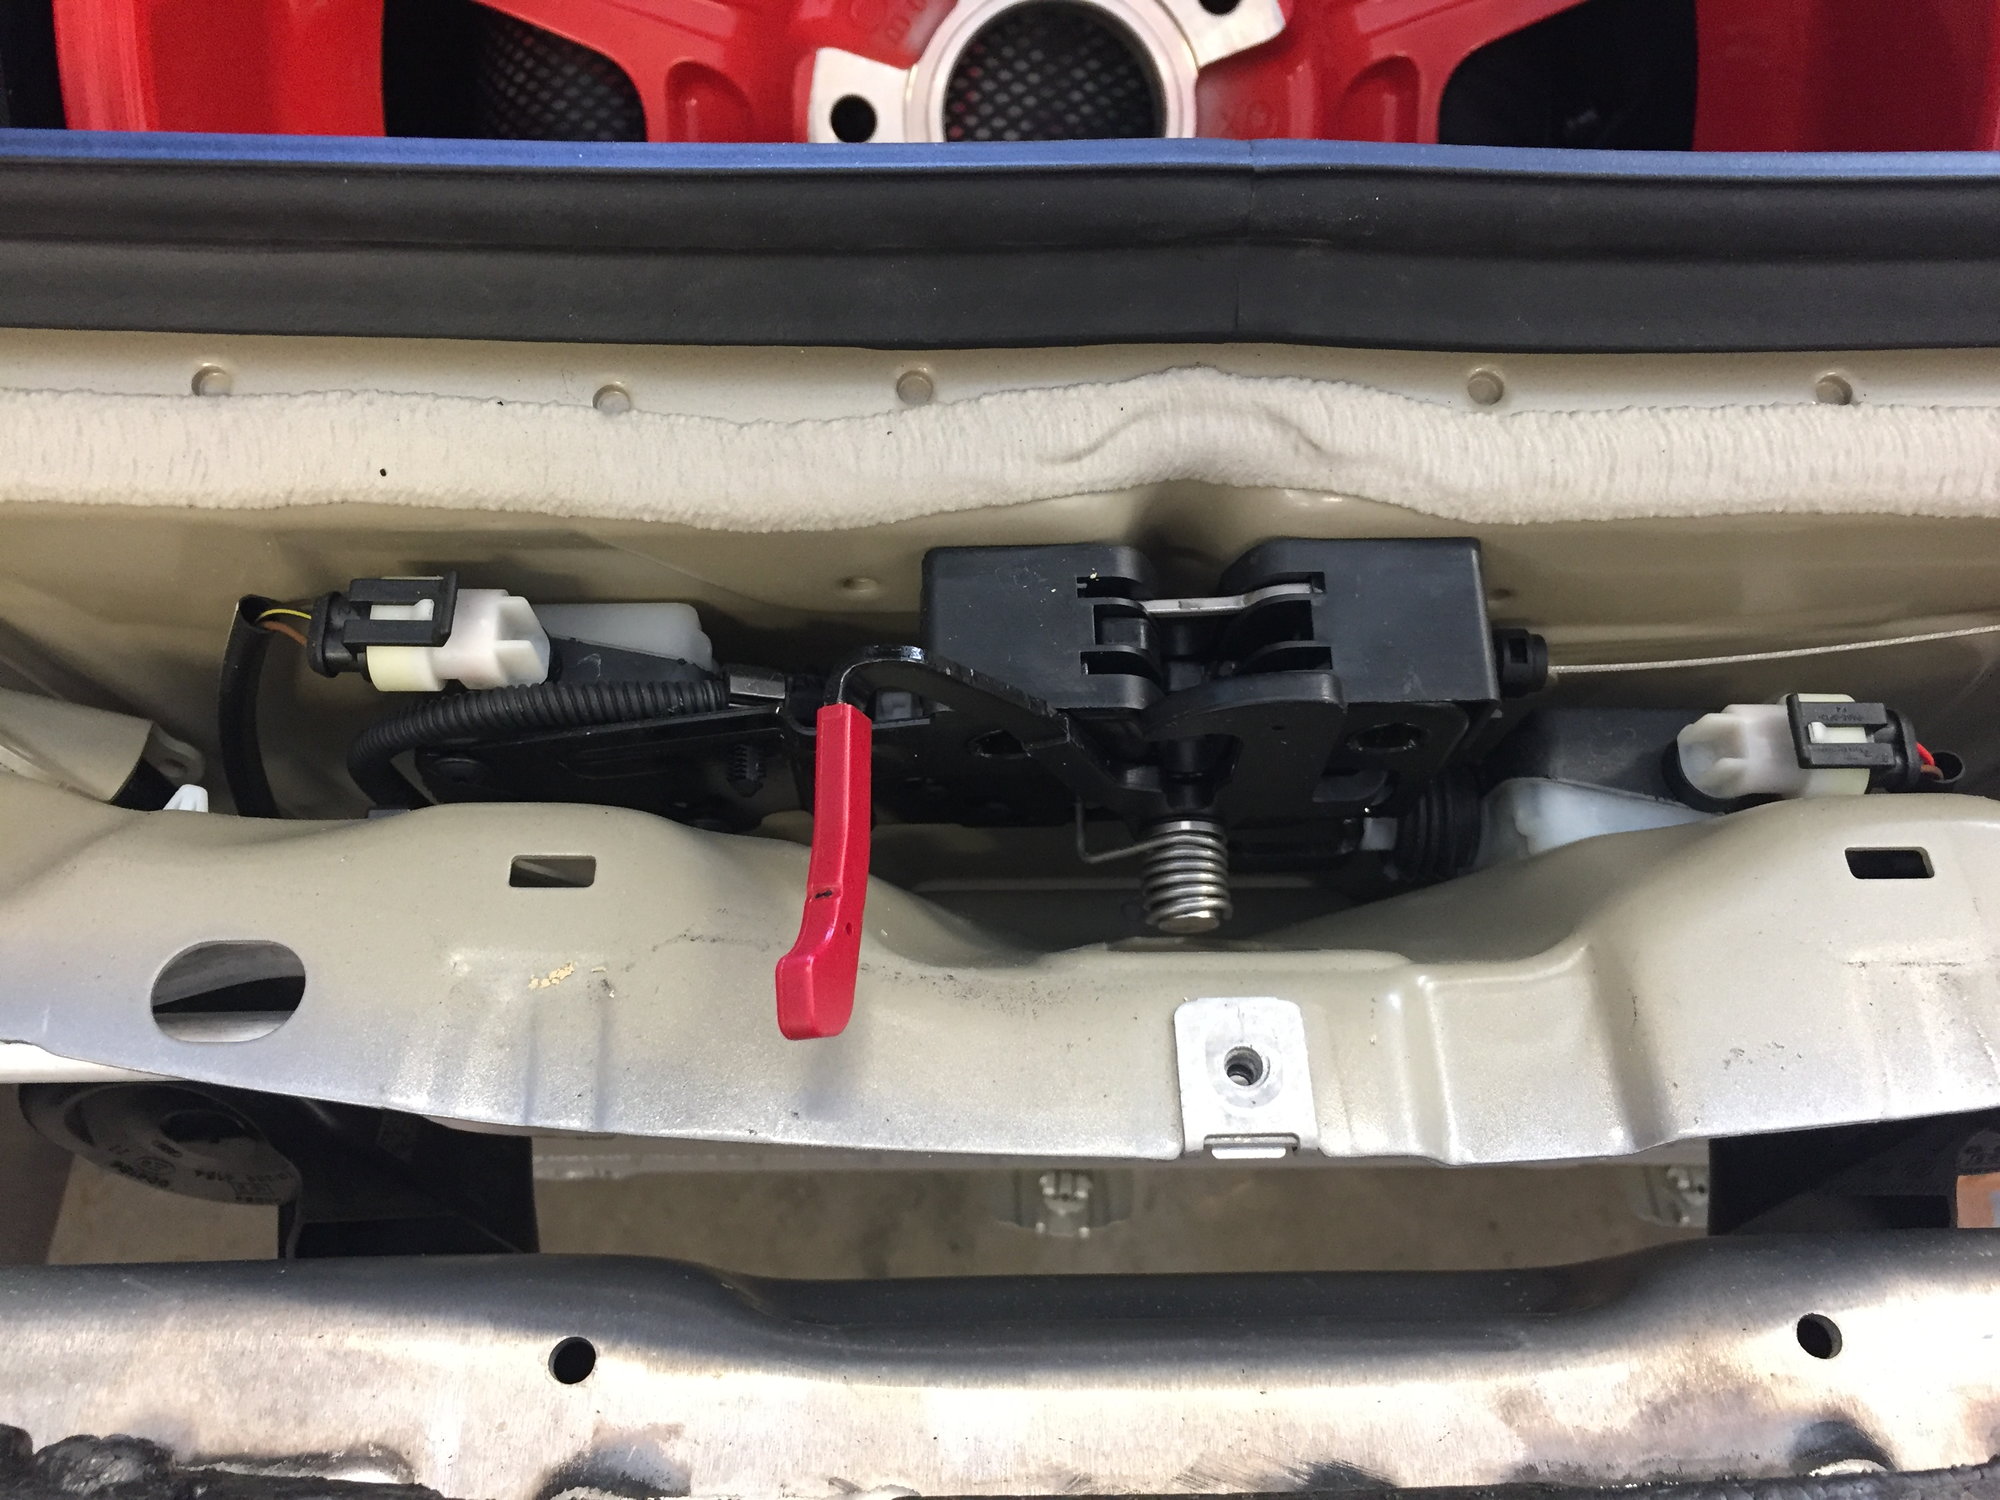
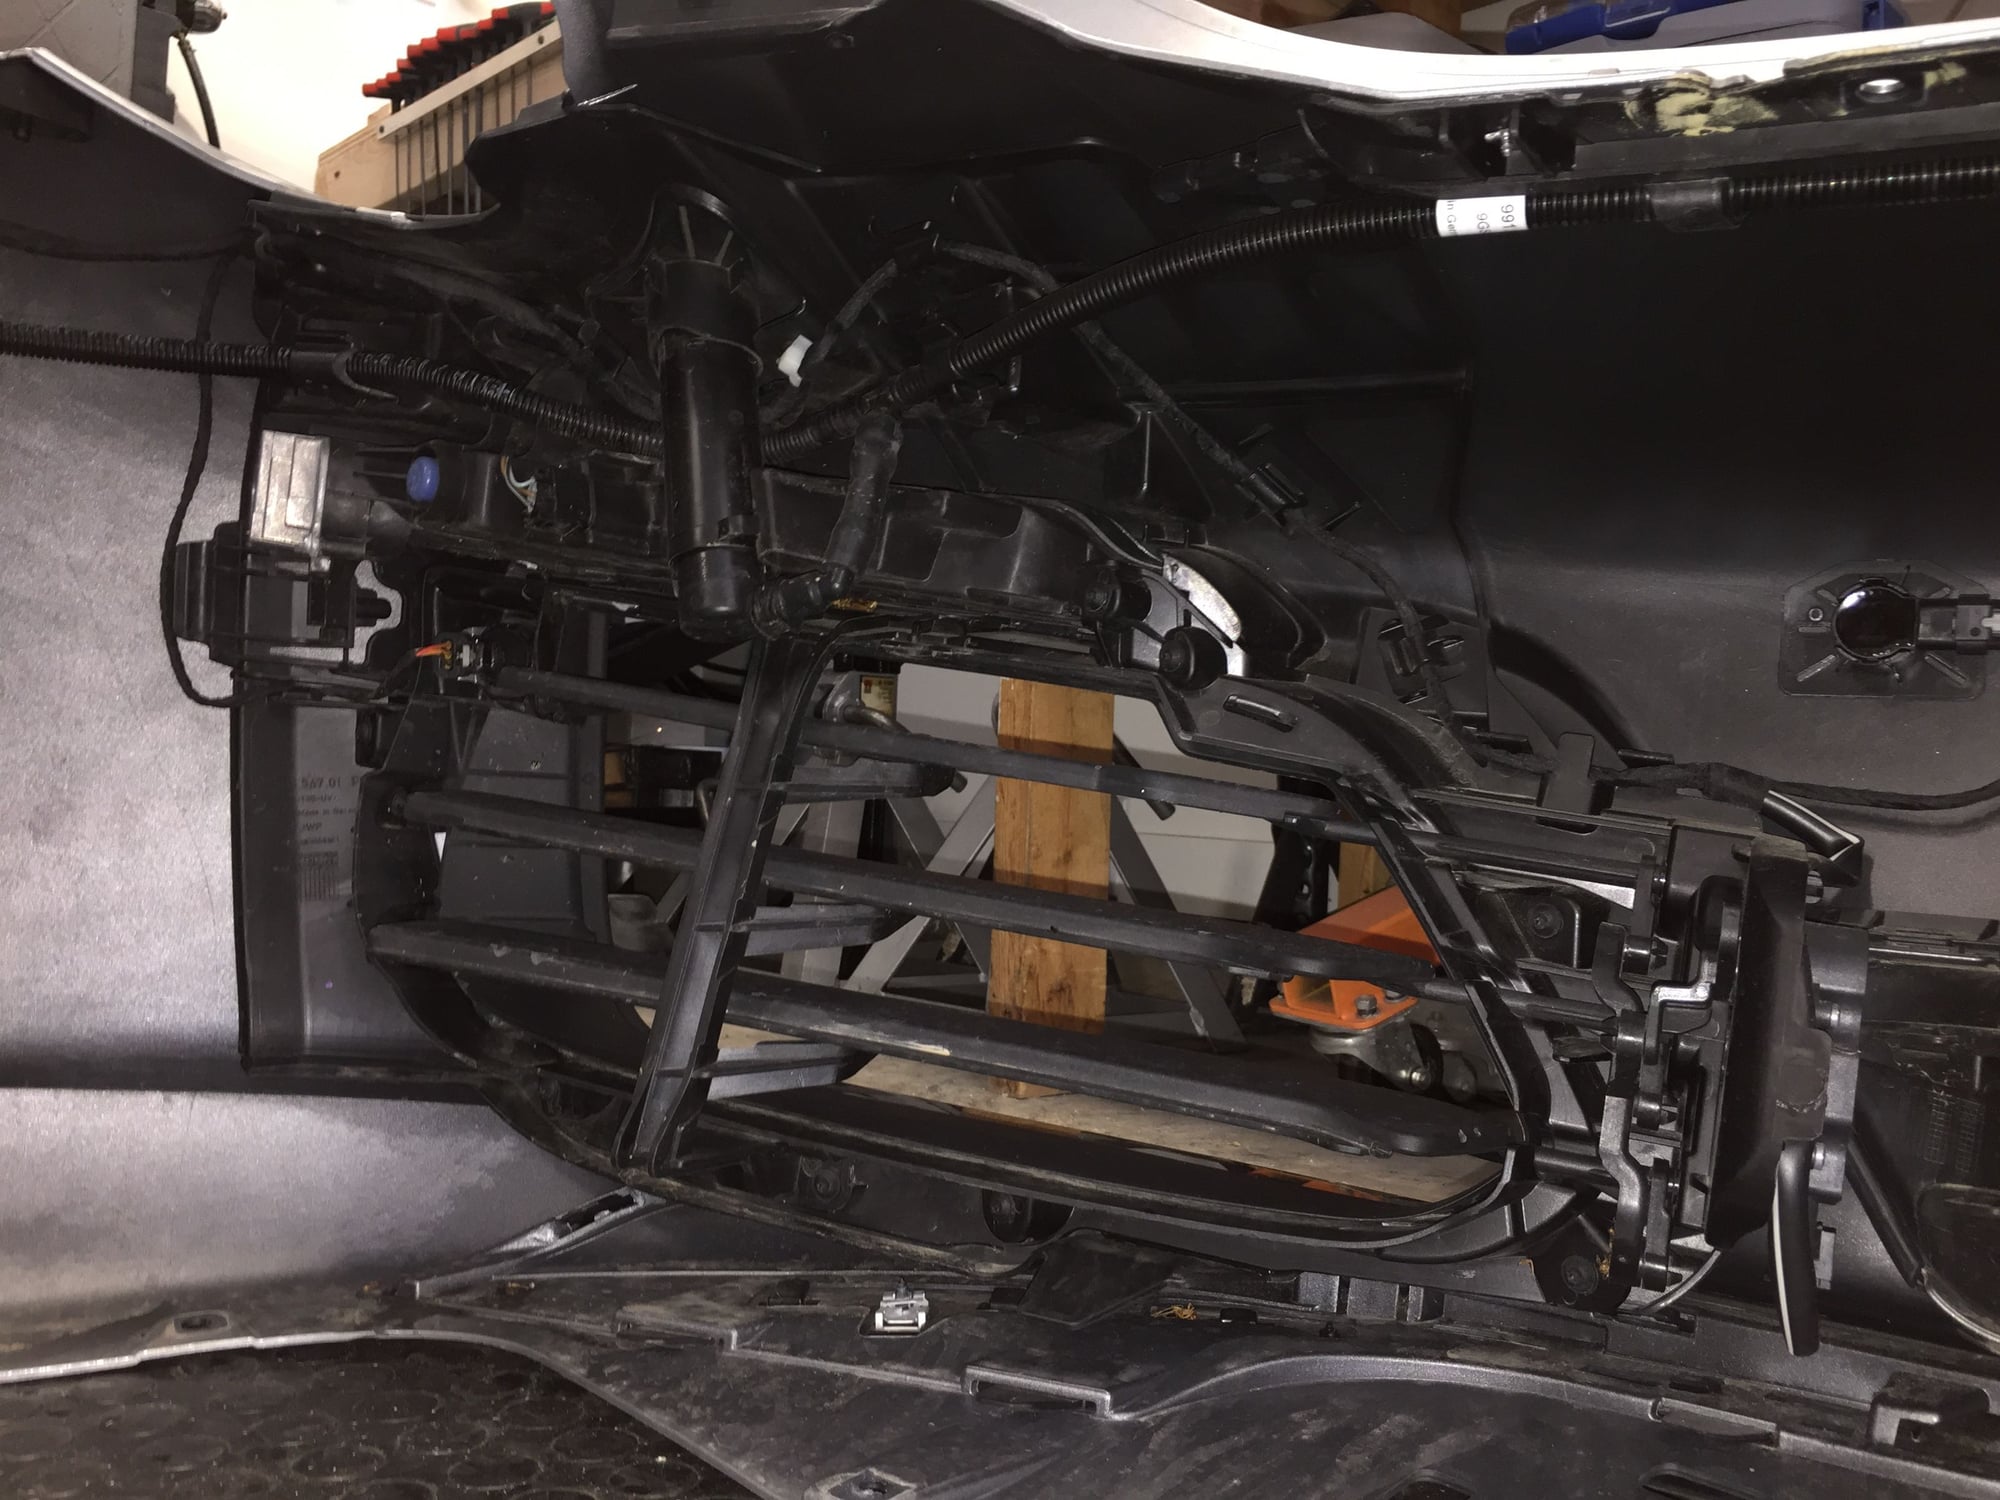
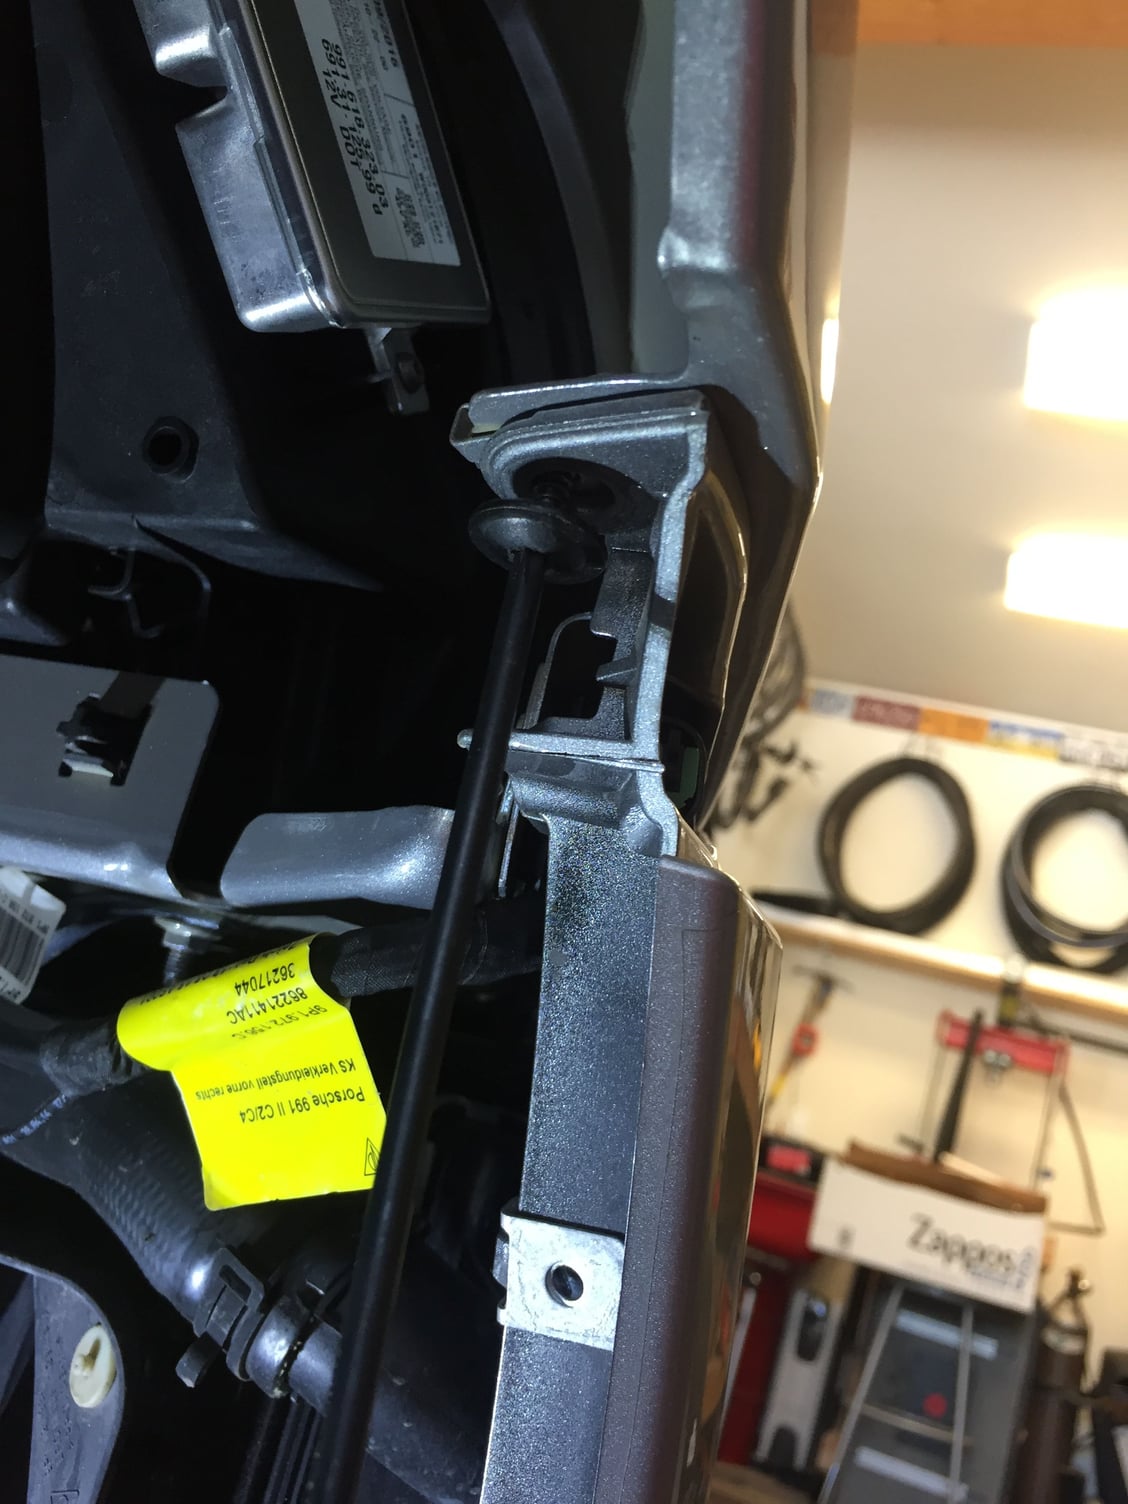
Here is the frunk latch. Note the thin wire cable going off the the right of the photo (left side of car):
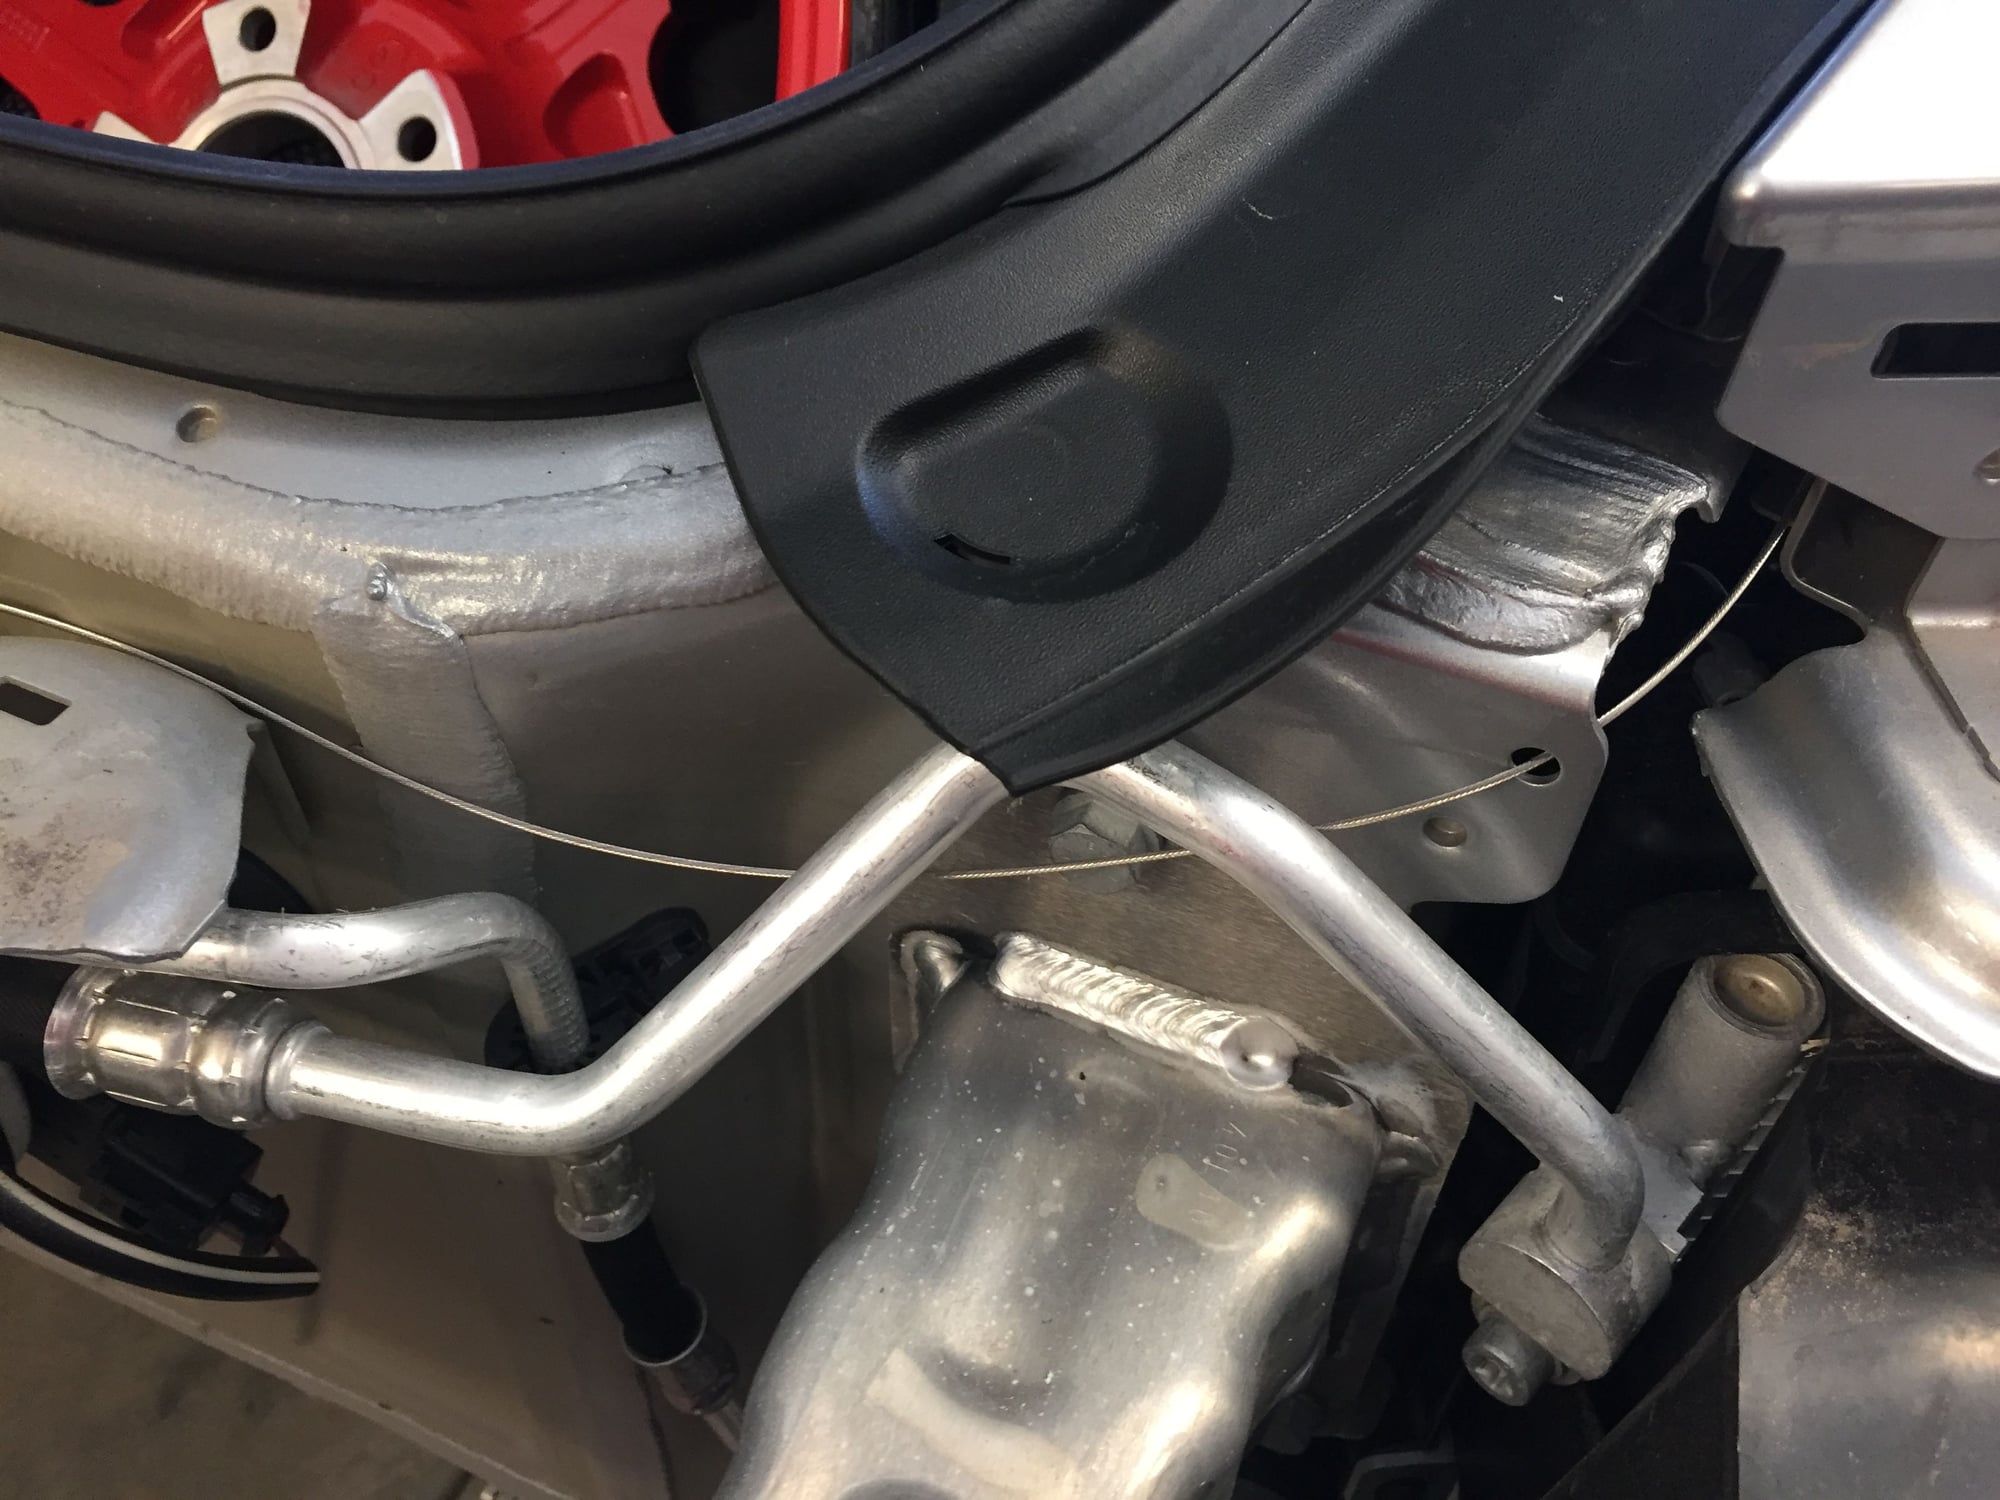
Follow the cable below the left headlight:
And into the left fender well. This is the external emergency frunk release, for when the electrical system is dead. Just remove the wheel and fender liner, and pull on the cable to open the frunk:
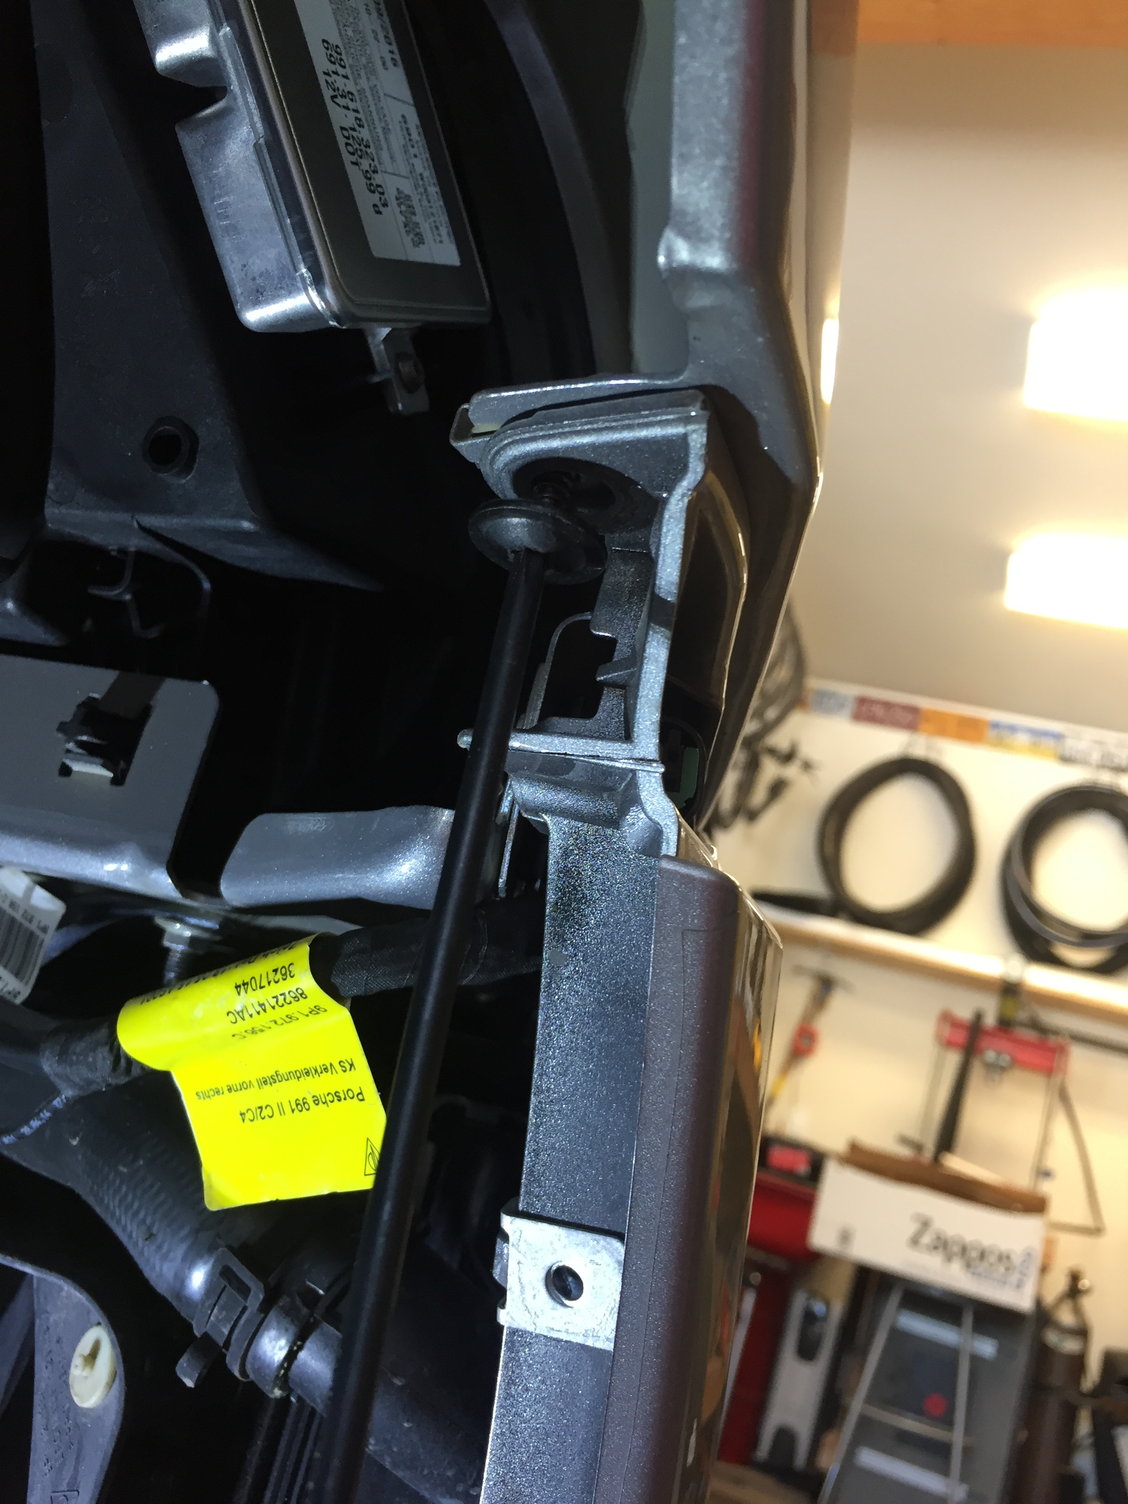
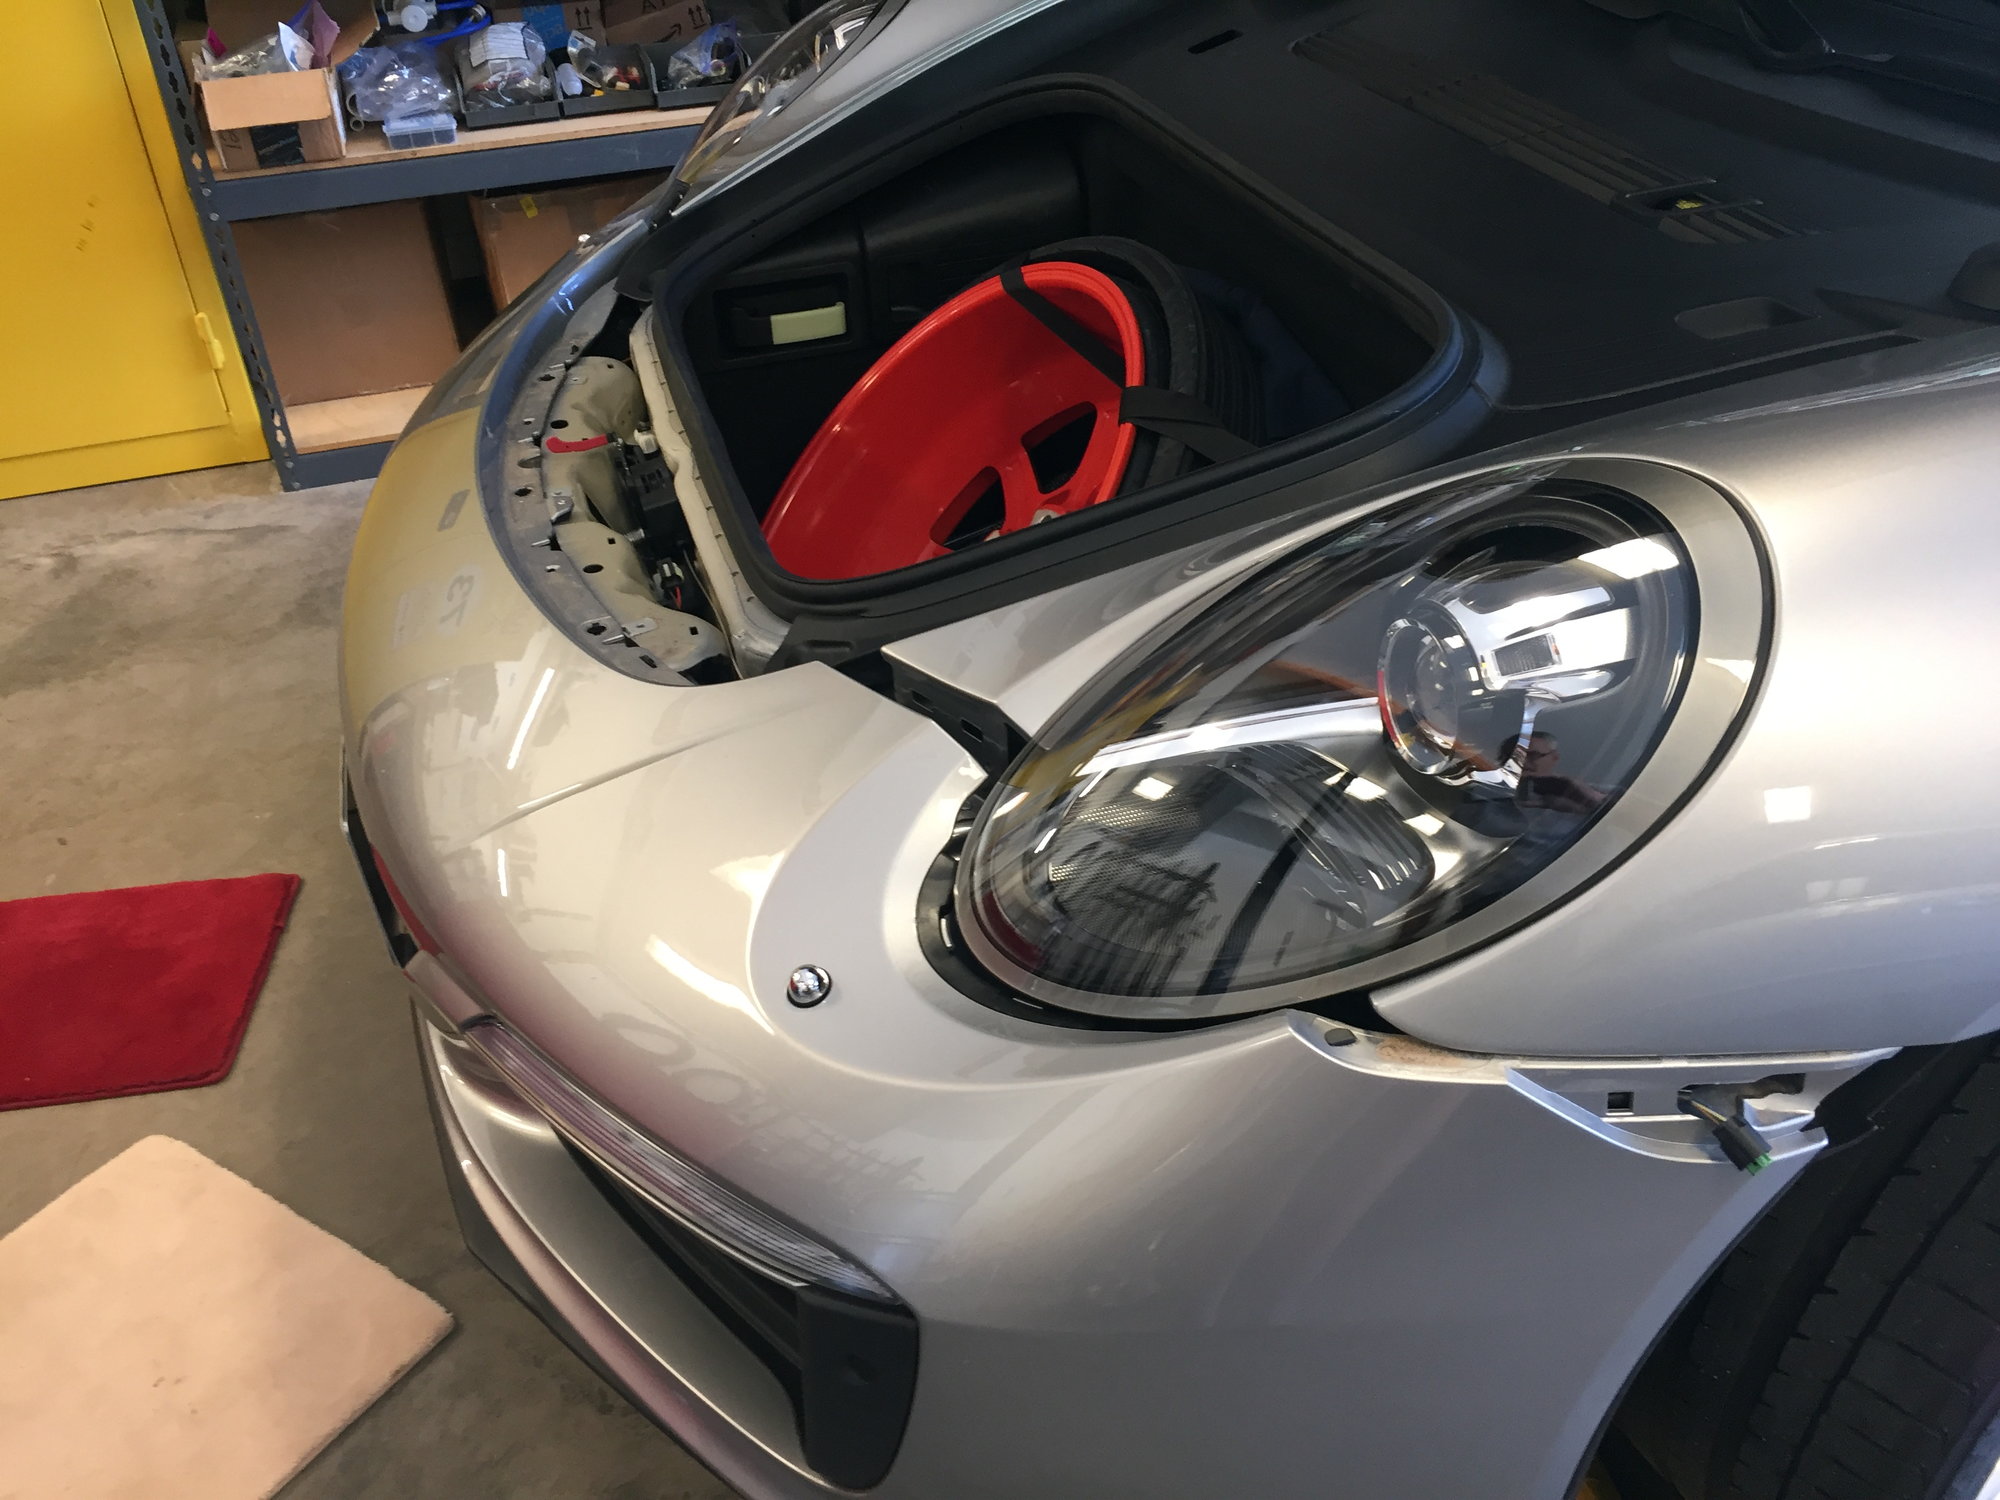
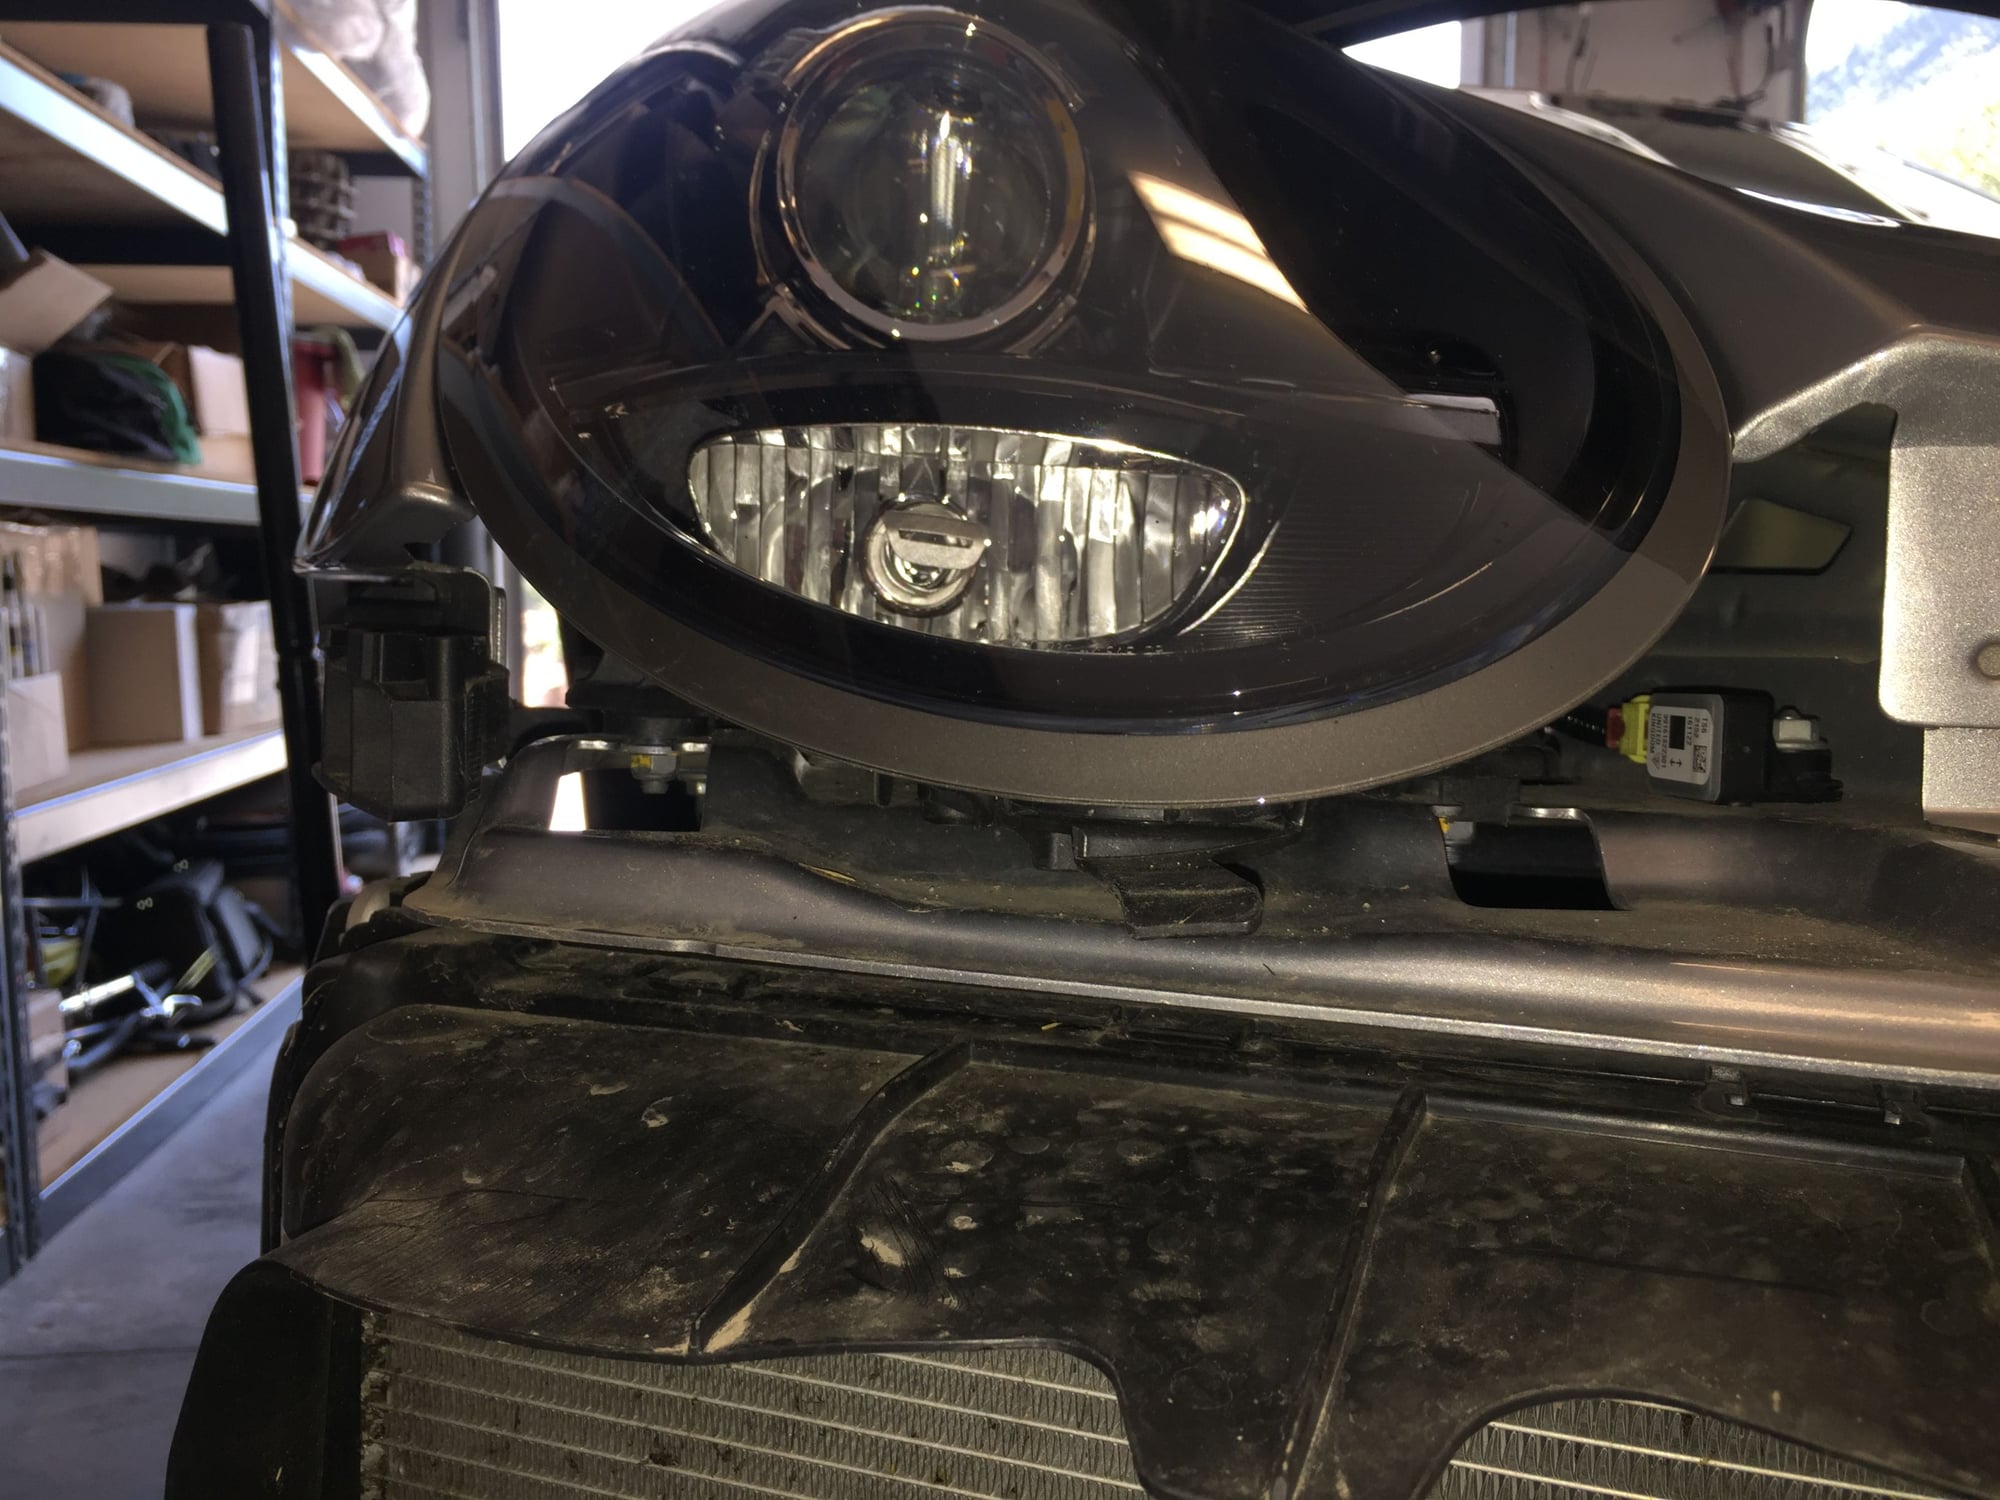
Speaking of headlights, these are attached differently compared to the 991.1, which has a release accessible from inside the frunk. To release the 991.2 headlight requires loosening 2 10mm nuts under the headlight bracket, and then sliding the headlight forward. I did not actually do this:
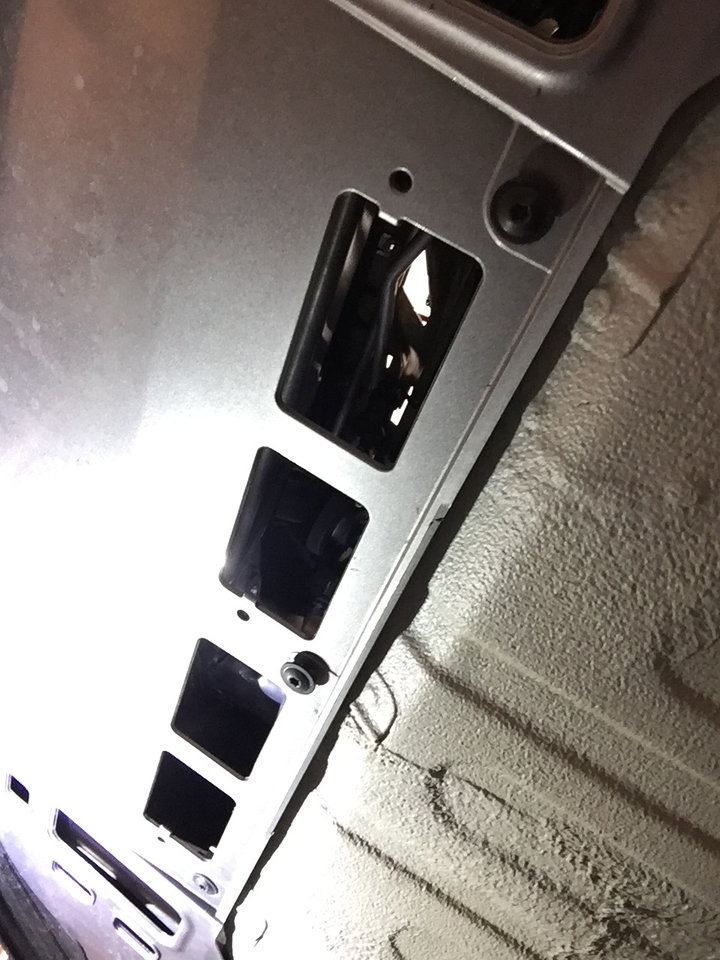
Turning our attention to the bumper cover, here is the interior (right side):
And interior of the left side:
The interior of the center does not have much on my car, with no ACC or other gizmos:
To start installation, insert the pedestrian protector into the lower part of the bumper cover. There is a horizontal tab inside the cover:
And a corresponding slot in the protector. Slide the protector into the cover until it snaps or sticks in place:
Now gently "hang" the bumper cover on the car, leaving about an inch of space:
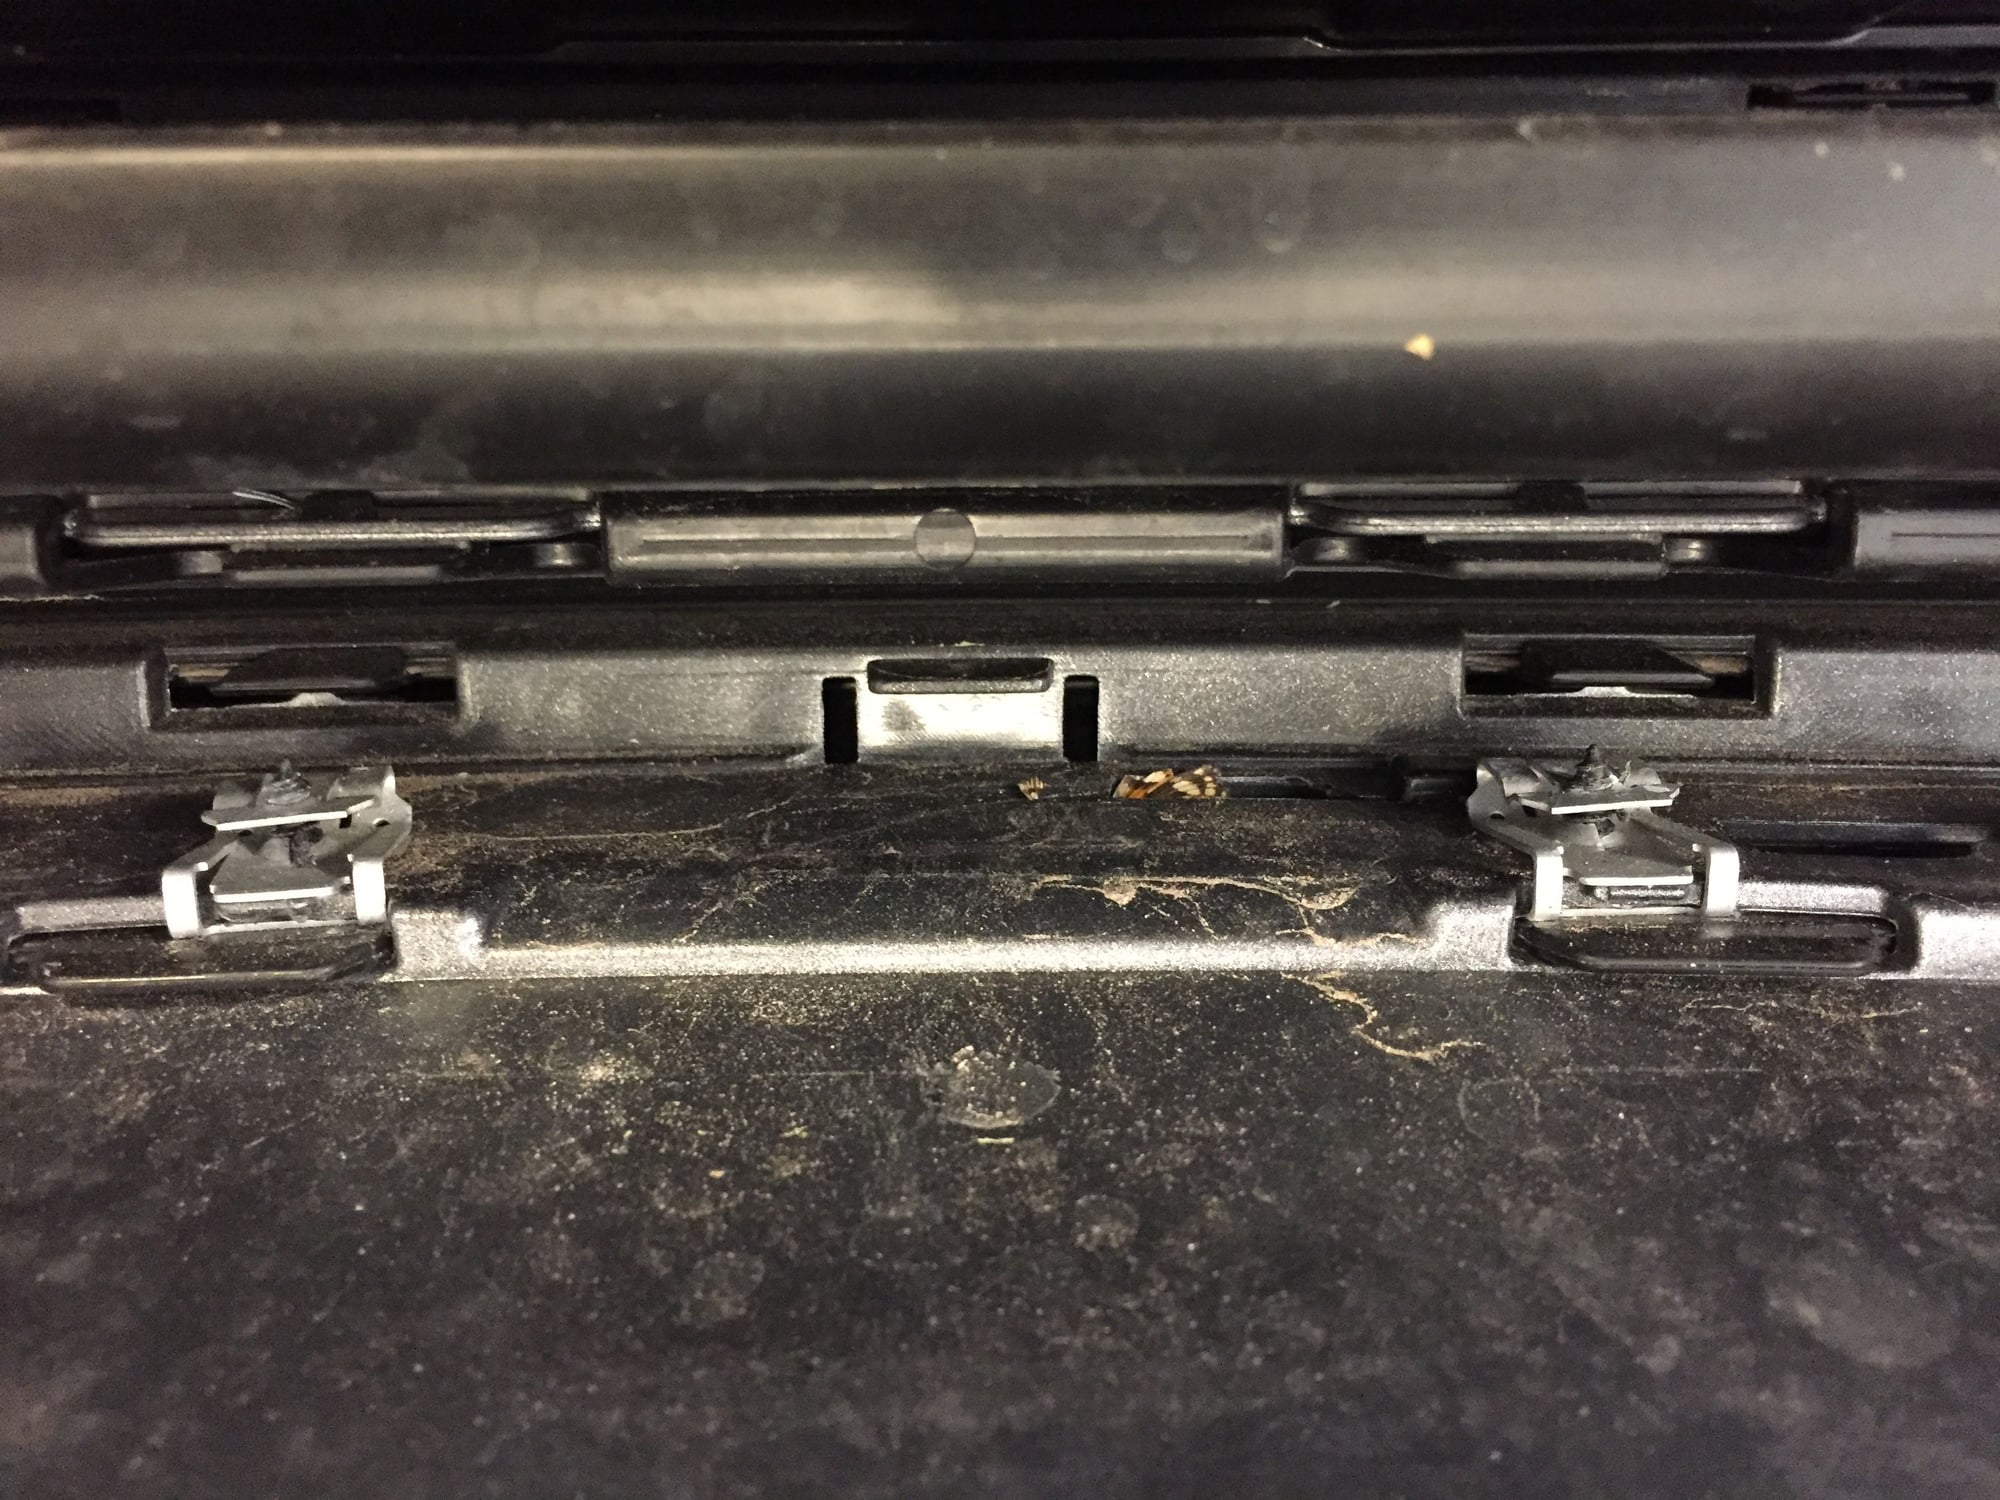
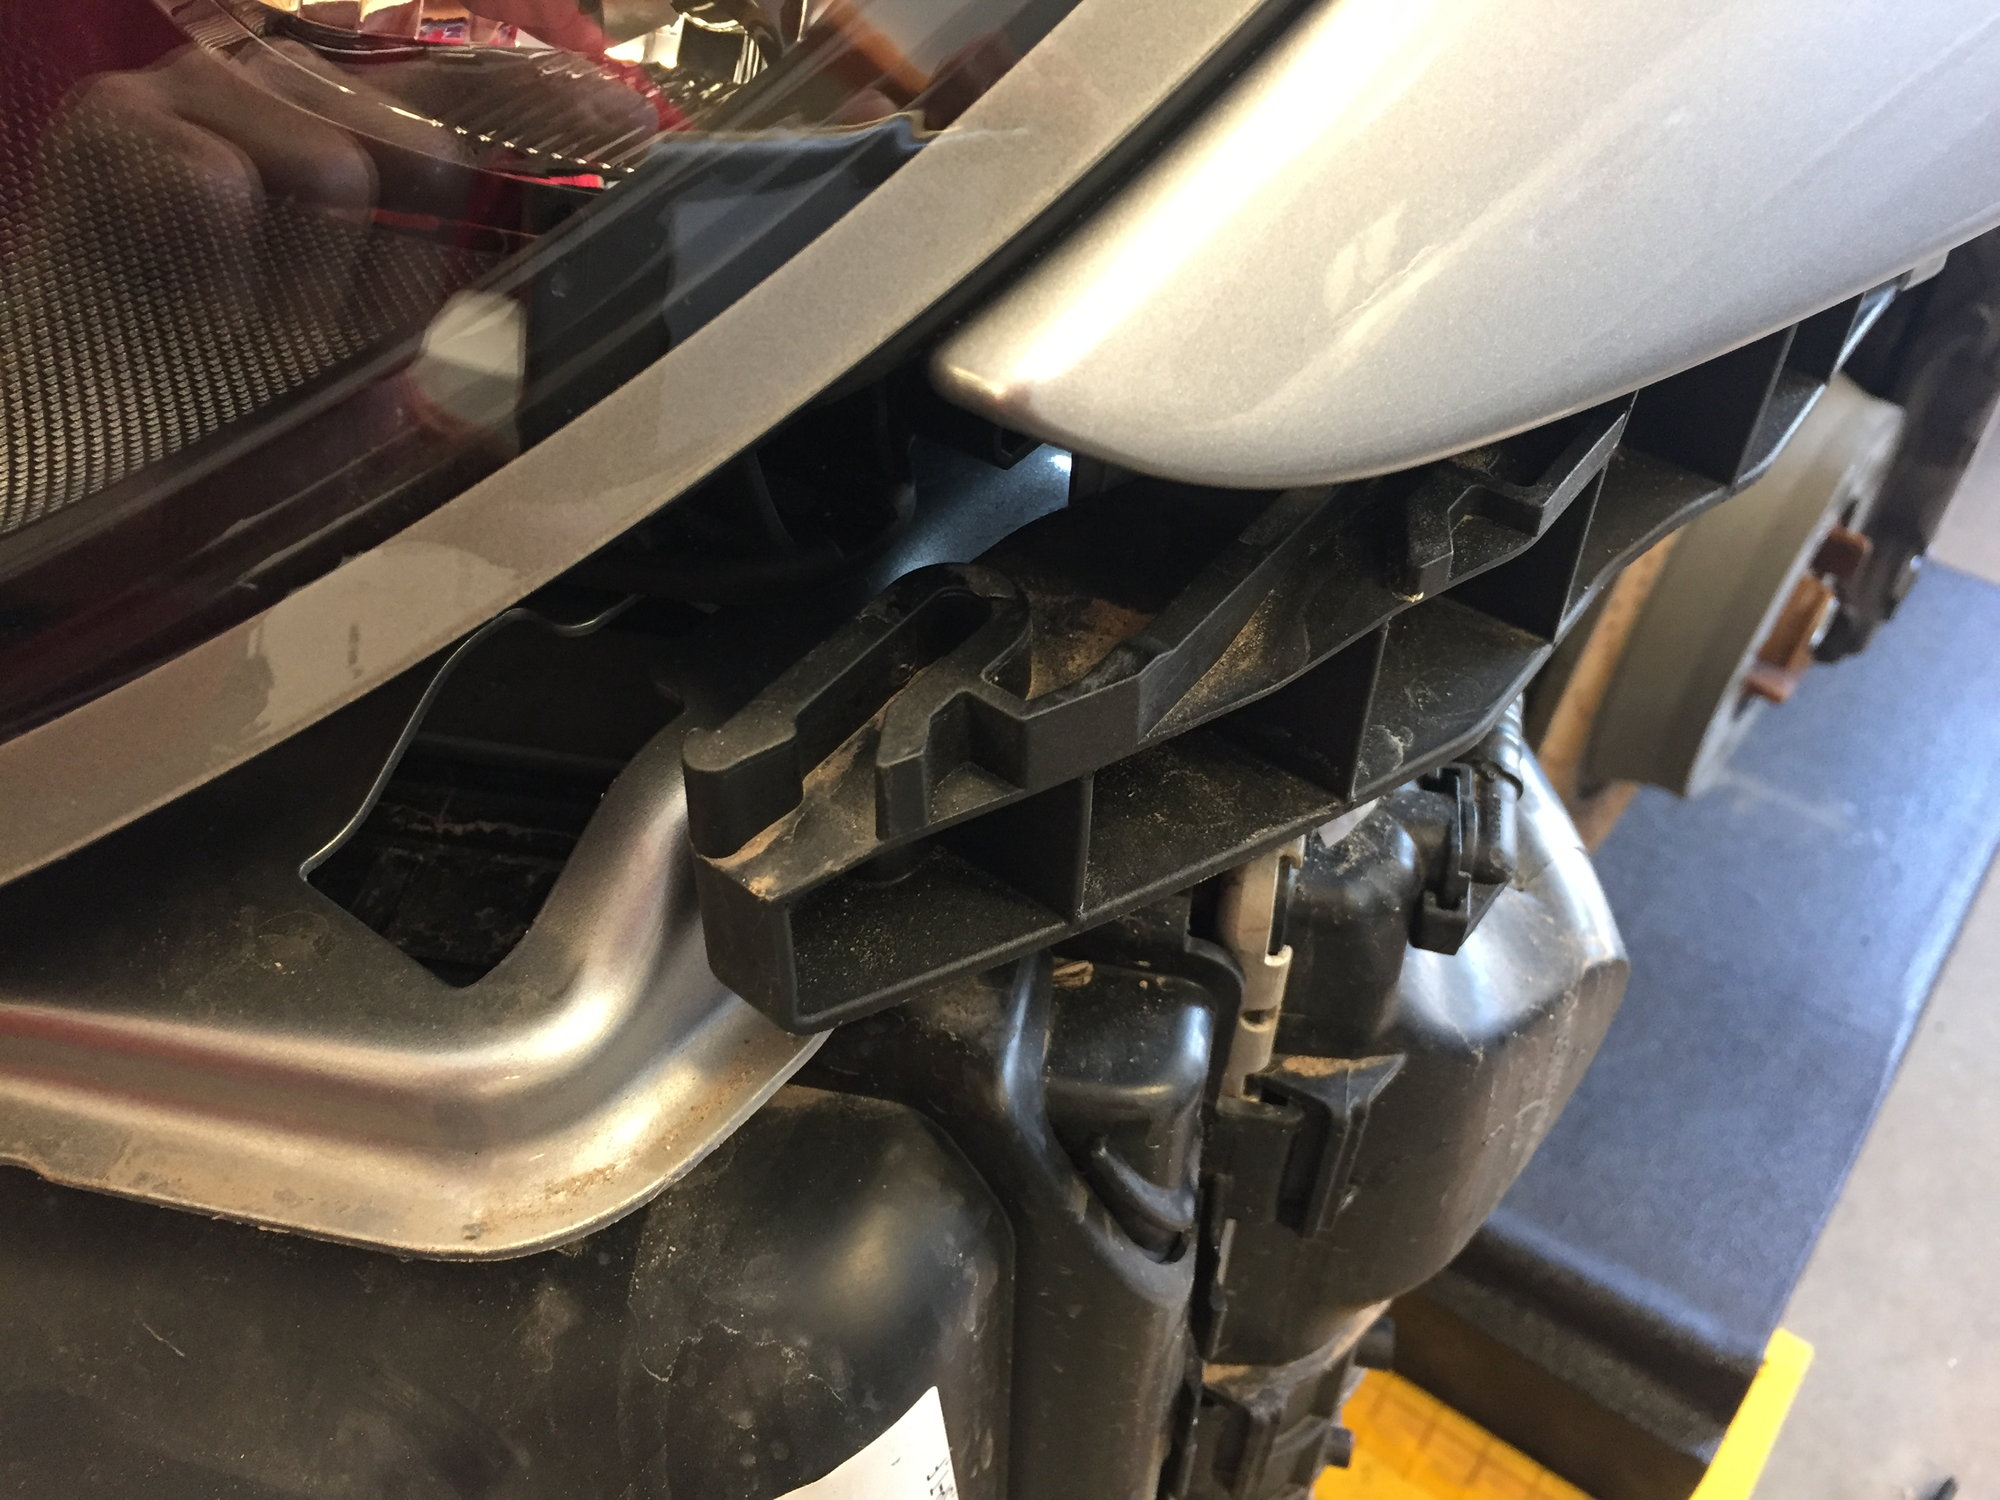
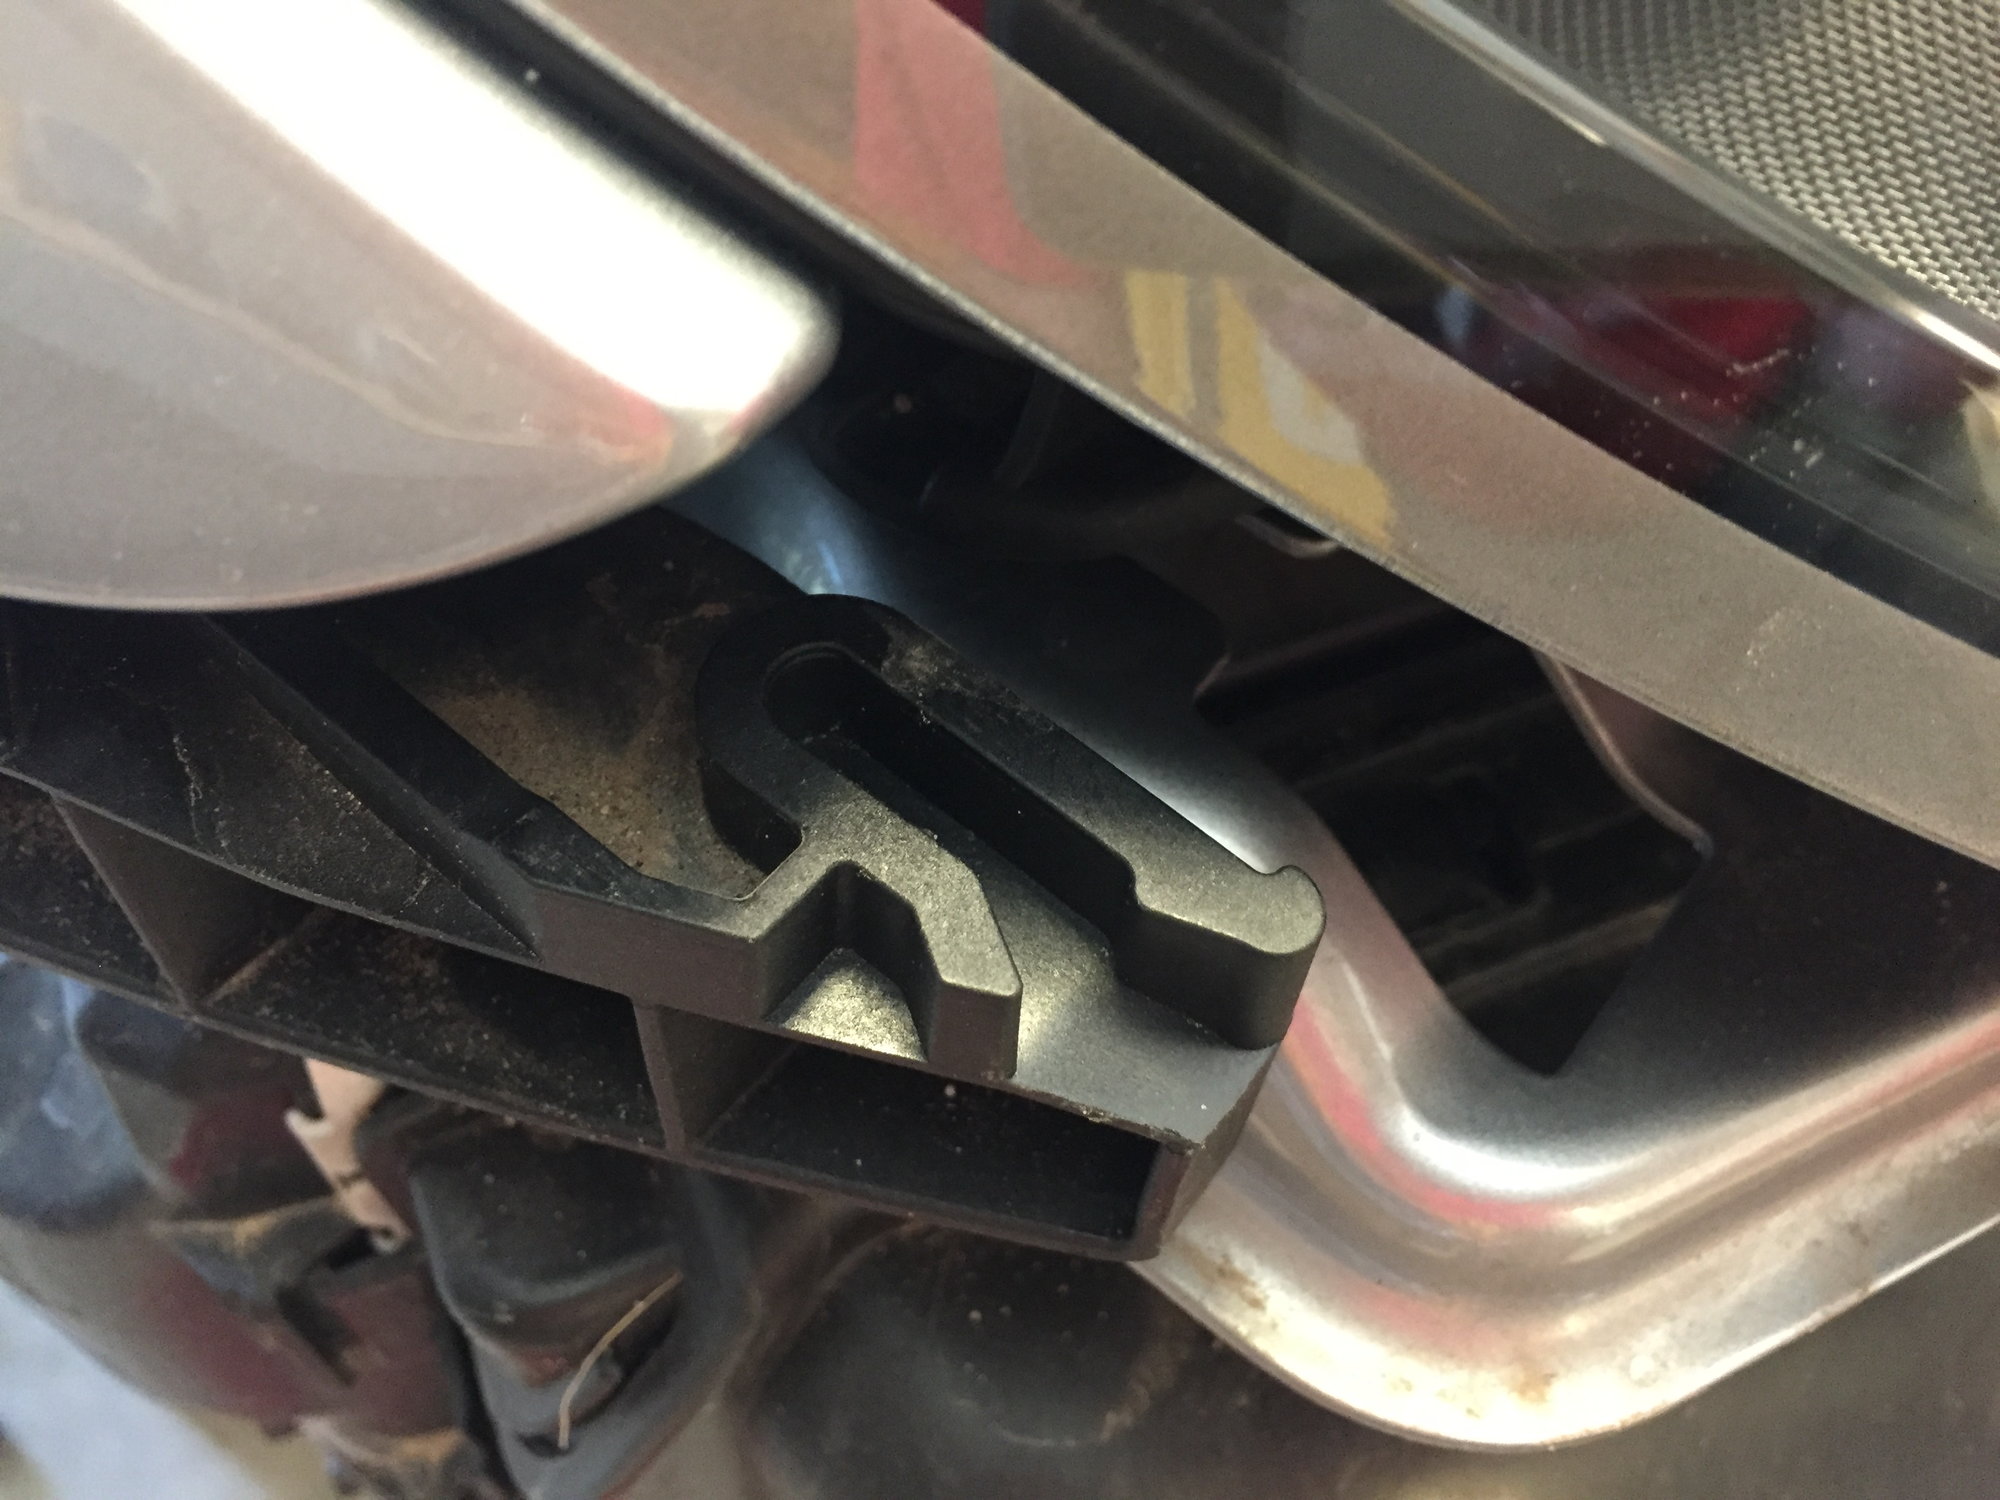
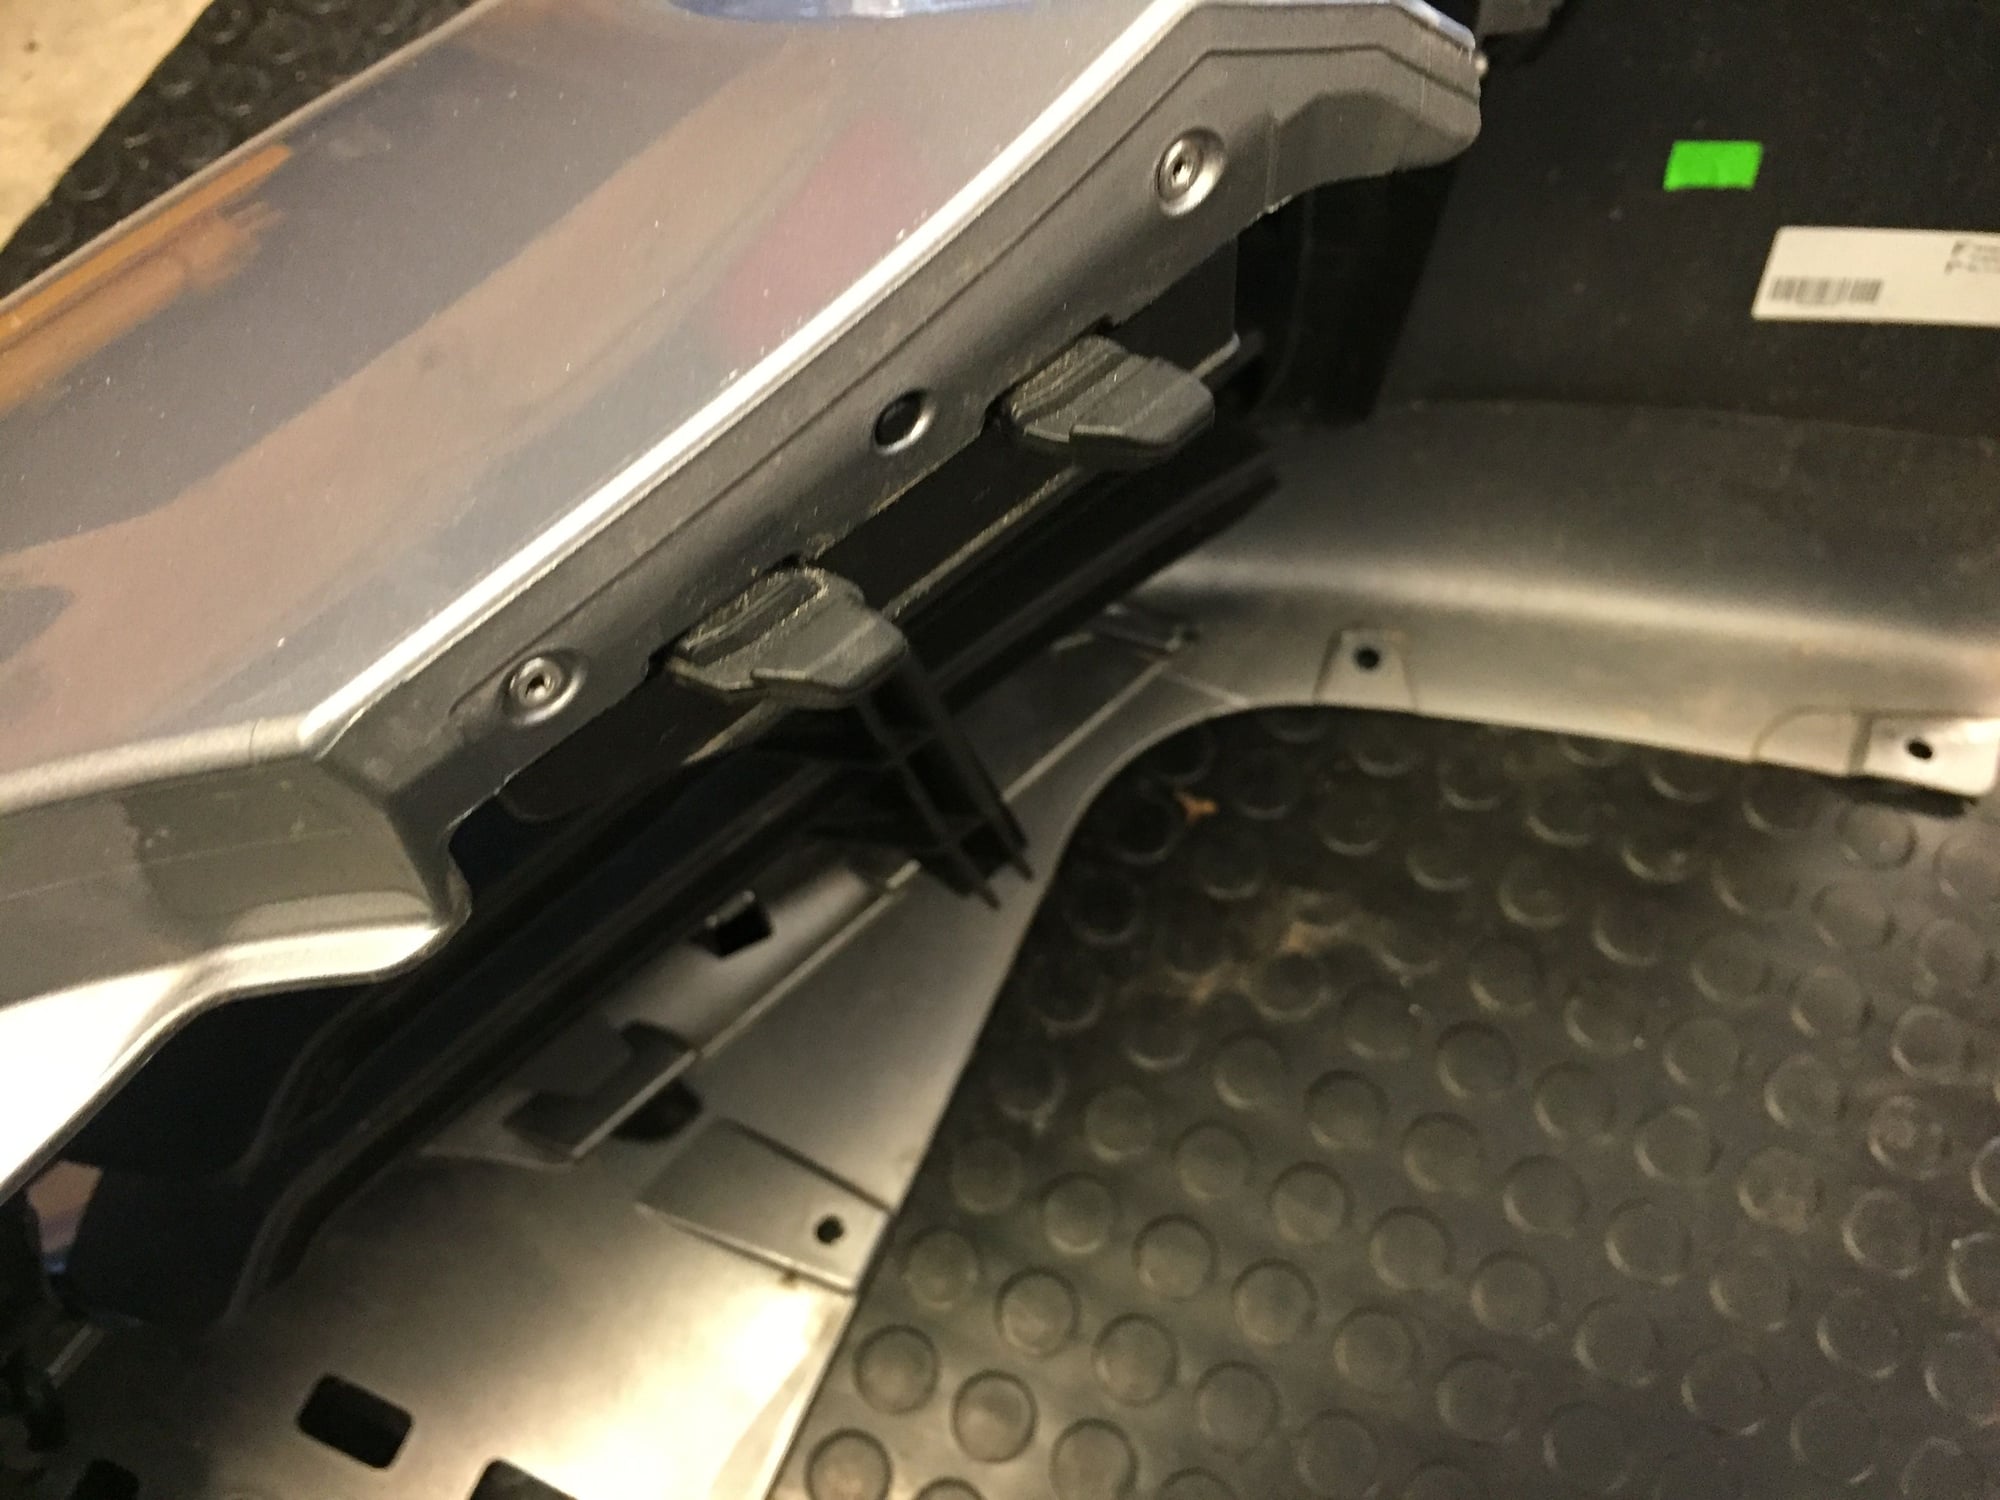
As the bumper slides rearward into place, it is guided by a number of tabs and slots. Here is a spacer at the top by the frunk latch:
There are grooves below each headlight:
And twin horizontal slots and tabs on the left and right sides:
As you slide the bumper rearward into place, these tabs and slots will guide it into the correct position:
Now, reinstall all the attachment hardware. I started with the 3 screws along the top edge, in front of the frunk. I then installed the retaining clips on both sides. These slide horizontally, towards the sides of the car, and have two "bumps" that you will feel as they slide into place:
Install the screws behind the side marker lights:
Working inside the left fender, insert the washer hose elbow into the bracket by inserting into the larger hole, and then pulling sideways into the smaller hole. Connect the washer feeder hose to the top of the elbow, and fix in place with the sliding clip. Snap together the electrical connector and slid onto the mounting clip.
Install the left fender liner. Note the the top edge has a bracket for the washer feeder hose:
As you wiggle the left fender liner in place, be sure to snap the feeder hose into the bracket (also note the the bottom of the fender liner goes above/inside the edge of the bumper cover):
Finish installing all the screws that attach the left fender liner.
Inside the right fender well, snap together the large and small electrical connectors, and attach to the mounting clip:
Install the right fender liner and all screws (again, the lower part of the fender liner goes above/inside the edge of the bumper cover):
Install all screws for the underside of the bumper cover.
install the side marker lights. Start with the electrical connectors and then slide/snap the lights in place:
Install the trim piece along the front of the frunk. Start in the center by feeding the catch release lever through the hole. Note that the front trim has tabs on each end that engage the side trim pieces:
Make sure the frunk gasket sits on top of the trim:
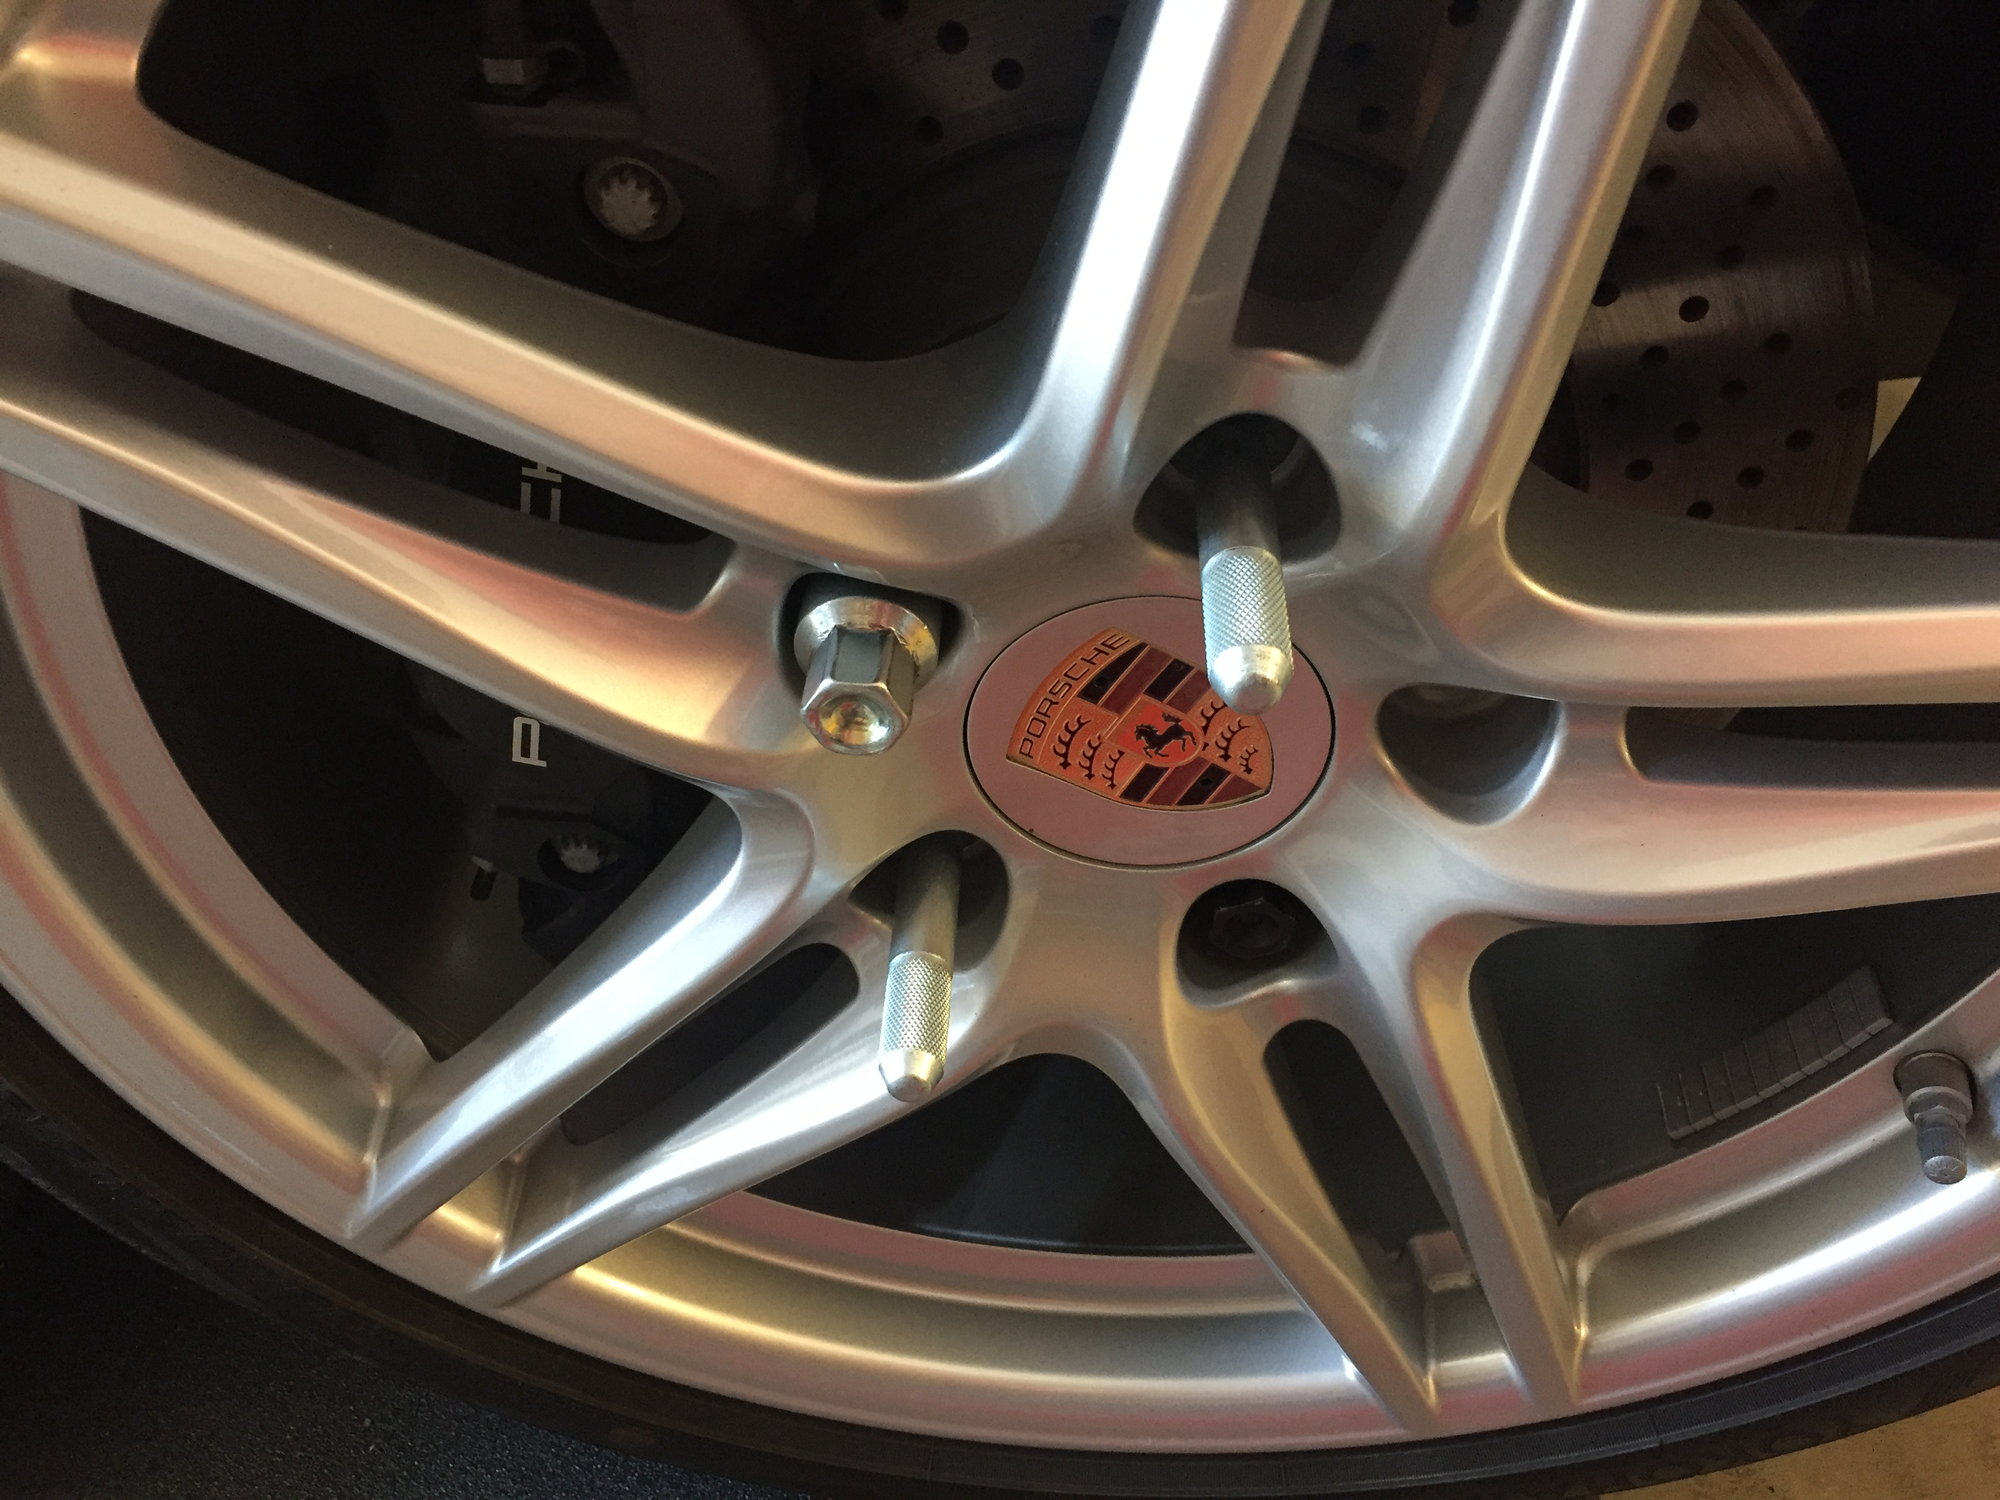
Install the front wheels and torque to 160 Nm. Wheel locater studs HIGHLY recommended:
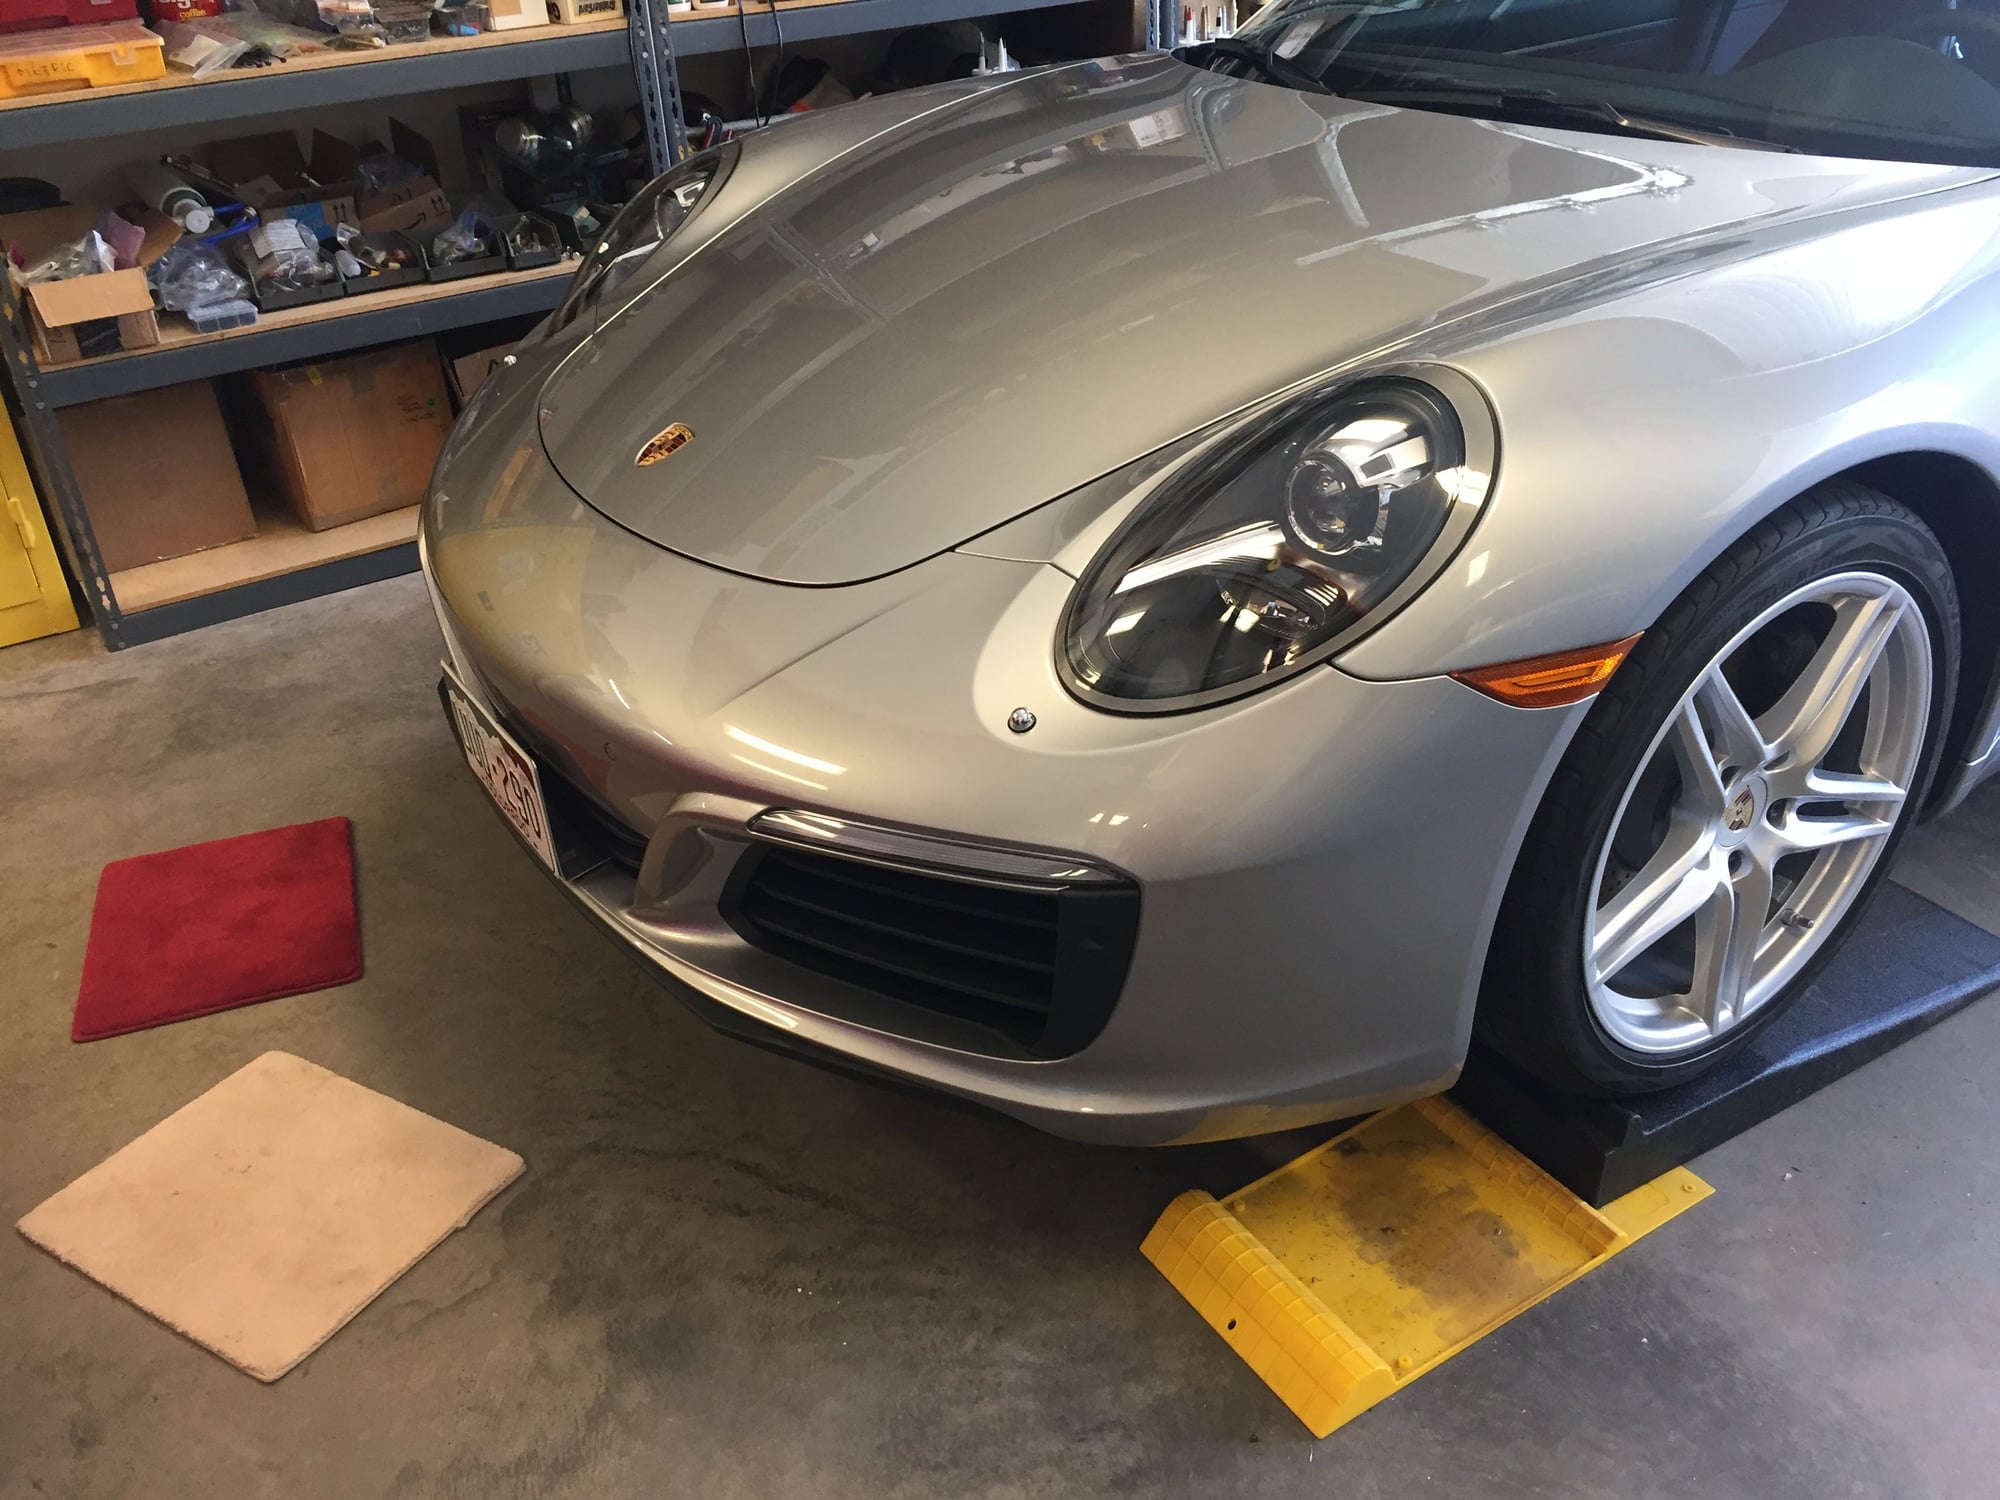
Check for alignment and proper function--all done!
Fantastic and incredibly detailed write up. I recently posted about my visit to Rennline so they could test install their front intake screens on my 991.2 GTS. I watched and tried to learn from their process of removing the front bumper and I wanted to mention that they DID NOT remove the front wheels nor the front fender liners. They did remove a couple of screws from the fender liners to be able to reach behind them, but they were able to do what they needed without taking quite as much apart as you did.
I'm not trying to take anything away from your awesome write up and detailed pictures which are all immensely helpful information and this is a great follow up to your very detailed oil change instructions which were extremely handy for when I changed my own oil. So thank you for all the hard work and contributions you're making here.
I just do not understand Porsche Management for this (I don't blame the engineers on this), for creating a complex model on purpose so that Dealership Service departments can make money. Front grill mesh is needed so much now that almost all cars are technically turbos.
Great shots and thank you for sharing. Porsche management needs to make design easier for maintenance - we all know it can be done easier
I don't know if the side trim parts are the same on the 991.1 and 991.2 but on my 2016, when I lifted the side trim piece to get at the clip, the part of the trim that has a slot for the thing that looks like a rivet head cracked. It did not break of though. I found it to be easy to just remove the side trim piece completely to get it out of the way.
Fantastic and incredibly detailed write up. I recently posted about my visit to Rennline so they could test install their front intake screens on my 991.2 GTS. I watched and tried to learn from their process of removing the front bumper and I wanted to mention that they DID NOT remove the front wheels nor the front fender liners. They did remove a couple of screws from the fender liners to be able to reach behind them, but they were able to do what they needed without taking quite as much apart as you did.
I'm not trying to take anything away from your awesome write up and detailed pictures which are all immensely helpful information and this is a great follow up to your very detailed oil change instructions which were extremely handy for when I changed my own oil. So thank you for all the hard work and contributions you're making here.
I guess disconnecting the large electrical connectors could be done with the fender liners just pulled aside a bit, and maybe even the headlight washer hose connector, but I wager that it would be quicker to remove the wheels and undo 5 or 6 more screws to remove the liners completely.
Well, maybe before I tried to flush them out with the hose. The next morning my garage was rather stinky, and the remaining hopper mash turned out too soggy.
OK, here comes another long overly-detailed DIY with lots of photos. This started when I started to clean my 2017 C2 for a local car show.
I pulled my front bumper today to install Rennline L&R intake screens, and to install the magnetic license plate bracket holding trick I read about on RL. I have to say these instructions were perfect, and no telling what I would have messed up if bkrantz had not taken the time to post these detailed instructions. I deviated in a very minor way. I pulled the L&R front bumper clips using an 18" cable tie looped around the hook on the clip as opposed to needle nosed pliers, to prevent scratches and a potential rust spot. And on replacement of the bumper, once it was in place, the first thing I did was to reinstall the clips. Other than that I followed the instructions to a 'T' and it worked perfectly. Thank you!!!


 09-03-2017, 08:31 PM