When you click on links to various merchants on this site and make a purchase, this can result in this site earning a commission. Affiliate programs and affiliations include, but are not limited to, the eBay Partner Network.
Background
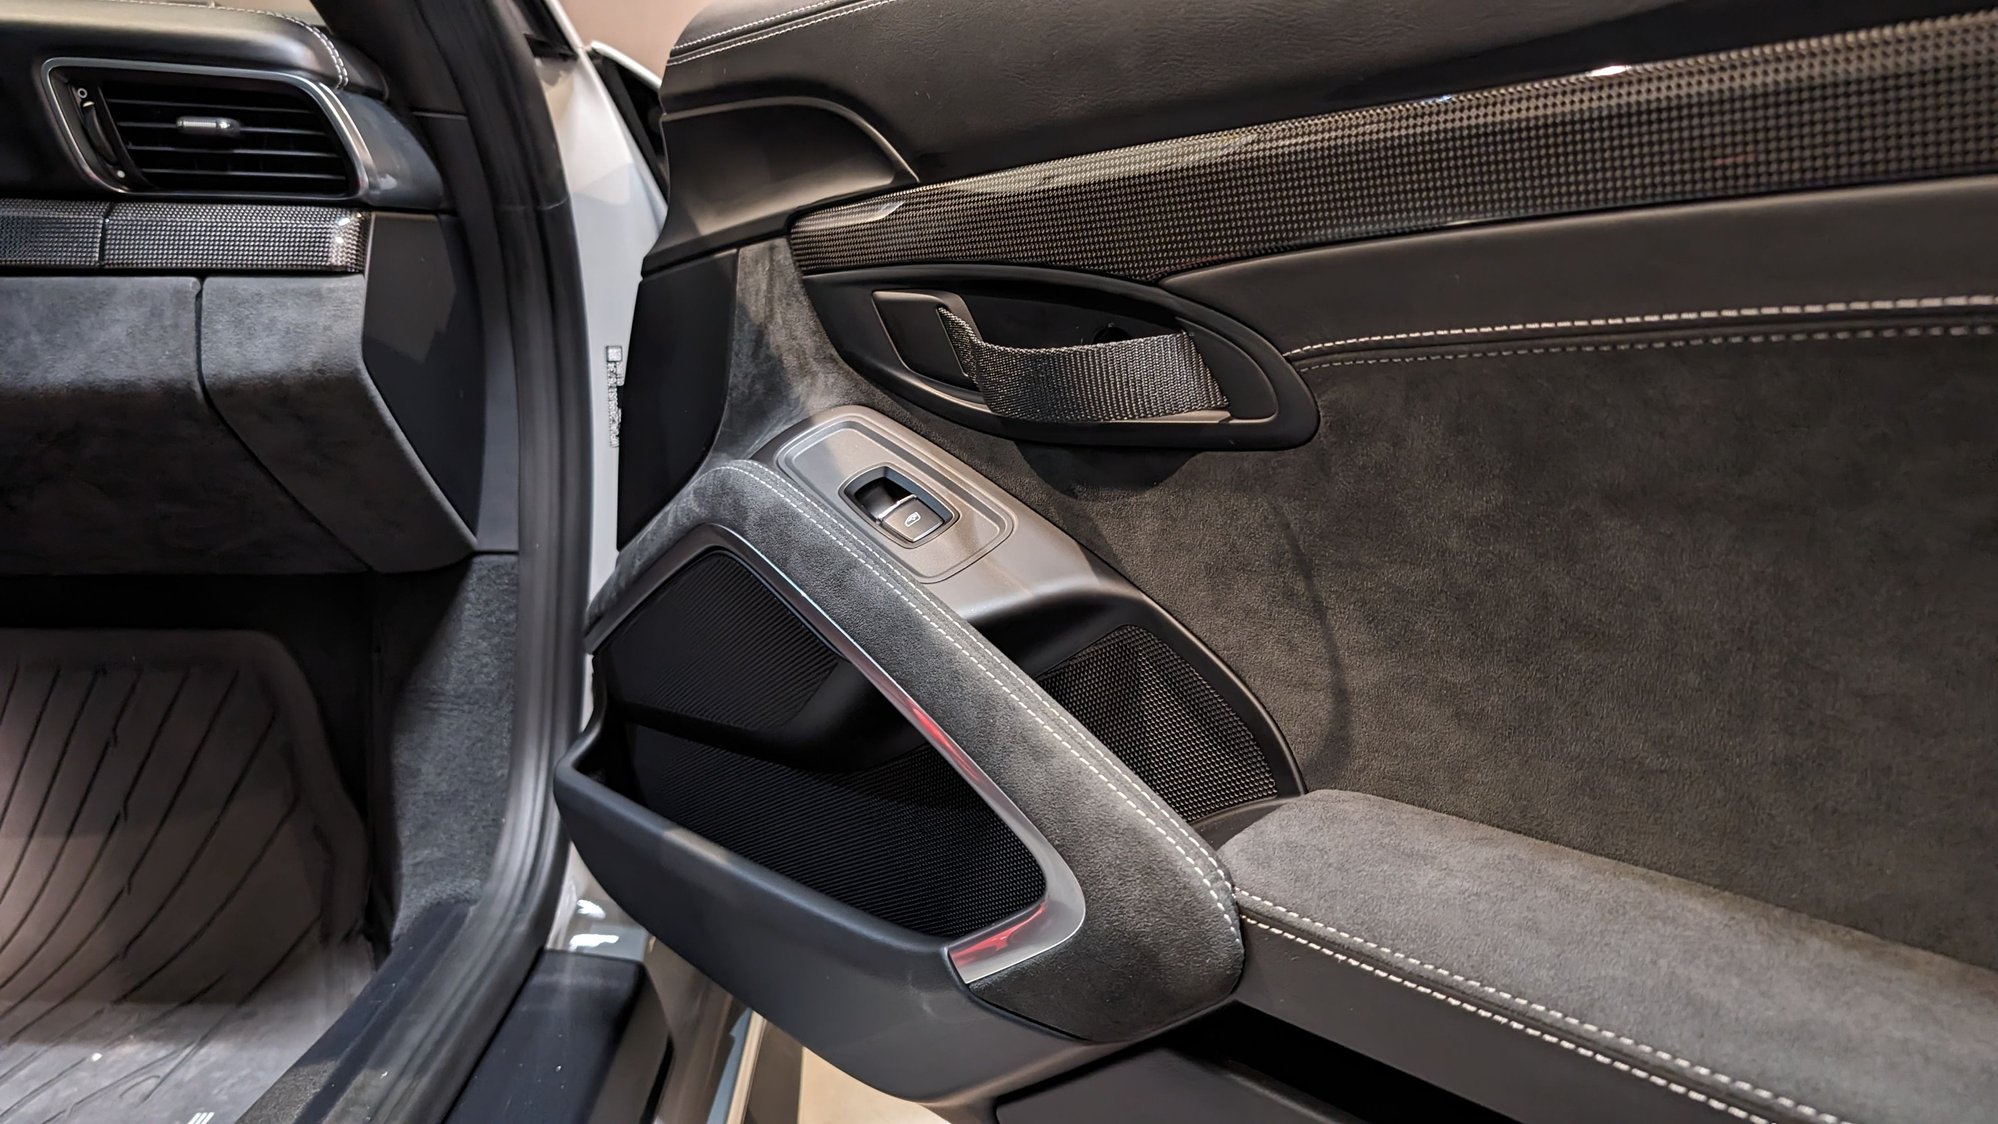
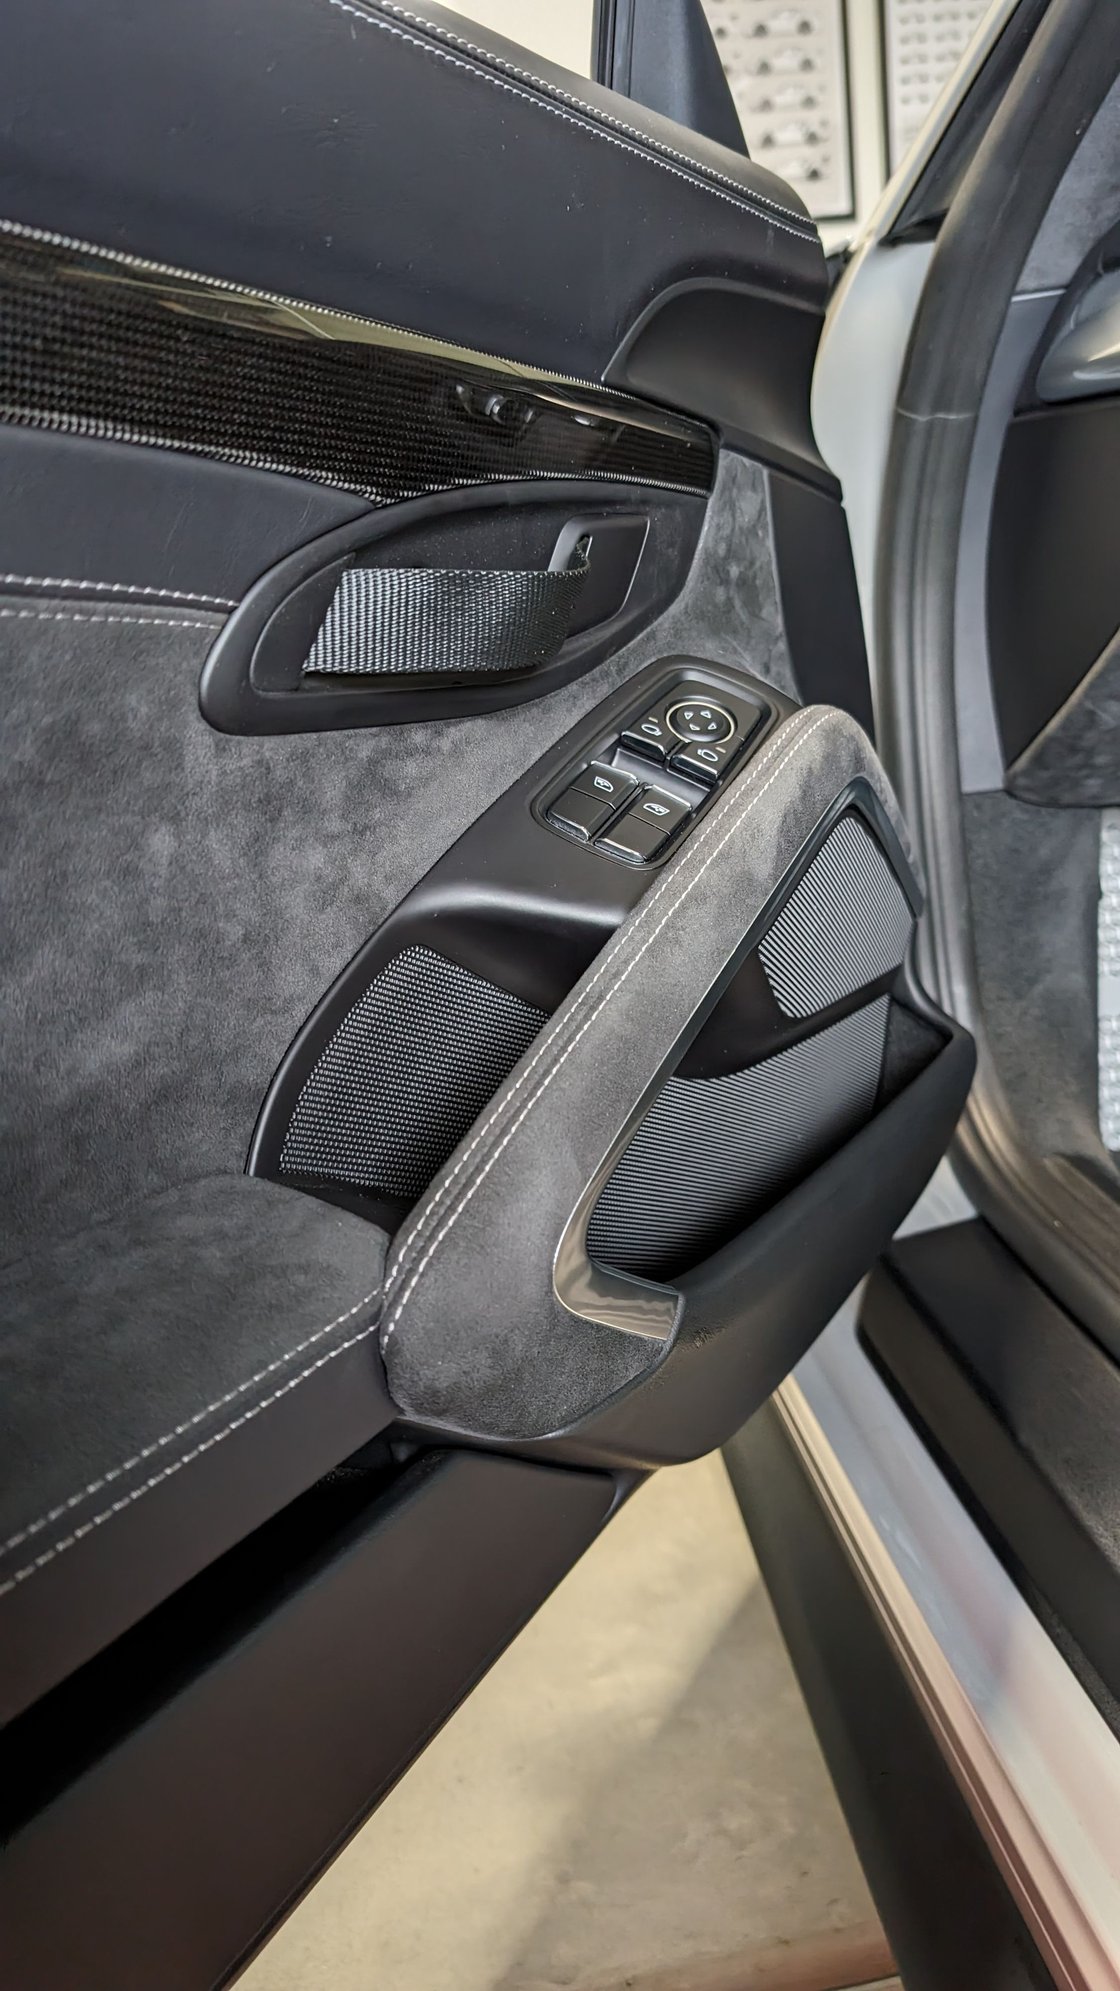
For as long as I've had my GT3, I've wanted the door pulls from the RS/GT4. Something about the door handles just felt out of place in the interior. I figured this would be a straightforward swap, similar to the 997, but after doing some research it seemed that was not the case.
One difference between a GT3 door panel and an RS/GT4 door panel is the bracket where the door handle or door pull is mounted.
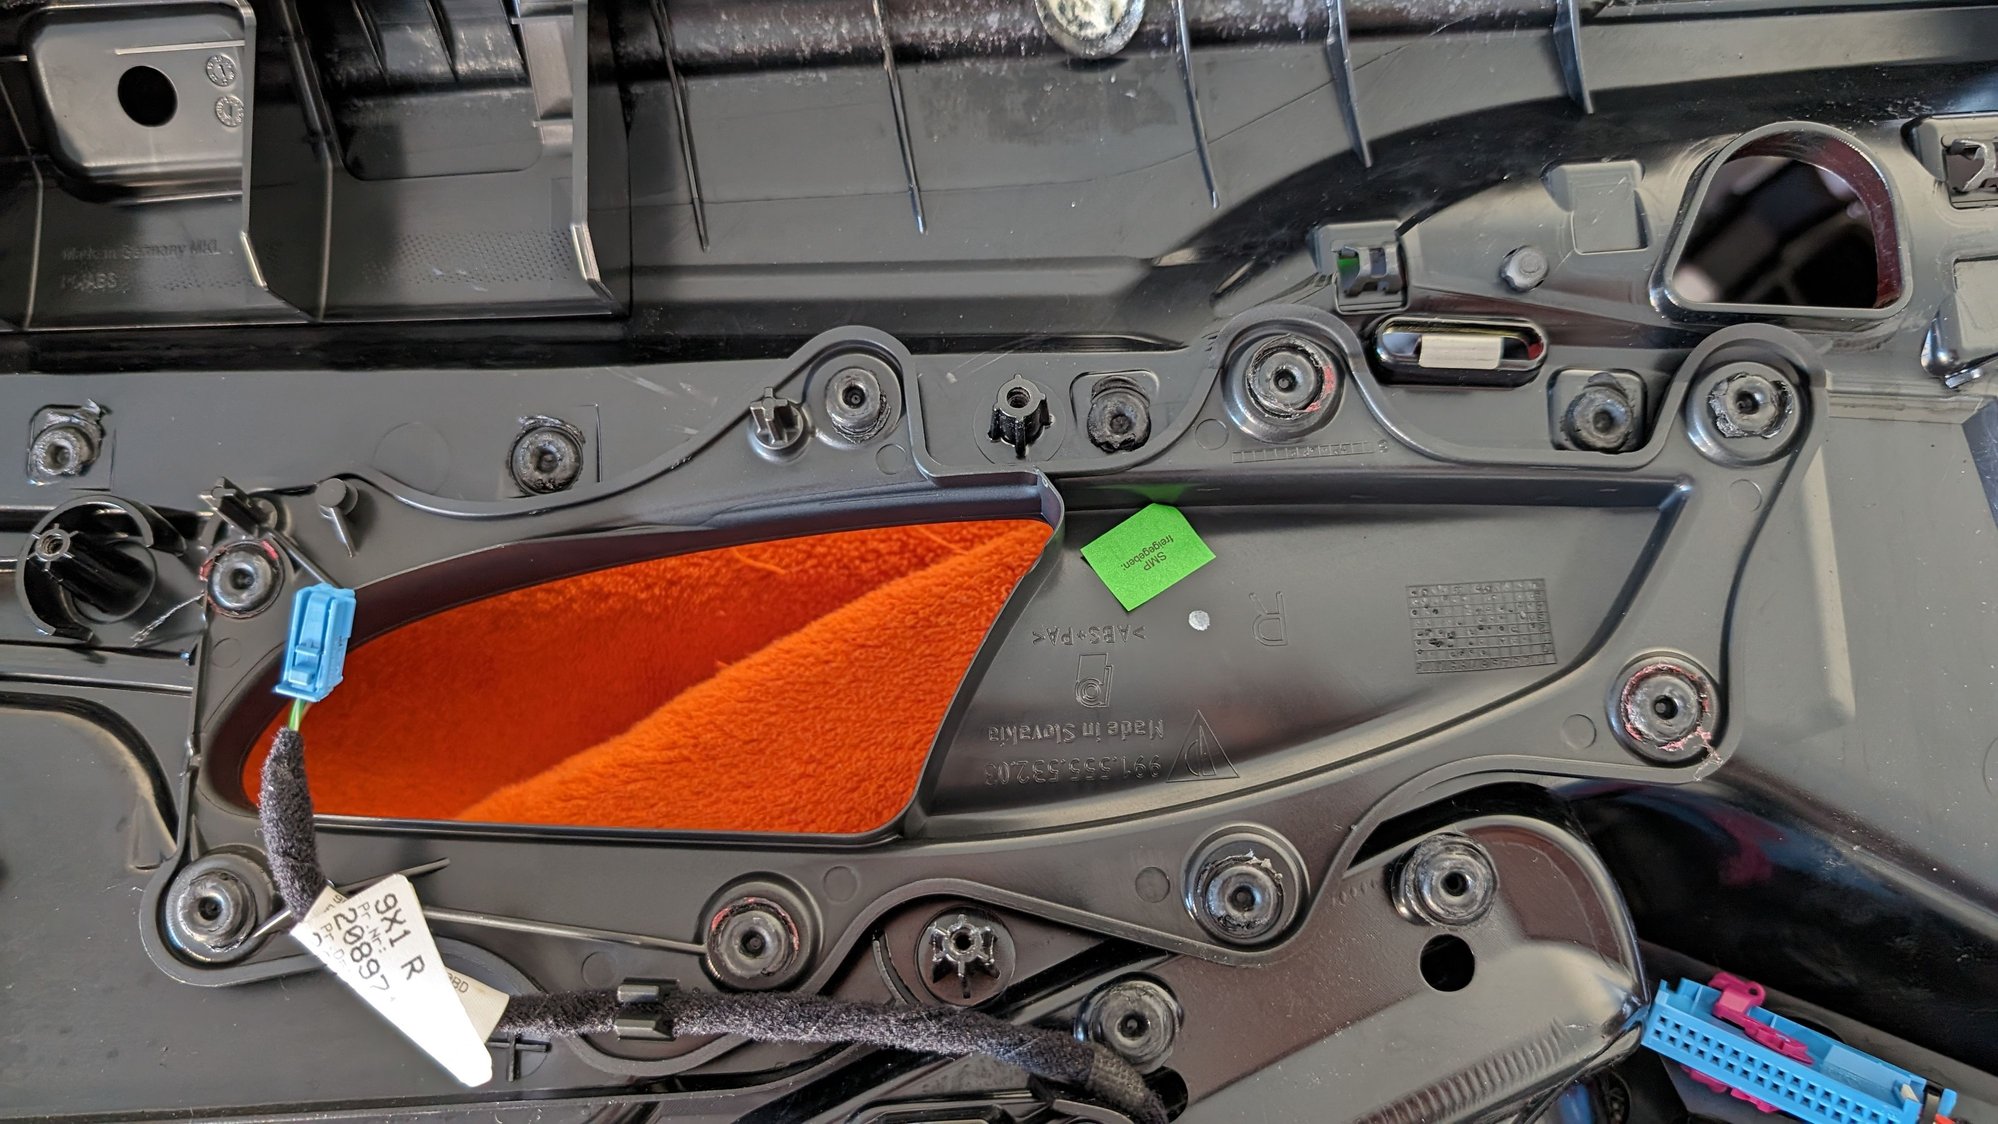
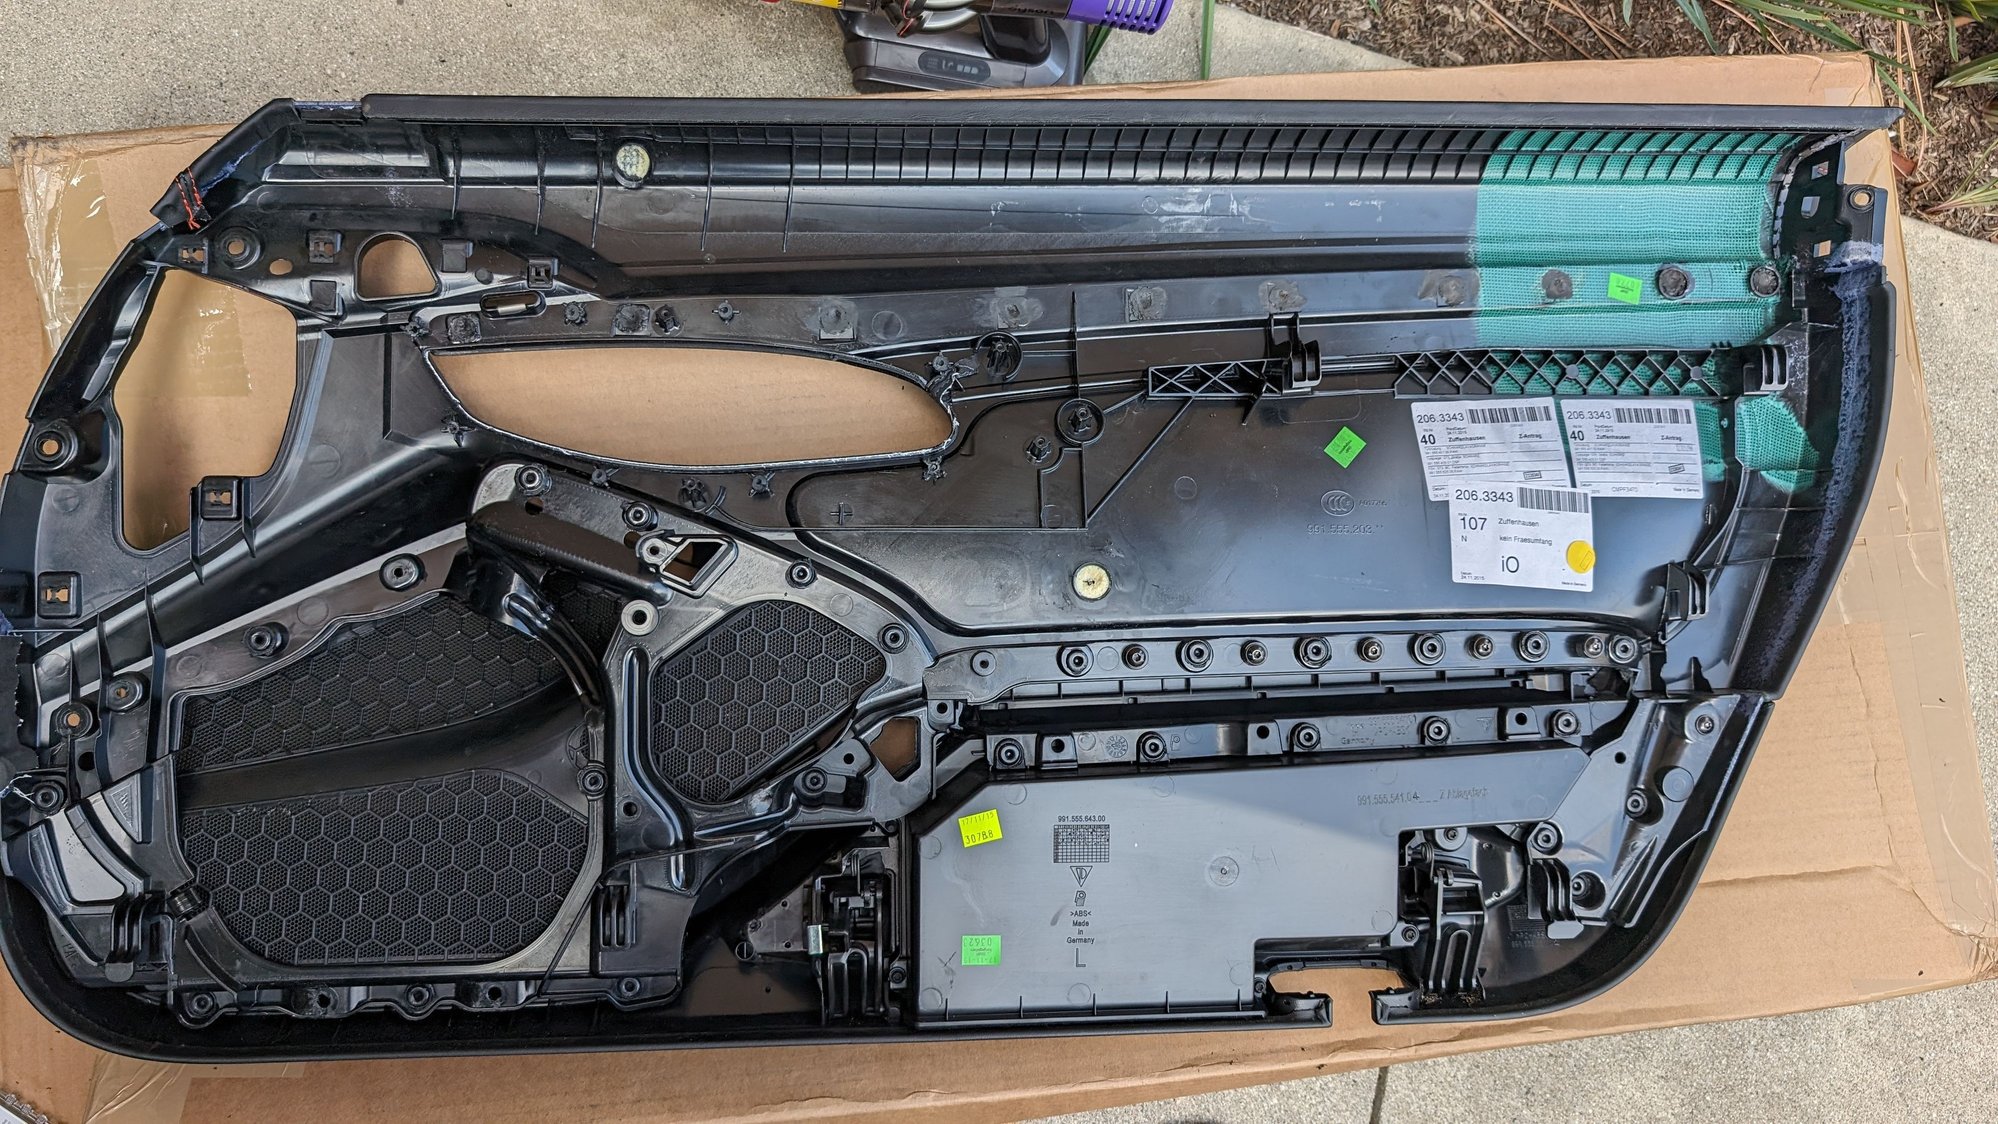
On a GT3, the bracket looks like this:
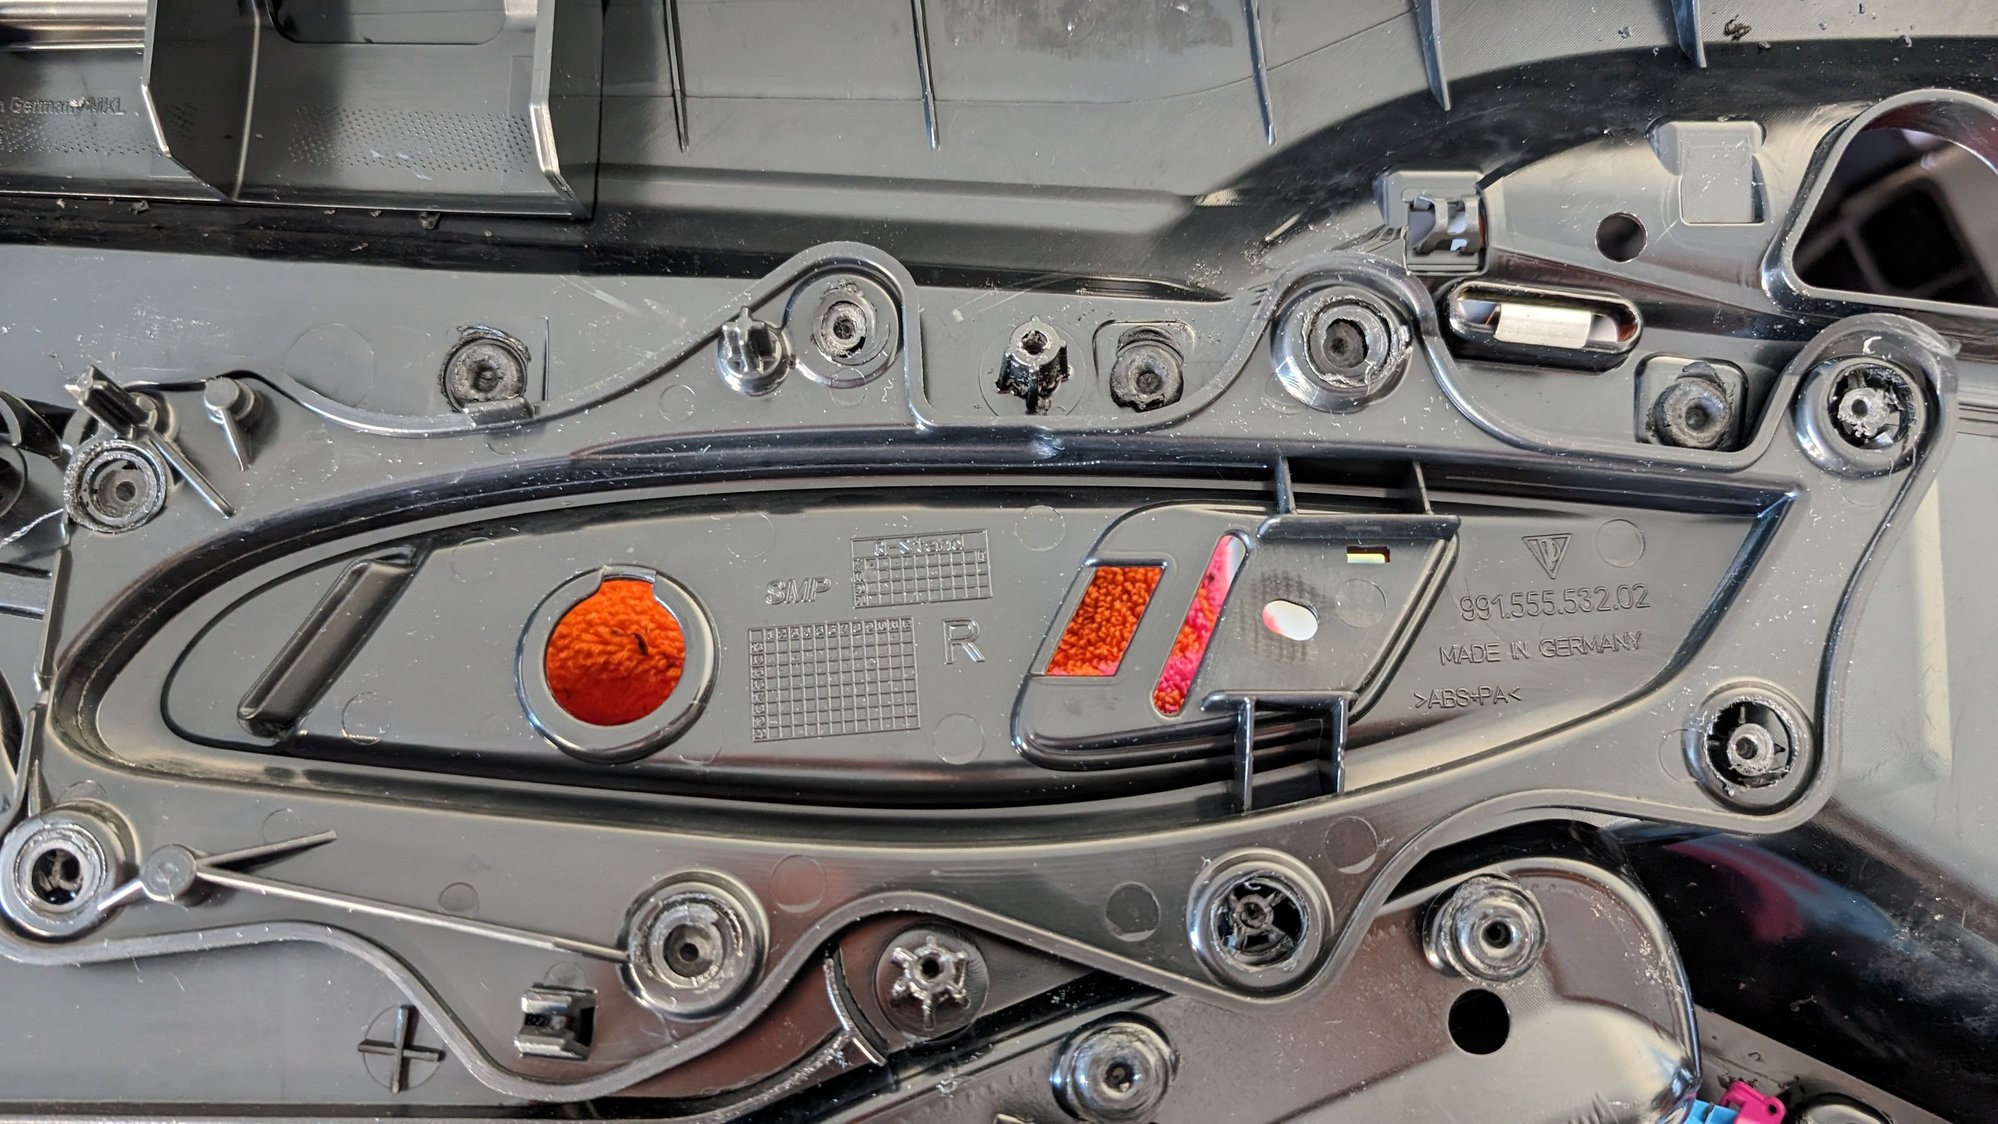
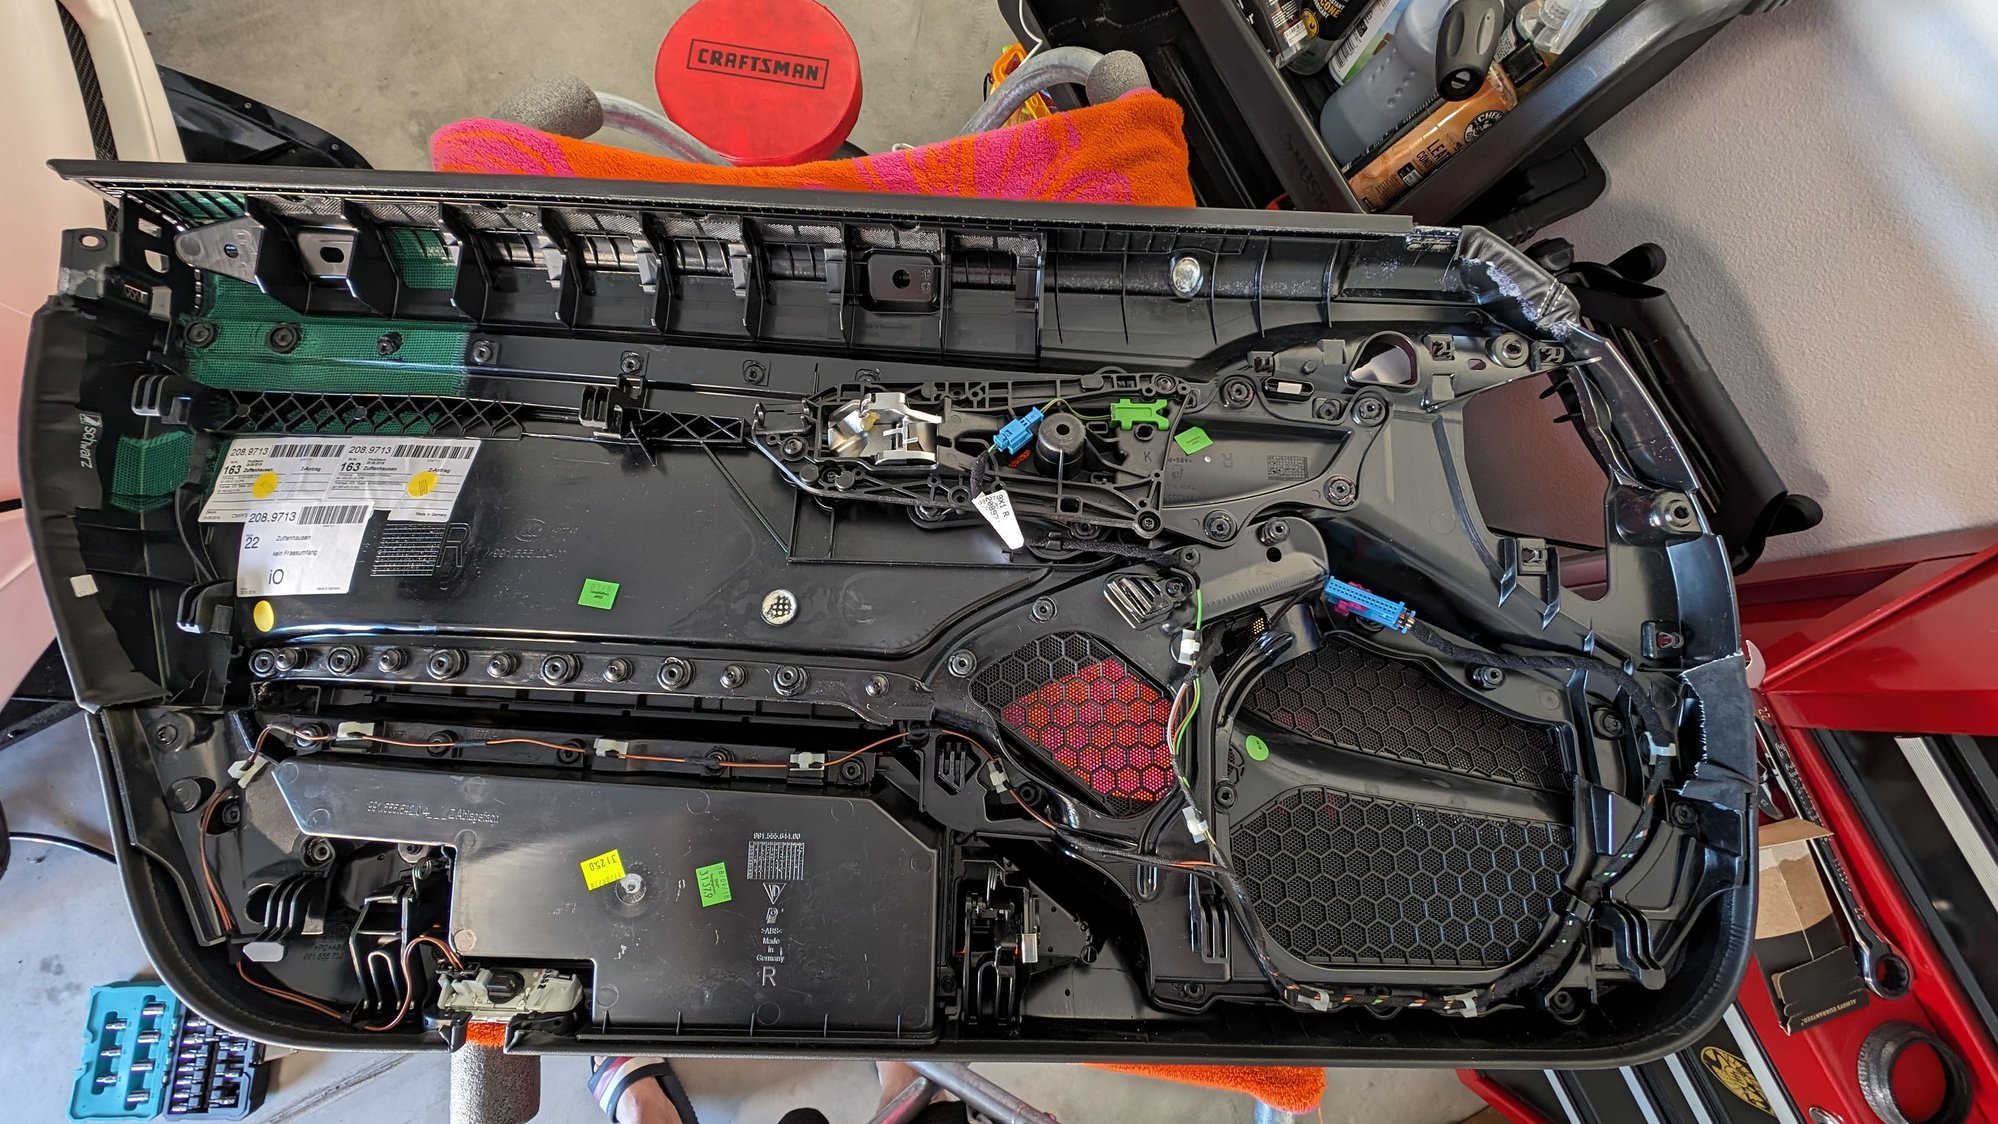
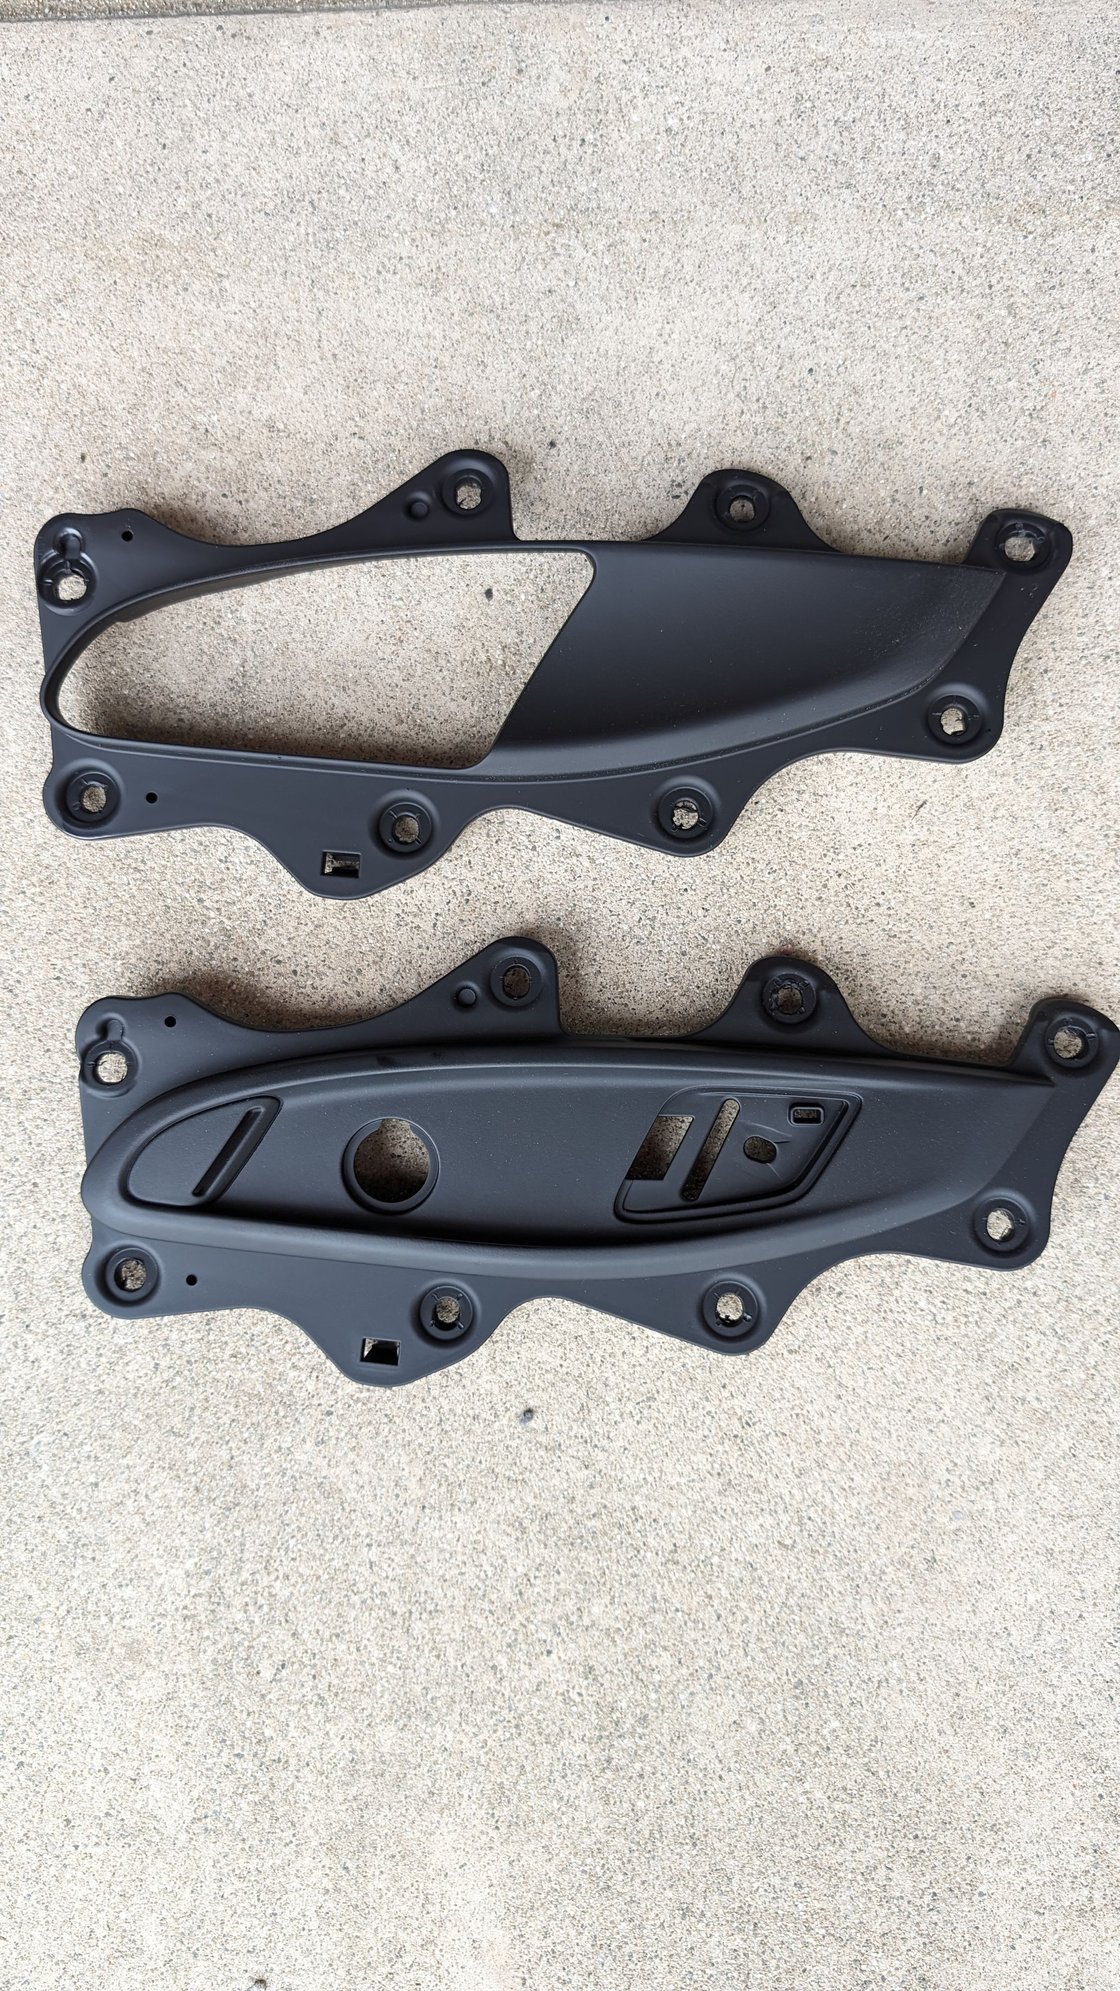
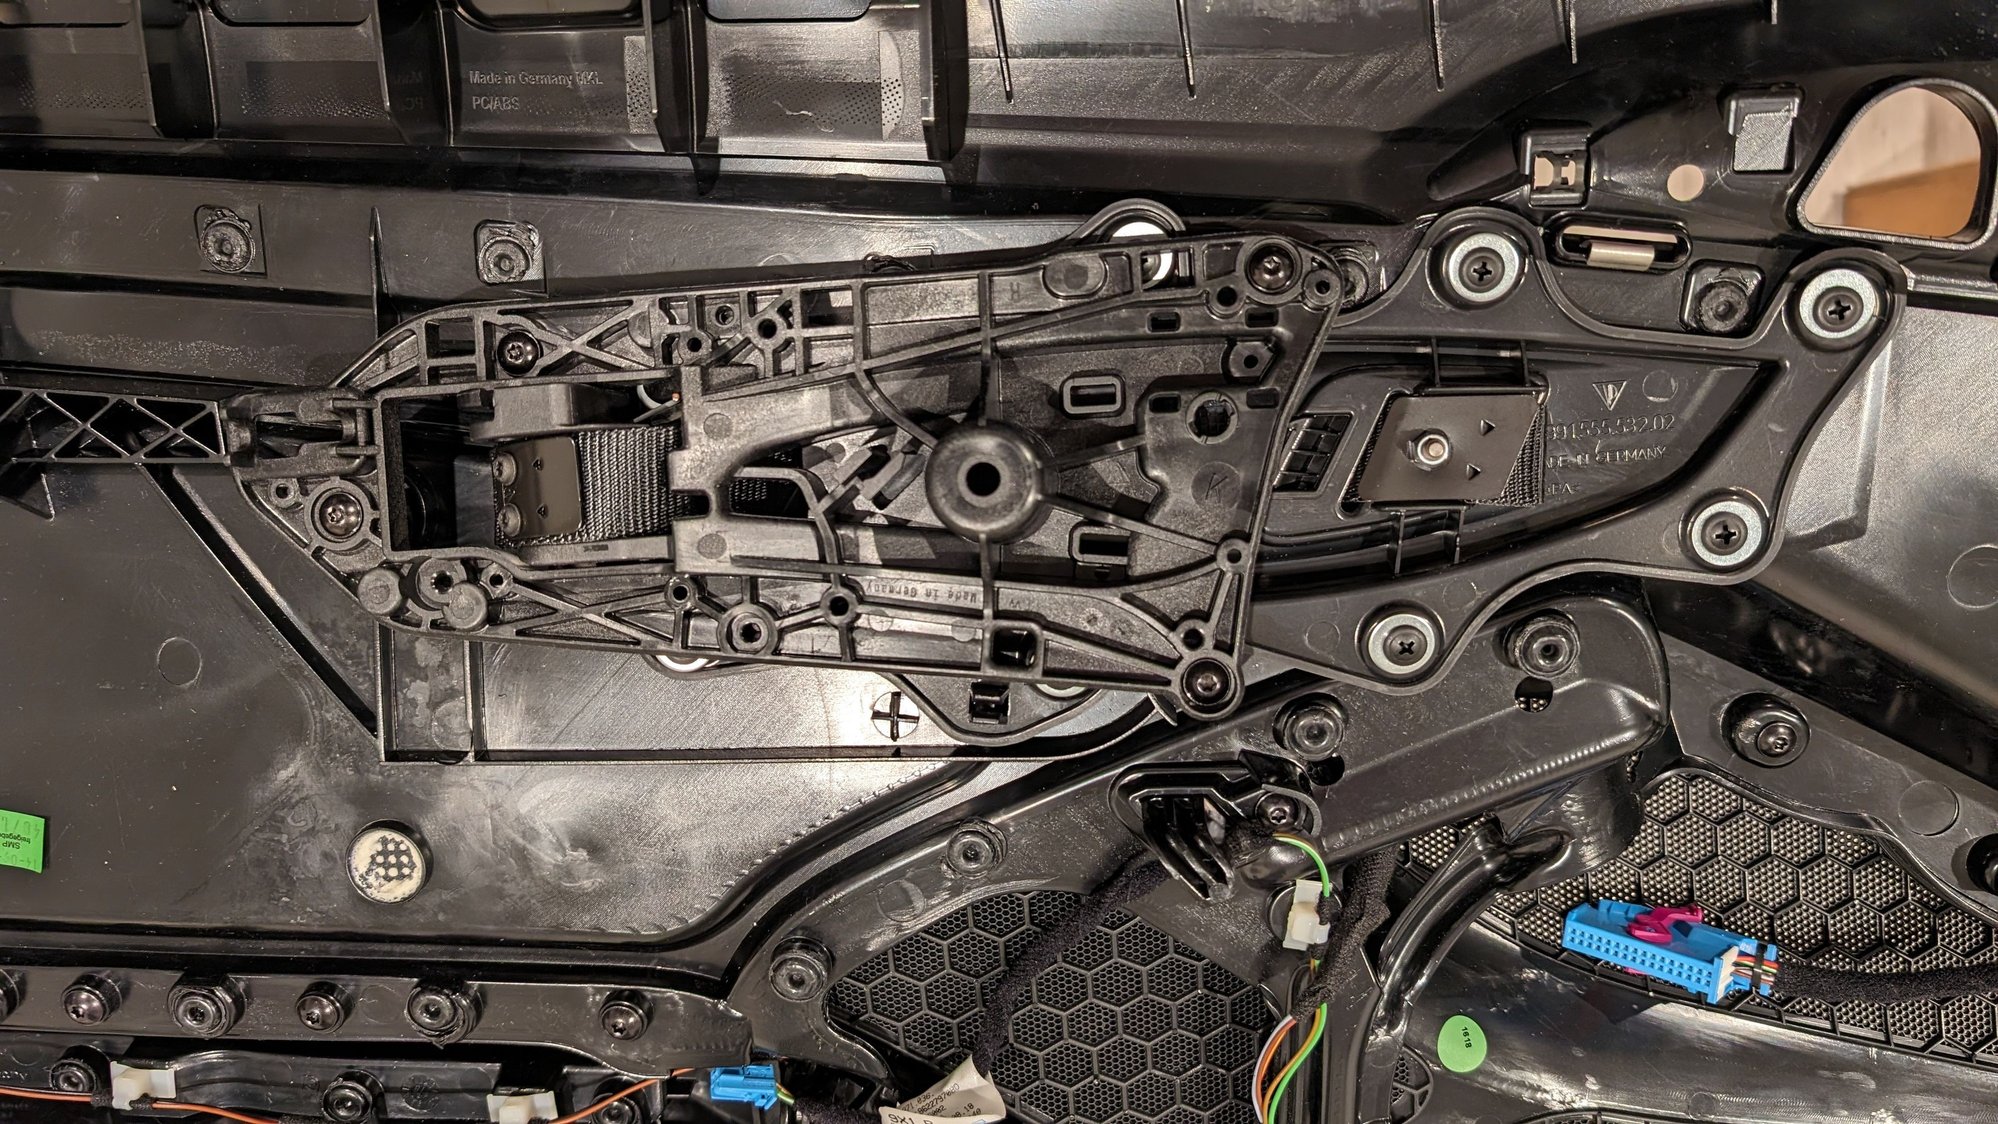
On an RS/GT4, the bracket looks like this:
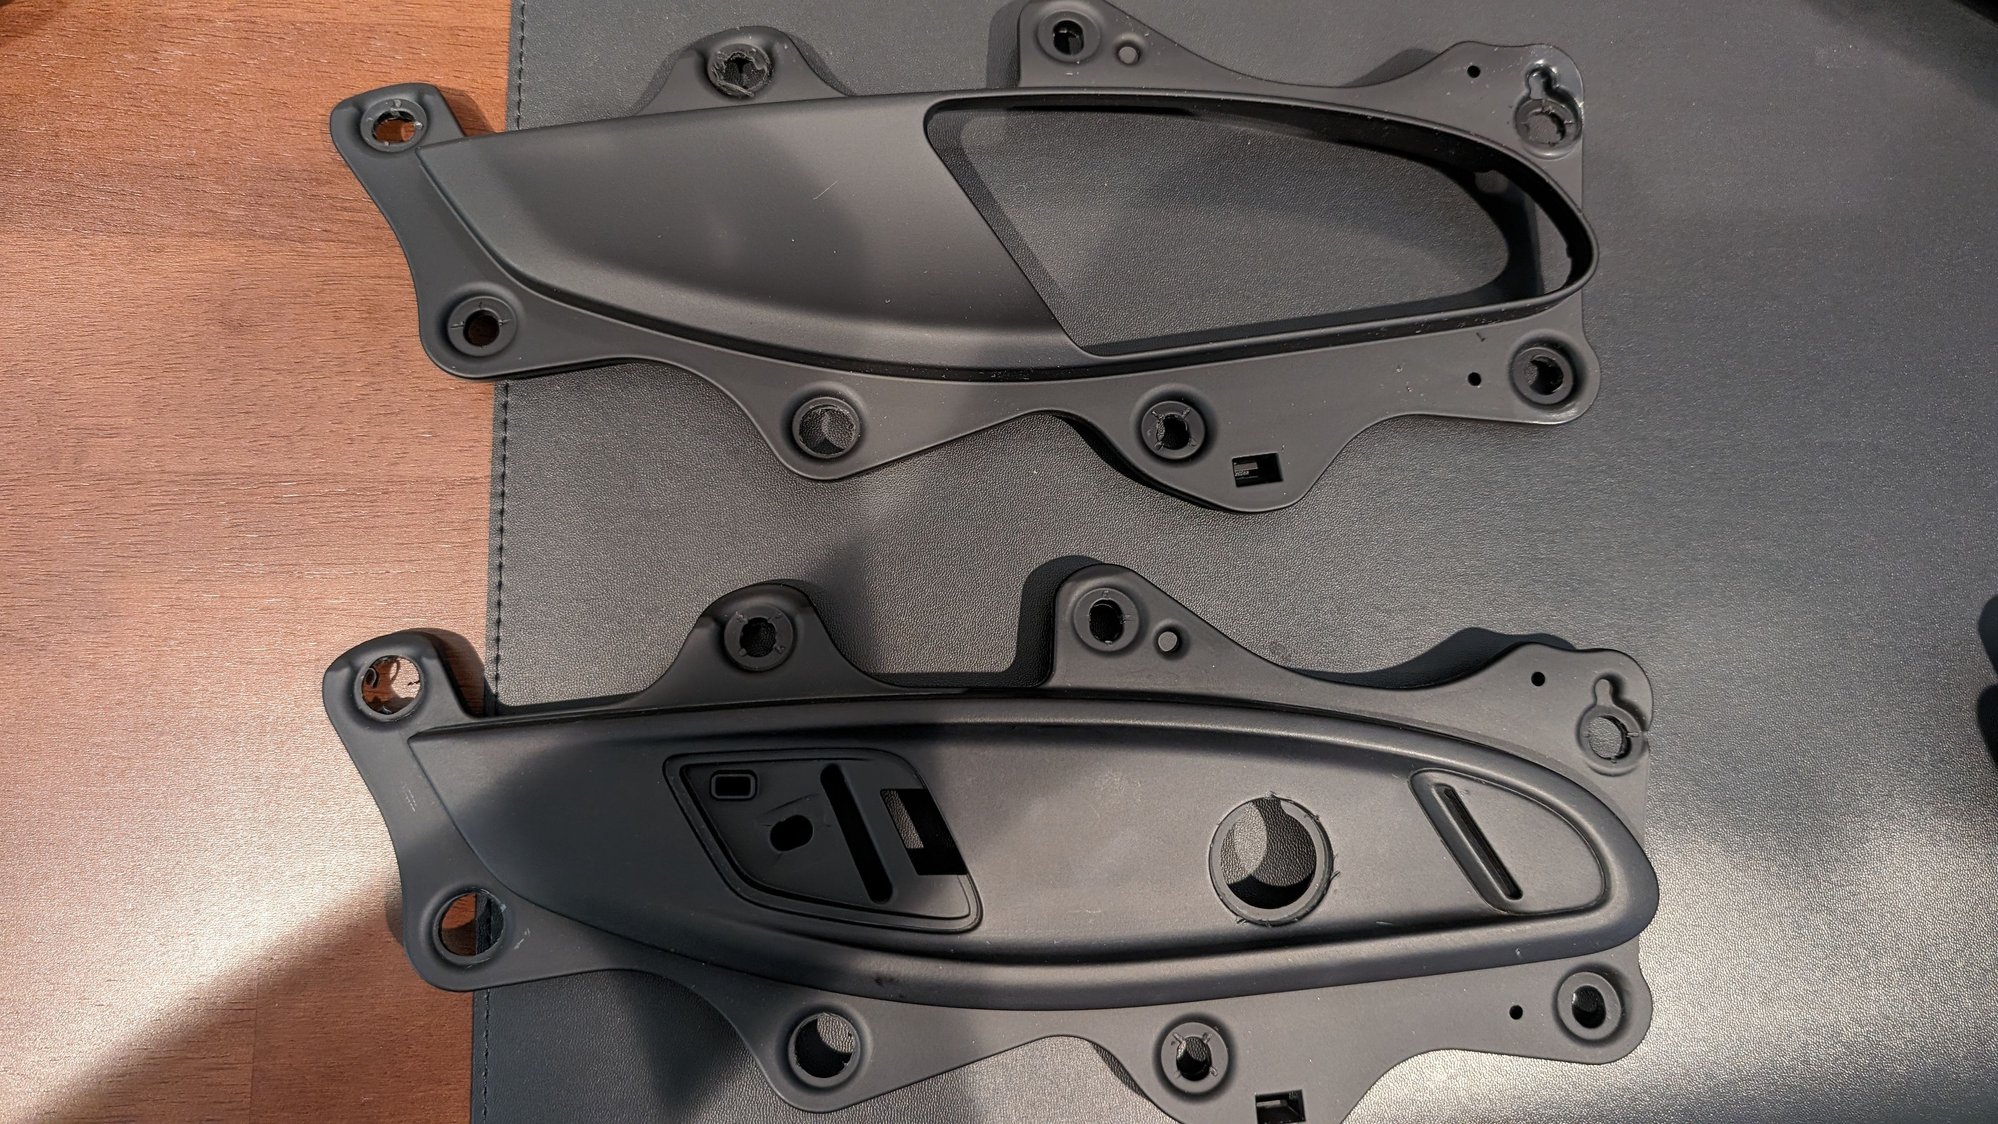
Side by side:
Each bracket allows for mounting either the door handle or the door pull, so in order to install the door pulls in a GT3, you would first need the correct bracket. Unfortunately, this presents a challenge because:
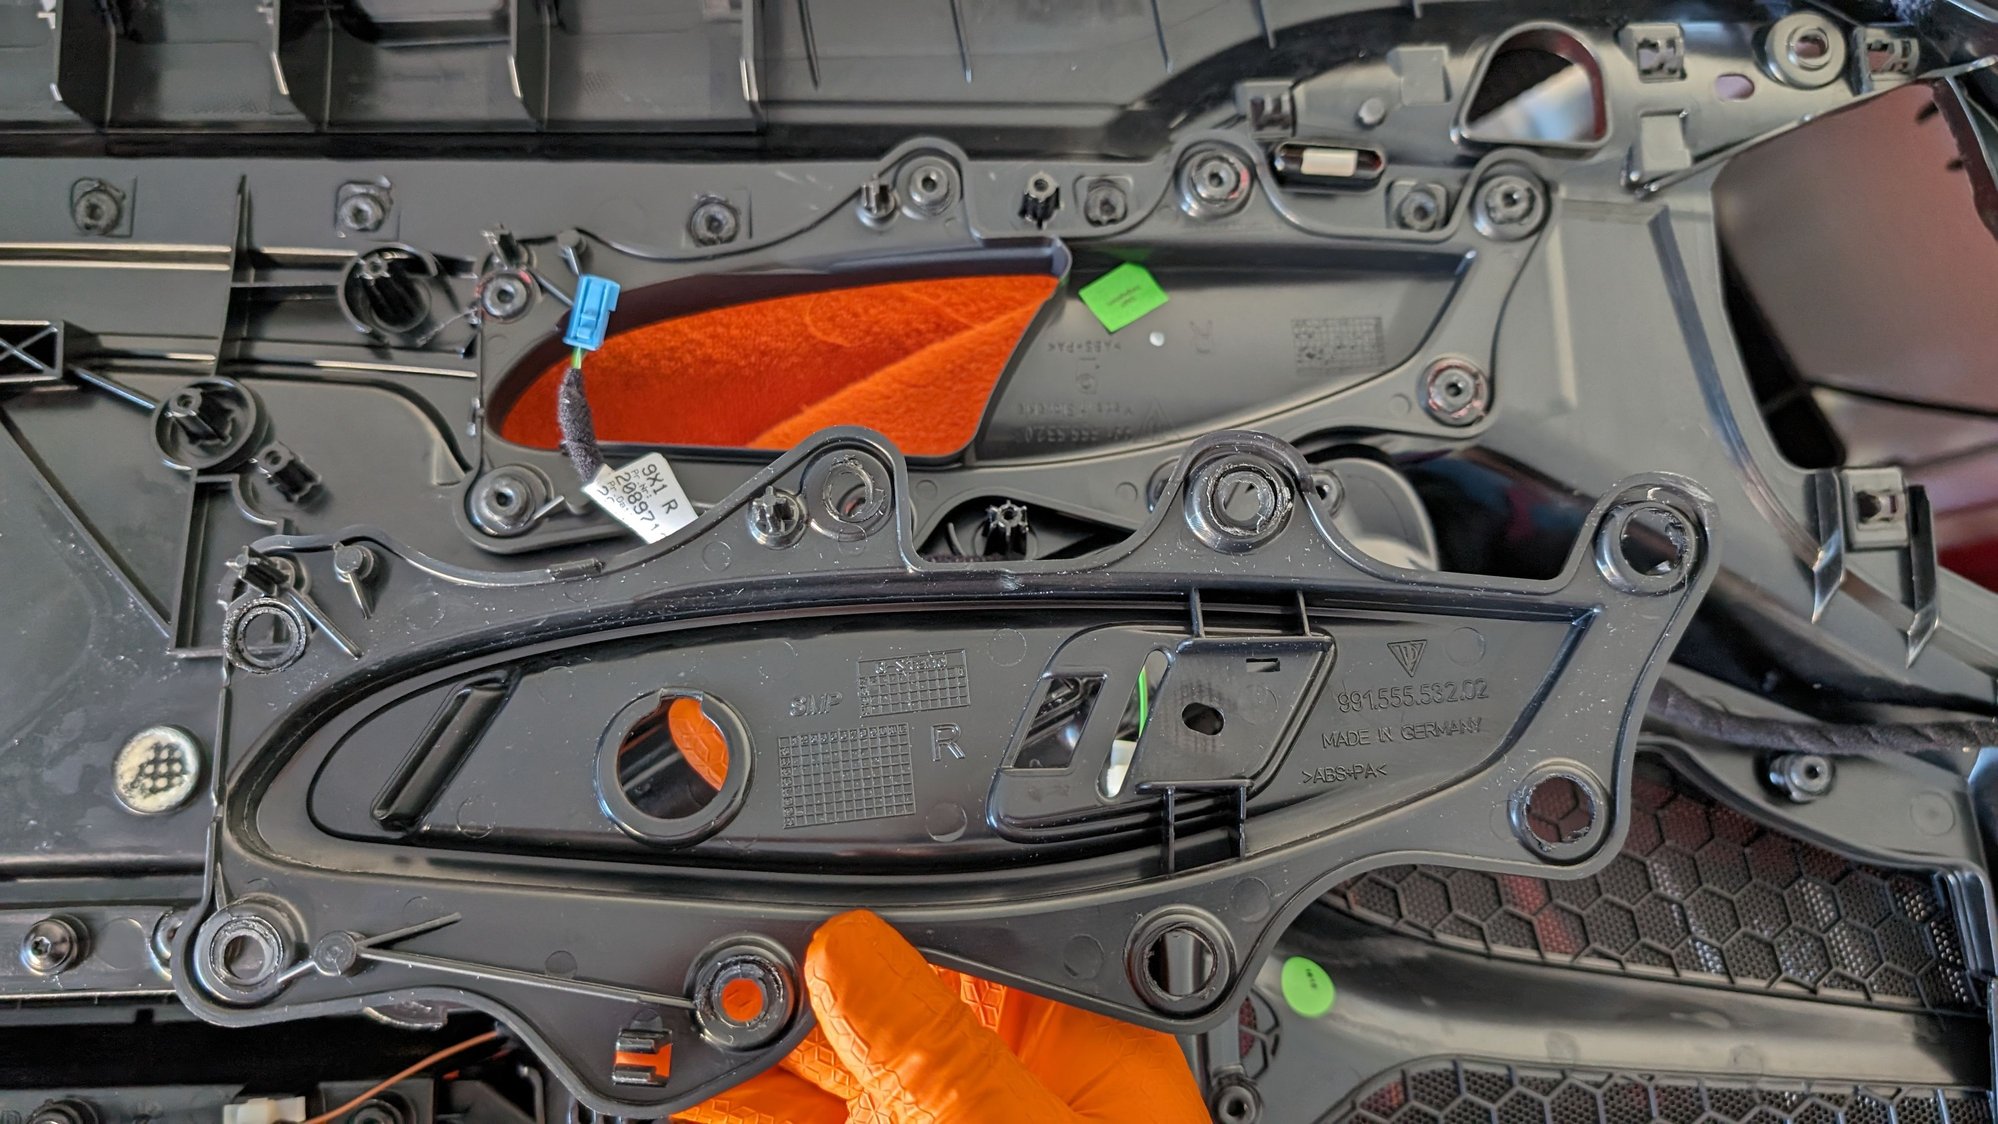
the bracket is "permanently" attached to the door panel via 8 points which are melted together (looks like small doughnuts)
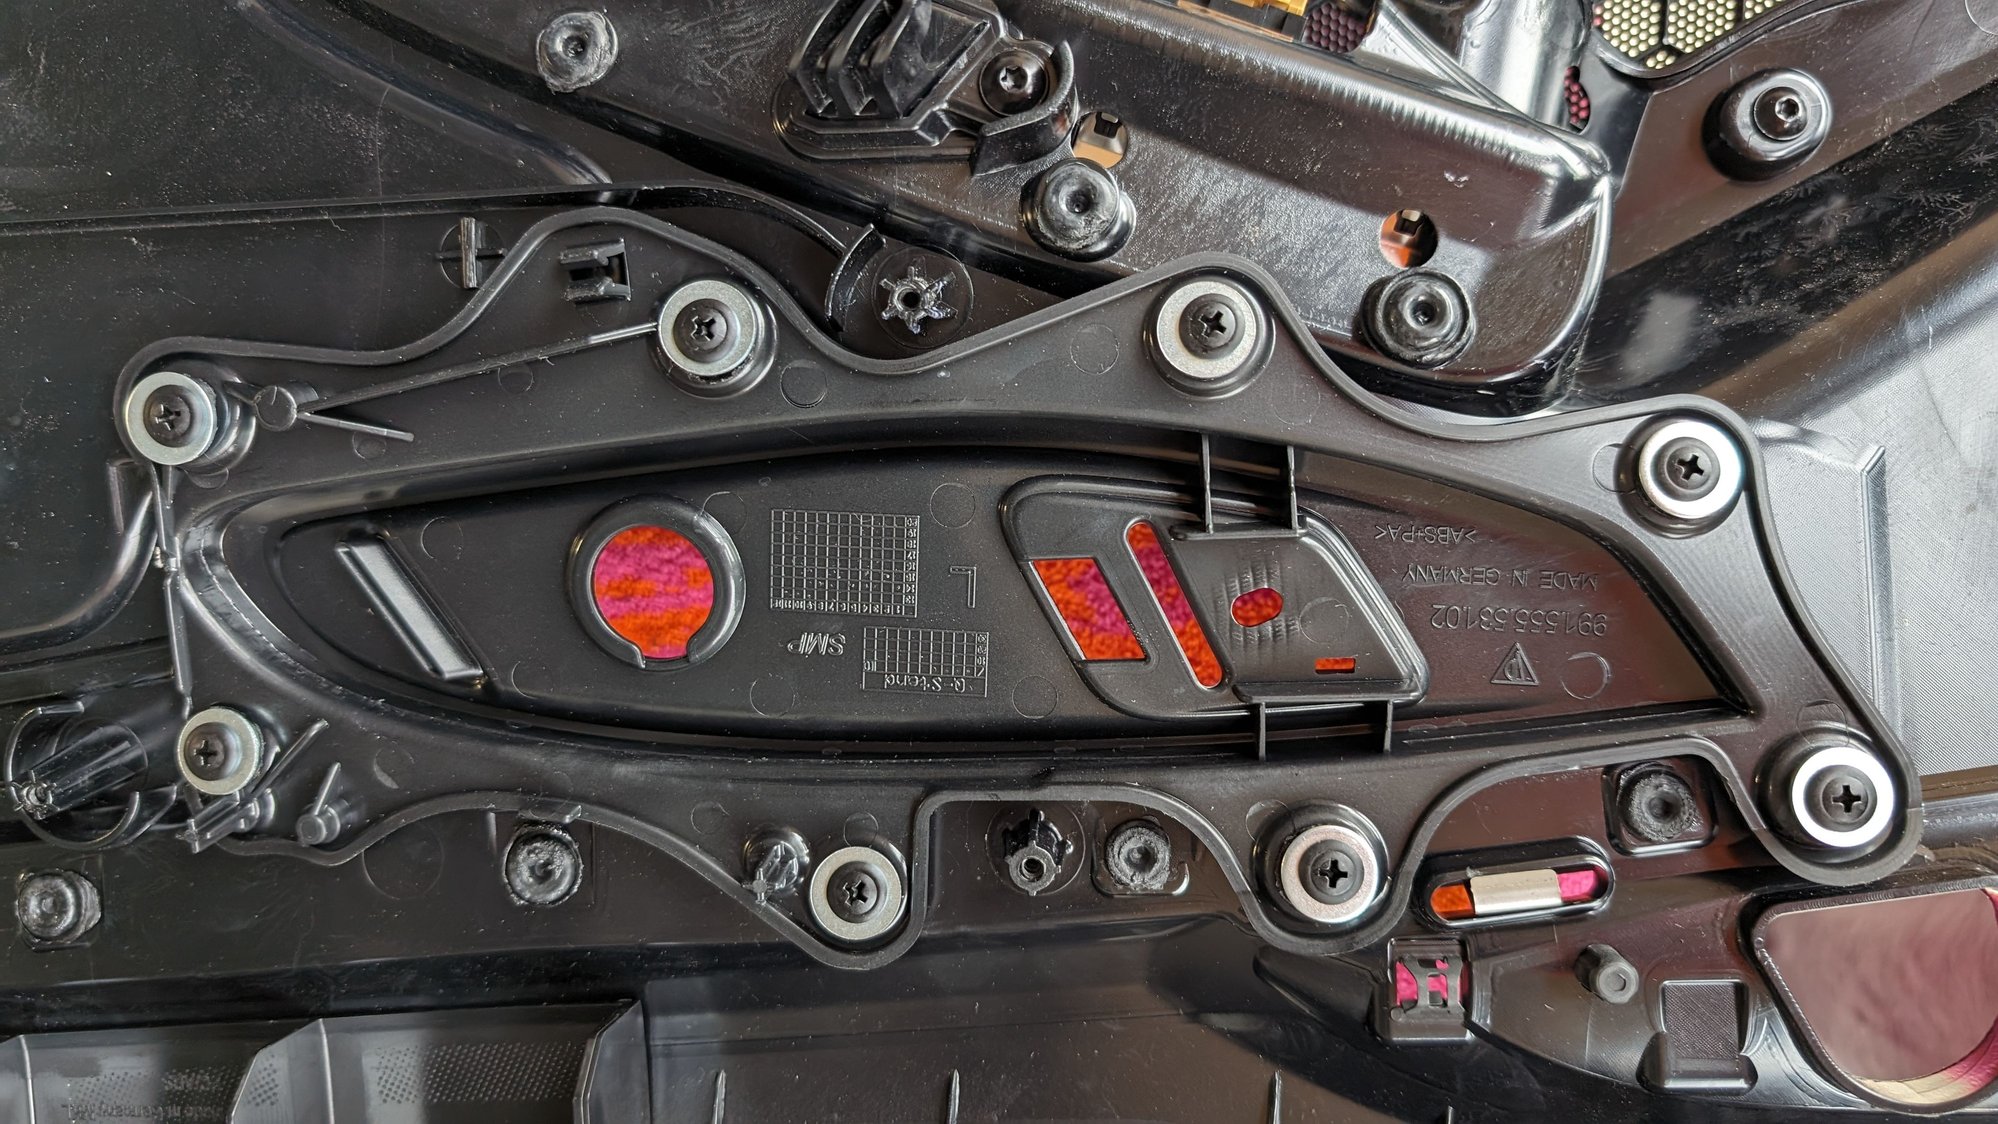
Porsche does not sell the bracket separately (part numbers are 991.555.531.02 and 991.555.532.02 if you want to check). If you want this bracket, you would need to purchase a new door card.
With this information, I did what any logical person would do - I found a "cheap" set of GT4 door panels on eBay and experimented with retrofitting the door pulls on my door panels.
Disclaimer: This DIY involves modification to your OEM door panel. Don't proceed if you're not comfortable with this.
Parts needed
Door panels from any of the following: 991 GT2/3 RS, 911R, Speedster, 981/718 GT4 or Spyder. I found mine on eBay.
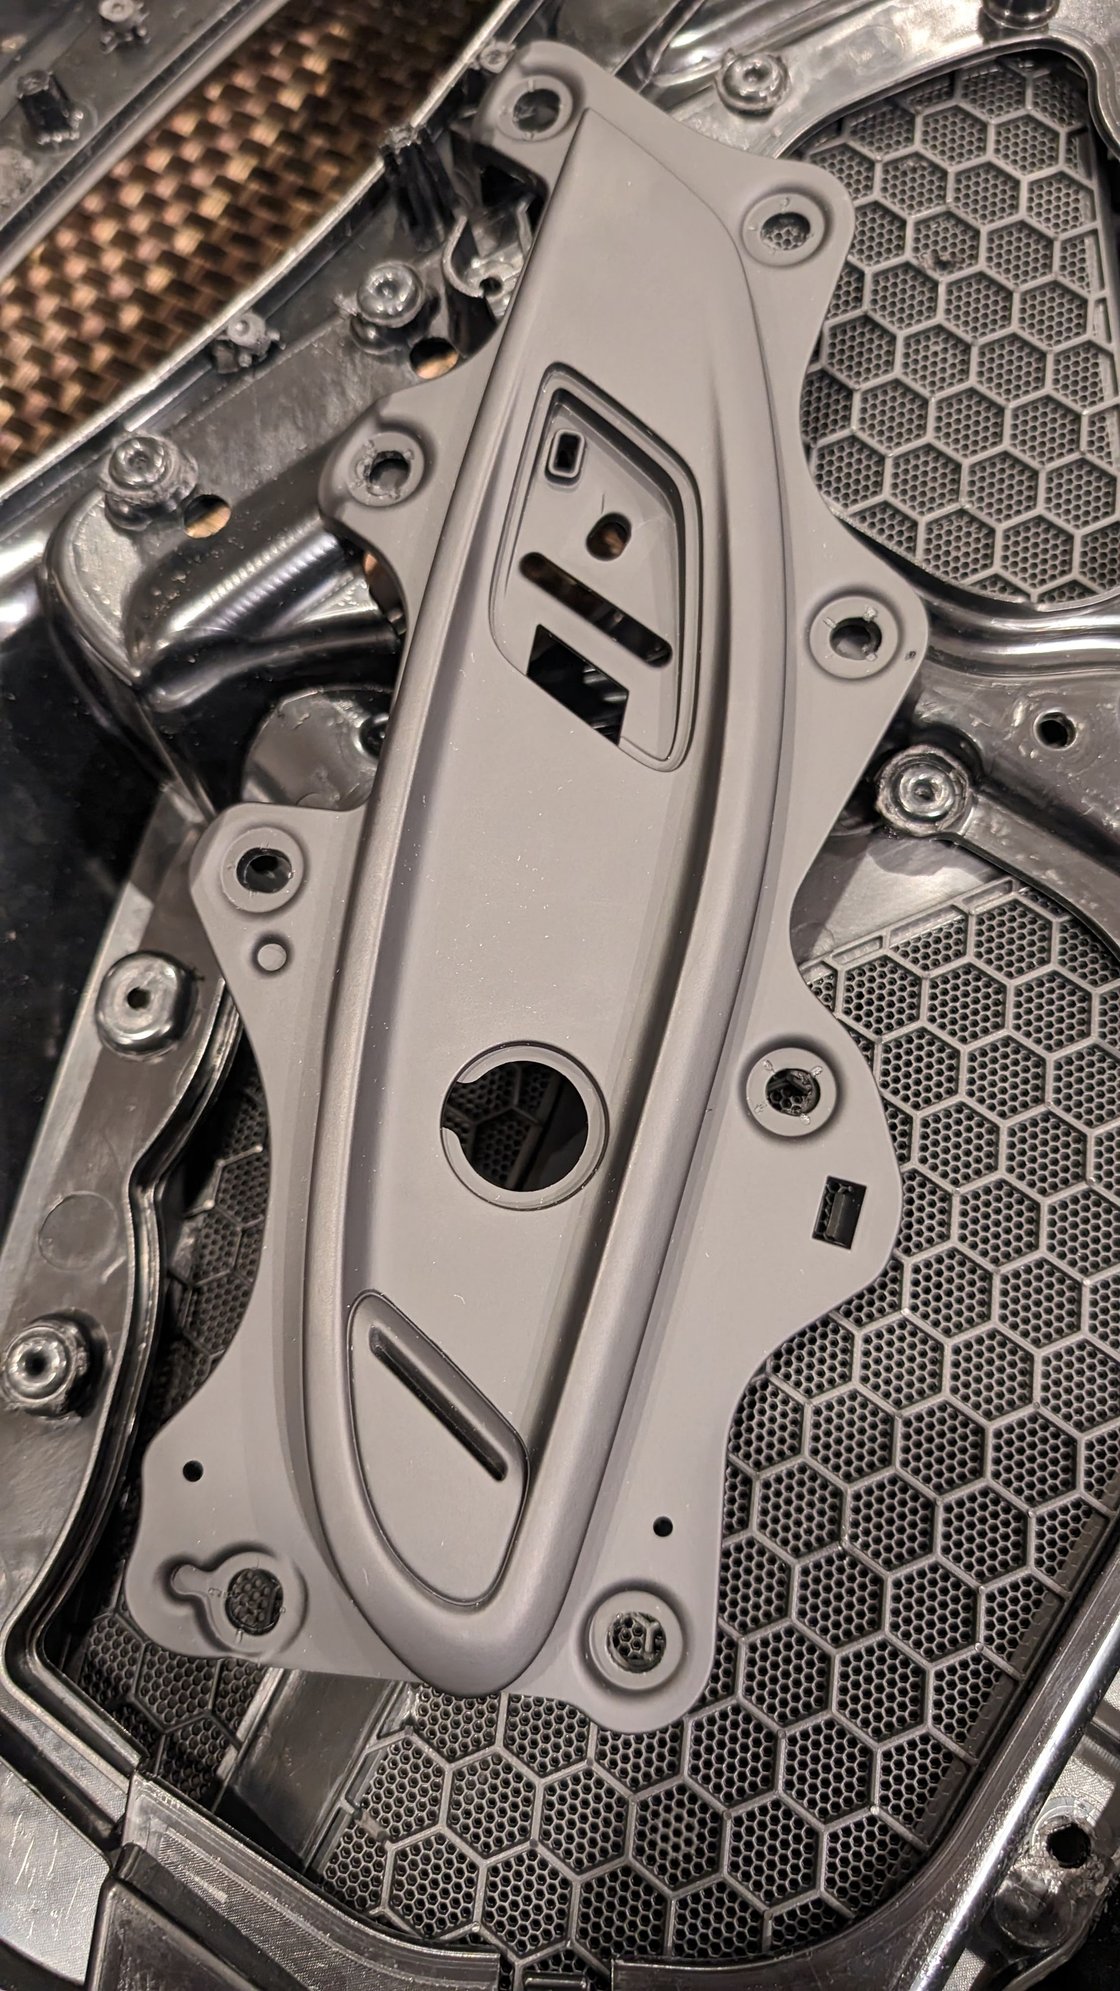
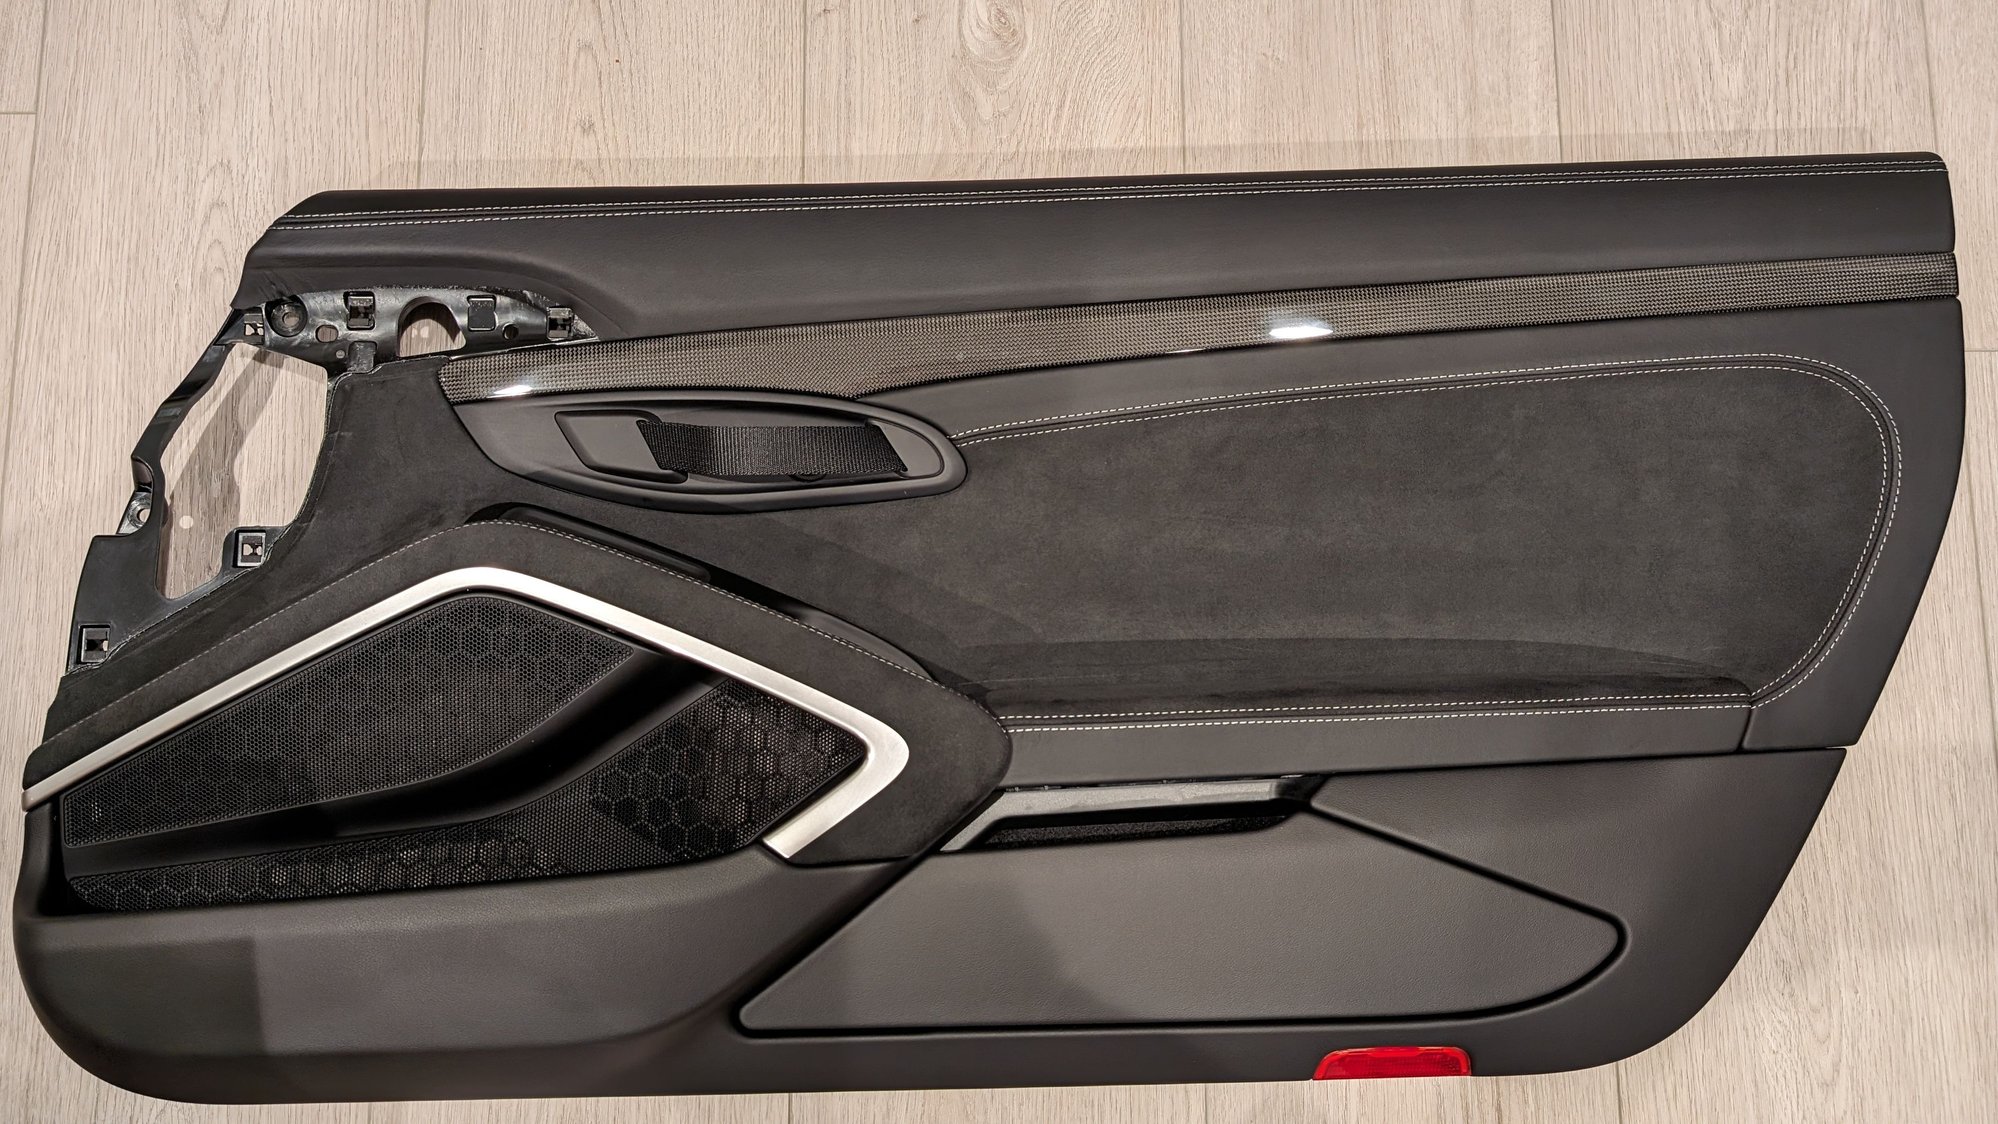
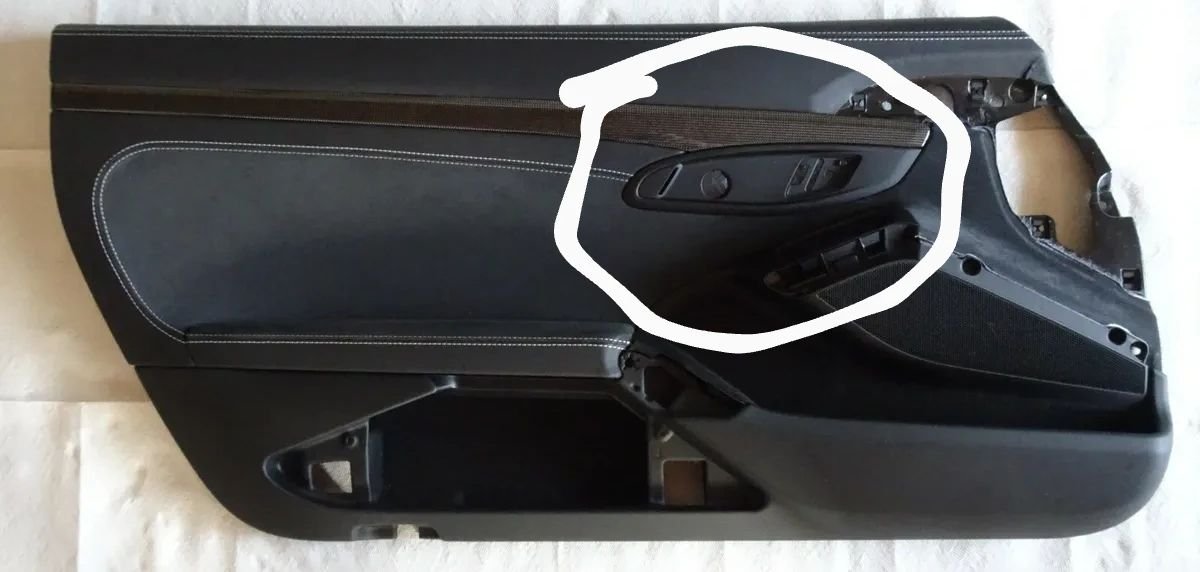
when selecting a door panel, make sure it comes with the correct bracket. For reference this is what the front of the door panel should look like (note the circled part).
If possible, also try and gauge the condition of the bracket and whether it has scuffs.
Door pulls. I bought mine from Suncoast (link) but I think they can be found cheaper elsewhere. Another option would also be to find door panels that still have the door pulls attached.
Misc parts to attach the door pull to the bracket (these will be required if your door panel doesn't come with the door pull attached. Please verify if you actually need these)
991-555-579-00-5Q0 (2x) - cap that covers a door panel mounting screw
991-555-590-00-5Q0 (1x) - moulding/screw for attaching the door strap to the bracket
991-555-589-00-5Q0 (1x) - same as above. Opposite side
900-084-122-02 (2x) - nut for securing the door strap
991-555-615-00 (1x) - metal piece for securing door strap
991-555-616-00 (1x) - same as above. Opposite side
Pan Head Screws 8 x �� and washers
You'll need 16 of these for reattaching the brackets to the door panel.
My all-in cost on these ended up being roughly $1400:
$700 for two door panels
$550 for black door pull assemblies
$150 for misc parts listed above
Tools needed
Interior trim tools
T-30 Torx
Philips screwdriver
Drill
Forstner bit. I used a 5/8 inch but a 1/2 would also work
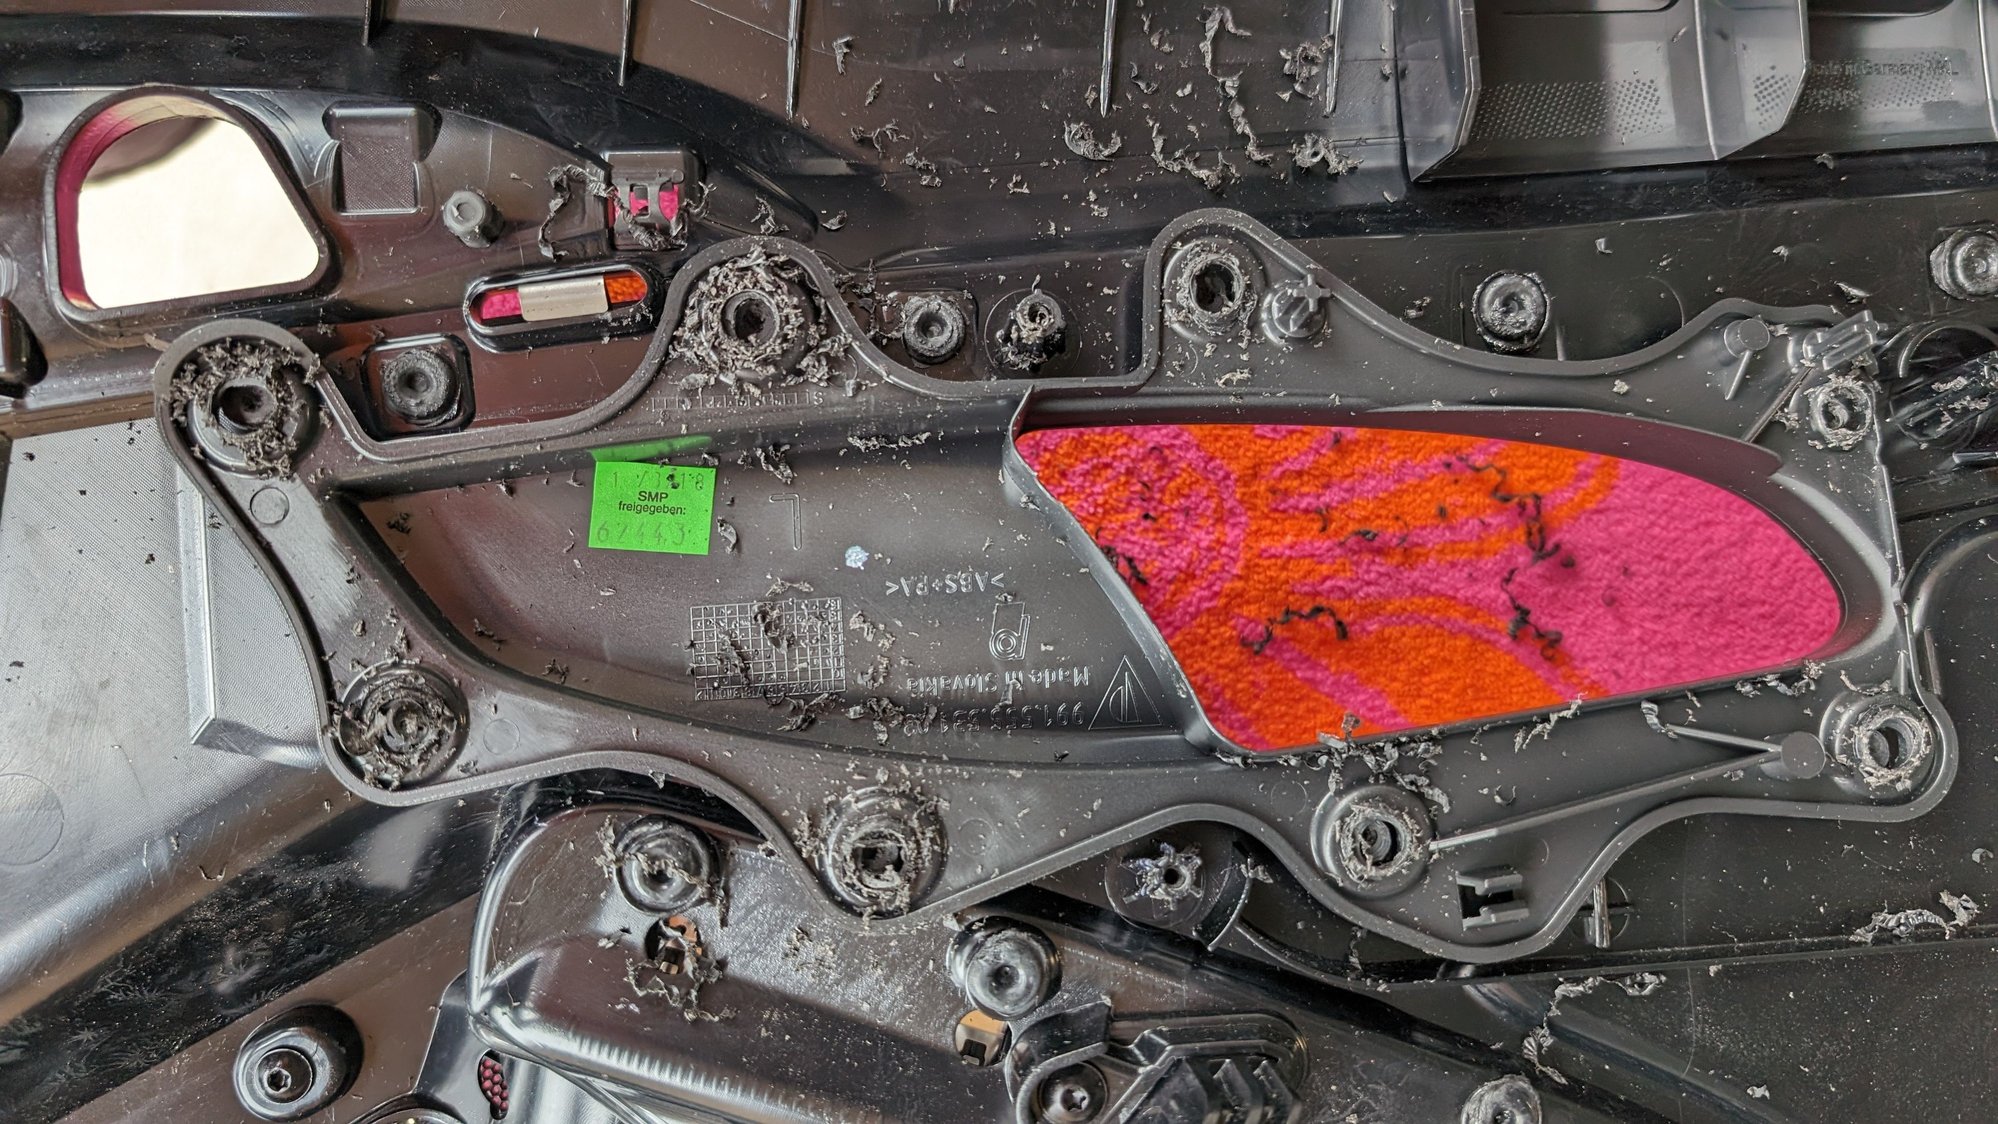
Step 1: Disassemble door pull bracket from door panel
In order to transfer the door pull bracket, you'll first need to separate it from the door panel its mounted on.
There are 8 points securing the bracket to the door panel. The door panel itself has 8 poles which the bracket slides onto. From the factory, these are then melted to form a donut which permanently fixes the bracket to the door panel. There are likely multiple ways to remove these, but what I did was use a forstner bit and slowly grind away at the plastic just enough to separate the bracket from the poles.
Note: Since this is the donor door panel, going slowly isn't as important. However, you'll be performing the same operation on your existing door panel so I would use this opportunity to get comfortable with this so you don't mess up your door panel later on.
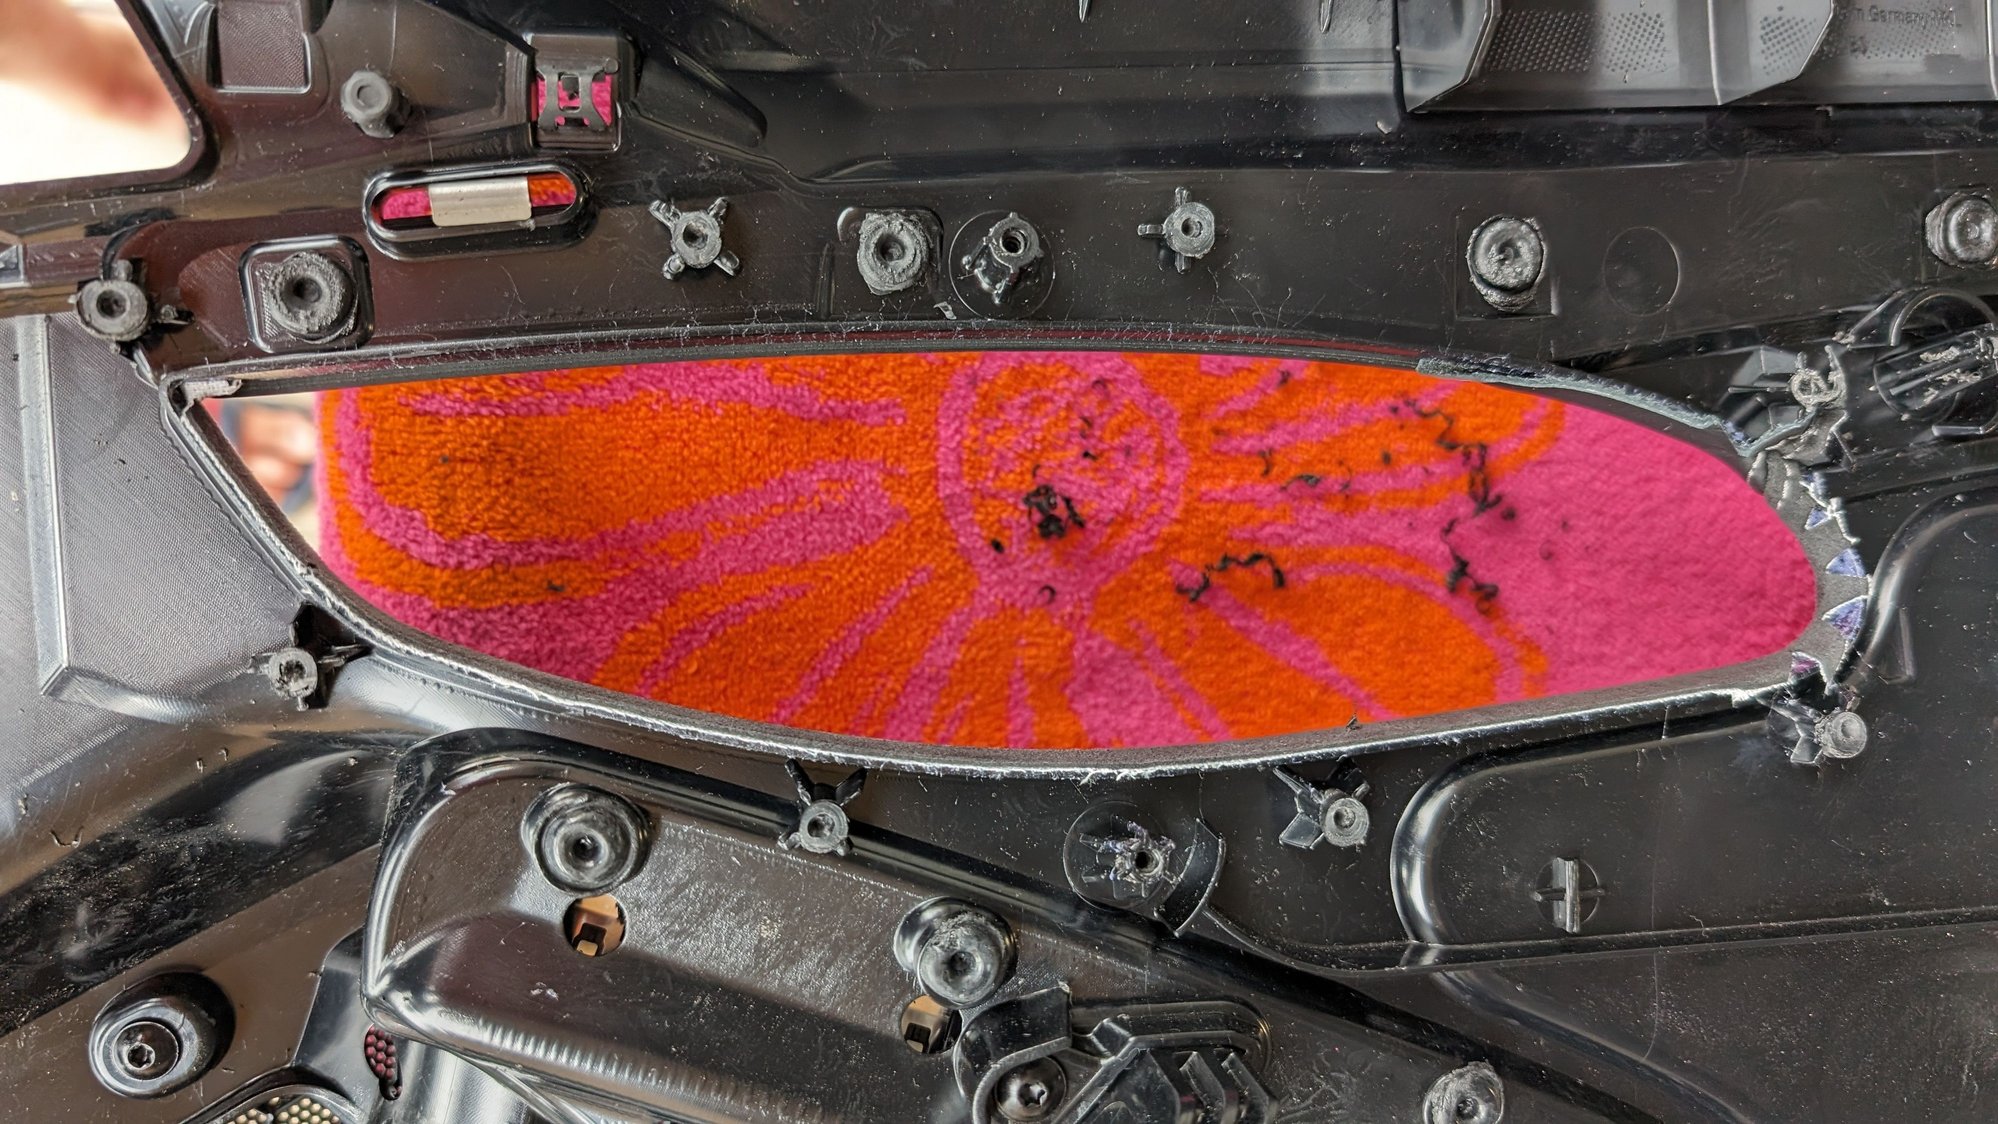
Once you've successfully drilled out the 8 points, you should be able to separate the bracket from the door panel.
Repeat this for both door panels and set both brackets aside.
Step 2: Remove door panel
Now its time to move on to installing the brackets onto your current door panels. Before doing so, you'll need to remove your door panels.
Luckily, this is a very straightforward procedure - I followed this
Step 3: Disassemble door handle and door handle bracket from door panel
Flip your door panel around - it should look something like this.
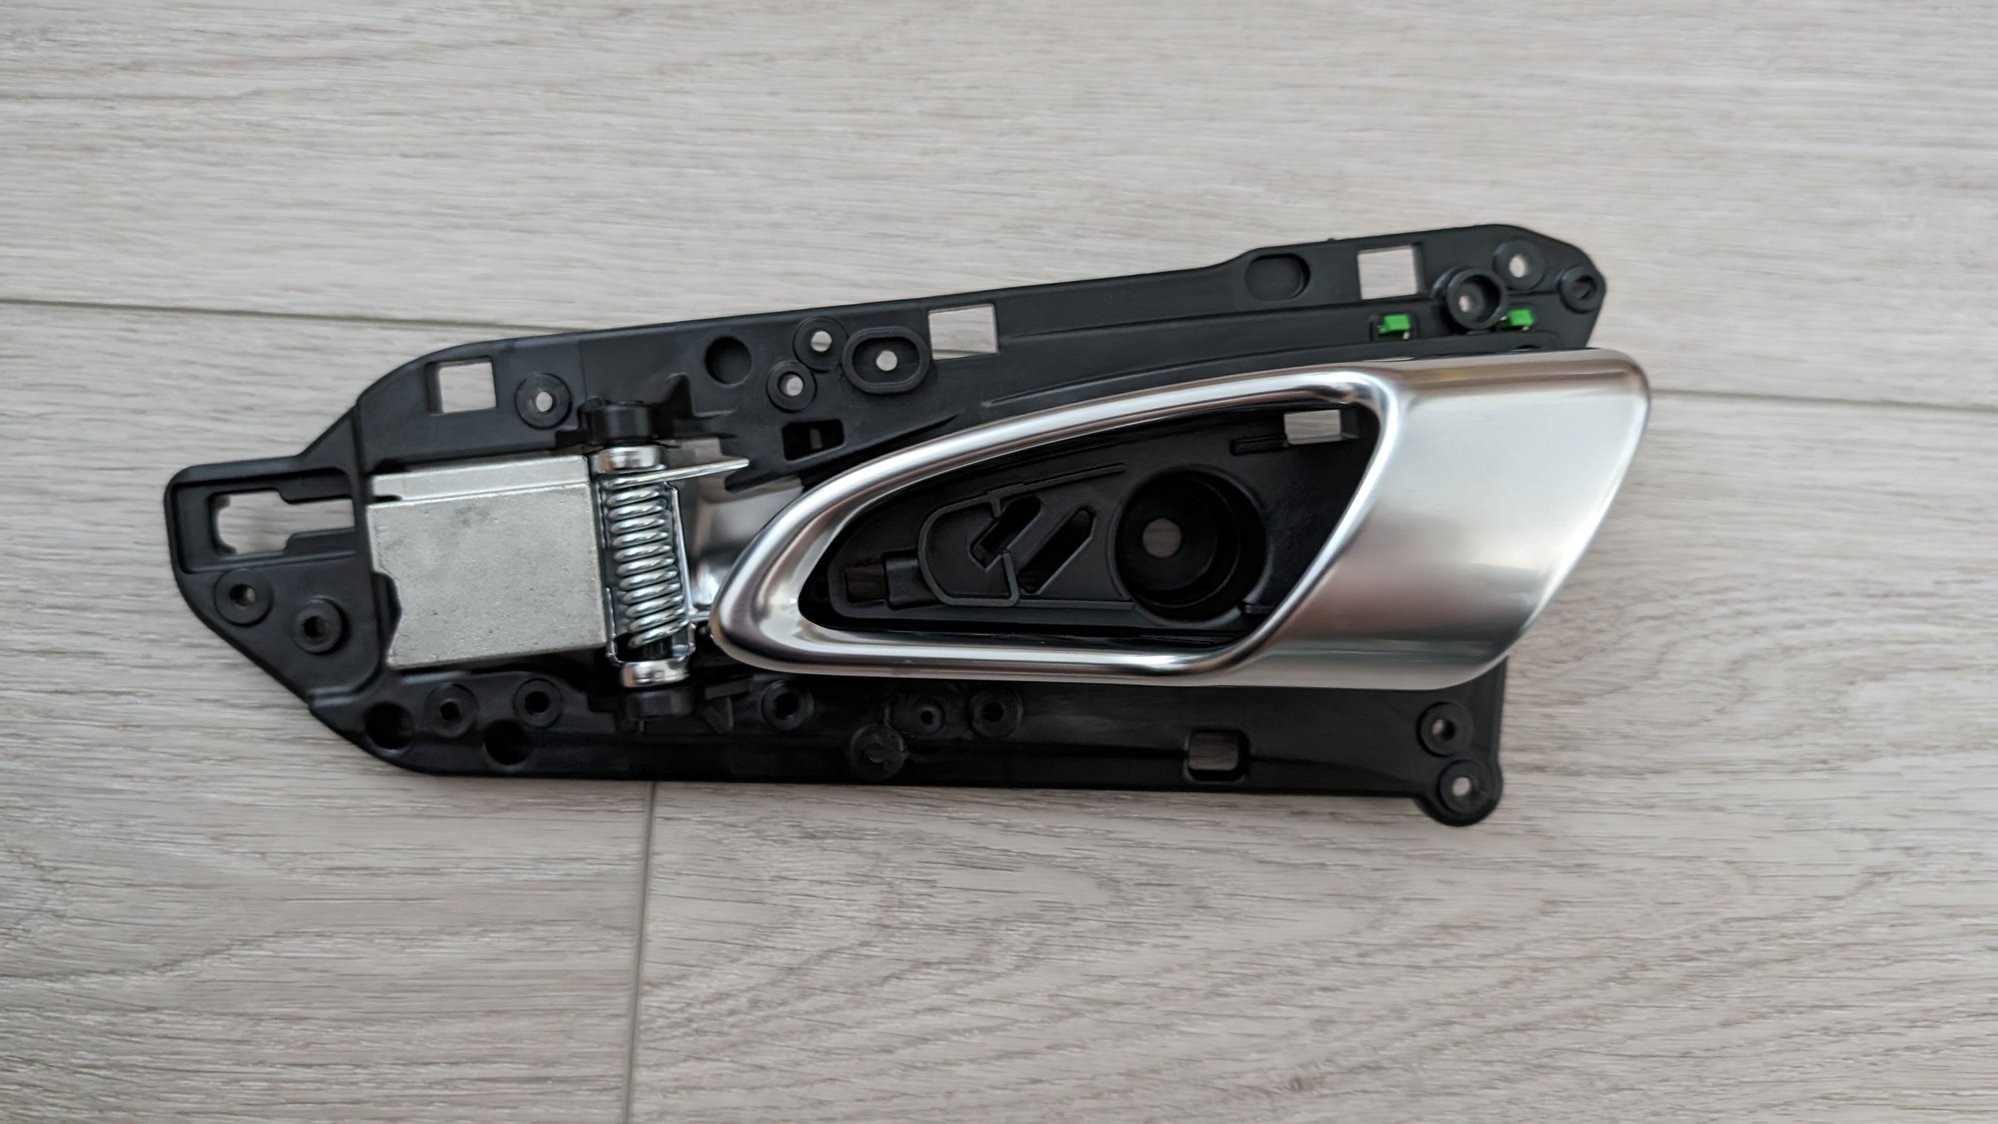
Go ahead and remove the door handle assembly which is just held on by 5 T20 screws.
Once that's off, you'll need to remove the door handle bracket. As you can see in this picture, the bracket is the same shape as the door pull bracket we previously removed.
Follow the same steps as before and use your forstner bit to separate the bracket from the door panel. Remember to go very slow so you don't accidentally snap any of the plastic poles on the door panel.
Side by side comparison of the door handle bracket vs the door pull bracket
Once complete, your door panel should look like this
Repeat for both door panels.
Step 4: Attach door pull brackets
Now that you've removed the door handle bracket, you'll want to install the door pull bracket in its place.
Take 8 of the panhead screws and washers and install the bracket onto your door panel.
Repeat for both door panels.
Step 5: Install door pulls
Now that you have a door pull compatible door panel, you can go ahead and install the door pull assembly.
For this, you can follow the same instructions as replacing the door pull. Here are a few resources I found helpful:
Nice work and writeup!
Altough I find this a tad unconfortable to use(I had a rented GT4 for 2 days). Weight saving is a laught, one should skip morning cofee and would amount the same. Easthetic is a subjective thing. I always liked the 911 door pull design, matches the steering wheel on the .1 GT3. Not so much in the 992.
I just a gimmick after all. As Doug DeMuro said: porsche mastered the fine line beween weight saving and annoying people, LOL.
Looks good. I too want to do this. My issue is finding the panels to remove the bracket. Someone needs to scan these so we can get them 3d printed and not need to buy a complete panel. Would you be willing to remove yours to get scanned 😛
Looks good. I too want to do this. My issue is finding the panels to remove the bracket. Someone needs to scan these so we can get them 3d printed and not need to buy a complete panel. Would you be willing to remove yours to get scanned 😛
beat me to it. I was going to offer to scan the part and get it 3D printed.
I have a gt4 in addition to the gt3 so maybe I�ll just take the panel off sometime.
Awesome write up. Thank you for taking the time out to help some people like my self. I just purchased two Door panels on ebay my self and will be doing this in the next few weeks.
Looks good. I too want to do this. My issue is finding the panels to remove the bracket. Someone needs to scan these so we can get them 3d printed and not need to buy a complete panel. Would you be willing to remove yours to get scanned 😛
Yeah looking back, I really should have scanned the brackets. I think I was just too eager and didn't think about this 😅
I might have the door panels off again soon-ish for another project. If I do, I'll take the brackets off and have them scanned.
I have a set of OEM silver door pulls from my RS, perfect like new condition, pm if interested - I swapped to yellow to match the dev. stitching in the car.
I have a set of OEM silver door pulls from my RS, perfect like new condition, pm if interested - I swapped to yellow to match the dev. stitching in the cat.
OP, thanks for posting this! Awesome DIY, thanks for sharing your knowledge!
A question I've had for a while is, aren't the 981/718 GT4 door panels the same as the 991 GT3 panels? Meaning, if one were to find used GT4 panels with the same material finishes as their GT3 panels, then they could just drop the GT4 panels straight into the GT3 without having to perform the extra steps here?
i guess it would depend what trim Level you find or that you have
OP, thanks for posting this! Awesome DIY, thanks for sharing your knowledge!
A question I've had for a while is, aren't the 981/718 GT4 door panels the same as the 991 GT3 panels? Meaning, if one were to find used GT4 panels with the same material finishes as their GT3 panels, then they could just drop the GT4 panels straight into the GT3 without having to perform the extra steps here?
Absolutely. If you are able to find panels that match your trim 100% that would be ideal. In my case, it was pretty much impossible to find panels in good condition that matched my current trim.
 01-07-2024, 04:35 AM