Apicella Auto Sound - 2018 GT3 High-End Sound System & Radar/Laser Countermeasures
 08-21-2021, 11:00 PM
#1
Former Vendor
Thread Starter

Hey everyone, this is a build we did last spring at the beginning of the shutdown and figured I'd share it with you. Now before we get into it, yes, I'm well aware of what a lot of you are about to say... "why would you do this in a GT3?!" Simple answer... because the owner wanted to 
PS, everything done is 100% reversible and can go back to factory without any degradation. Nothing OEM was cut, drilled, modified, etc outside of small plastic panels that are easily and cheaply replaceable.
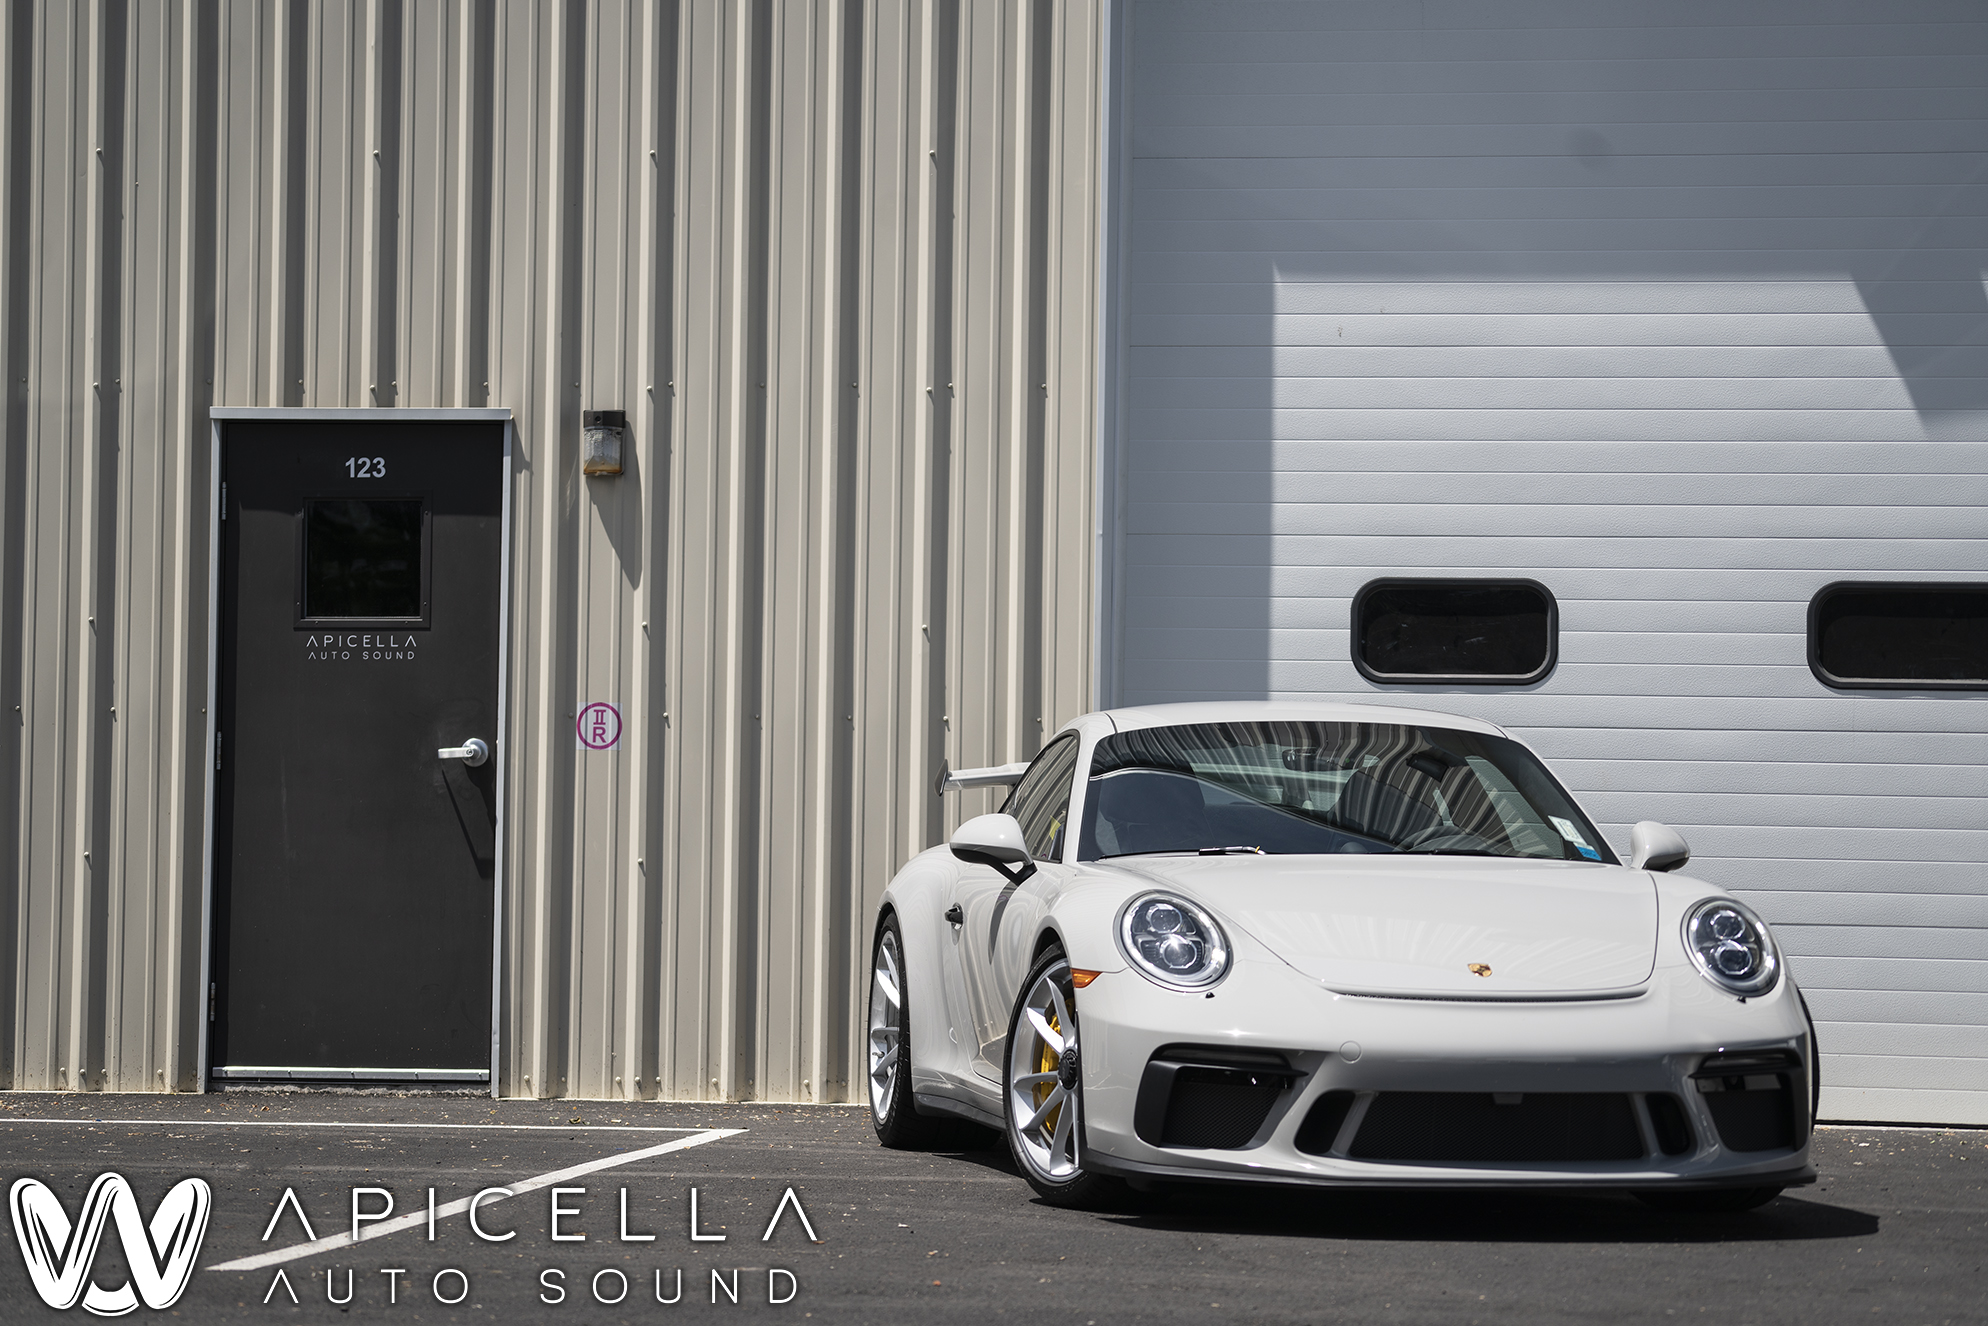
So, moving on from that, here she is, our Quarantine Queen build.
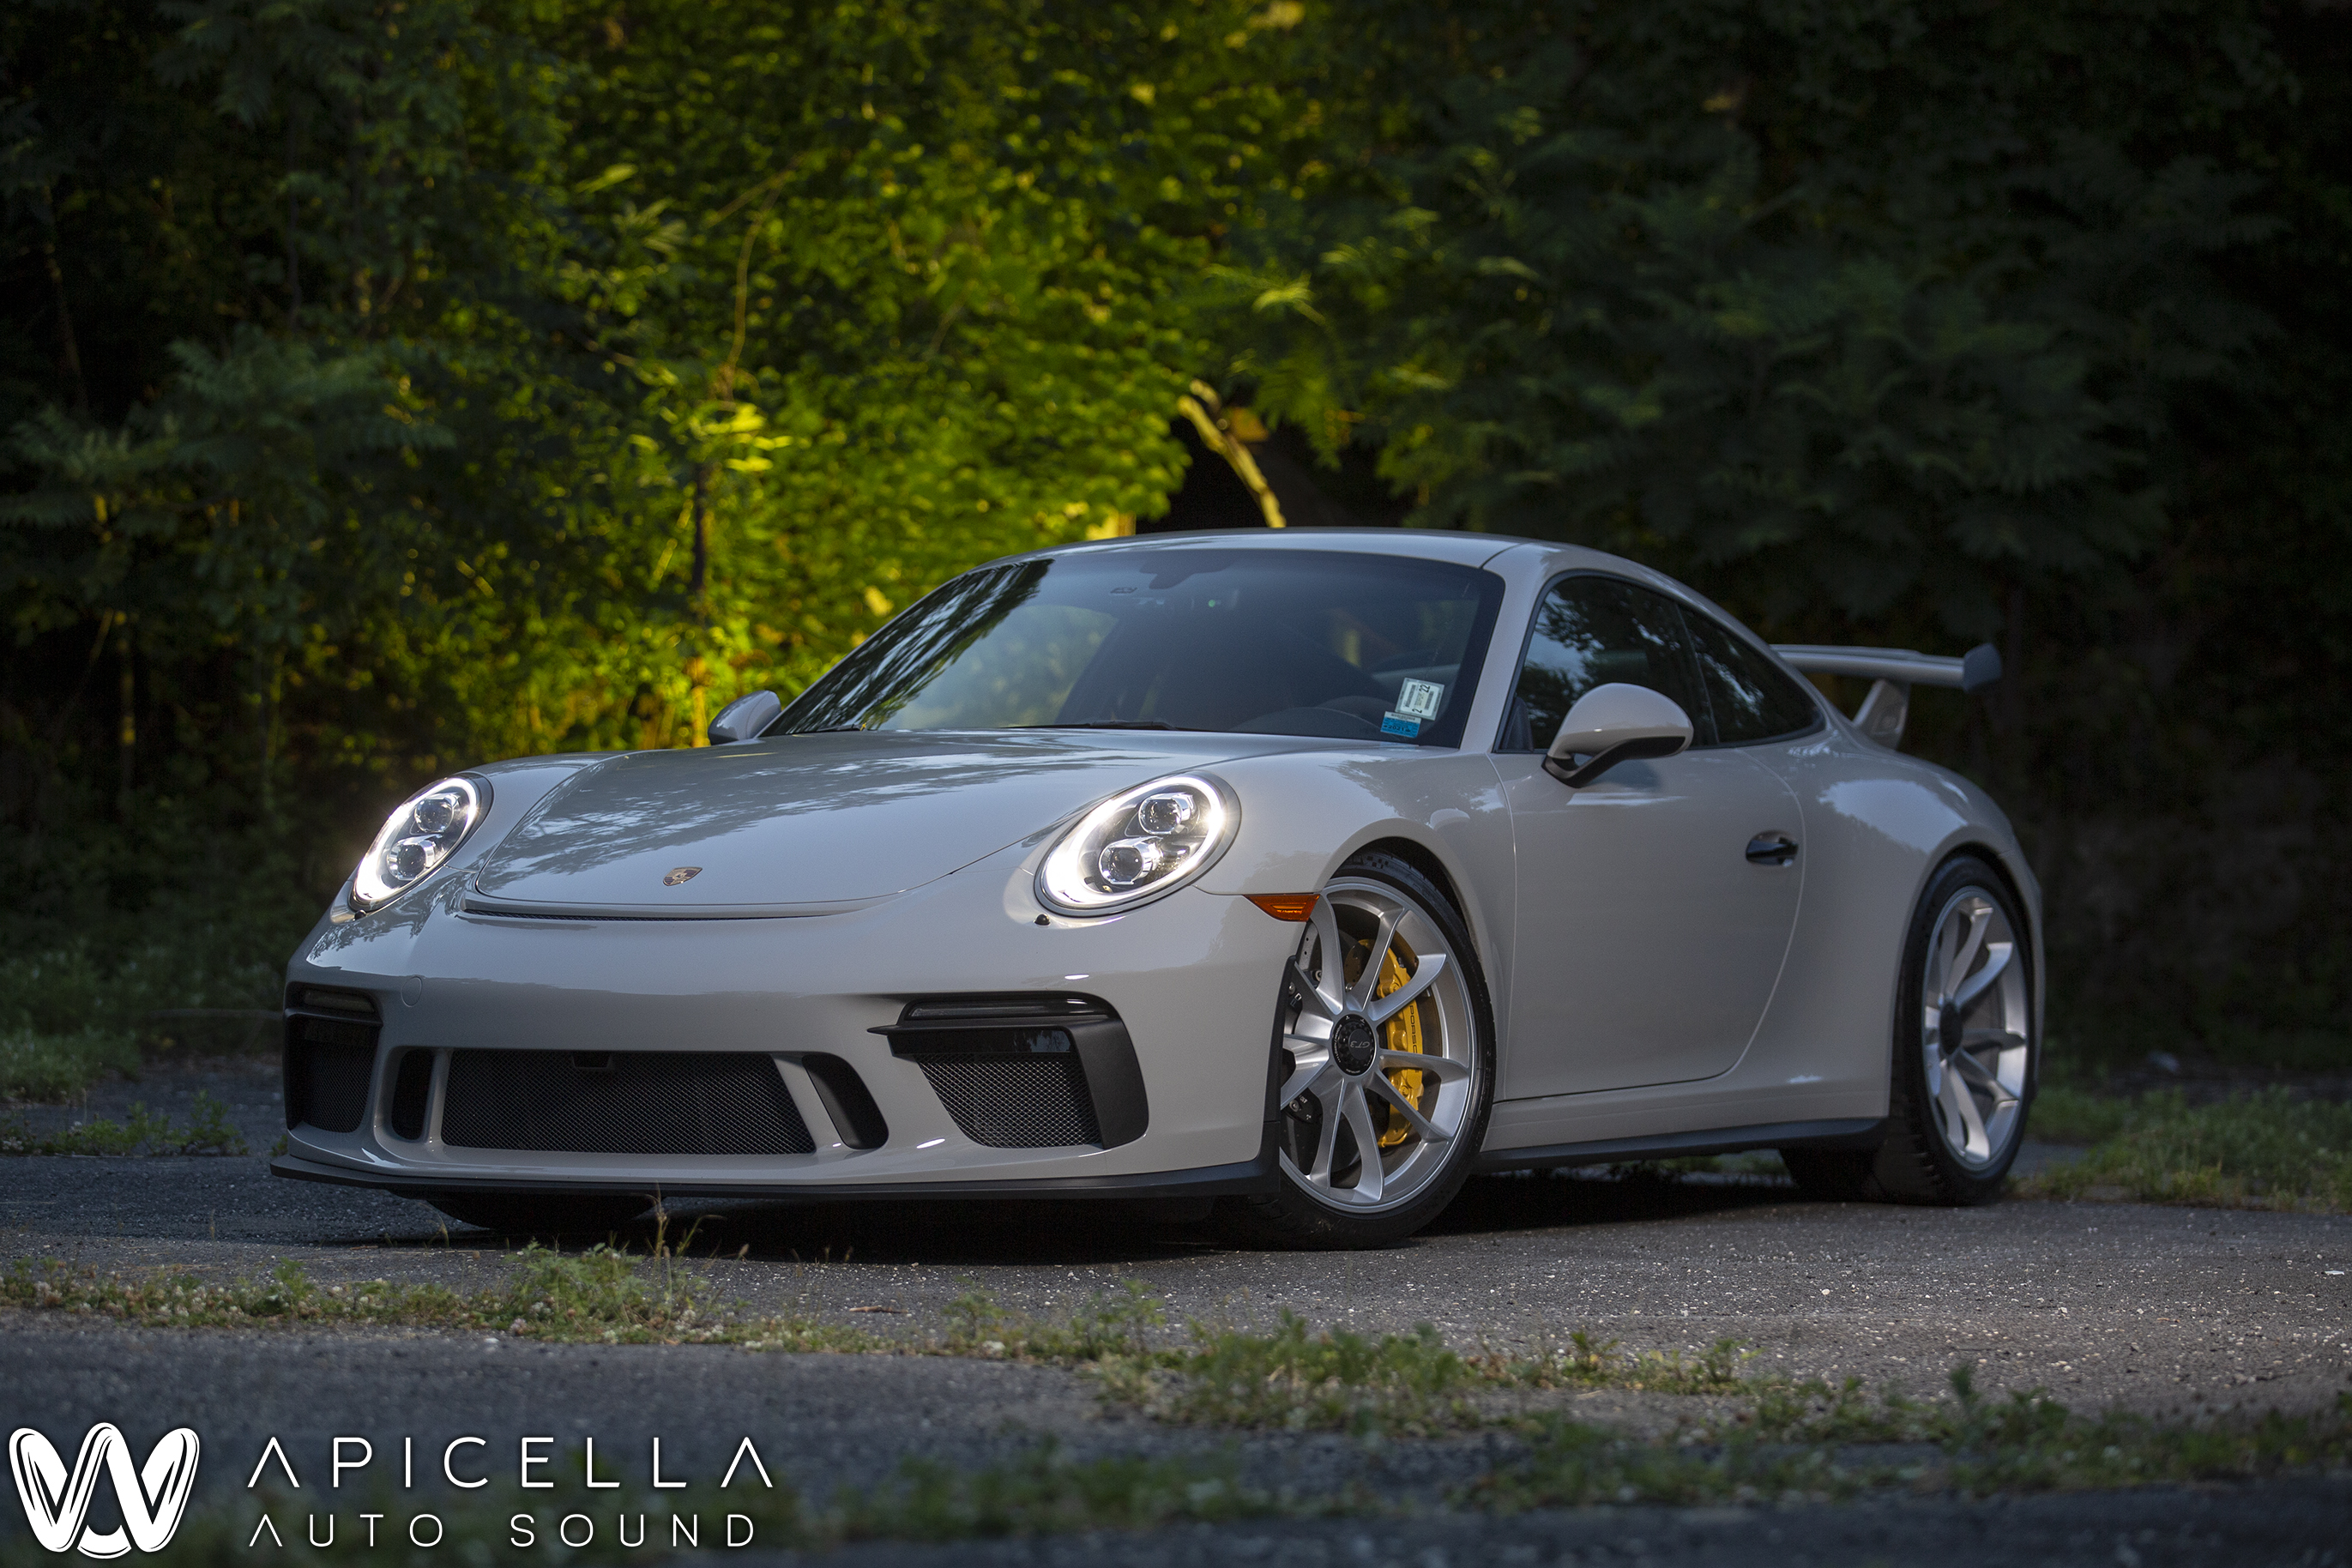
So, it all started when I was away at a Mobile Solutions training in Arizona when I got a text from one of my previous customers that included a picture of a Chalk 2018 GT3 and said "Springtime project. Thinking Focal Utopia M and Mosconi Pro amps".. Needless to say, I was hyped. One of my favorite cars and he wants to use some of my favorite gear, say no more. We set this up right around the springtime rush, and since this project was large in comparison to the rest, we scheduled it last. Well, when the time came for the car to be dropped off, the world was on the edge of collapse, so I said to him "Hey, mind if we go a little crazy with this and take our time?".. He had no issues with that, and our Quarantine project began.
The goals for this build were to eek out every last drop of audiophile goodness that this car would allow us to have, while also designing it to appear like a super-exclusive OEM option. Oh, and output, because, well... listen to a GT3 and you'll understand why. All OEM materials were used.. leather, suede, and carpet. For this job, I finally bit the bullet and purchased a new, much larger/more powerful laser; an Epilog EXT36. 24" x 36" of cutting area. I can pretty much do a whole trunk on the computer now.
So, the list of gear is as follows..
. Escort Ci Max 360 Radar & Laser countermeasure system
. Nav-TV Zen V
. Helix DSP Ultra with Wifi adapter
. (2) Mosconi Pro 5|30 5 channel amplifiers
. (2) Illusion Audio C12 subwoofers
. Focal 8WM midbass drivers
. Focal 3.5WM midrange drivers
. Focal TBM tweeters
. ResoNix Sound Solutions Squares & CCF65, and Blackhole Tiles
. RSD Custom Cables
Since he let us have our time with it and get a little wild, I decided to push myself and make this the best looking build we have done yet. I think I achieved that goal. Unfortunately, I can also say that this might have been the first time I have pushed myself too hard. I finally was beaten by the job and was not able to pull off something I had envisioned in my head. I may have been able to if I wasted days of time and a ton of materials, but I just didn't see it happening (especially since said material was on backorder for 8+ weeks out).
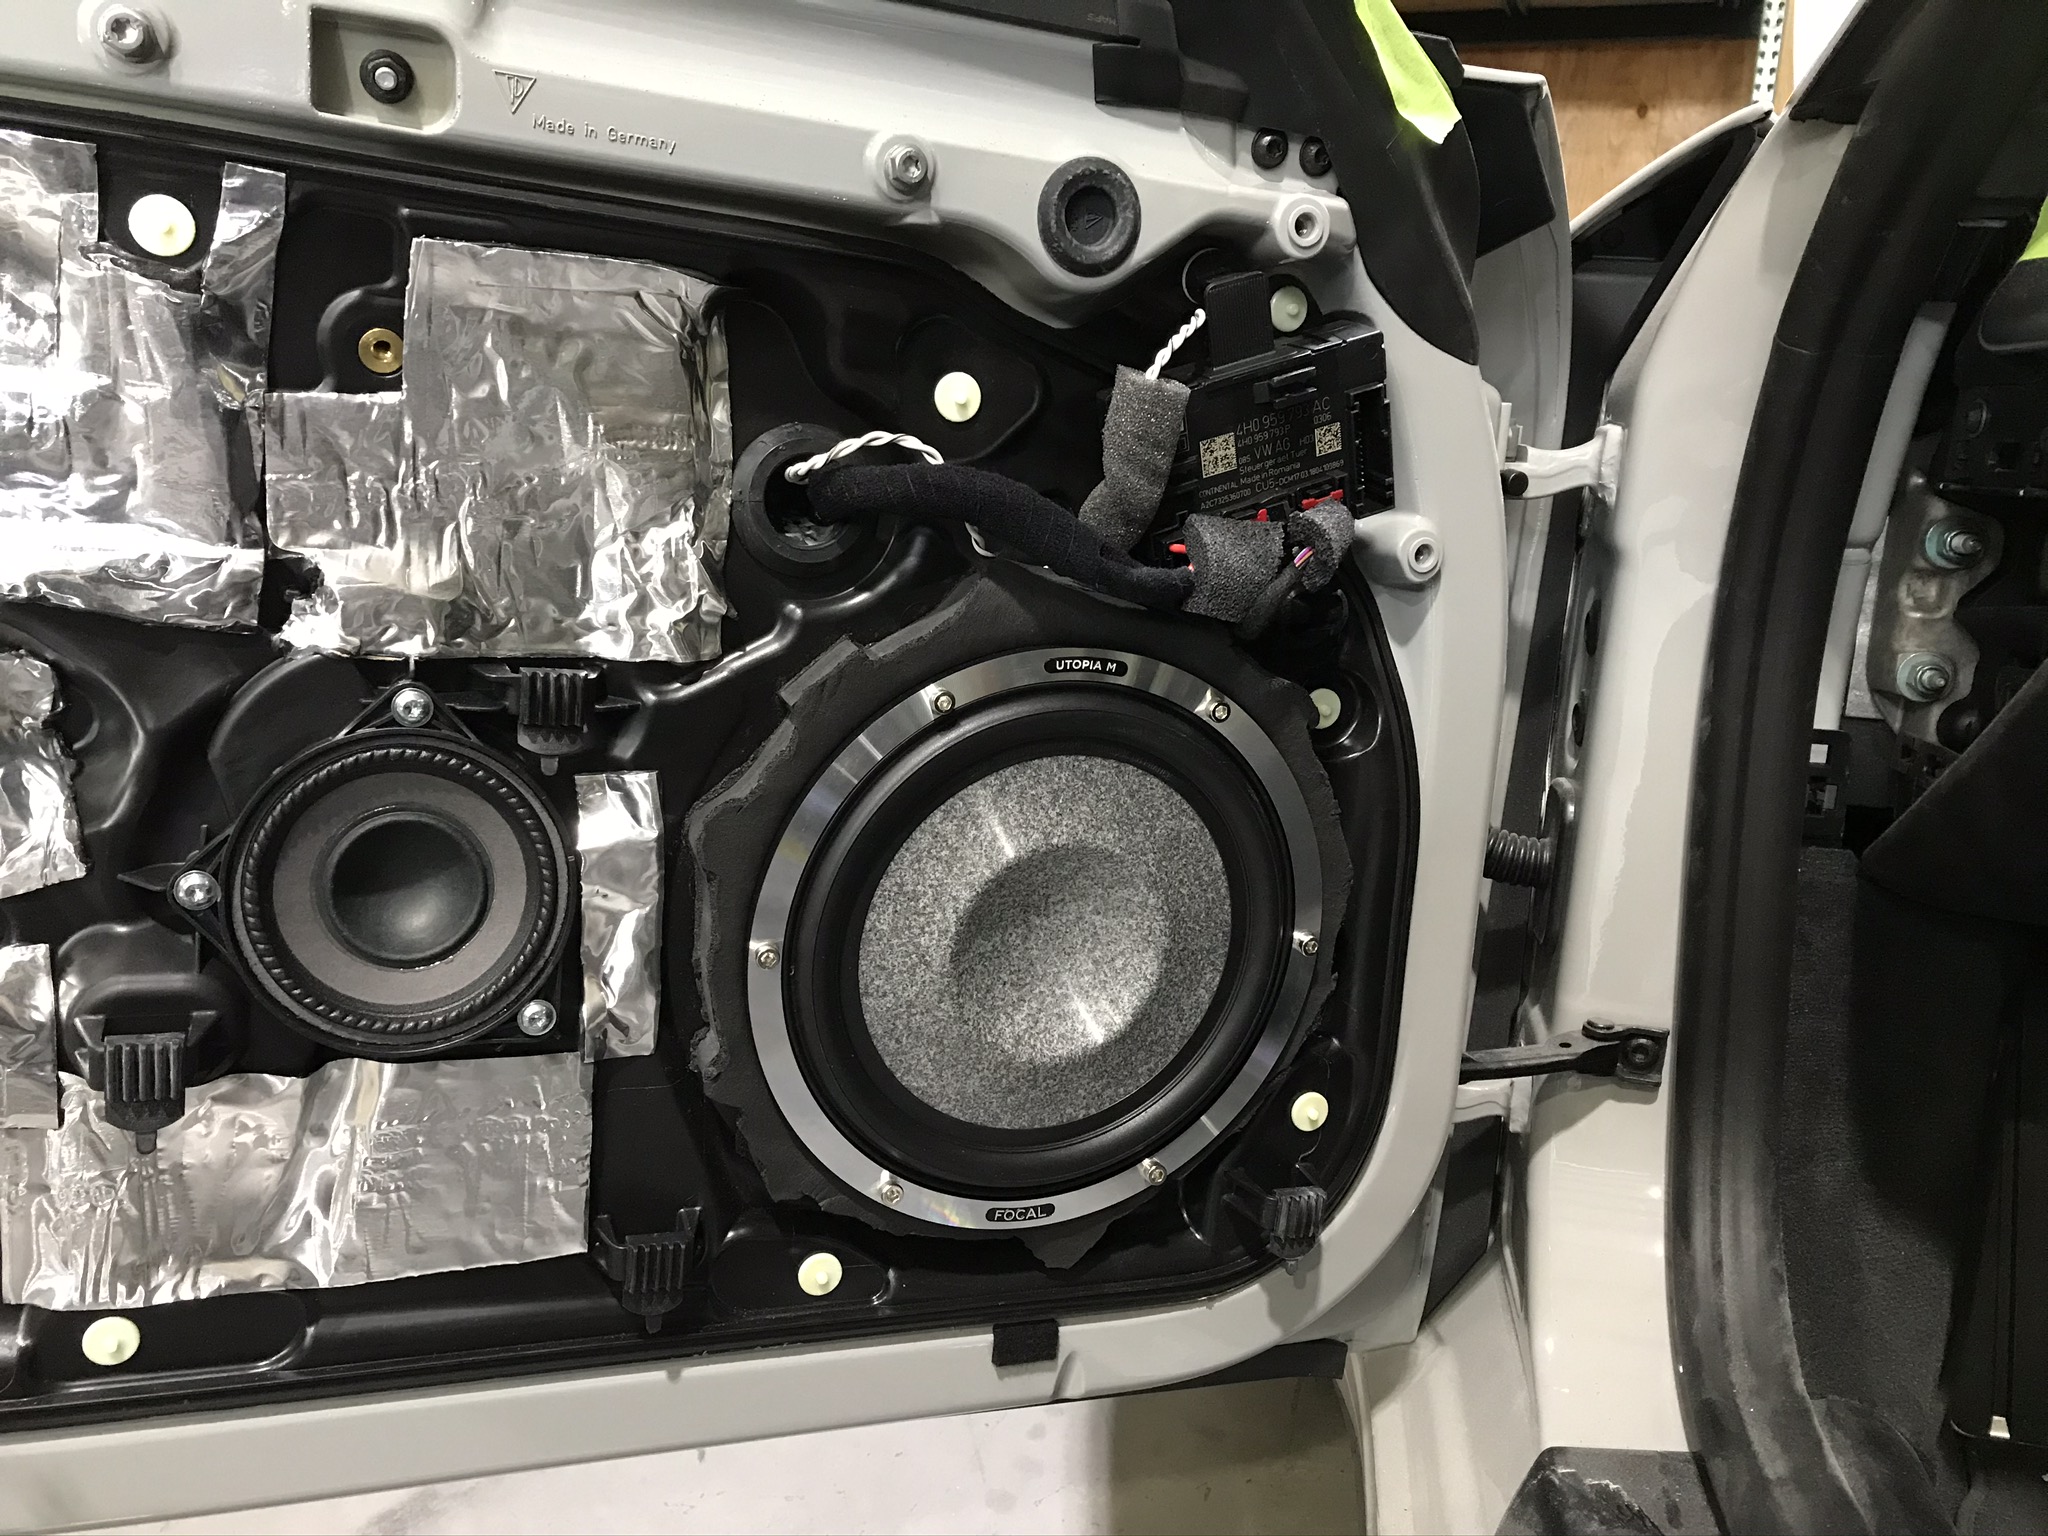
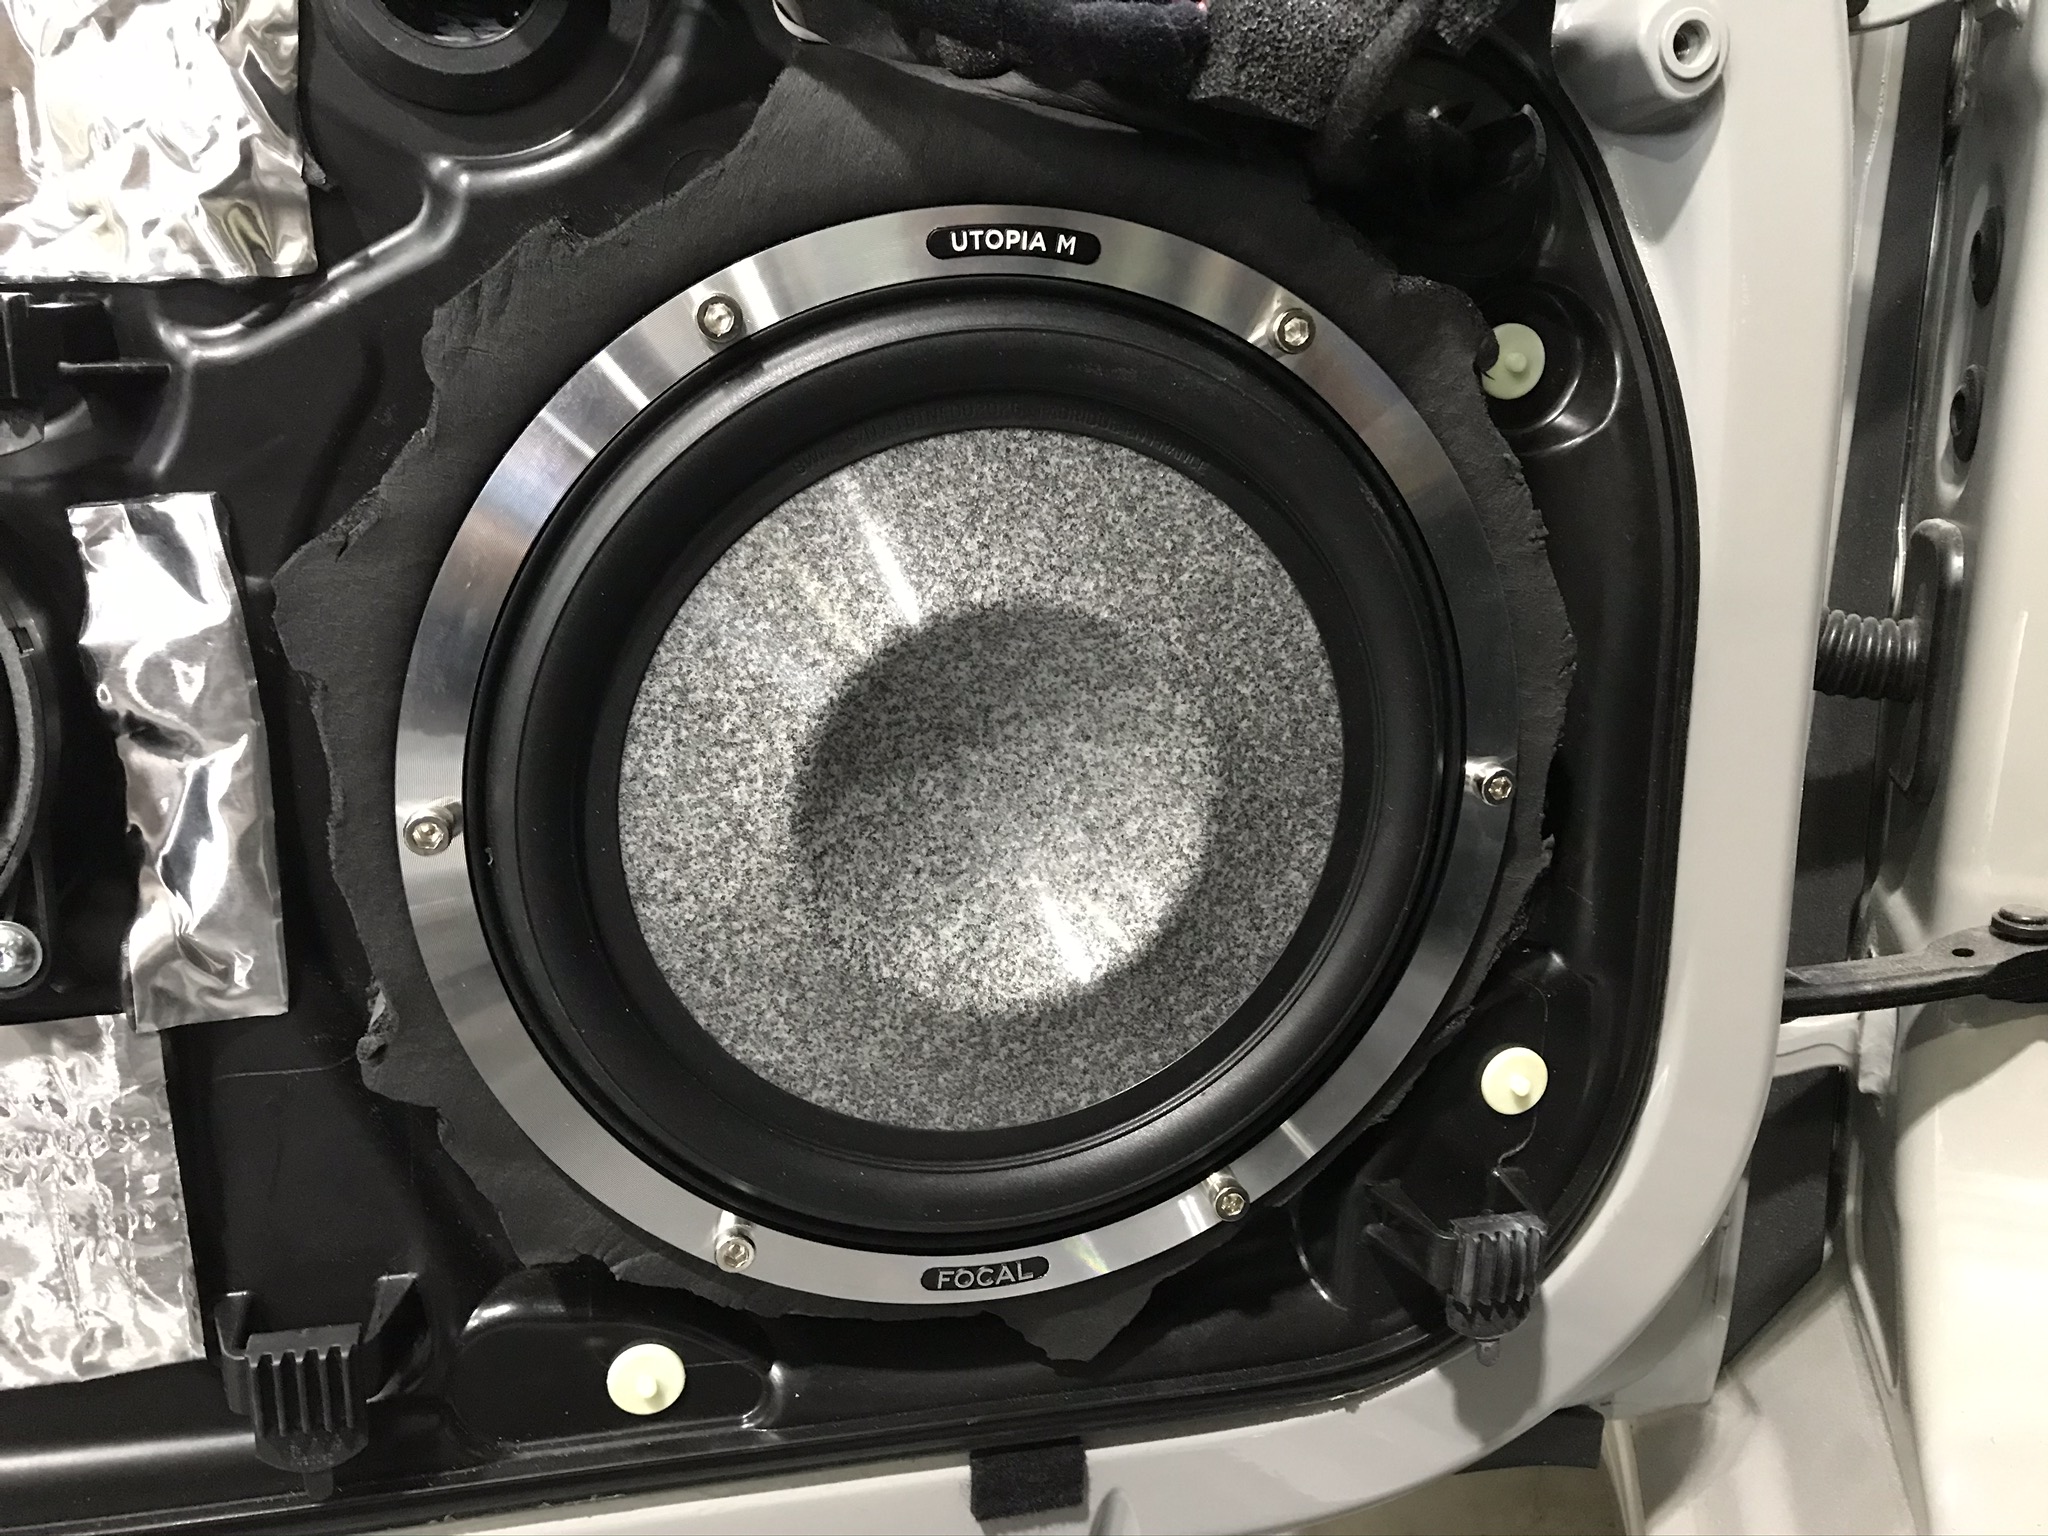
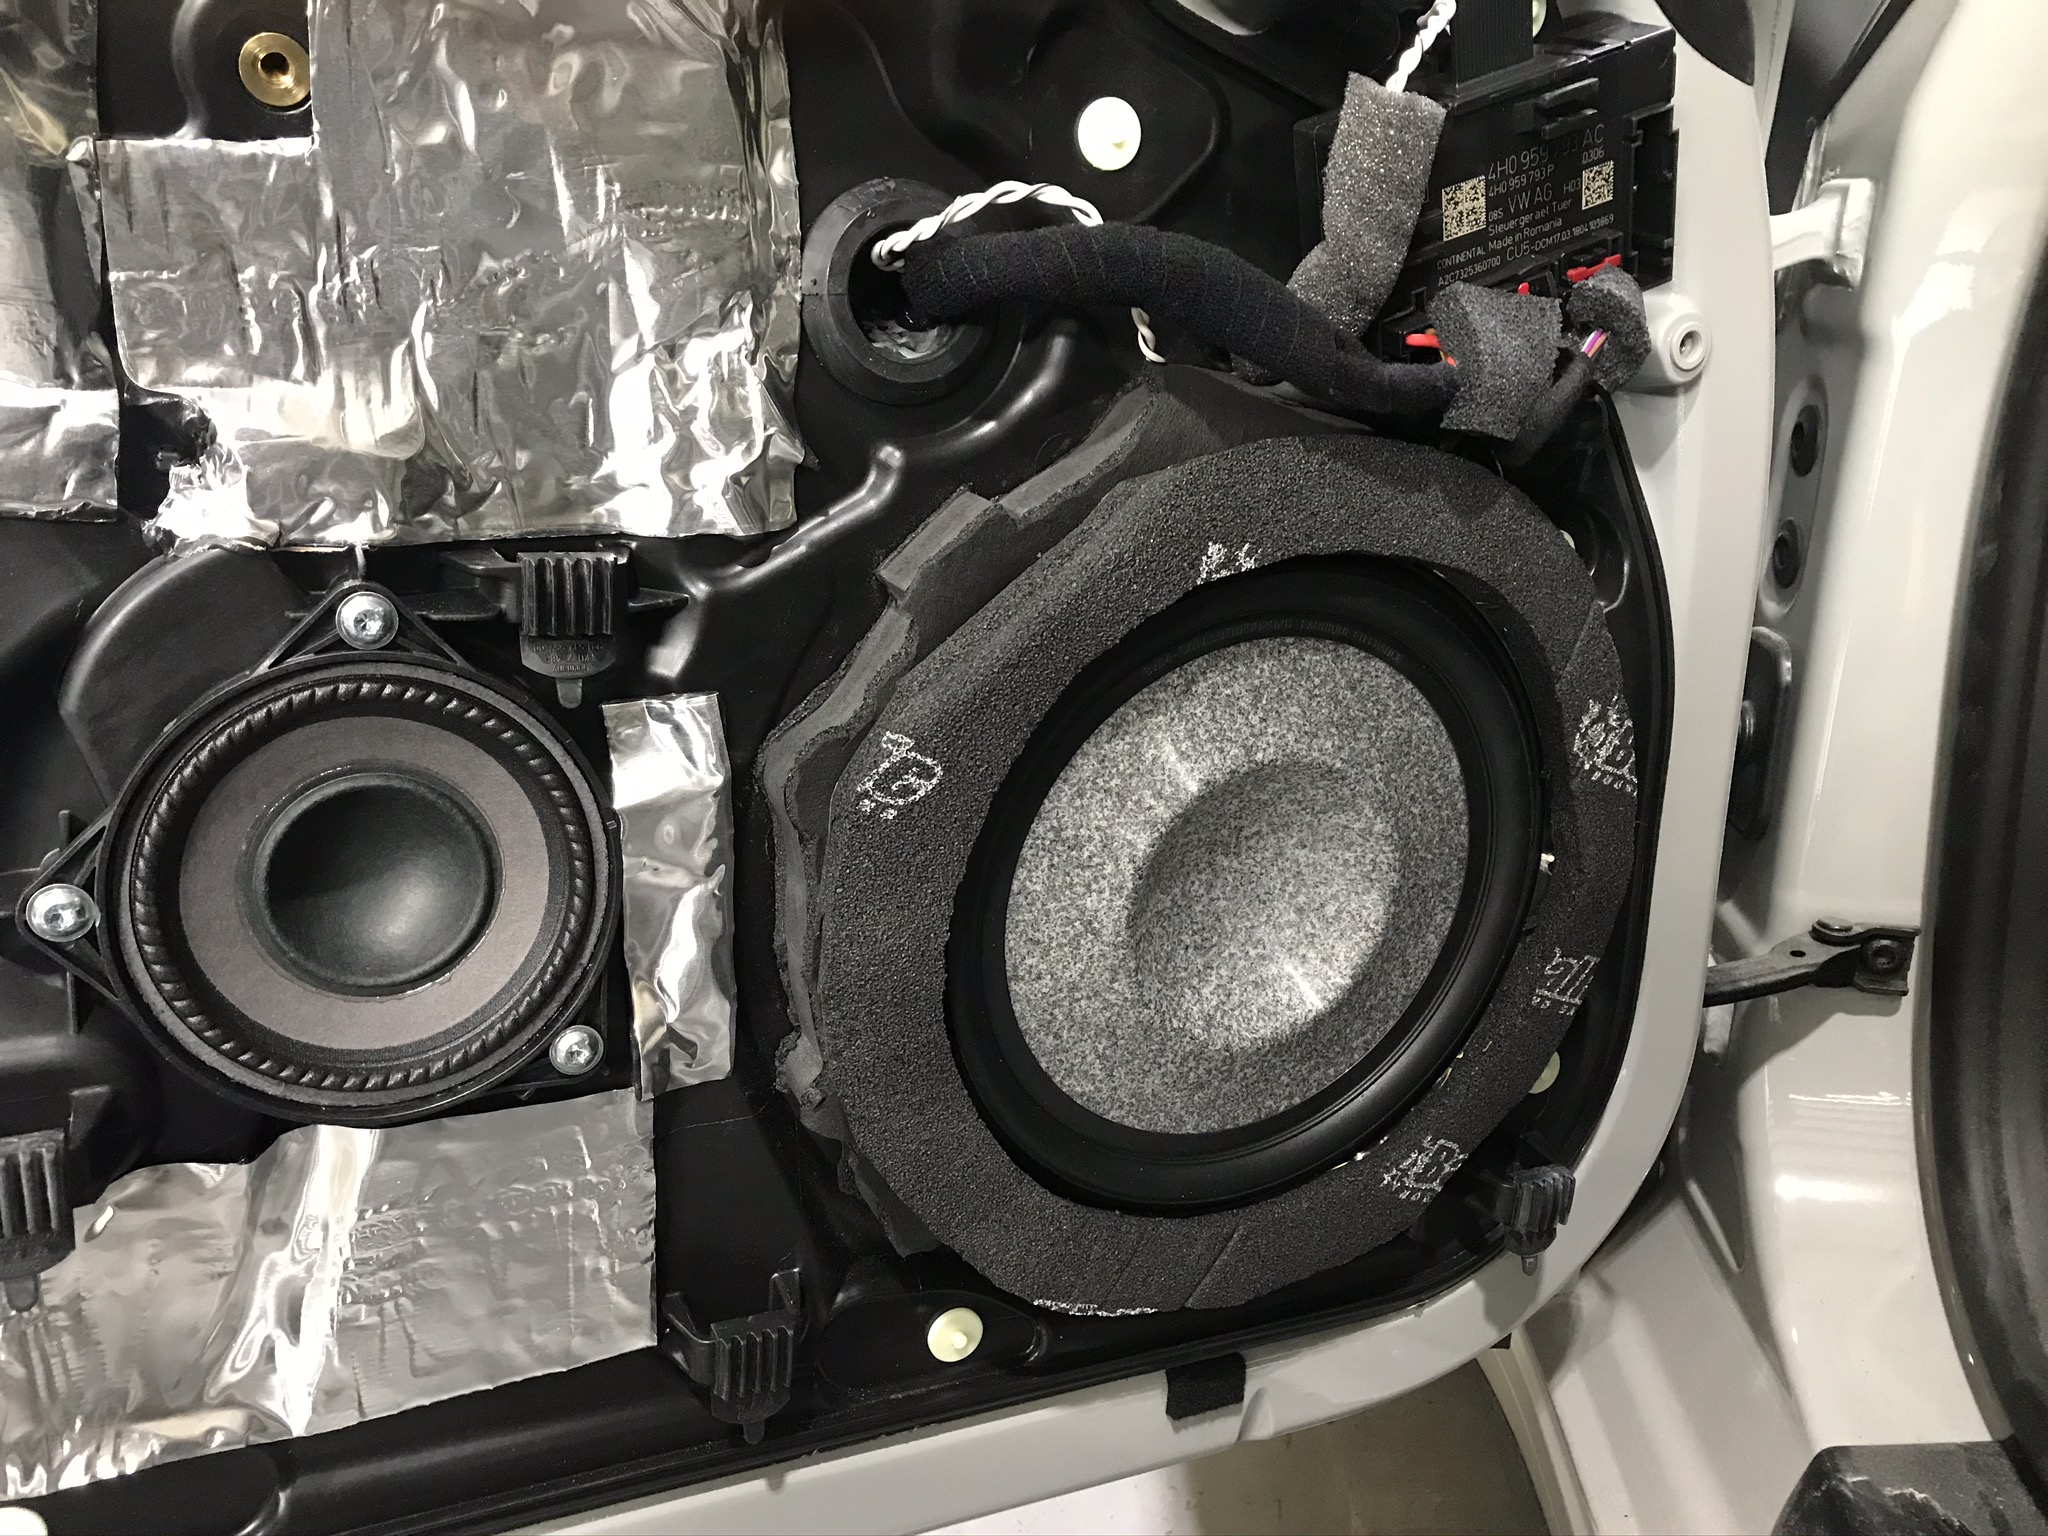
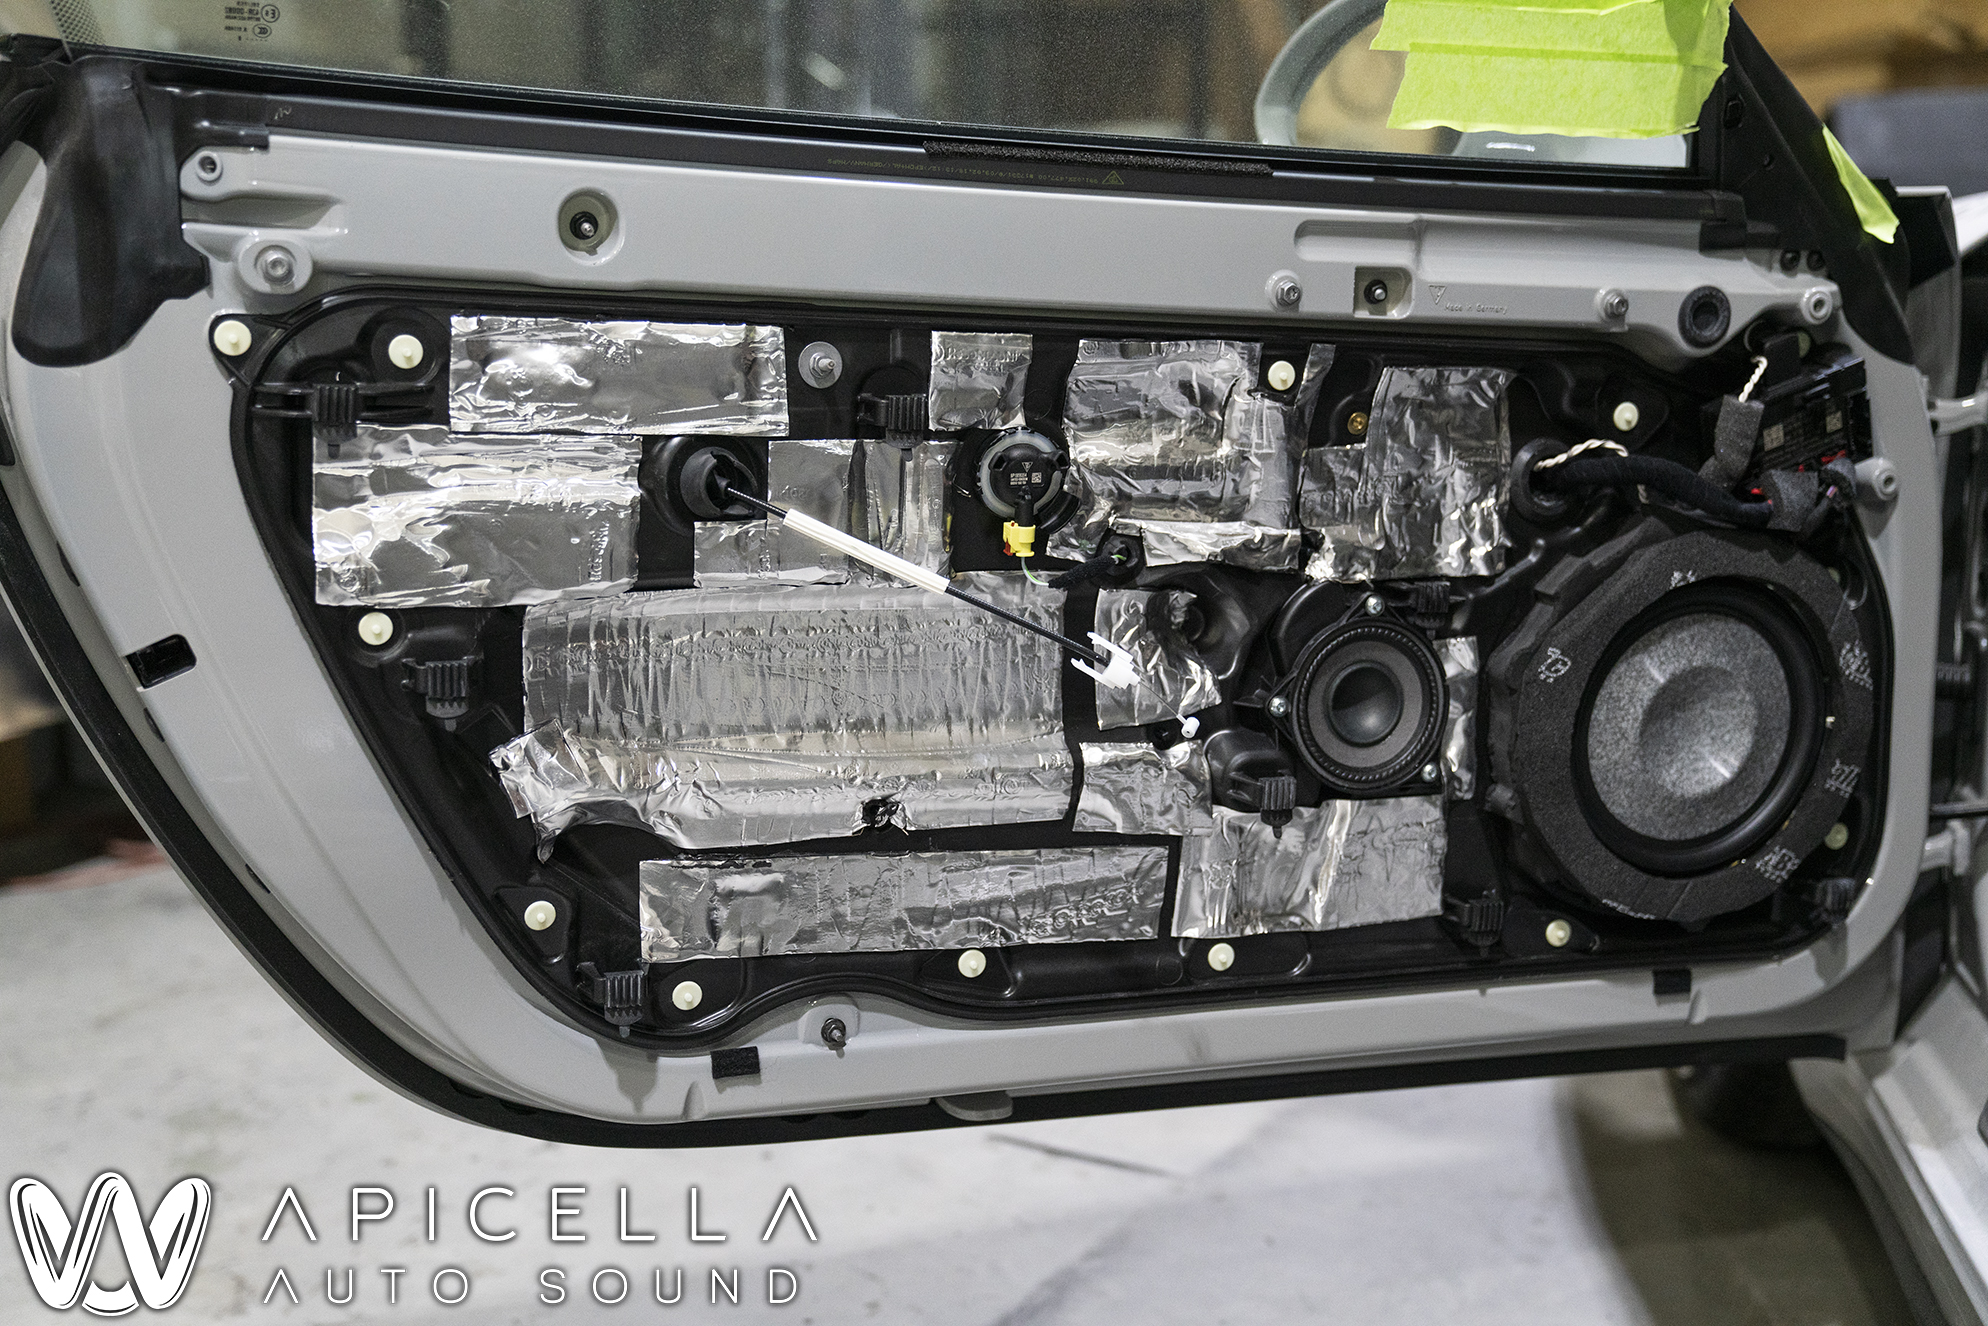
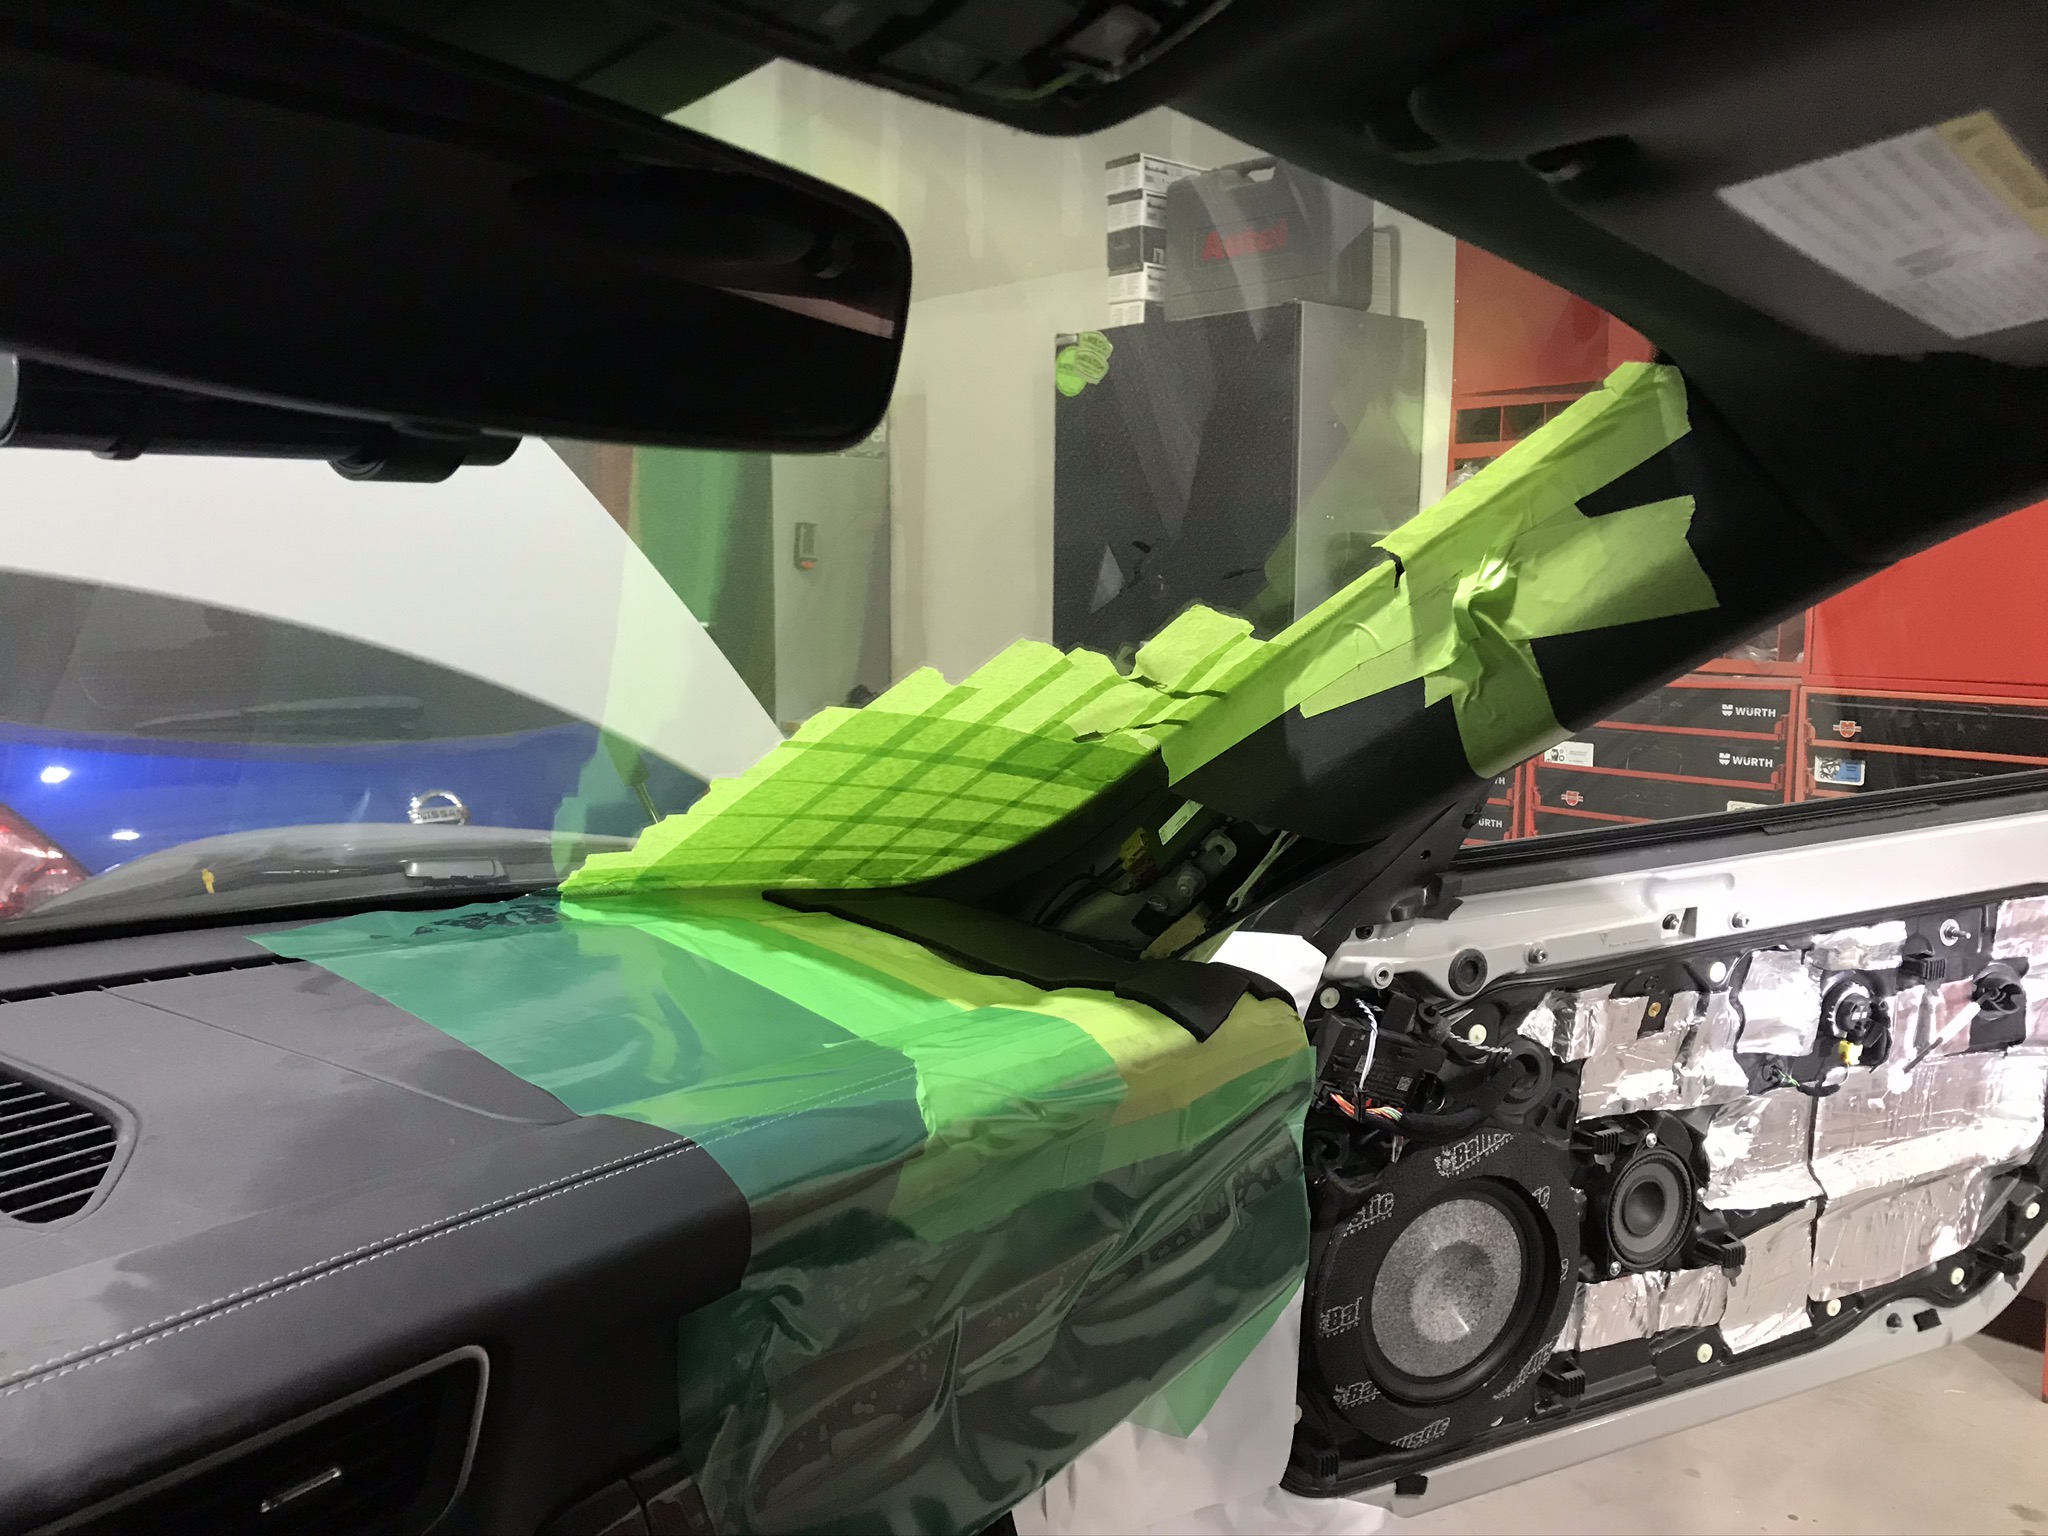
So, on to the build.. The inner skin was removed, and the outer skin was fully treated (sorry, we only have a before pic). We left the OEM midrange in there since it is in its own enclosure. The baffles were fabricated out of PVC and then lined with CCF to help the midbass drivers get a perfect seal. I think a sharper razor blade is needed for that next time lol. ResoNix CLD Squares, CCF7, and Blackhole Tiles were used to treat the doors in this car. Once that was done, a CCF ring was installed around the Utopia M midbass driver to couple it to the cabin to help increase output and reduce resonance in the door panel. The door panel and roof were treated with ResoNix Squares as well as our new CCF7 as well.
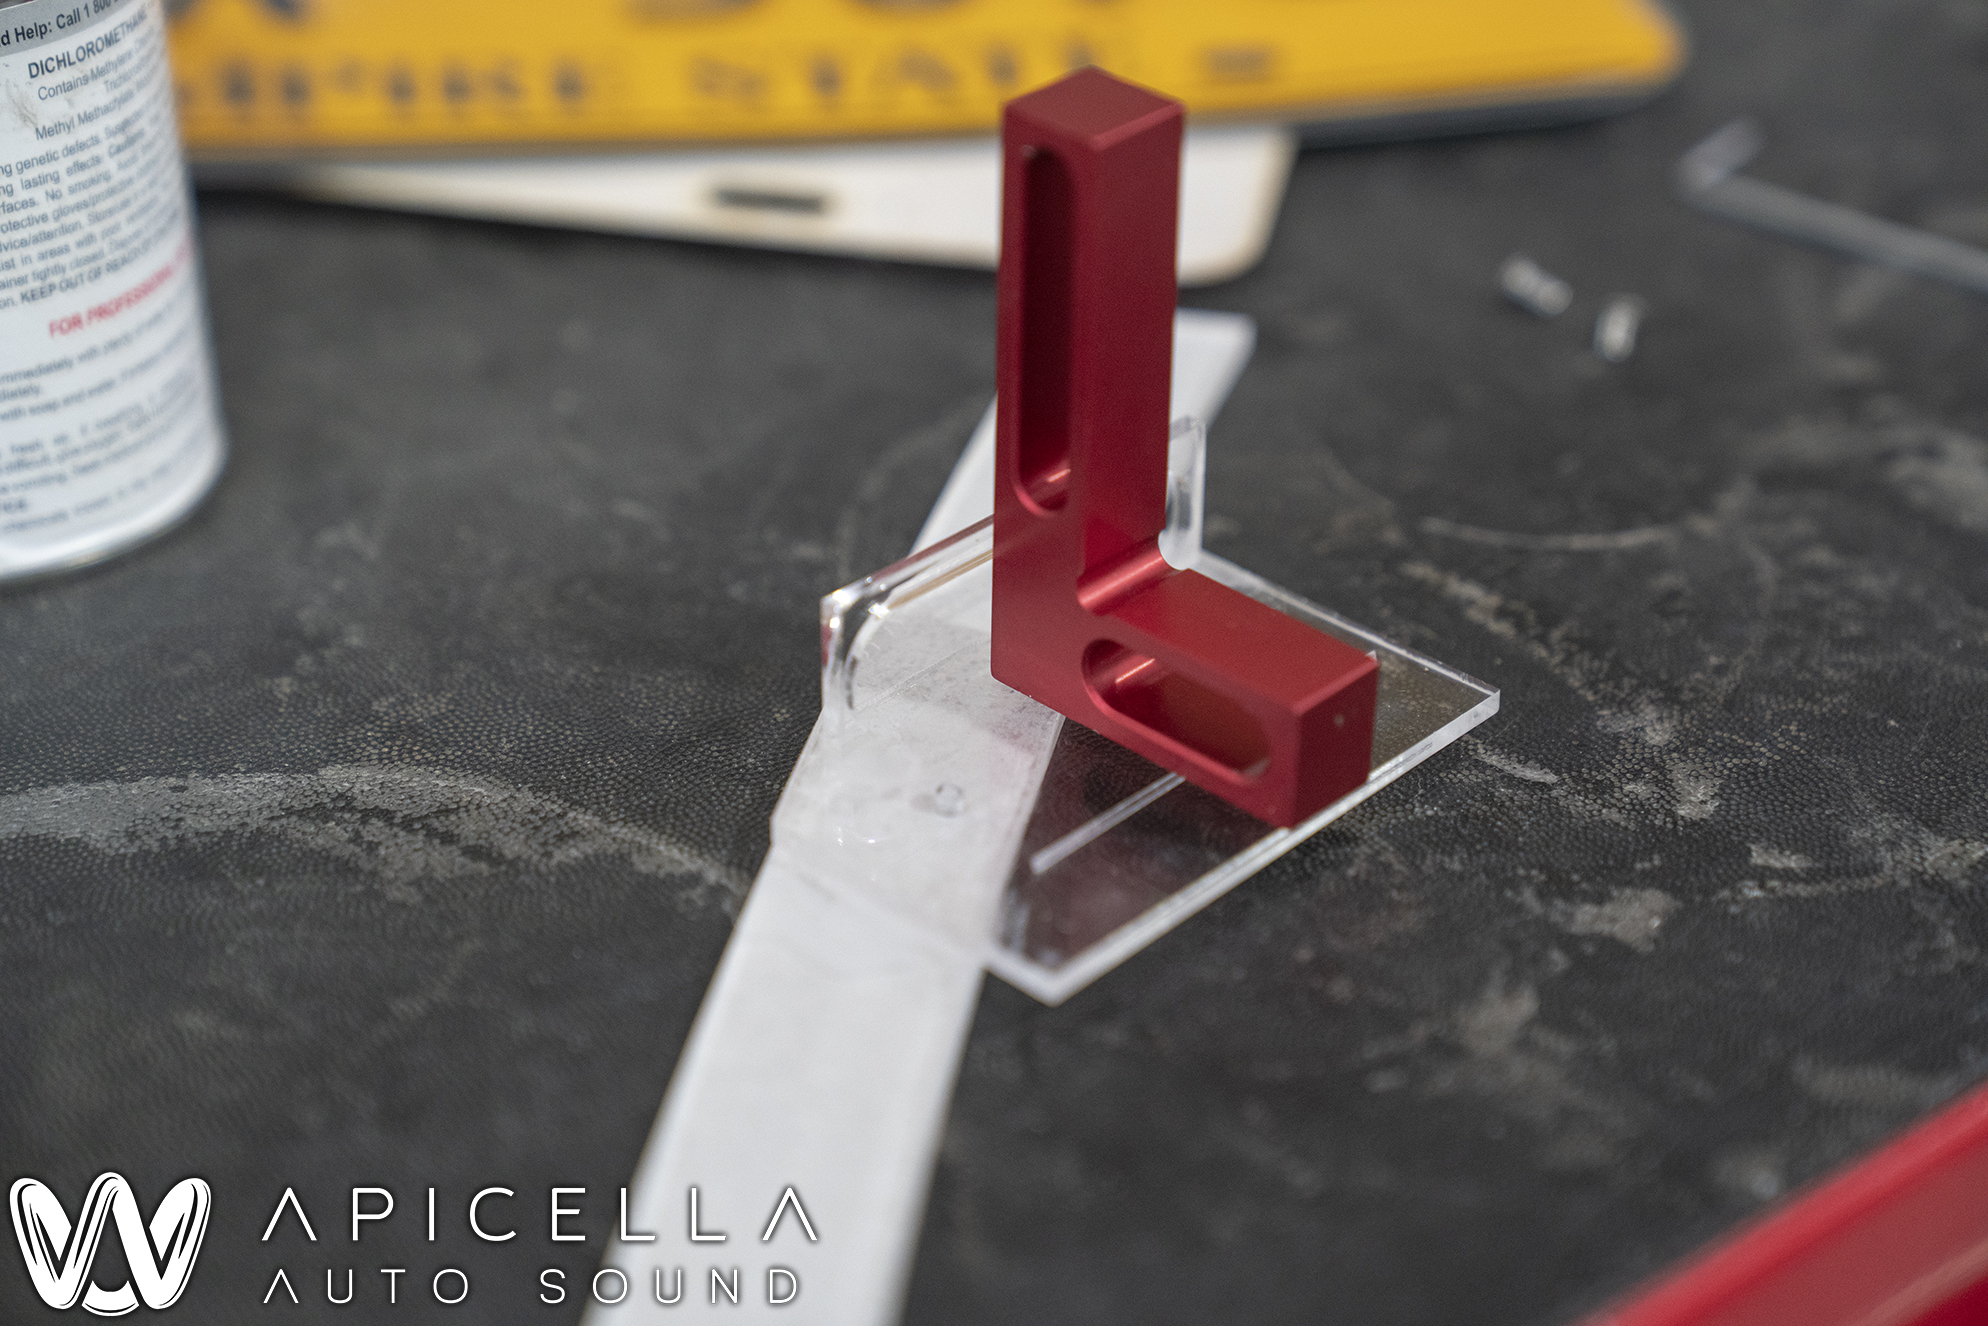
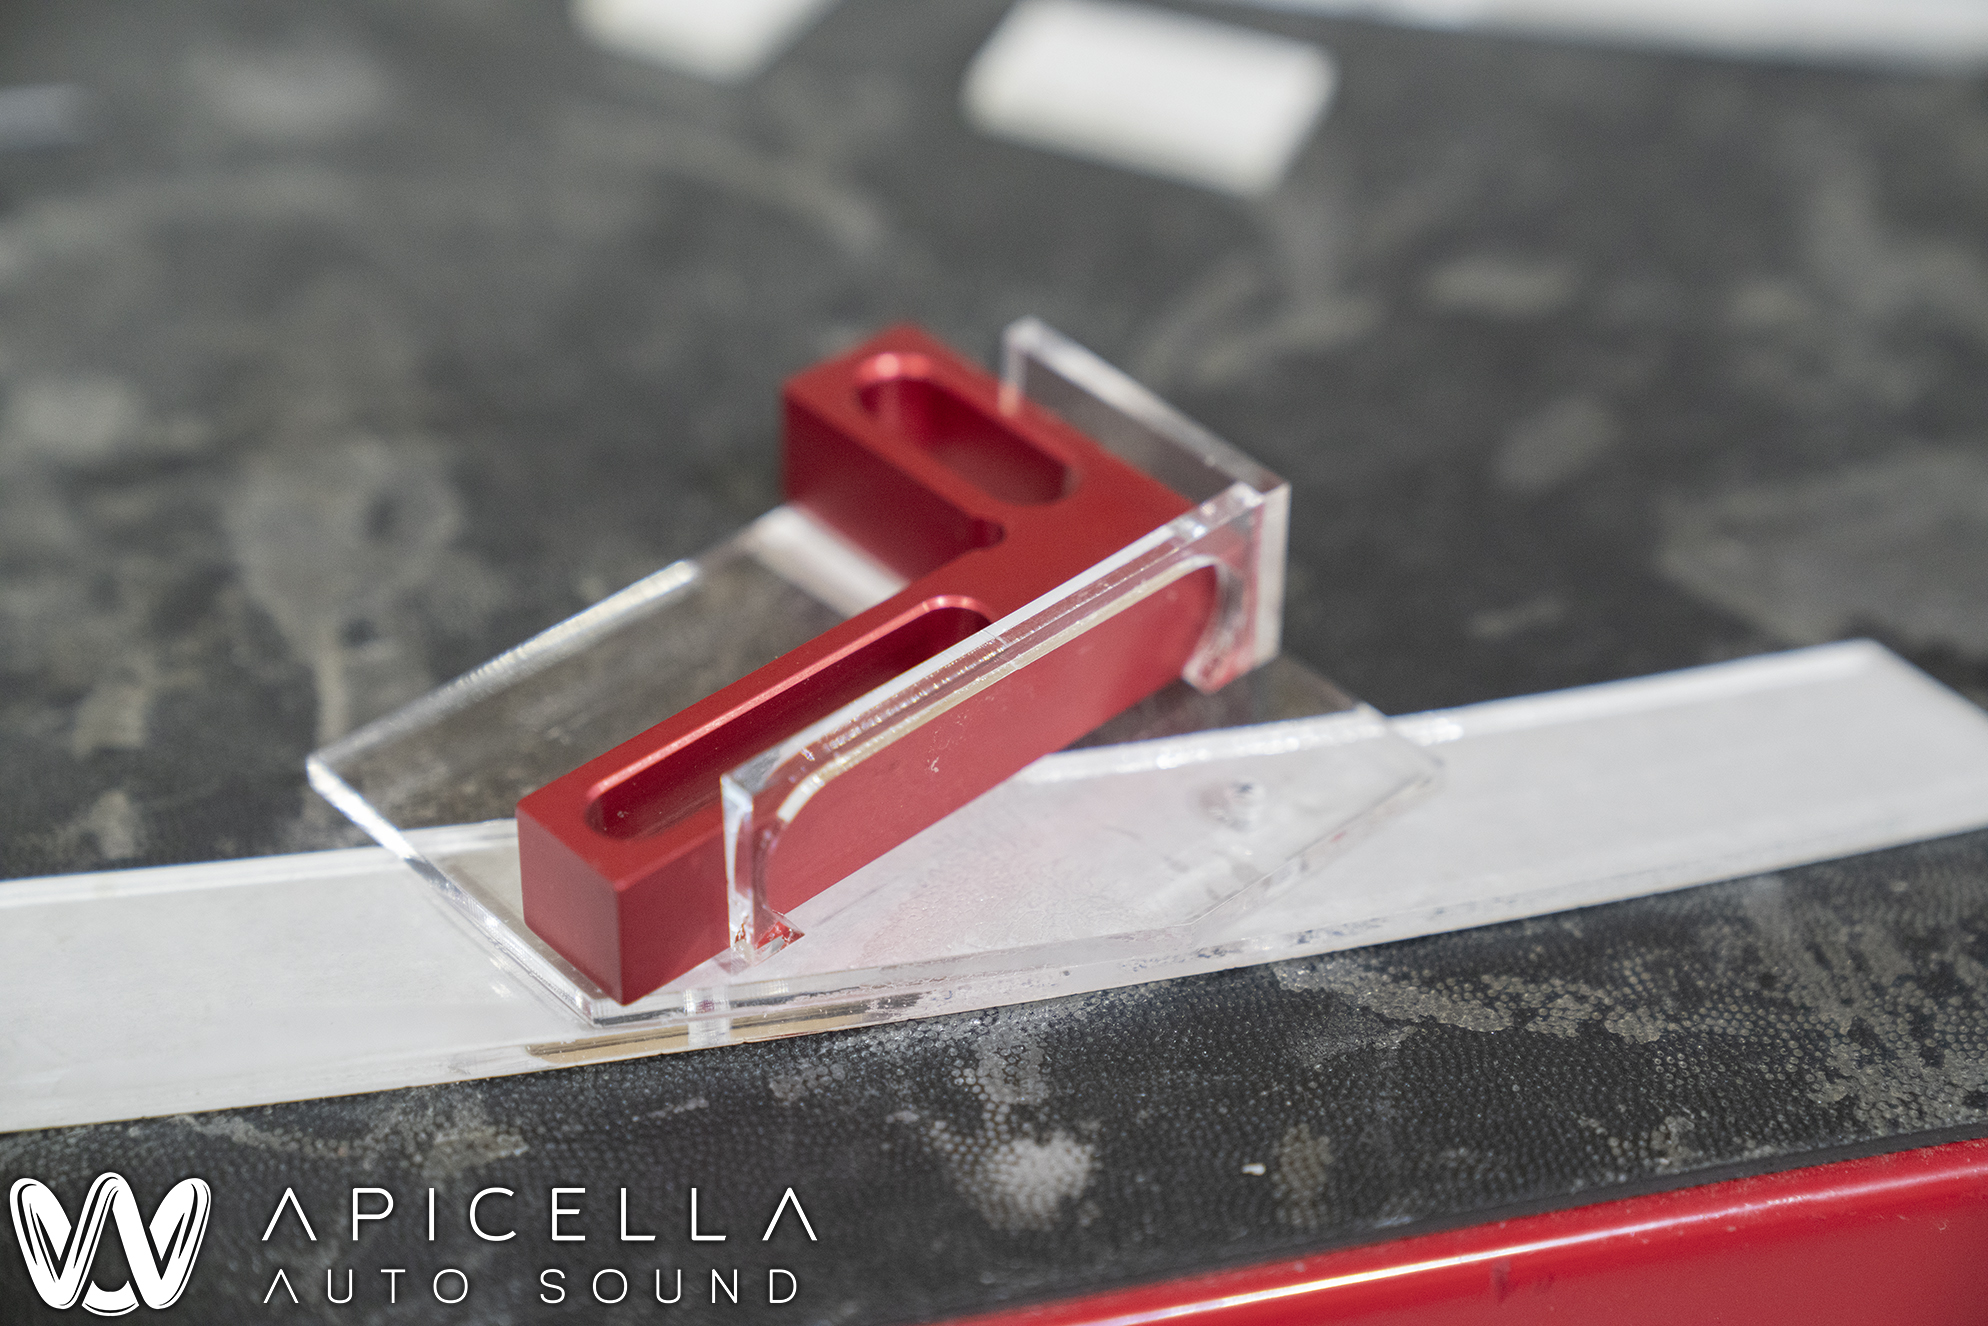
Next up are the enclosures that were built where the rear seats would normally be in a Porsche 911. The GT3 does not have any though, so the foam-backed carpet was removed, and we had plenty of room. The Baltic Birch was kerfed and then filled with a mixture of resin and milled fibers for a ton of extra strength. The beauty panels were made the same way. Here's where things got tricky.. fabricating the grills and grill "enclosures". We had to make a set of 3 different jigs that provided reference to the curves we needed.
Here is the start of the fabrication for the piece that bridges the gap between the sub enclosures and the center console. We used 1708 Biaxial Mat for the most strength per given thickness since this part needed to be thin yet strong.
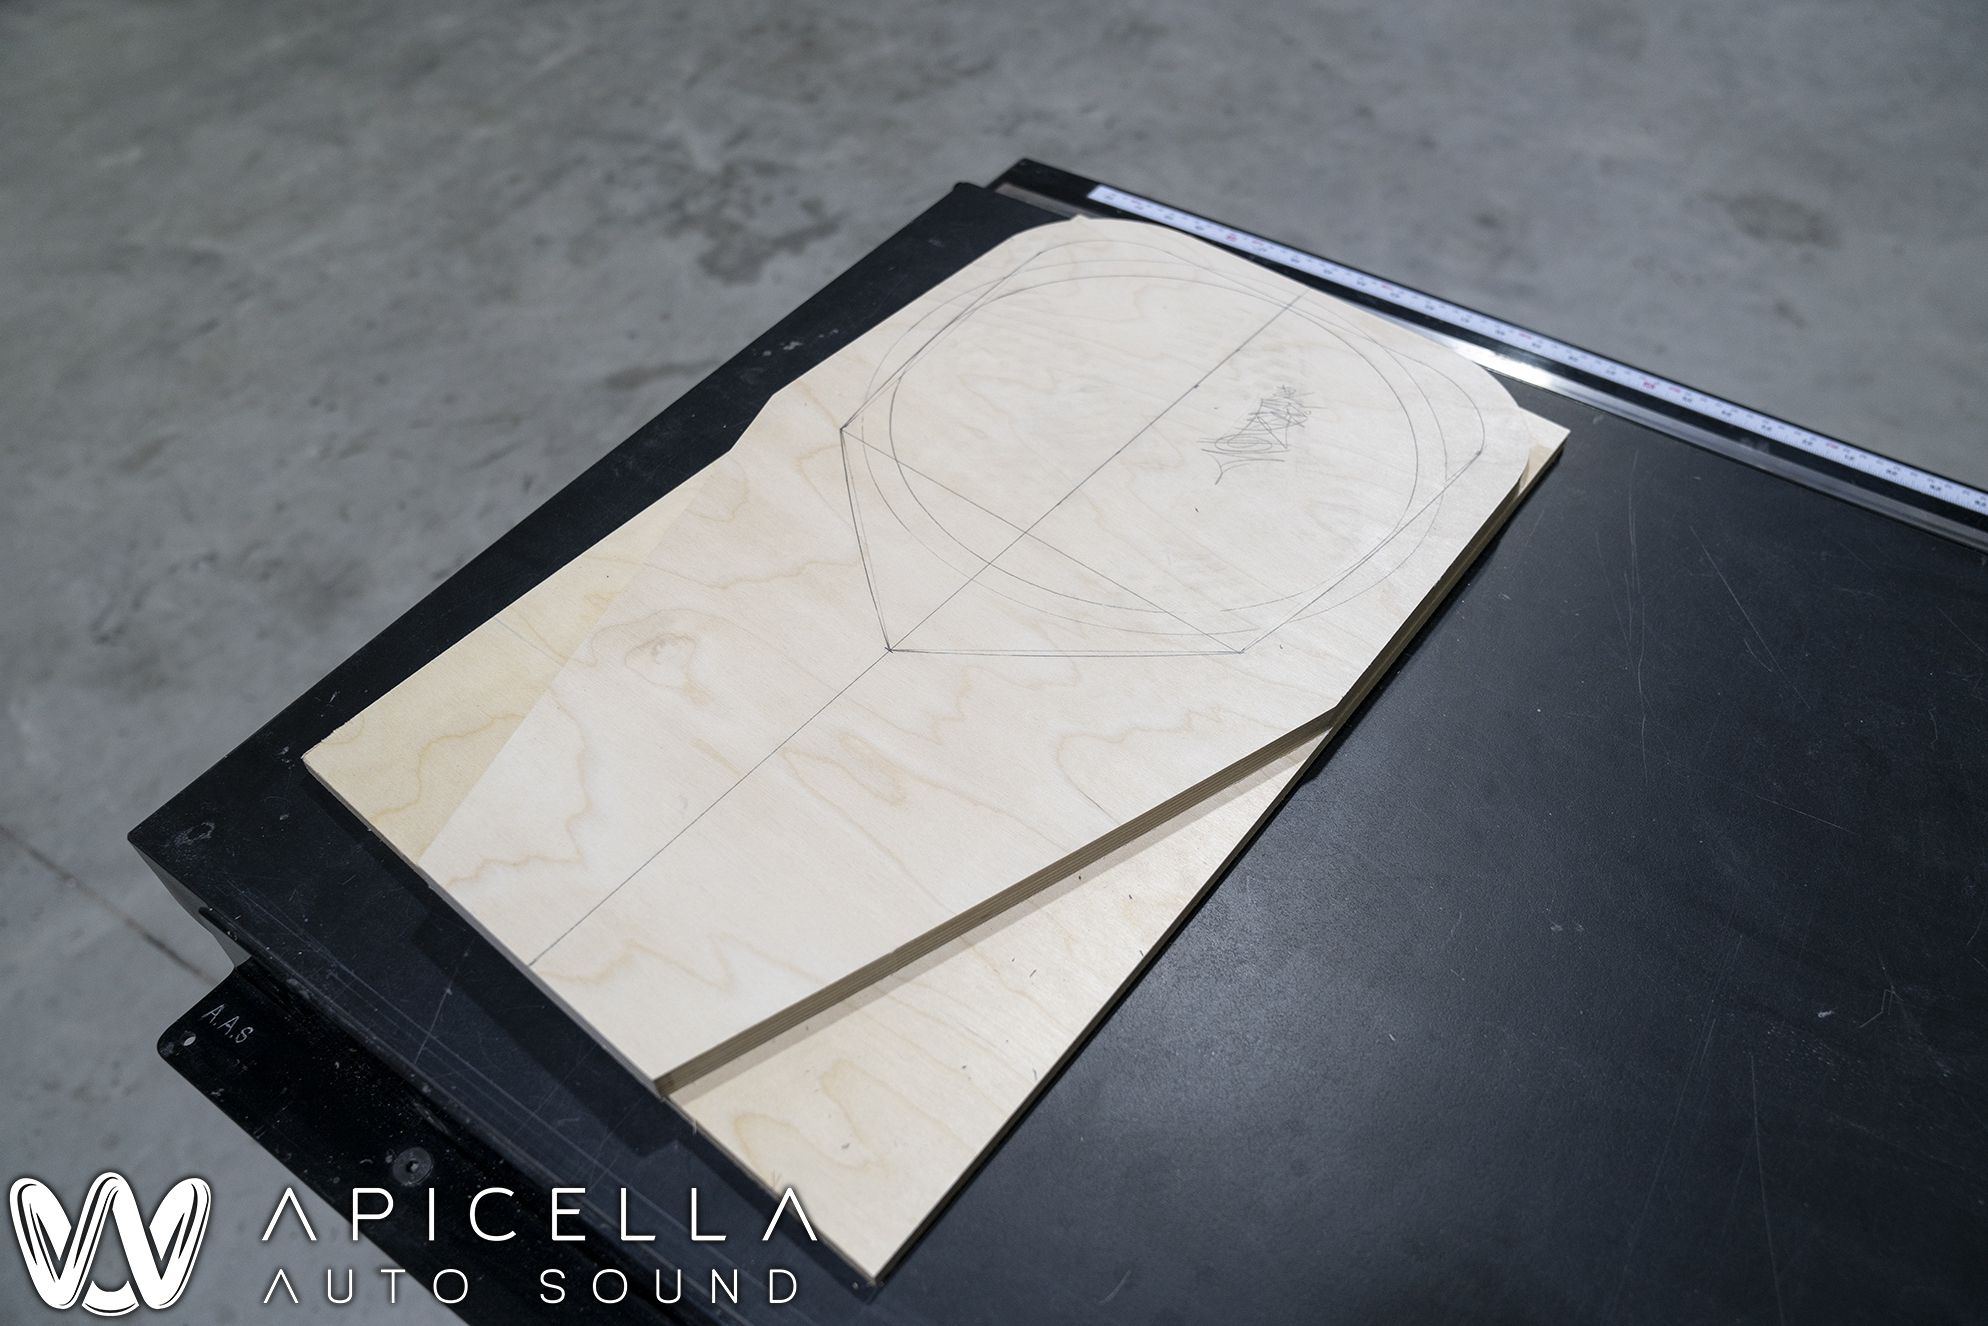
A little sneak peek at some of the design phase.. I cant draw very well. The grill shapes coming to fruition. I spent countless hours coming up with possible designs for this part.
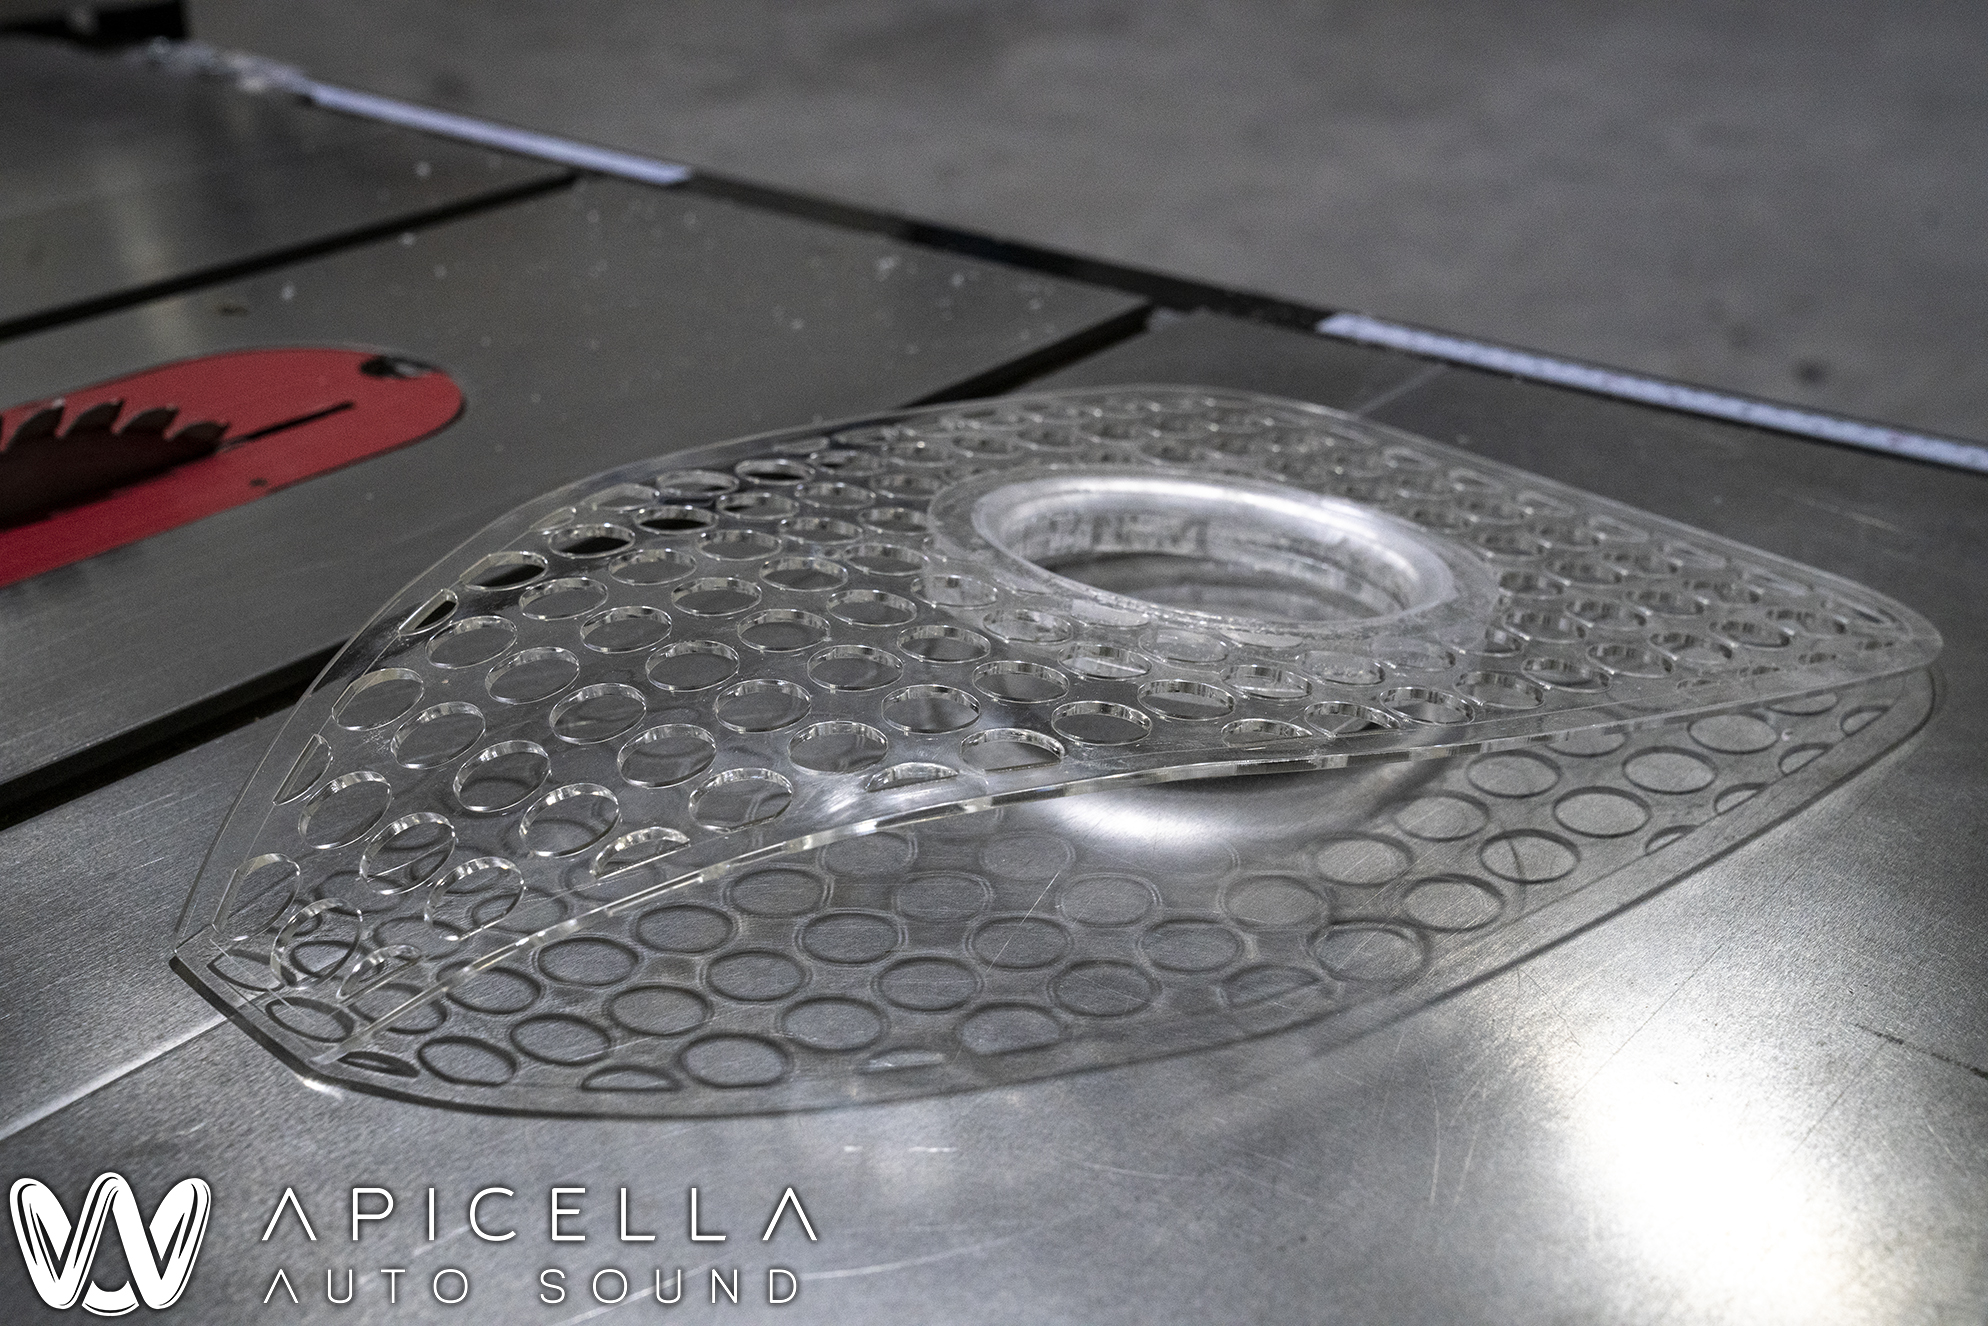
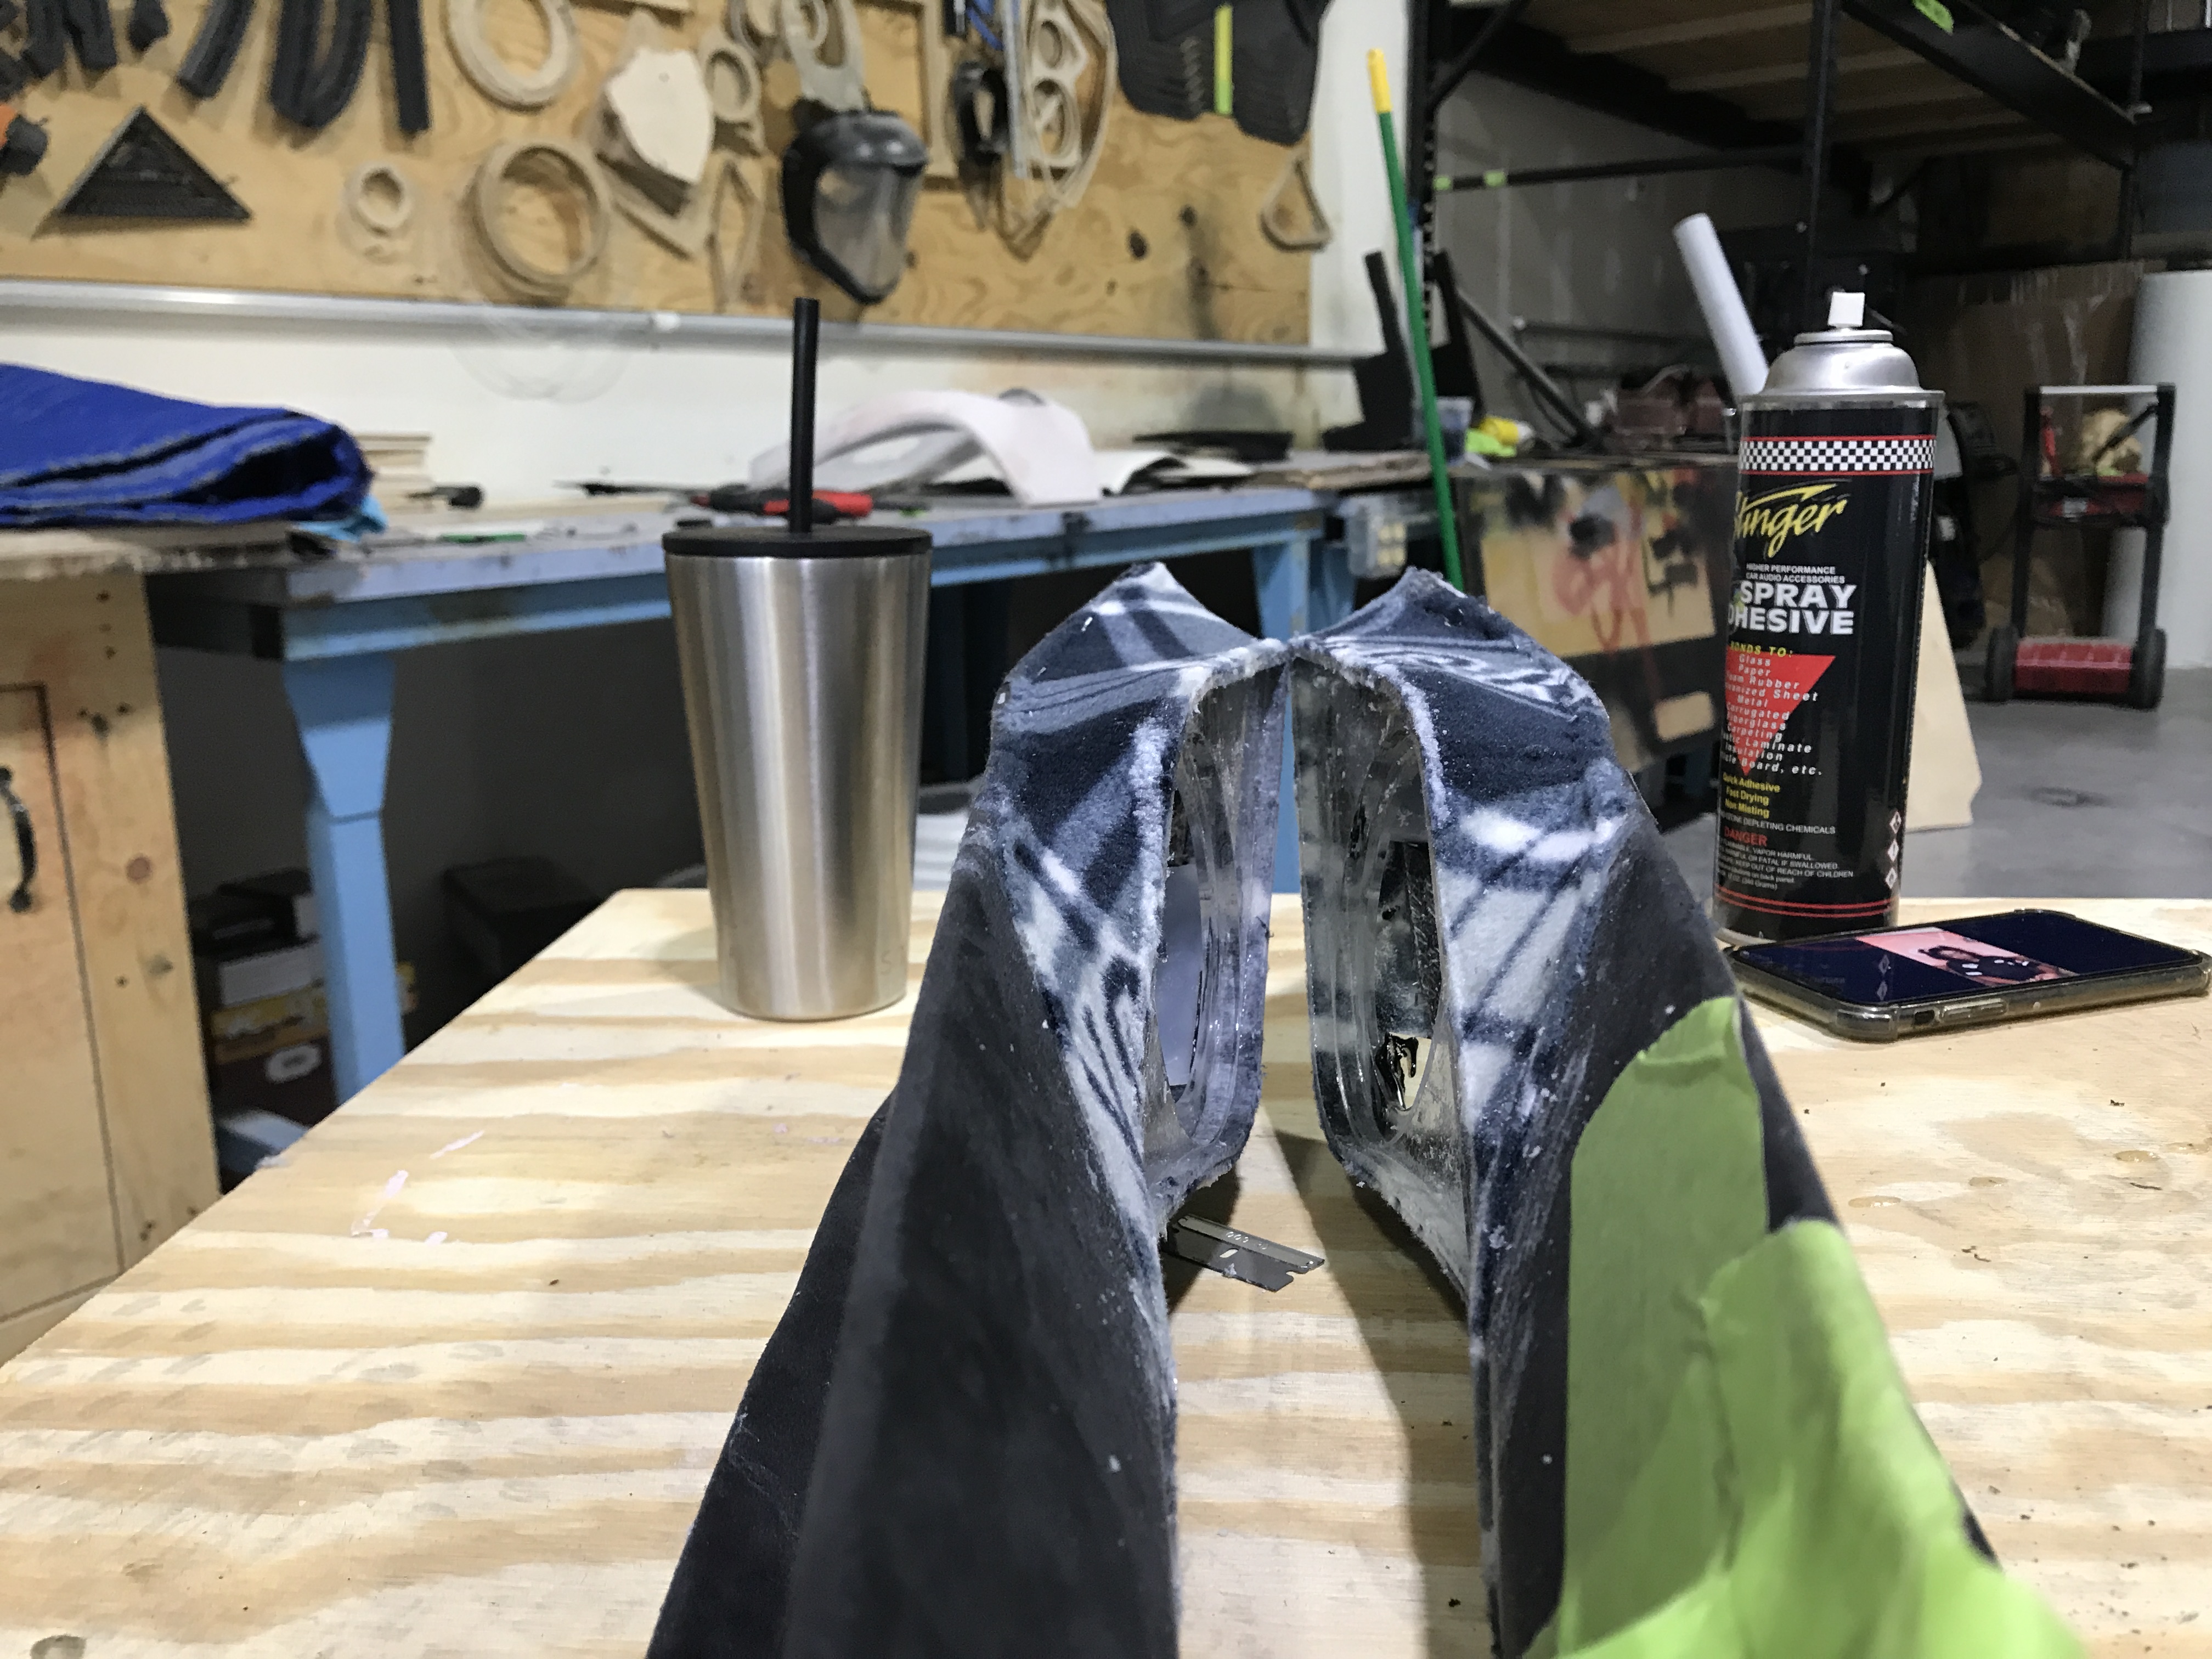
And from there, we have a grill. This is where I got defeated. I originally wanted to press the grill out of the usual metal grill mesh that I use, but unfortunately, it just wouldn't take/hold shape. So, I made them out of acrylic and wrapped them with an OEM matching premium quality grill cloth.
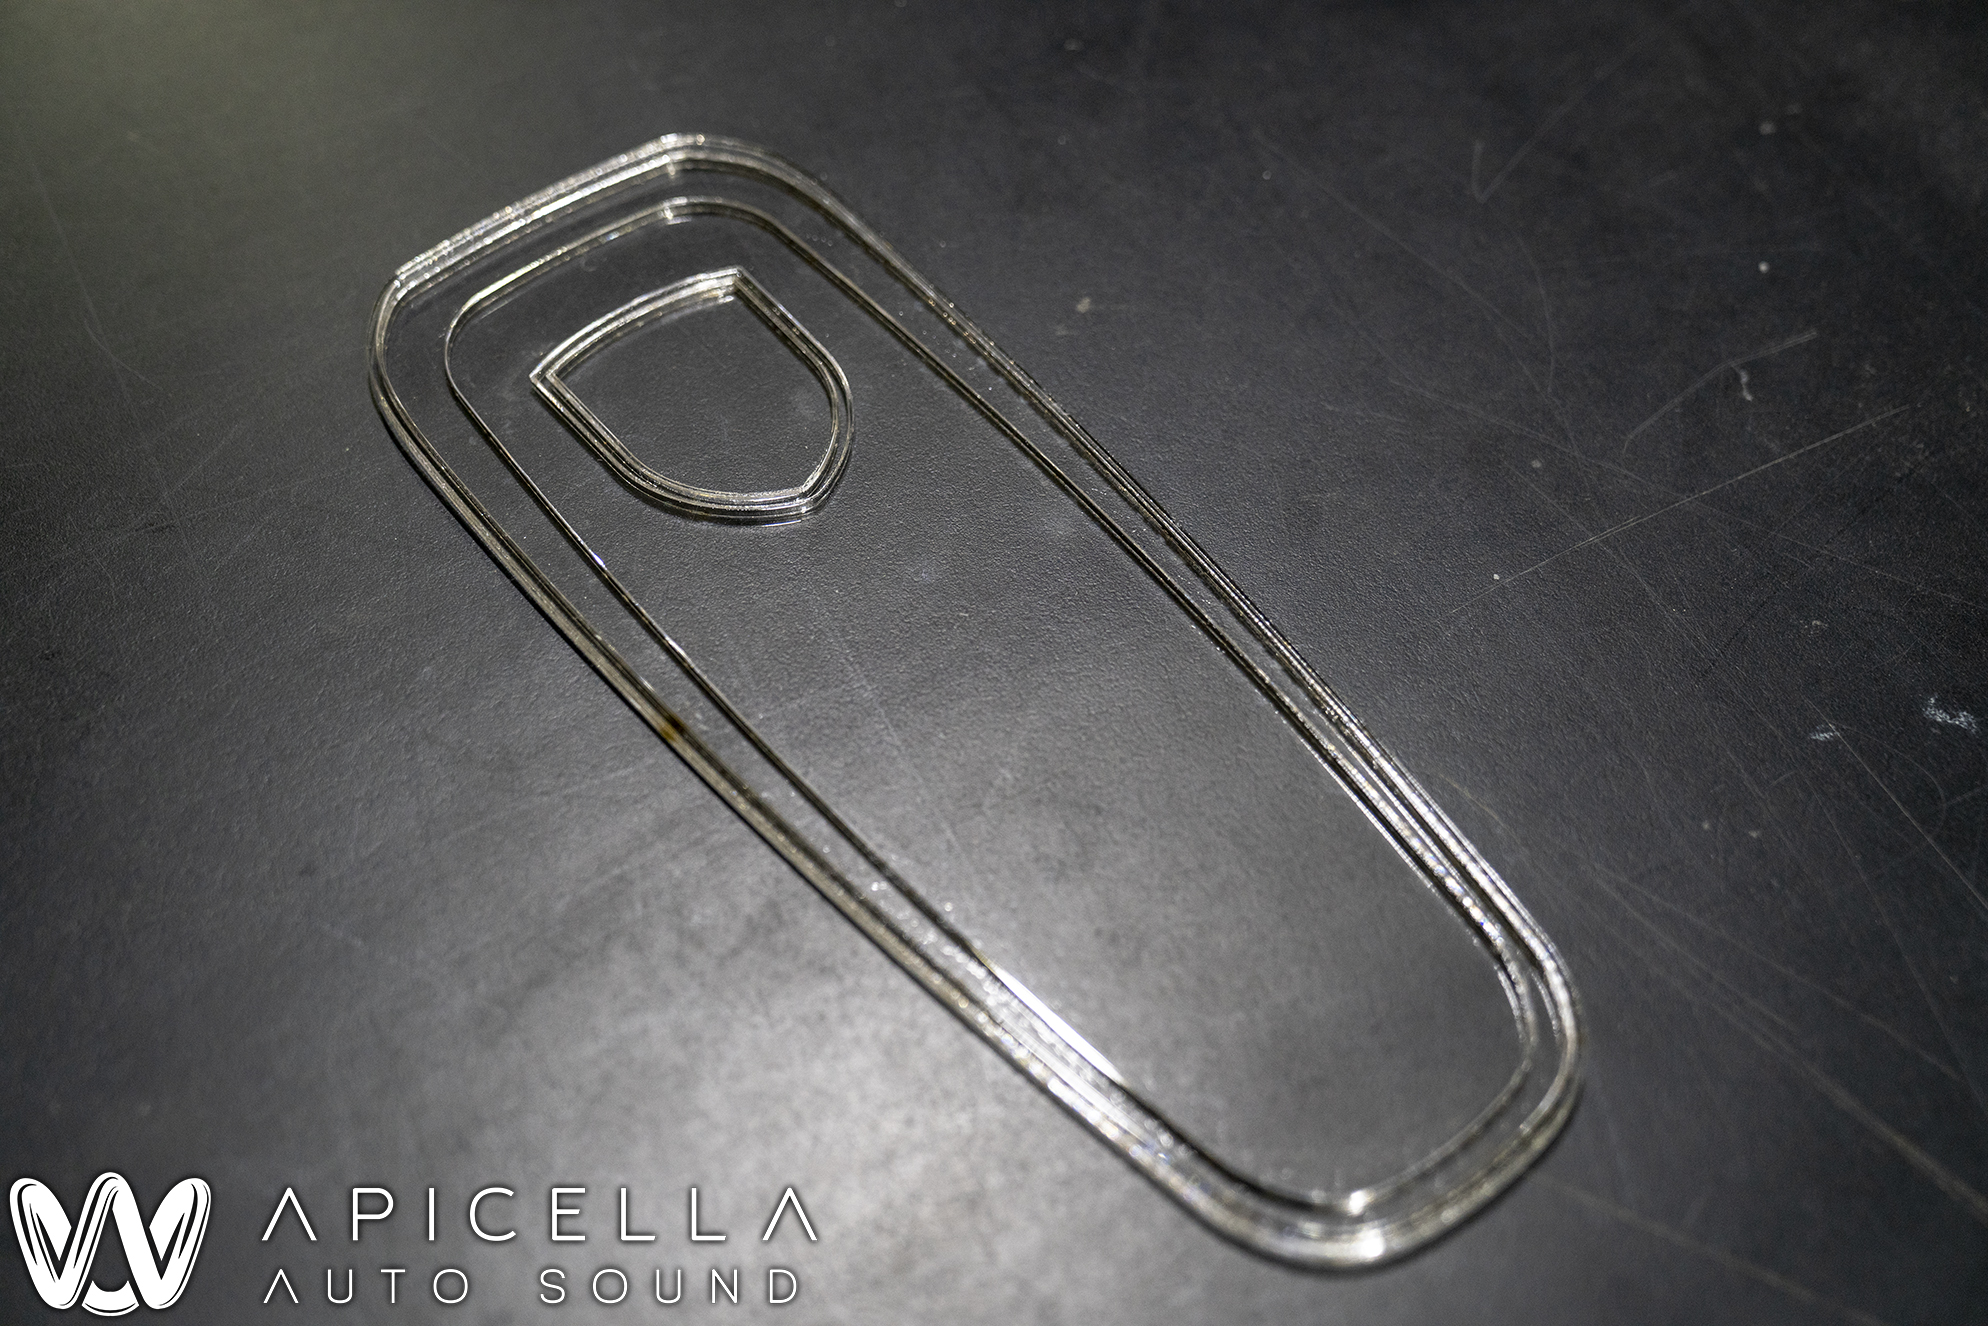
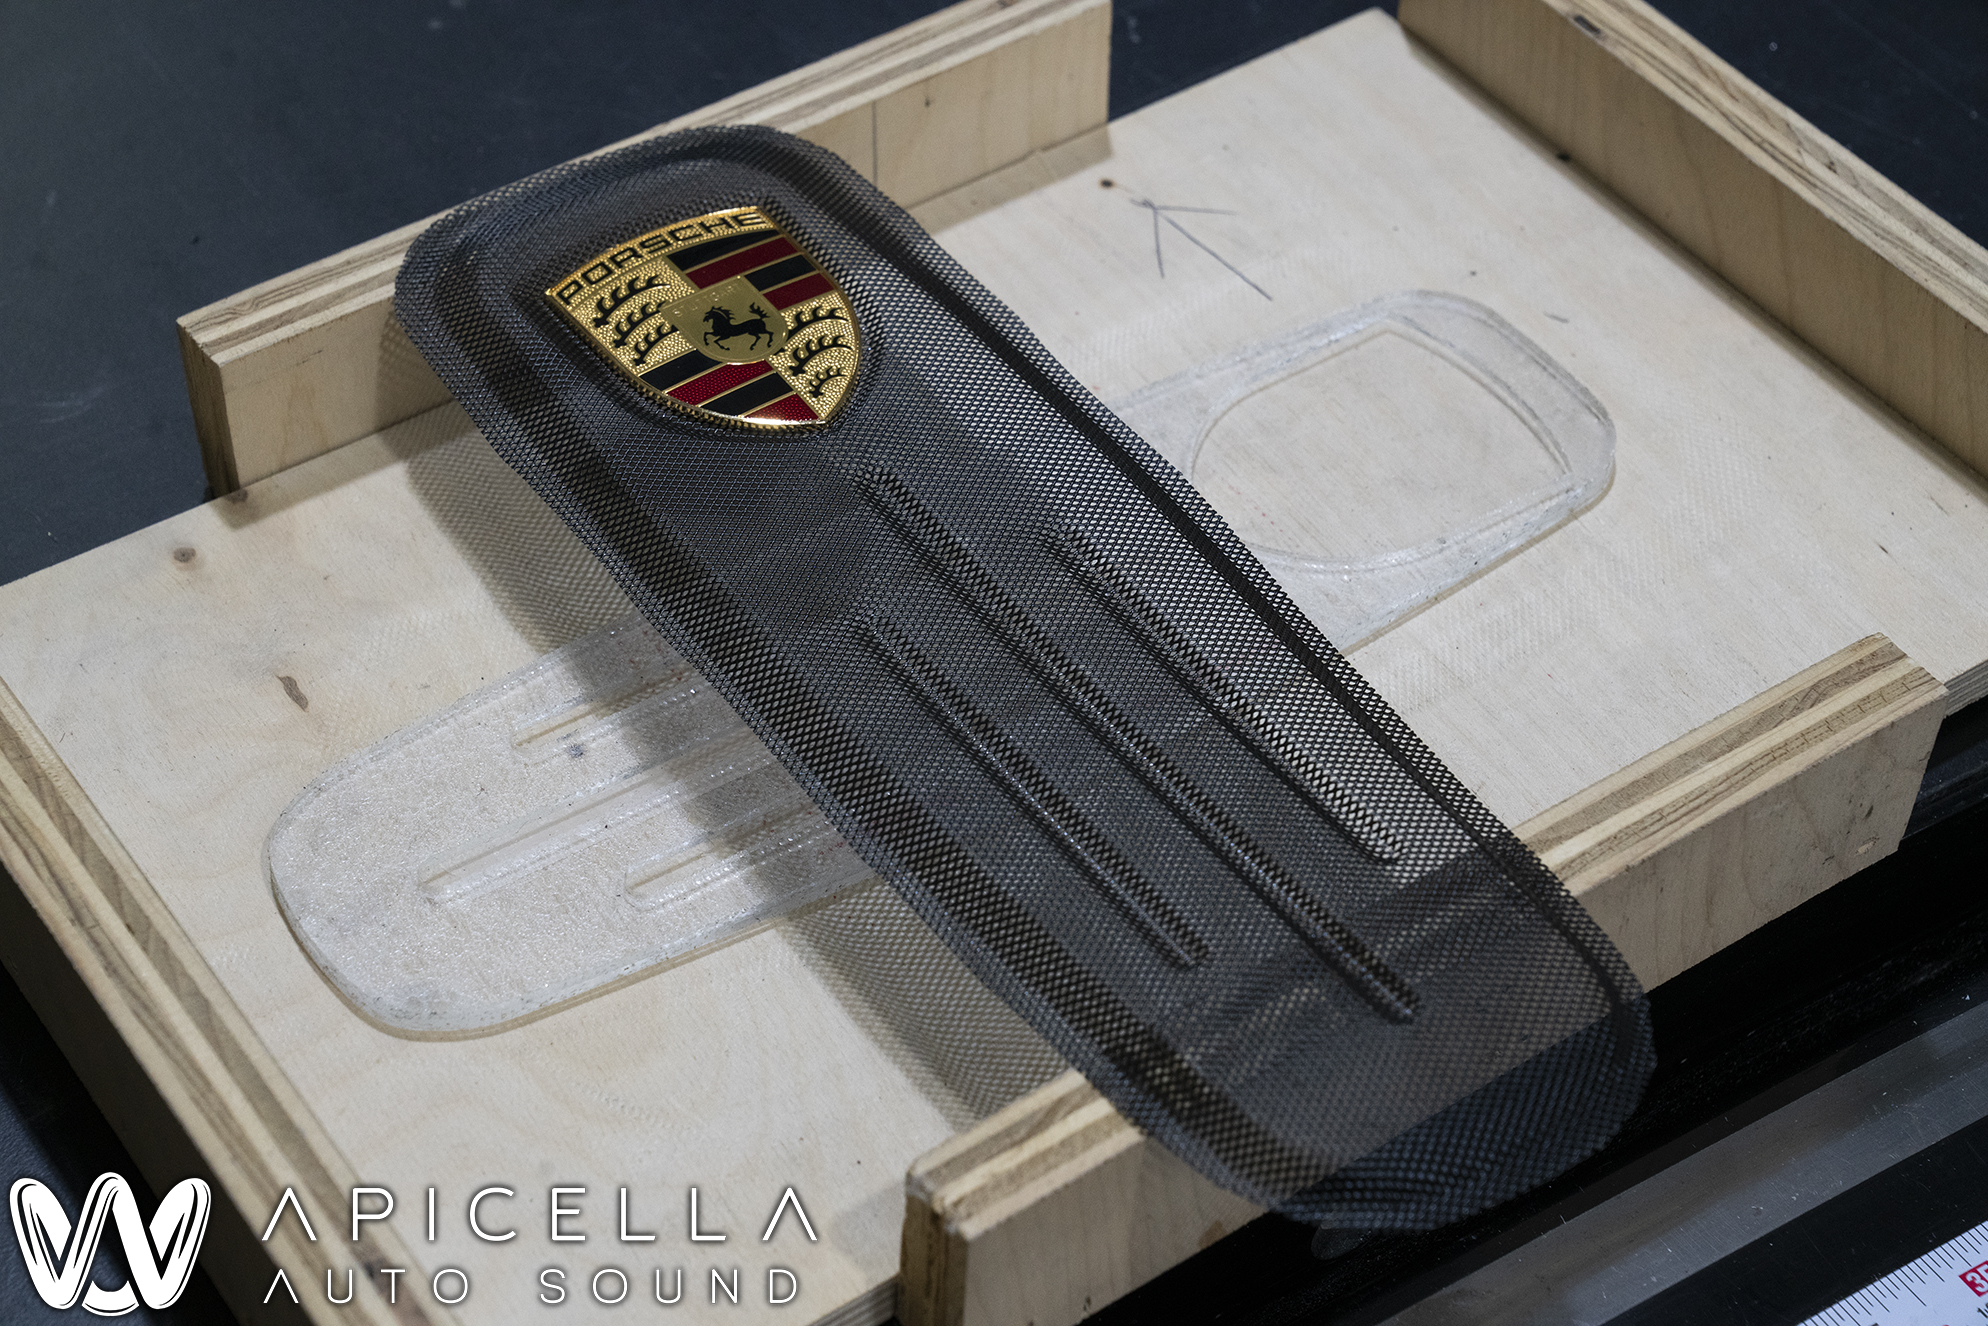
Here are the templates and final pressed grill for the centerpiece. I ended up making this 3 times to make sure it was perfect.
All of the sub enclosure build, minus the "bridging" piece done, primed, and ready for upholstery
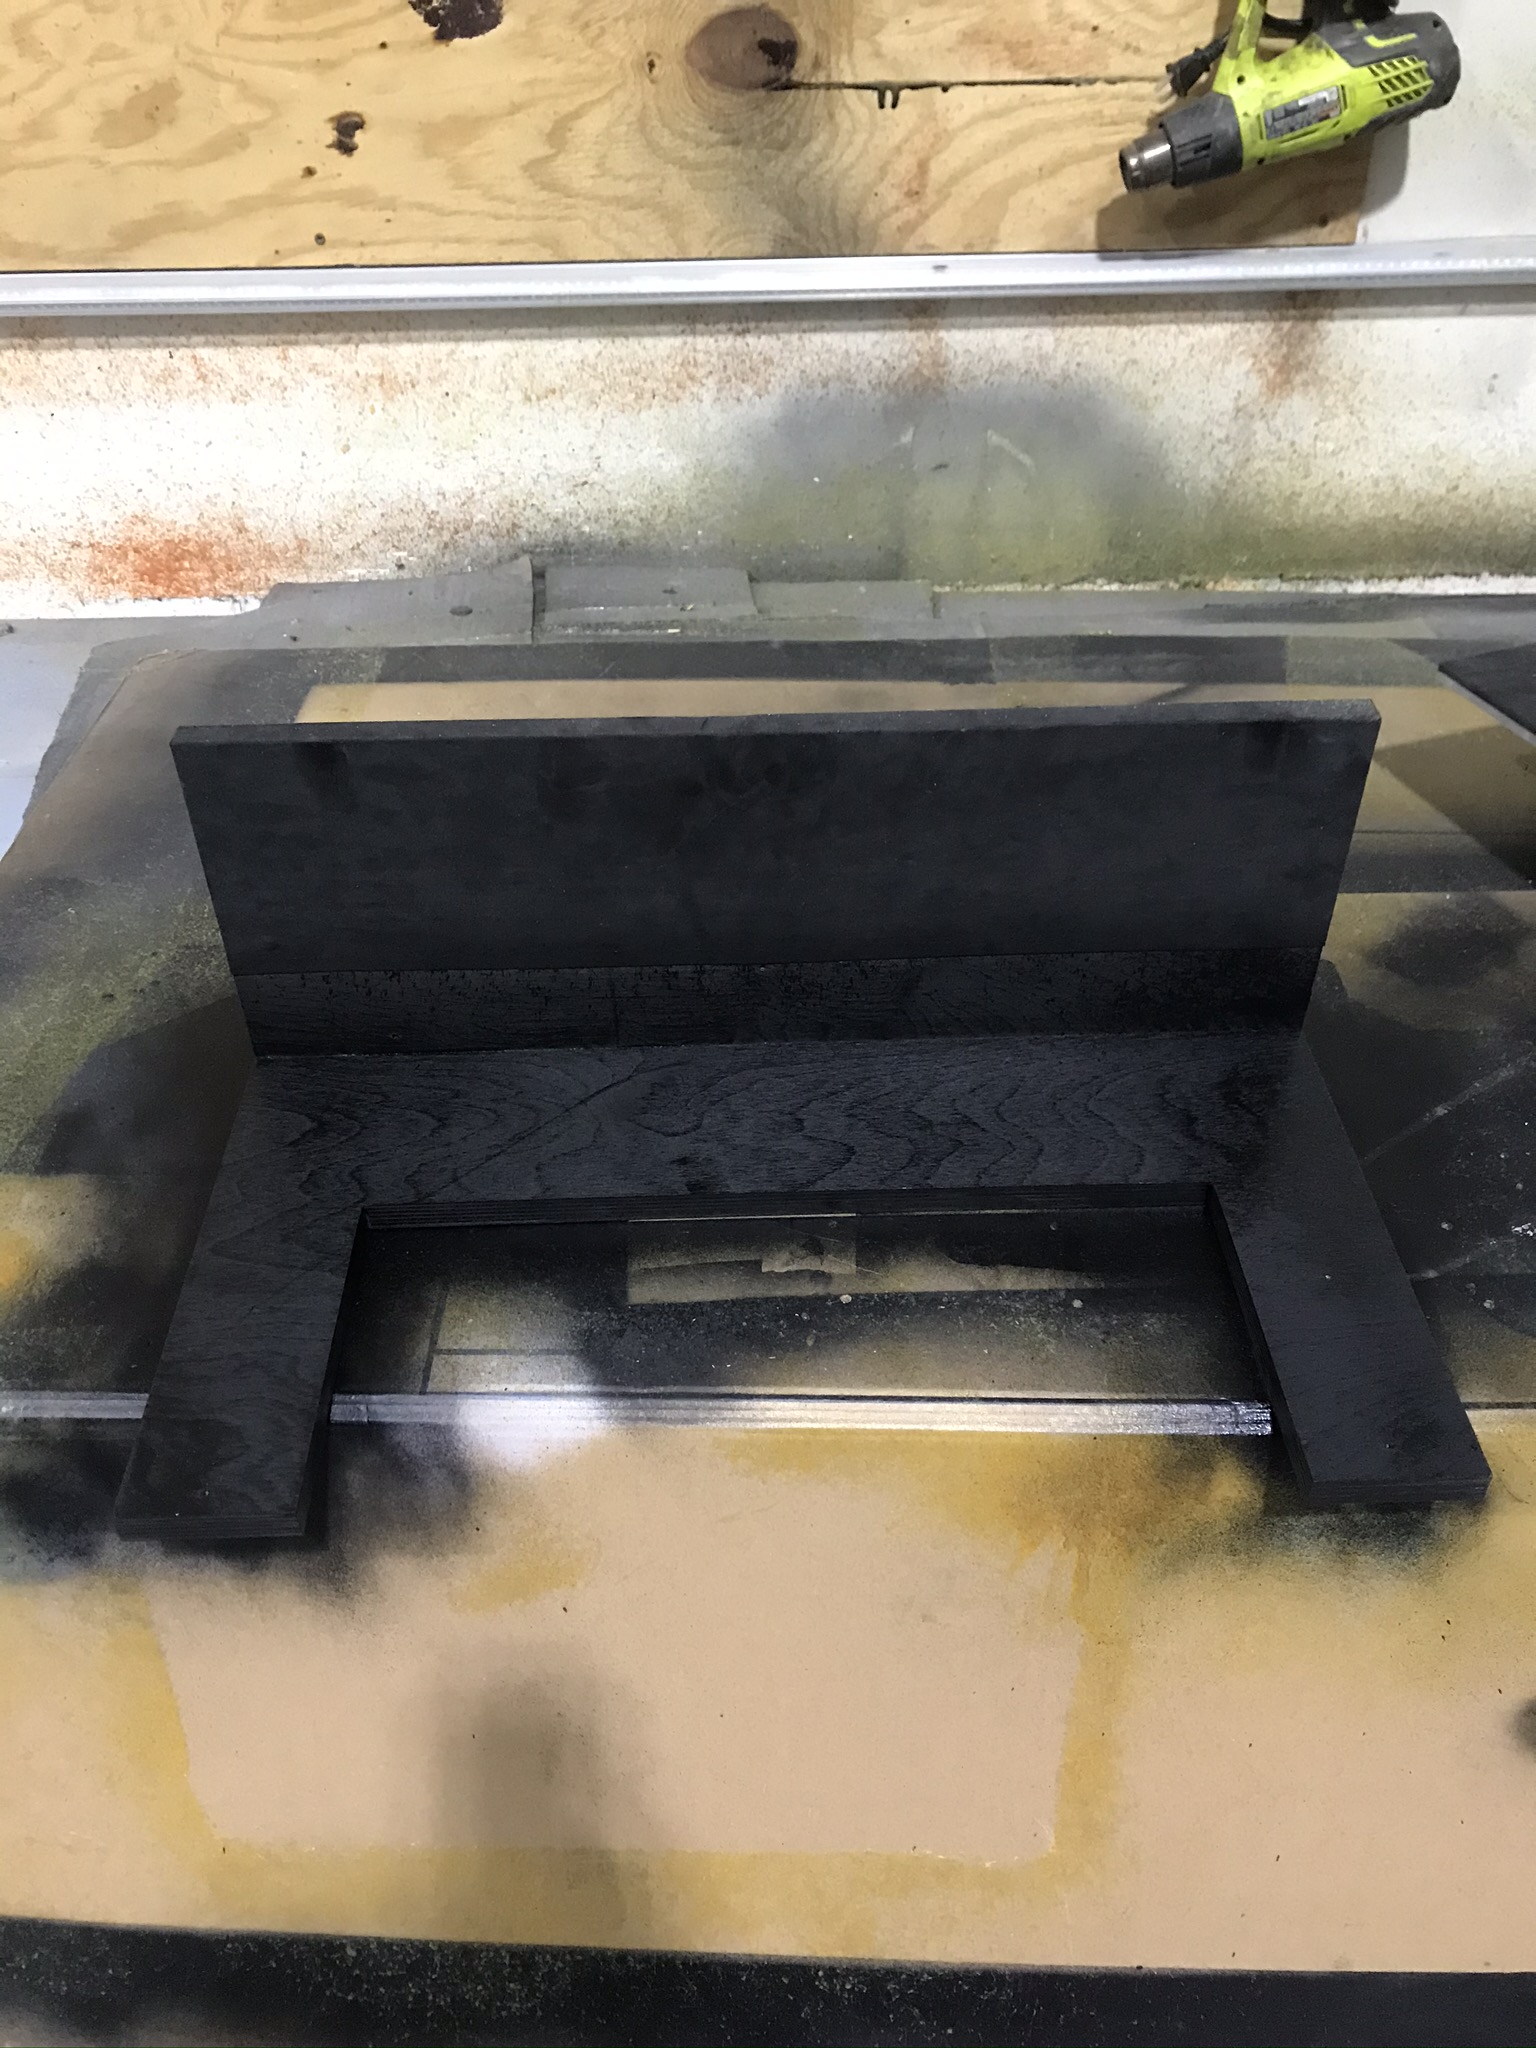
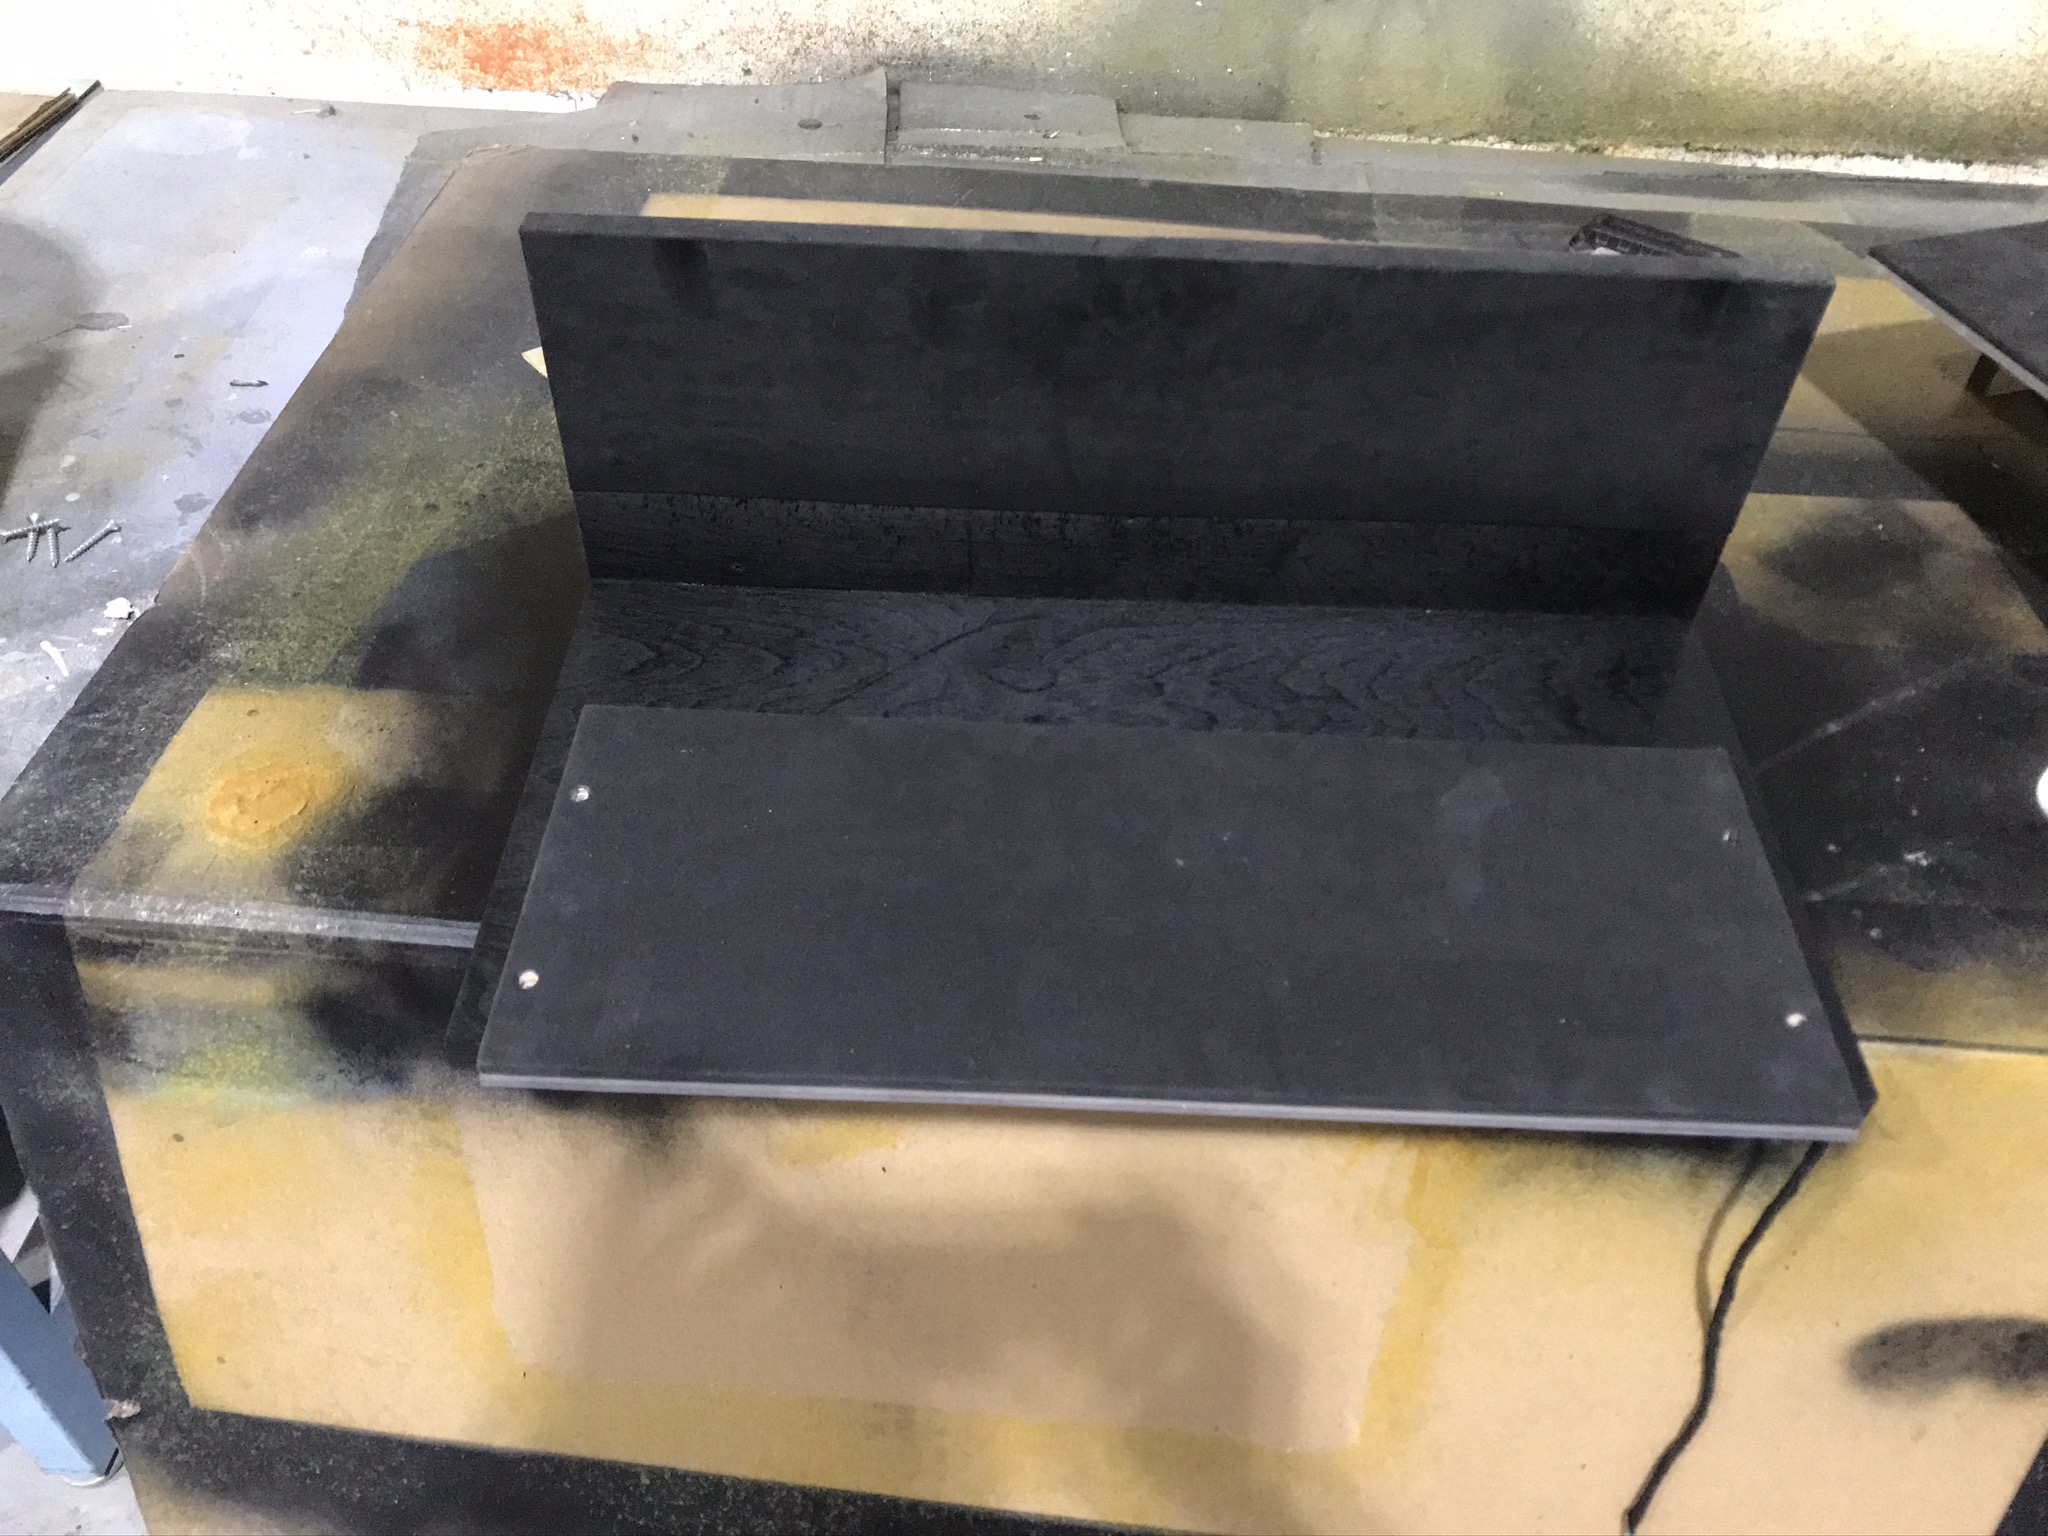
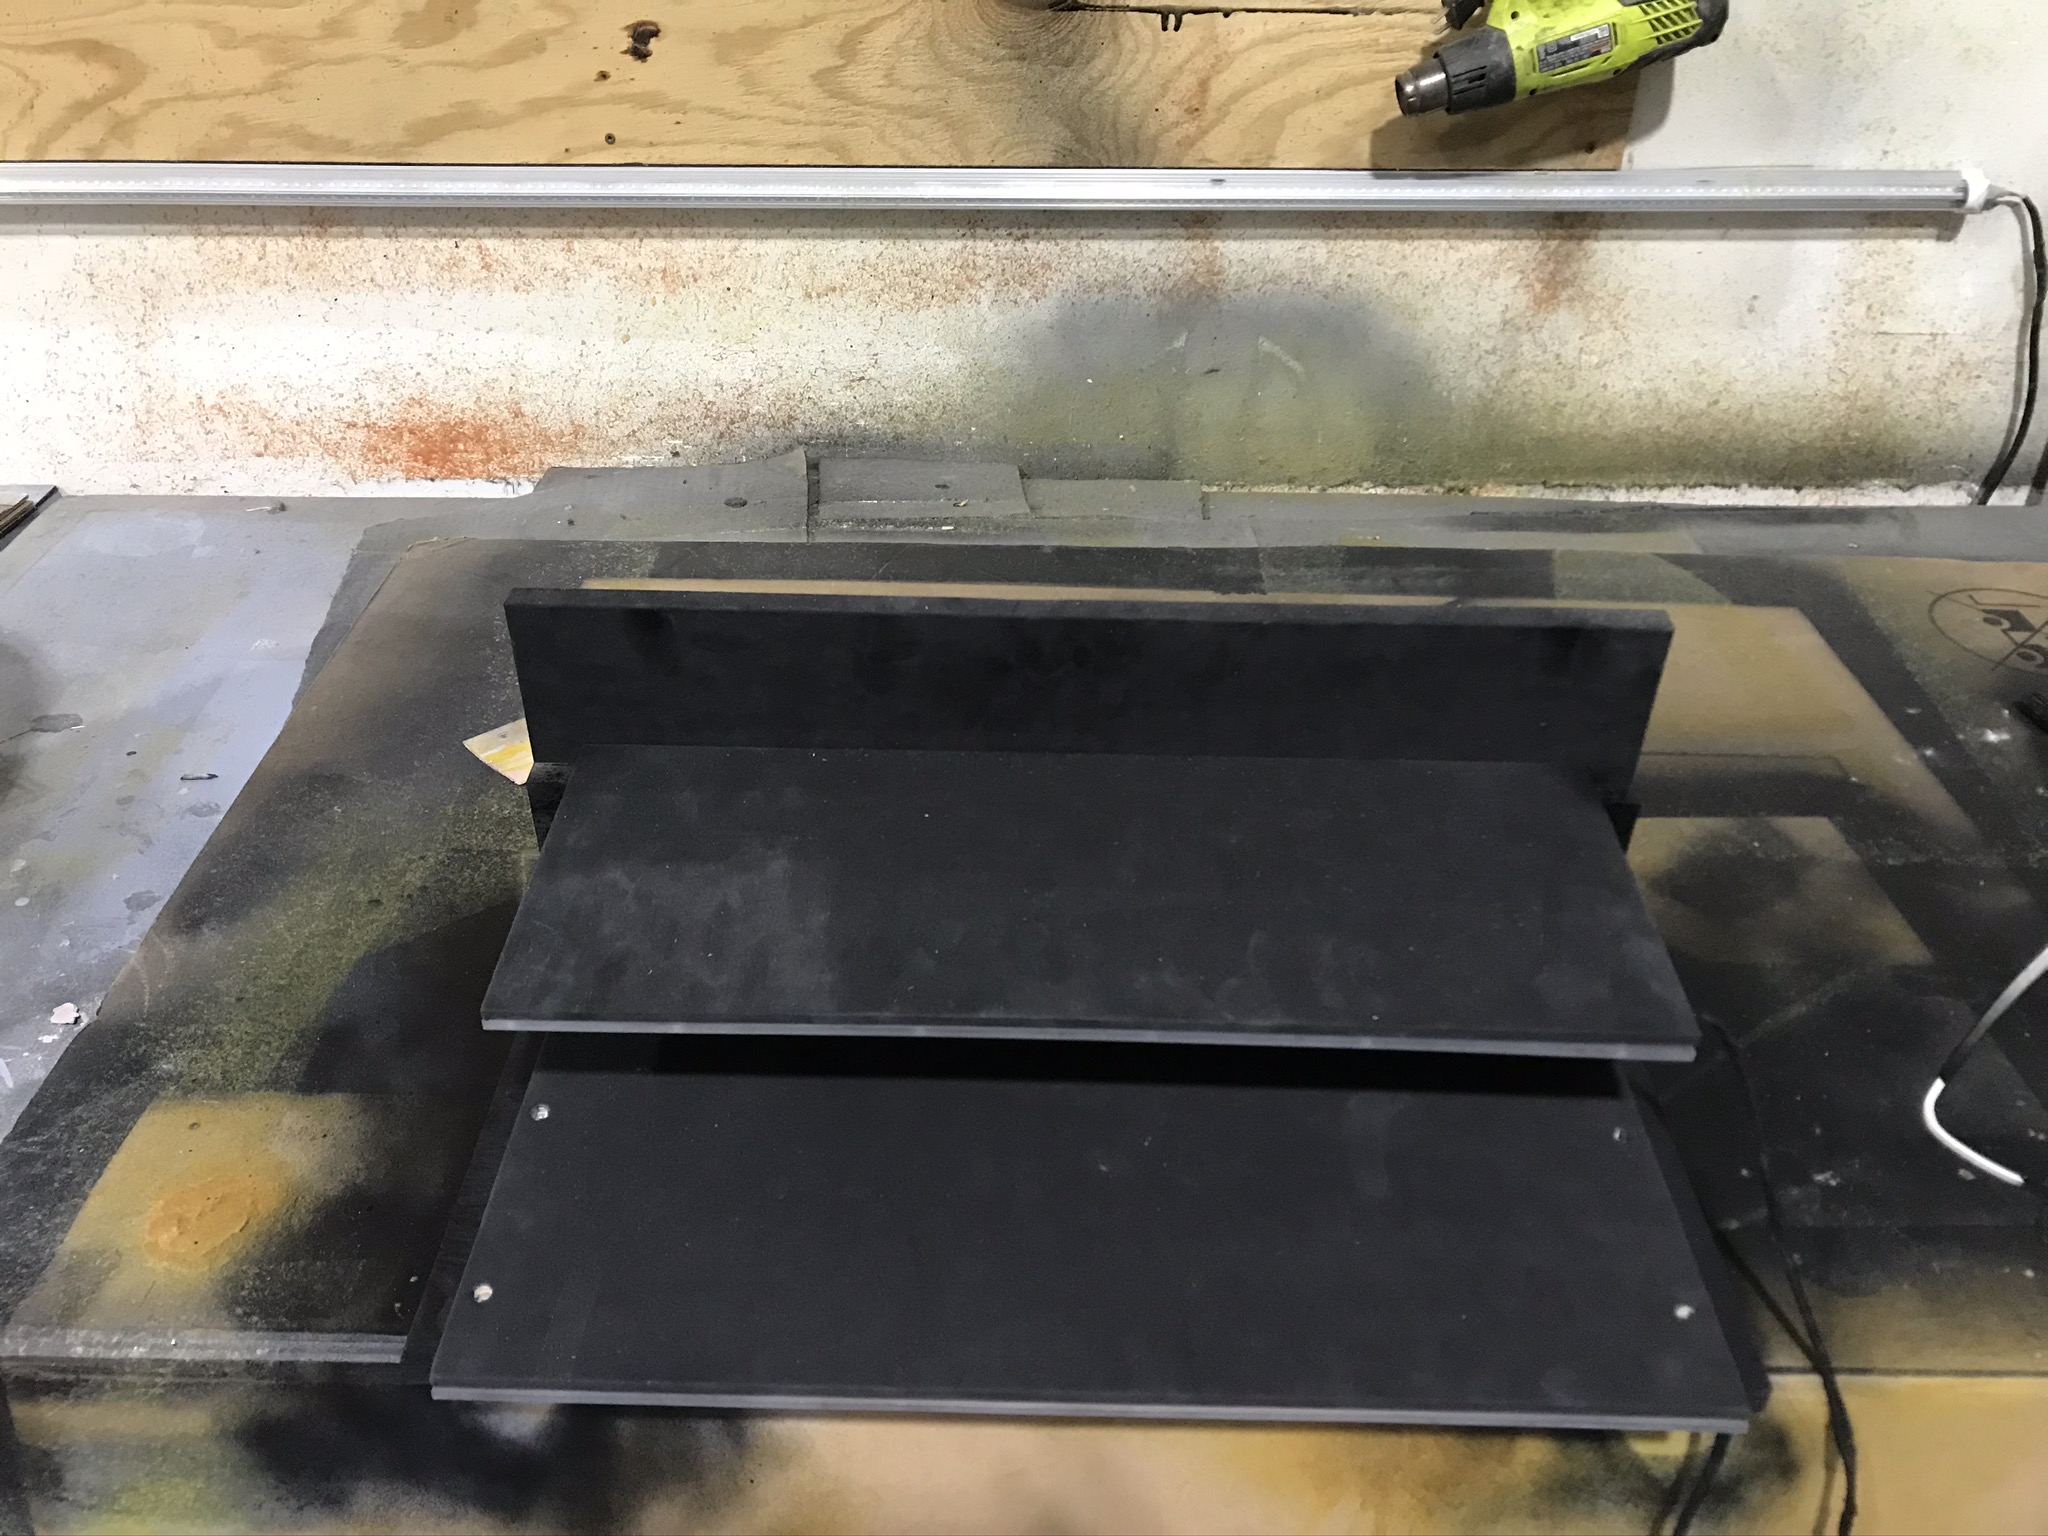
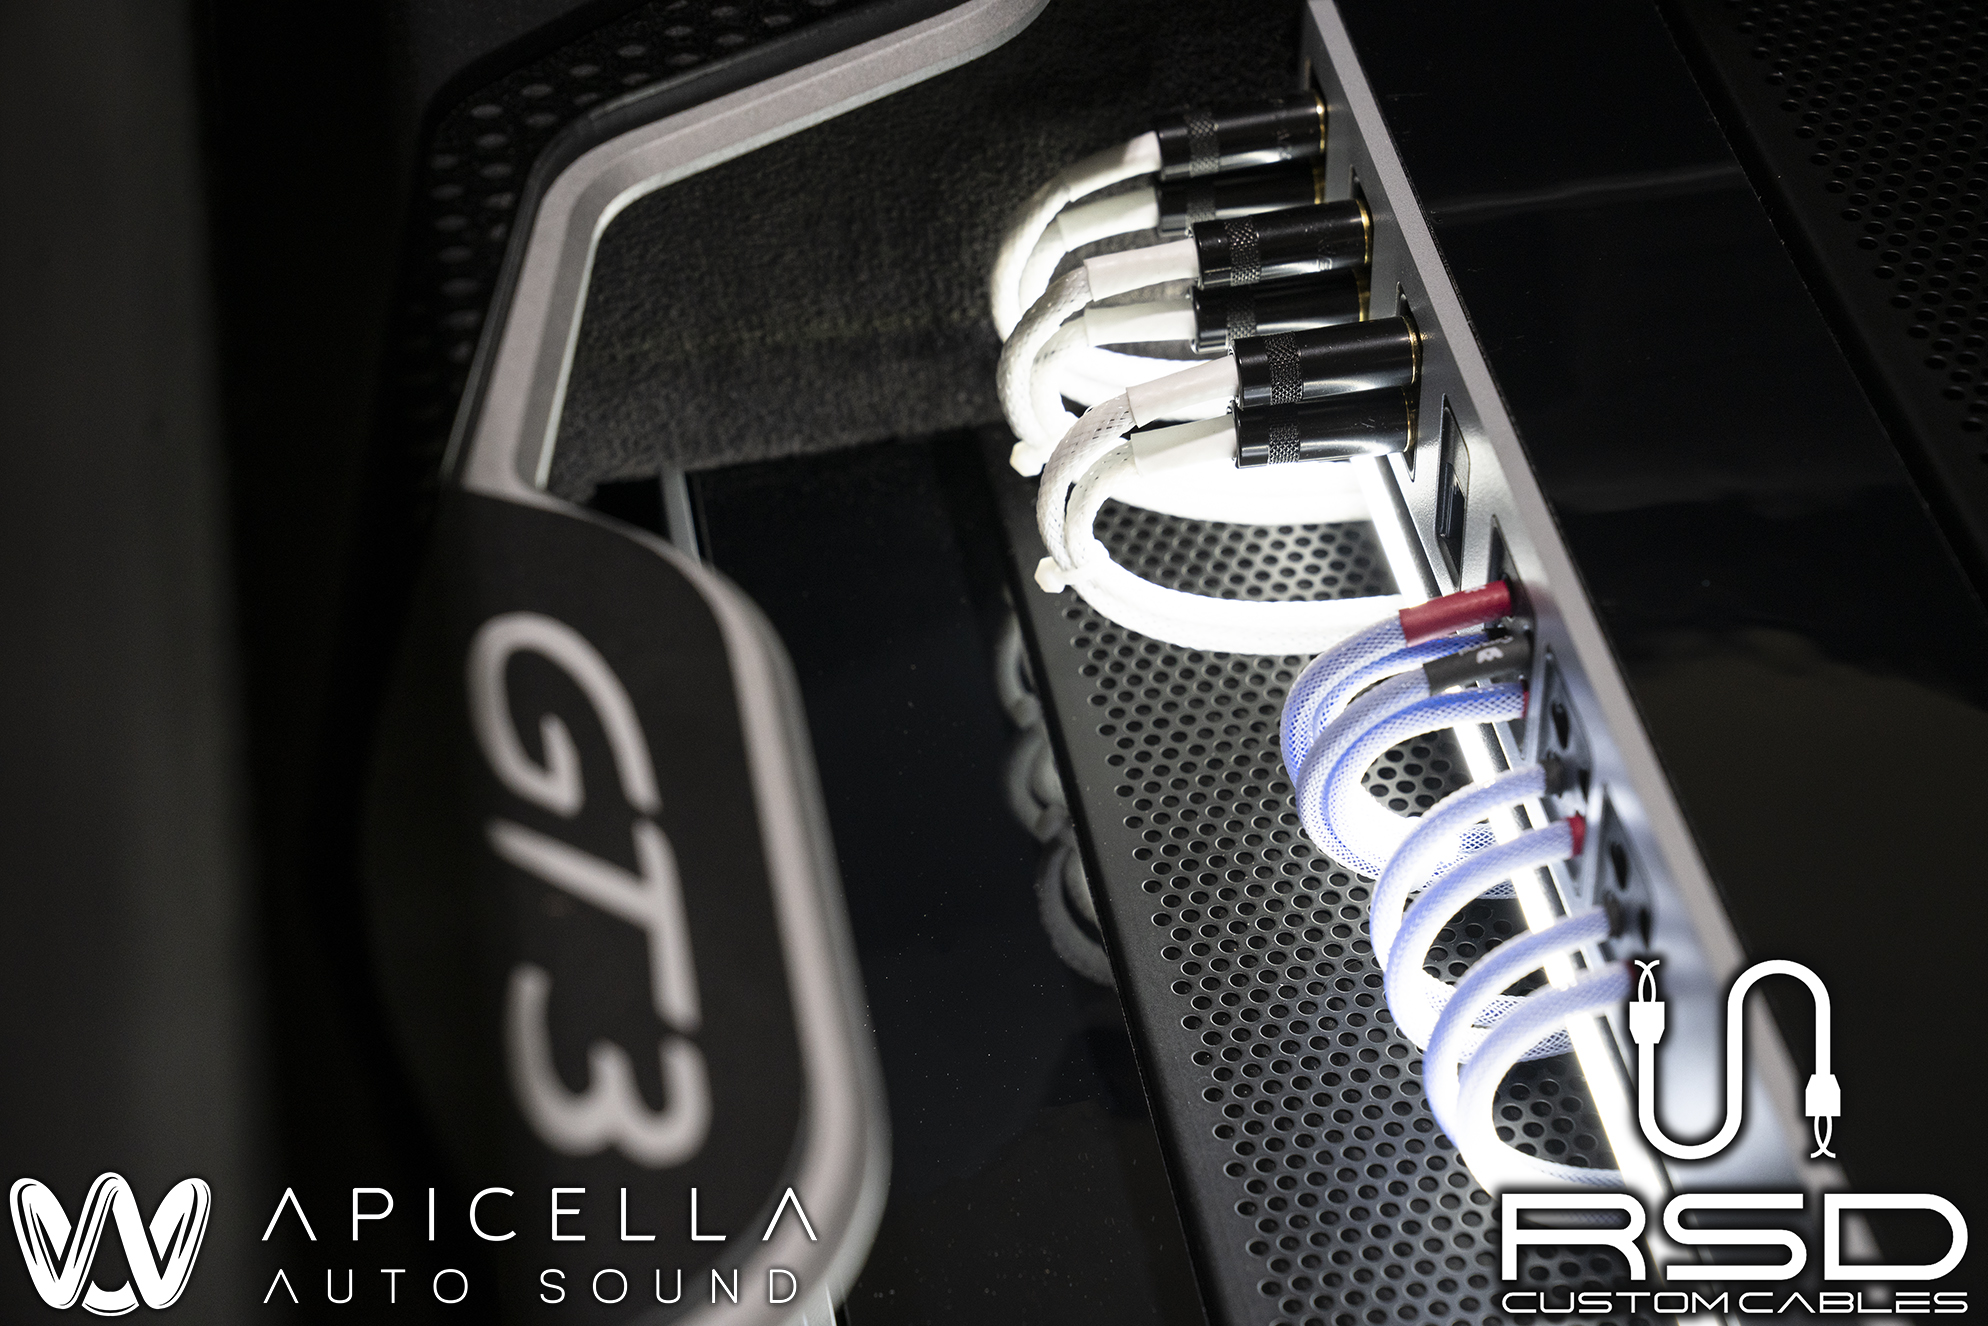
Here is the start of the amp rack, housing the pair of Mosconi Pro 5|30 amplifiers. These were made out of Baltic Birch. No MDF is used here at Apicella Auto Sound. We went with a stair-step design and lit just the edge to provide some ambient light and give the trunk some character. Not too much though, since you don't want to get cheesy in a Porsche.
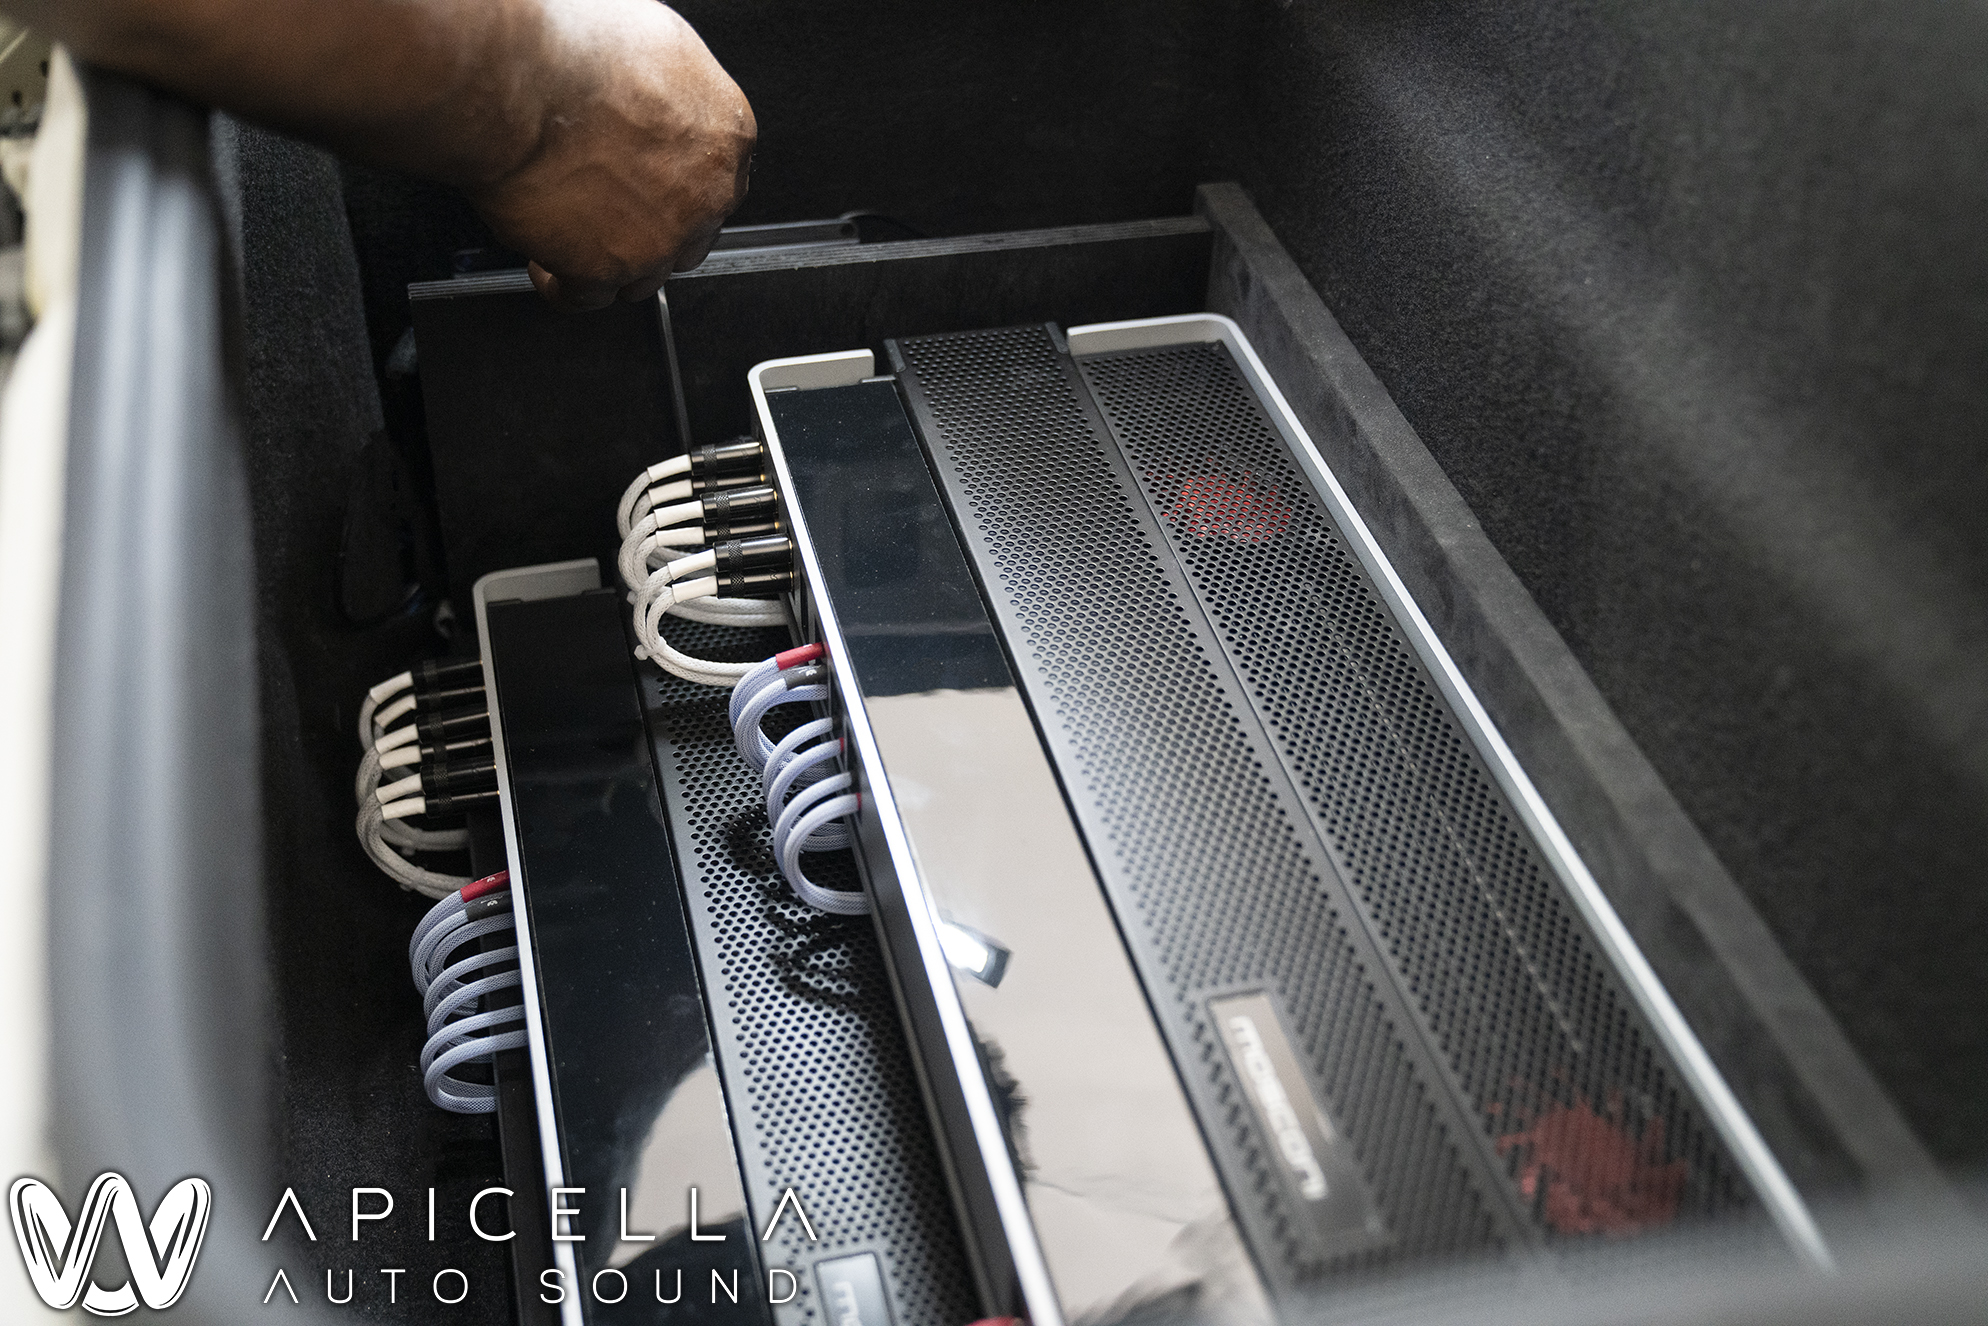
Amp rack installed and wired. We opted to go with RSD Custom Cables, as we always do with our high-end builds. Check them out on Facebook. Good custom cables for a good price.
And here's where the new laser came in. This would not have been possible without it, let alone at the ease and speed I managed to do it at even though it was my first time designing a trunks beauty panel in CAD.

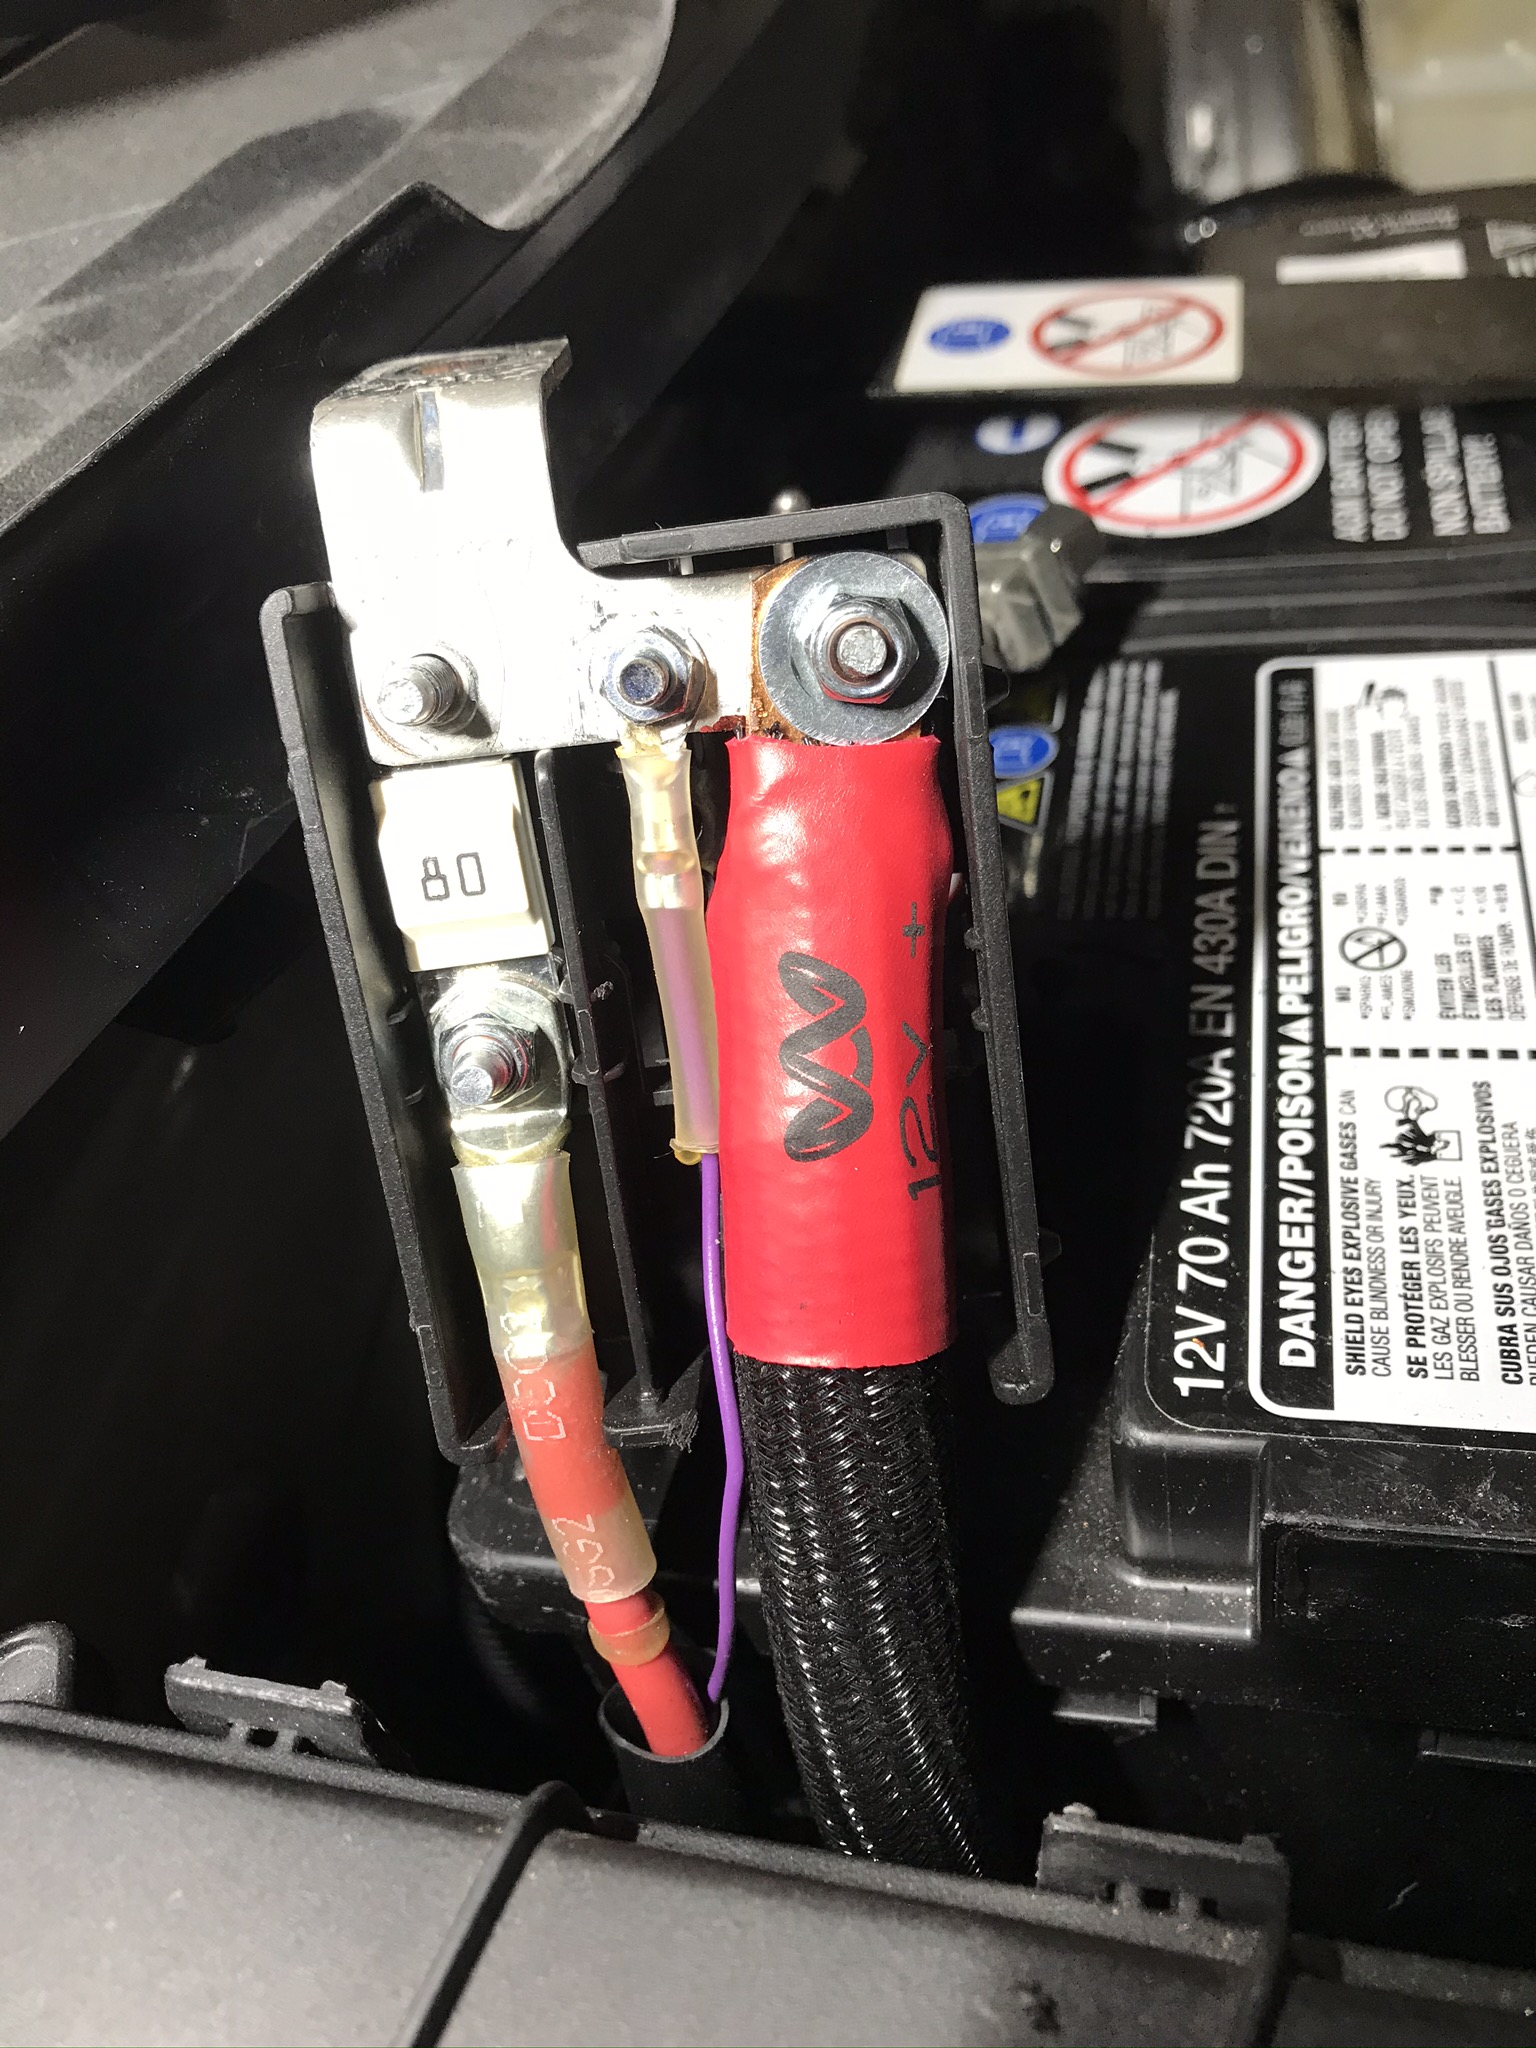
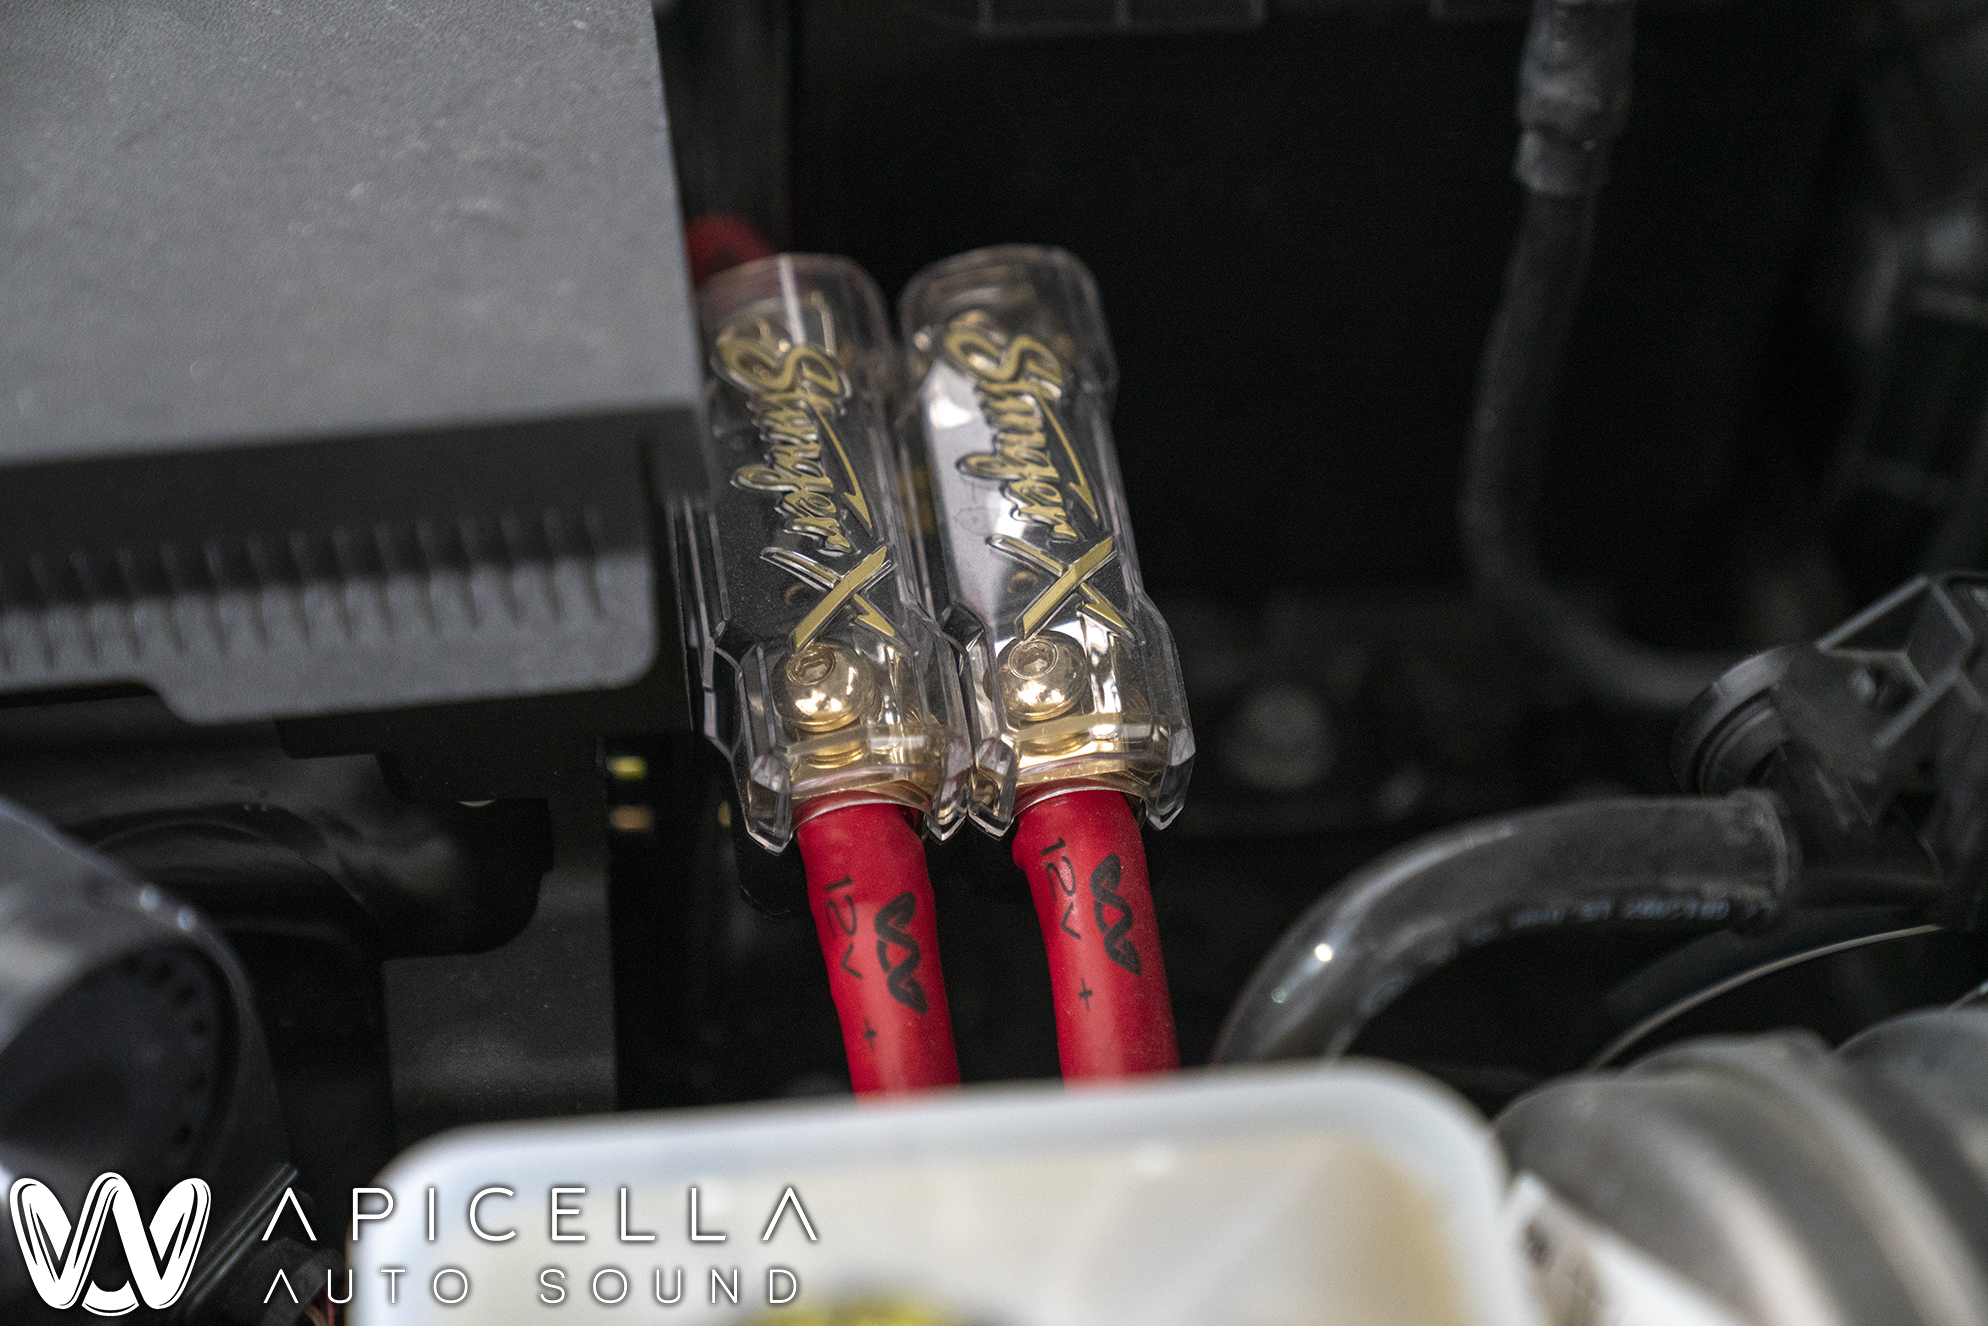
Our power wire and fuse holder install. We used a metal bracket that secured to OEM bolts to secure the fuse holders in place.
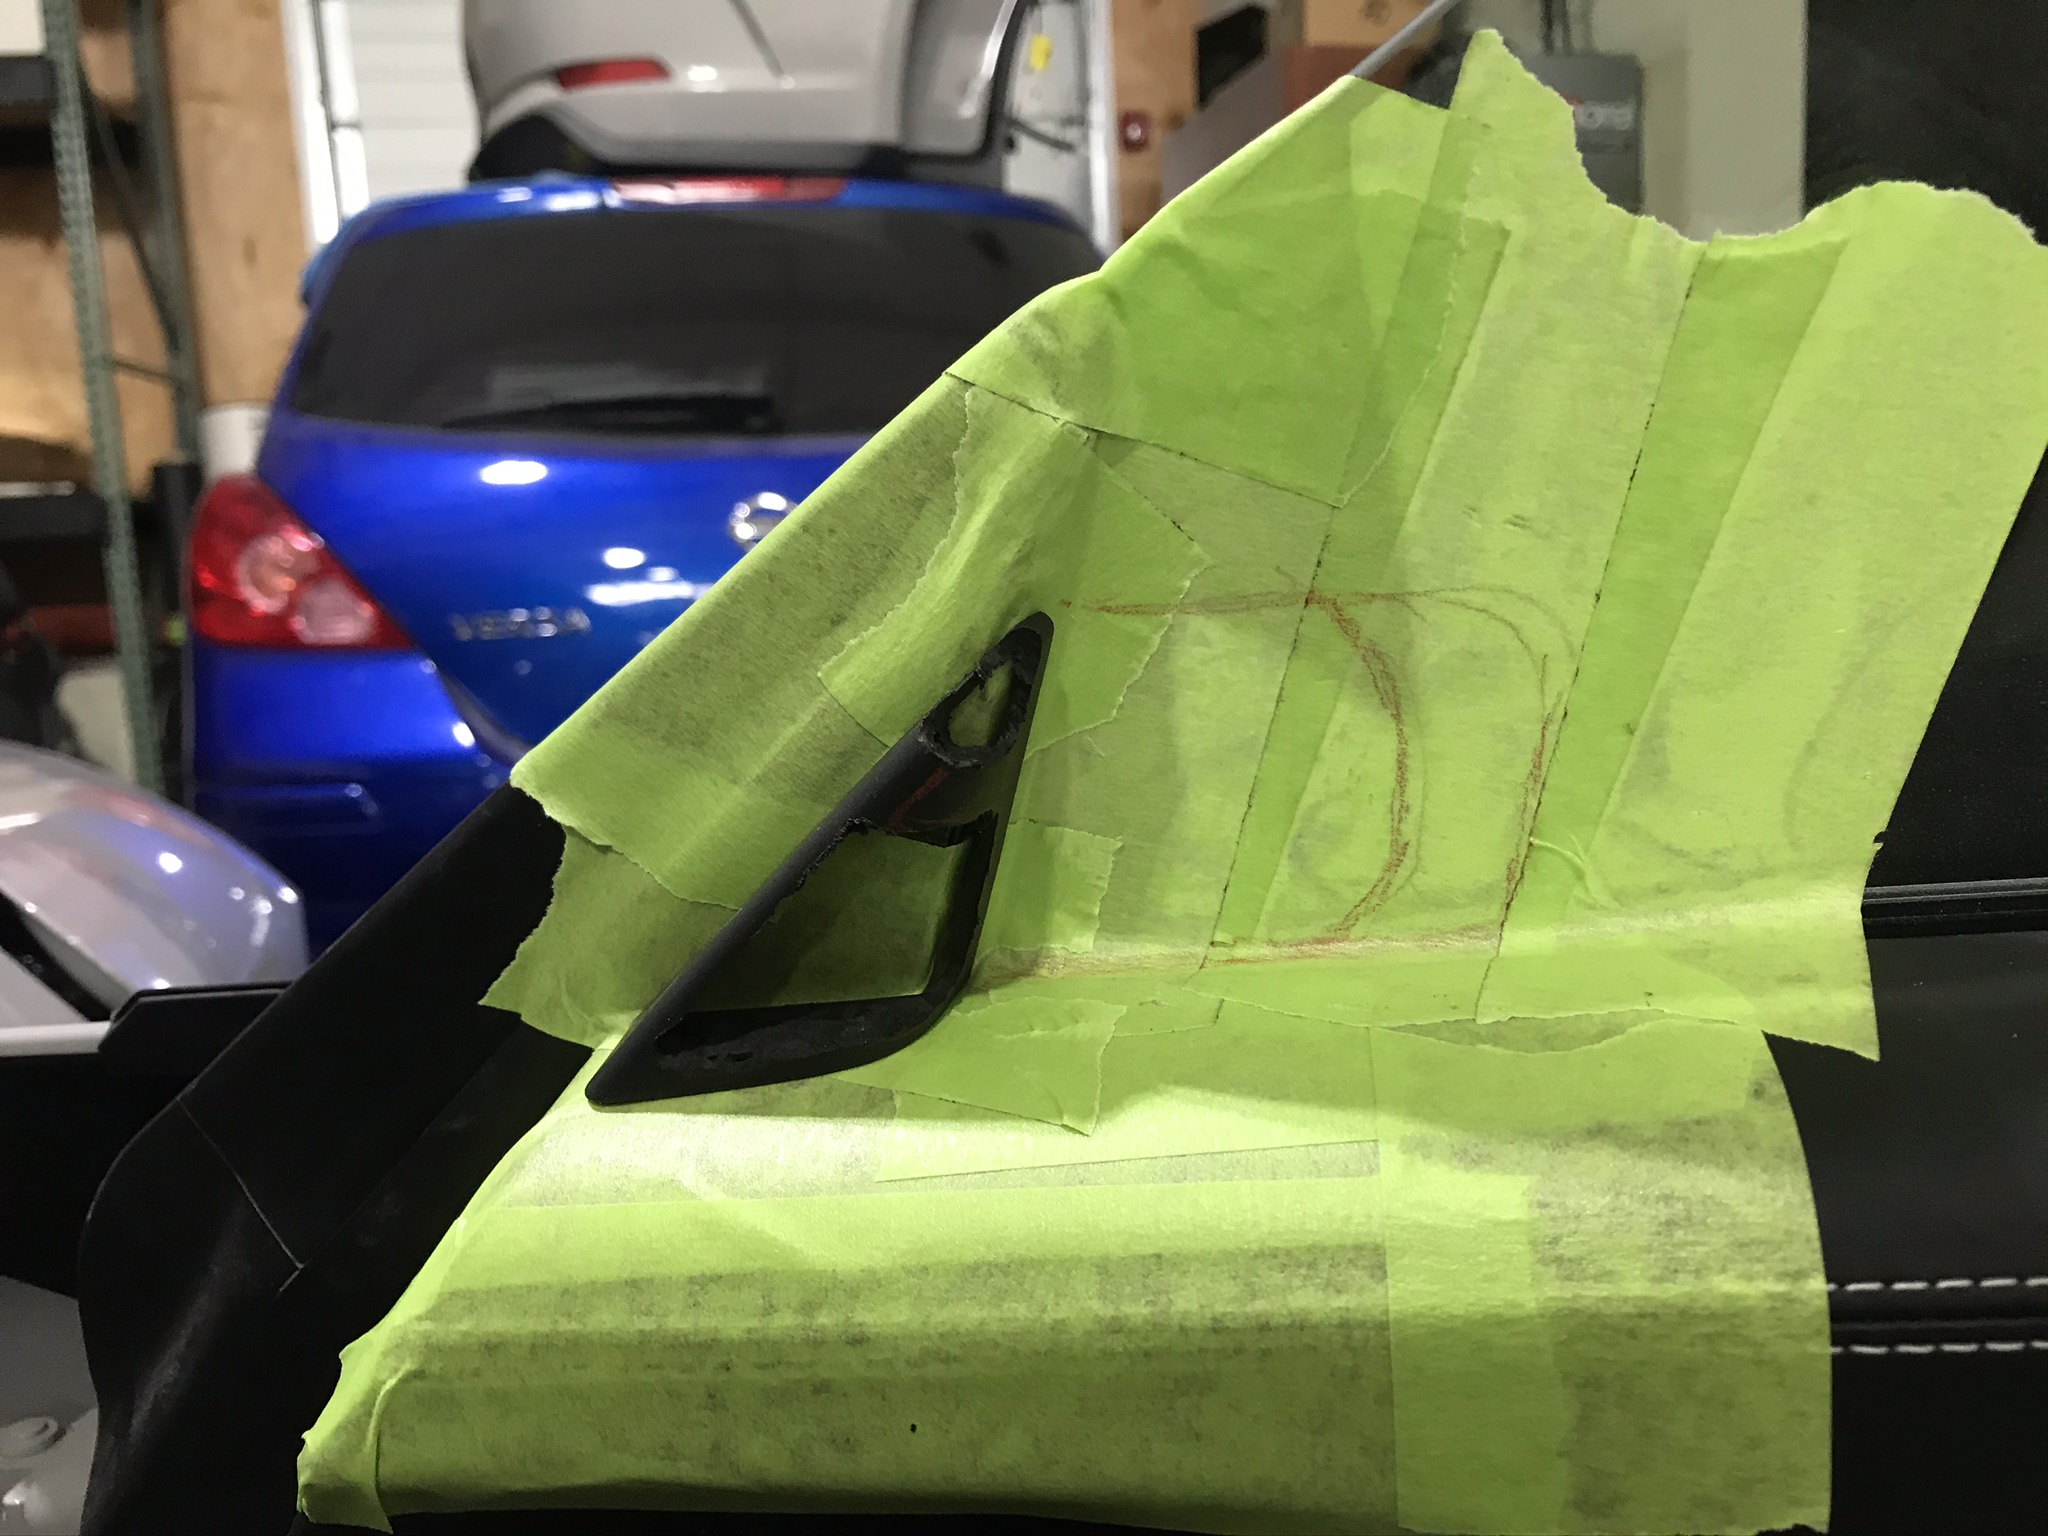
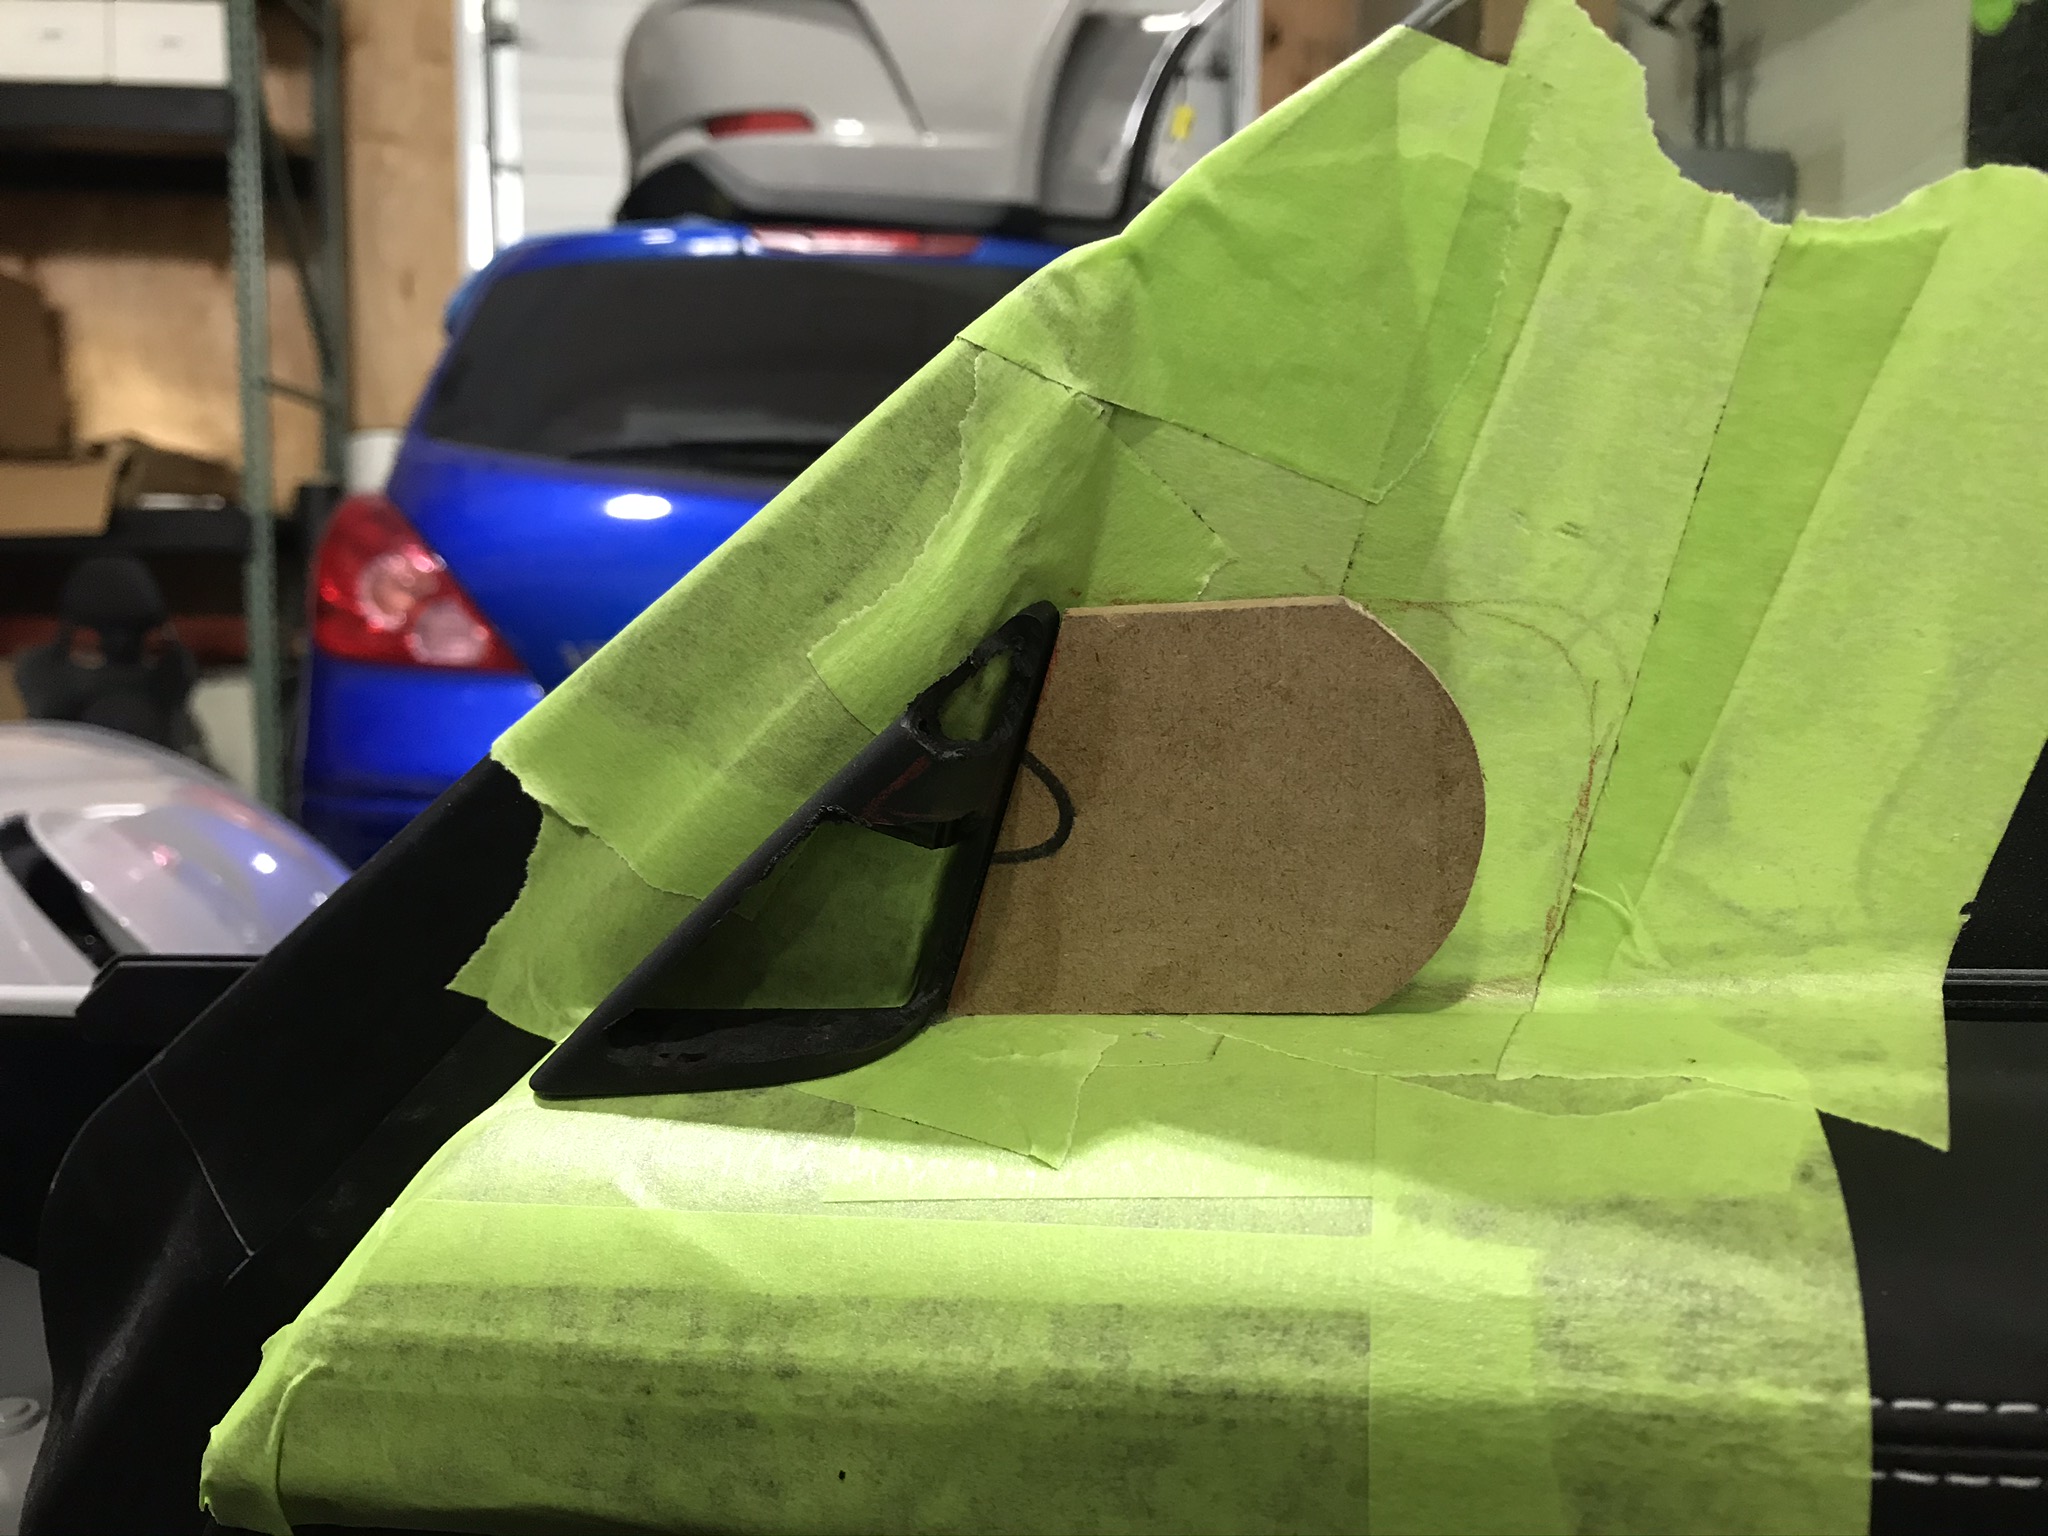
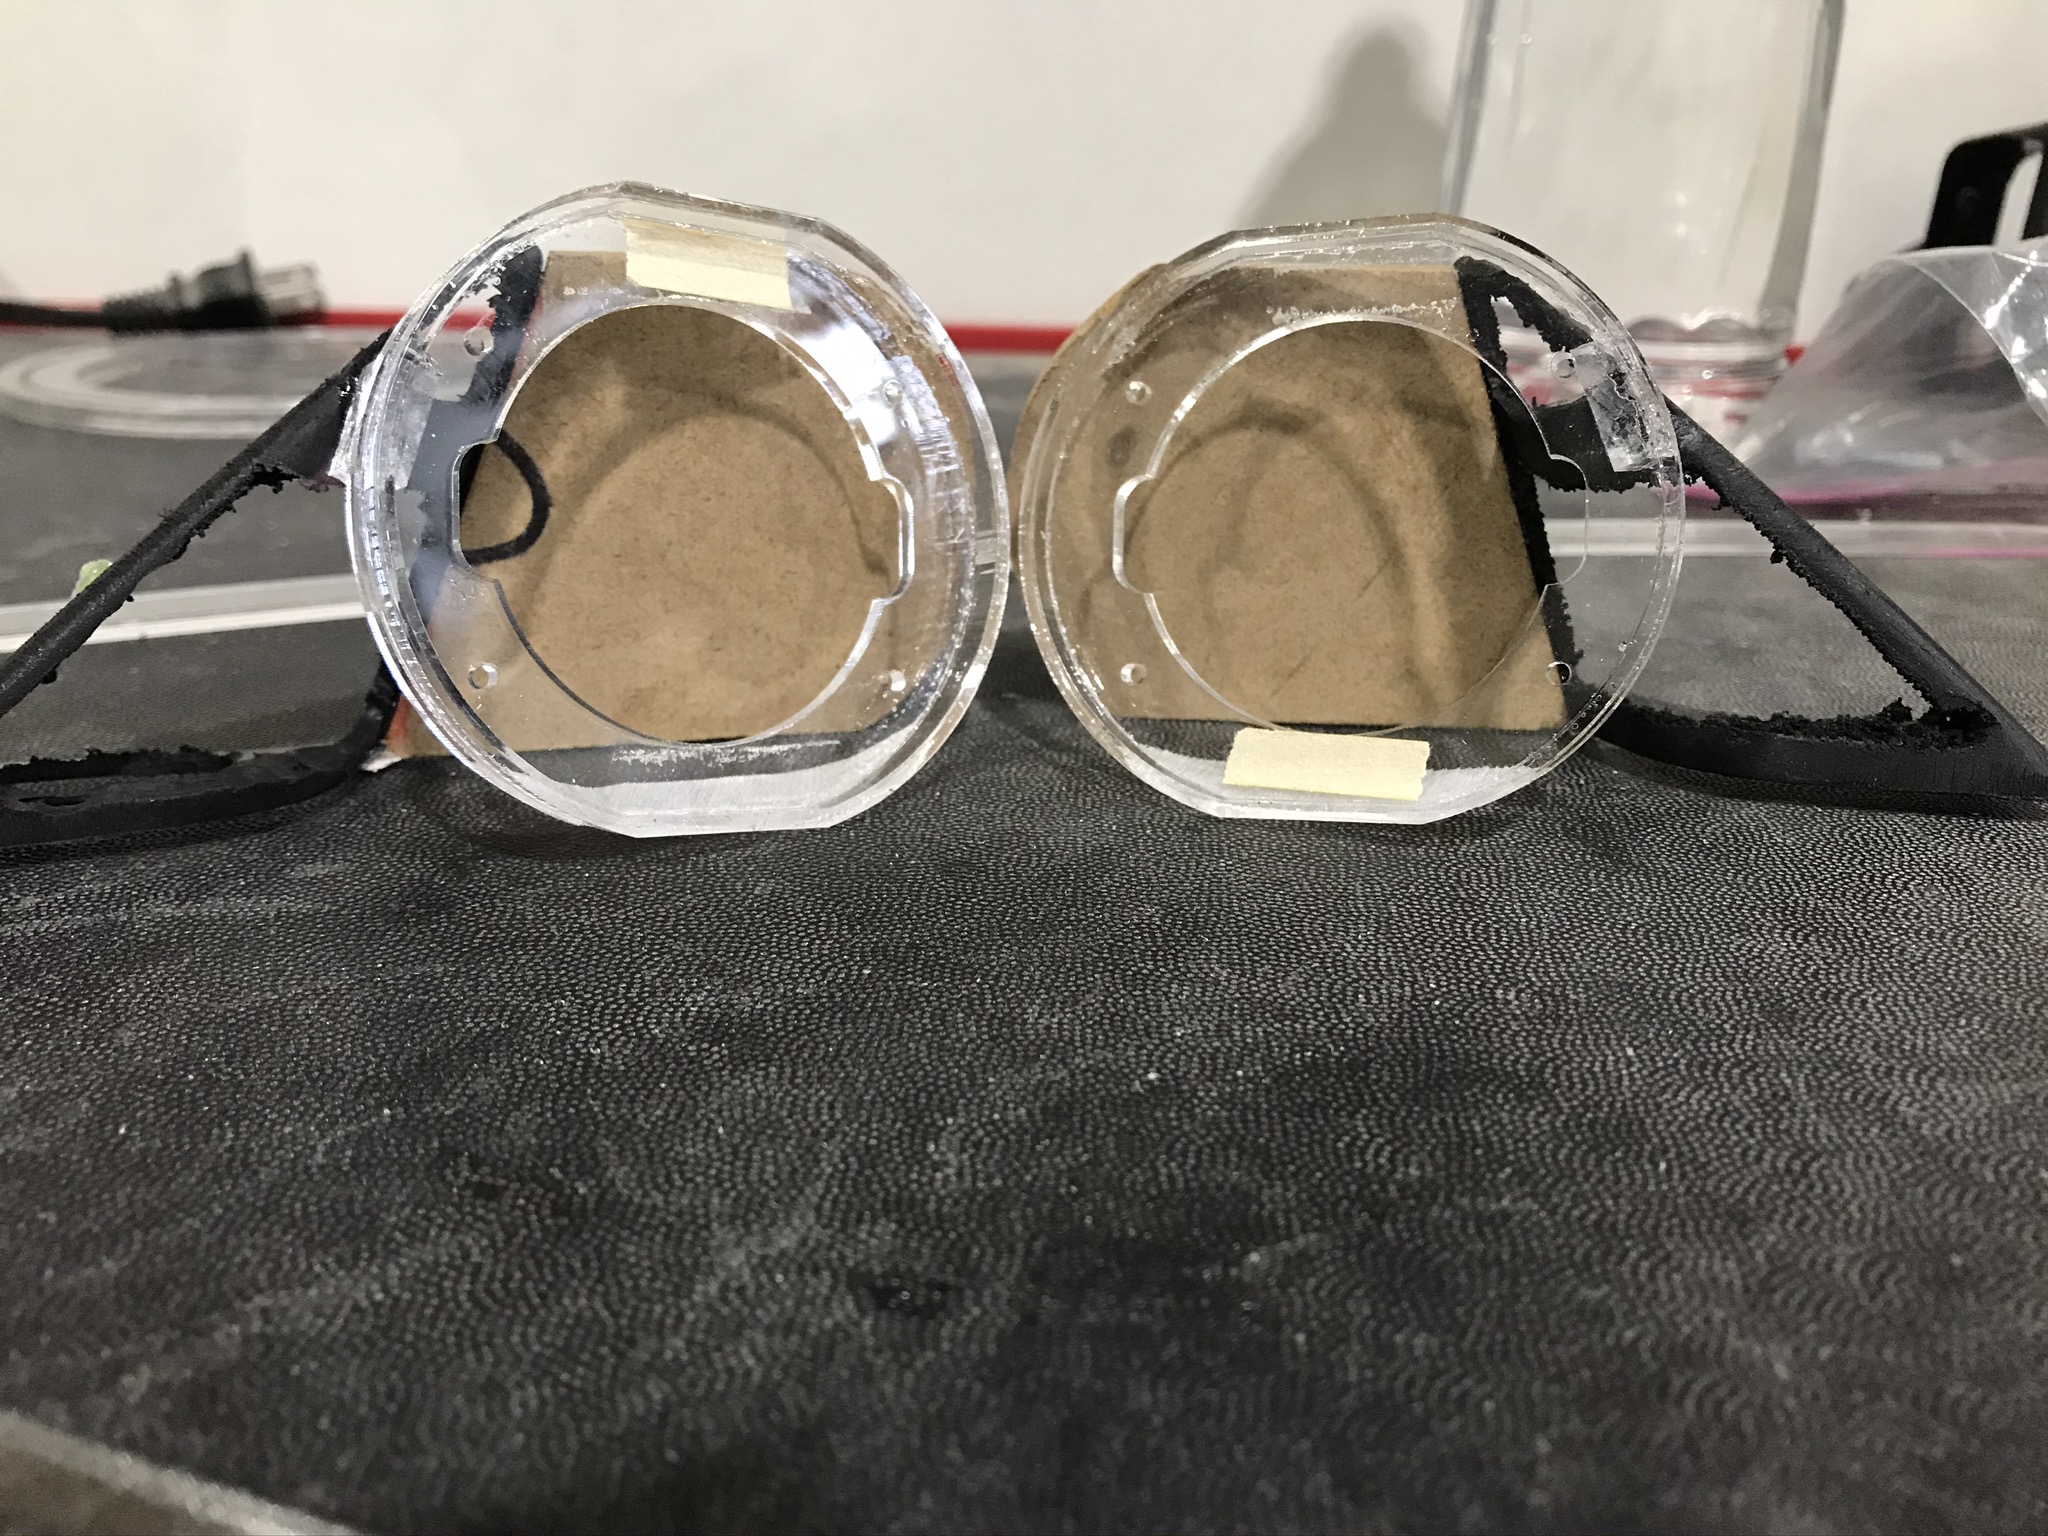
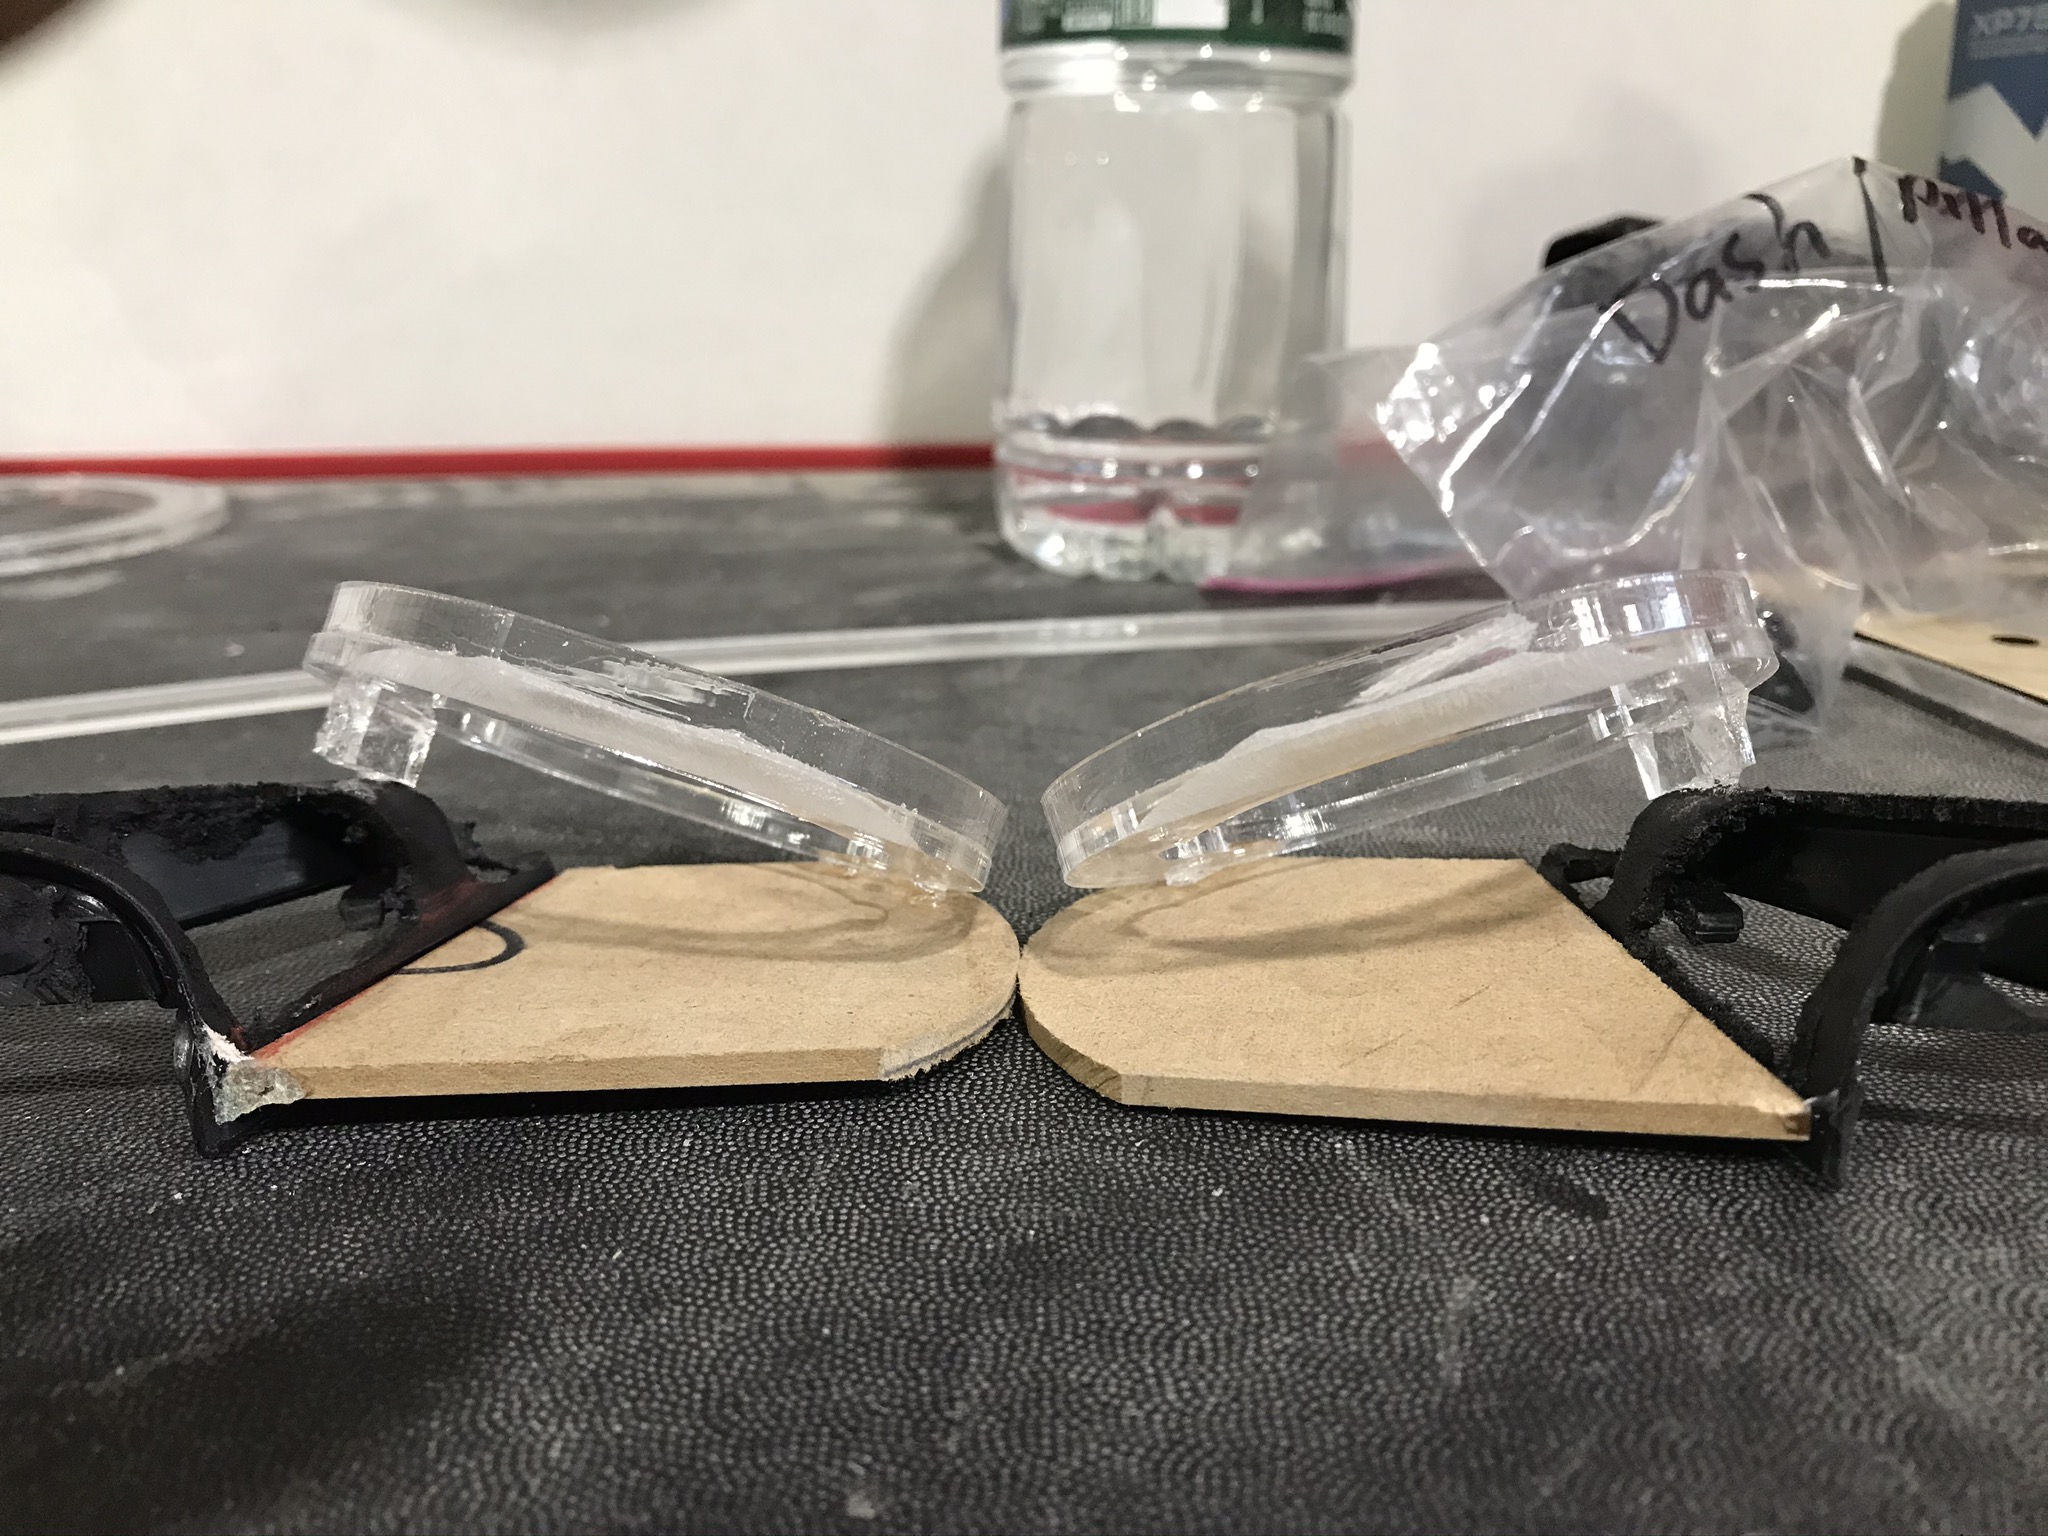
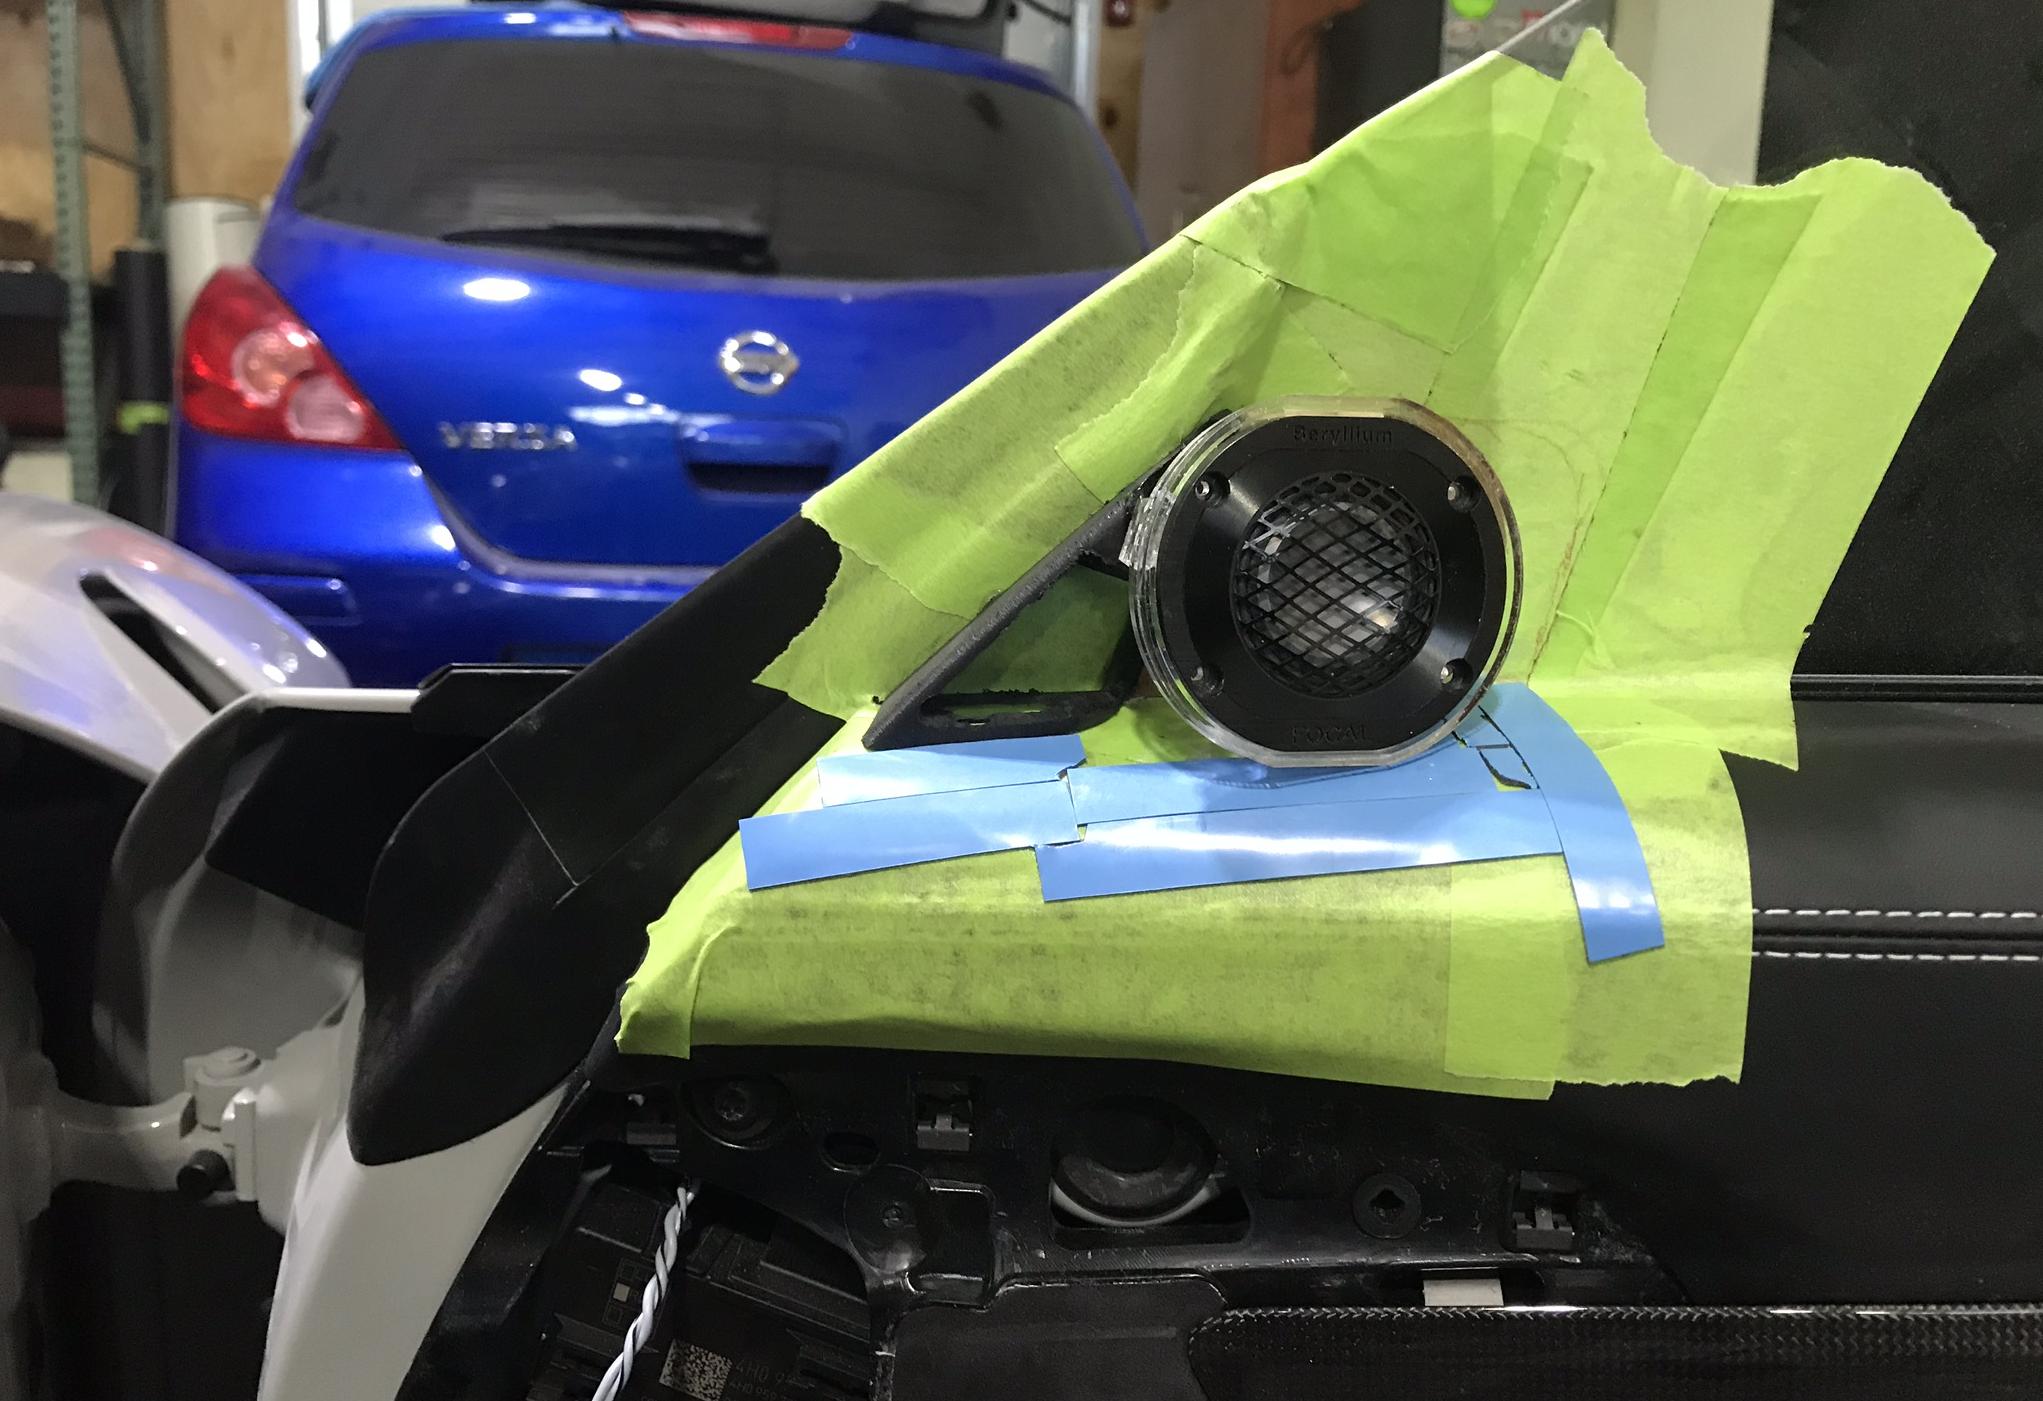
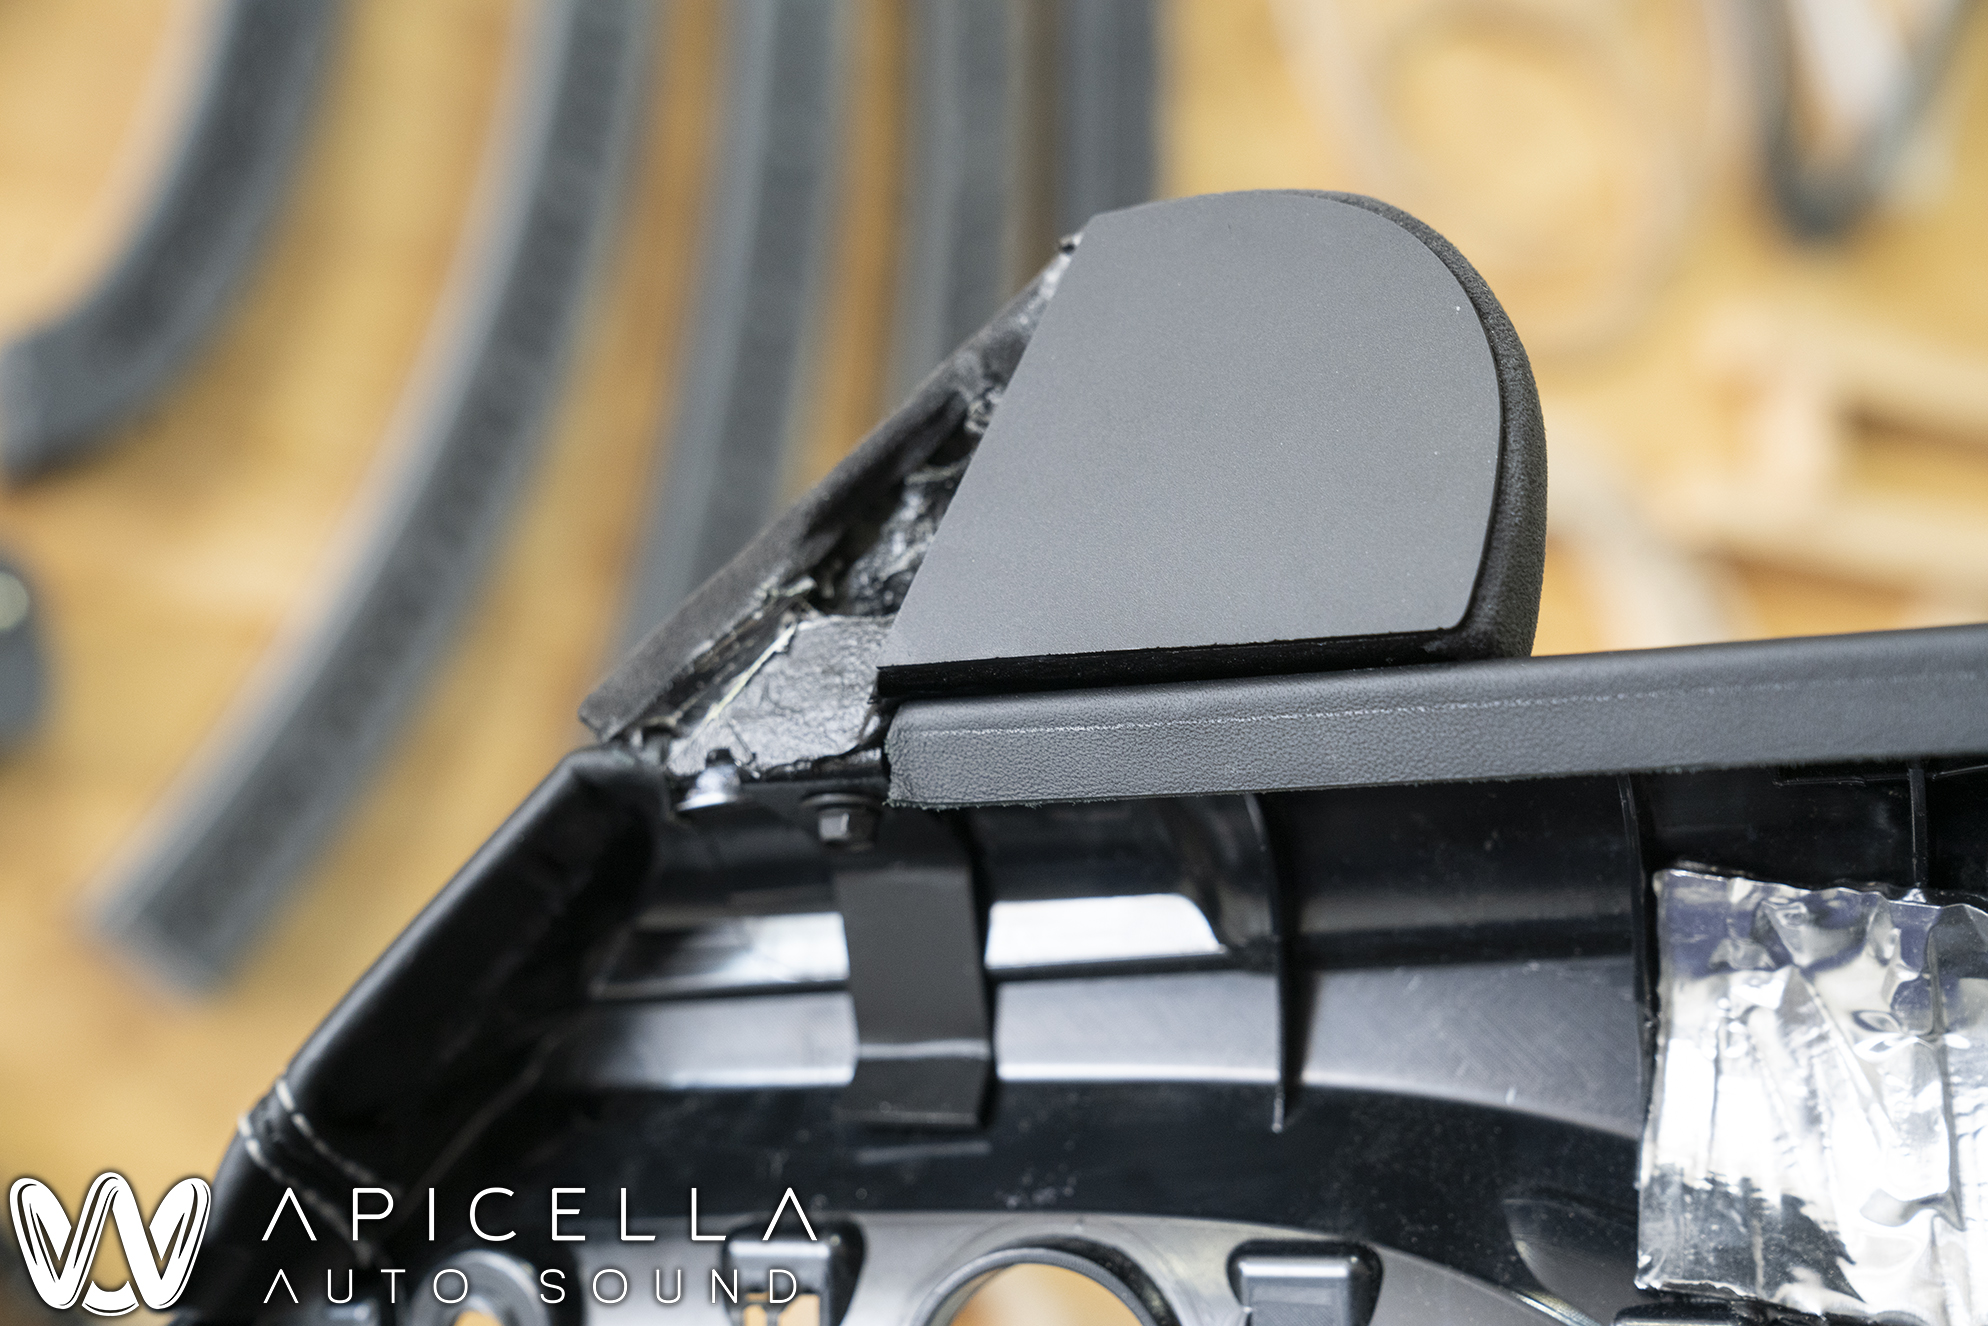
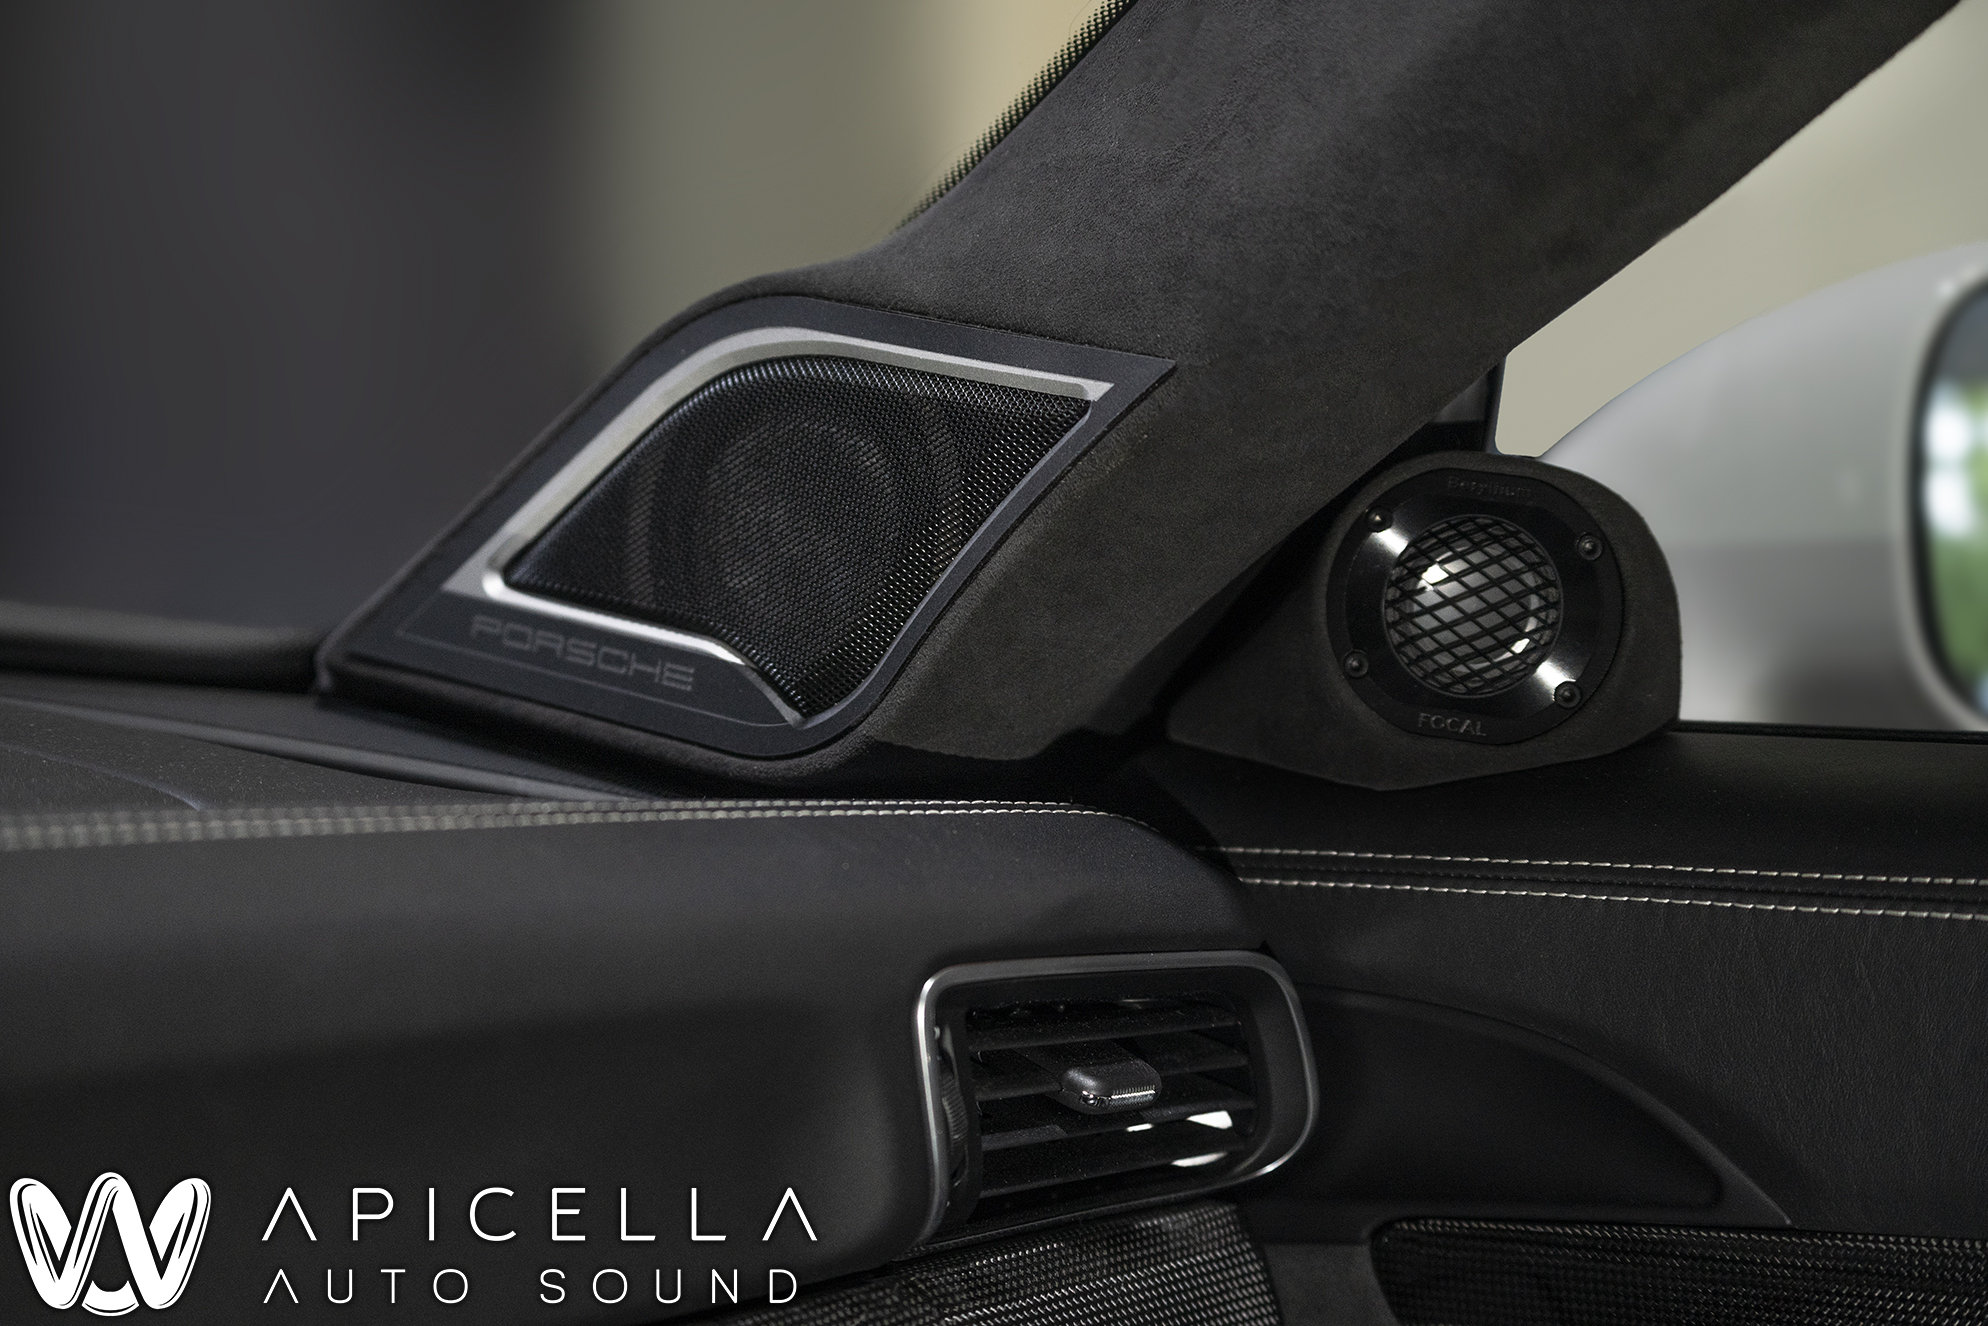
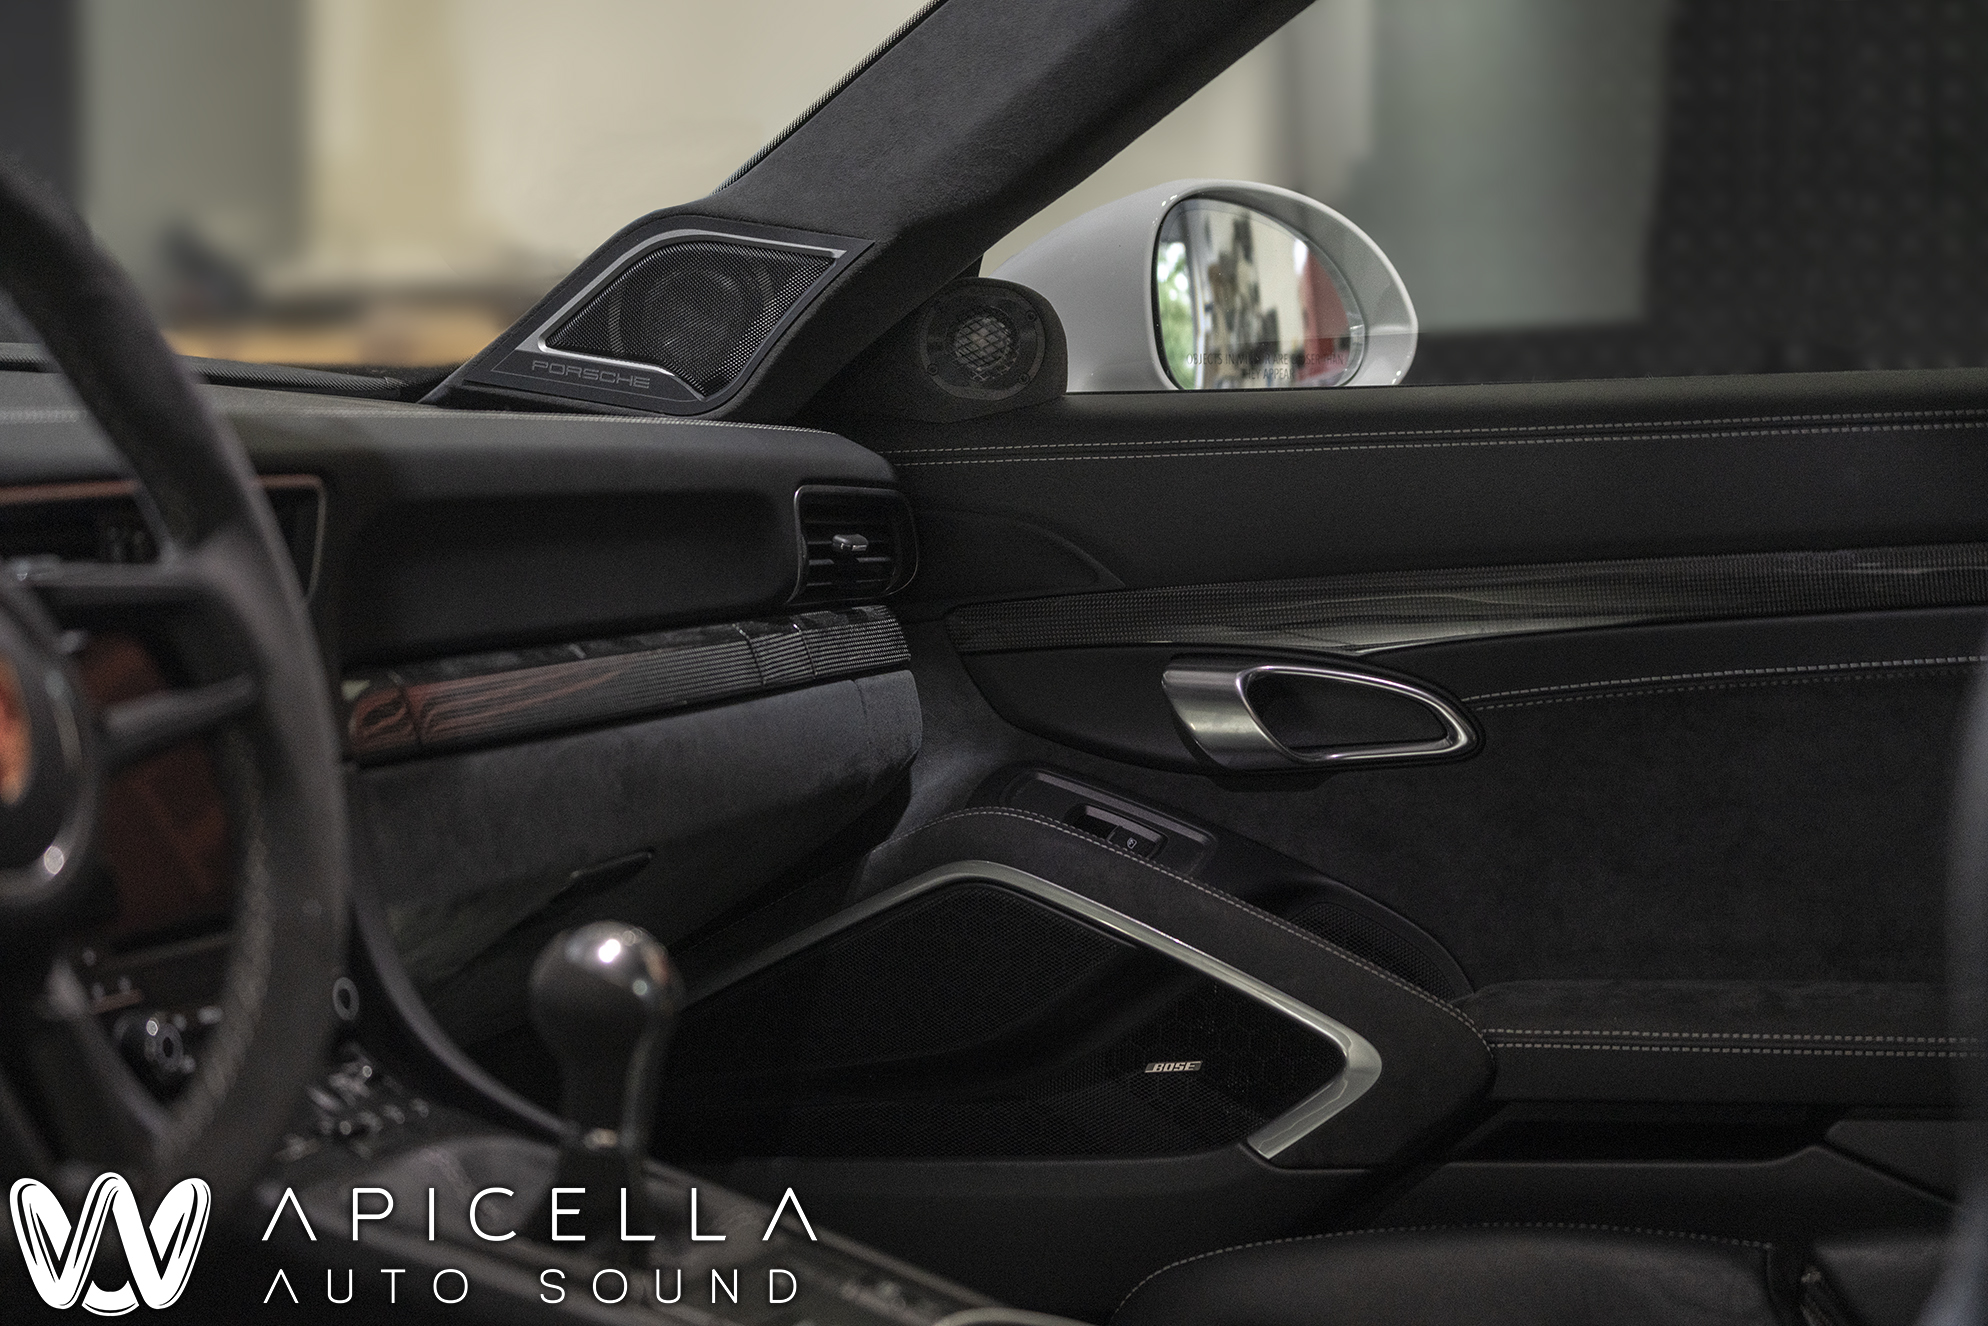
From here, the sail panels were started. We came up with a great mounting solution here as well. Some of the OEM sail panel was retained to keep the little hook that holds it into place. Said hook is behind the "bridge" in the plastic of the panel. The rest of the mounting mechanism is shown in later pics. Baffles for the Focal Utopia TBM tweeters were lasered out and aimed and attached and ready to be glassed.
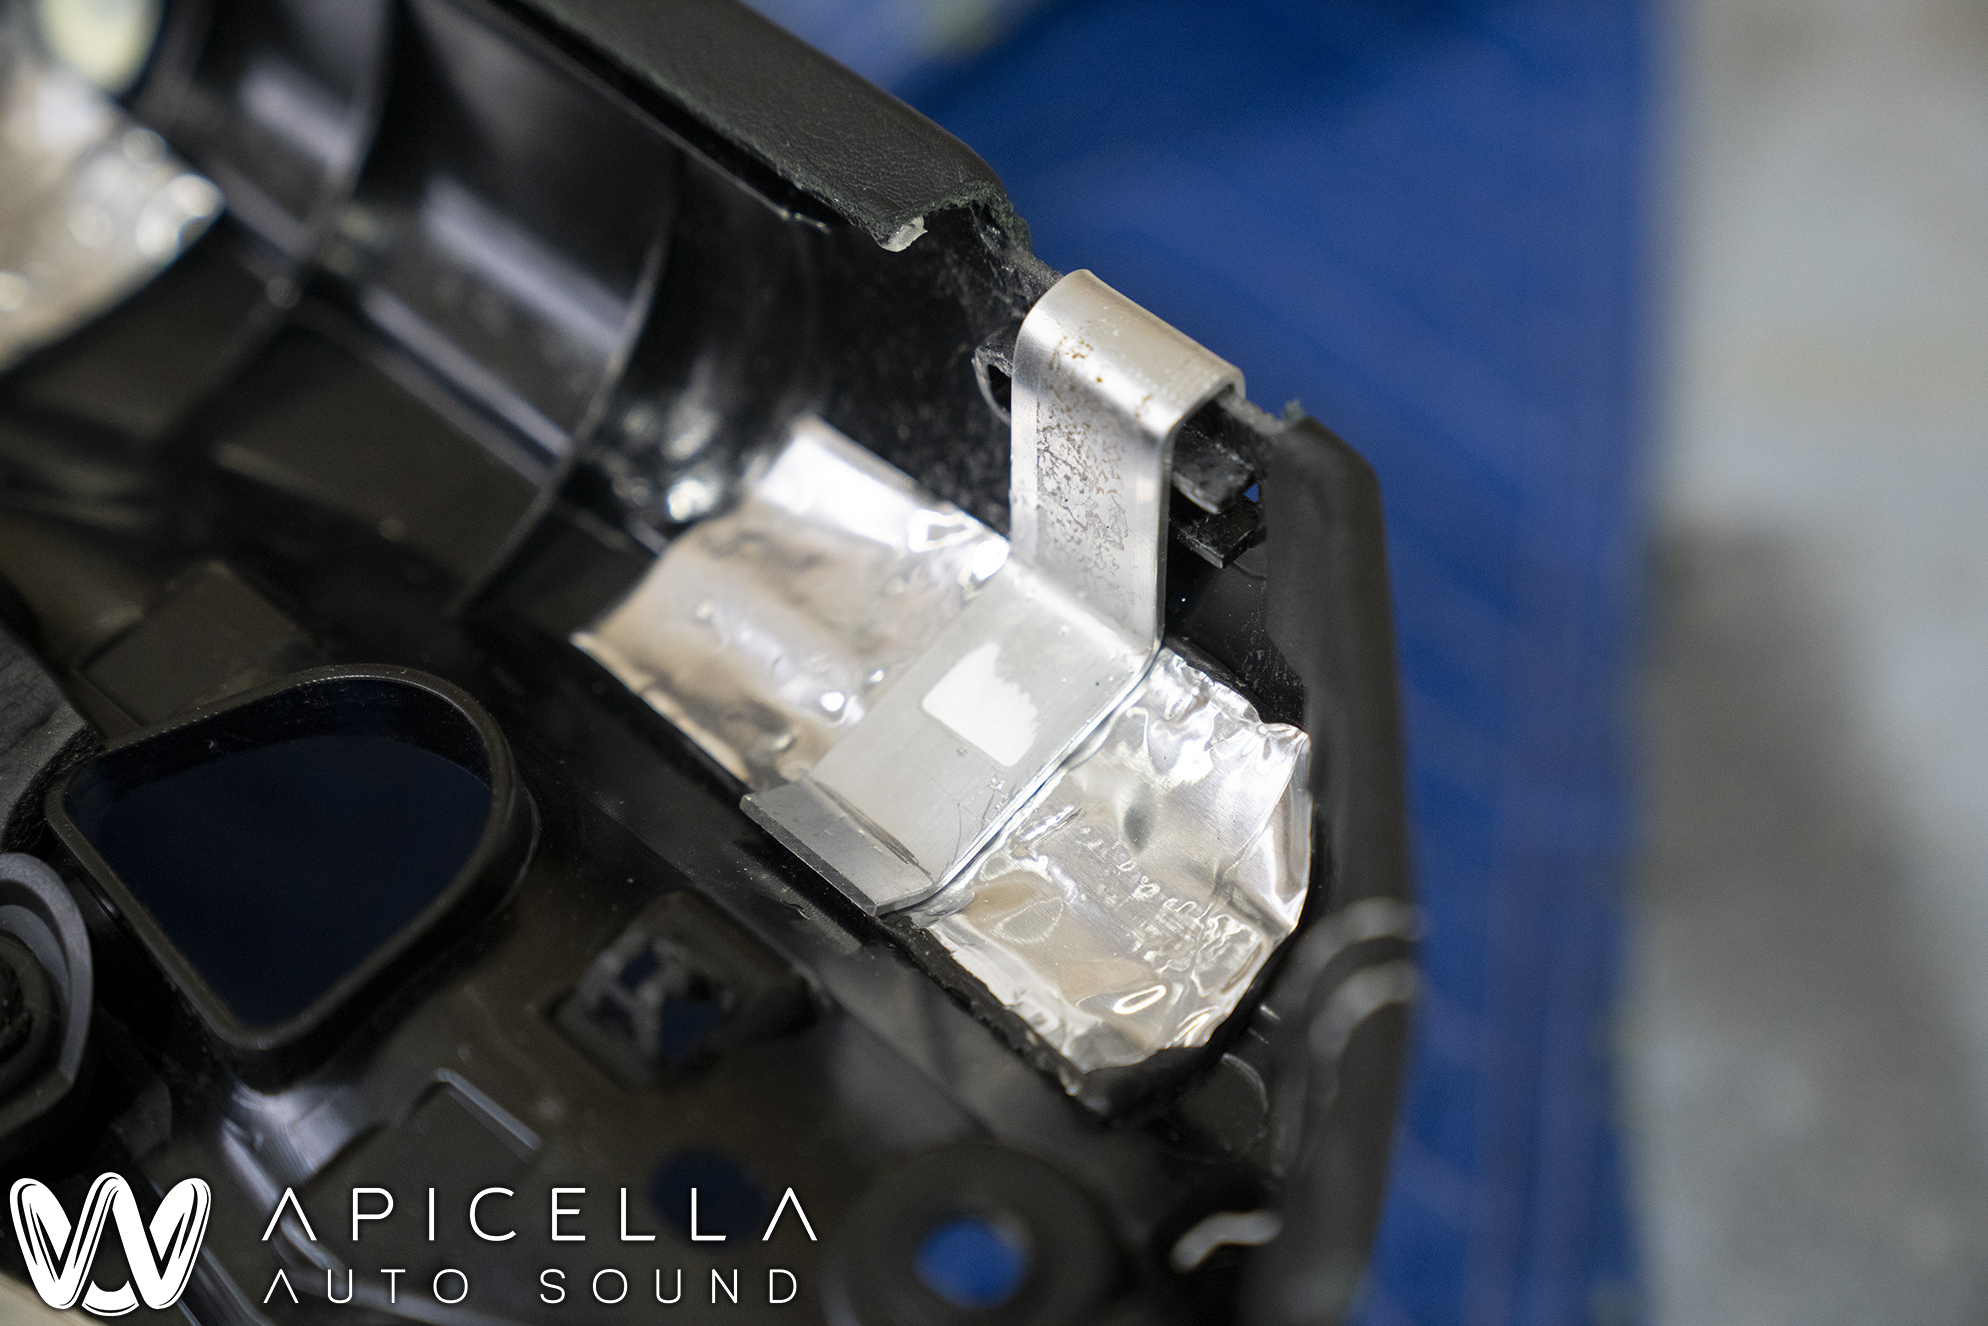
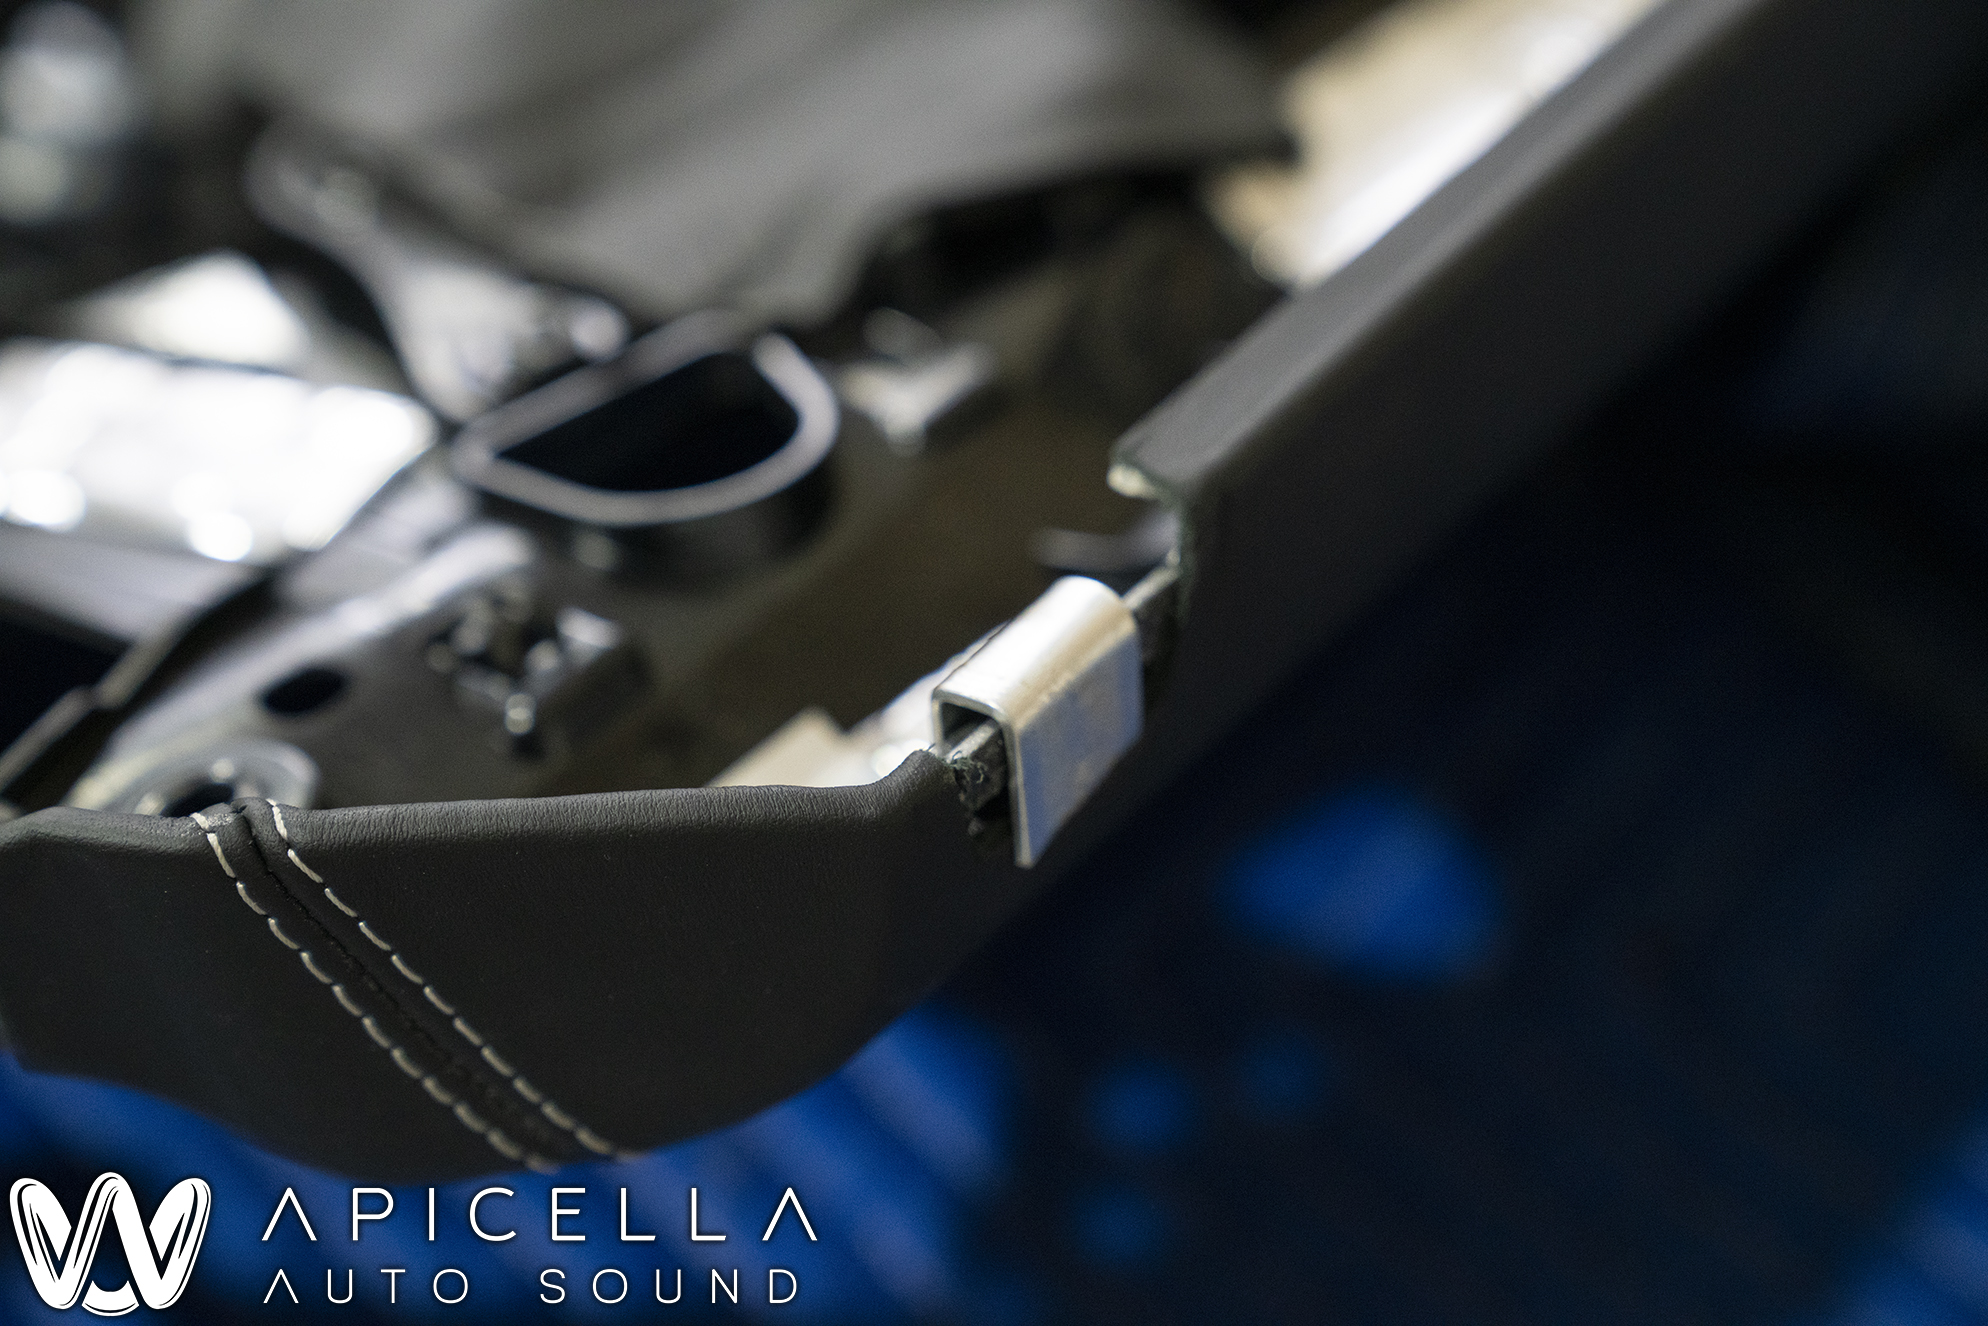
Here is the rest of the mounting for the Sail panels. Aluminum was bent to perfectly hug the door panel, and attach to the sail panel from underneath. Once the sail panel is secured to the door panel, the "hook" part that was retained just latches on to the door frame and stays put. Very clever and solid mounting for the pod.
Next up, pillars. Antenna wires needed to be cut and extended and an antenna amplifier needed to be relocated from the passenger side pillar
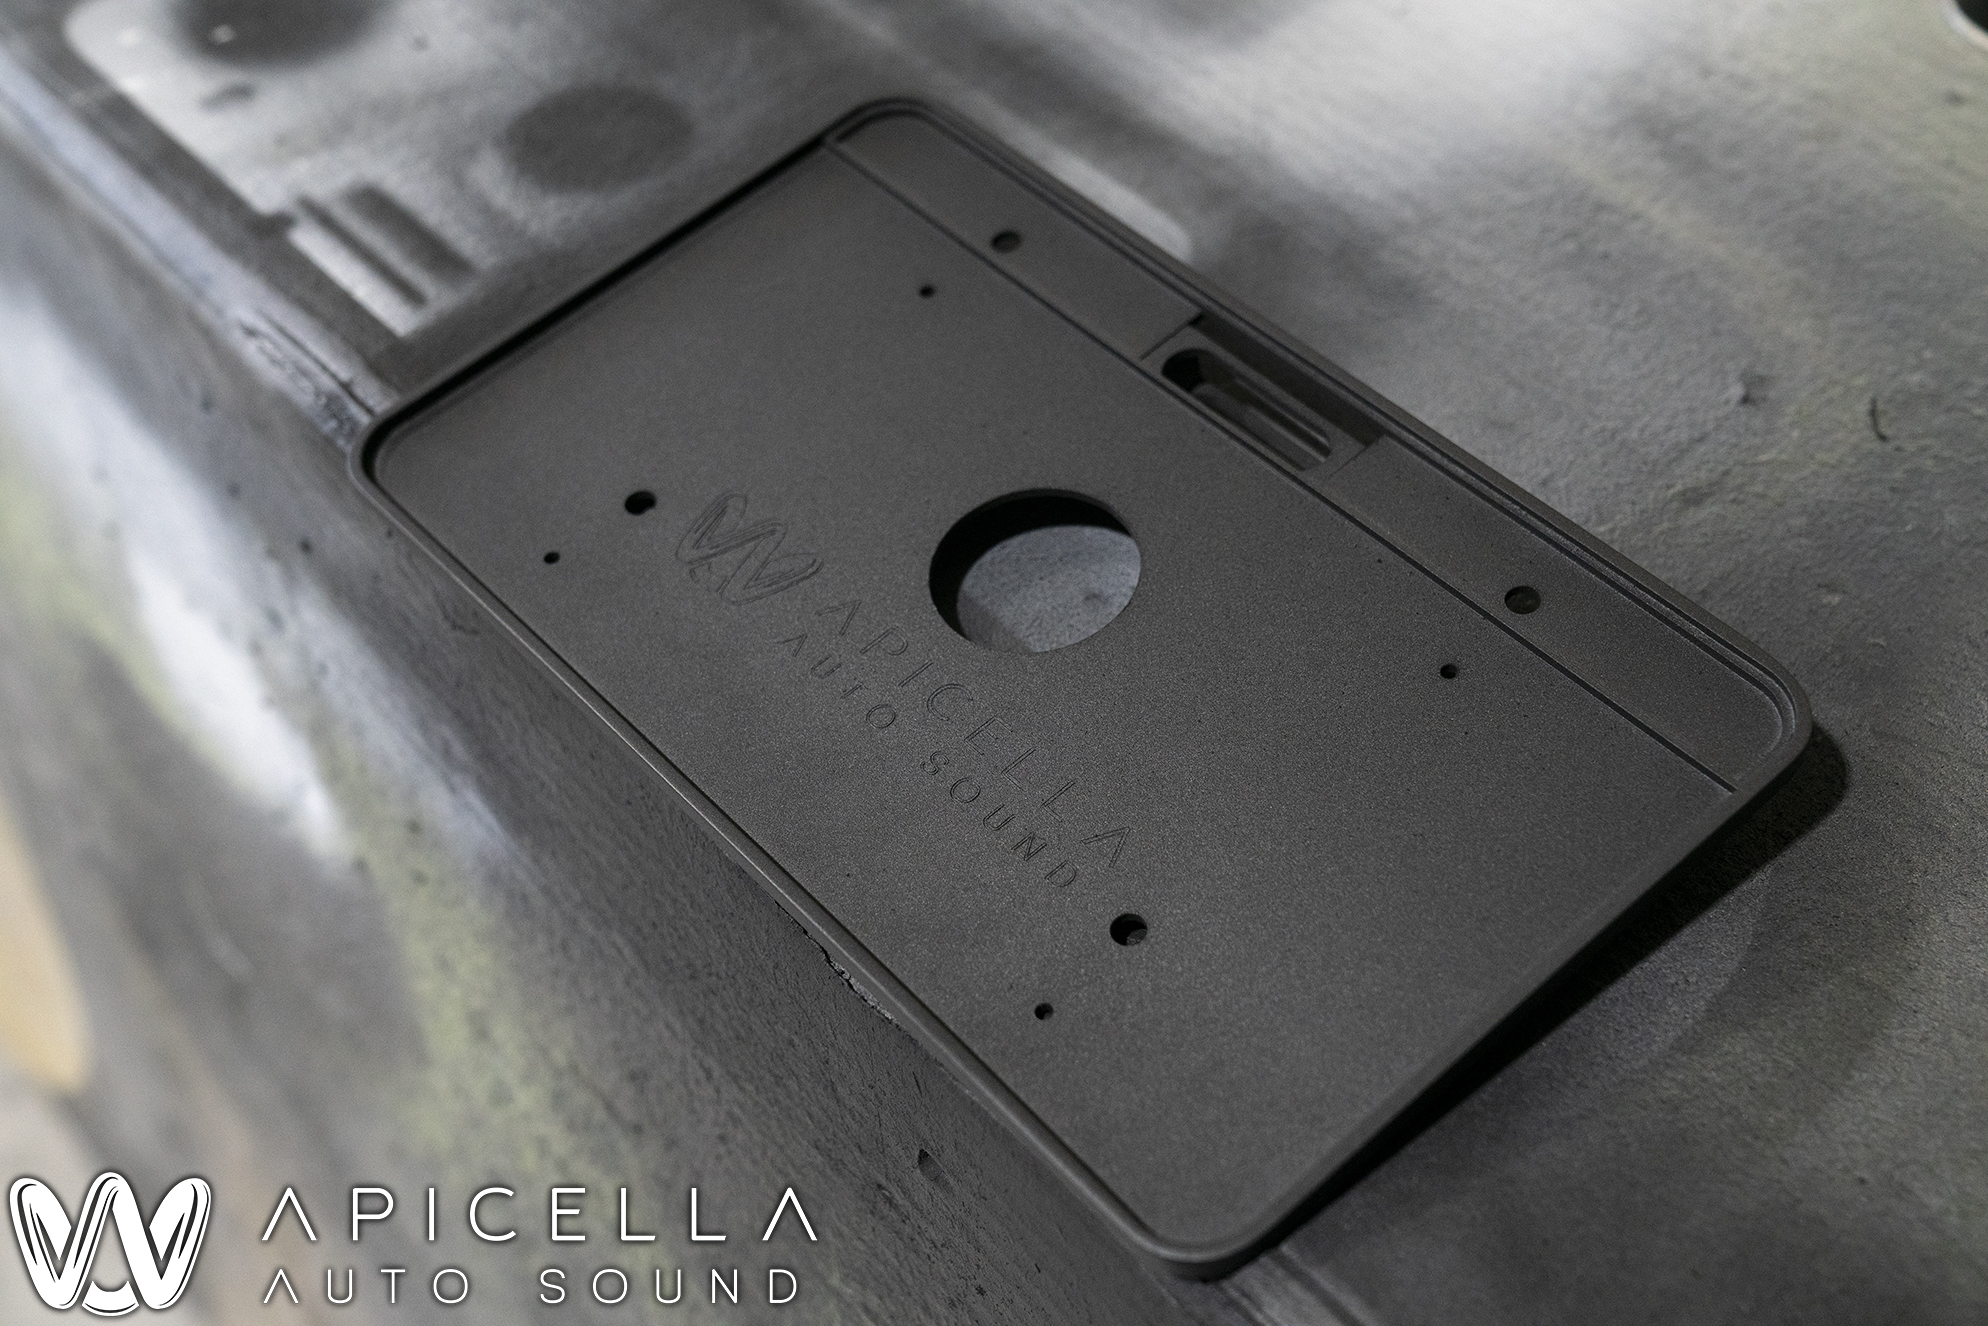
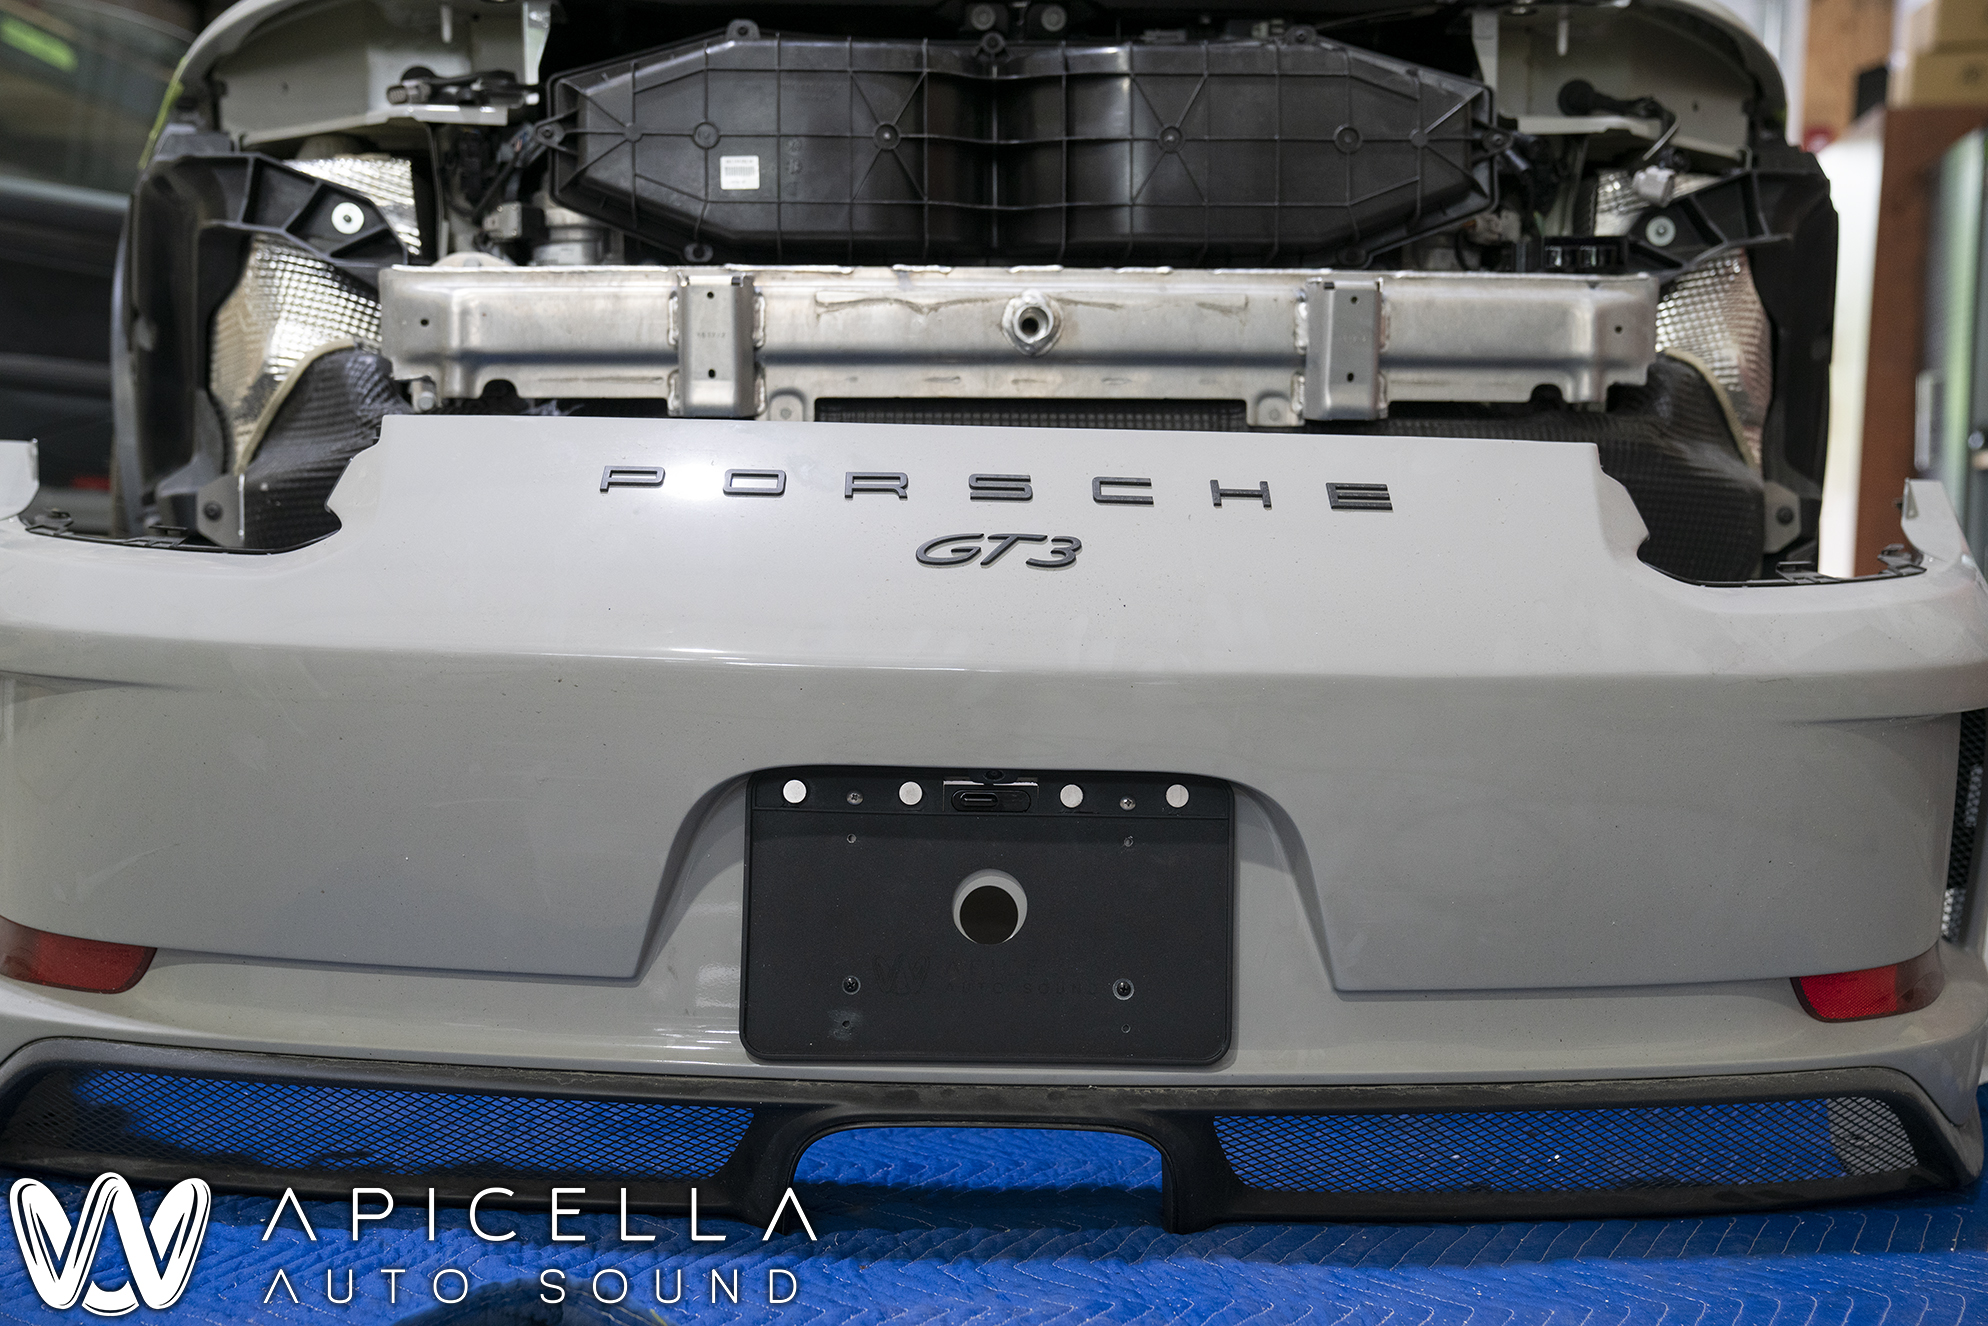
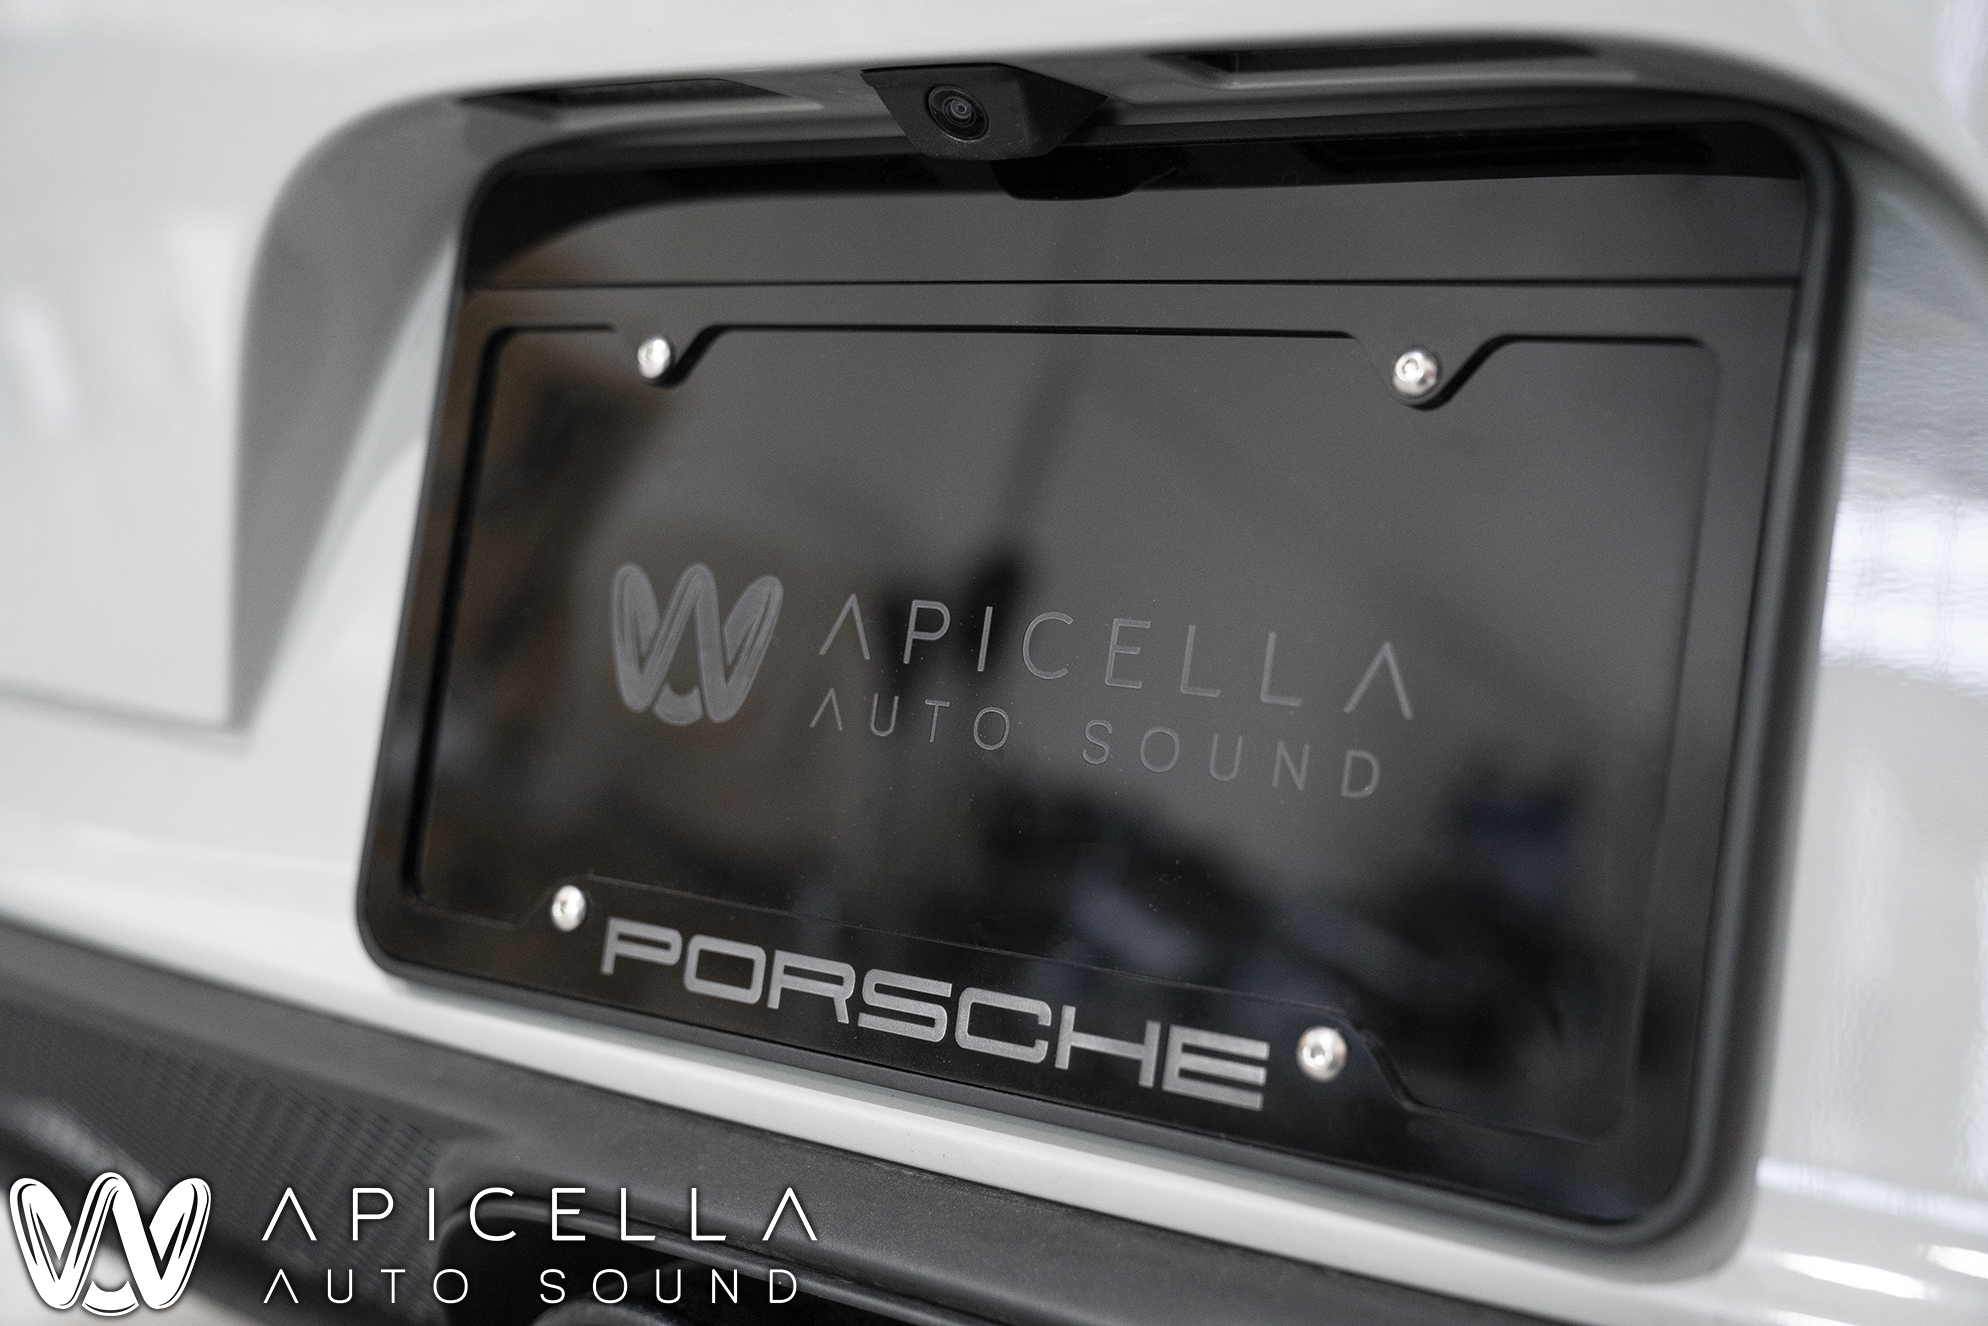
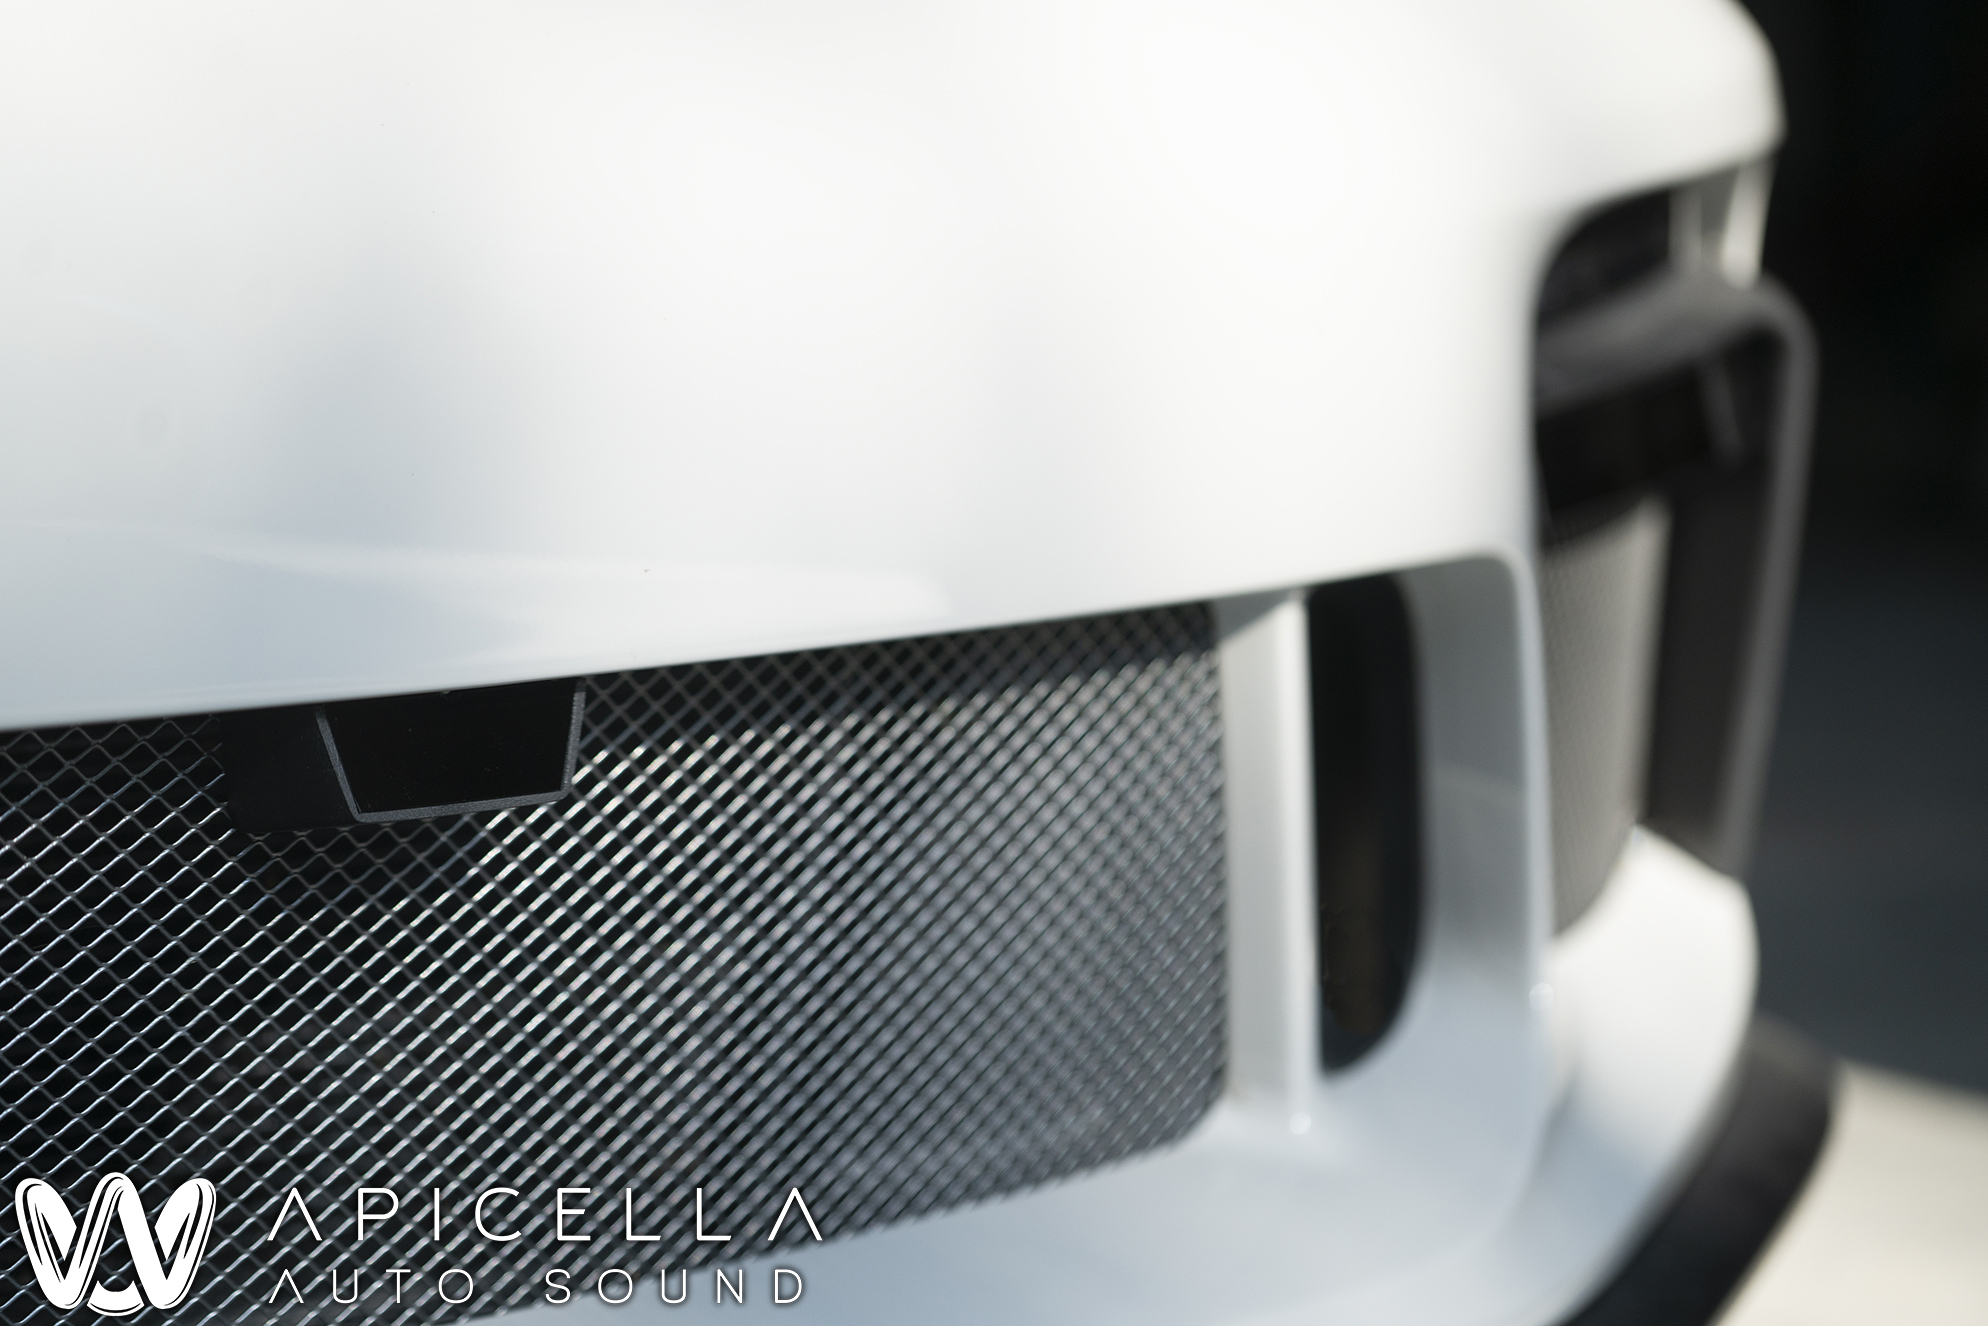
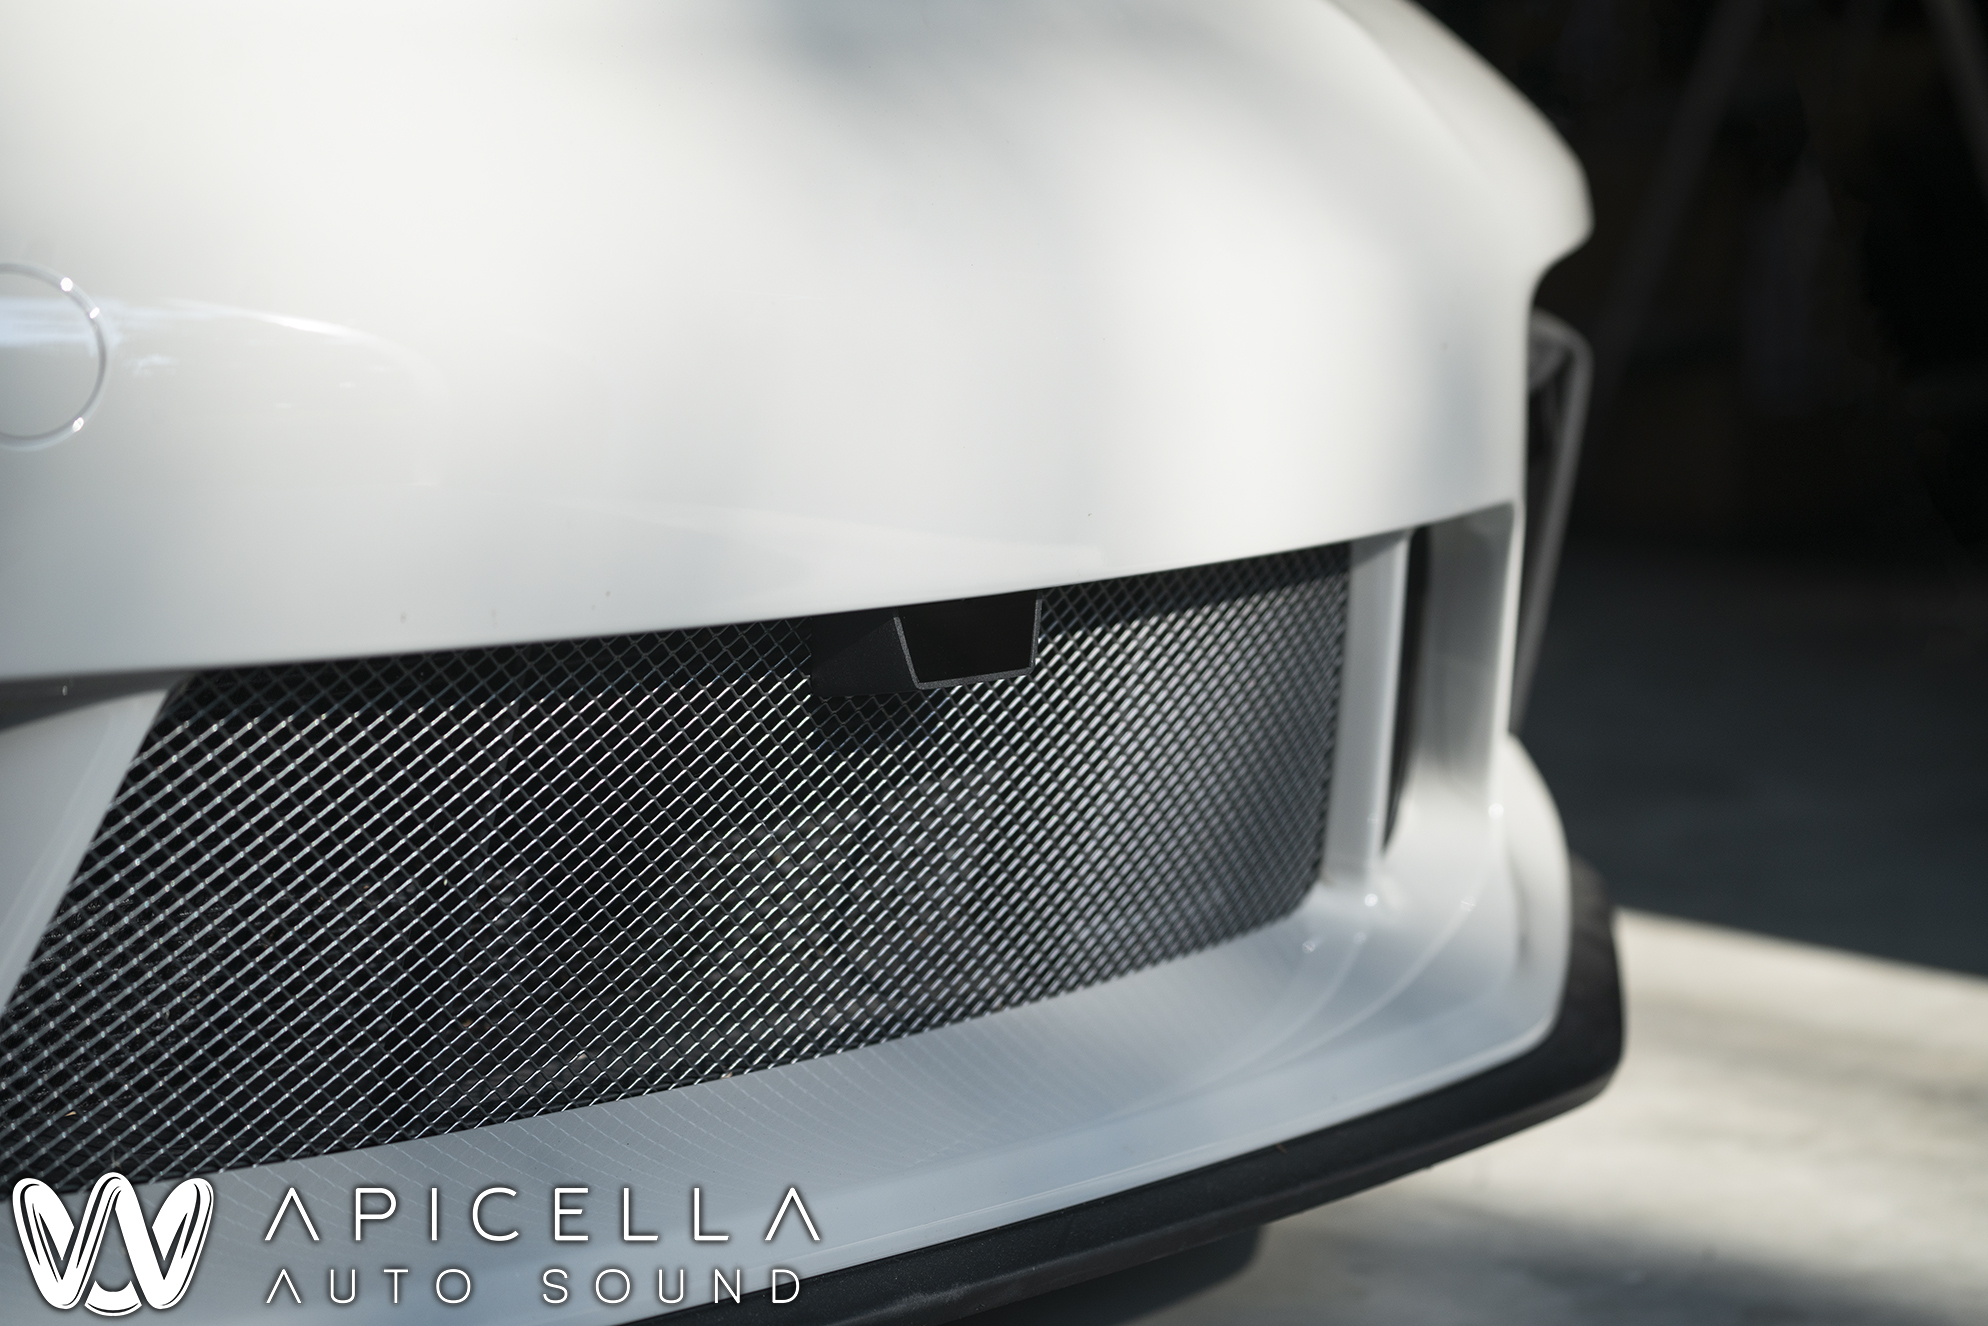
Next up, the Escort Ci Max 360 Radar Detector & Laser Jammer install. These were installed in a way so that you don't even realize they were there, yet are fully functional. When the automotive videographer came by to shoot and saw "Laser jammers" on the list, he looked at the front and rear bumpers and said, "where are these things?". That was good to hear. The front pods were fabricated out of acrylic, as was the custom rear plate frame that houses the rear sensors.

The controller for the Escort system was installed in the ashtray. The display was integrated into the OEM dashboard, so the Escort display was not needed.
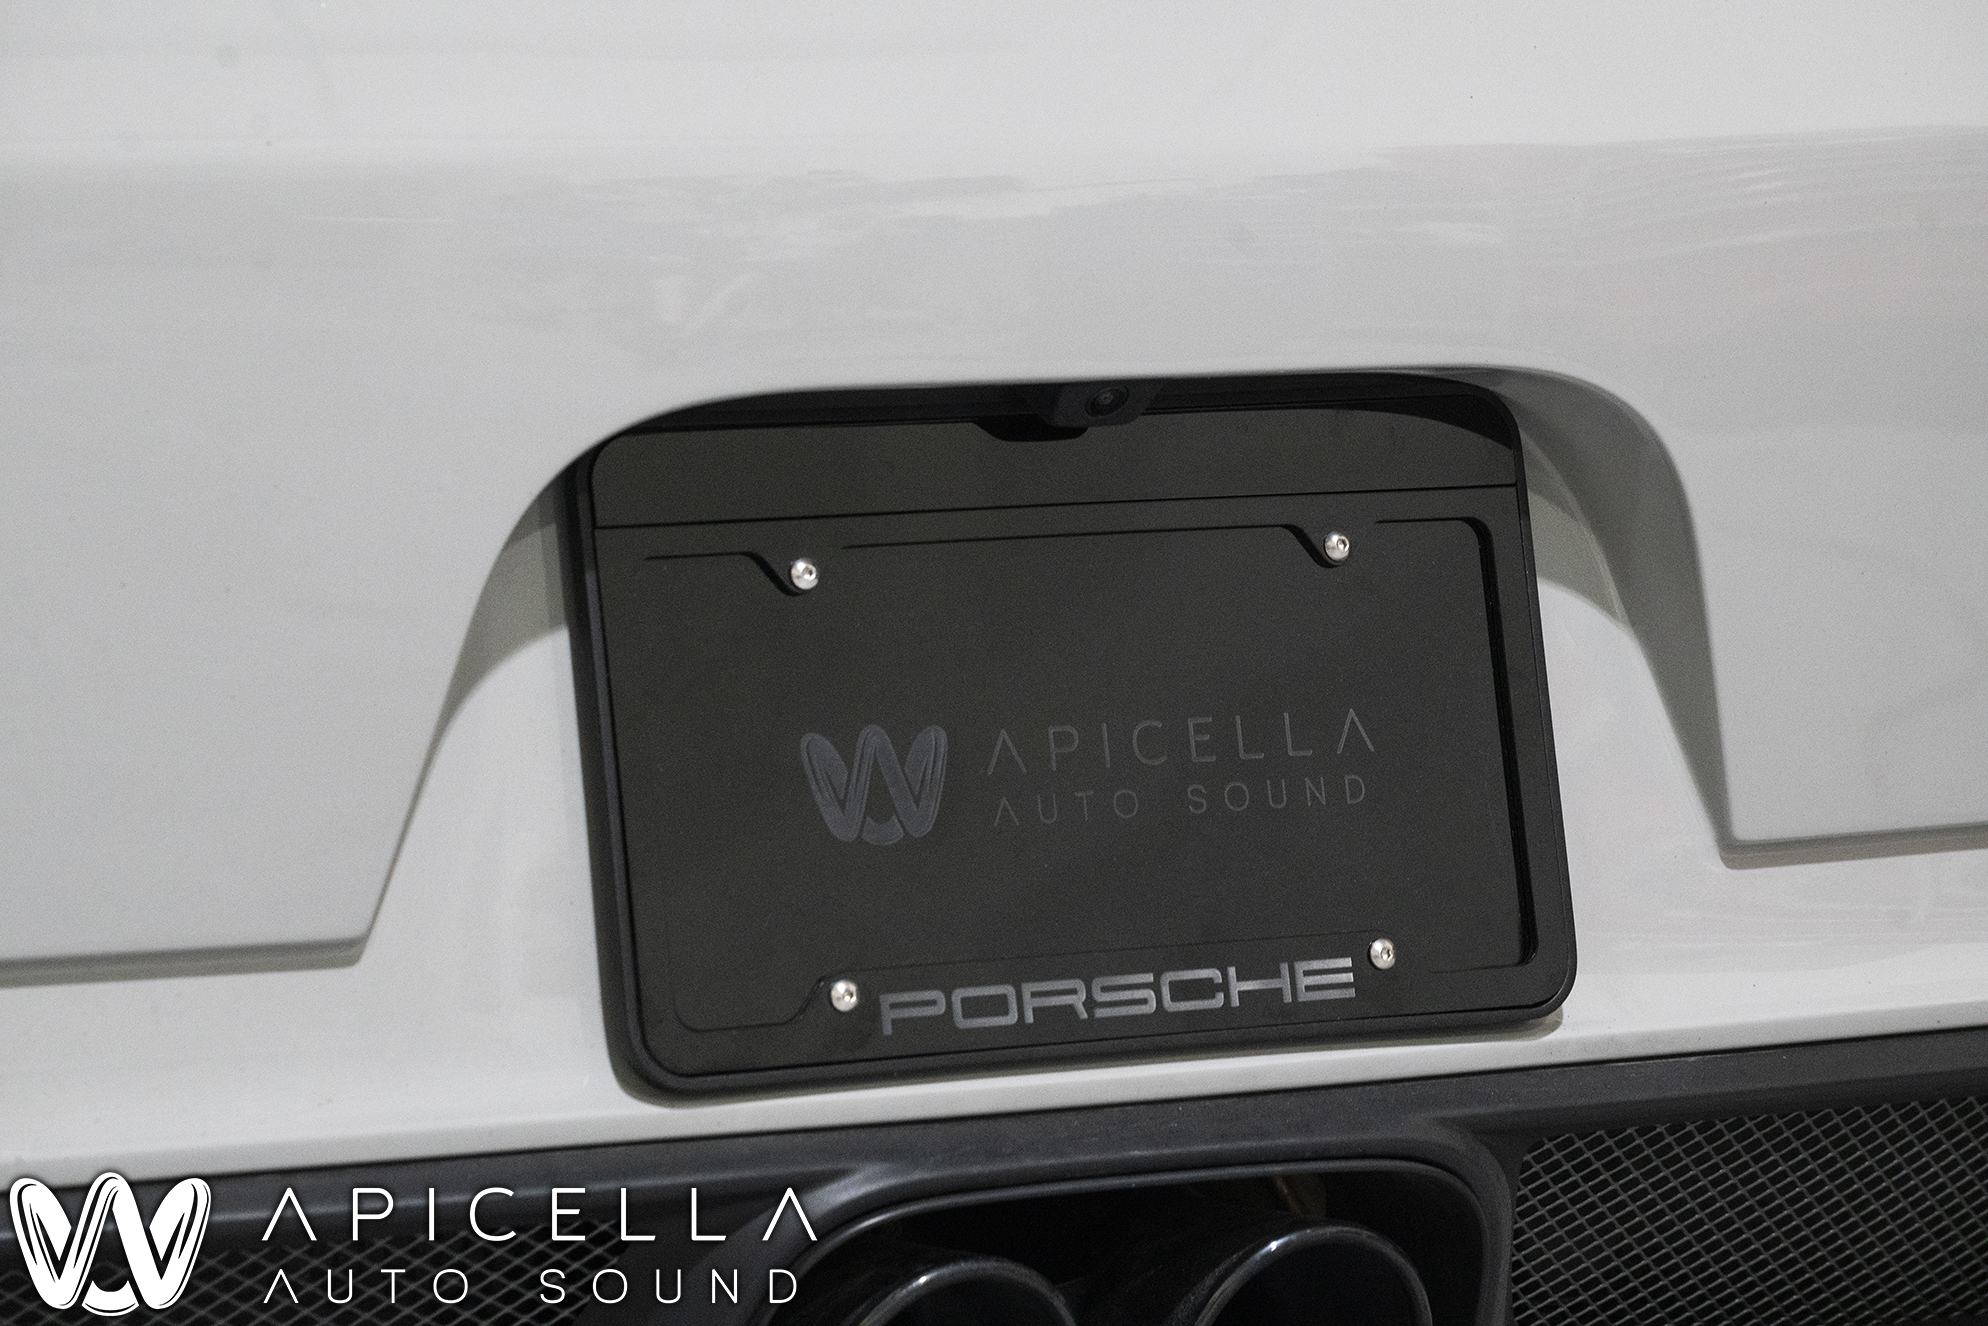
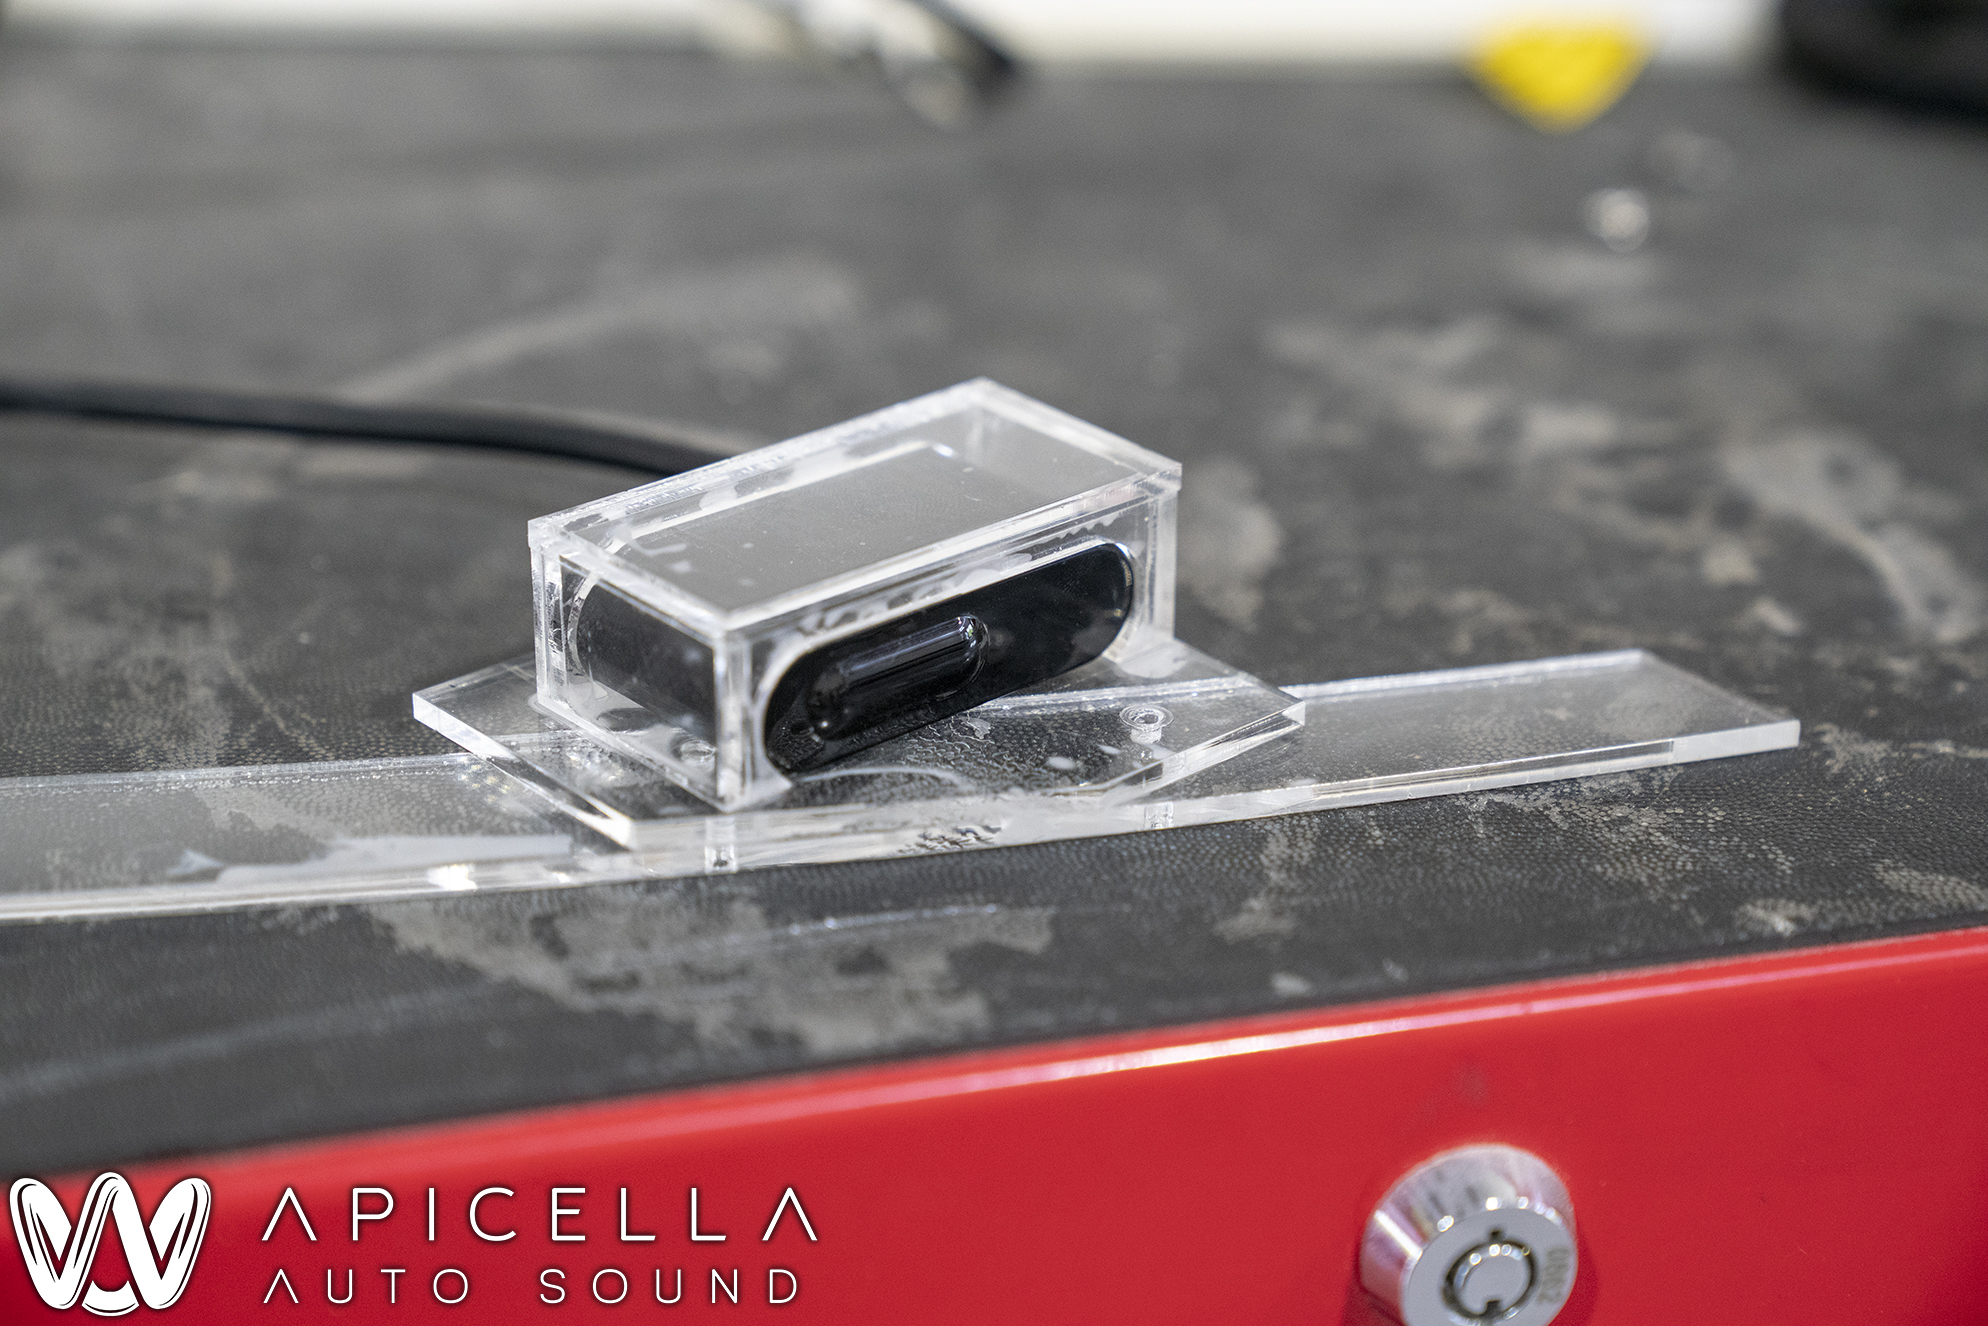
The rear plate bracket was installed, and the laser jammer's IR Acrylic Cover was also installed. The way we did this, you don't even know the laser jammer is there, it appears factory, and the jammer still fully works with this special acrylic. This was also used on the front laser jammers.
The sail panels were wrapped in an OEM Alcantara, and black machine screws were used instead of the original silver ones to not grab your attention.
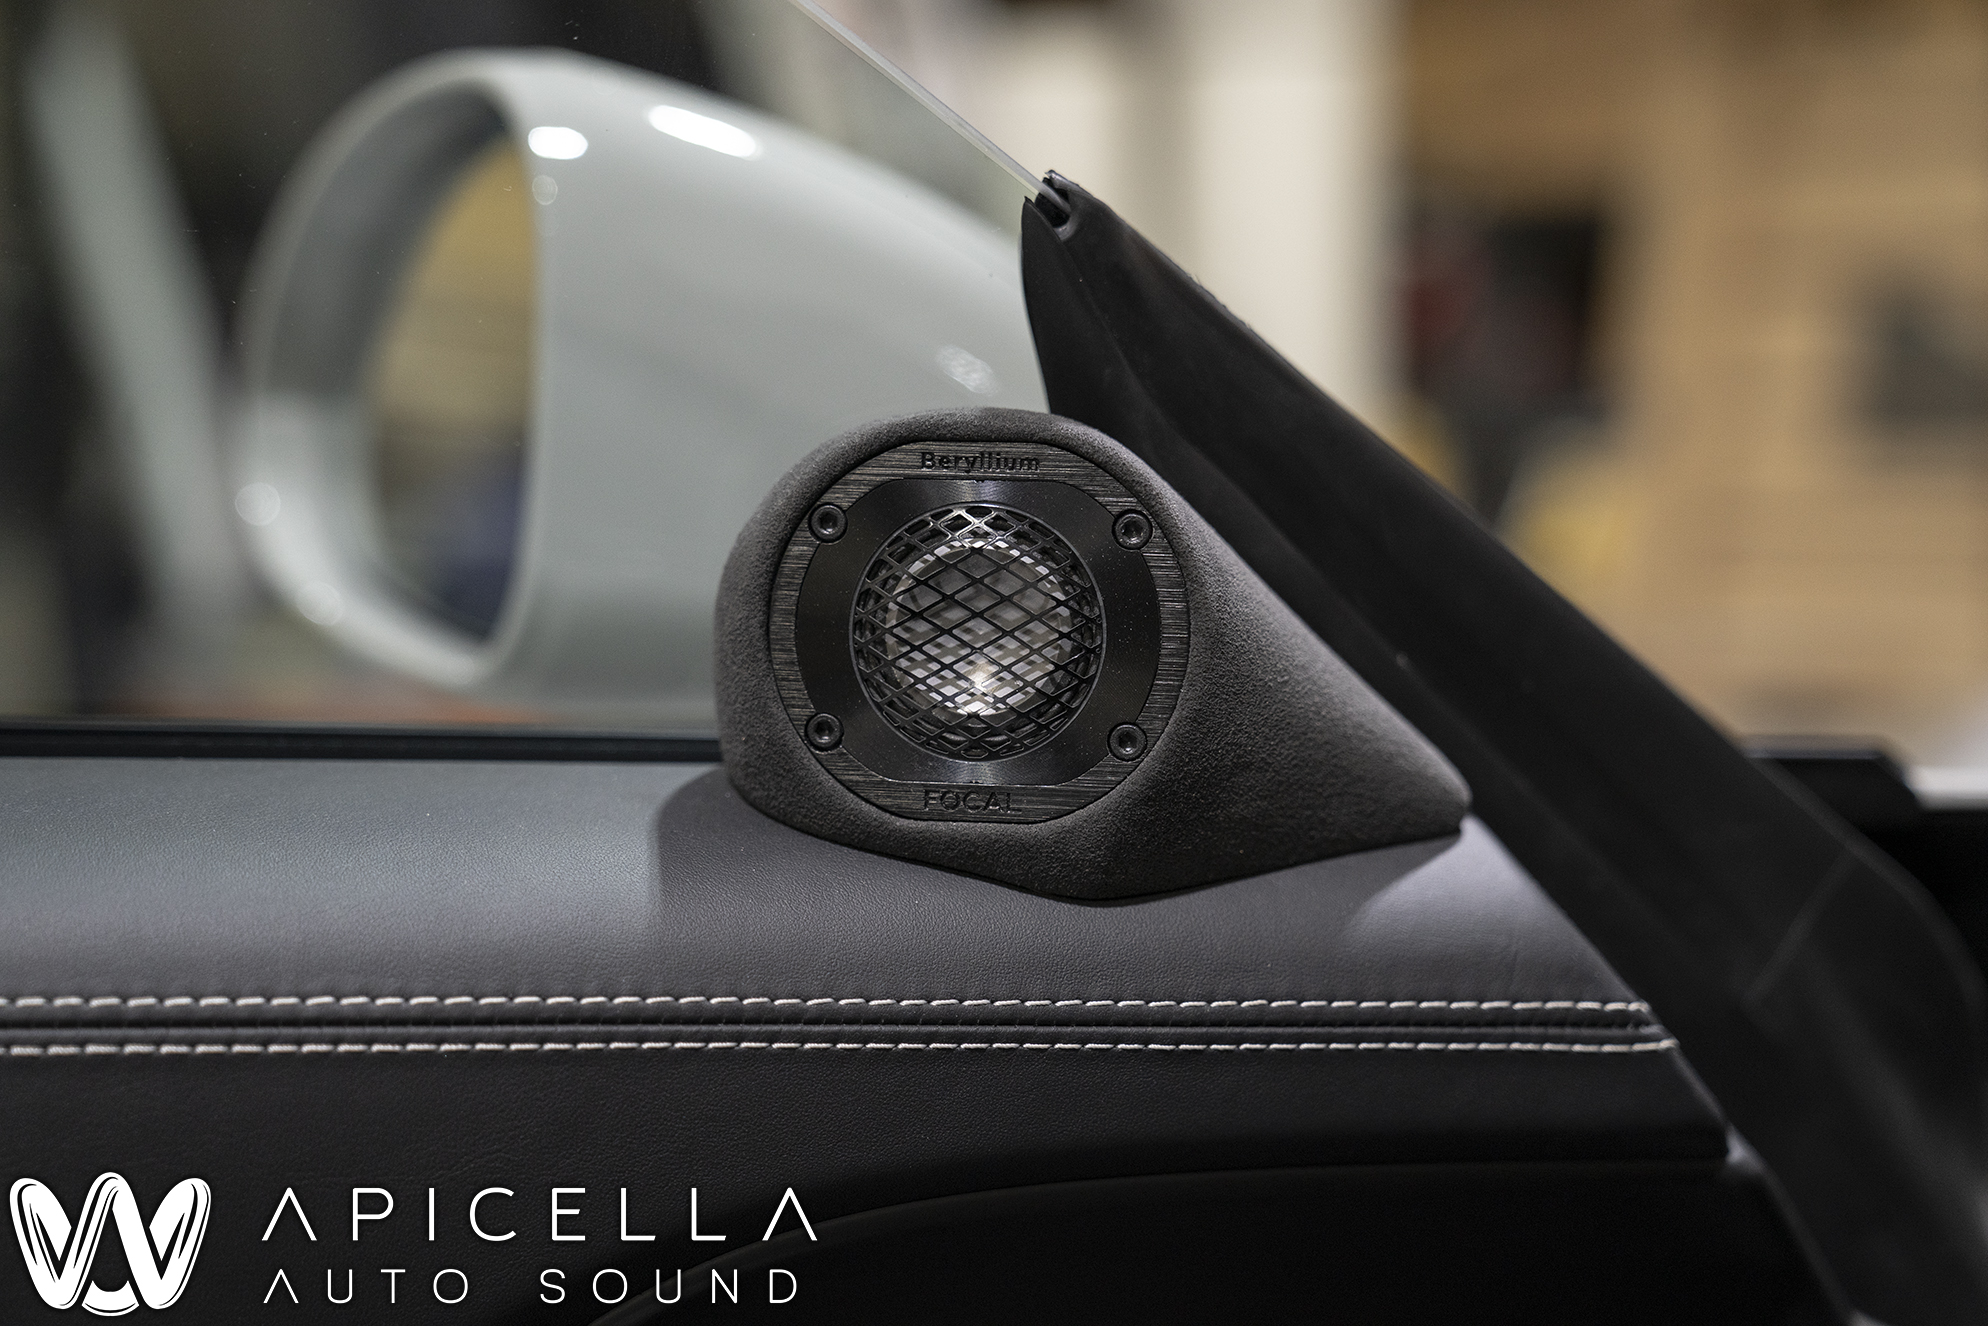
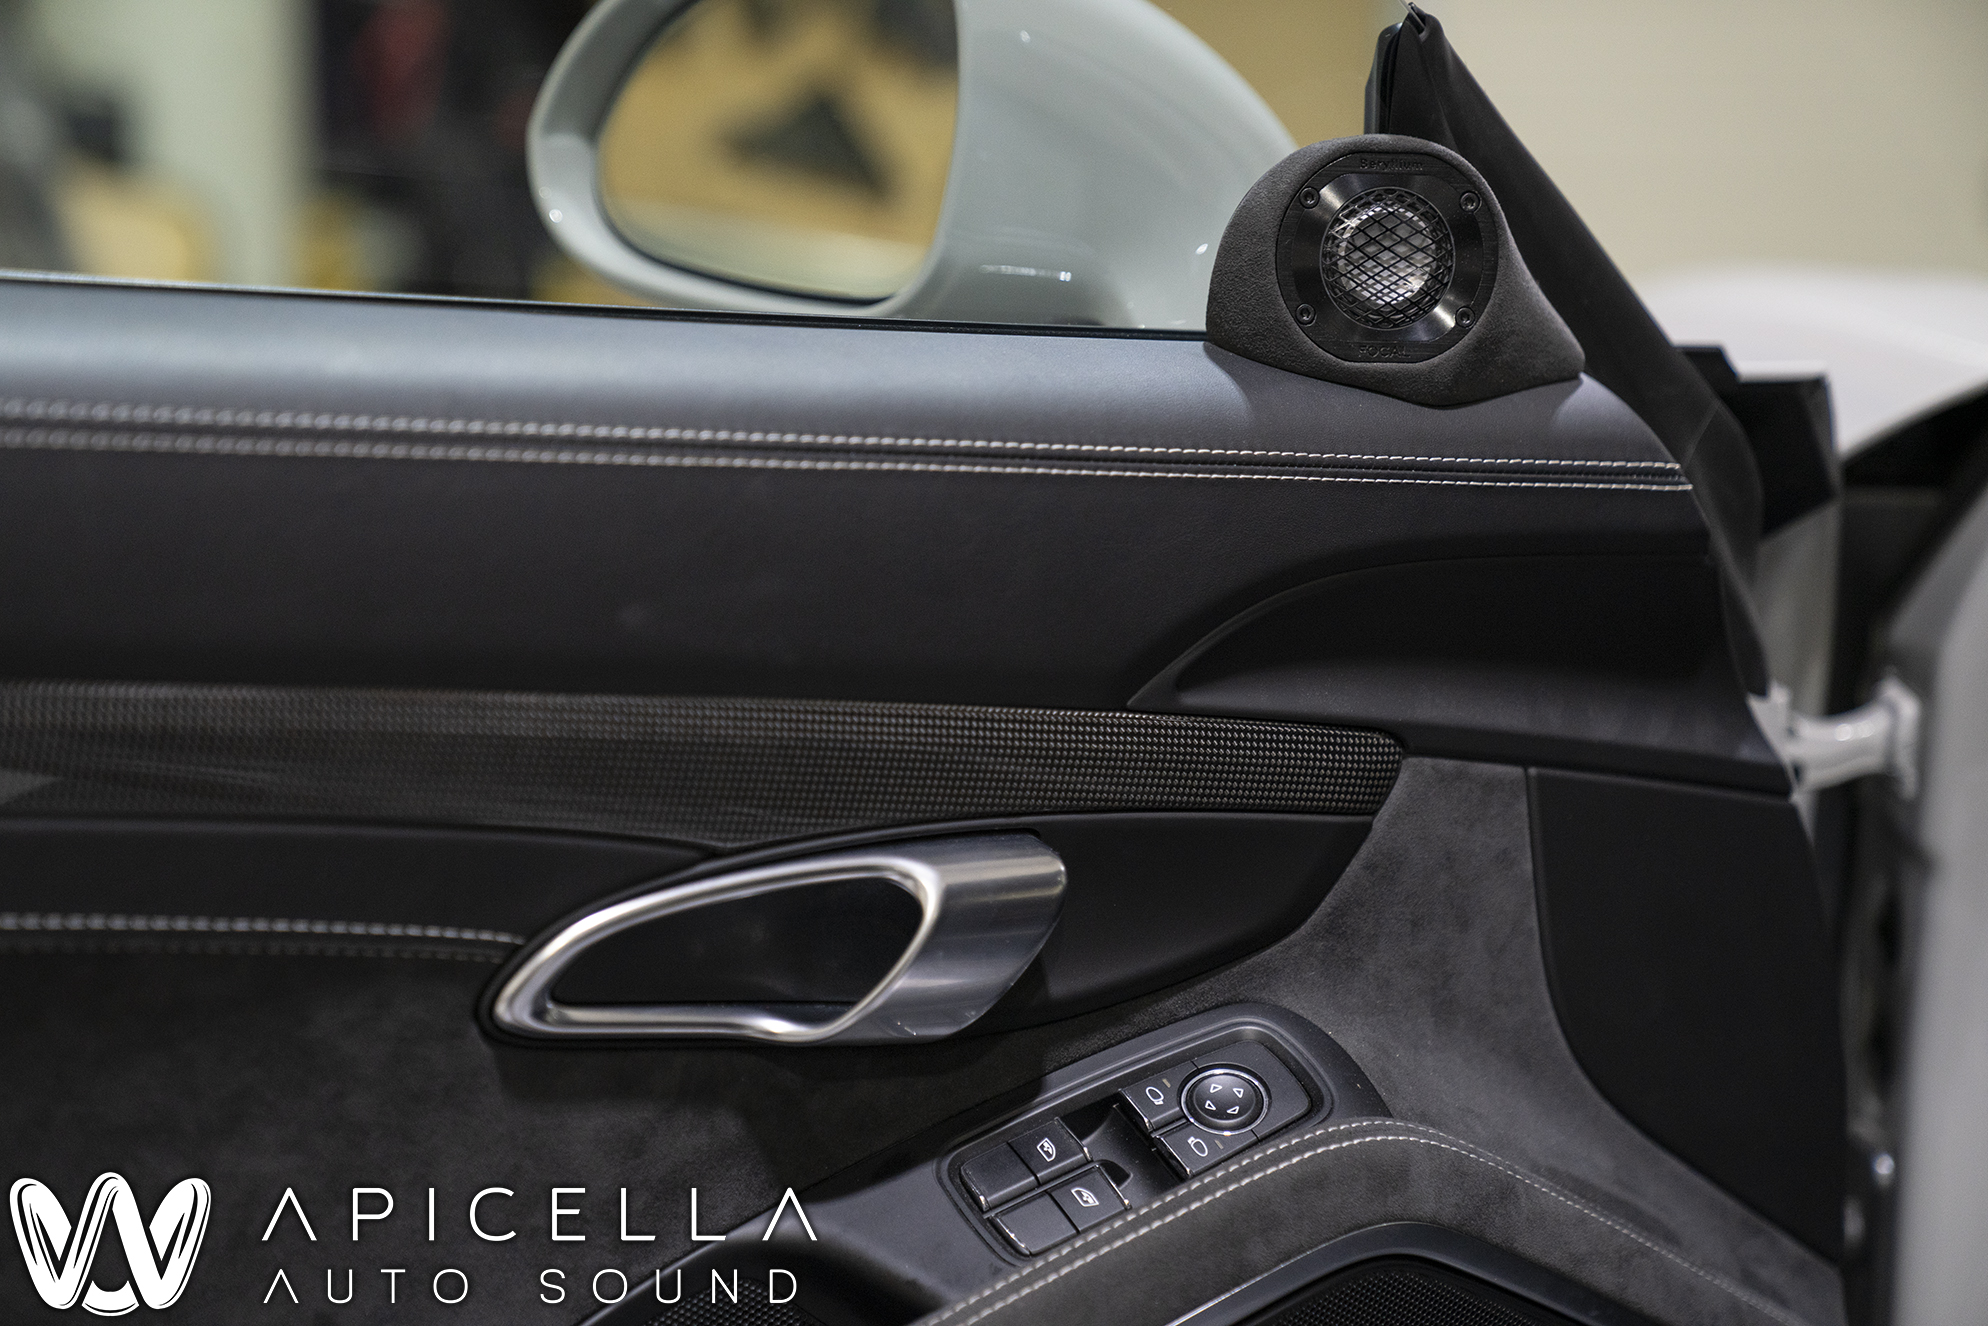
As far as OEM looking yet fully custom goes, these are my favorite pillars to date. These grills took a ton of testing and planning and trying to get them how I wanted. The silver trim was made to emulate the silver trim that goes around the grill on the door panel.
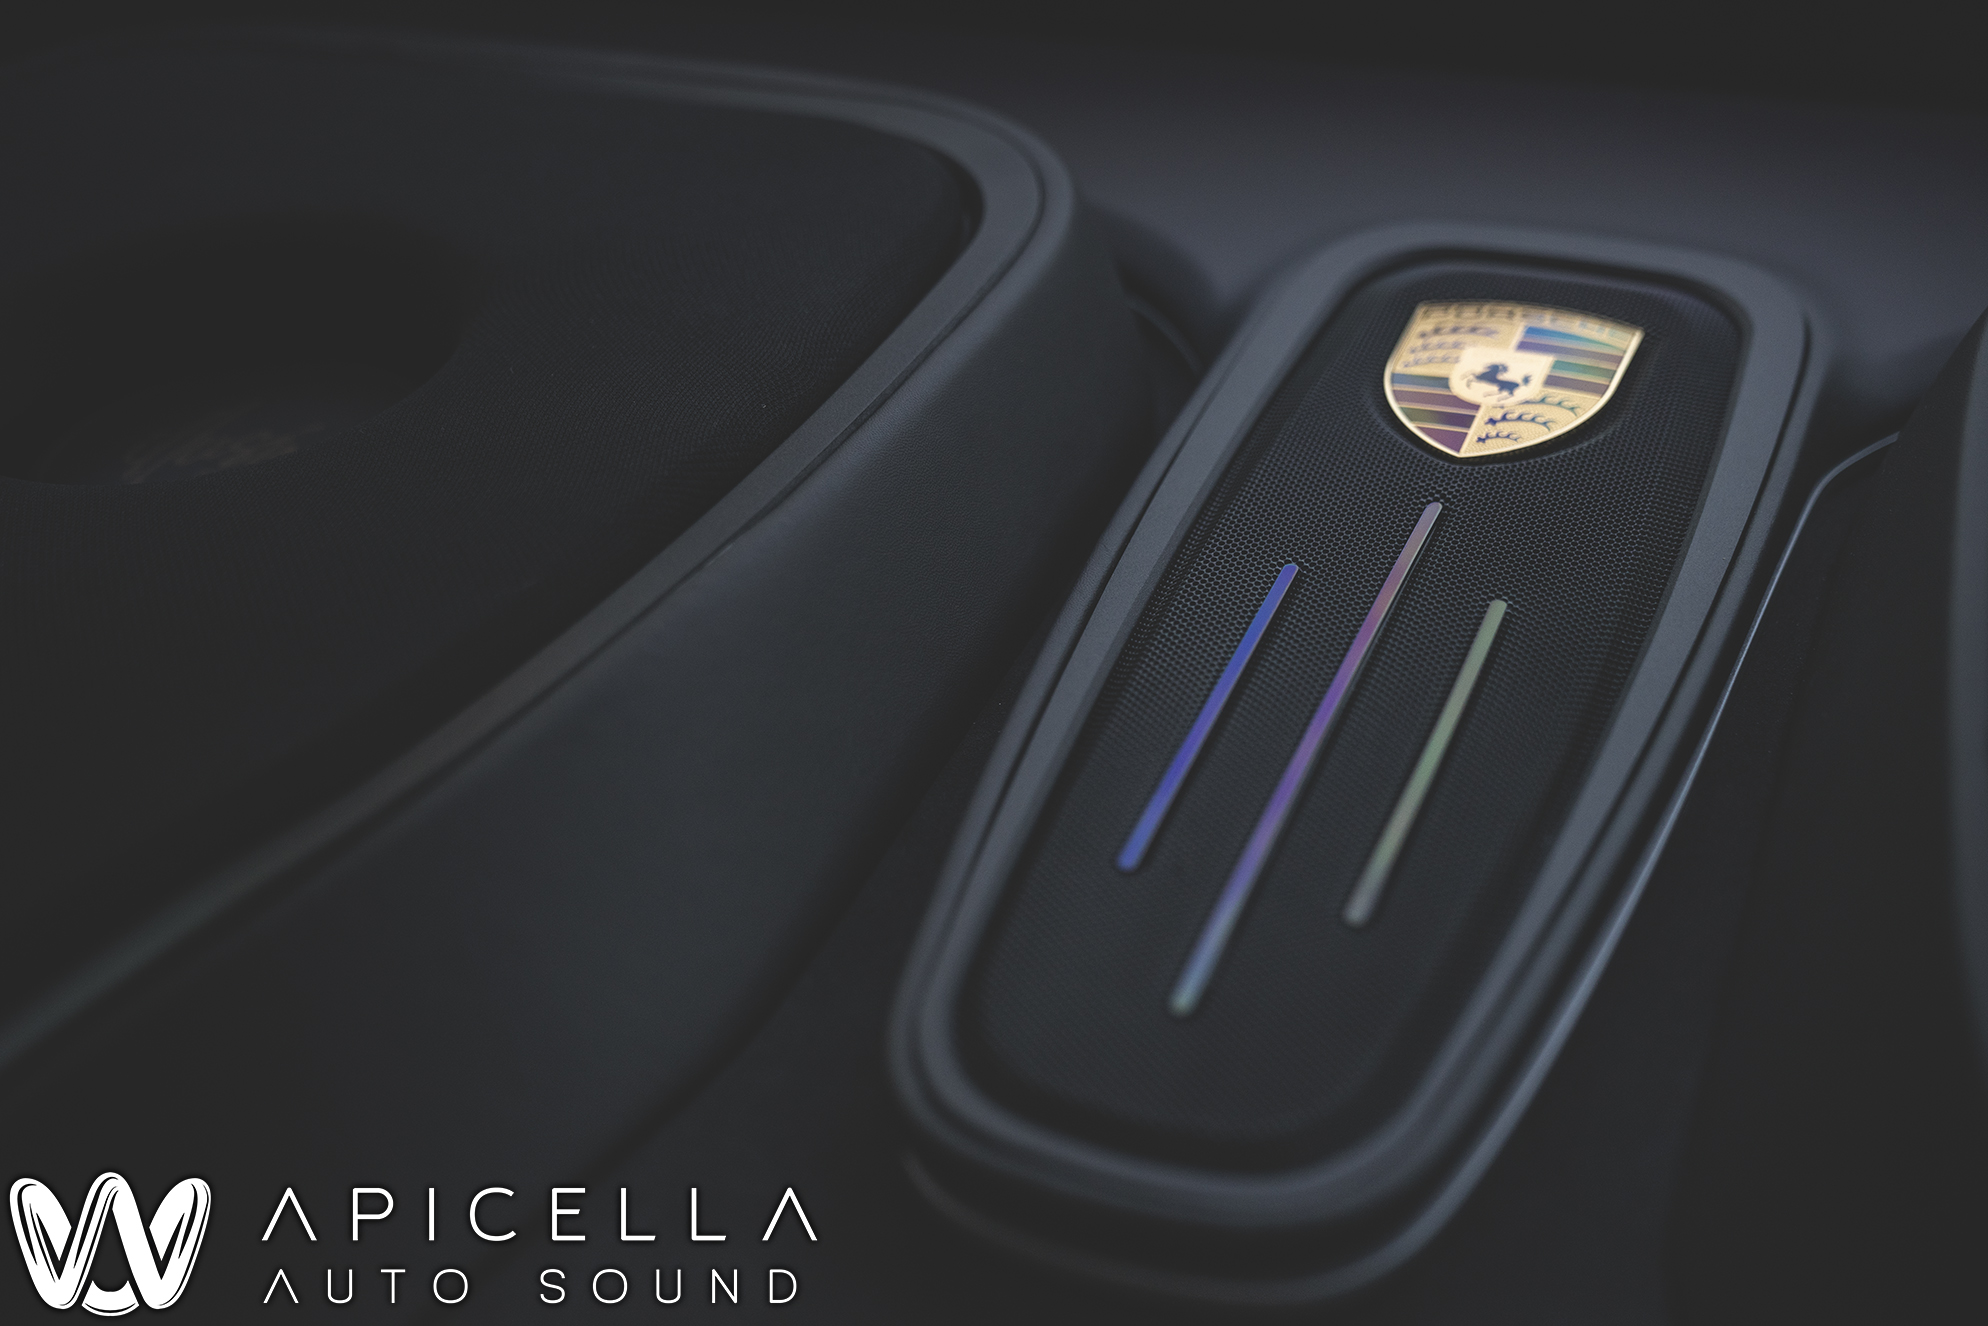
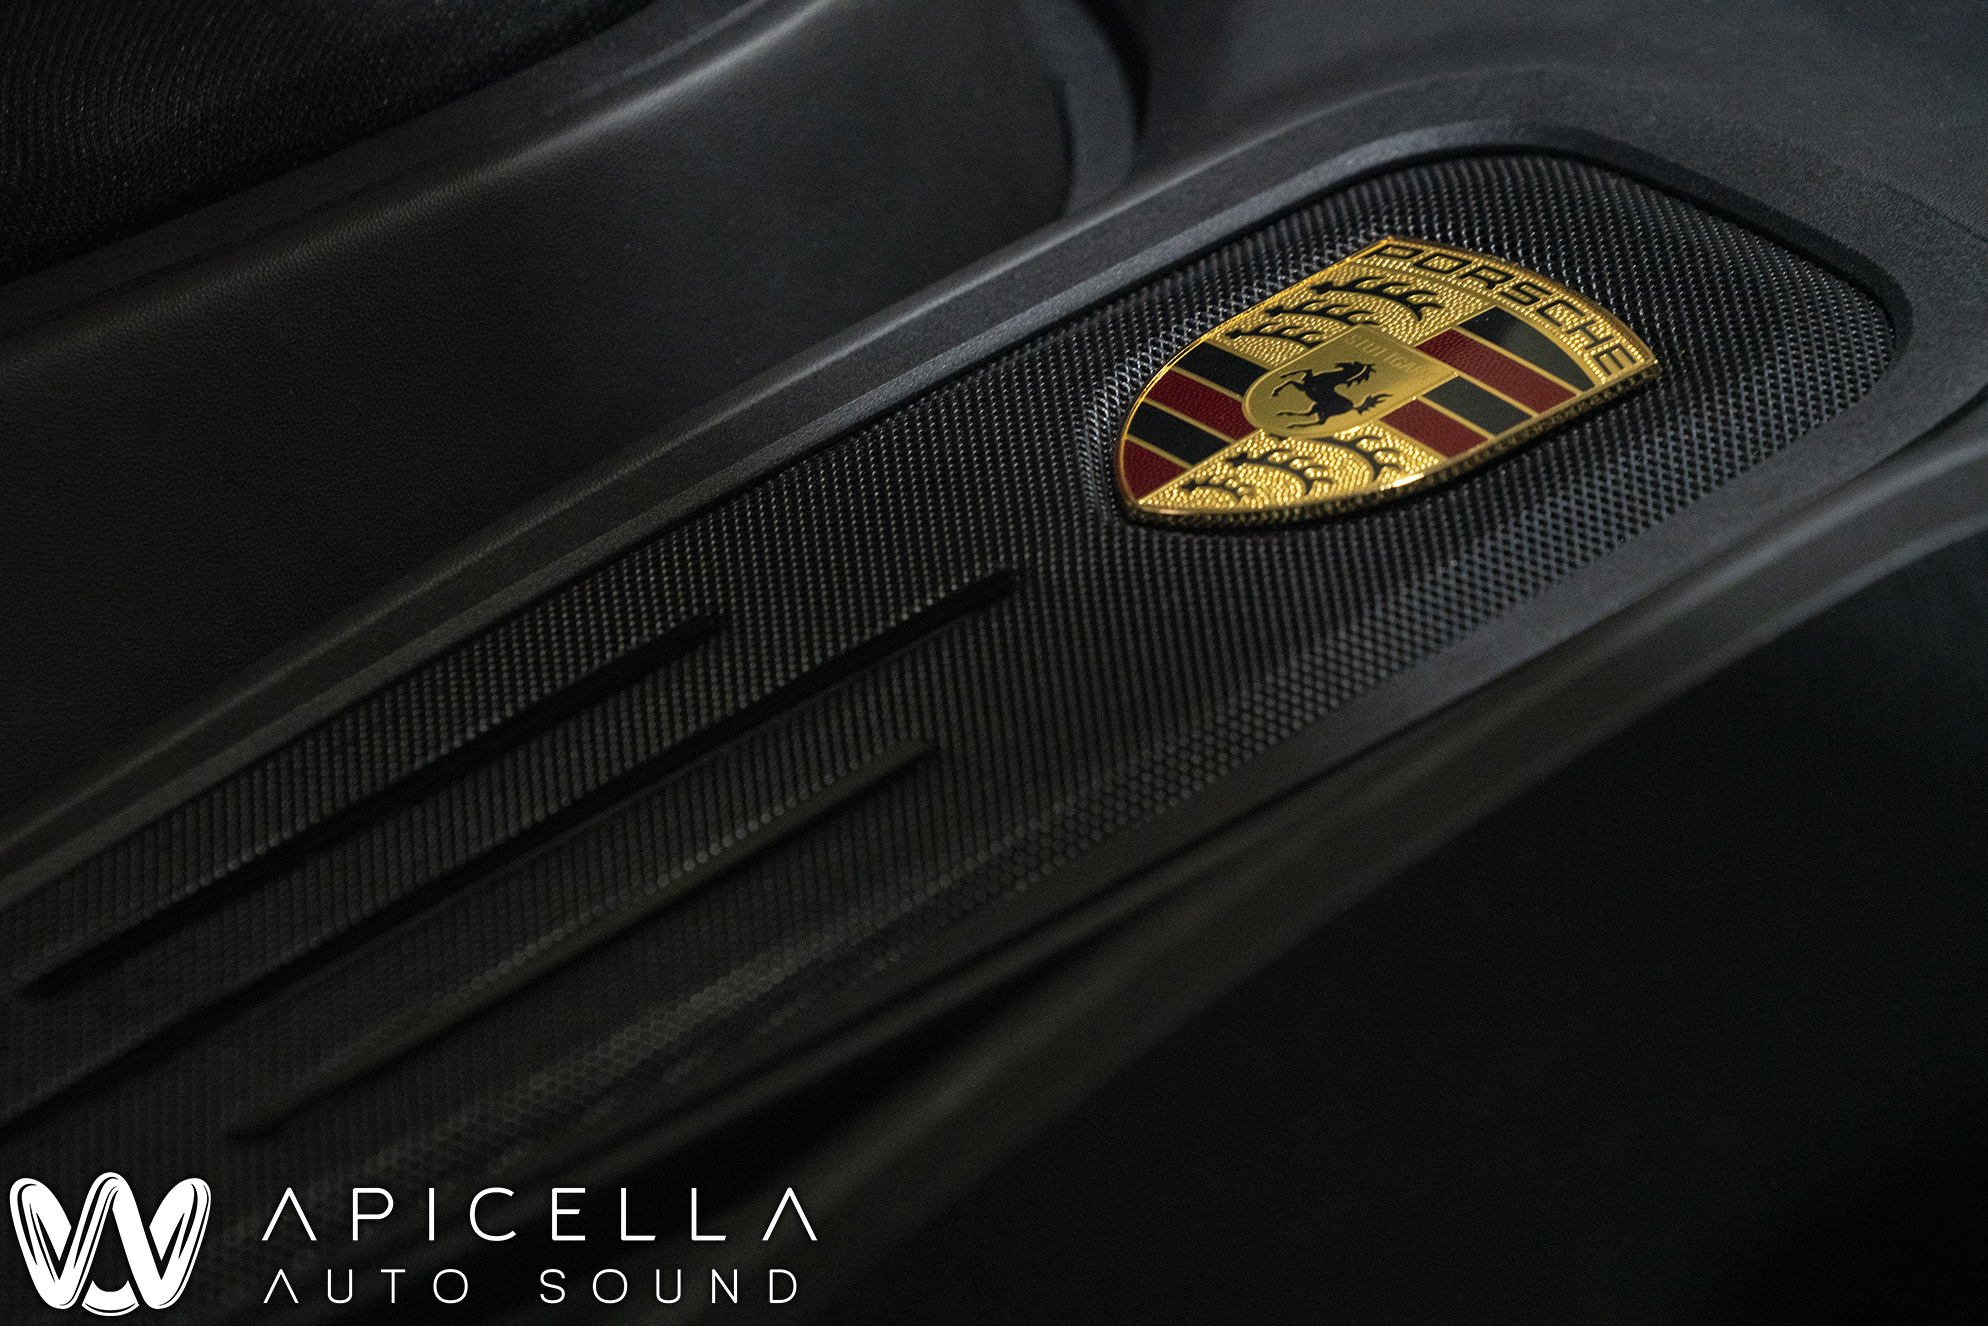
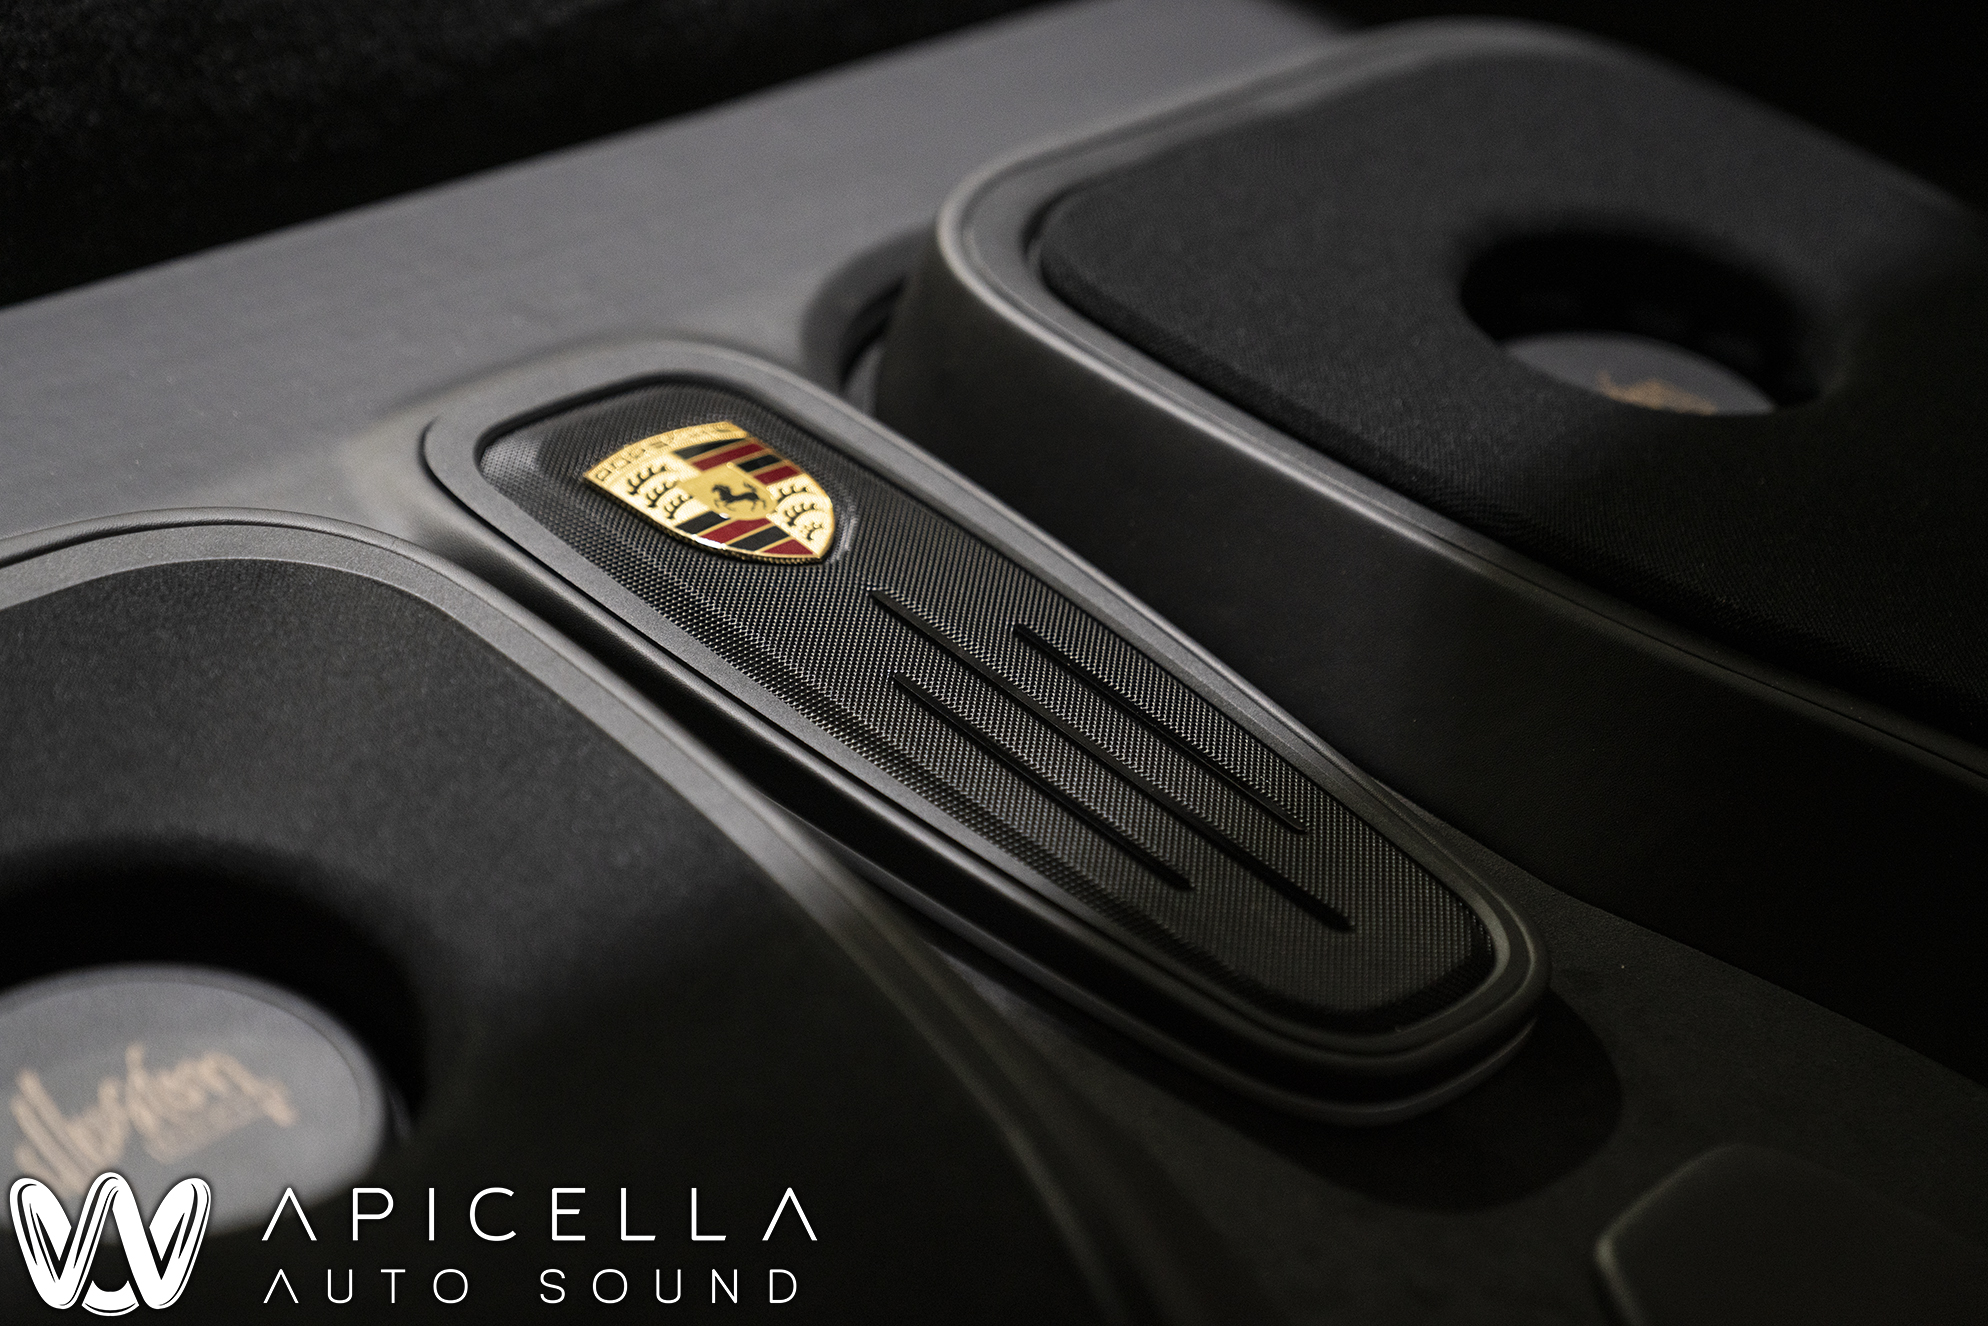
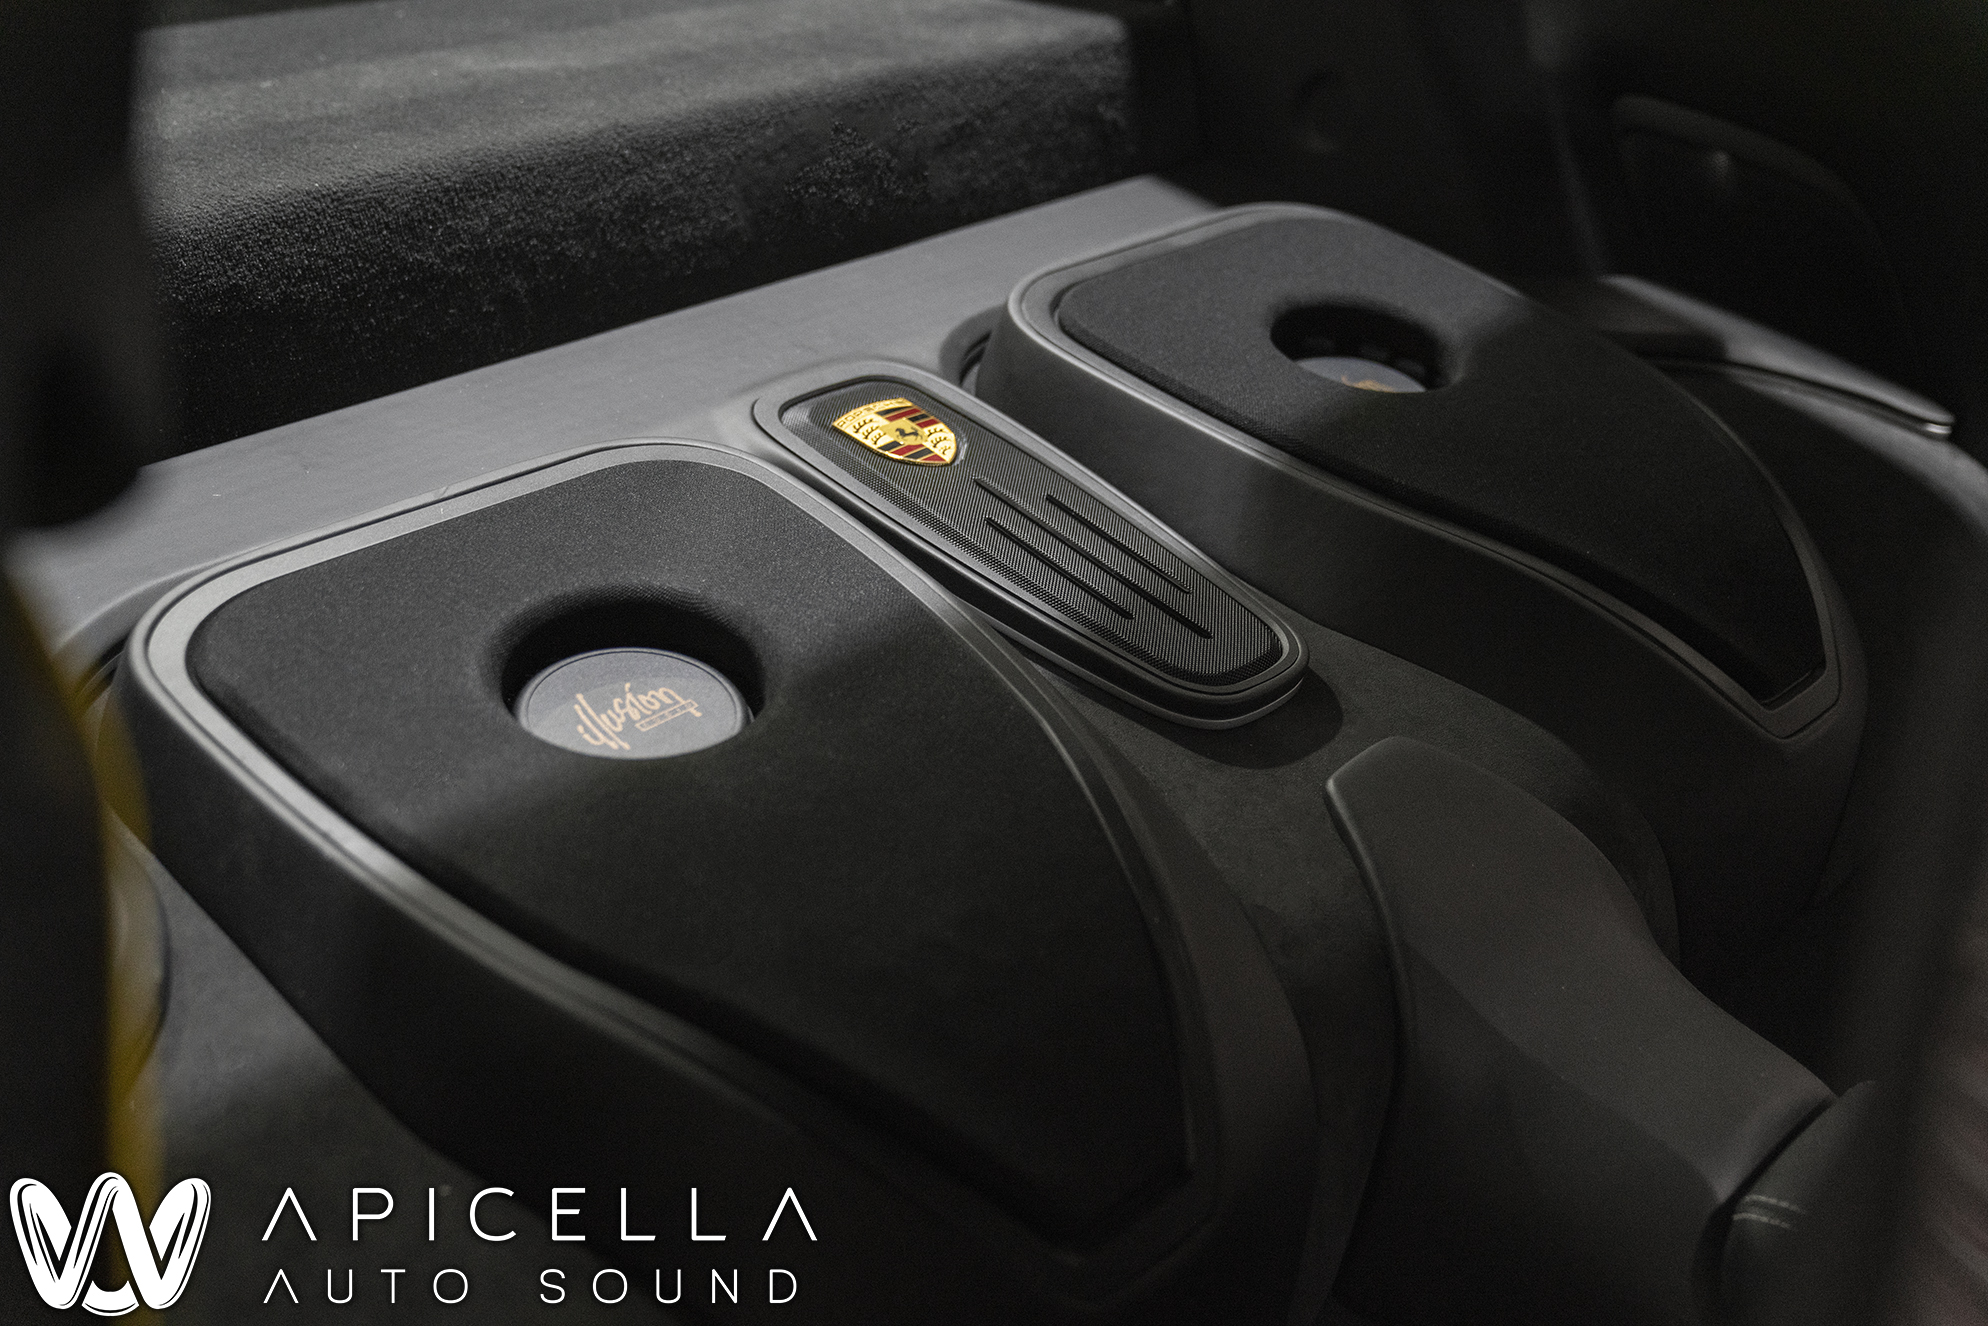
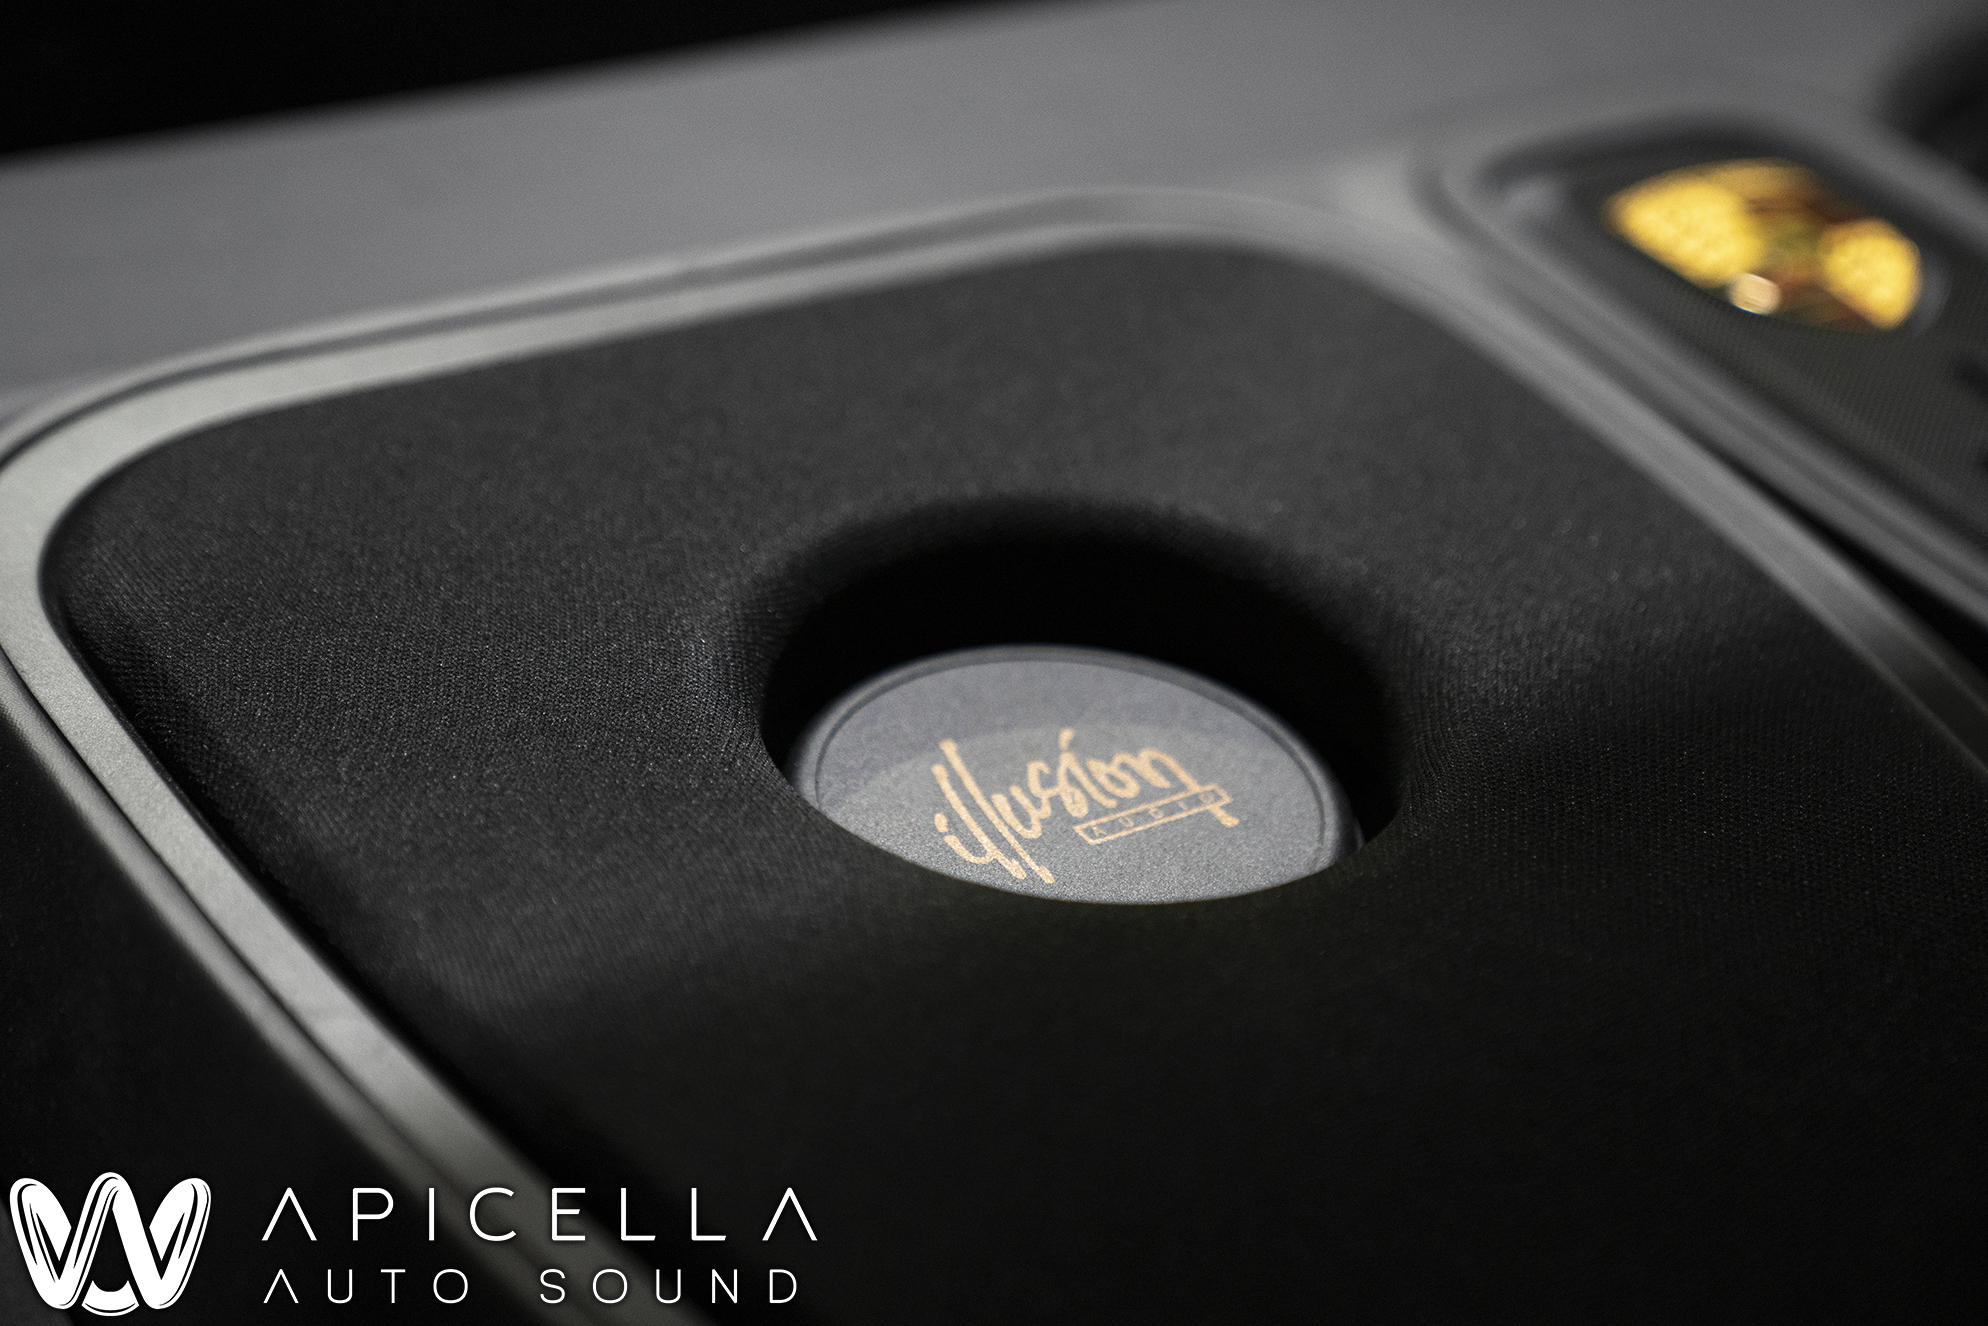
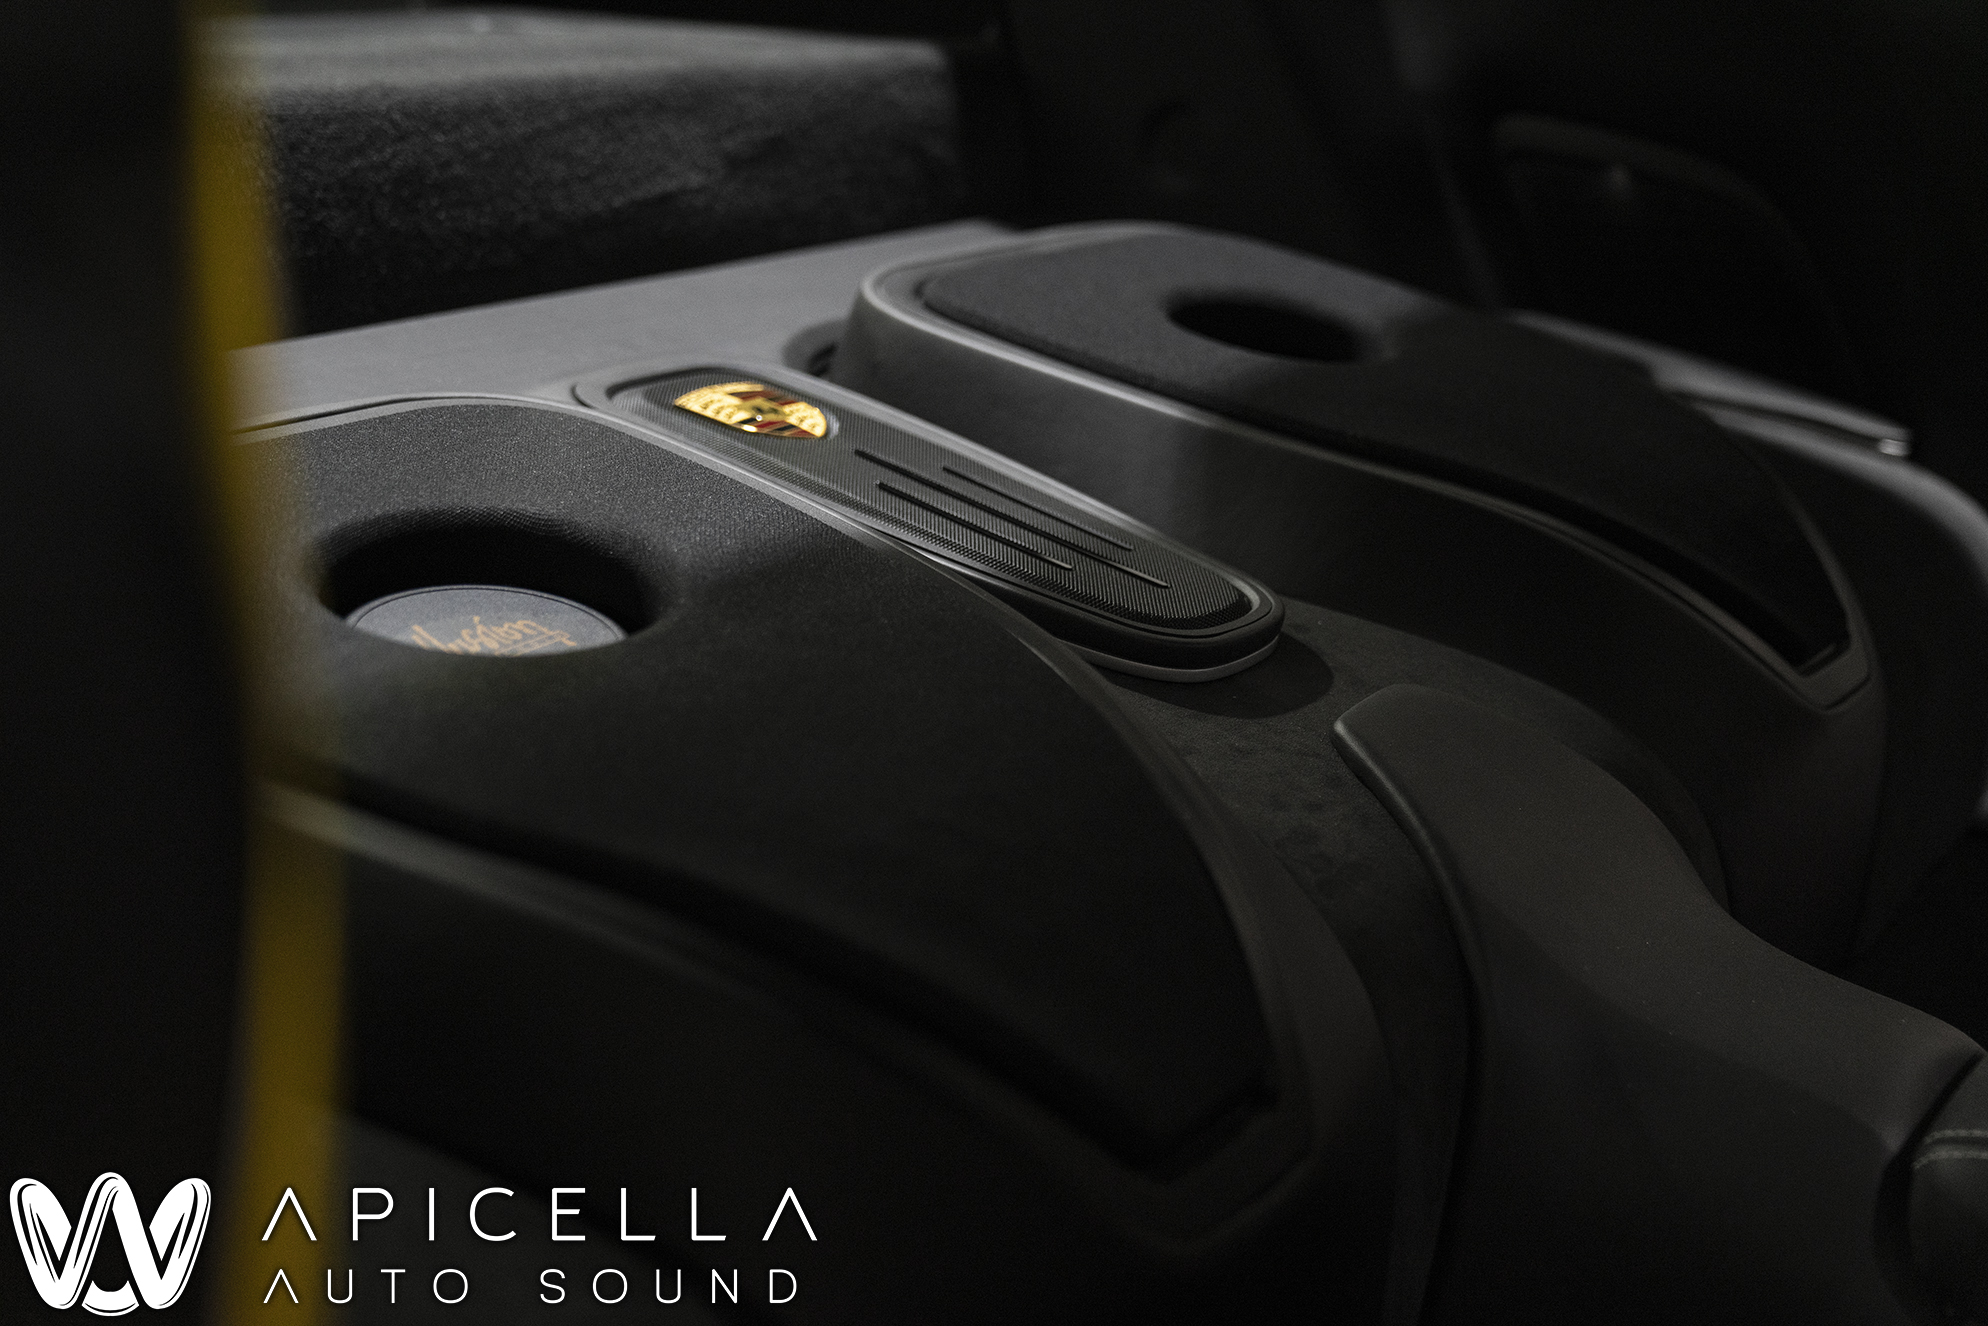
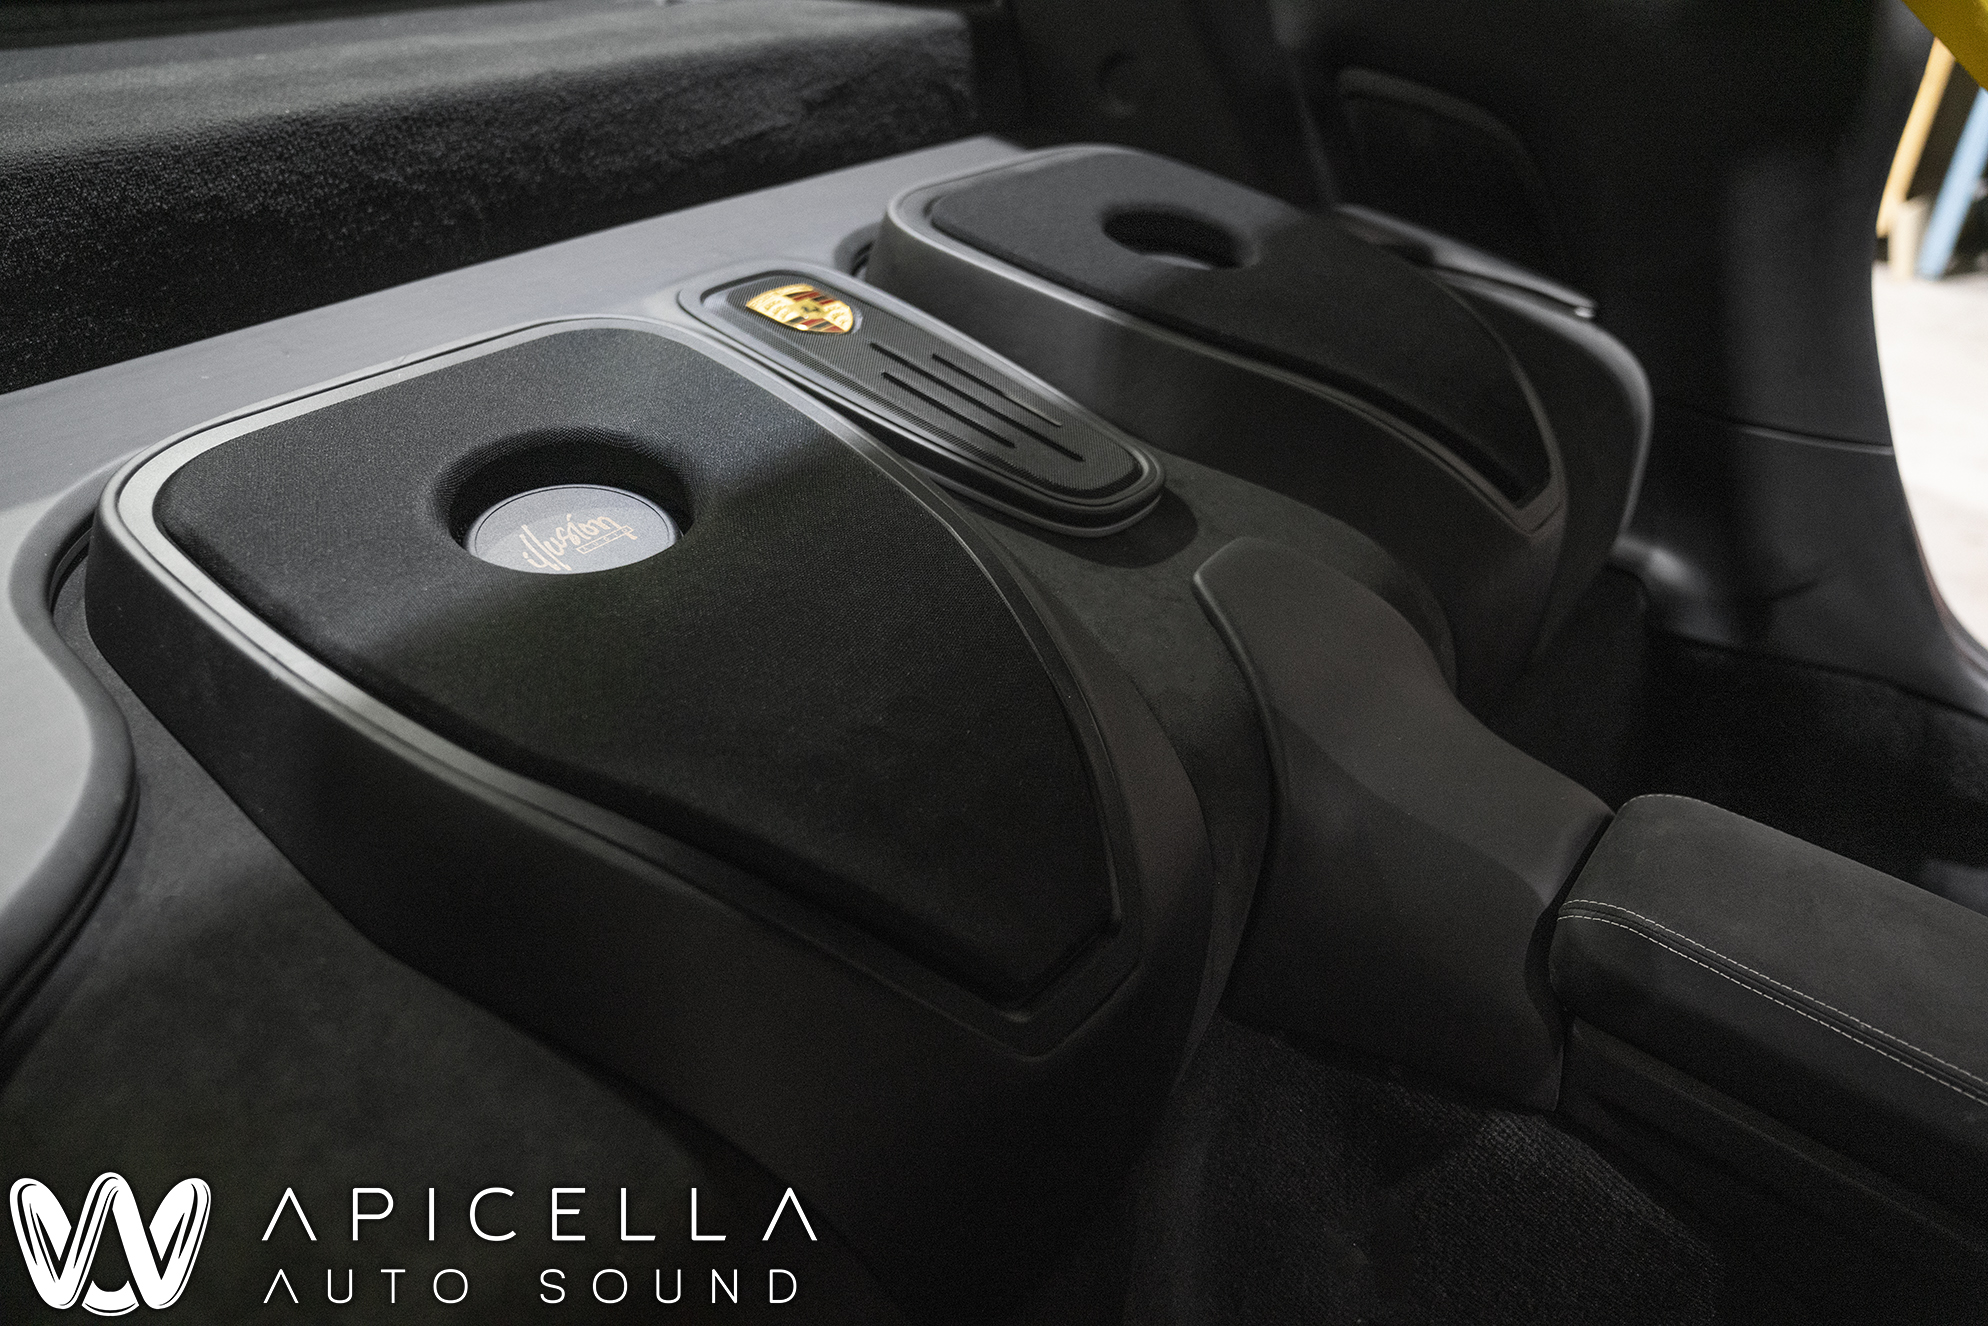
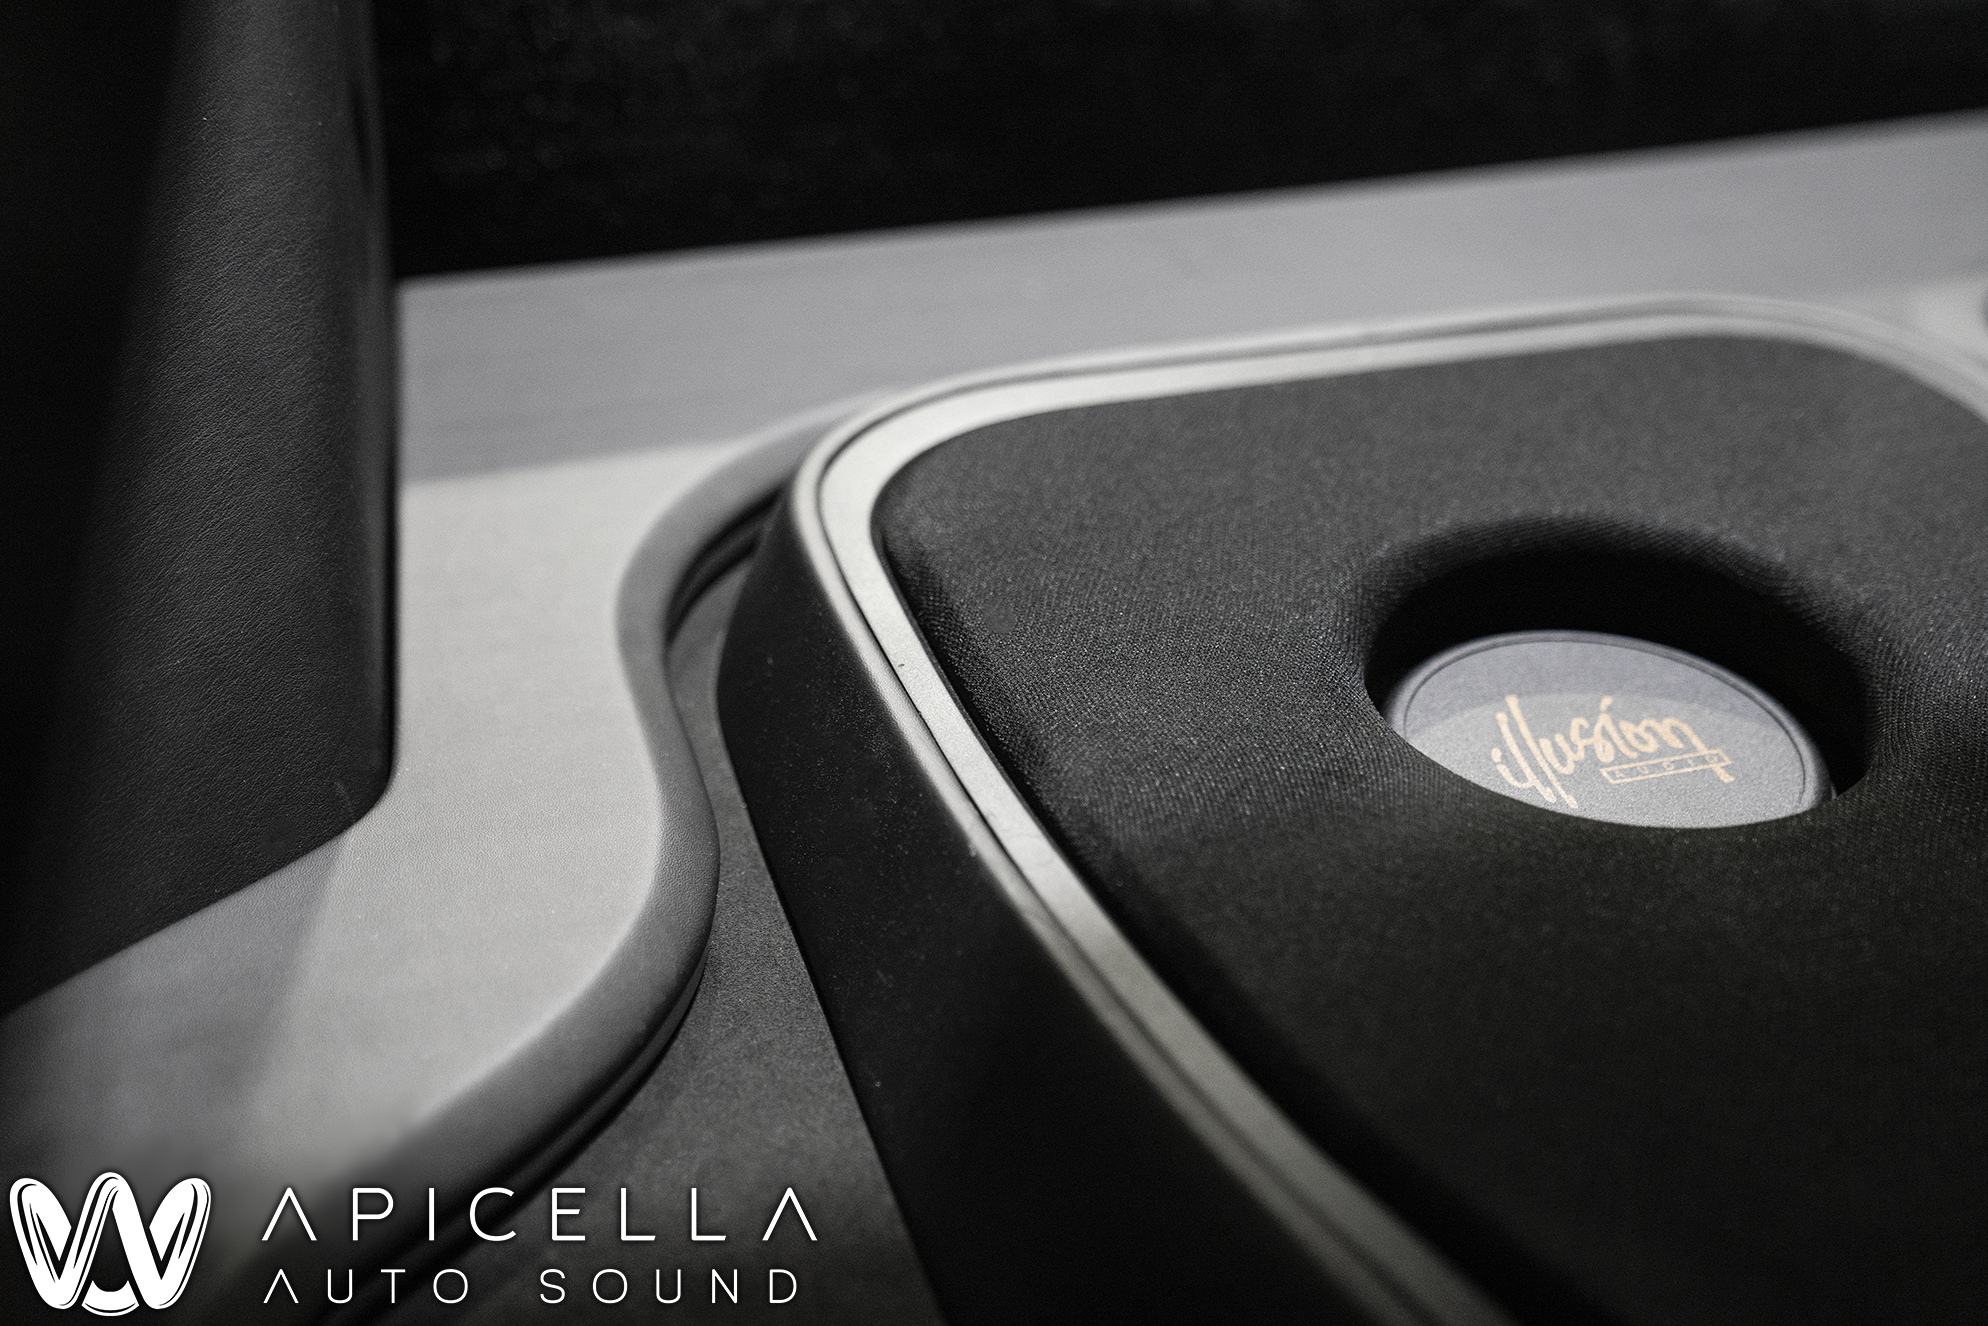
The sub enclosures and beauty panel all finished up. An OEM hood badge was used for this center grill. When you look at this in person, nothing about it hints that it's aftermarket. It's crazy how factory it looks when you have the seats in.
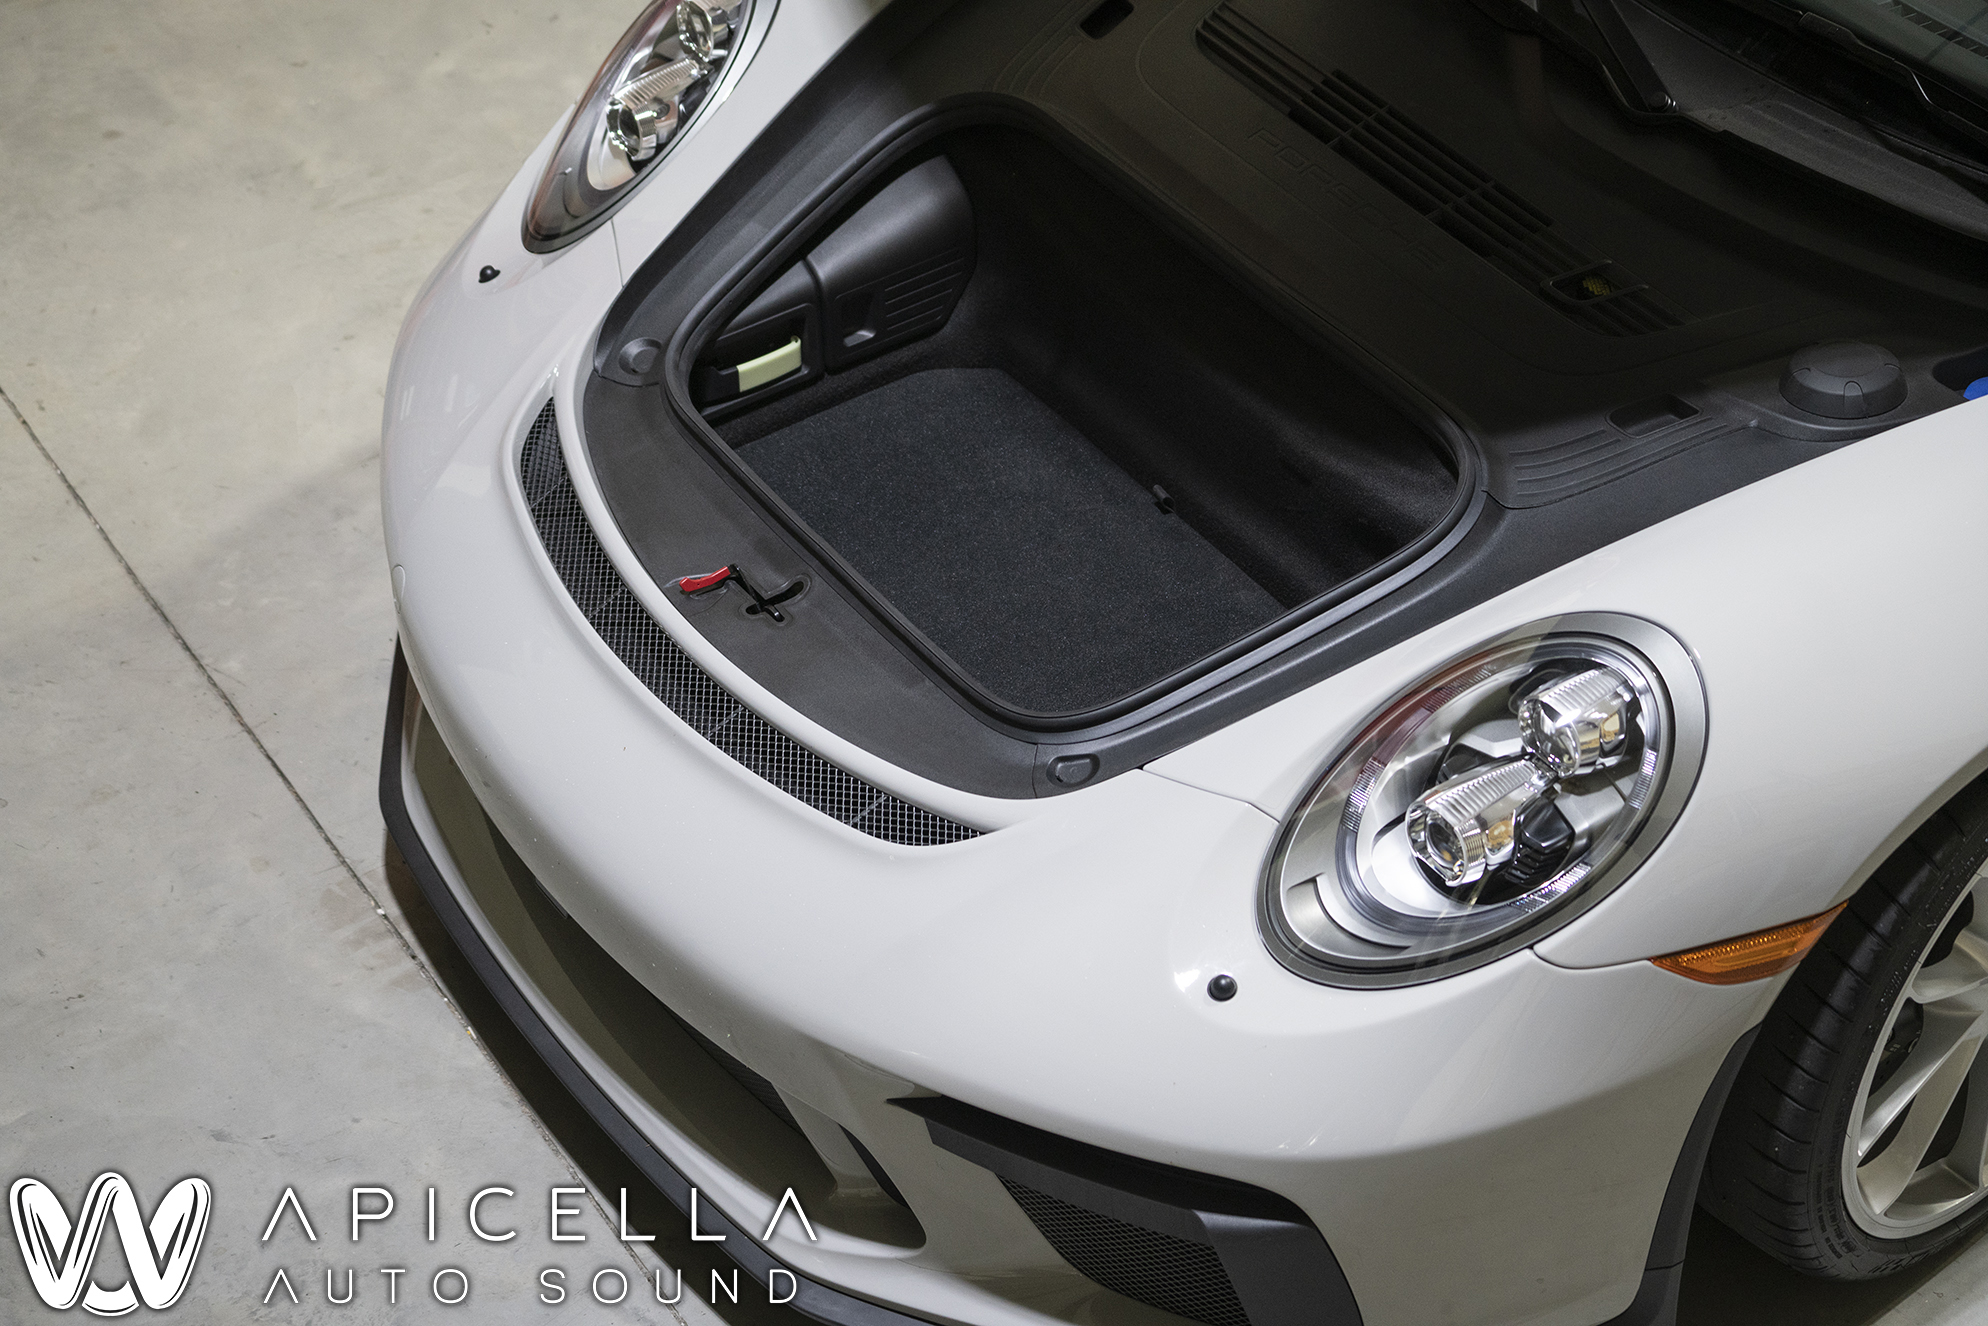
The "Frunk" was finished with a cover so some storage space is retained and usable.. An Alcantara pull strap was made to help remove it when needed.
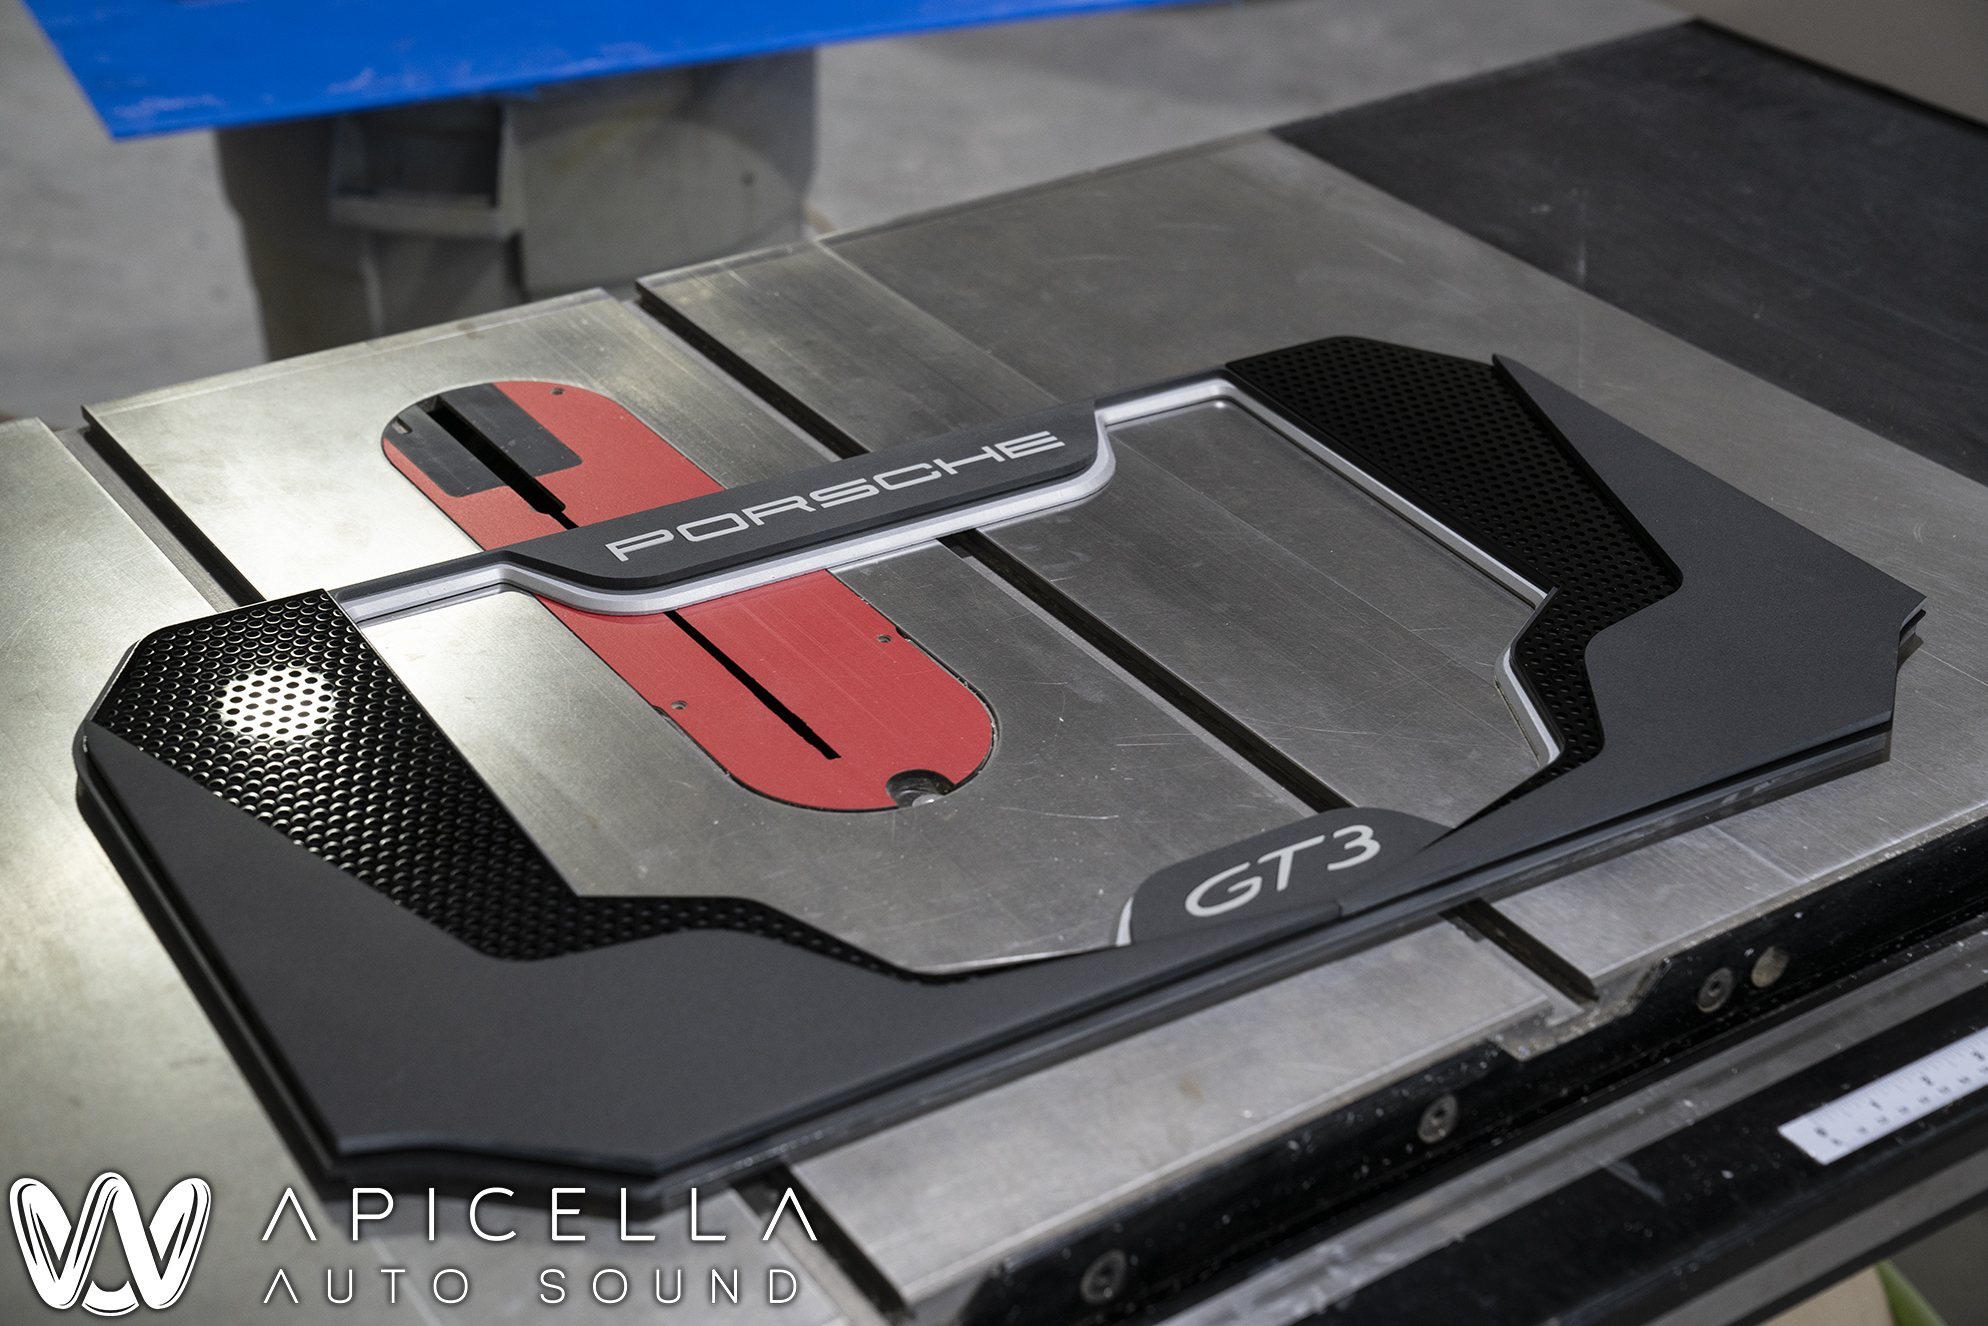
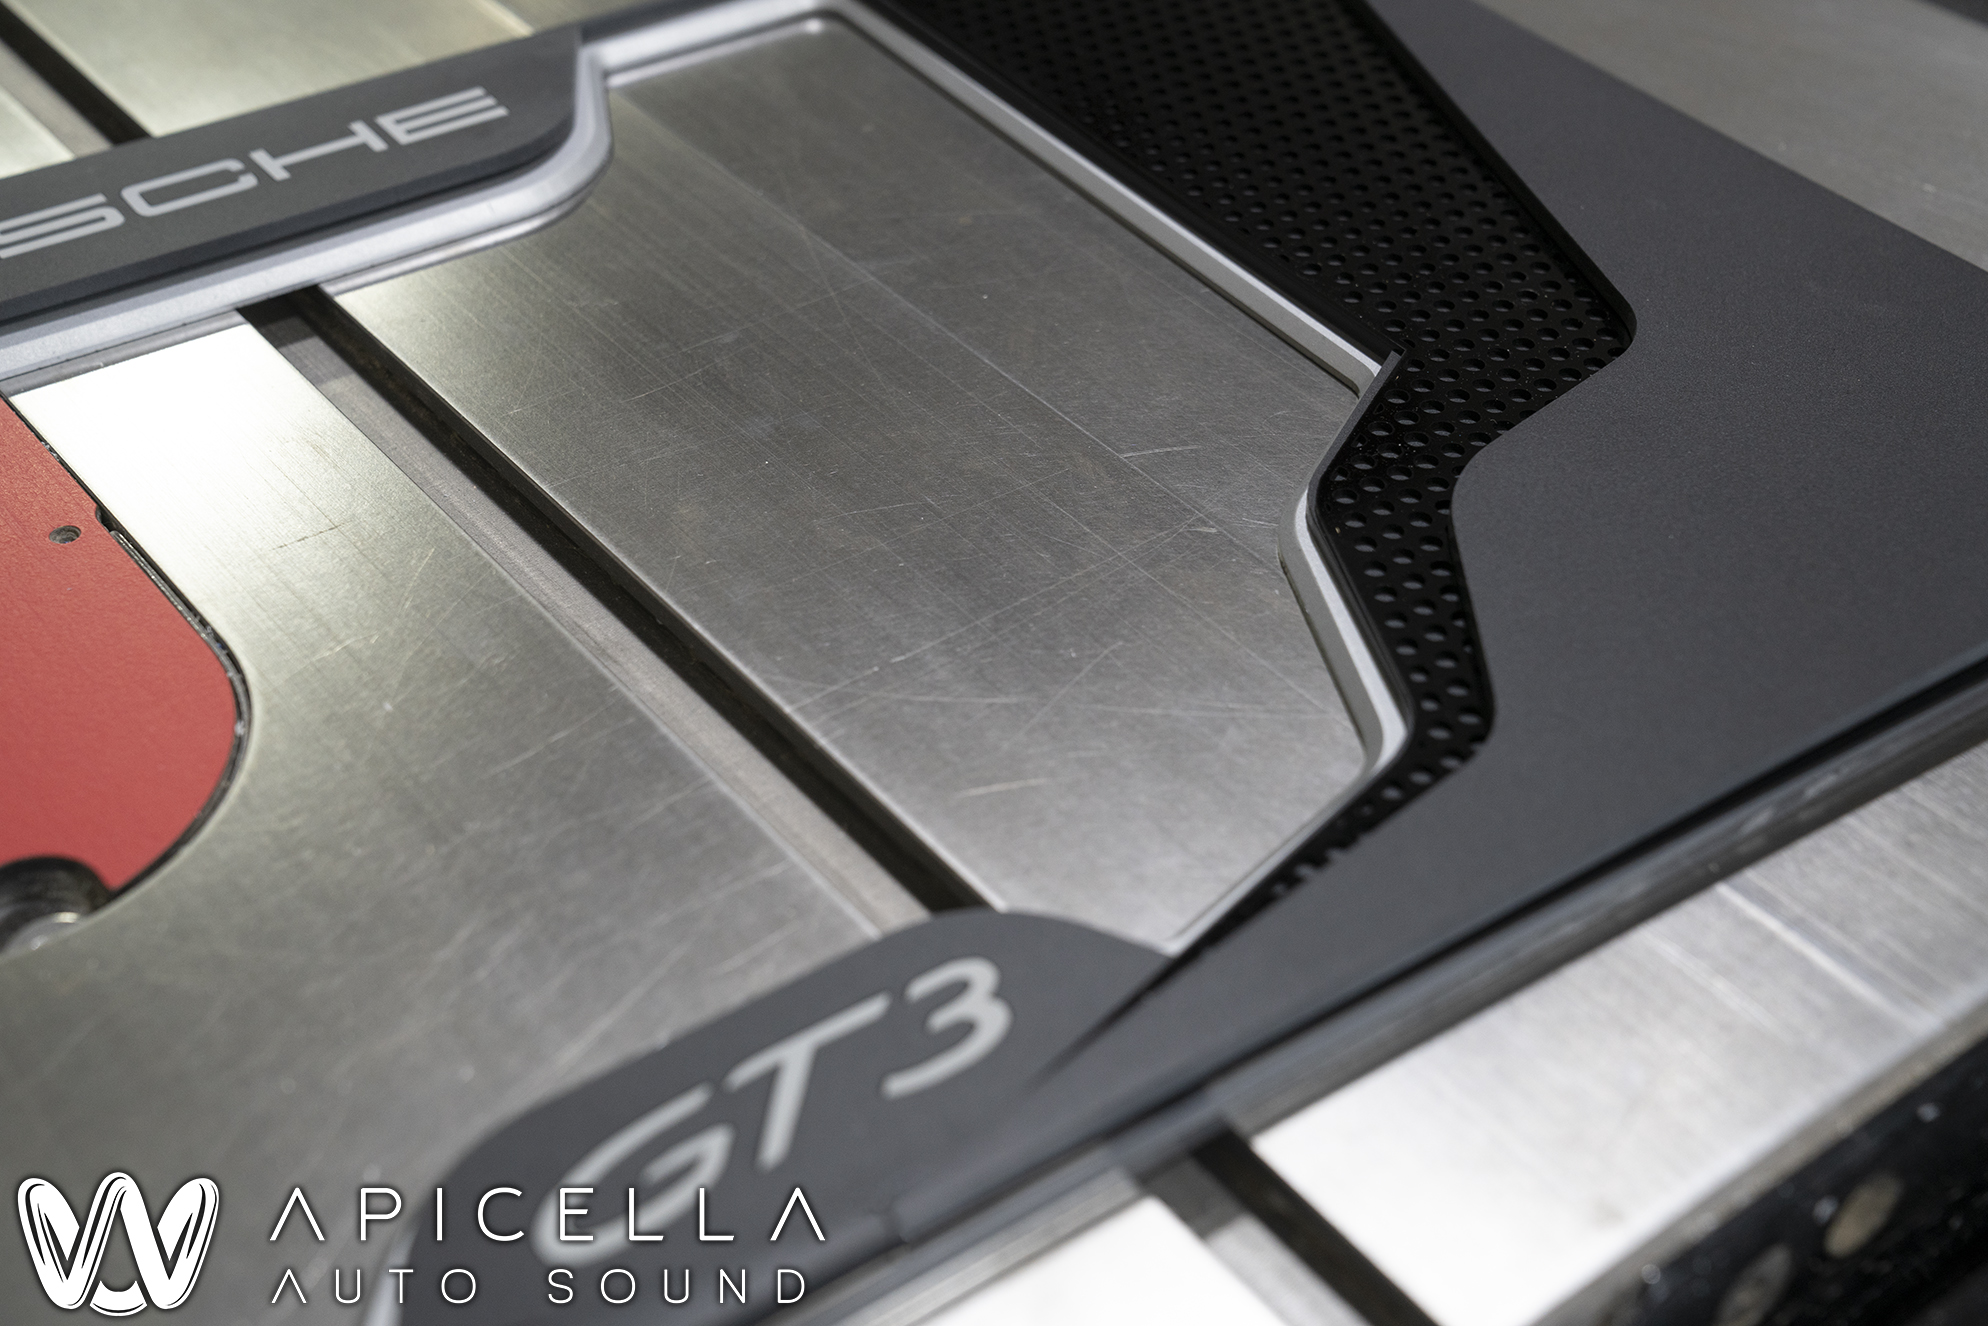
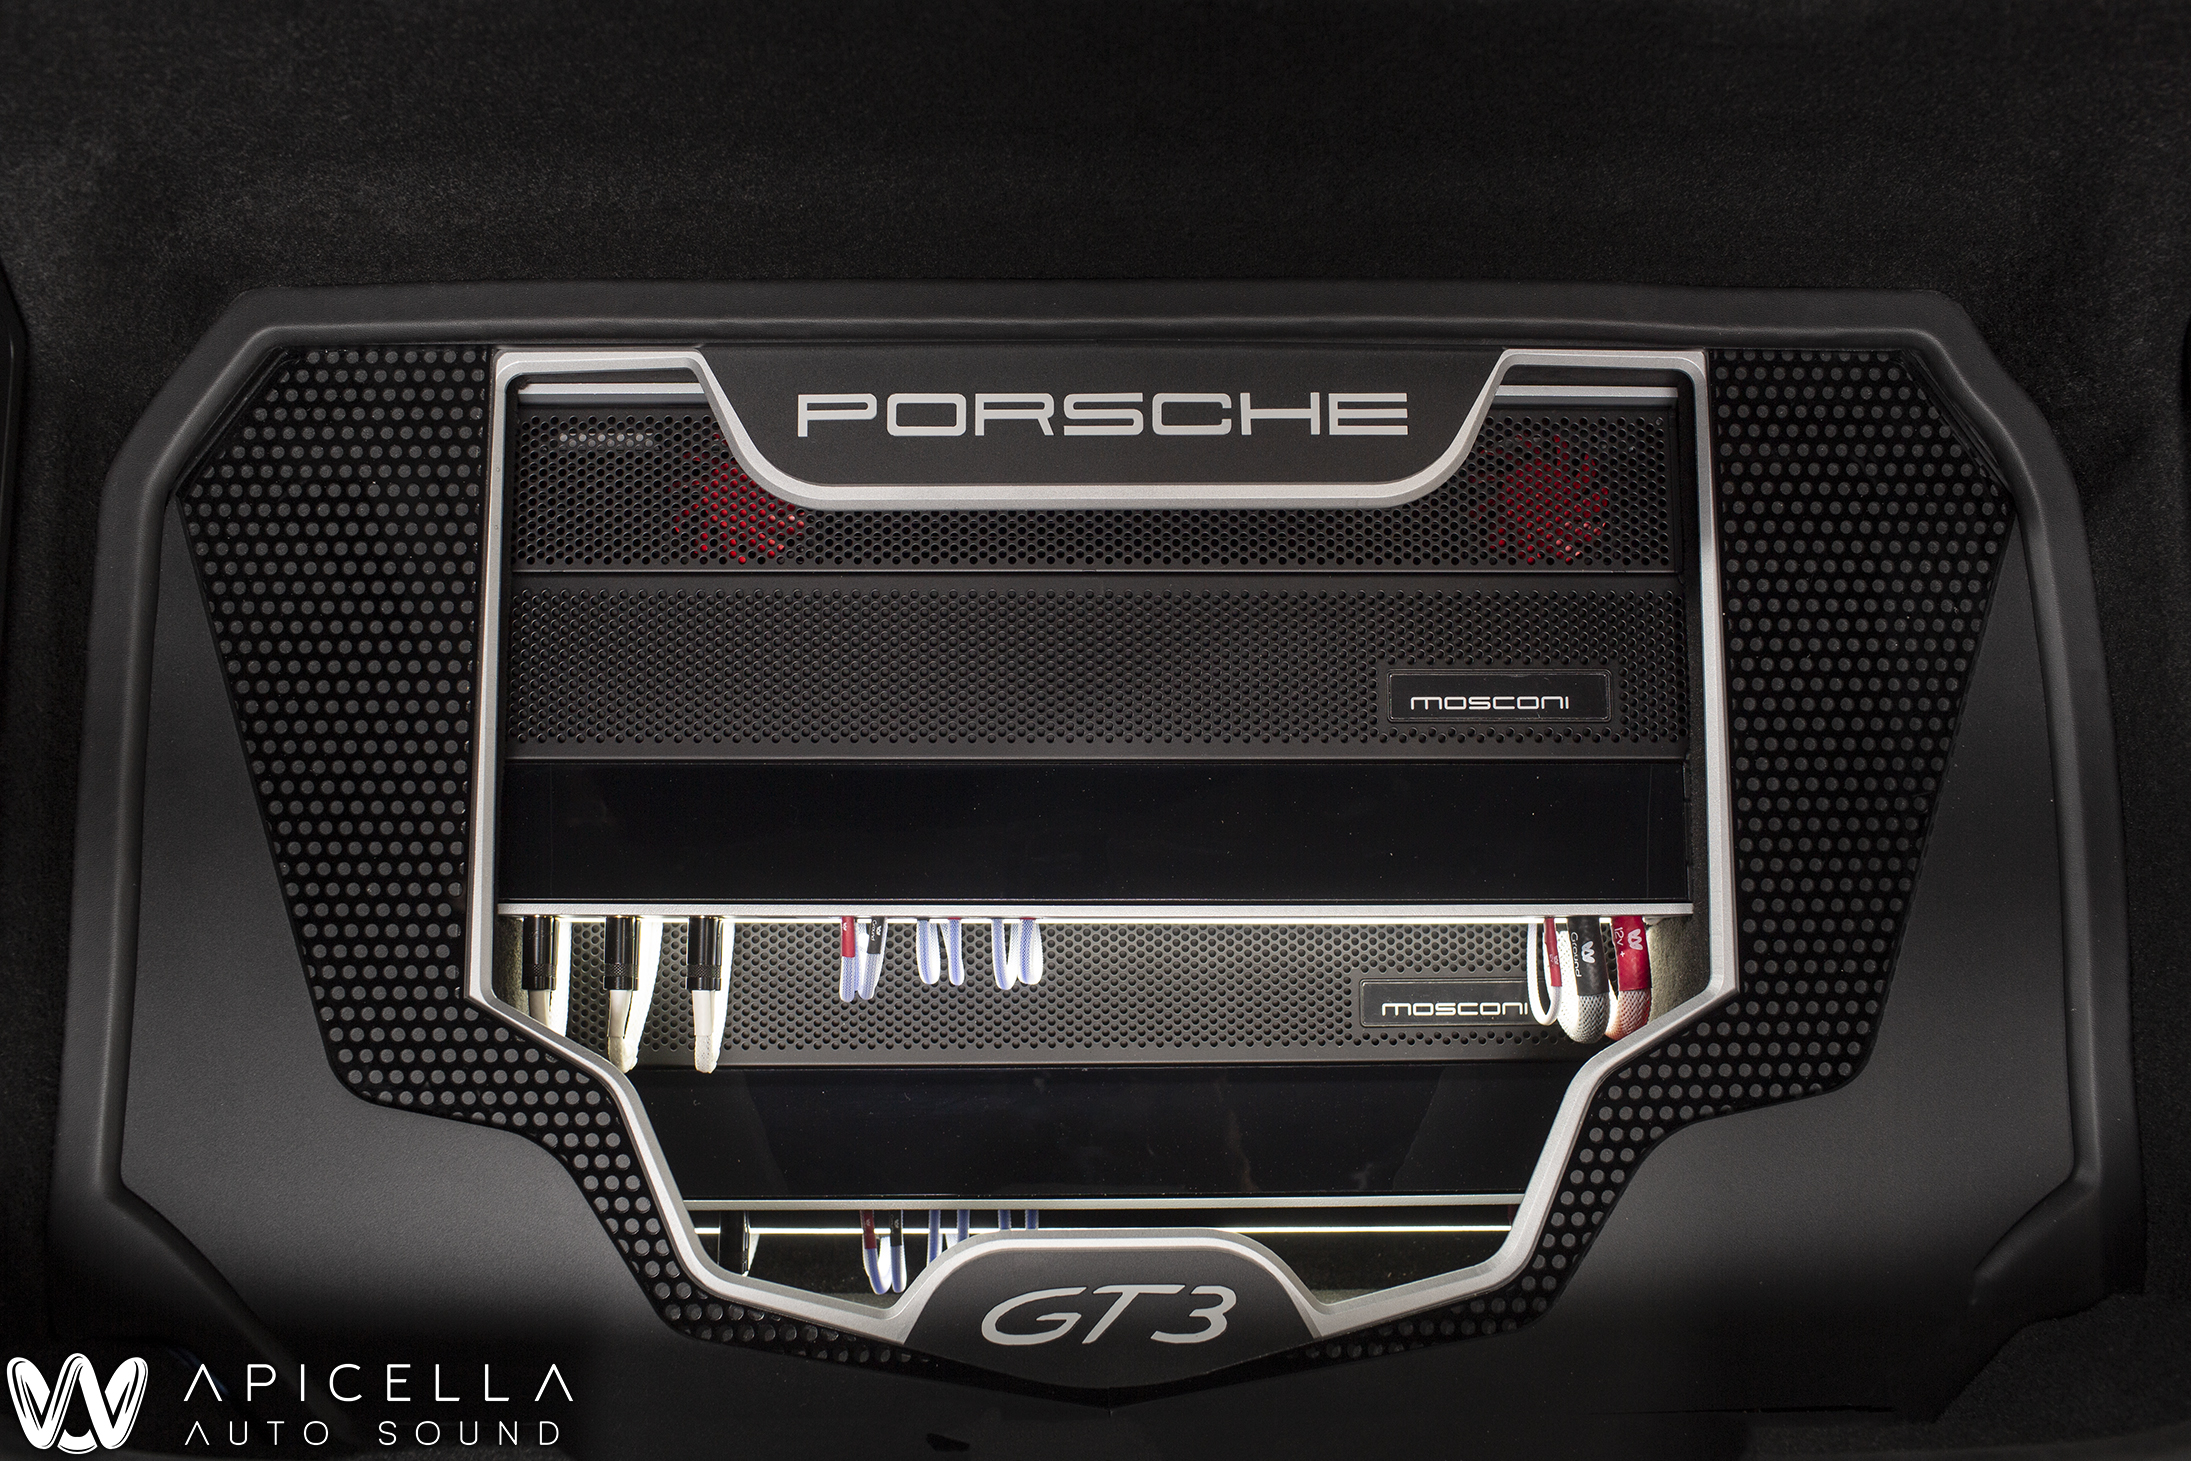
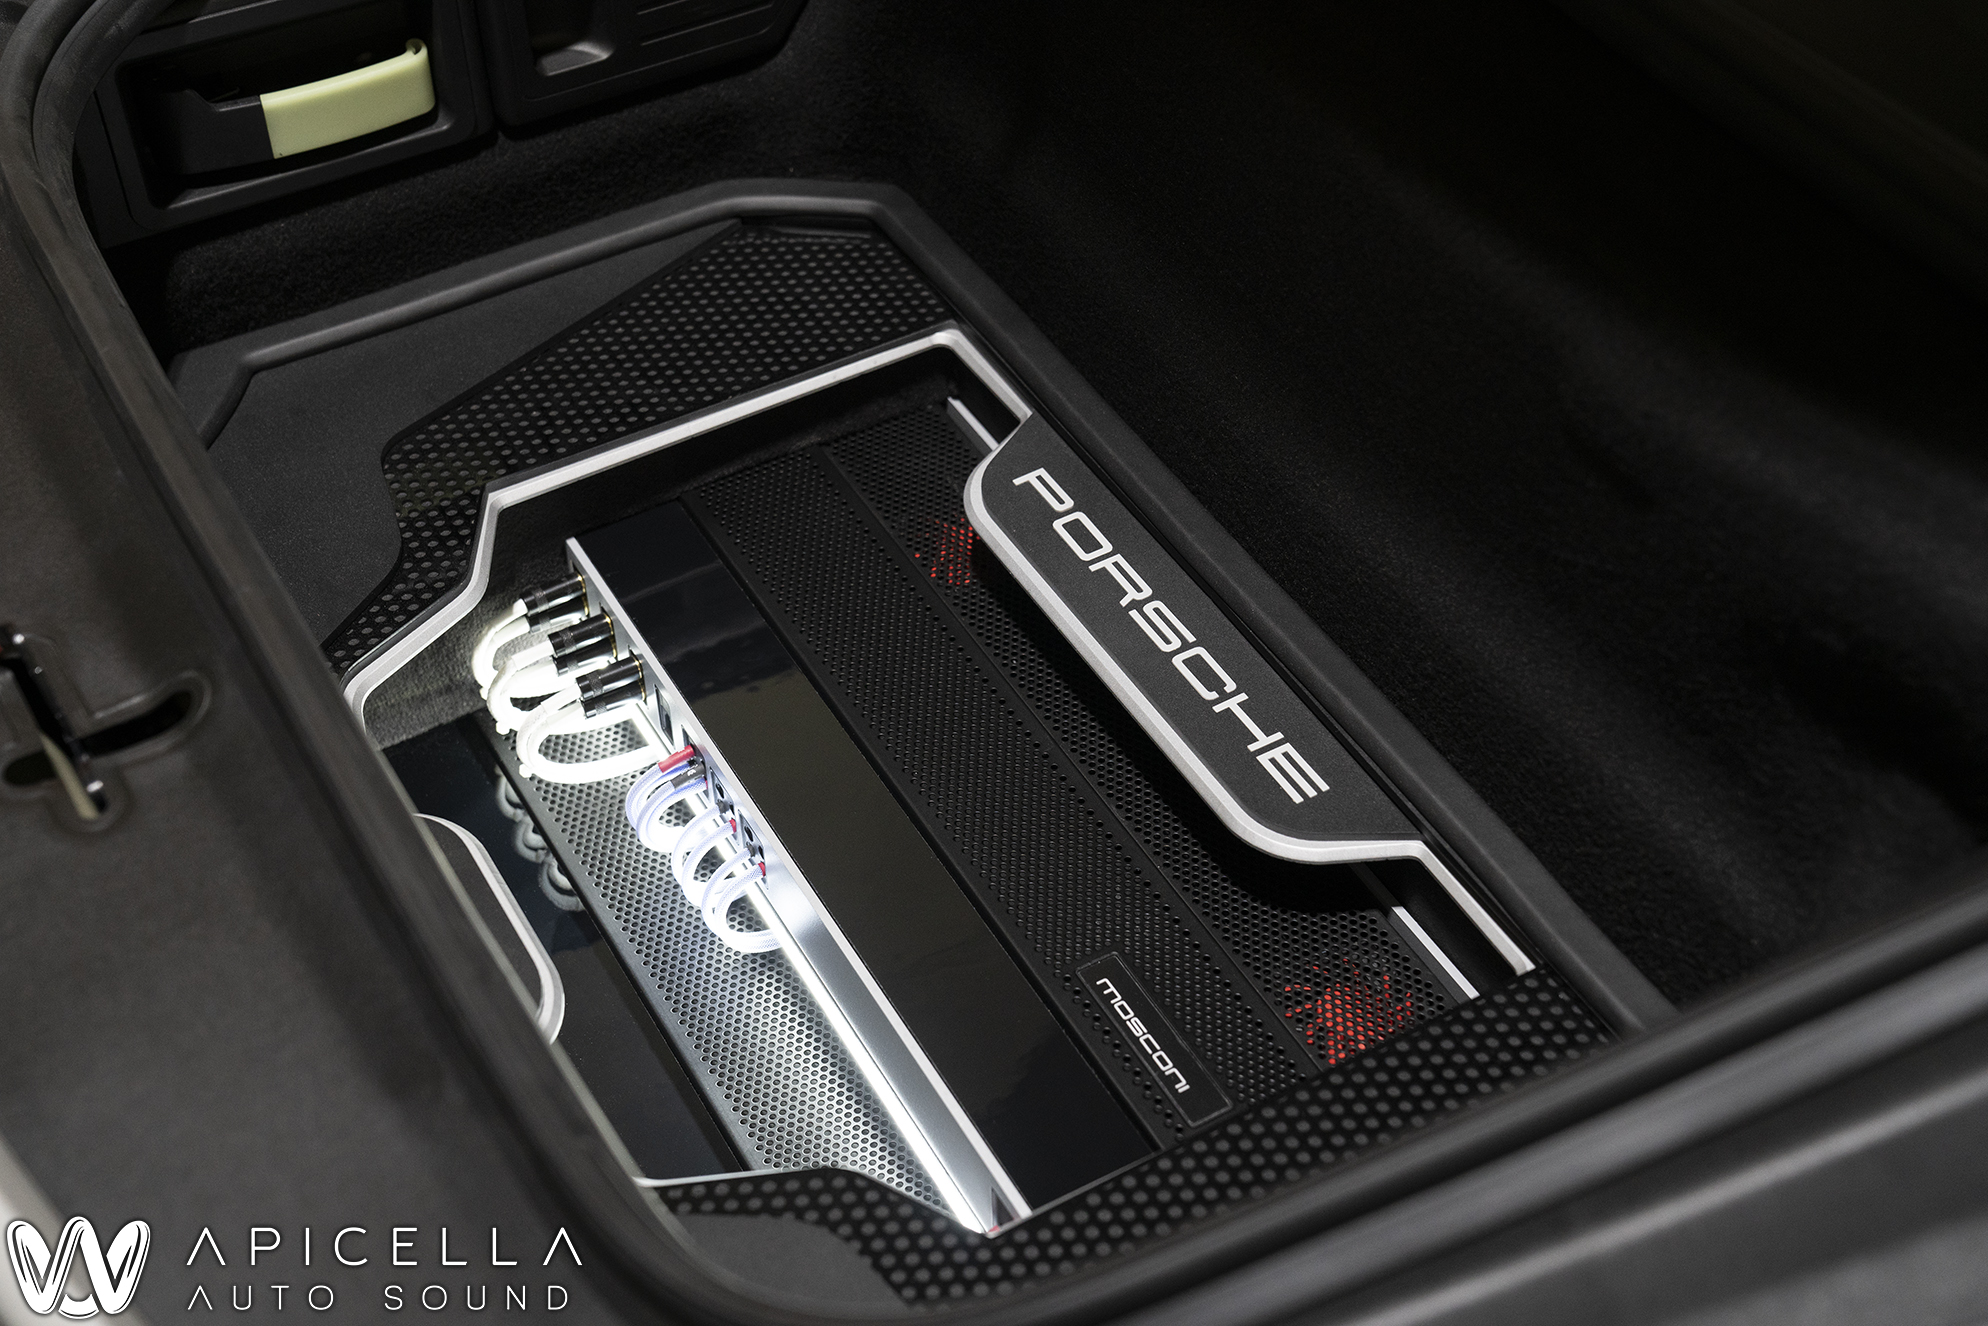
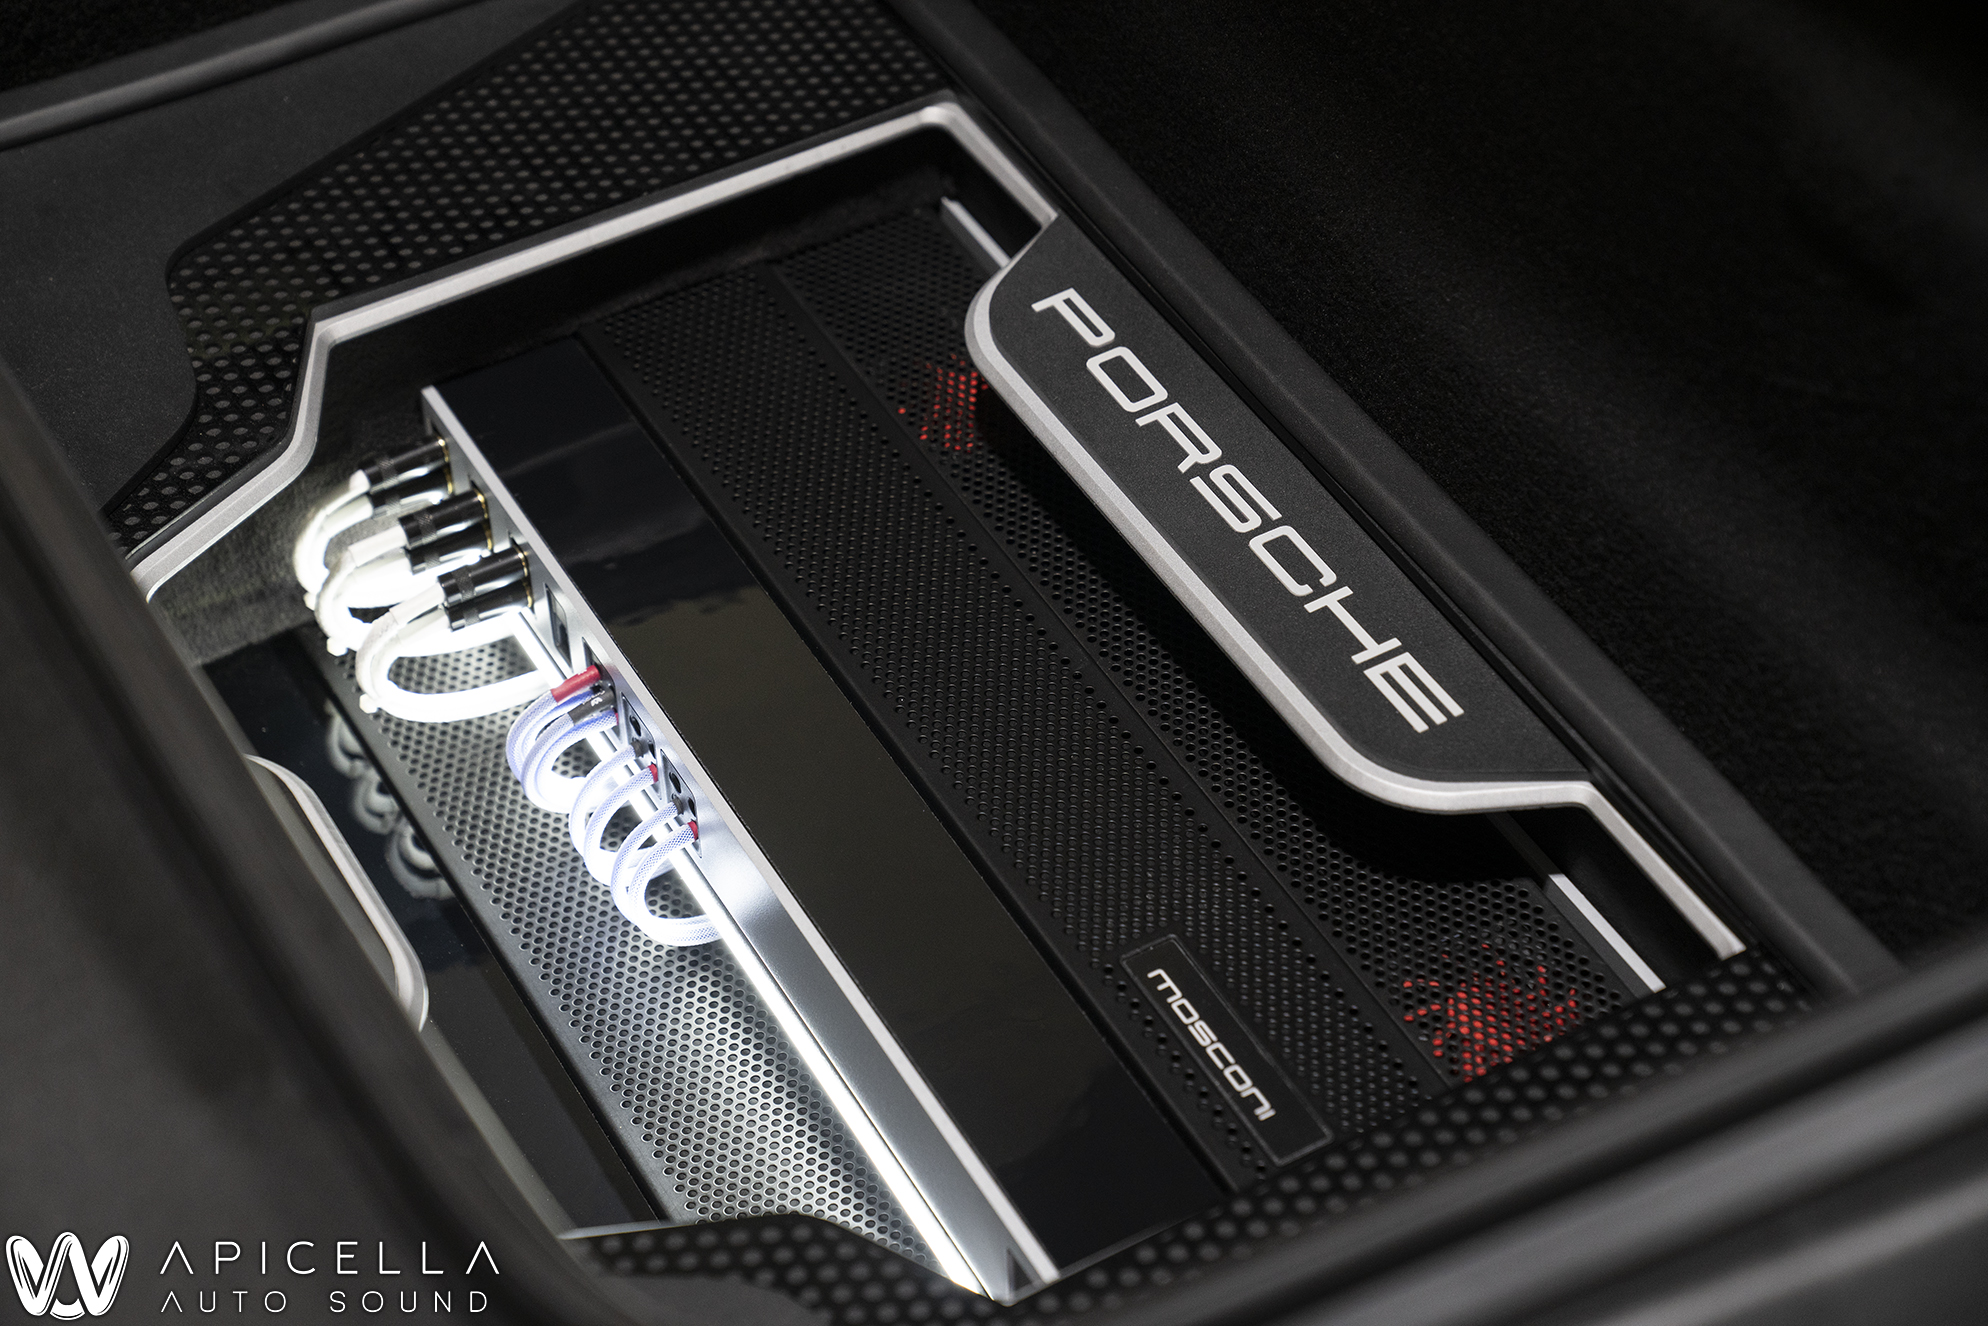
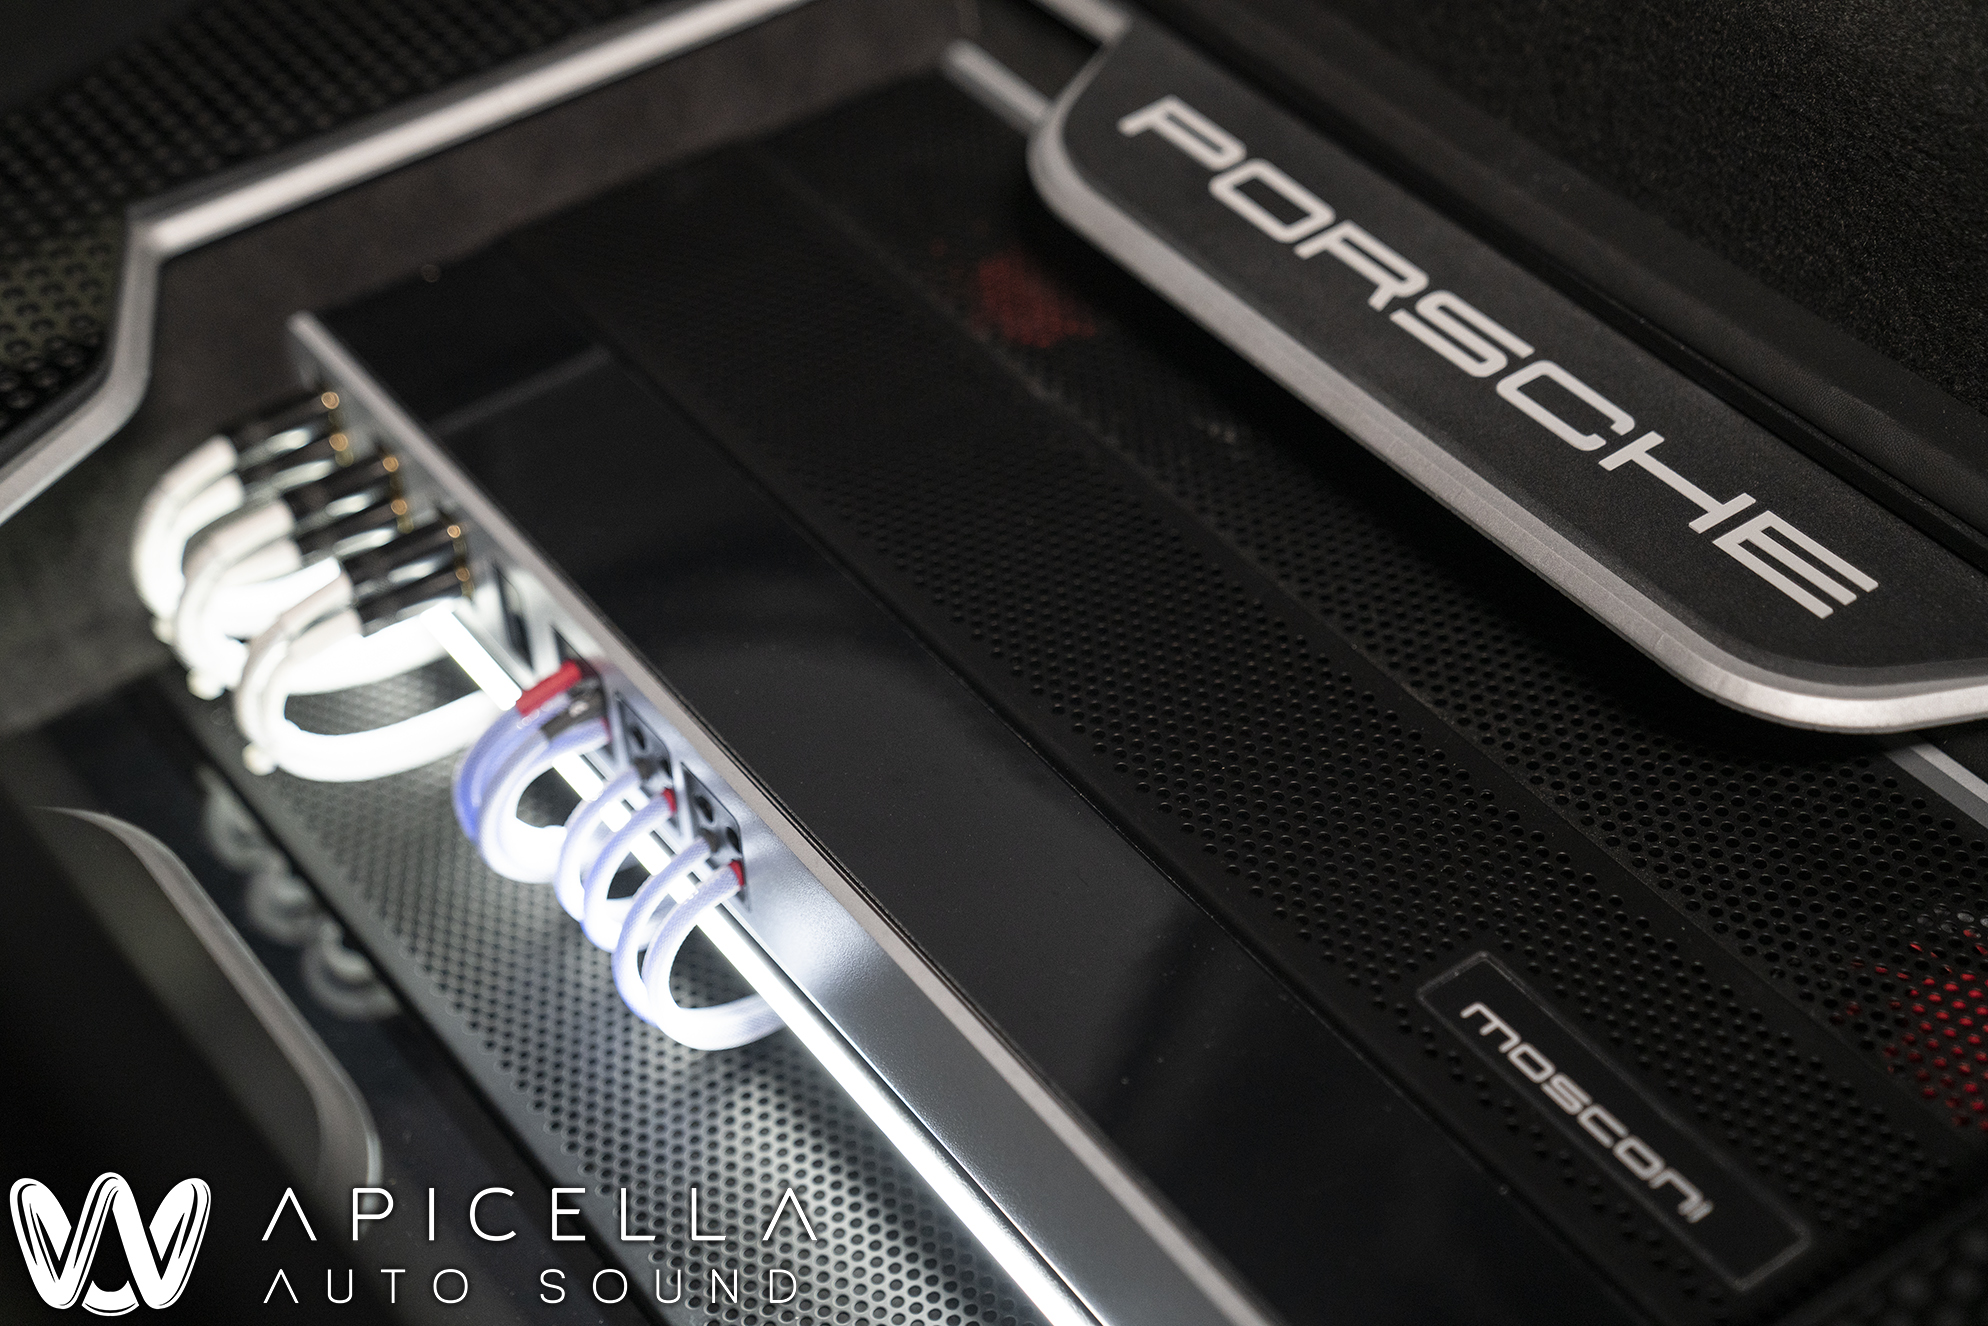
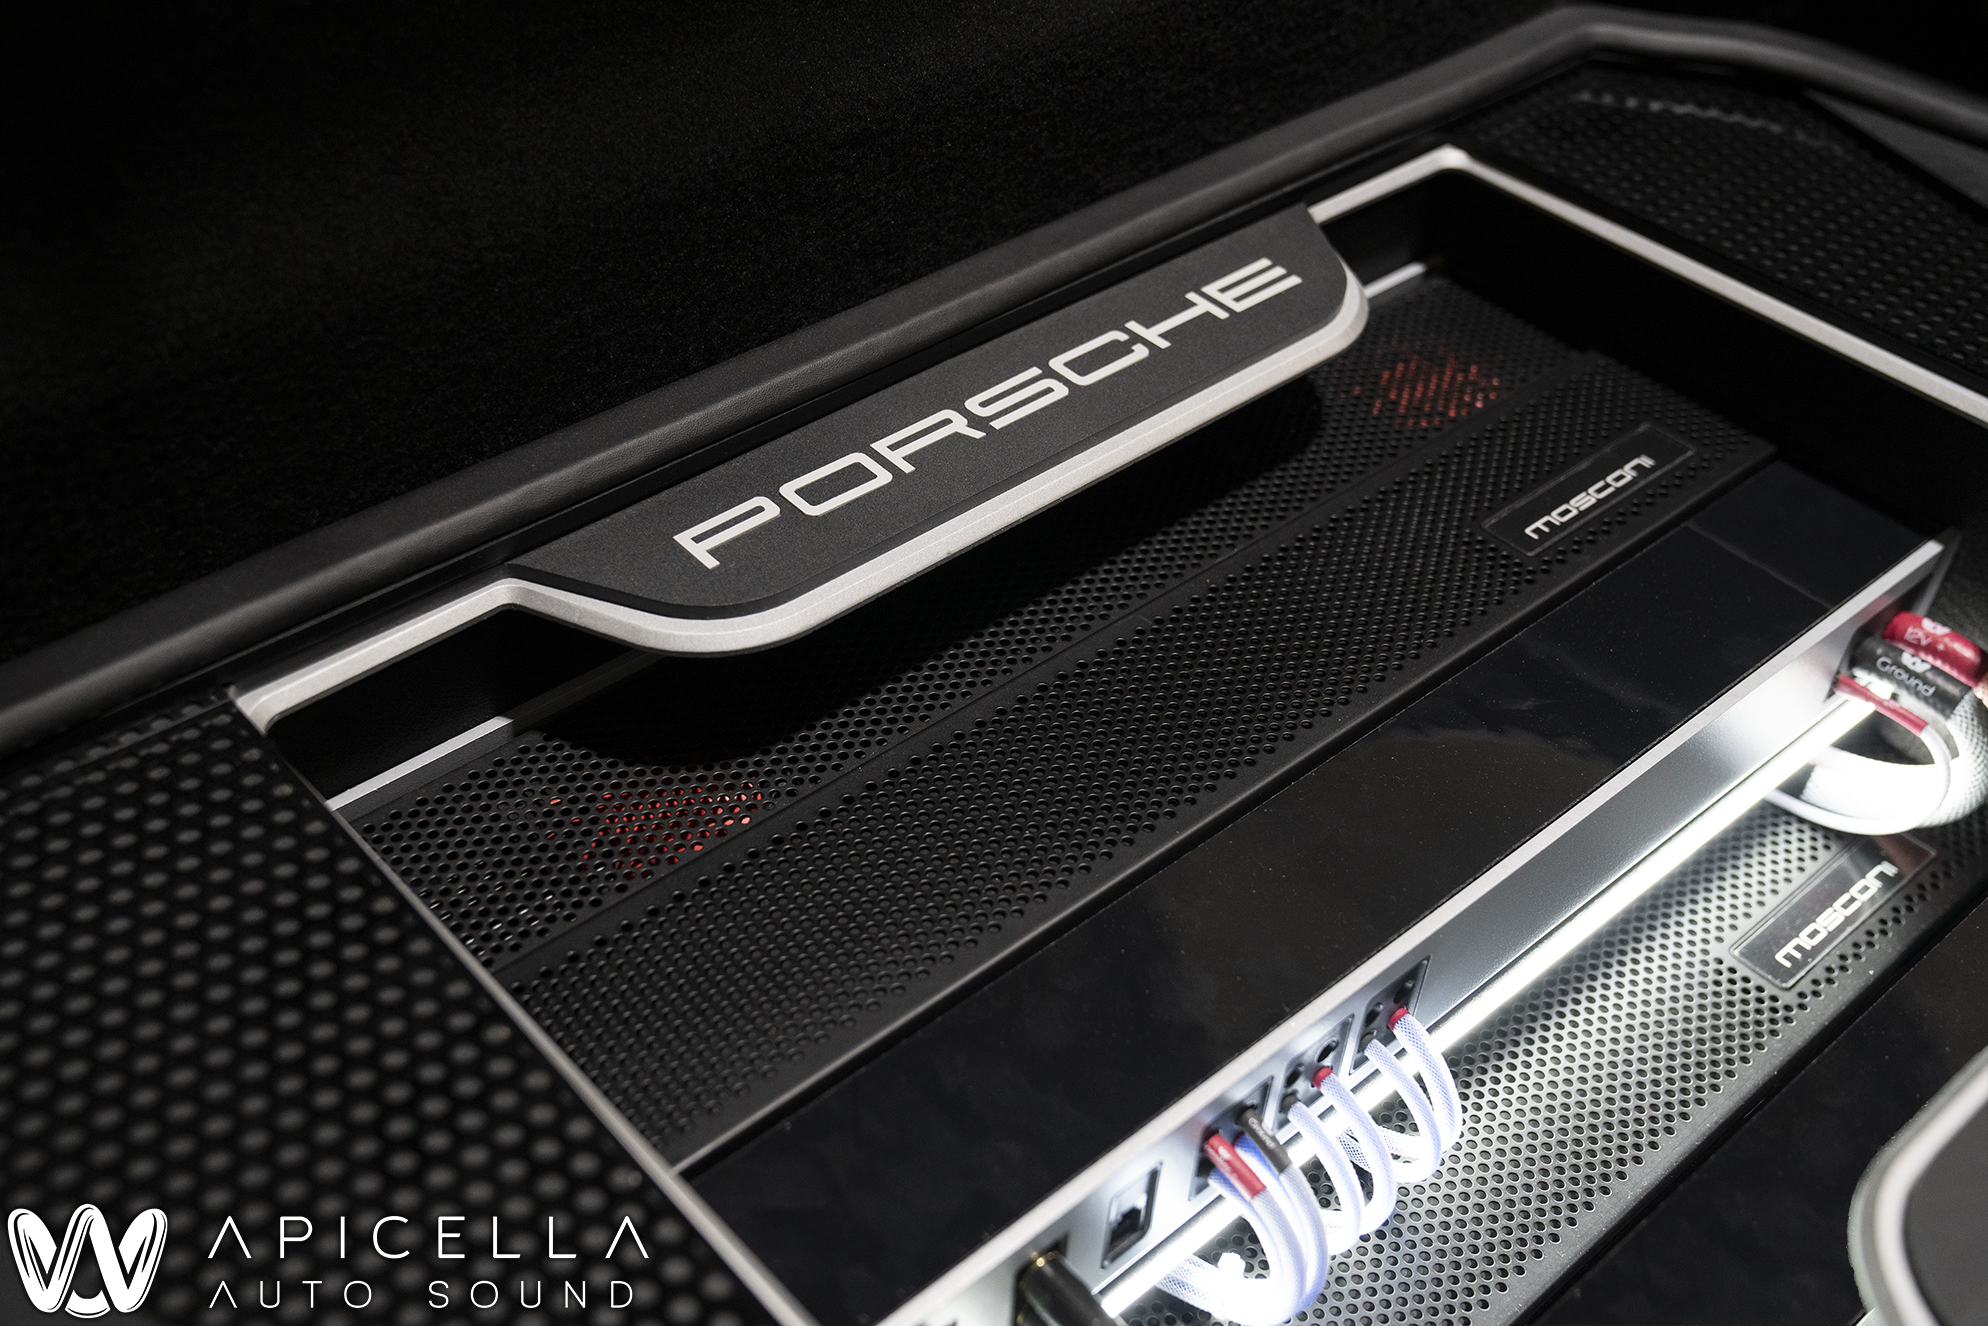
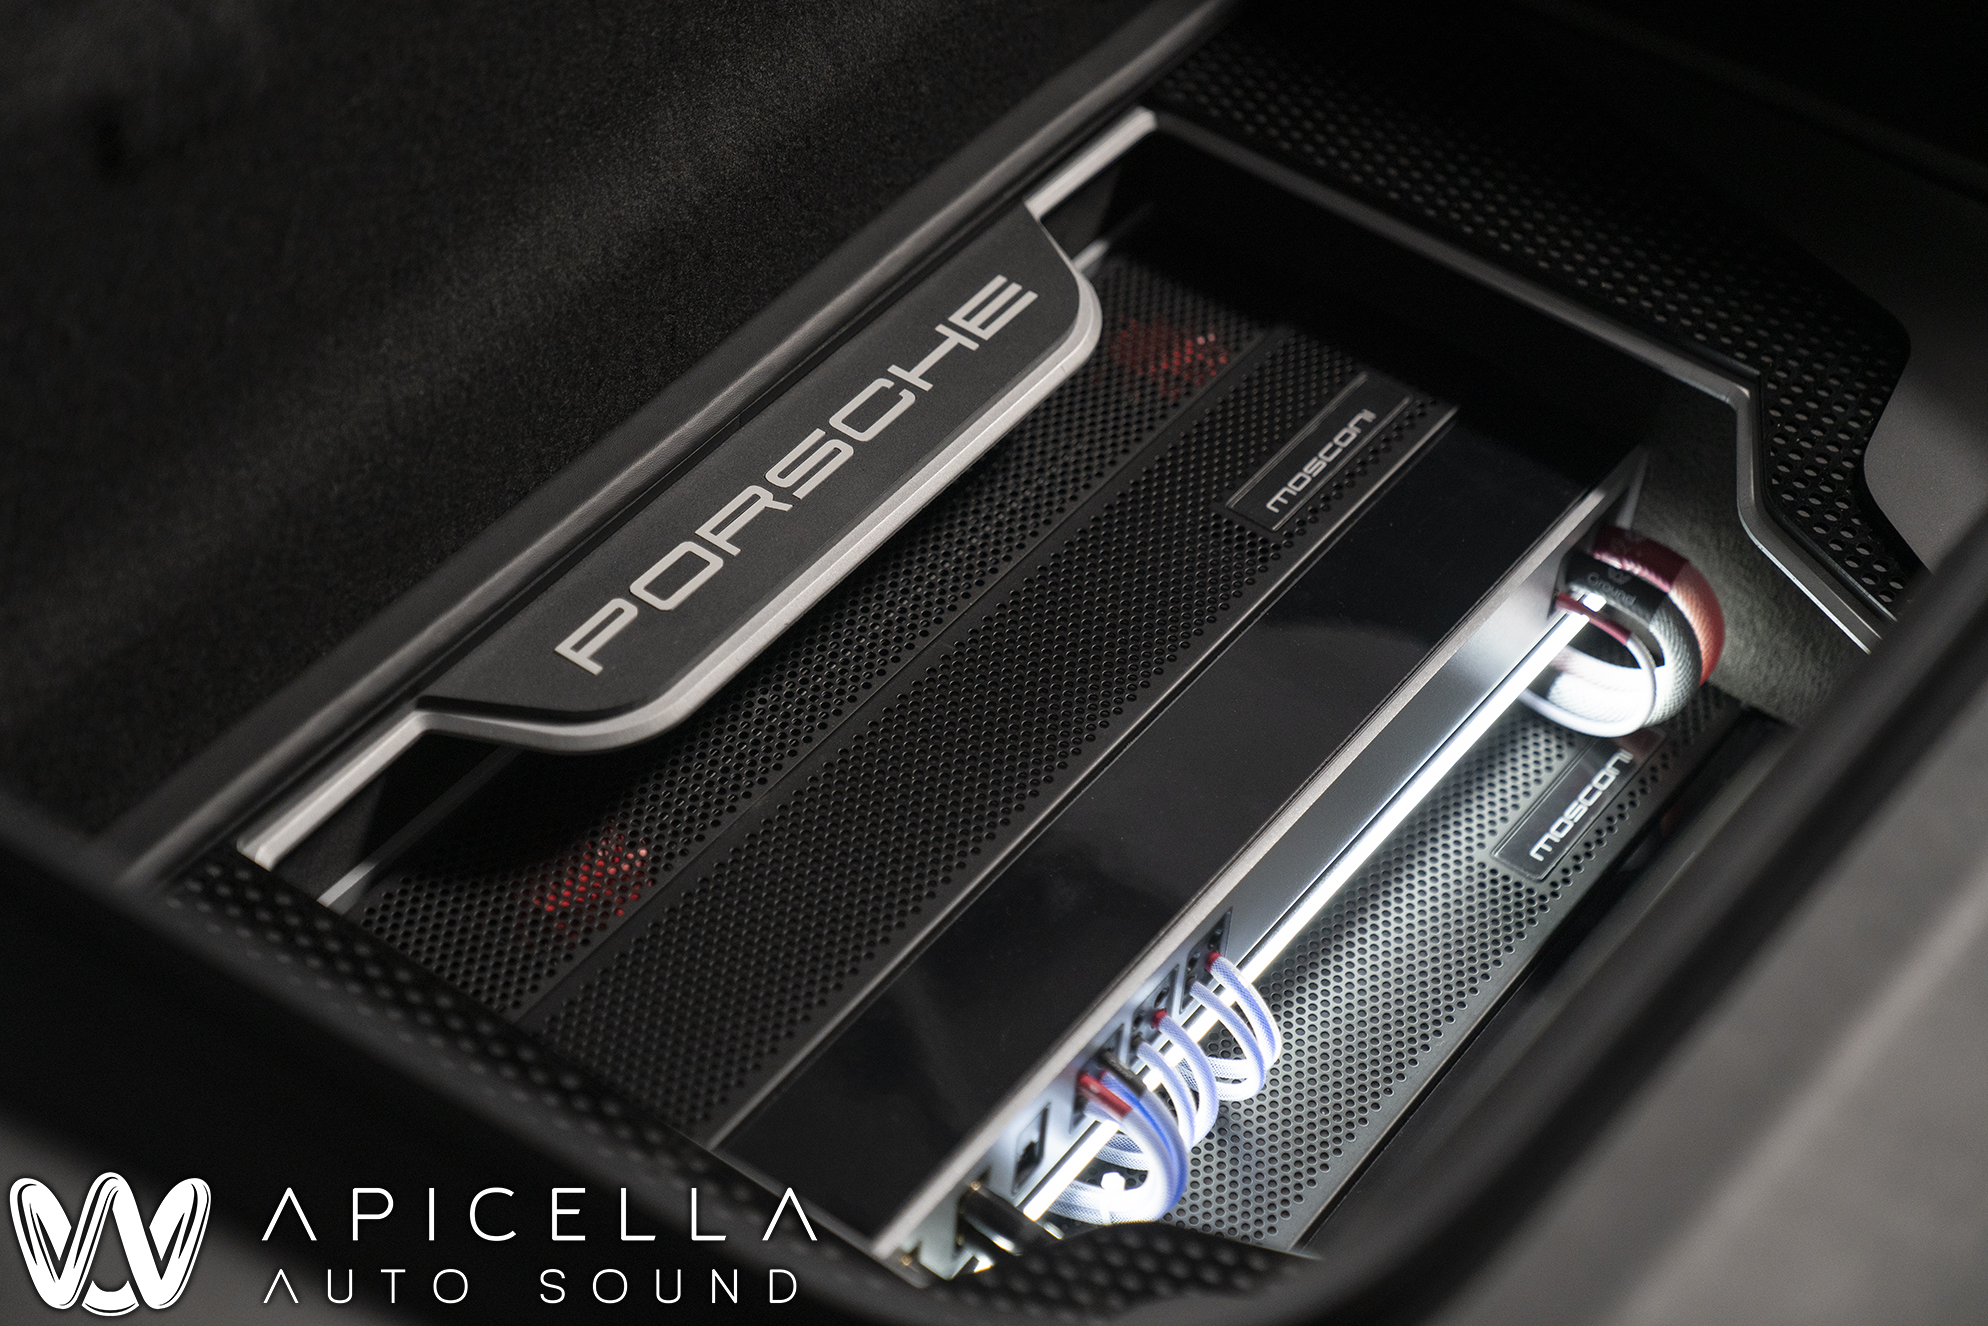
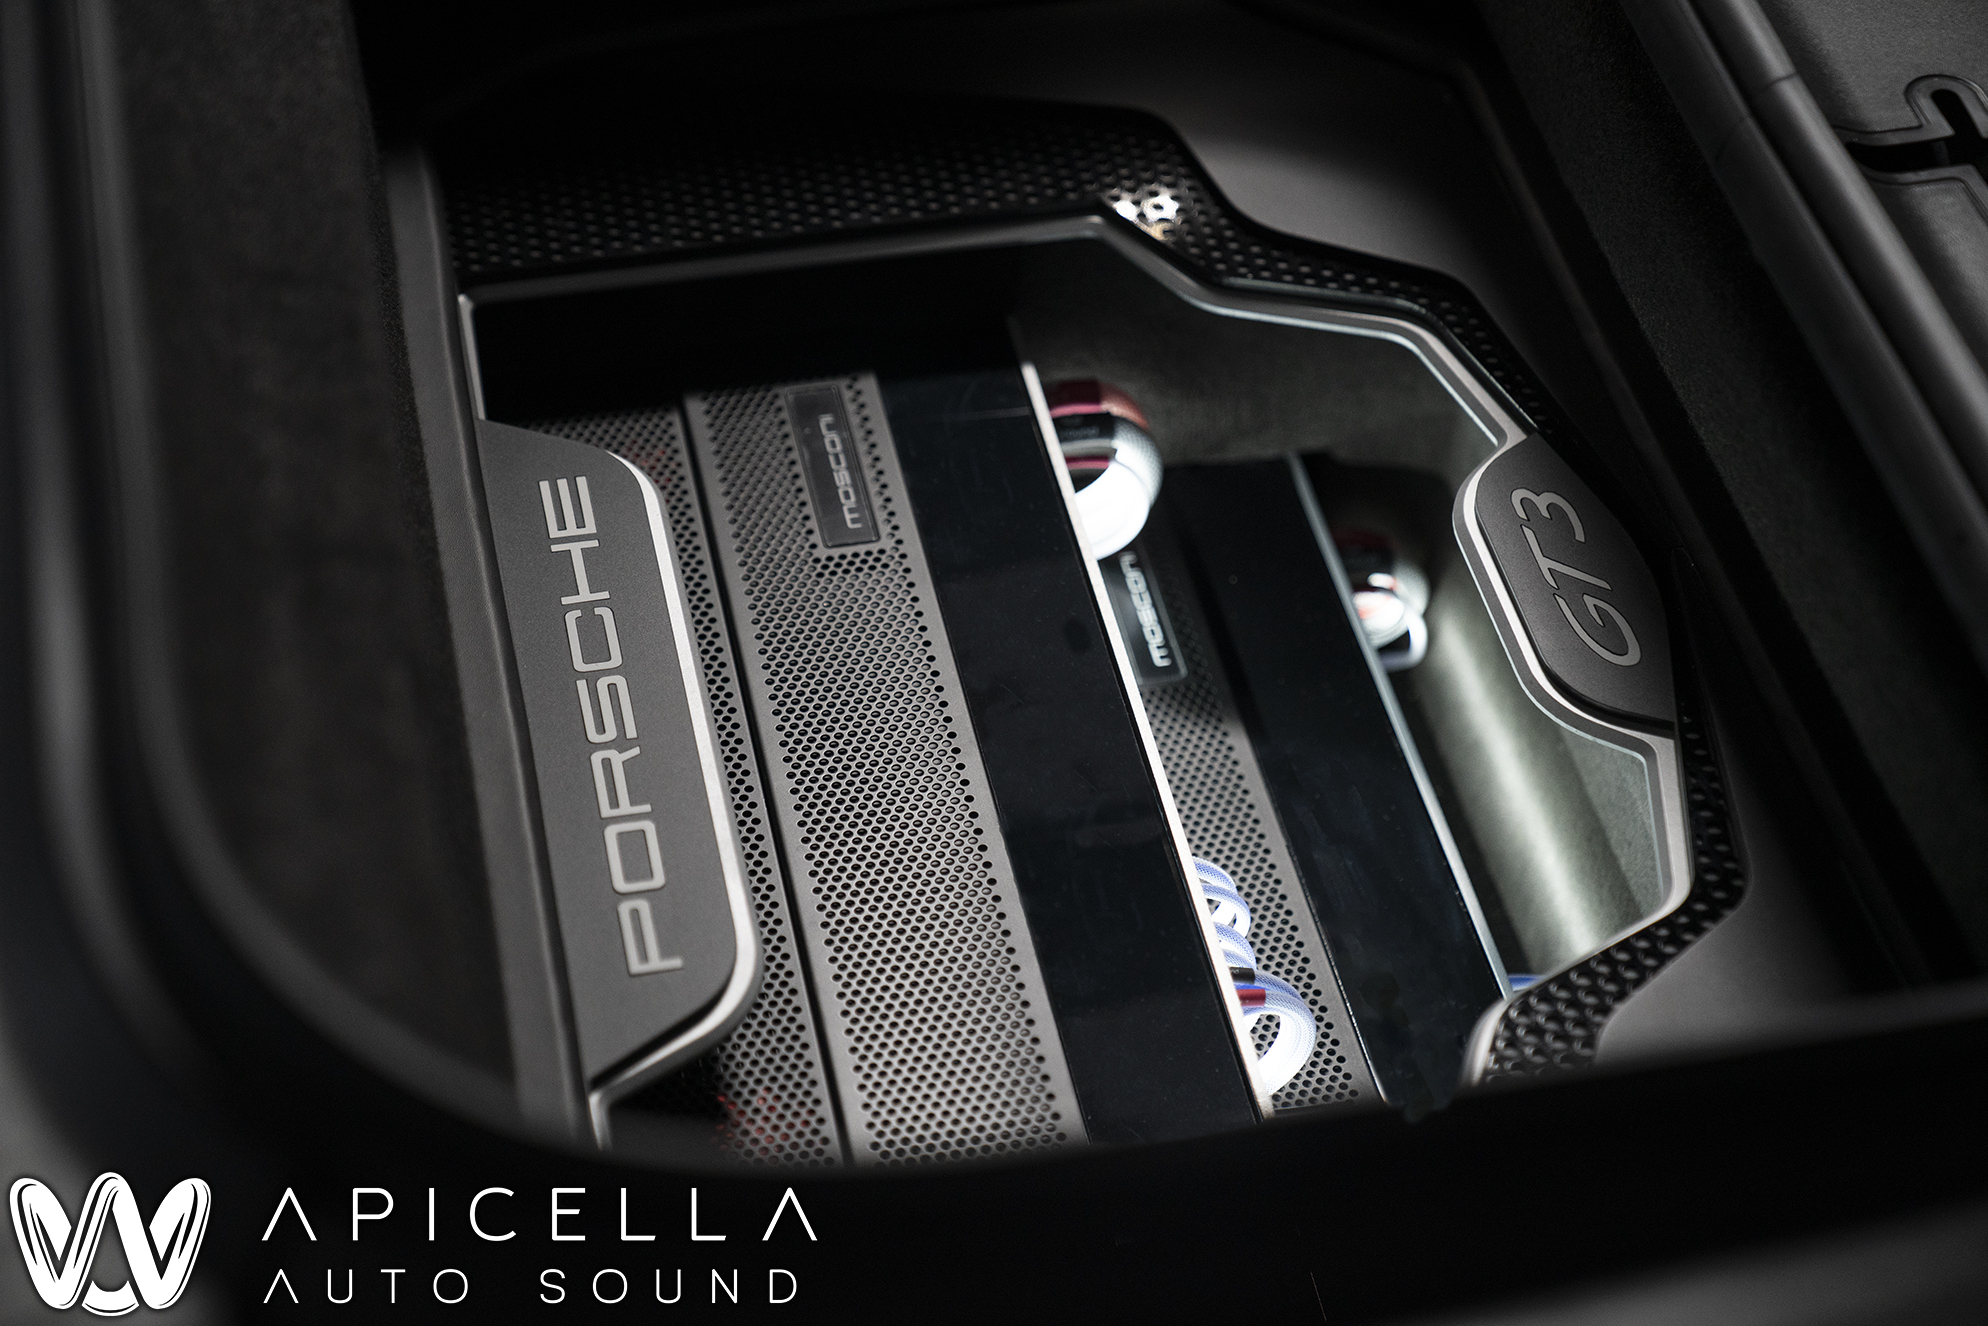
The amp rack in all its glory.. To date, this is probably my favorite piece I've ever fabricated.. These, the pillars, or the Tesla Model S pillars from this past winter. The "Porsche" and "GT3" text was cut out, painted the OEM "Chalk" color, and reinstalled right into the acrylic trim that was painted in a way to match the color and texture of the trim on the rest of the vehicle. It's hard to tell in photos, but the trim on the bottom-most layer is a silver that matches the trim on the Mosconi amps and rest of the car, while the text is a bit different and is the color of the exterior of the car

And that's all she wrote.. Thank you for looking
 .
.
PS, everything done is 100% reversible and can go back to factory without any degradation. Nothing OEM was cut, drilled, modified, etc outside of small plastic panels that are easily and cheaply replaceable.
So, moving on from that, here she is, our Quarantine Queen build.
So, it all started when I was away at a Mobile Solutions training in Arizona when I got a text from one of my previous customers that included a picture of a Chalk 2018 GT3 and said "Springtime project. Thinking Focal Utopia M and Mosconi Pro amps".. Needless to say, I was hyped. One of my favorite cars and he wants to use some of my favorite gear, say no more. We set this up right around the springtime rush, and since this project was large in comparison to the rest, we scheduled it last. Well, when the time came for the car to be dropped off, the world was on the edge of collapse, so I said to him "Hey, mind if we go a little crazy with this and take our time?".. He had no issues with that, and our Quarantine project began.
The goals for this build were to eek out every last drop of audiophile goodness that this car would allow us to have, while also designing it to appear like a super-exclusive OEM option. Oh, and output, because, well... listen to a GT3 and you'll understand why. All OEM materials were used.. leather, suede, and carpet. For this job, I finally bit the bullet and purchased a new, much larger/more powerful laser; an Epilog EXT36. 24" x 36" of cutting area. I can pretty much do a whole trunk on the computer now.
So, the list of gear is as follows..
. Escort Ci Max 360 Radar & Laser countermeasure system
. Nav-TV Zen V
. Helix DSP Ultra with Wifi adapter
. (2) Mosconi Pro 5|30 5 channel amplifiers
. (2) Illusion Audio C12 subwoofers
. Focal 8WM midbass drivers
. Focal 3.5WM midrange drivers
. Focal TBM tweeters
. ResoNix Sound Solutions Squares & CCF65, and Blackhole Tiles
. RSD Custom Cables
Since he let us have our time with it and get a little wild, I decided to push myself and make this the best looking build we have done yet. I think I achieved that goal. Unfortunately, I can also say that this might have been the first time I have pushed myself too hard. I finally was beaten by the job and was not able to pull off something I had envisioned in my head. I may have been able to if I wasted days of time and a ton of materials, but I just didn't see it happening (especially since said material was on backorder for 8+ weeks out).
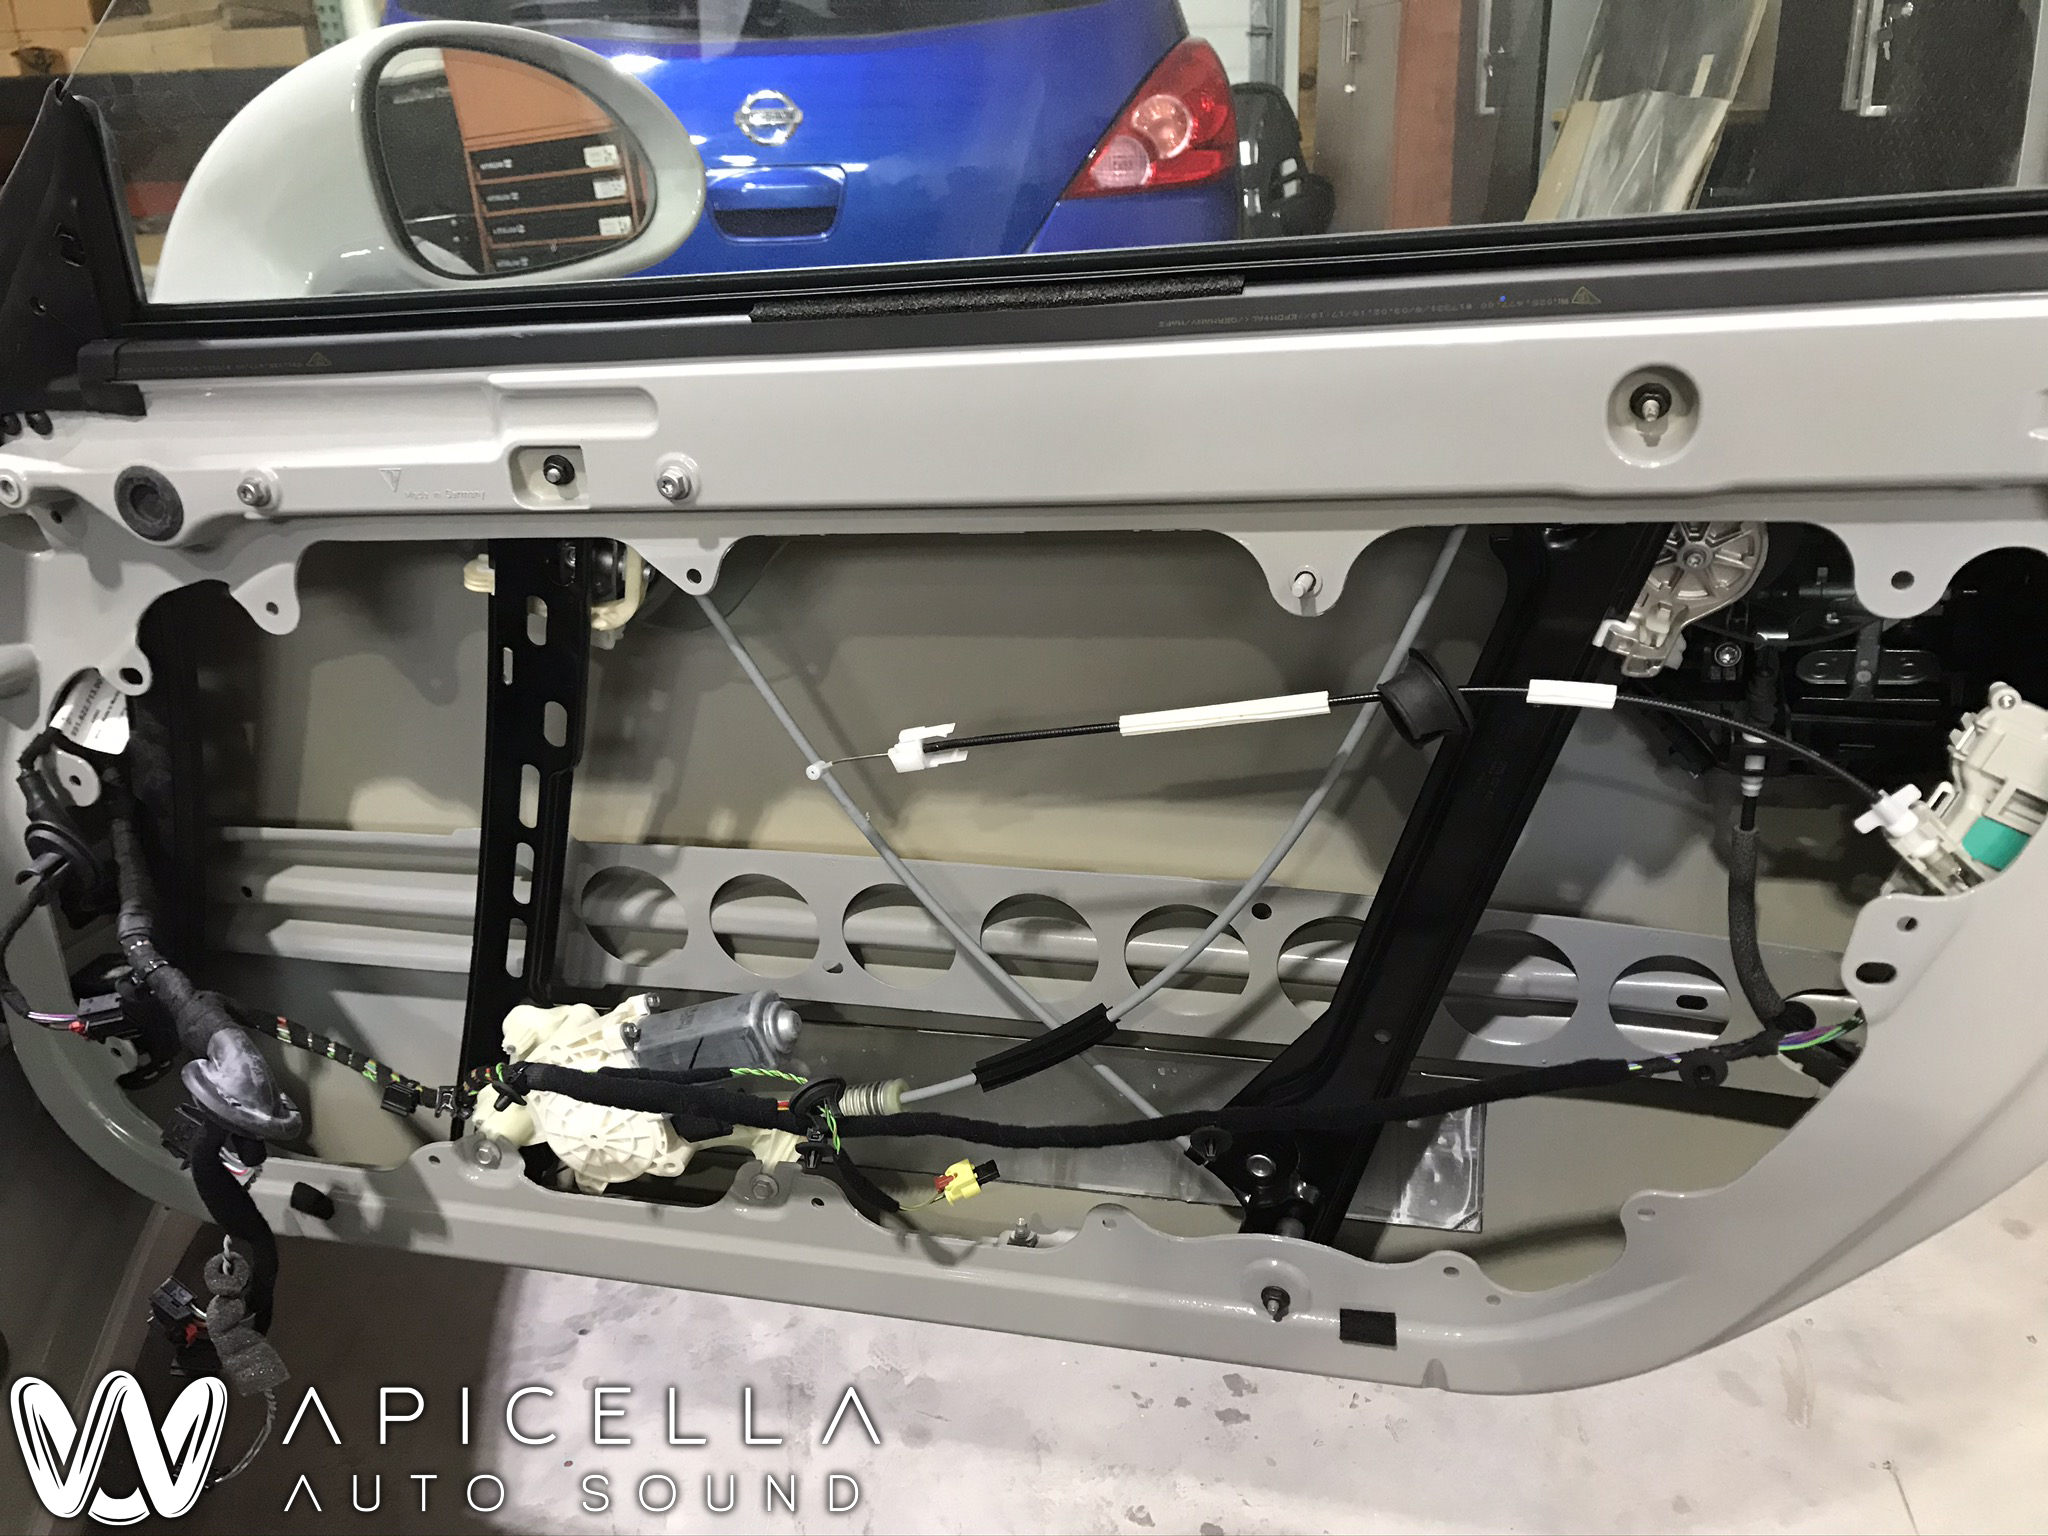
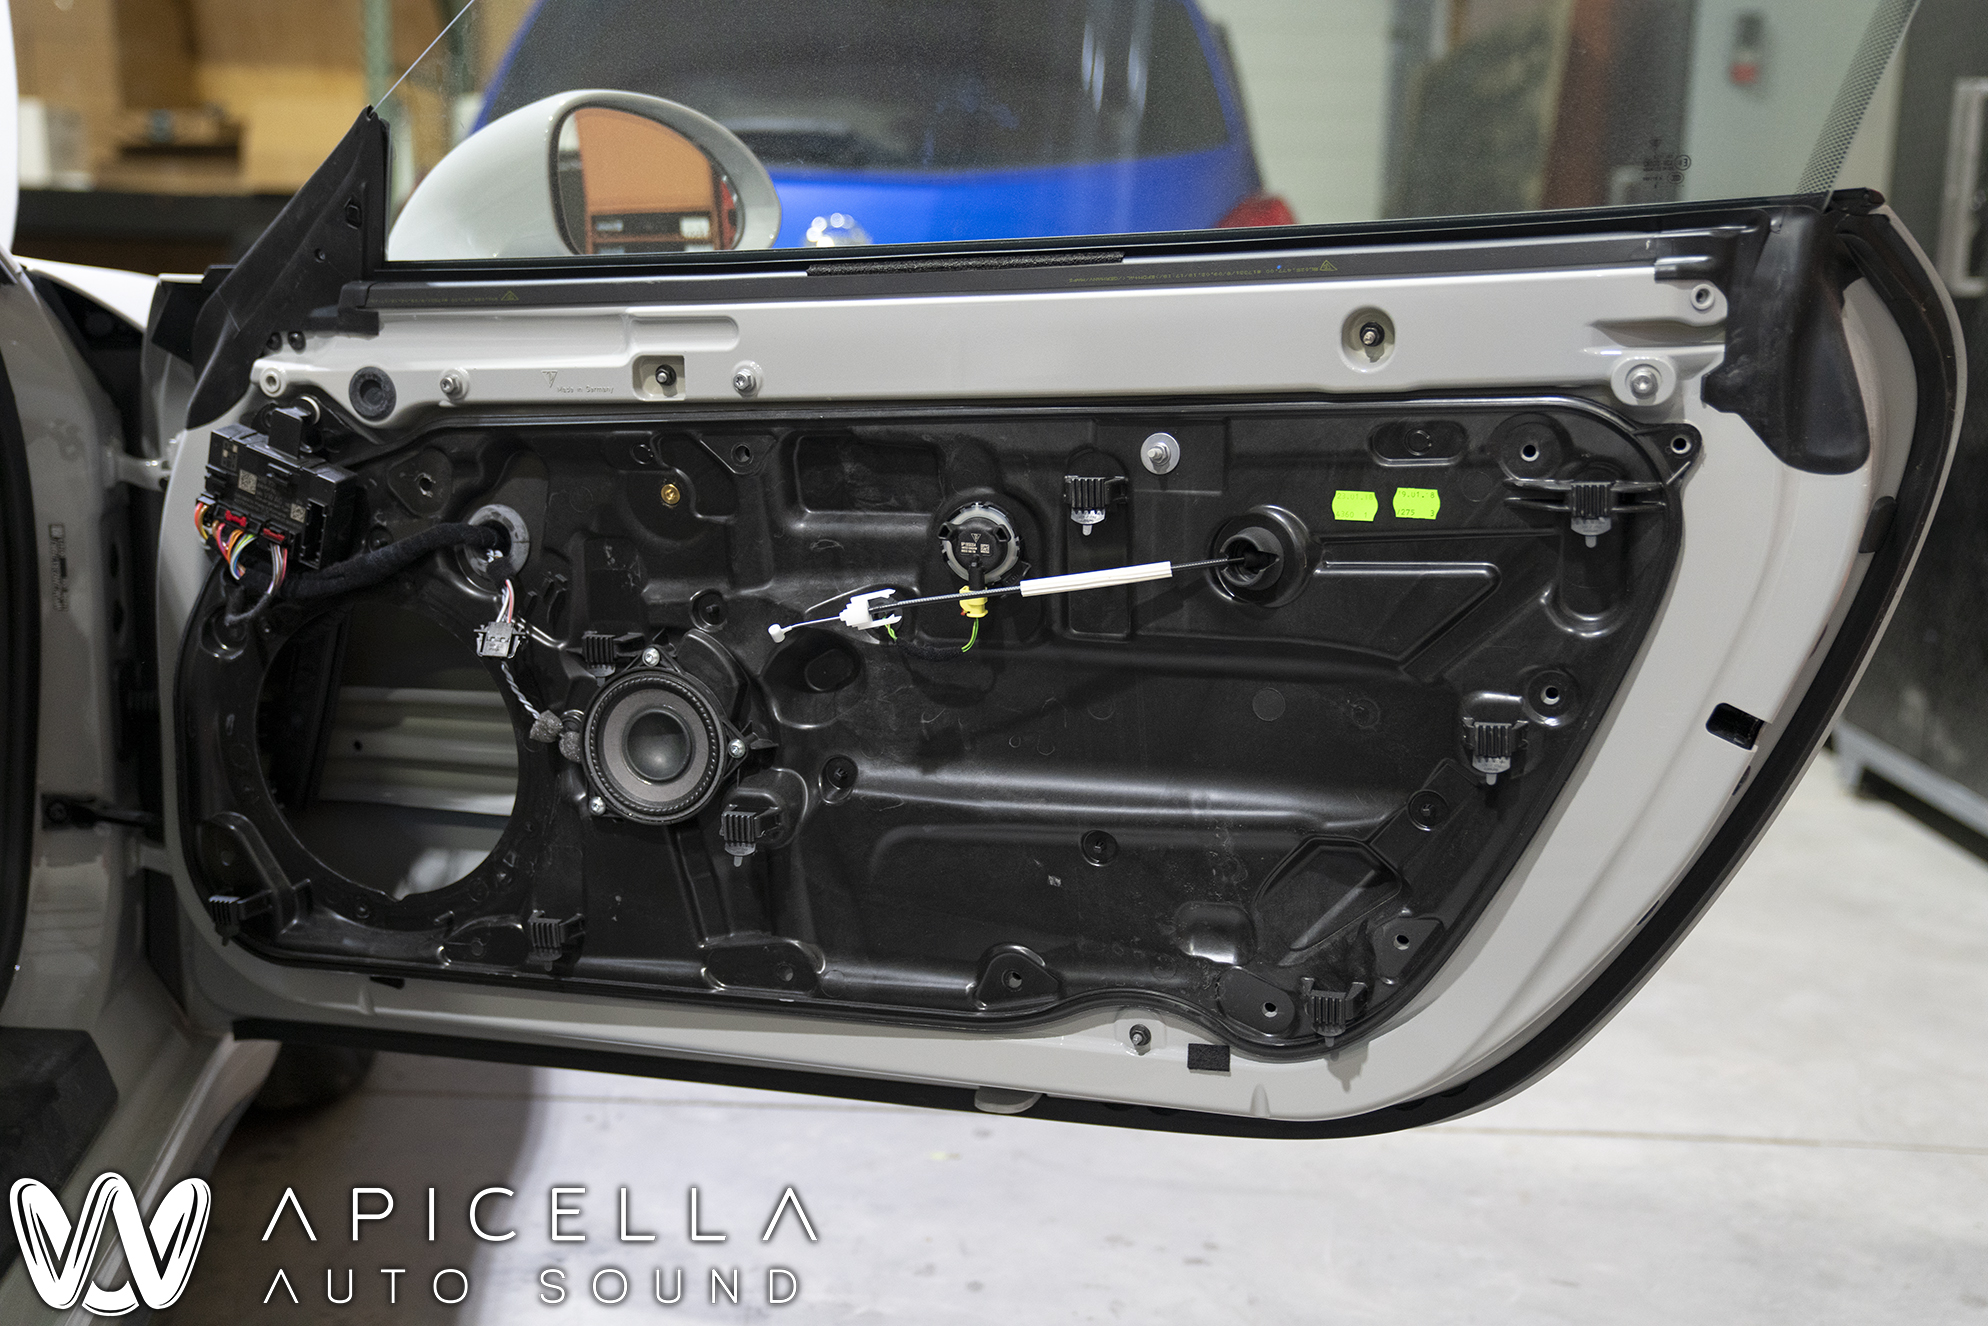
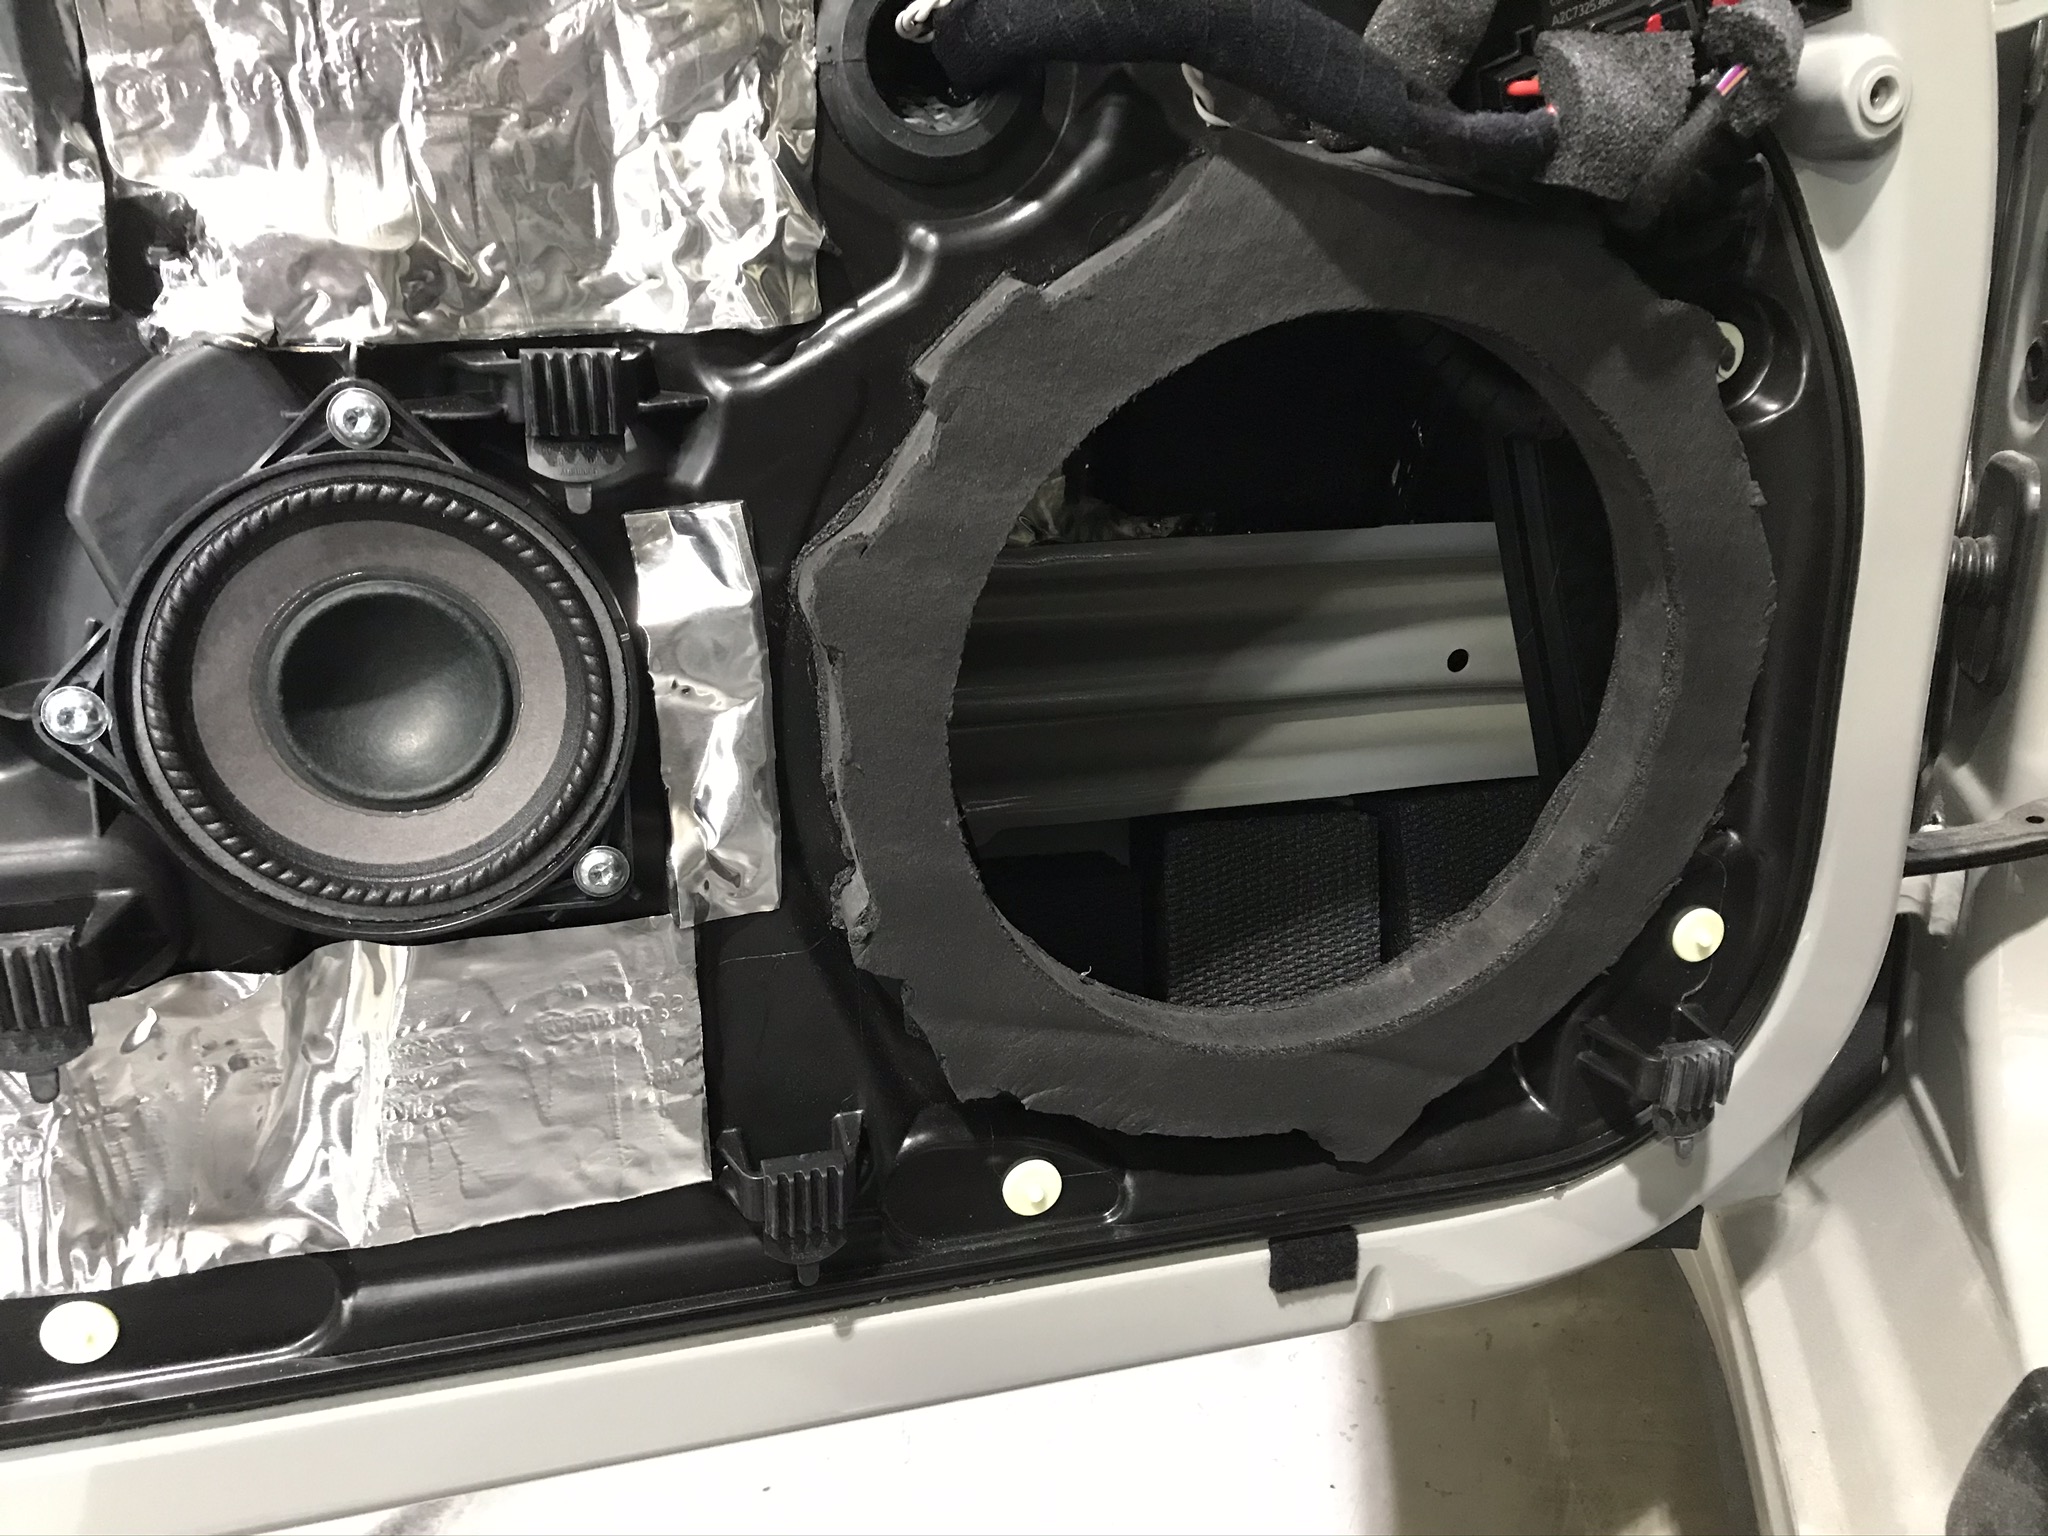
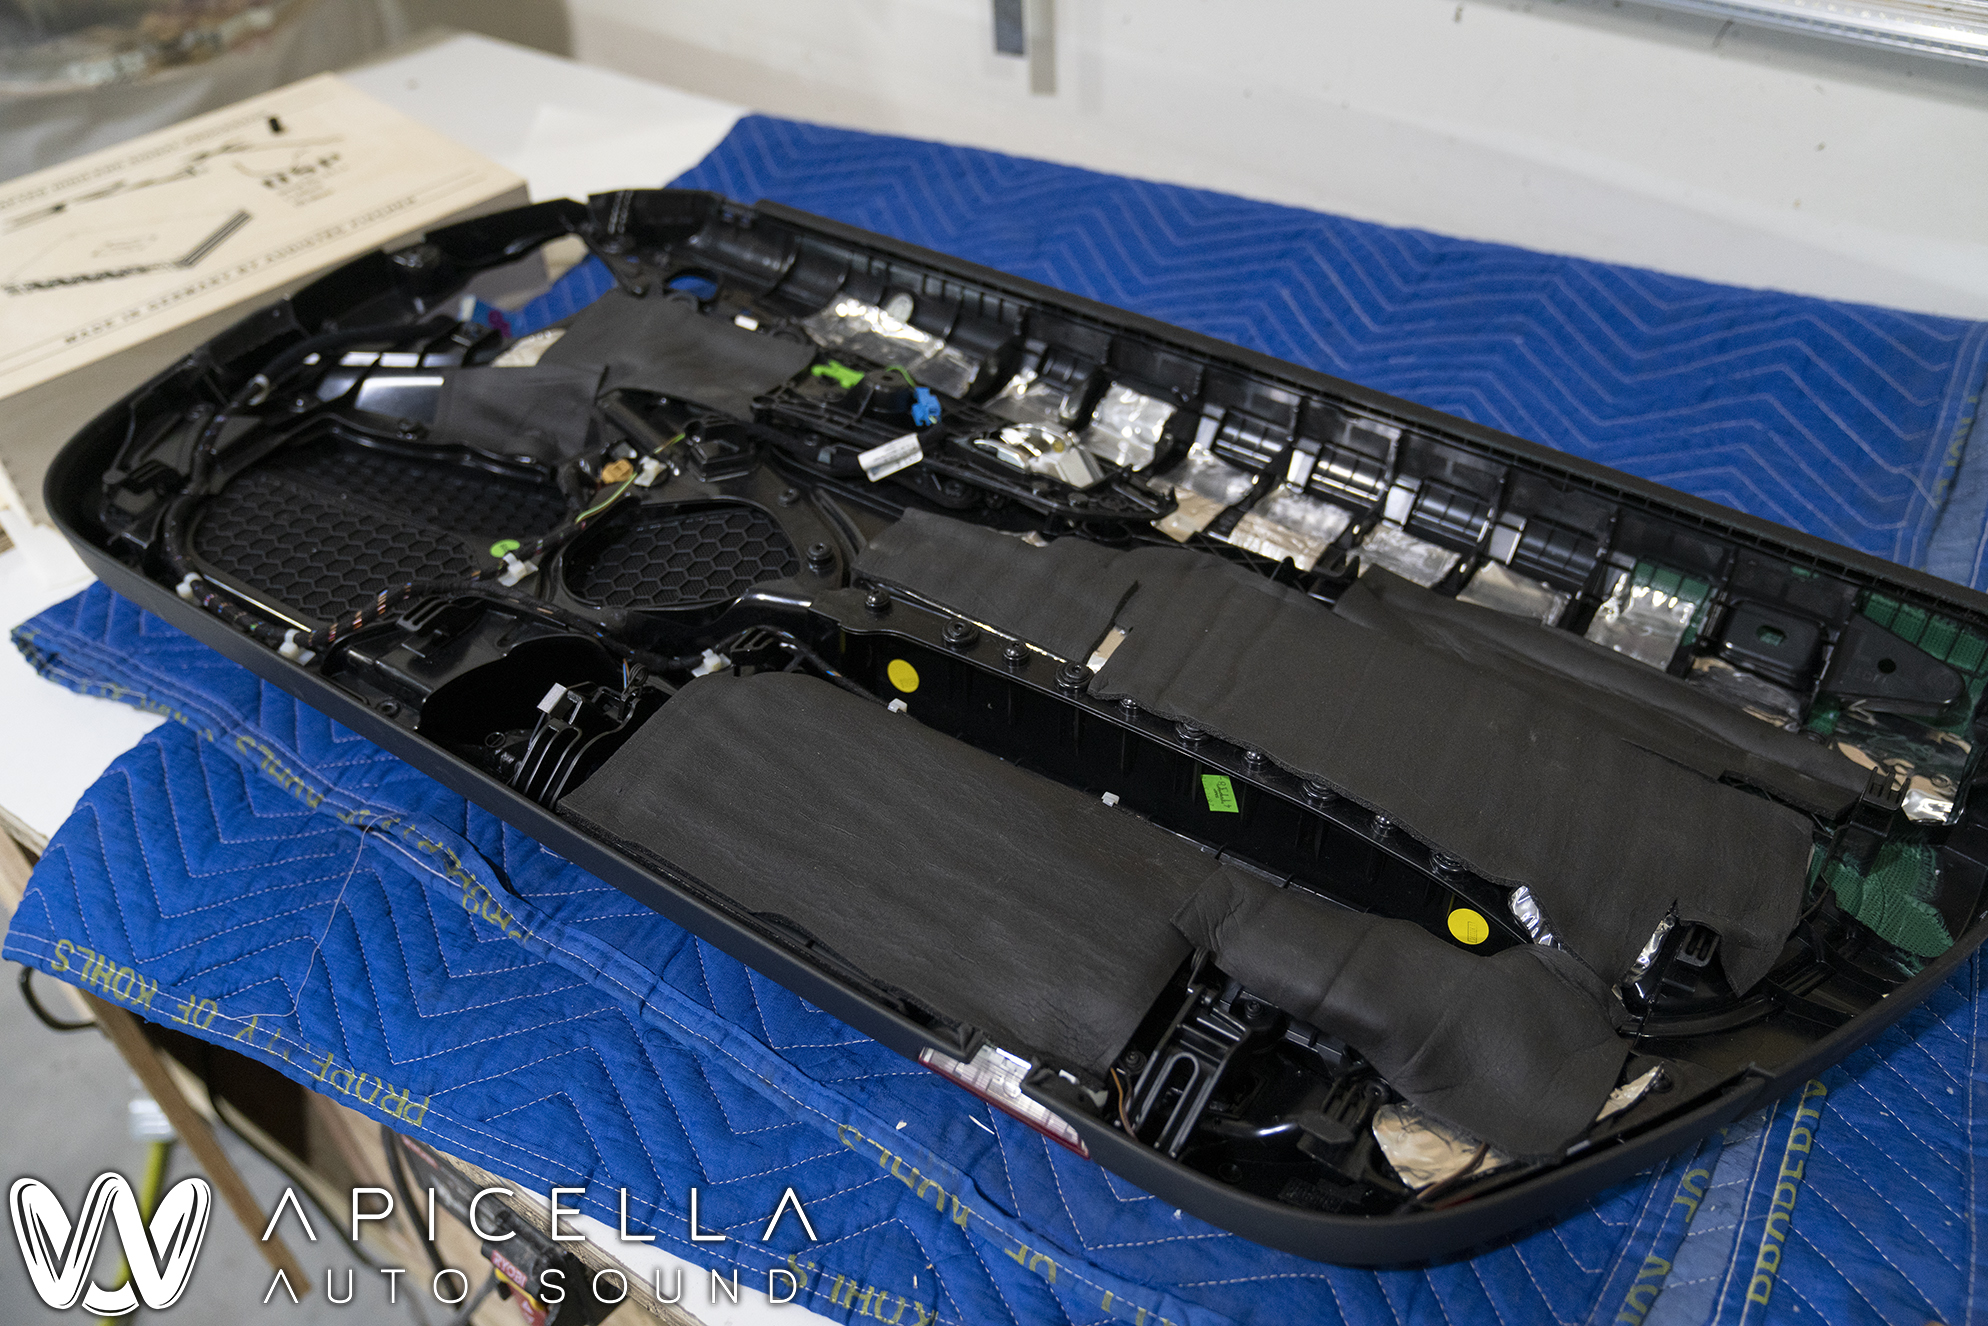
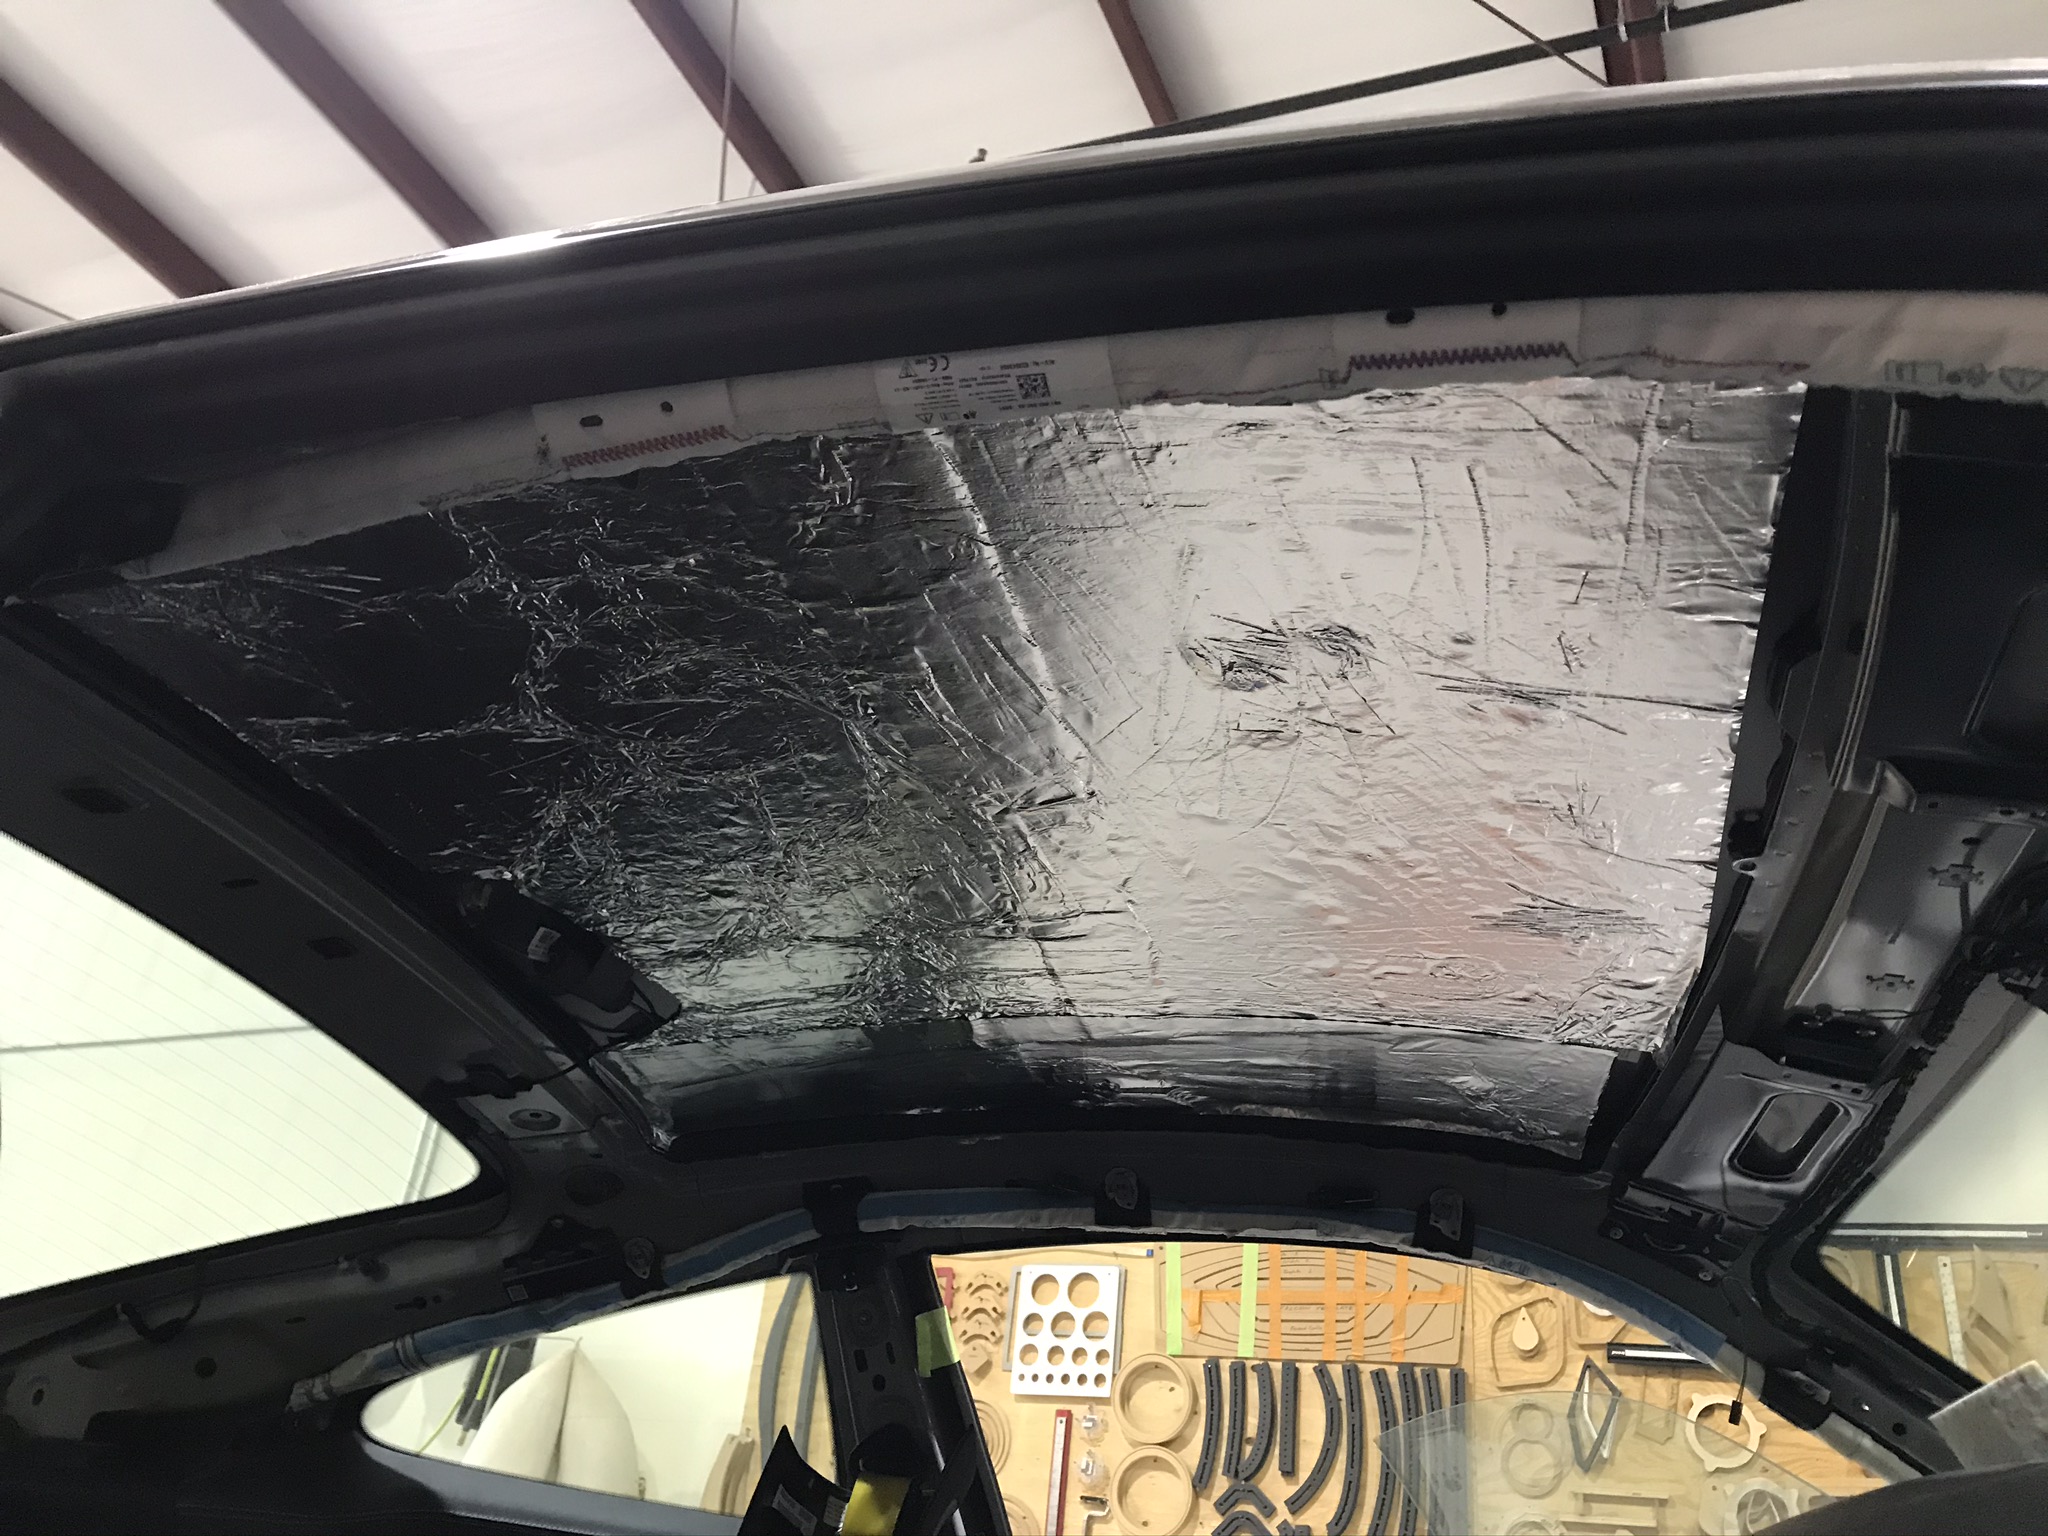
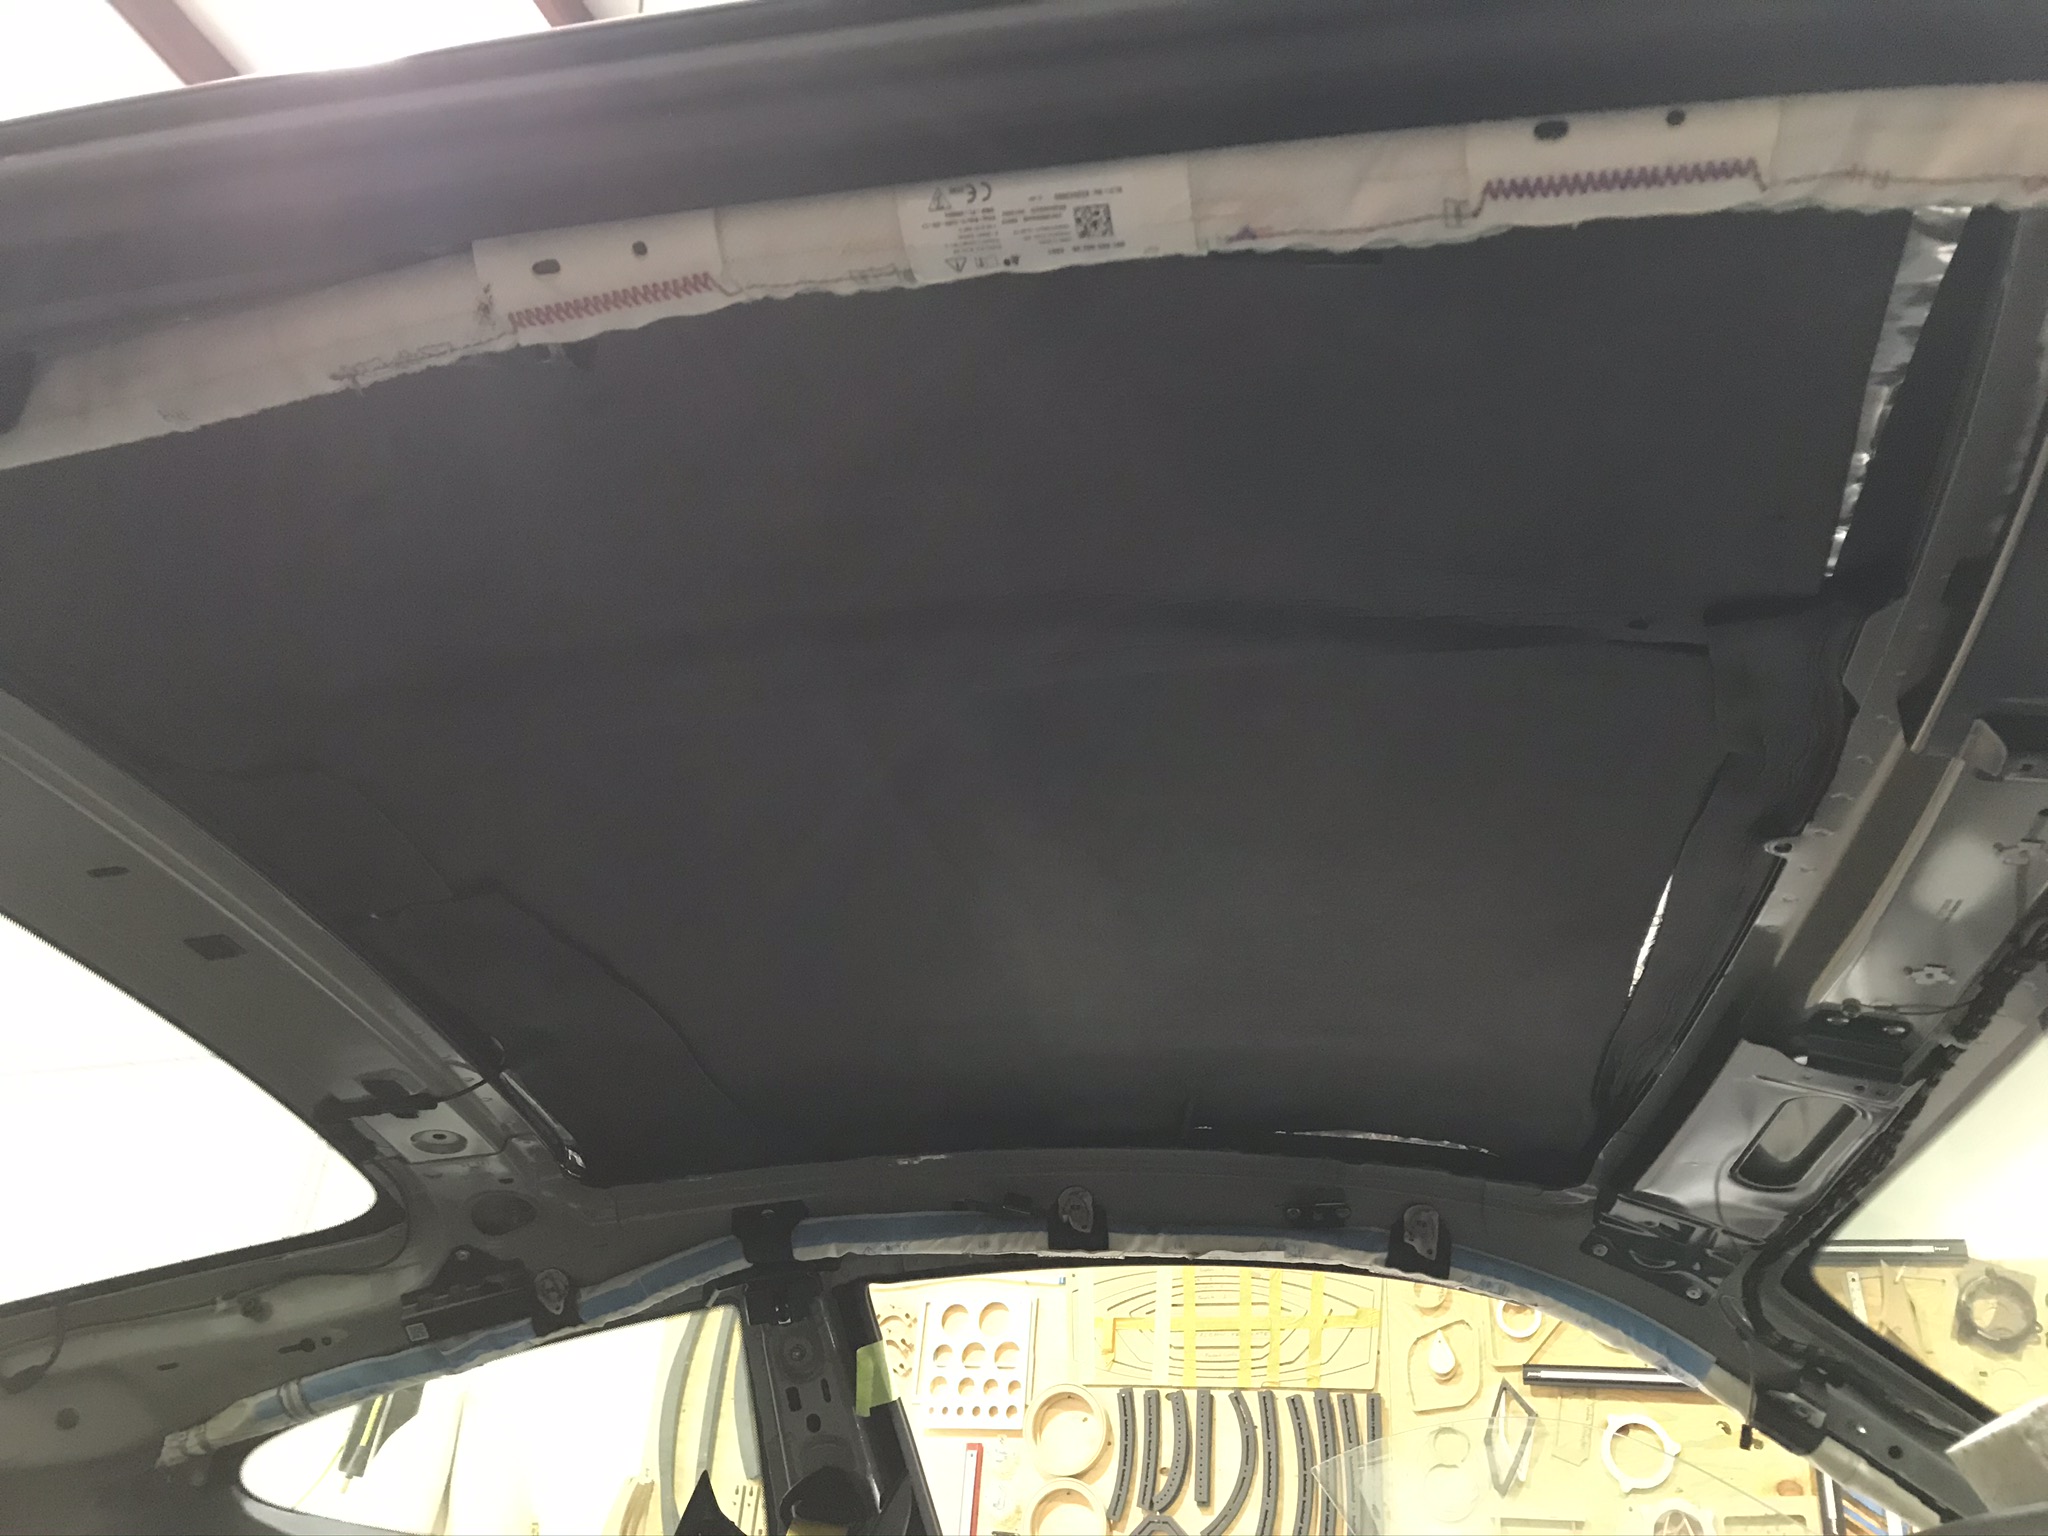
So, on to the build.. The inner skin was removed, and the outer skin was fully treated (sorry, we only have a before pic). We left the OEM midrange in there since it is in its own enclosure. The baffles were fabricated out of PVC and then lined with CCF to help the midbass drivers get a perfect seal. I think a sharper razor blade is needed for that next time lol. ResoNix CLD Squares, CCF7, and Blackhole Tiles were used to treat the doors in this car. Once that was done, a CCF ring was installed around the Utopia M midbass driver to couple it to the cabin to help increase output and reduce resonance in the door panel. The door panel and roof were treated with ResoNix Squares as well as our new CCF7 as well.
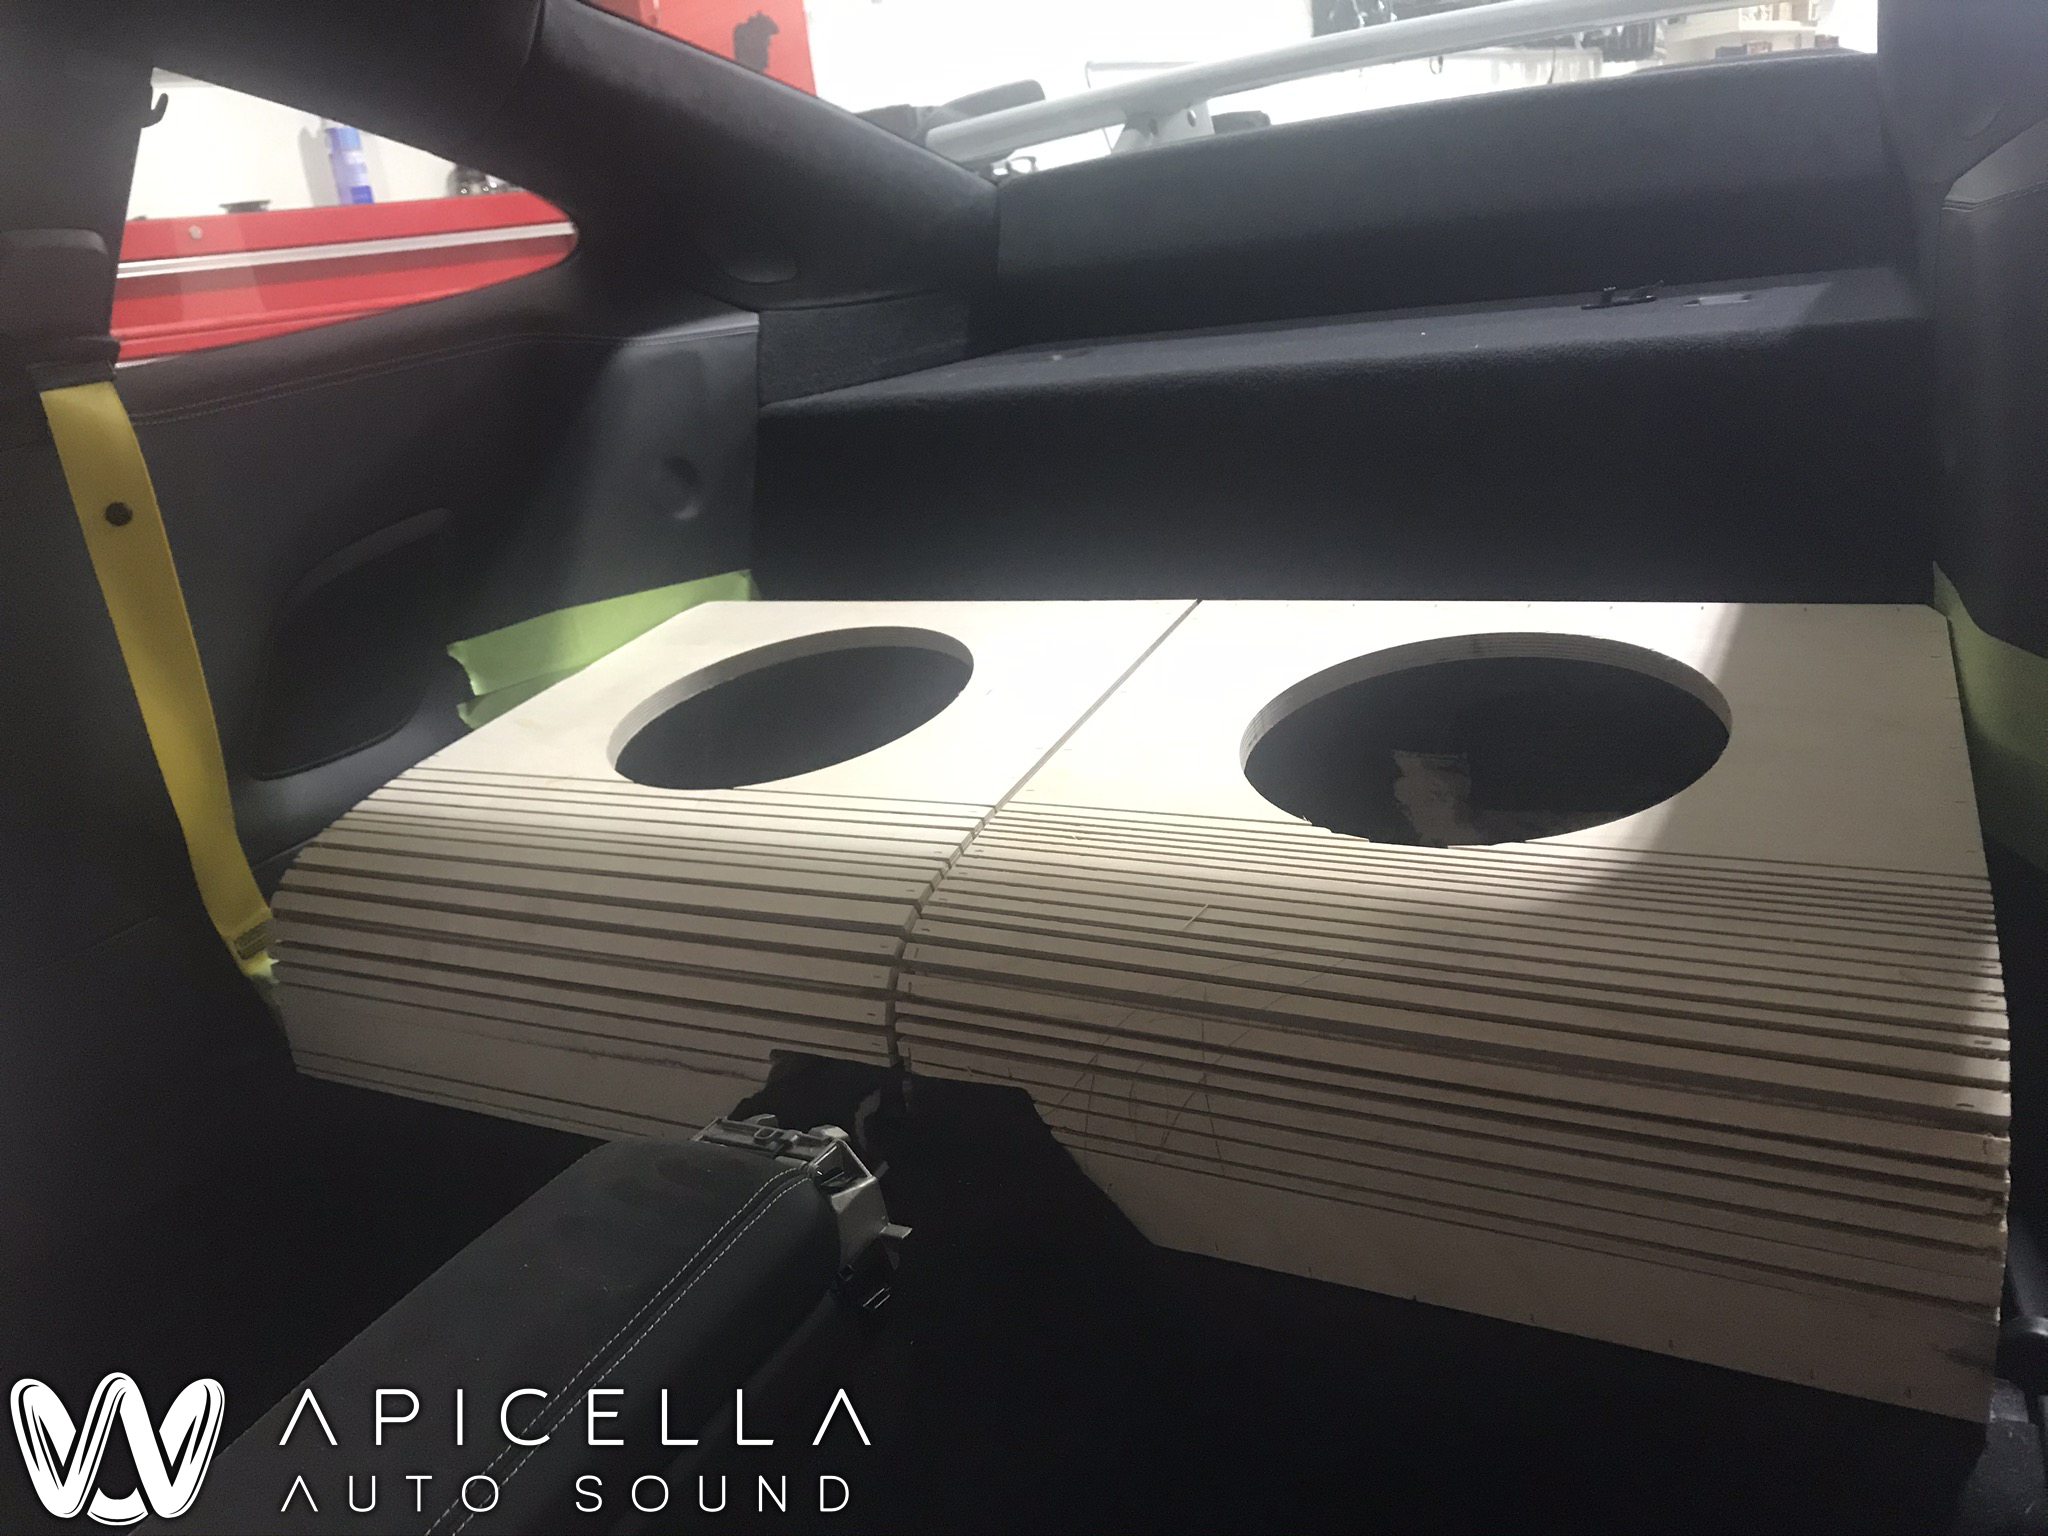
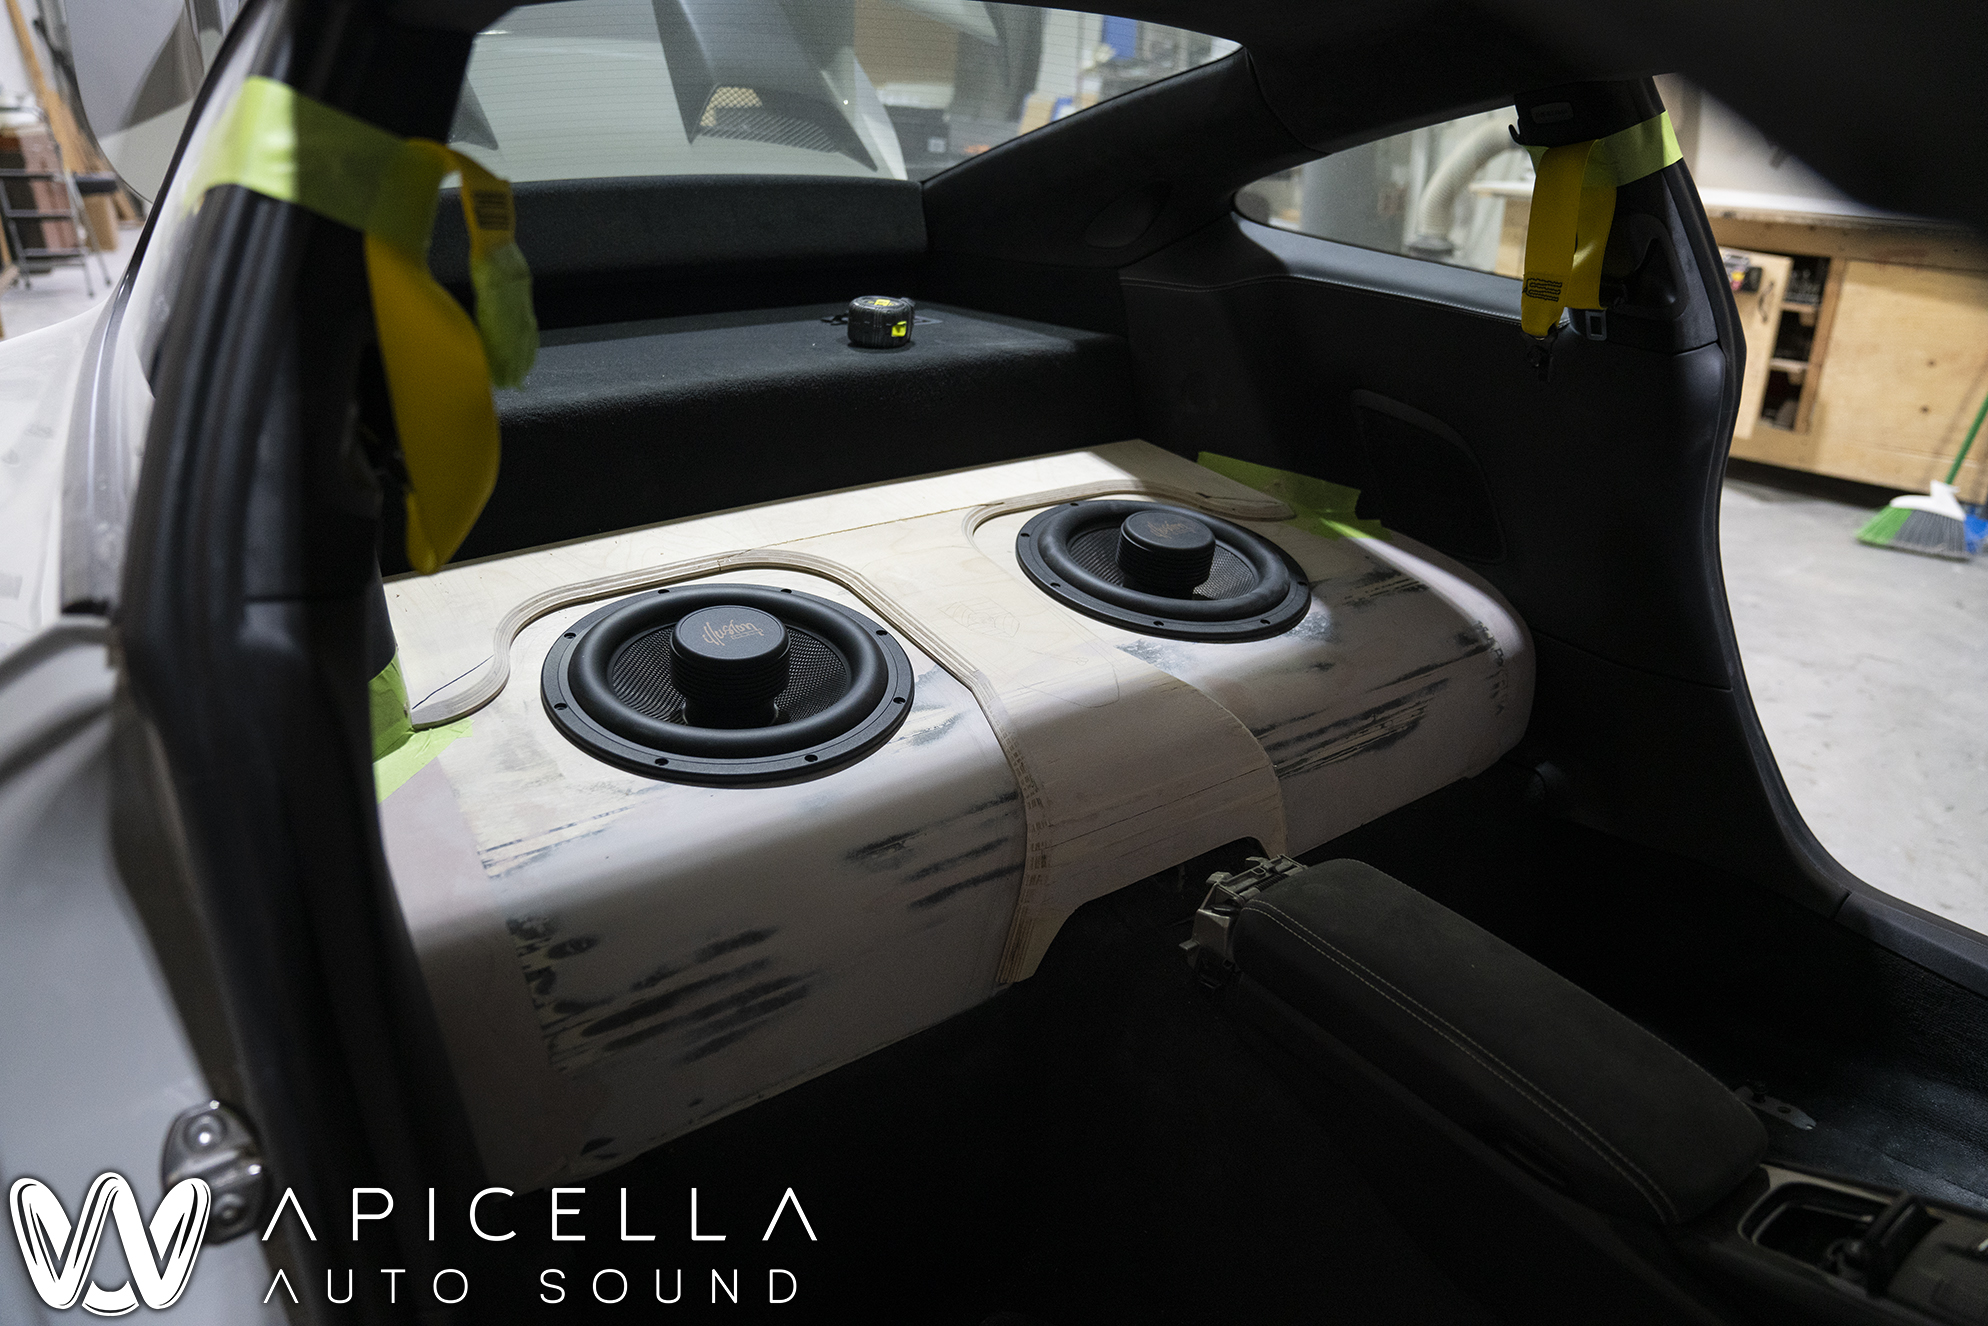
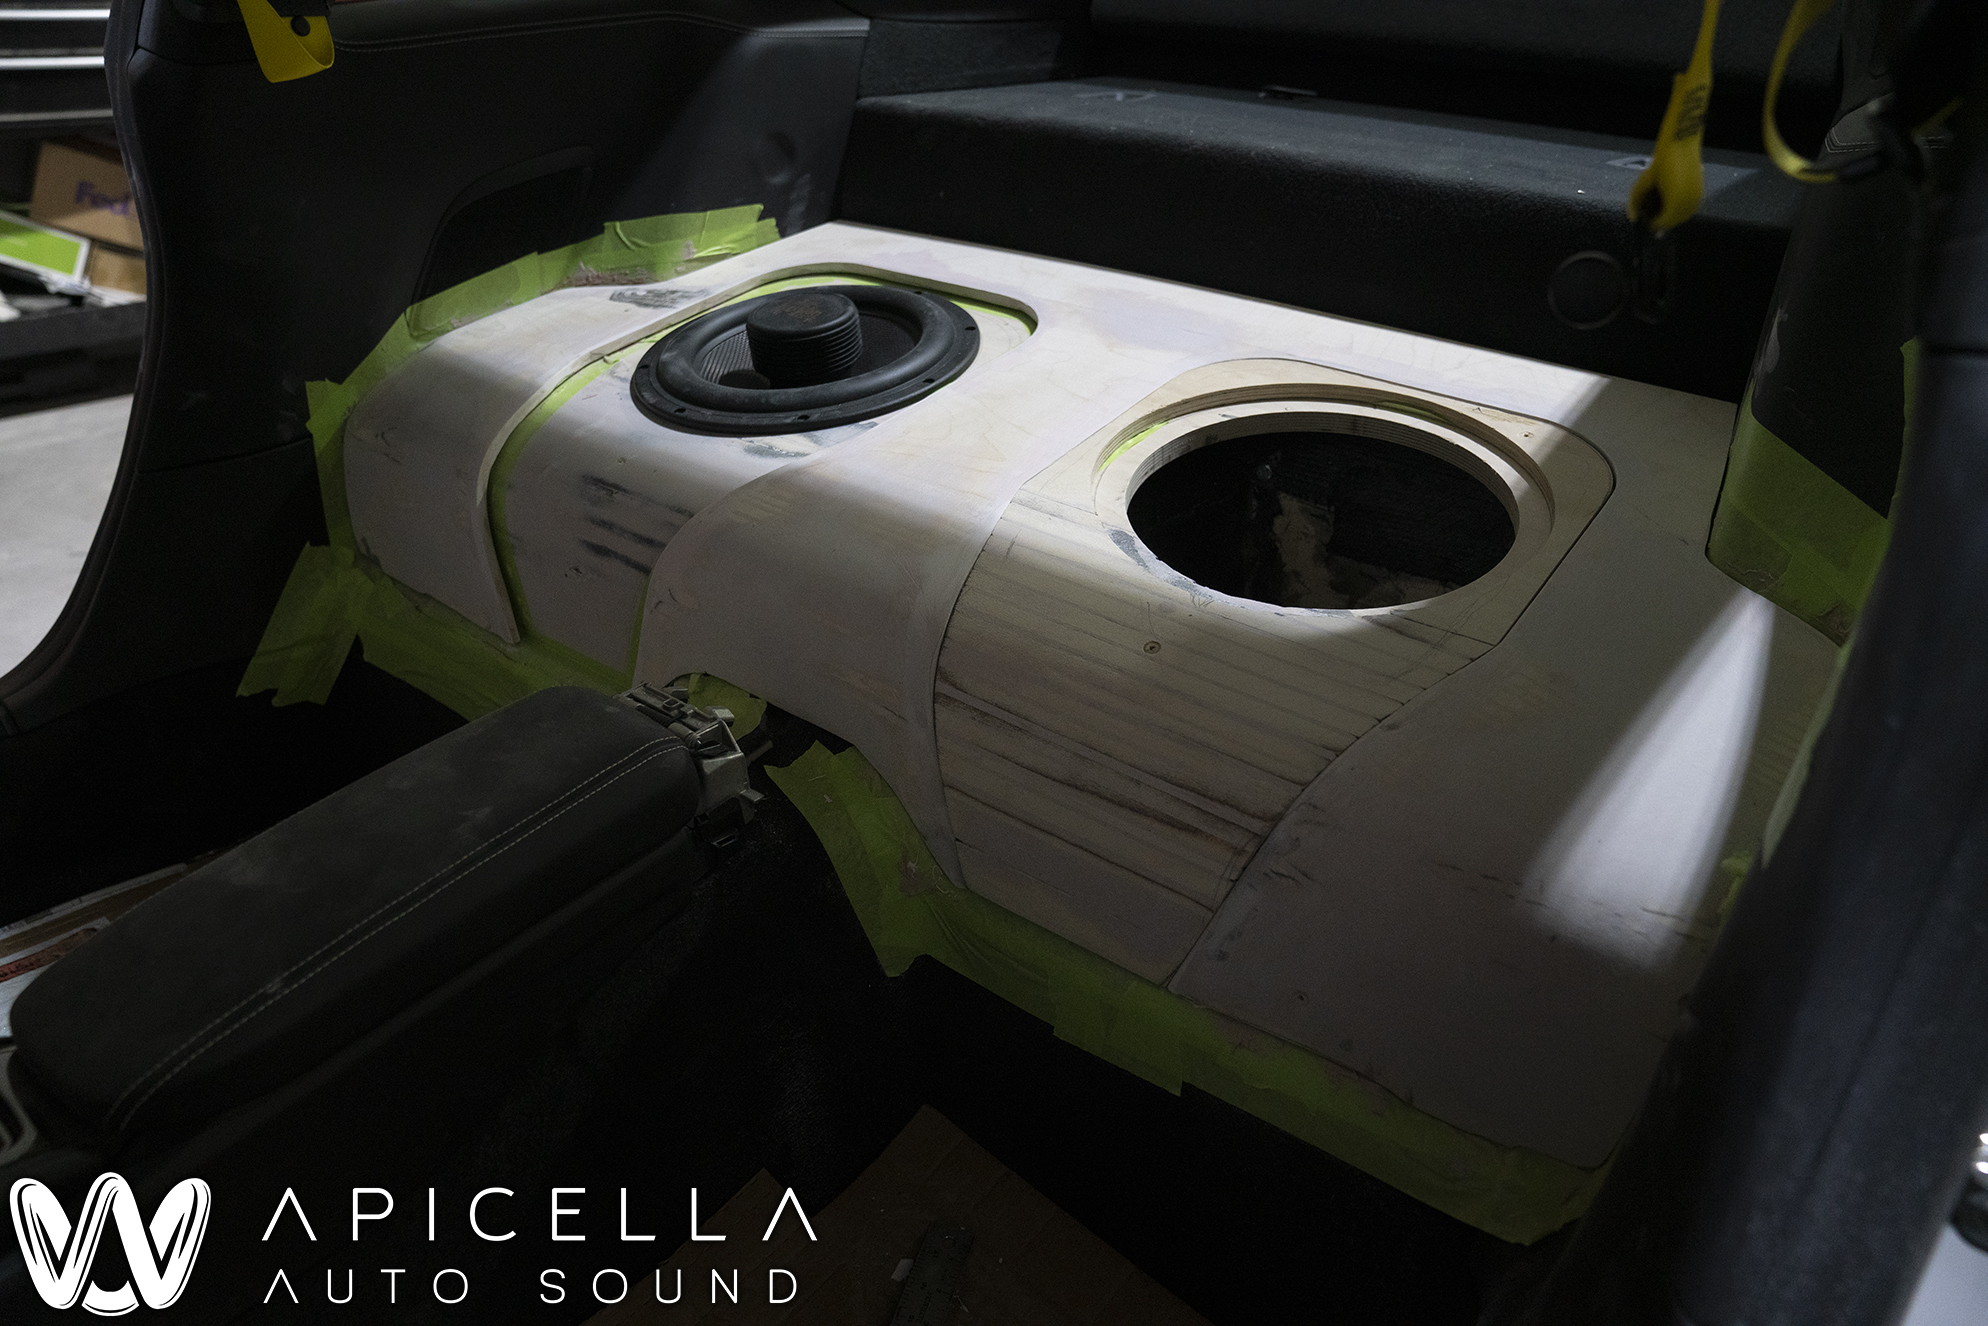
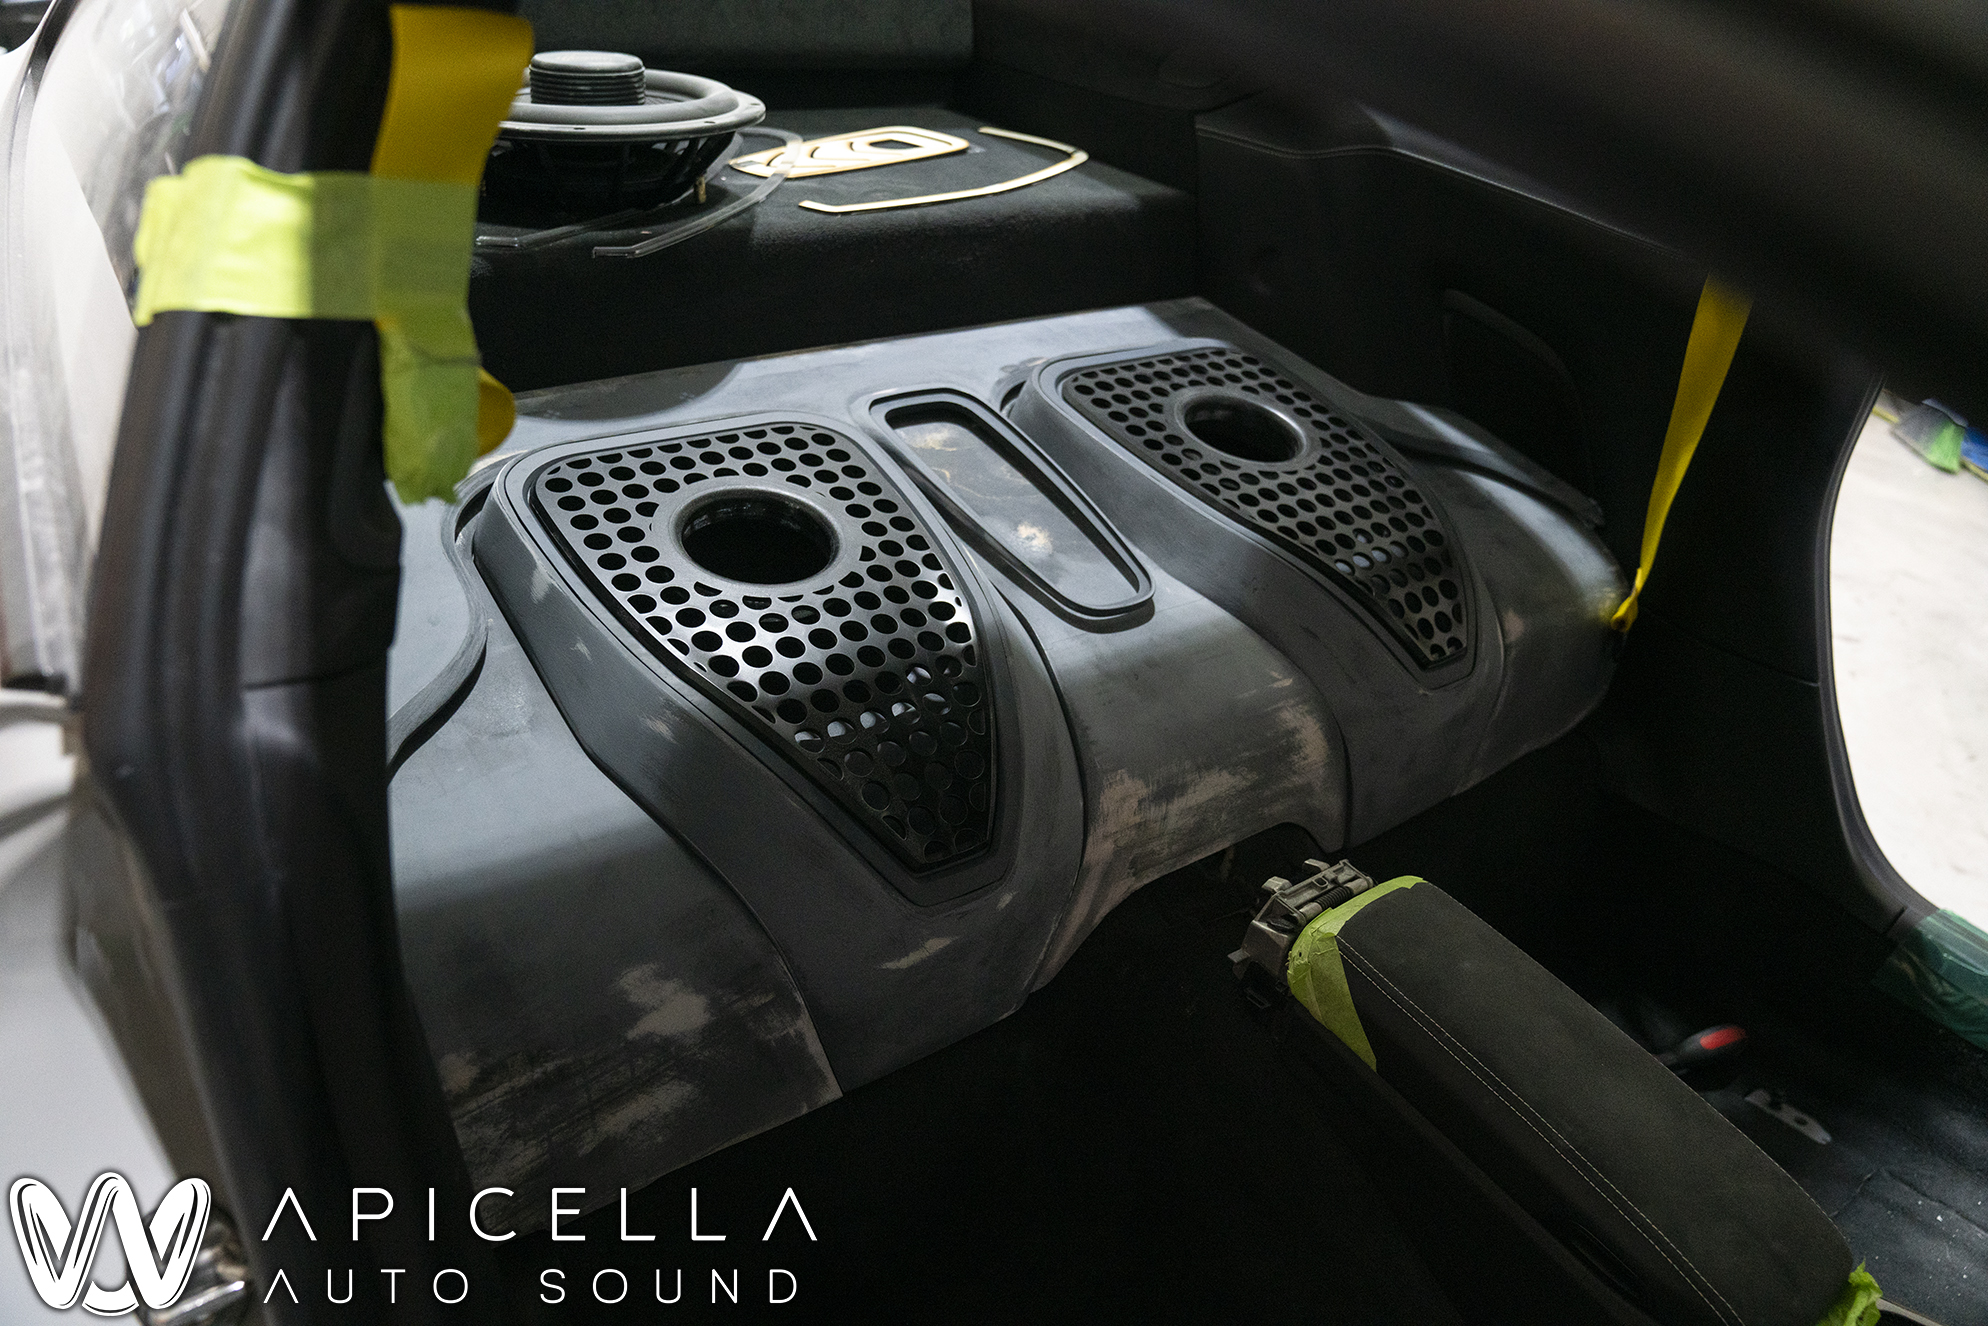
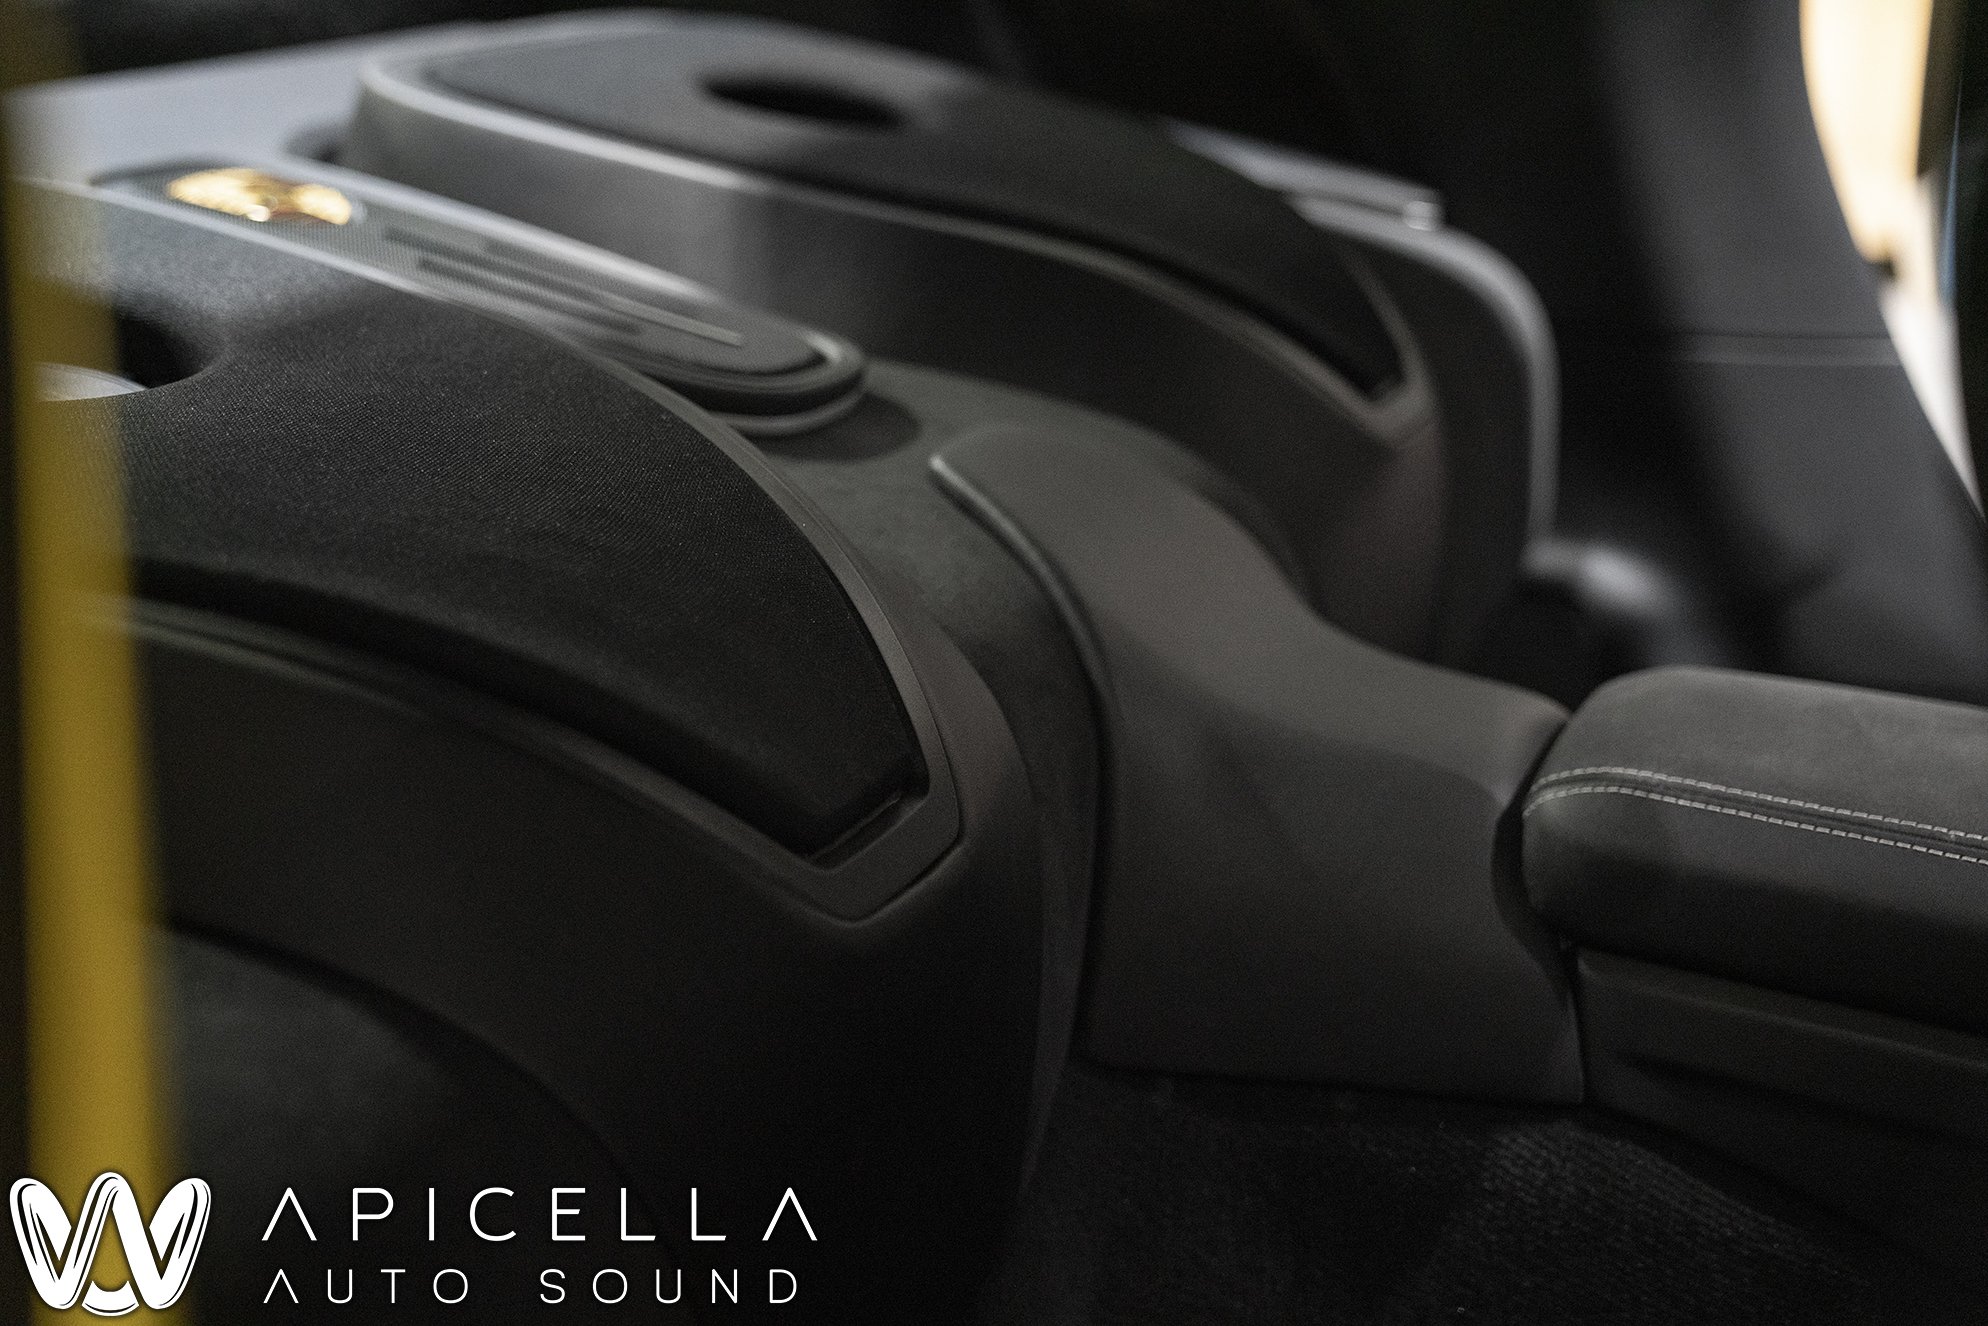
Next up are the enclosures that were built where the rear seats would normally be in a Porsche 911. The GT3 does not have any though, so the foam-backed carpet was removed, and we had plenty of room. The Baltic Birch was kerfed and then filled with a mixture of resin and milled fibers for a ton of extra strength. The beauty panels were made the same way. Here's where things got tricky.. fabricating the grills and grill "enclosures". We had to make a set of 3 different jigs that provided reference to the curves we needed.
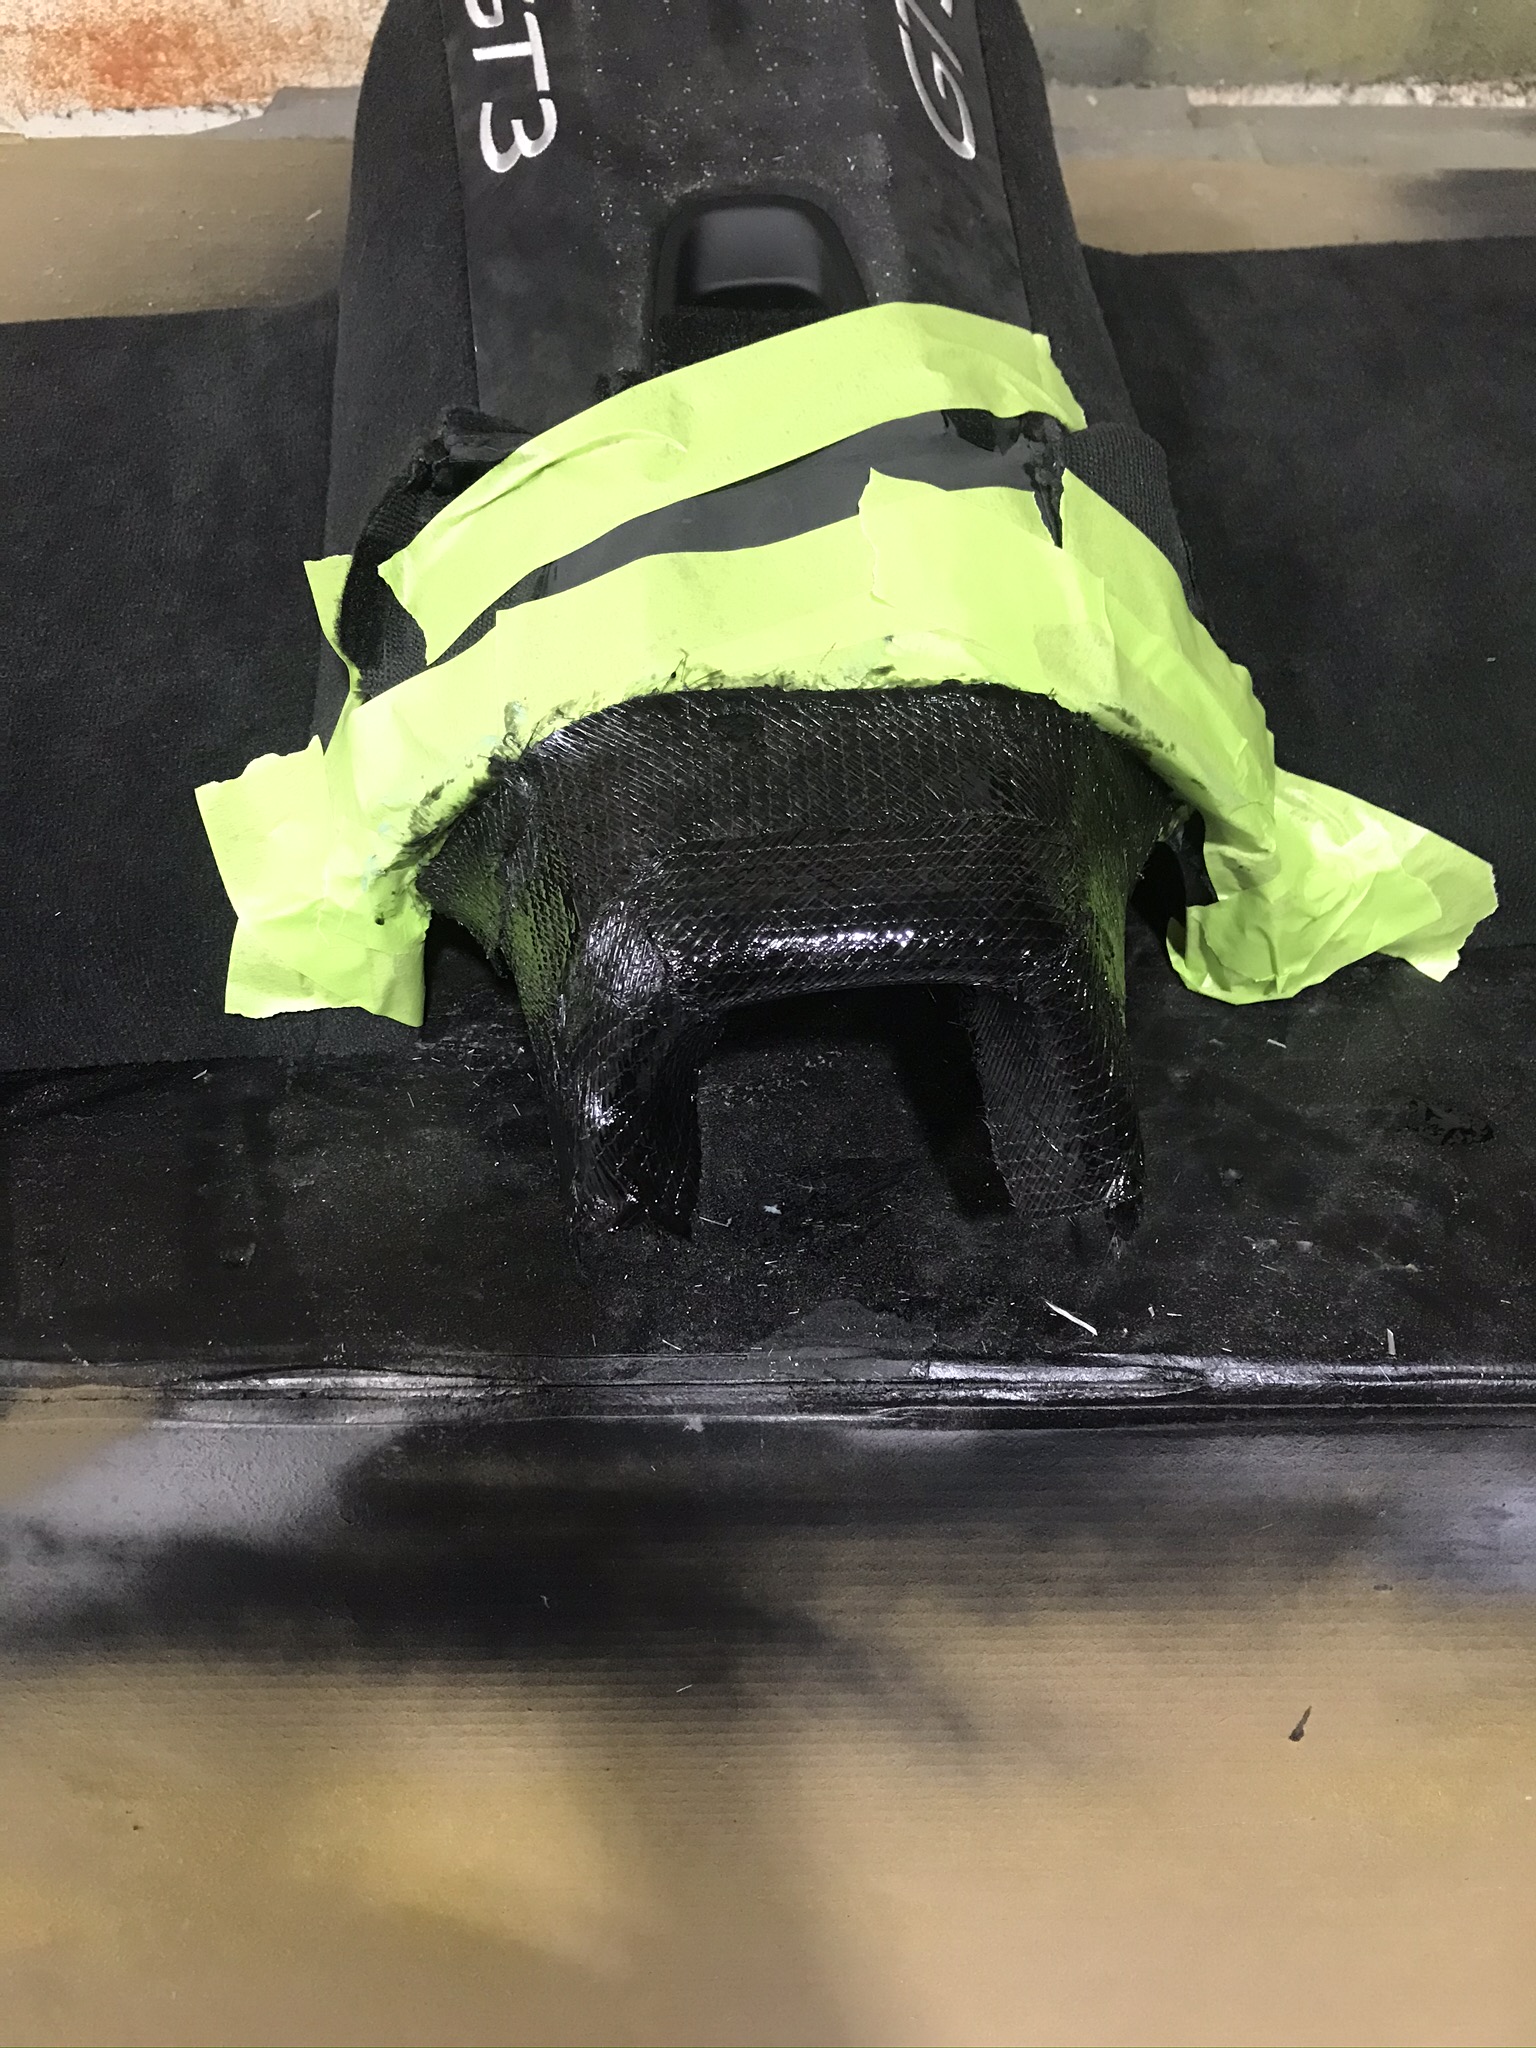
Here is the start of the fabrication for the piece that bridges the gap between the sub enclosures and the center console. We used 1708 Biaxial Mat for the most strength per given thickness since this part needed to be thin yet strong.
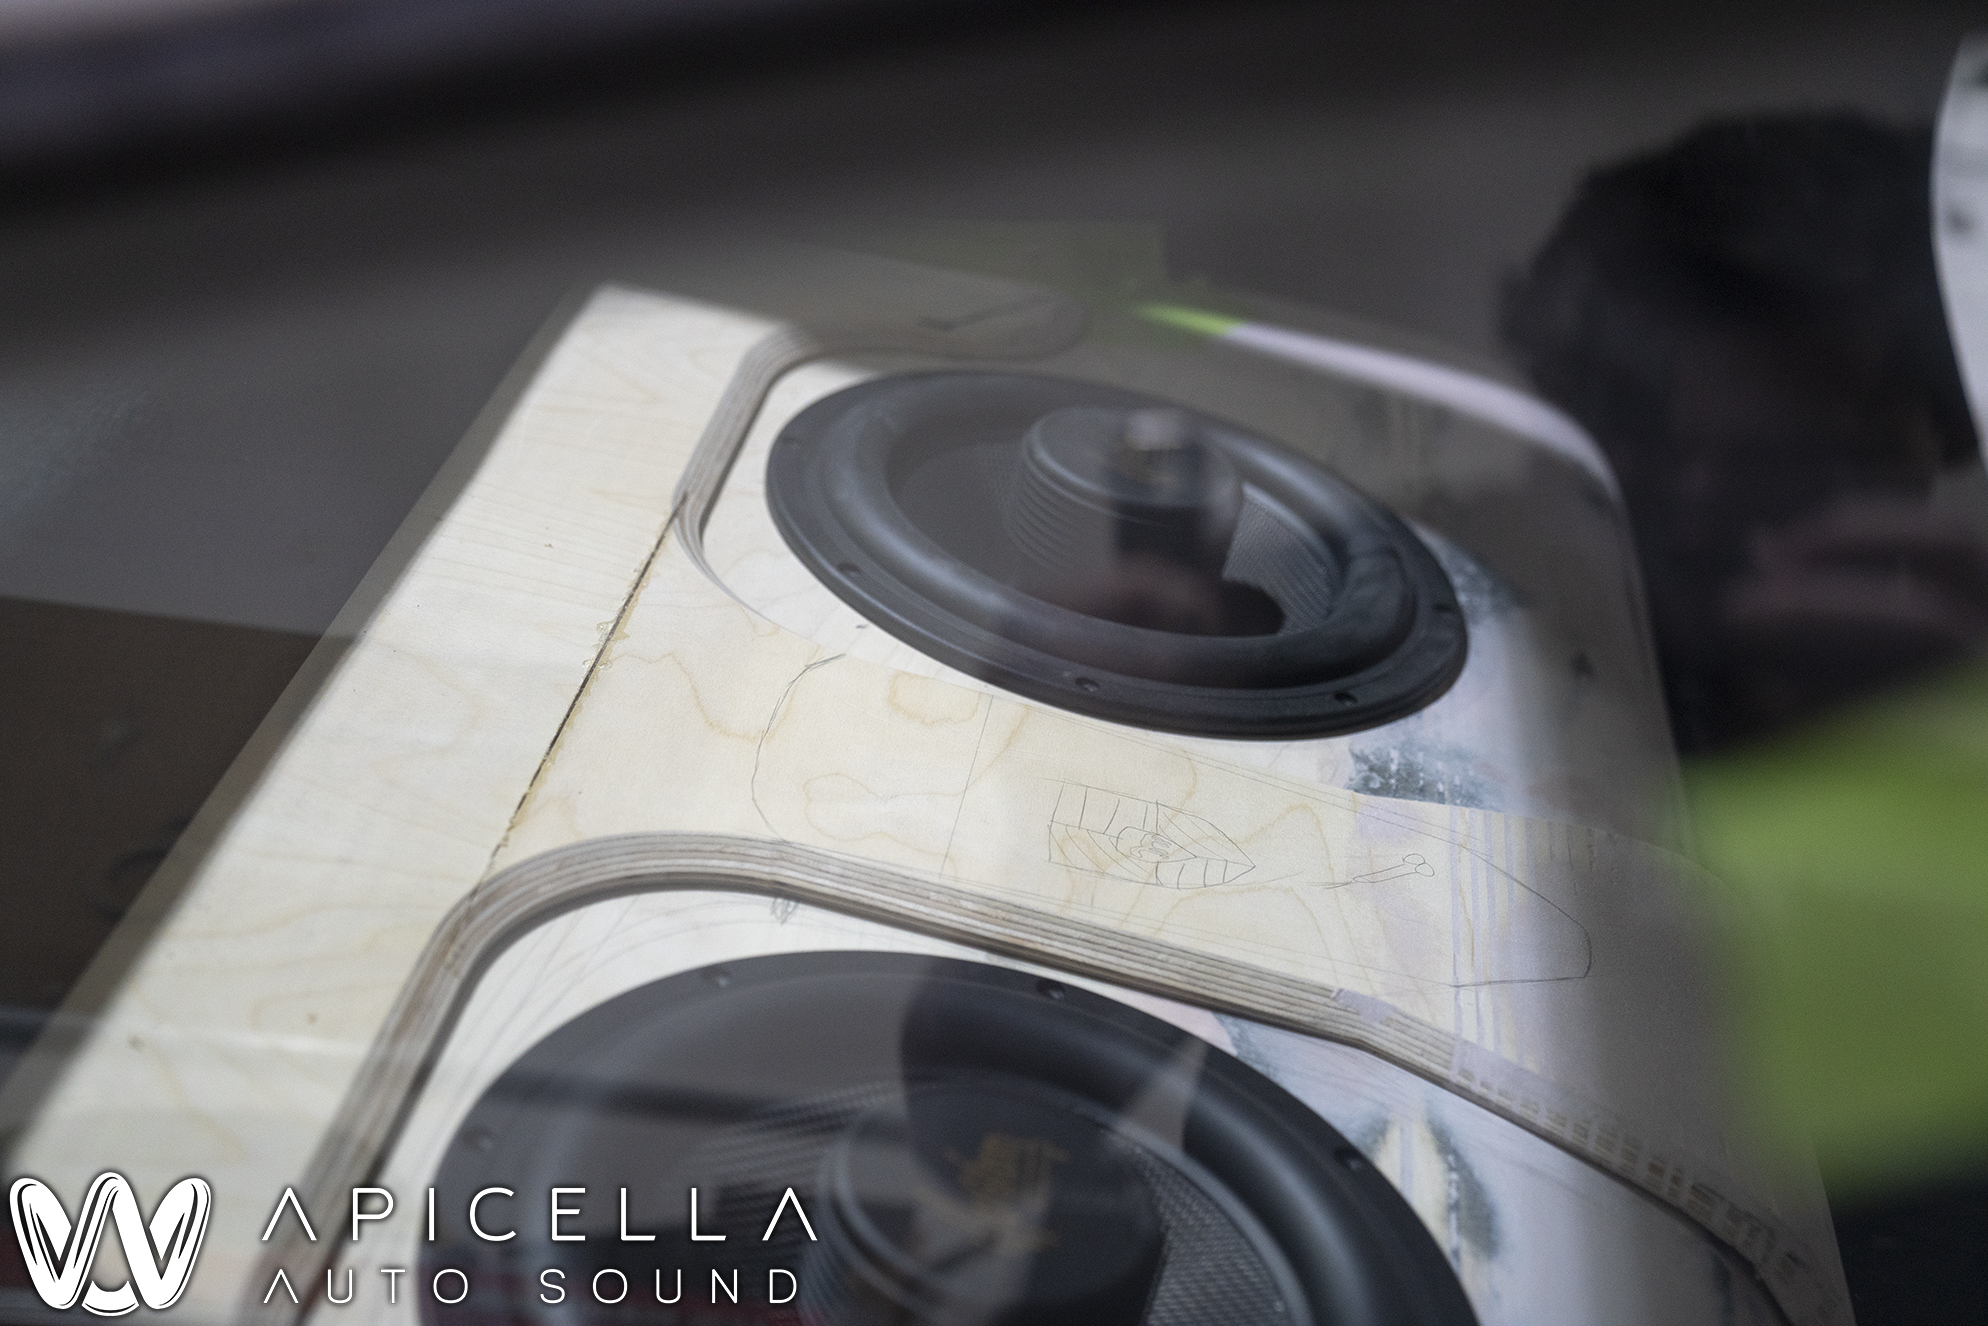
A little sneak peek at some of the design phase.. I cant draw very well. The grill shapes coming to fruition. I spent countless hours coming up with possible designs for this part.
And from there, we have a grill. This is where I got defeated. I originally wanted to press the grill out of the usual metal grill mesh that I use, but unfortunately, it just wouldn't take/hold shape. So, I made them out of acrylic and wrapped them with an OEM matching premium quality grill cloth.
Here are the templates and final pressed grill for the centerpiece. I ended up making this 3 times to make sure it was perfect.
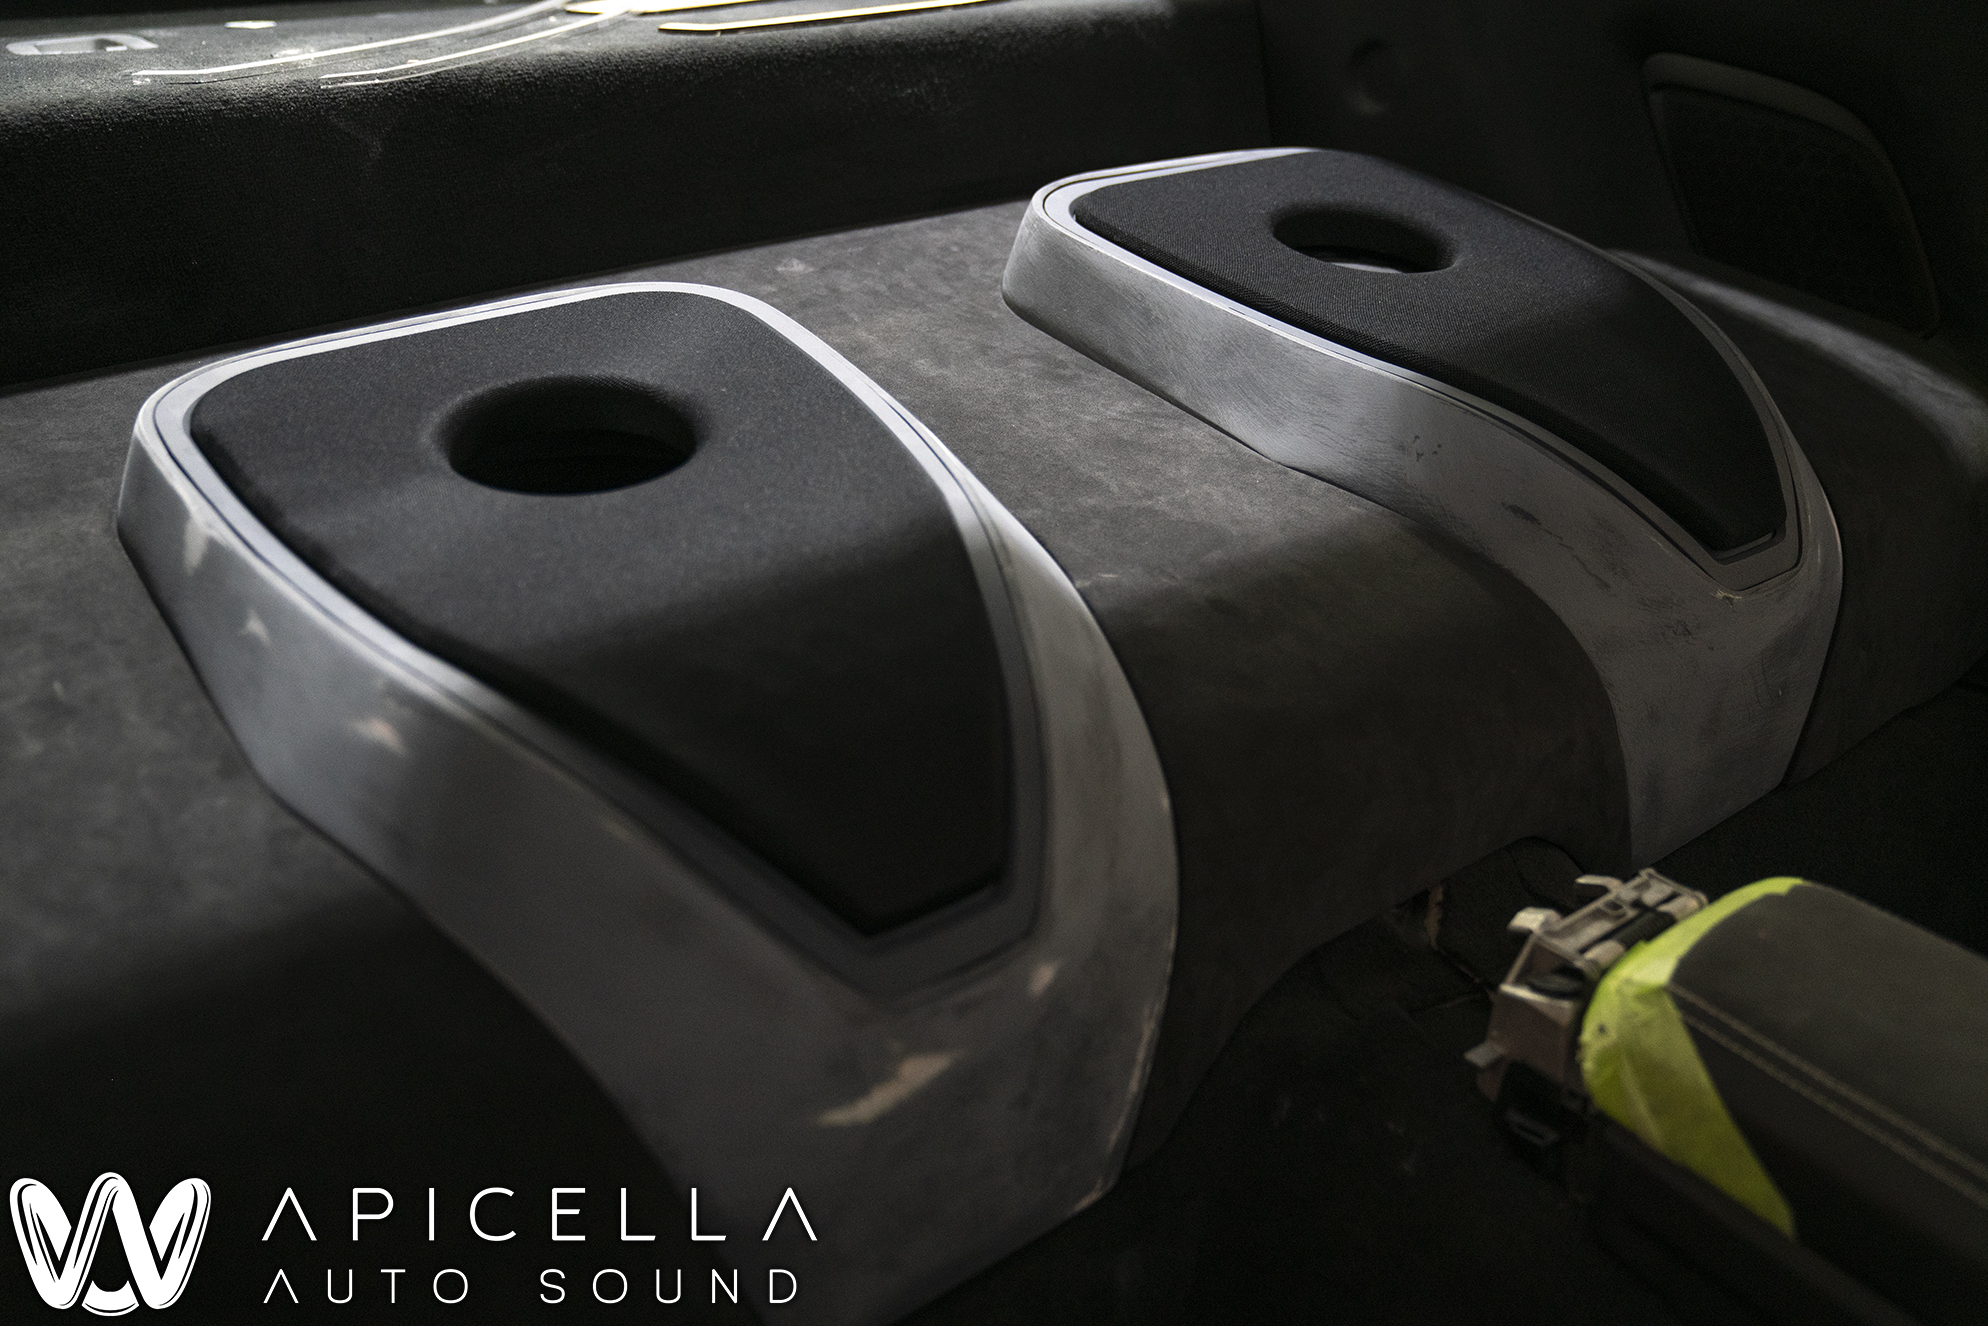
All of the sub enclosure build, minus the "bridging" piece done, primed, and ready for upholstery
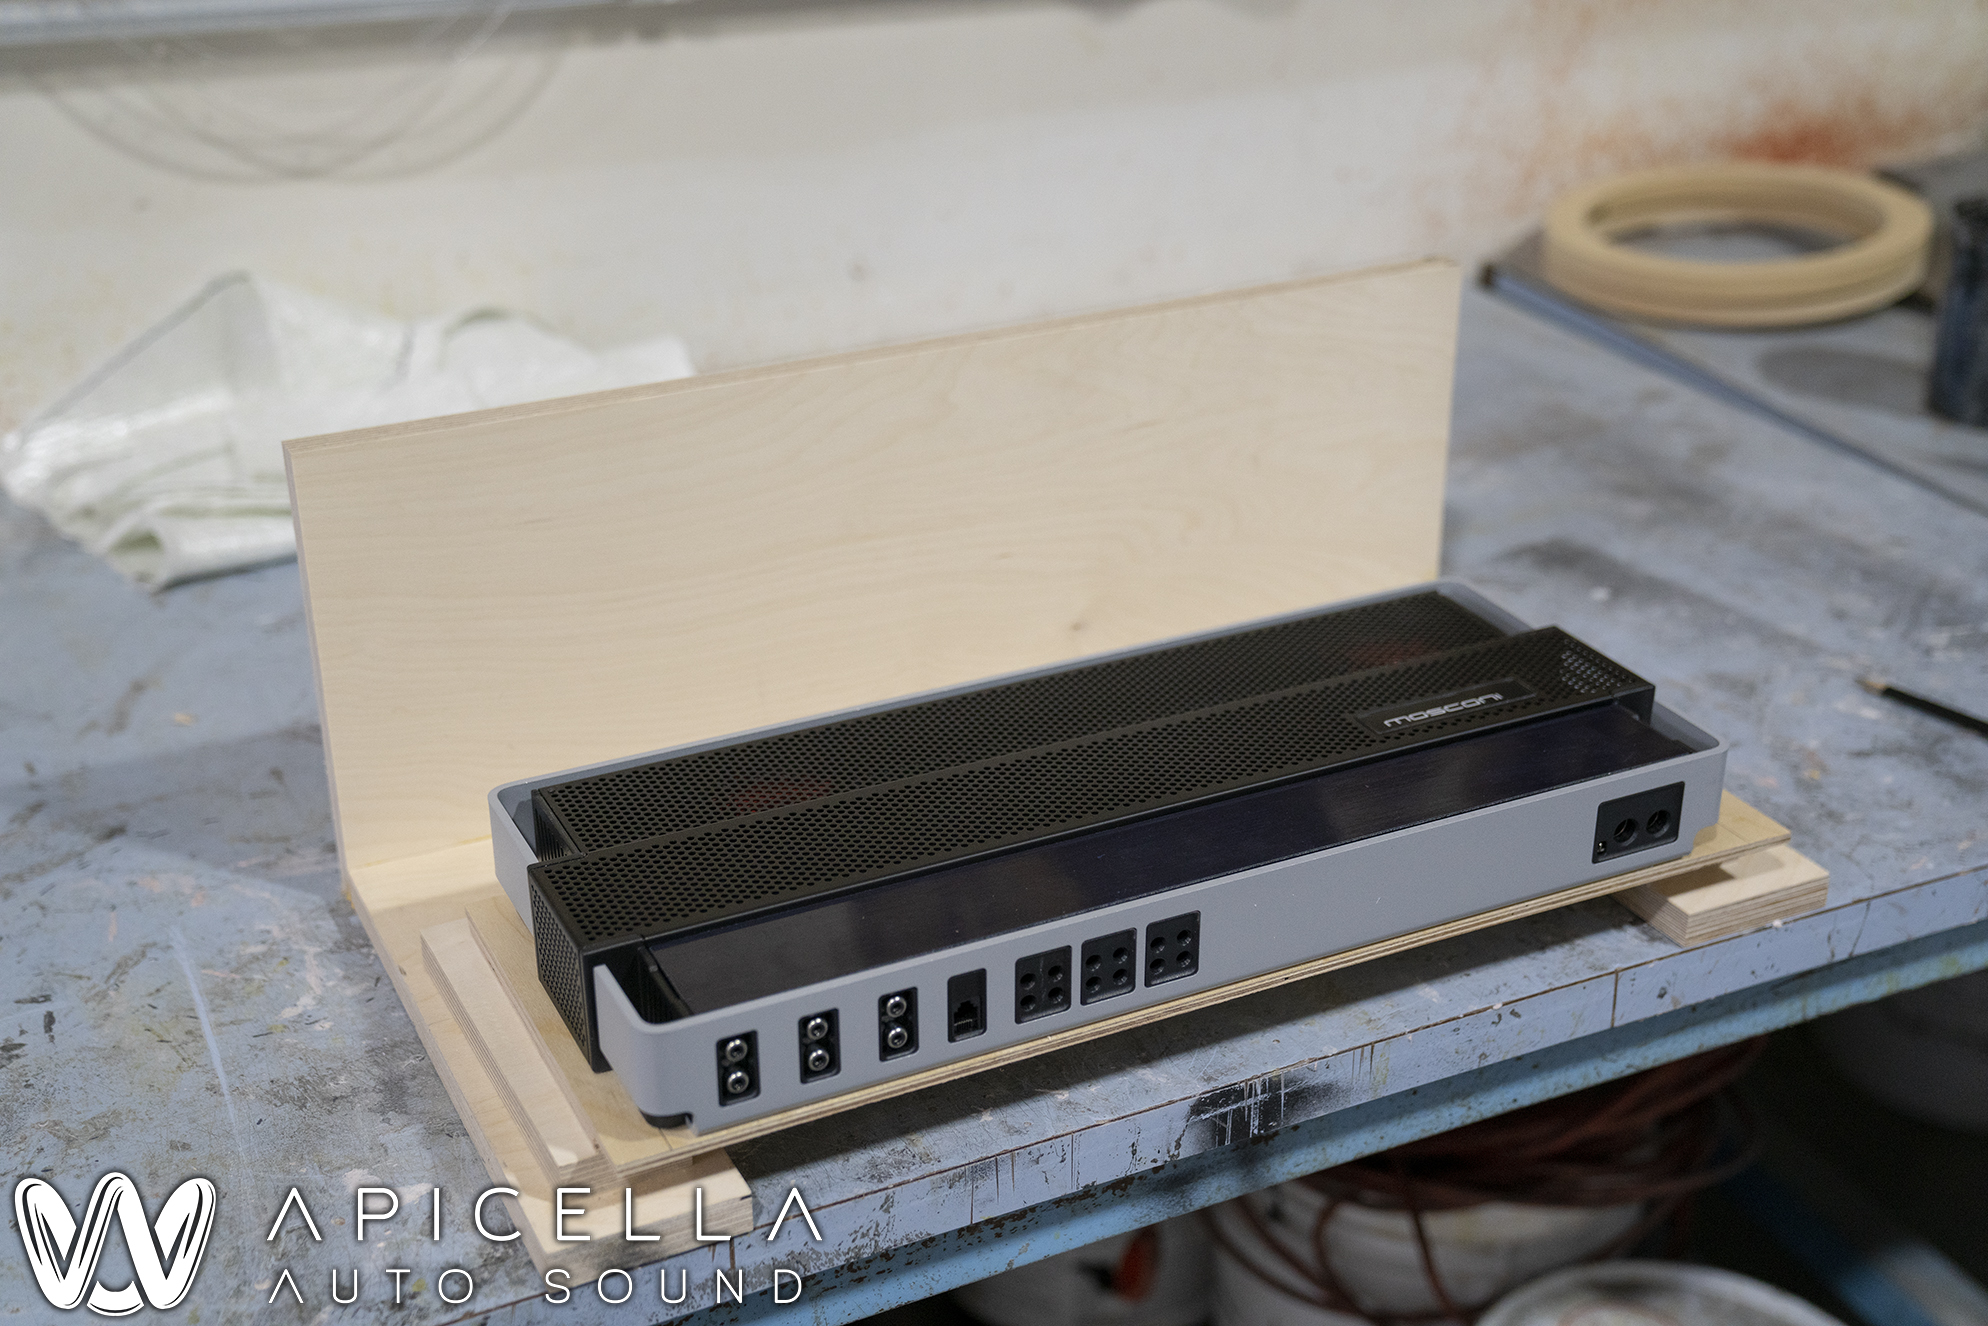
Here is the start of the amp rack, housing the pair of Mosconi Pro 5|30 amplifiers. These were made out of Baltic Birch. No MDF is used here at Apicella Auto Sound. We went with a stair-step design and lit just the edge to provide some ambient light and give the trunk some character. Not too much though, since you don't want to get cheesy in a Porsche.
Amp rack installed and wired. We opted to go with RSD Custom Cables, as we always do with our high-end builds. Check them out on Facebook. Good custom cables for a good price.
And here's where the new laser came in. This would not have been possible without it, let alone at the ease and speed I managed to do it at even though it was my first time designing a trunks beauty panel in CAD.
Our power wire and fuse holder install. We used a metal bracket that secured to OEM bolts to secure the fuse holders in place.
From here, the sail panels were started. We came up with a great mounting solution here as well. Some of the OEM sail panel was retained to keep the little hook that holds it into place. Said hook is behind the "bridge" in the plastic of the panel. The rest of the mounting mechanism is shown in later pics. Baffles for the Focal Utopia TBM tweeters were lasered out and aimed and attached and ready to be glassed.
Here is the rest of the mounting for the Sail panels. Aluminum was bent to perfectly hug the door panel, and attach to the sail panel from underneath. Once the sail panel is secured to the door panel, the "hook" part that was retained just latches on to the door frame and stays put. Very clever and solid mounting for the pod.
Next up, pillars. Antenna wires needed to be cut and extended and an antenna amplifier needed to be relocated from the passenger side pillar
Next up, the Escort Ci Max 360 Radar Detector & Laser Jammer install. These were installed in a way so that you don't even realize they were there, yet are fully functional. When the automotive videographer came by to shoot and saw "Laser jammers" on the list, he looked at the front and rear bumpers and said, "where are these things?". That was good to hear. The front pods were fabricated out of acrylic, as was the custom rear plate frame that houses the rear sensors.
The controller for the Escort system was installed in the ashtray. The display was integrated into the OEM dashboard, so the Escort display was not needed.
The rear plate bracket was installed, and the laser jammer's IR Acrylic Cover was also installed. The way we did this, you don't even know the laser jammer is there, it appears factory, and the jammer still fully works with this special acrylic. This was also used on the front laser jammers.
The sail panels were wrapped in an OEM Alcantara, and black machine screws were used instead of the original silver ones to not grab your attention.
As far as OEM looking yet fully custom goes, these are my favorite pillars to date. These grills took a ton of testing and planning and trying to get them how I wanted. The silver trim was made to emulate the silver trim that goes around the grill on the door panel.
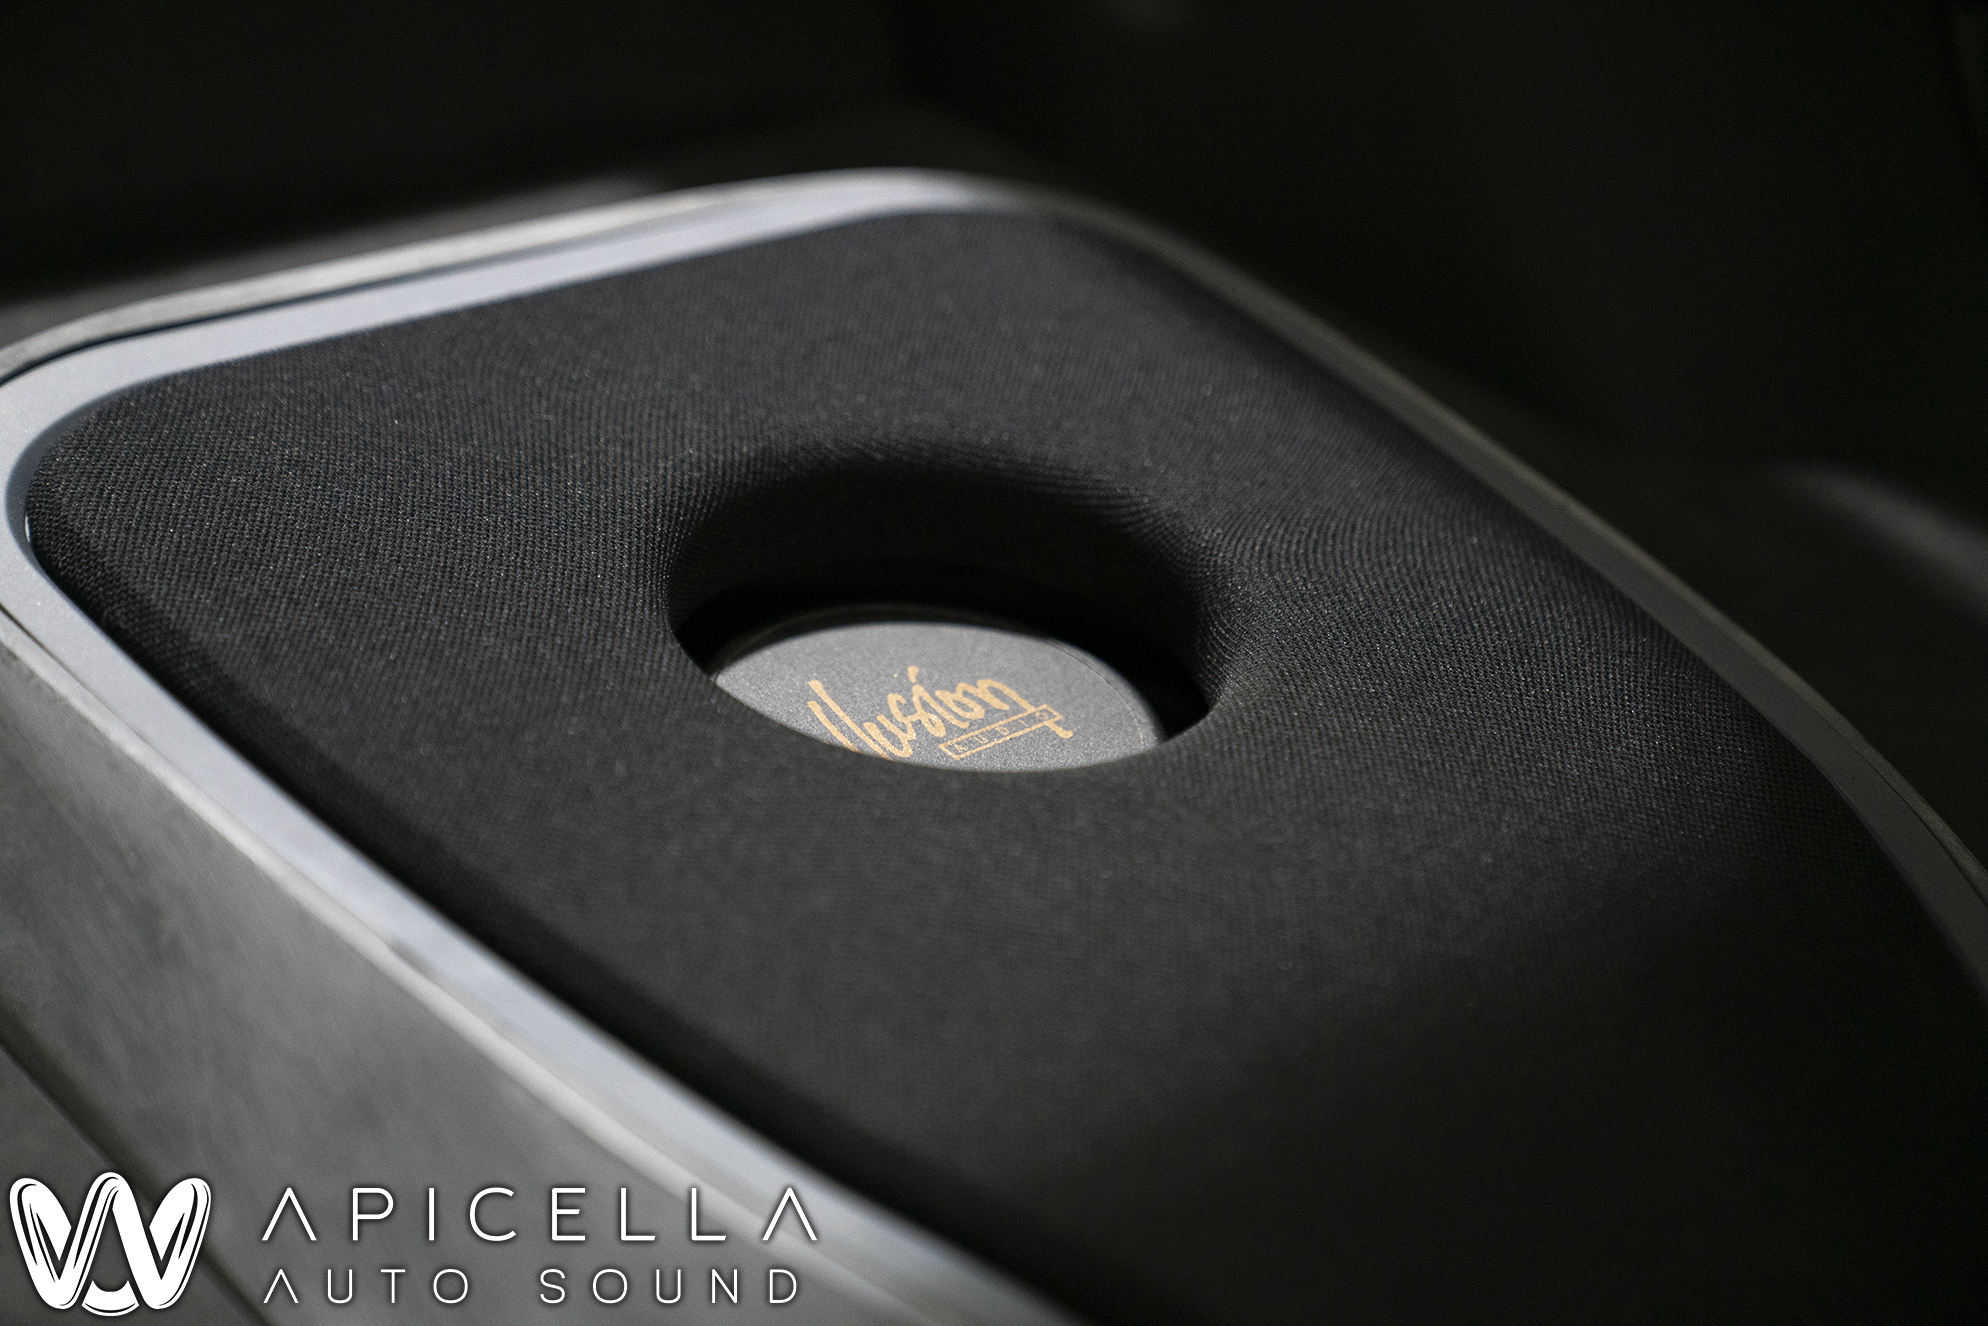
The sub enclosures and beauty panel all finished up. An OEM hood badge was used for this center grill. When you look at this in person, nothing about it hints that it's aftermarket. It's crazy how factory it looks when you have the seats in.
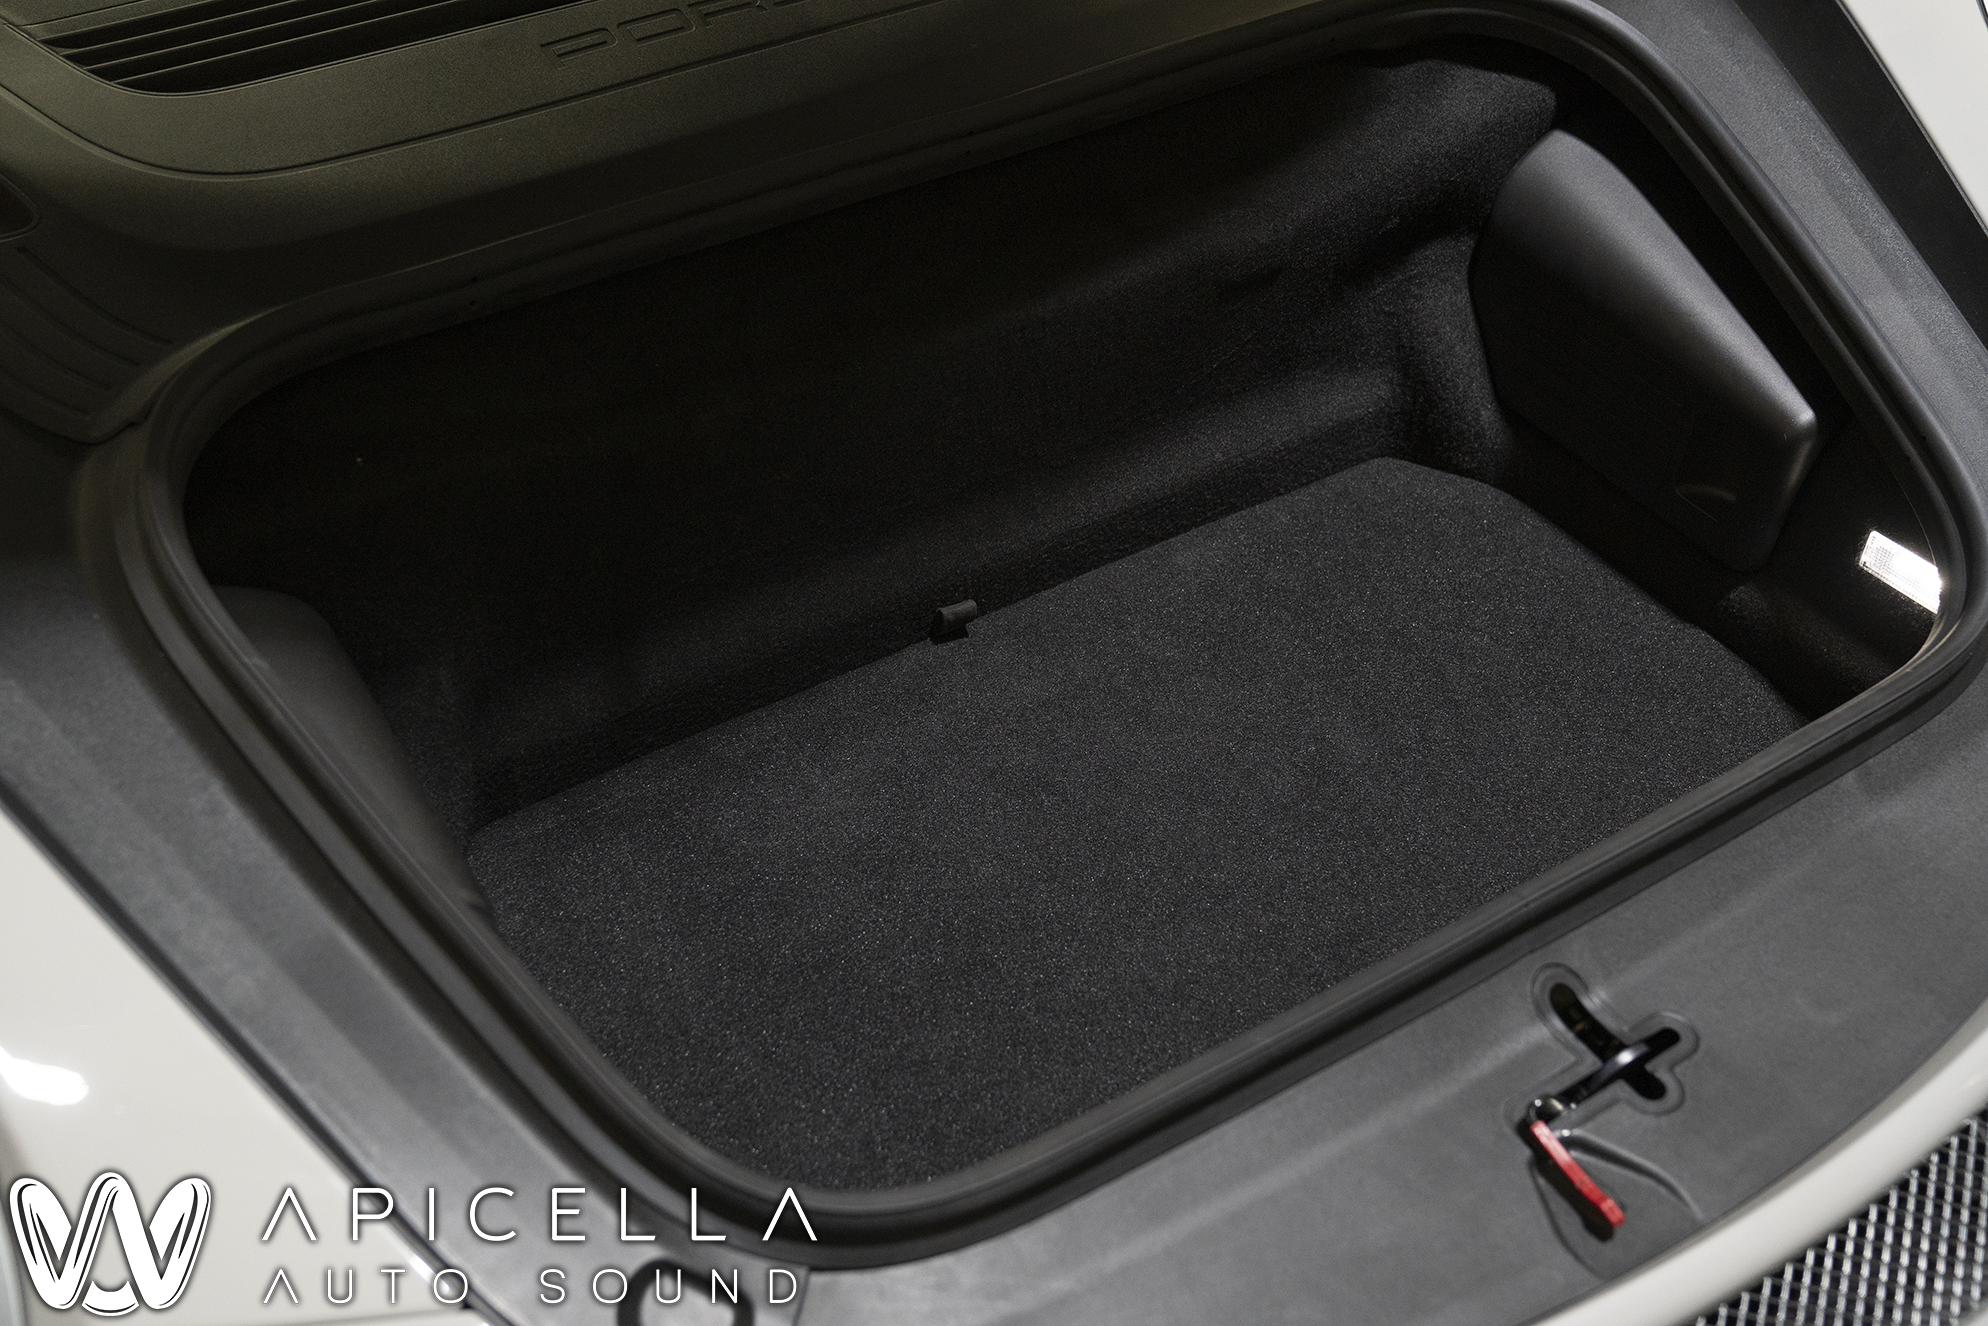
The "Frunk" was finished with a cover so some storage space is retained and usable.. An Alcantara pull strap was made to help remove it when needed.
The amp rack in all its glory.. To date, this is probably my favorite piece I've ever fabricated.. These, the pillars, or the Tesla Model S pillars from this past winter. The "Porsche" and "GT3" text was cut out, painted the OEM "Chalk" color, and reinstalled right into the acrylic trim that was painted in a way to match the color and texture of the trim on the rest of the vehicle. It's hard to tell in photos, but the trim on the bottom-most layer is a silver that matches the trim on the Mosconi amps and rest of the car, while the text is a bit different and is the color of the exterior of the car
And that's all she wrote.. Thank you for looking
.
The following 8 users liked this post by ResoNix Sound Solutions:
-Ryan- (08-22-2021),
achenator (08-22-2021),
CustomPerformanc (08-23-2021),
CX_GT3 (08-23-2021),
Jbravo23 (08-22-2021),
and 3 others liked this post.
The following users liked this post:
Mojonito (08-22-2021)
The following 2 users liked this post by usrodeo4:
17bhub (08-24-2021),
ResoNix Sound Solutions (08-22-2021)
08-22-2021, 05:46 PM
#4
Former Vendor
Thread Starter
08-23-2021, 03:15 PM
#6

WOW! Many many years ago I was an installer (and competitor) in the car audio/audiophile world so I truly appreciate the amount of work that went into this system, and the amount of talent it takes to build something like this. Absolutely amazing attention to detail - it often goes unnoticed to the casual observer how difficult it is to build systems like this in a car! Kudos, this is something to be proud of!
I tell myself that someday I'm going to do something of this caliber in one of my cars again (not myself though... the standard of the car audio(phile) scene surpassed my abilities many years ago). Personally I wouldn't do this in my RS, but in my Cayenne, hell yes!
I tell myself that someday I'm going to do something of this caliber in one of my cars again (not myself though... the standard of the car audio(phile) scene surpassed my abilities many years ago). Personally I wouldn't do this in my RS, but in my Cayenne, hell yes!
The following 4 users liked this post by ludey:
17bhub (08-24-2021),
ResoNix Sound Solutions (08-23-2021),
sdm100 (08-23-2021),
usrodeo4 (08-23-2021)
08-23-2021, 03:17 PM
#7
Rennlist Member

I could care less about the sound system on my car. Honestly, I hardly use it and just focus on the beautiful sound from my GMG center bypass. All that said- wow amazing work.
The following 4 users liked this post by JT198:
17bhub (08-24-2021),
991C2S88 (09-02-2021),
ResoNix Sound Solutions (08-23-2021),
sdm100 (08-23-2021)
Trending Topics
The following 3 users liked this post by amsmike:
08-23-2021, 05:17 PM
#9
Rennlist Member

Nice work but now you cant hear the rumble of the engine/exhaust
The following users liked this post:
ResoNix Sound Solutions (08-23-2021)

The following users liked this post:
ResoNix Sound Solutions (08-23-2021)
08-23-2021, 07:32 PM
#11
Former Vendor
Thread Starter
WOW! Many many years ago I was an installer (and competitor) in the car audio/audiophile world so I truly appreciate the amount of work that went into this system, and the amount of talent it takes to build something like this. Absolutely amazing attention to detail - it often goes unnoticed to the casual observer how difficult it is to build systems like this in a car! Kudos, this is something to be proud of!
I tell myself that someday I'm going to do something of this caliber in one of my cars again (not myself though... the standard of the car audio(phile) scene surpassed my abilities many years ago). Personally I wouldn't do this in my RS, but in my Cayenne, hell yes!
I tell myself that someday I'm going to do something of this caliber in one of my cars again (not myself though... the standard of the car audio(phile) scene surpassed my abilities many years ago). Personally I wouldn't do this in my RS, but in my Cayenne, hell yes!
Thank you!
Let me tell you two about a little thing called a volume ****
08-23-2021, 08:11 PM
#12
Three Wheelin'
WOW! Many many years ago I was an installer (and competitor) in the car audio/audiophile world so I truly appreciate the amount of work that went into this system, and the amount of talent it takes to build something like this. Absolutely amazing attention to detail - it often goes unnoticed to the casual observer how difficult it is to build systems like this in a car! Kudos, this is something to be proud of!
I tell myself that someday I'm going to do something of this caliber in one of my cars again (not myself though... the standard of the car audio(phile) scene surpassed my abilities many years ago). Personally I wouldn't do this in my RS, but in my Cayenne, hell yes!
I tell myself that someday I'm going to do something of this caliber in one of my cars again (not myself though... the standard of the car audio(phile) scene surpassed my abilities many years ago). Personally I wouldn't do this in my RS, but in my Cayenne, hell yes!
The following users liked this post:
ResoNix Sound Solutions (08-23-2021)
08-23-2021, 08:18 PM
#13
Three Wheelin'
Totally get that but while I am not an audiophile I have to have my Rock and Roll (or Classic composers, Beethoven's 5th is pretty cool in the GT2) when I drive my GT car for fun, for me personally the Bose is just fine...of course if I am driving the Grim Reaper in anger the radio gets clicked off. But this groups workmanship and engineering and design and installation looks like nothing I have ever seen. Nothing but praise for their effort and outcome of their delivered product.
The following users liked this post:
ResoNix Sound Solutions (08-23-2021)
08-23-2021, 11:39 PM
#14
Former Vendor
Thread Starter
Totally get that but while I am not an audiophile I have to have my Rock and Roll (or Classic composers, Beethoven's 5th is pretty cool in the GT2) when I drive my GT car for fun, for me personally the Bose is just fine...of course if I am driving the Grim Reaper in anger the radio gets clicked off. But this groups workmanship and engineering and design and installation looks like nothing I have ever seen. Nothing but praise for their effort and outcome of their delivered product.